Part of Her World
Head to the Battle LV 5 world like you were trying to reach before Monstro so rudely interrupted. You will arrive at Atlantica in the Tranquil Grotto where you’ll learn to swim. Just follow Flounder around and tag him. After a few rounds of this a new enemy will appear.
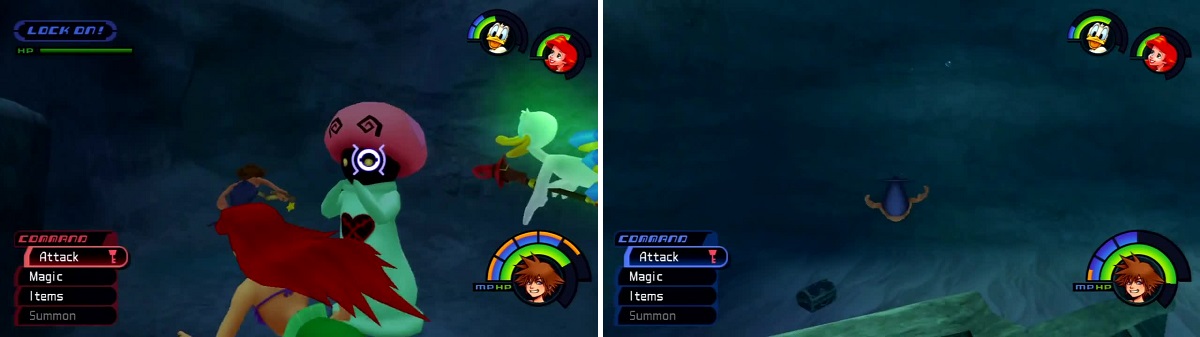
Sea Neon
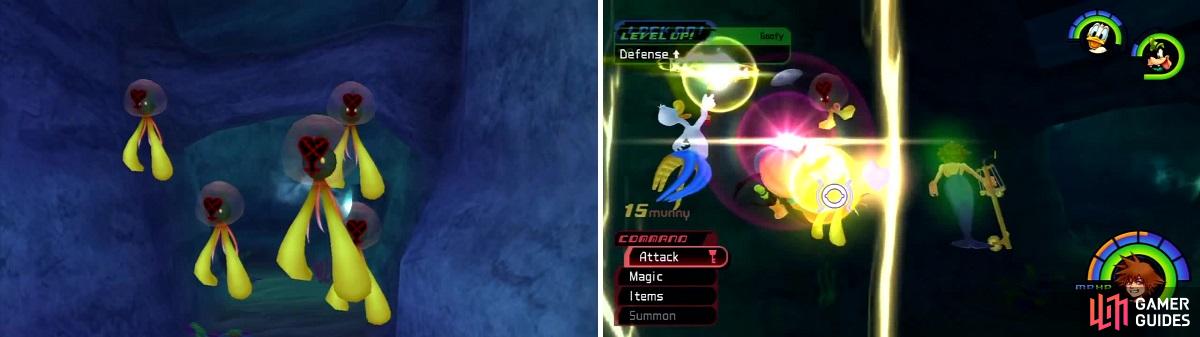
Sea Neons (left) come to attack after you swim with Flounder. Donald decides to take matters into his own hand (right).
Sea Neons are one of the easiest water Heartless to defeat. They only charge at you and can die from a single Fira. They drop so many clear orbs you might as well use Fira to take them out everytime since you’ll refill the Charge Gauge quickly.
Hit the clamshell to open it and use the Save Point. You should switch out Goofy for Ariel since there are no Trinity Marks available to you in this world. Ariel focuses on magic and clearly it’s at an advantage in this area. Head out to the Undersea Valley when you are ready.
Treasures of the Deep
From the red shell you can spot another shell (left) not far away. Don’t forget to check the underside of the cliff on Sora’s right (right) here.
Start by heading to the red shell in front of you. Clear the Heartless then shoot it with a Fira spell to claim a Mythril Shard . Nearby is an alcove with another clam shell, hit it with your Keyblade to claim the Mega-Ether inside. Leave the alcove and descend to your left towards another clam shell. Clear the Heartless that spawn and open this shell for a Mega-Potion . From here there is a somewhat hidden alcove that leads to another shell.
To get to it, look up from the shell to notice an opening on the underside of the cliff. The shell here contains a Mythril . Now swim across to the opposite side to find two more shells – an Elixir and Cottage .
Follow the trident symbols to the Calm Depths. Go with the flow of the current to fight some Search Ghosts then enter the Undersea Cave. Open the shell here to acquire another Cottage then swim up. In the Undersea Gorge clear out the Sea Neons then descend near the entrance to find a blue clam shell. Hit it with Blizzara to acquire the Mythril Shard inside. Keep along the ocean floor to find another clam shell. Hit it to get the Mega-Ether then continue along towards Triton’s Palace. Instead of entering here though, go to the left of it and enter the Undersea Garden to find a clam with a Mega-Potion inside.
Screwdriver
Screwdrivers look like Soldiers that grew fish out the back of their heads. They have spears they will attack you with (right).
The Screwdiver works in conjunction with Aquatanks to charge up and attack much like a Soldier would. They move quickly and in a group they are annoying more than they are deadly. With other enemies the Screwdiver will be hard to dodge so dispatch the other Heartless first then focus all of your attention on the Screwdiver. If there is an Aquatank present then defeat that first.
To Tritons Palace
Head back to the Gorge and into Triton’s Palace. Clear out the Heartless and descend near the entrance to reach a clam shell – it holds a Cottage . There’s another clam shell on the ground to the right of the entrance with a Mega-Ether inside. From here you can see the yellow clam shell. Hit it with Thunder and claim the Mythril Shard . Swim across the bridge to the opposite end and hit the clam shell here for an Elixir . Enter Triton’s Throne from here to start a cutscene.
Sheltering Zone
The Sheltering Zone is a giant version of the Sea Neon. It moves much slower and it doesn’t really attack often. The catch is that it is electric so hitting it will harm you. When defeated the Sheltering Zone will split into three Sea Neons. You’ll want to take this guy out last since it’s usually grouped with Screwdivers and adding three more Sea Neons to the fray isn’t a good idea. If you defeat the Sheltering Zone with a Fire attack then it won’t split into Sea Neons and you’ll receive Munny and clear orbs for defeating it instead. Overall, this guy isn’t that big of a threat, he’s just big and shouldn’t post a threat to you so long as you stick to casting Fira spells from a safe distance.
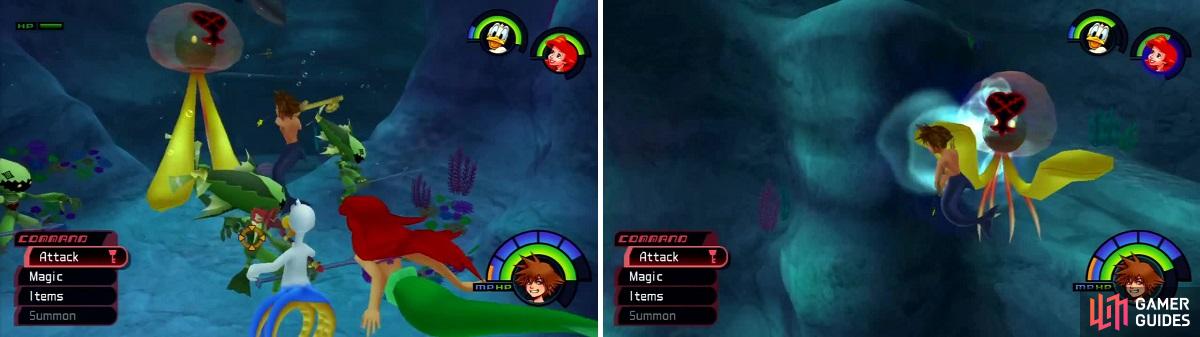
The Sheltering Zone is a Sea Neon on steroids (left). It will crackle with electricity that will damage you if attacked (right).
Ariels Folly
Head to Ariel’s Grotto and swim to the bottom for a Chest with a Mega-Potion inside. There’s another Chest higher up that holds a Cottage and another higher than that with a Torn Page inside. Leave the Grotto and ride the dolphin here so that another one spawns where you will be heading. You must do this in order to progress even though the dolphin doesn’t take you anywhere. Head to the Undersea Cave where you have a chance to spawn the Pink Agaricus. Return to the Undersea Valley and ride the dolphin here to the Sunken Ship.
Pink Aragicus (left) has a chance to spawn. Search the sand around the Sunken Ship to find a couple of Chests (right).
Swim down from the entrance to a Chest with a Mythril Shard . Behind this a ship with a hole in it. There is Chest here as well and it holds an Elixir for you. Head inside the large ship and open the Chest here for the Crystal Trident . Check near the back of the steps for a Mythril Shard in the Chest then swim down underneath the steps to find a clam shell with a Mythril . Head outside to meet the Shark.
BOSS - Shark
You can actually just run away from the Shark if you don’t want to fight it and it’ll let you get away. It is a good idea to fight him though since he drops some good items and isn’t that tough. Get Aero on Sora and try to strike from the Sharks side to avoid being chomped. If you fight near the walls you’ll have a chance to dodge the Sharks charge and it’ll get stuck in the wall leaving itself exposed.
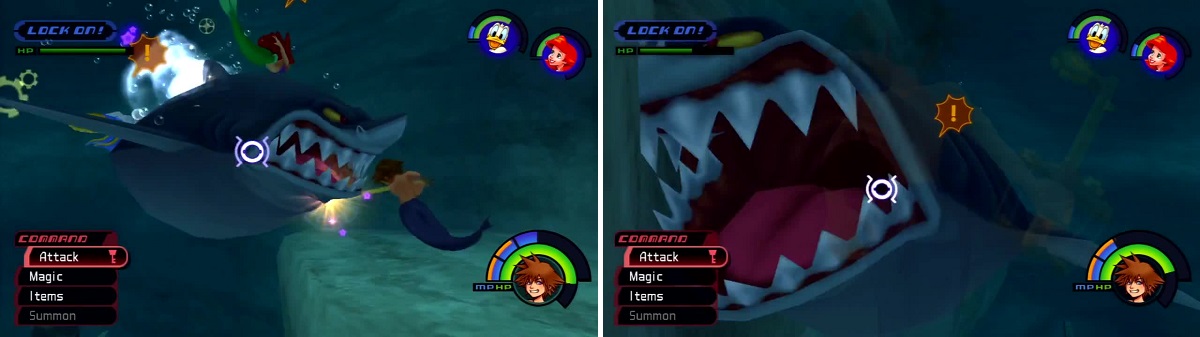
Try to stay on the Shark’s flank and attack or you may find yourself at the wrong end of those big chompers (right).
Ursulas Tricks
Head into the Undersea Gorge via the hole at the bottom of this area. Hit the geyser and ride it to pop loose the Chest near Ariel’s Grotto. Open the chest for an Orichalcum then enter the Grotto and place the Crystal Trident in it’s slot. After the scene head back to Triton’s Throne where you’ll encounter a new enemy.
Aquatank
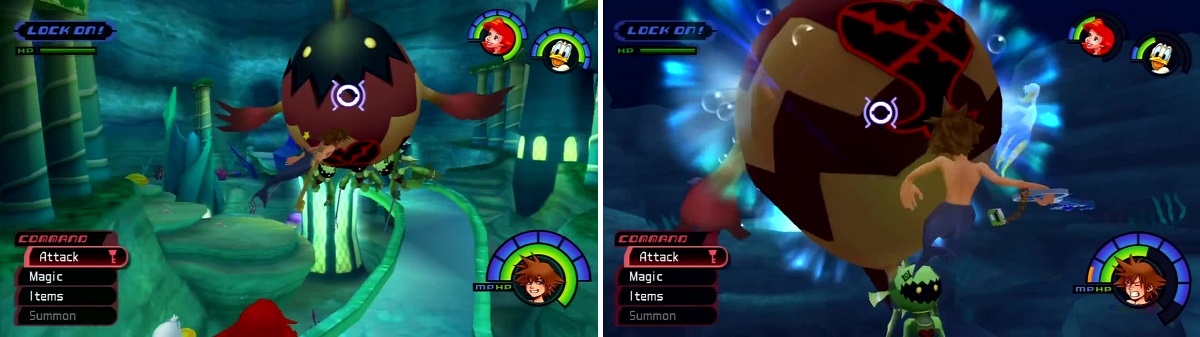
The Aquatank is large and comes with three Screwdrivers attached (left). It doesn’t put up much of a fight but it will charge at you (right).
An Aquatank holds a bunch of Screwdivers underneath itself. It will charge at you now and again which certainly deals a lot of damage, but in general these Heartless don’t pose much of a threat to you. You will get a bunch of Munny for defeating them.
Head back to the Sunken Ship and turn left to the front end of a smaller ship smashed against the wall. Behind it you can examine a switch that Sebastian can reach. This gives you access to the Den of Tides. Defeat the Search Ghosts then stay right at the fork to reach the Cavern Nook. Open the clam shells for a Mega-Ether and a Save Point then head down the other path to find Ursula.
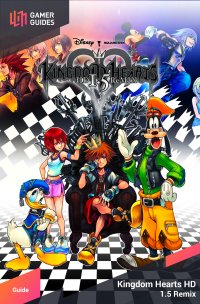
BOSS - Ursula, Flotsam and Jetsam
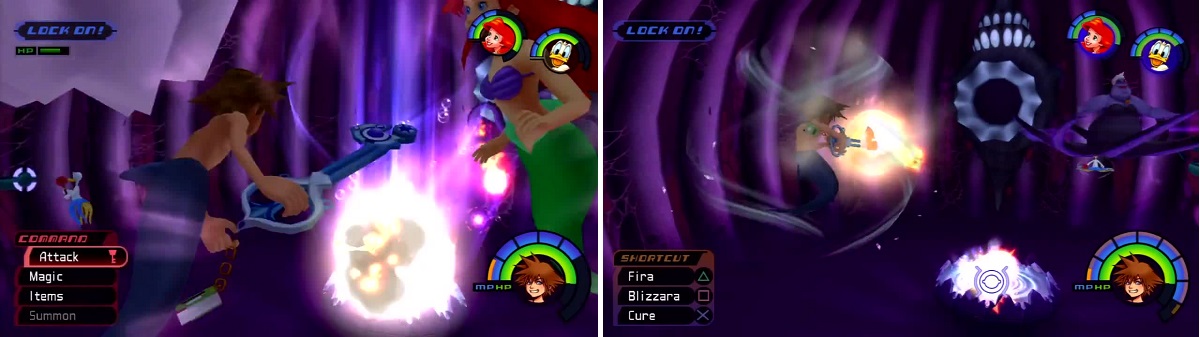
Shoot Ursula’s cauldron relentlessly until it backfires (left). Watch out for Ursula as she spins around like a maniac (right) while you are attacking the cauldron.
This battle is easier if you have Fira set as a quick spell. The objective is to shoot Fira into the cauldron until it backfires and knocks everything out. This is the perfect time to hit Ursula since any other time she takes minimal damage or deflects all damage. You’ll probably have to do this three or four times and that means you could run out of MP. You have two options, use Ethers or knock out Flotsam and Jetsam to get some MP back. The latter is a good option since it also takes these two out of the battle for a little bit. You’ll know when they revive because Ursula shouts, “Get up and fight!” Remember to “Call for Help” when Ursula goes down so that your companions are chipping in to maximize damage.
Return of the King
You will learn the Shared Ability Mermaid Kick after the battle, be sure to equip it! Leave Ursula’s Lair and then head back in. Blow up the sea urchin and the nearby clam will drop a Chest containing Mythril . Head out and save then go to the Calm Depths and swim against the current to reach an unknown location where Ursula awaits for a rematch.
BOSS - Ursula
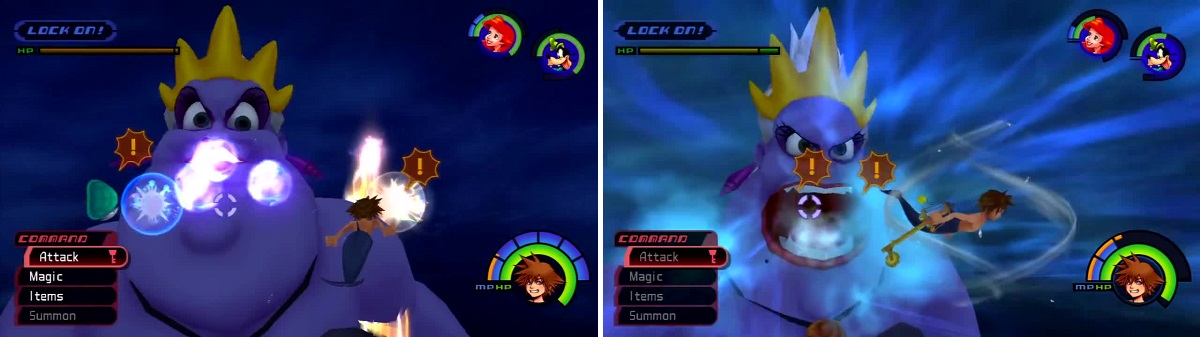
Ursula shoots bubbles from her mouth (left); you don’t want to pop them. She will open her mouth (right) and vacuum everything within range toward her.
This time around Ursula isn’t playing games. Harnessing the power of the trident, she grows to an enormous size! You’ll need to endure this battle since you will be taking damage. There are a few attacks you’ll need to dodge. The easiest one is her Thunder spell she casts throughout the battle so just put Aero on and you will be fine. Another is when she starts to open her mouth. You’ll want to swim away with Mermaid Kick at this point or you’ll get sucked in to chomping range. Ursula also shoots bubbles at you but she has to taunt you before she lets you have it, a dead giveaway for you to back up. Once you take her down to 300 health (one bar remaining) she’ll start to use a Thunder Strike that hits all around her. She will also make an announcement for this attack, so just back away and then charge right back in.
After battle you learn Thundara and receive Ansem’s Report 3 . Return to Ariel’s Grotto and seal the Keyhole to receive the Crabclaw Keyblade. With that your time here is done. You can use your Torn Page to help Pooh out again in the 100 Acre Wood. It is recommended to do this next since you’ll aquire a great number of awesome items.


 Sign up
No Comments