The Rising Falls
If you drop down onto the water you can walk on it. Jump over the first set of rocks to spot a Chest with a Life-G inside. Head back to the starting platform and use Blizzara to freeze the bubbles. Jump from them up to a Chest with Dalmatians 91, 92 and 93 . Glide from here to a central location and freeze the bubble here. Hop up to another platform and claim the Blizzara Ring from the Chest . Now jump into the bubble you just froze to go underwater and find another Chest with a Meteor-G inside.
Head back up the platforms until a scene takes over. Donald and Goofy leave, Beast joins, and Sora is without the Keyblade. Glide over to the Chest behind you for a Megalixir then climb up to the Castle Gates where you’ll surely find new enemies.
Darkball
Darkballs can charge and bite you to deal damage but they can also move through darkness to become un-hittable. When they emerge from the darkness you can take damage since they are charging. Occasionally Darkballs will move around rapidly – these movements will deflect your attacks. Take these guys out early since they have low HP.
Defender
Defenders have a giant shield that protects them from all frontal attacks. The shield also uses Fire and Blizzard, the former of which can be deflected while the latter cannot. The best way to beat them is Dodge Roll to their backside and combo. Likewise, Gravity provides the same opportunity while dealing a large chunk of damage in the process.
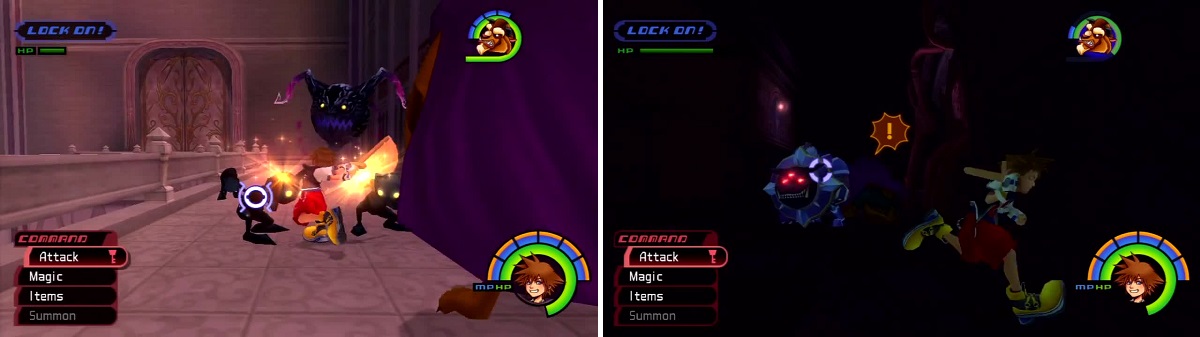
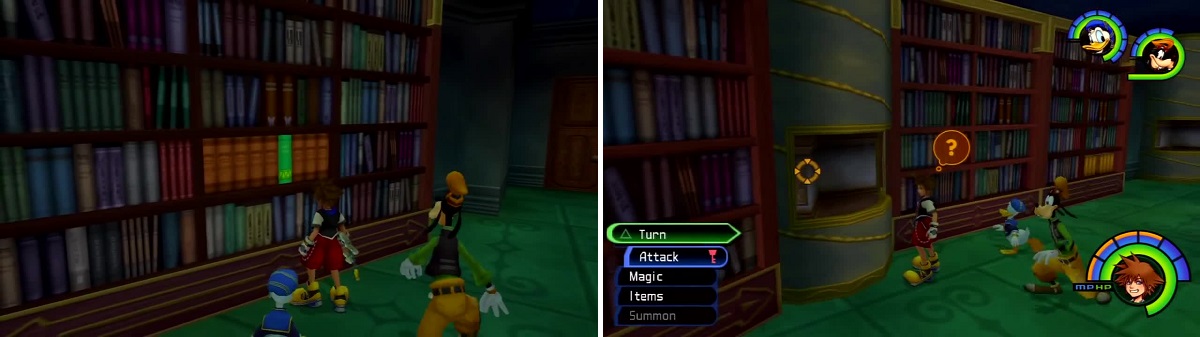
Darkballs float around (left) but present a big target. A Defender charges up his shield to shoot Fire (right).
Wyvern
Wyverns are large and have a swooping attack that they’ll use when you aren’t looking to knock you back. Be careful of where you are located and don’t try to jump out to hit them because you’ll likely end up falling. Instead, focus on defeating other Heartless and wait for this one to come to you.
Wizard
Wizard’s often come in groups and as you might guess, cast a variety of magic. They have the ability to disappear and reappear like Search Ghosts and are impervious to attack while using Thunder. They should be one of your first targets in a battle.
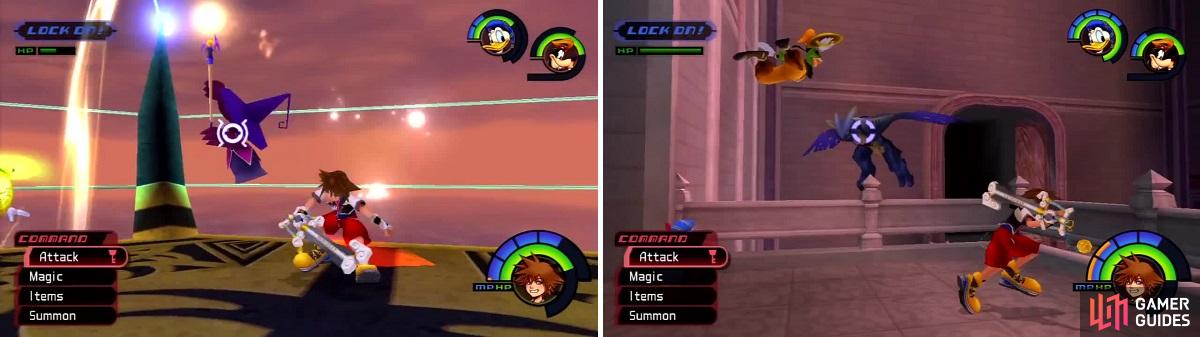
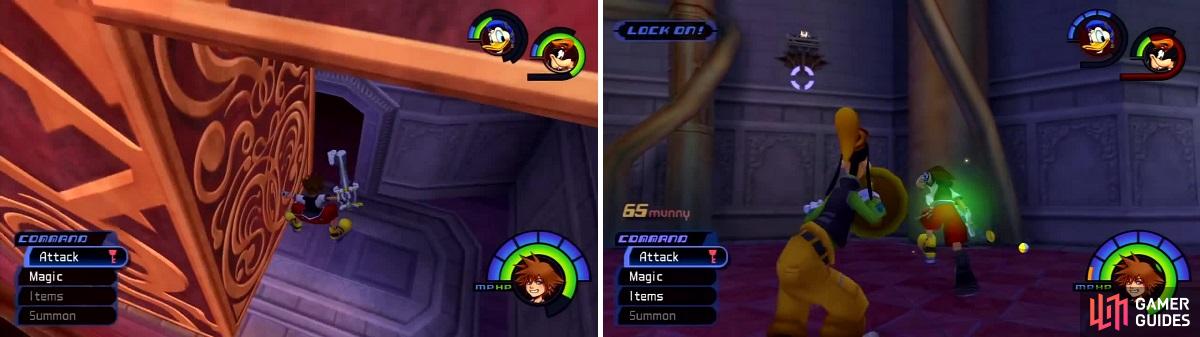
This Wizard (left) is using its Thunder attack. Goofy decides to dive after a Wyvern (right) that is flying over the banister.
Stealth Soldier
The Stealth Soldier is what you might expect, a Soldier that is invisible but targetable and damageable. It attacks swiftly and uses a charge attack like the Soldier but it deals far more damage. Use Aero to deal with this damage and make sure you defeat the other Heartless in the area before fighting these things. Using Stop on the Stealth Soldier will make it visible and obviously freeze it. They can be tough until you reach higher levels where you can hunt them in the Grand Hall.
Entering The Castle
Turn right from the entrance and go through the gate. Examine the red lit up crystal then the blue one to be taken lower. Let Beast take out the Darkballs then jump into the bubble on the left that’s off the water. Jump up to the Chest to claim a Mythril then across to another Chest for a Thundara-G . Use the crystal here and a platform slides out. Jump and Glide across the platforms back to where you entered this zone to find a Paper-G inside the Chest on the ledge.
Return to the area with the movable block and push it so you can reach the platform opposite the entrance. Use the crystal here to extend another platform then cross them to reach the Waterway. Call Beast to break the gate and take the Thundaga-G from the Chest .
Head back to the Base Level and use the other bubble. Open the Chest for a Fira Ring then utilize the Save Point. Freeze the bubble on the other side with Blizzara and jump on it then to a ledge up high. Open the Chest for a well-earned Dark Matter . Now use the bubble you just froze to reach another section of the Waterway.
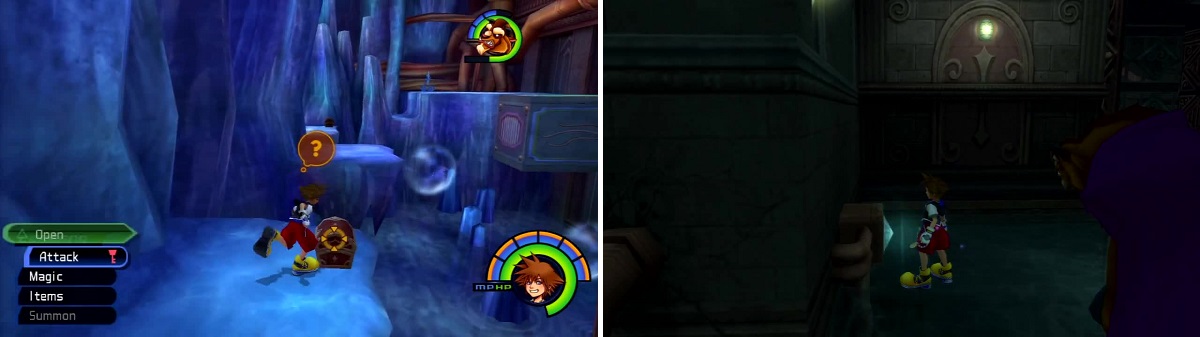
There are a myriad of Chests to collect before heading inside (left). These switches (right) need to be activated to advance.
Have Beast break the stone wall and defeat the Heartless in the Dungeon. Open the Chest to claim an Ultima-G and Thundaga , then make a mental note of the Trinity Jump in this room.
Leave the Dungeon and button hook left to a switch, release it. Move up and press another switch to move the gates again, then use yet another switch to reveal the final switch. When pressed it grants access to the next section. Use the bubble here to hit another switch that raises a platform to a Defender. Distract it so Beast gets a back attack then release the switch. Return to the Castle Gates by using the switches in reverse order and enter the Entrance Hall.
BOSS - Riku
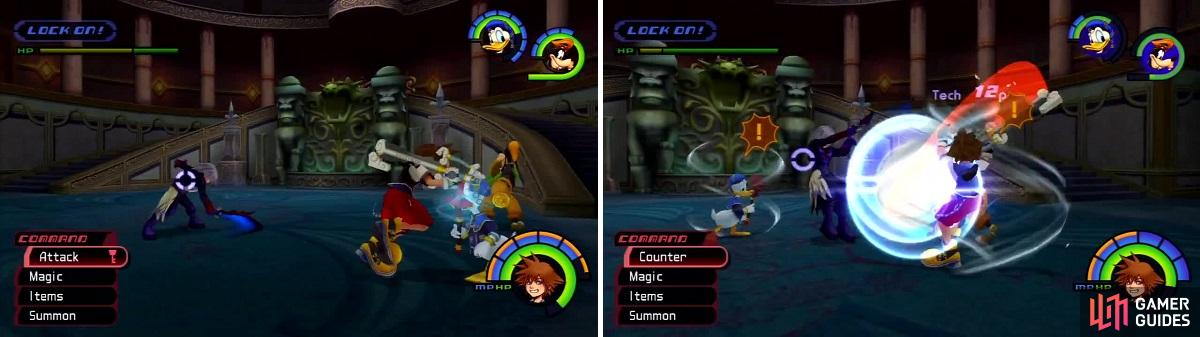
Riku uses a three-combo attack (left) but it can be parried (right).
The battle against Riku isn’t all that hard because he doesn’t hit hard though he is pretty fast. He fights with combos and jumps away when you hit him but with Donald and Goofy he can’t run away like he normally could. Use Aerora and summon Tinker Bell if youare having trouble but you should be able to just hack and slash your way to victory. A Dodge Roll here and there will help avoid some of his attacks and leaves Riku open for a solid combo. Overall this fight should be easy and end relatively fast.
The Greatest Puzzle of Them All
You learned Trinity Detect which will be used on the White Trinity Marks around the worlds, but for now you need to clear Hollow Bastion. Head up the steps and into the room with the Heartless Symbol. On the right pillar is a small ledge you can grab onto and reach the upper level. Open the Chest on the opposite pillar for an AP Up . Exit to the right and enter the Library.
Pick up the red book on the ground, Khama Vol. 8 . Place it into the empty slot on the bookshelf with the red books and the wall slides. Now check the pillar to your left and spin it twice to get the Chest and the Elixir inside of it.
Head up the stairs to find two similar pillars. Turn the first one four times and open the Chest for a Mythril . Turn the second one five times and open the Chest for a Mega-Potion . Pick up Theon Vol. 6 from the desk near the Save Point then use Trinity Ladder #9 to reach Azal Vol. 3 . Now take Mava Vol. 6 out of the orange slot and place Theon vol. 6 in it’s place. Press the switch to unlock the door on the second level. Now jump across the top of the bookcases and open the Chest for an Ultima-G then walk over to another pillar that spins. Spin it twice and claim the AP Up from the Chest .
If you drop down between the bookcases in front of the Save Point you’ll reach a new section. Take Salegg Vol. 6 from amidst the green books then place it with the blue books behind you.
This green book is out of place (left) and needs to be put back with the other green books. Spin the columns (right) to get some Chests.
Now run back to the entrance and place Azal vol. 3 with the yellow books. Run in a circle to come back to the bookcase you just moved and claim Nahara vol. 5 . Place it with the yellow books on the second floor to find Mava Vol. 3 with the purple books. Drop back down to where you grabbed Salegg vol. 6 from the green books and place the correct two. Grab Hafet Vol 4 off the table in the new room and place with the purple books.
Enter the Lift Stop and cast Gravira on the floating platform holding a Chest then release Dalmatians 97, 98 and 99 . Use the blue crystal to ride up to a new area and use Gravira on the Chest again. Take the Osmose-G then return to the Library. You might want to heal and save before continuing out the door on the second floor.
Opening the Heartless Door
Head right and break the two pots nearby to have an Emblem Piece drop out into the fountain. Don’t get it yet, instead move around the room and light the eight candles on fire. Near the last set of candles is a stone with a lightning bolt. Cast Thundara then jump to the central area and claim an Emblem Piece .
Opposite the Library door is a statue that can be pushed into place, doing so creates a Chest on the first floor. Now head over to Trinity Charge #6 to knock a statue over and reveal another Emblem Piece . Jump down and grab the two pieces in the center then open the chest that you revealed for the final Emblem Piece . Place all the pieces on the Heartless Door to start a cutscene.

Use Fire on the unlit candles (left). You can move this statue (right) to make a Chest appear.
From the Top to the Bottom
Enter the Lift Stop and hit the red crystal to change it blue. Use the first blue crystal to go up. Use Gravira on the Chest to obtain an Orichalcum then head back down. Change the crystal back to red and ride the elevator again, this time down.
Enter the Waterway and defeat the Heartless then take the right platform to find a red crystal. Examine it for a Mythril then head back down and take the other platform to reach the Dungeon. Clear out the Heartless and use Trinity Jump #16 to obtain a Mega-Ether , Cottage , and Mega-Potion .
Return to the initial platform in the Lift Stop and exit past the red crystal into the Castle Gates. Be careful here because if you fall you’ll have a nice little trip back up. Let the Wyverns come to you and defeat them then hit the red crystal. Use the newly moving platform to reach another Chest that you must use Gravira on, it contains Dalmatians 94, 95 and 96 .
Now ride the moving platform back to the opposite end and jump on the other one. Ride this to a Chest containing Haste2-G . Glide from here to another Chest on the pillar for an Orichalcum .
Bottom to Top, I Stop
Cross back over to the original platform and use the blue crystal. Move up the steps to a red crystal that teleports you to a platform. It moves to the opposite end of the castle but Heartless appear to impede your progress. Beat them and hit the crystal again to continue.
Use Trinity Jump #17 to obtain a Megalixir and two Cottages then open the Chest for a thundaga-G . Head down the steps and back into the Lift Stop. Use the blue crystal to move up then enter the Great Crest. Open the Chest to the left as you enter for an Orichalcum . Use another blue crystal to reach a higher location.
Jump over the edge and glide to this hidden door (left). There are quite a few chests that hover in the air (right), keep an eye out for them.
Defeat the Heartless and use Gravira to grab the Thundara Ring from the Chest . Jump off the platform near the blue crystal and Glide to the right so you go underneath the area to a hidden section of the Lift Stop. Use Gravira and open the Chest for a Royal Crown . Head back to the High Tower and jump off and Glide left then just drop, it takes you back one area.
Return to the High Tower again and use the red crystal then enter the Lift Stop behind you. Fight through this area back to the High Tower where more Heartless await. Use Gravira to lower the Chest and obtain an Osmose-G .
Use the red crystal and climb up the steps to another one. From here you can climb the steps again to a Chest with a Megalixir . Examine the red crystal on this ledge to open a way back to the Library. Hop down the steps now and enter the Lift Stop to reach the Castle Chapel.
BOSS - Maleficent

Maleficent stands on a moving platform that can be attacked (left). She summons huge meteors (right) that will hurt you.
Maleficent flies around on a moving platform that has a health bar. Knock it down or use Gravira to bring it down so you can hit Maleficent who will try to hit you away with her staff. She can also summon Defenders and Darkballs to the battlefield to assist her. You’ll want to deal with the Darkballs, the Defenders shouldn’t be too much of a bother.
When Maleficent shouts she will summon a meteor shower that goes down the middle of the battlefield so get wide of it or take some damage. Summon Tinker Bell and use Aerora to help mitigate the threat and if you’re feeling brash just use Ars Arcanum a few times to really put a dent in Maleficent’s HP.
After the battle Donald learns Cheer and you receive Ansem’s Report 5 . Save and adjust your items as you deem necessary. Head into the darkness portal to fight Maleficent again.
BOSS - Dragon
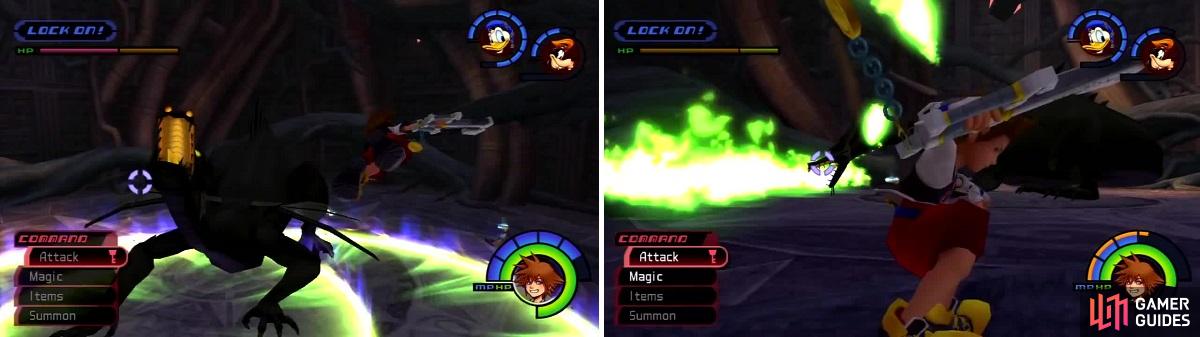
The Dragon sends out shockwaves as she slams the ground (left). She breaths green fire (right) and send green fireballs at you.
This battle is one of the harder ones in the game. Using Tinker Bell and Aerora is a viable strategy if you want to get up in the Dragon’s face and wail on it. You’ll still need to be cautious of your health but you can do a lot of damage with this formula. Regardless of your approach, you need to know what can kill you.
When the Dragon stomps it creates a shockwave through the entire room so you’ll need to jump. Maleficent can also breath a green fire on the ground that continues to burn. This all comes in addition to her claw swipes and bite attacks. There is also a nasty homing green fireball that you’ll have to deal with though it can be parried for quite a large number of Tech Points.
The basic strategy is to Glide in and hit the Dragon after it breathes fire. Take the weak hits from the claws and when the homing fireball is coming after you, parry it. You’ll be able to stay out of the fiery floor area and slowly nitpick damage. Likewise a reliable way for victory is to reach Maleficent’s back and attack her head for here. Strike Raid is a great ability for this particular approach.
After the battle you receive the Fireglow . Head back through the portal and save again. Move through the Lift Stop into the Grand Hall. Proceed up the stairs and another battle will begin. You’ll want to equip any Dark Resistant gear you have to lessen the damage you’ll take.
BOSS - Riku-Ansem
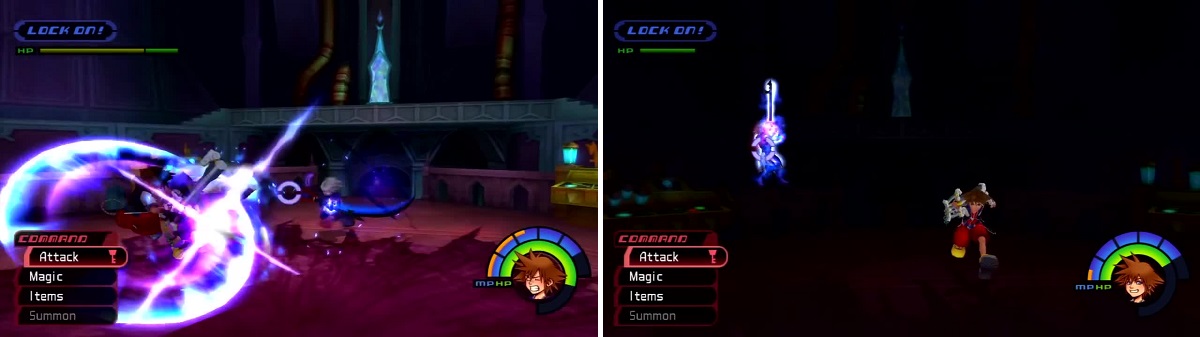
Riku seems the throw his keyblade at you (left). He will glow before doing his Dark Aura attack (right) which is your cue to start Gliding.
The difficulty doesn’t drop for this rematch. Darkness has taken over this former ally and he’s a lot tougher than before. Donald and Goofy are not available for this fight so you’ll have to rely on Aerora and Cura to keep Sora in good health. Riku still uses a three hit combo that can be Guarded. This will leave him open for a full combo. Normally he’ll try to counter attack right back so prepare to Guard again and you can get another combination in for more damage.
Rarely Riku will throw his Keyblade at you. Either Dodge Roll or Guard, though the latter can be difficult. When Riku moves to the center of the room and says, “Behold the power of darkness” you’ll want to start Gliding around the outside of the room to avoid his Dark Aura attack. You’ll want to wait until he finishes in the center before running in to strike.
Dark Aura will be used more frequently when Riku drops under 300 HP, so you’ll want to really put up some damage then. Ars Arcanum, when used midway through a combo, is a great way to deal a ton of damage quickly. Whatever you do, don’t cast Fira on Riku – he casts it backs as Dark Fire and it really hurts if you get hit.
After the battle you receive Ragnorak . Head back to the Entrance Hall after the scene. It’s fastest to just drop off the ledges. Another scene takes over when you reach this area and approach the group.

 Sign up
No Comments