Down the Rabbit Hole
After the scene with the White Rabbit head through the door down the hall. In this room you’re clearly too large, so approach the Doorknob to get things started. Push the bed in then drink the contents of the bottle. When you drop down you’ll find a new enemy.
Red Nocturne
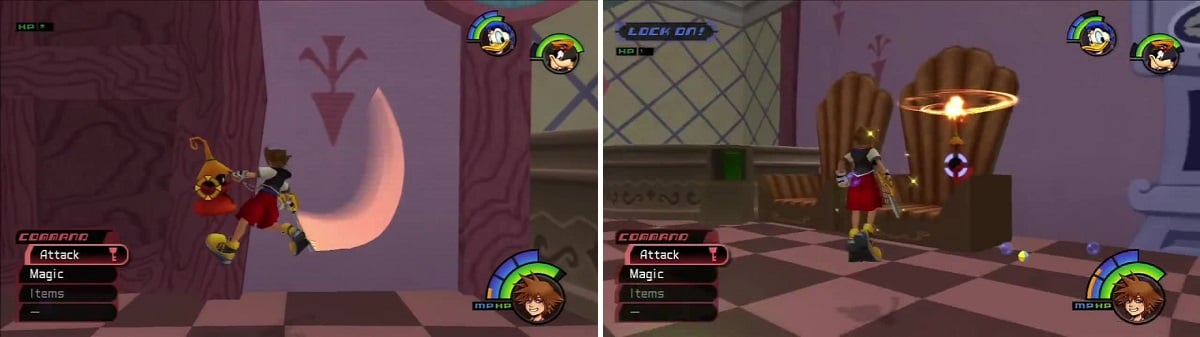
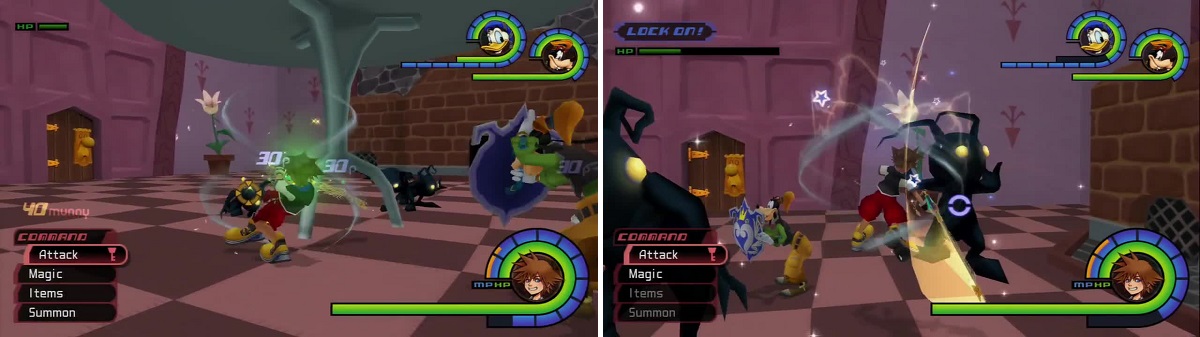
Red Nocturnes are small wizards that shoot Fire.
Red Nocturnes will fly around the air back and forth and then they start to swirl some fire around. That’s your indication to either prep for knocking a fireball back at them or dodging it. Like most enemies, deflecting their attack results in a stun so you can kill them pretty quickly. In a group you can get surrounded and pummeled easily so take them out quickly. Once you acquire Blizzard you’ll get Tech Points for using that spell on them, to which they are also weak and take additional damage.
After you clear out the Heartless head through the hole you revealed when you pushed the bed in. When the scene ends you’re tasked with finding evidence of Alice’s innocence.
Evidence for the Red Queen
Head out to the Lotus Forest to meet the Cheshire Cat. He mentions four pieces of evidence, but you need only one to start the trial. It is, however, incredibly useful to find all of the pieces so let’s get started. Clear out the Heartless and turn into the alcove past the red flower to find Trinity Jump #5 to receive an Ether , Potion and Tent . In this alcove you’ll also find the Footprints , your first piece of evidence. Give the flower here a Potion to receive a Hi-Potion . The red flower you passed earlier wants an Ether and will produce a Camping Set for your patronage. The other red flower along the path will do the same.
Head to the far side of the Lotus Forest and climb the rock to reach a lily pad with an Antenna . From this pad you can spot a chest high above in the corner. It is possible to make this jump and have Sora grab the ledge, you just need to jump at the absolute end of the pad while running to grab it; the chest holds a Scan-G . Head back to the alcove and climb the mushrooms up to a hole in the tree. Go through it to arrive back in the Bizarre Room right next to the Stench .
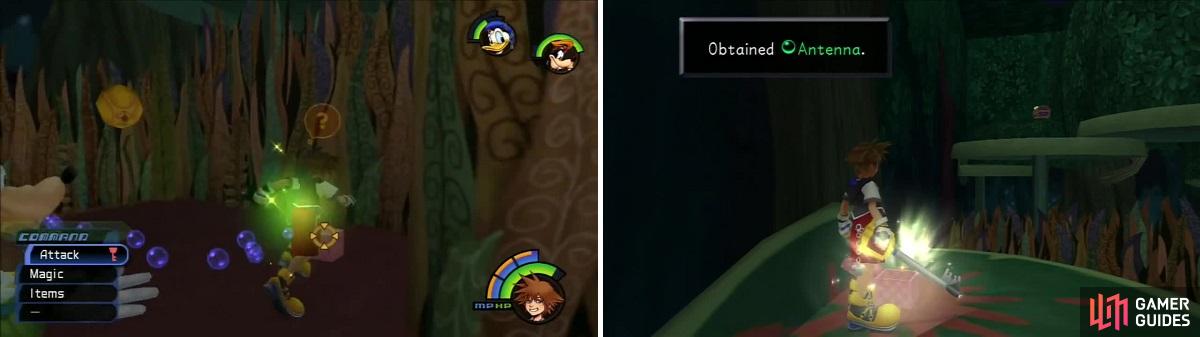
The first piece of evidence (left) is hiding next to a Trinity Jump. Hop up to the Antenna (right) and don’t forget to jump up to the chest afterwards.
Bonus Evidence
The last piece of evidence is the tricky one that the Cheshire Cat alluded to. First head back to the Lotus Forest where the large rock is located. Jump on the mushrooms and go left to reach a platform where you can jump across to the acorn. Hop down to the chest to find Dalmatians 16,17 and 18 then return to the entrance. Give the yellow flower a Potion and Sora becomes huge. Step on the stump near the entrance then “Take” the acorn from the tree. Hit the tree to change its direction then eat the acorn. Climb the tree once more and use the newly raised platform to reach a hole in the corner. From here you land on a faucet in the Bizarre Room. Carefully jump across to the Claw Marks to receive the Blizzard magic.
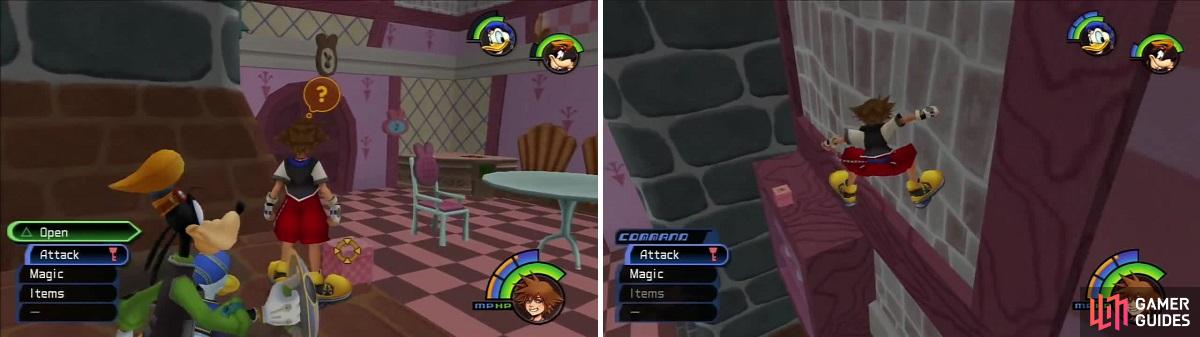
The hole in the tree takes you back to the Bizarre Room (left) for another piece of evidence. The final piece of evidence may look too far away (right) but Sora can make the jump to it.
The Red Queens Trial
Save your game back in the Queen’s Castle then approach the Ace of Hearts to present your evidence. There are five boxes of evidence and you can only choose one so there will be a 20% chance you pick the wrong one. If you choose the wrong one then Donald, Goofy, or both will be locked up during the next battle but you can break them out so it’s not a big deal.
BOSS - Cards and Tower
The objective of this fight is to bring down Alice’s cage so she can be freed. You need to break the cranks around the tower and they only take 1 HP worth of damage every hit. While this is happening the Cards will be attacking you and they can hurt. It’s usually best to take out a few Cards first then get to work on breaking the tower. You can knock the Queen out in a single hit most of the time. The Cards get back up over time so you can’t just dispose of them and then break the tower after. The tower can be targeted after the cranks have been broken and also only takes 1 HP worth of damage every hit. It’s not a bad idea to use Fire repeatedly to hit the crank and tower since it shoots fast and can end the fight quickly.
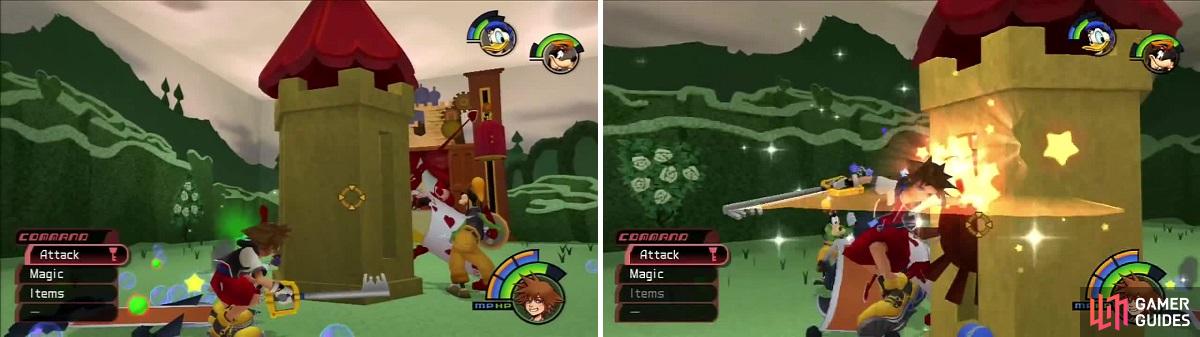
Take out a few cards so you have an easier time attacking the cranks on the Tower.
Where Did Alice Go?
Head back into the Bizarre Room and drink the contents of the bottle to return to the Rabbit Hole. At the beginning you’ll find some enemies that can be defeated to reveal a chest. Inside you’ll find a Mega-Potion as a nice reward. You’ll also probably notice that there are some new enemies you might encounter.
Gigas Shadow
The Bizarre Room is littered with Shadows (left). Defeat enough of them and the Gigas Shadows appear (right).
This Heartless is new to Final Mix and can only be found in one location in the entire game, the Bizarre Room in Wonderland. When you enter there will either be all Shadows or a mix of Soldiers, Large Bodies, and Red Nocturne. You want to enter the Bizarre Room when there are just Shadows. Defeat three waves of them and the Gigas Shadows will appear. There isn’t anything special about them other than being huge versions of the Shadow. The trick is to not get hit because once you do that Gigas Shadow will disappear and there’s only 7 of them. The drop rate is based on how many you defeat: 3 (10%), 4 (20%), 5 (35%), 6 (50%), and 7 (100%, 2 items).
If you equip items to reach maximum MP and have Cheer on everyone then you can summon Dumbo and use Splash to kill all the Gigas Shadows without fear of taking damage since you’re invincible. This is the best method for easily acquiring Fury Stones.
Large Body
These large Heartless will charge you from the front (left) so get behind them and attack (right).
The Large Body is one of the more annoying Heartless you’ll fight. It is best to strike at its back because your attack will deflect off the belly. If the Large Body taps its belly it will charge at you so either Dodge Roll at an angle towards but away from it or hit it with magic to force the Large Body to stop. Likewise, you can counter by timing your strike with the Keyblade to stun the Large Body when it charges. This leaves the Large Body exposed for combos to its back. Goofy can be useful because his spinning shield attack deals a lot of damage to the Large Body. In the same sense, Donald is useful for countering charges with magic. The most important thing is to leave the Large Body for last when in battle because trying to kill it while you are being shot at raises the difficulty of this foe.
Curiouser and Curiouser
Head back to the Lotus Forest and clear out the Heartless then give the yellow flower a Potion again to grow larger. Push the rock into the water to raise two platforms then “Take” the acorn by hitting the tree. Hit the tree again to move it back away from you, then eat the acorn. Use the new platforms to reach an area with Trinity Jump #6 - it yields a Camping Set and plenty of MP. You can also give the red flower a Hi-Potion to receive a Mega-Potion in return. By that math, you can turn Potions into Mega-Potions by resetting the flowers and buying Potions, feeding them to the red flower near the entrance, then using the Hi-Potion they give on the red flower you just fed. Curious.
Go through the doorway back to the Queen’s Castle and open the chest to receive Dalmatians 13, 14 and 15 . Return to the Lotus Forest and head to the back end. Climb up the tree using the mushrooms and enter the Bizarre Room by jumping from the acorn branch across the gap. Clean out the Heartless then “Touch” the lamp to light it and receive a Defense Up from the chest that spawns. Touch the second light to spawn a picture that you need to examine. In this closed off area of the Lotus Forest you’ll find two yellow flowers where you can trade a Potion for a Hi-Potion and an Elixir for a Mythril Shard . With this area complete, return to the Bizarre Room.

Hiting the tree (left) makes the platforms attached to it move. There are two lamps you should examine (right) in this part of the Bizarre Room.
A Very Merry Unbirthday
Hit the latch next to the Teddy Bear so that it drops into the chair. Now exit the Bizarre Room and climb up the mushrooms near the entrance of the Lotus Forest and reach the corner exit to return to the Bizarre Room. Turn the faucet to animate the pot then jump into it to reach a chest with a Meteor- G inside. Drop down and enter the Bizarre Room from the Queen’s Castle. Fight your way back to the tabletop and grow big again. Read the book near the Teddy Bear to receive a Mythril Shard . Now move the Teddy Bear to make the clock become real, then move the clock and get small again.
Enter the Tea Party Garden and open the chest before jumping down to receive a Dark Matter. There is a sign next to the Mad Hatter and March Hare picture that details sitting down in the chairs around the table to receive a reward. If you start a battle then the table goes away, so grab the rewards first! The chair at the head of the table and the middle left ones are the battles so skip those until you have grabbed the items.
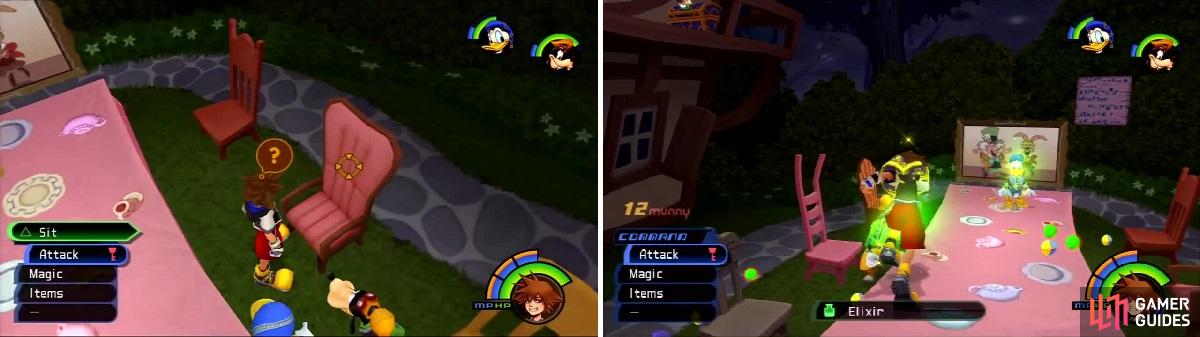
The chair on the left may look comfy but don’t sit in it. Sit in the others for some nice rewards.
Finding the Trickmaster
Enter the Bizarre Room via the door in the house. Clear out the Heartless in the room then jump up to the candles and light them. Release the latch at the far end of the room to reach another area of the Queen’s Castle. Open the nearby chest to find a Thundara-G then drop down. Enter the Bizarre Room once more and “Examine” the flower near the Doorknob to receive two Potions and a Mythril Shard . Save your game then talk to the Cheshire Cat to start the boss fight.
BOSS - Trickmaster
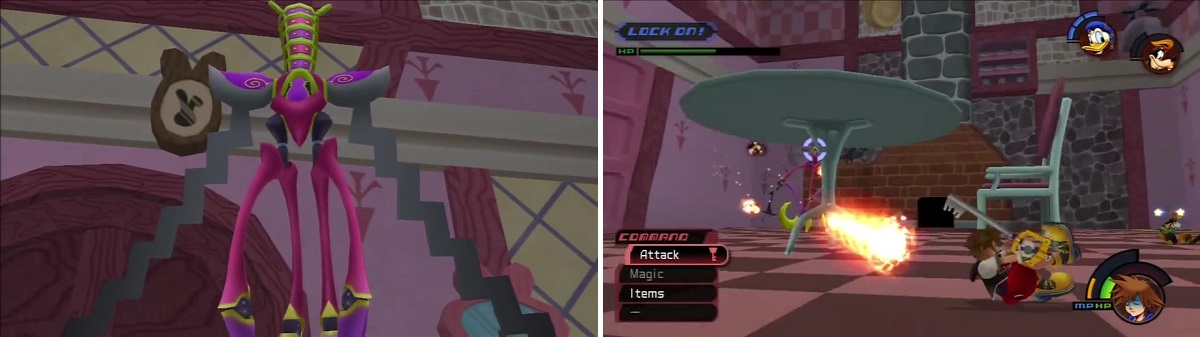
Trickmaster can be a pain but don’t let him light his batons. Firey doom awaits if you do.
Trickmaster can be a bit of a pain if you don’t understand his mechanics. While it may seem a bit backwards, the best defense against Trickmaster is to be constantly on offense. If you don’t give the Trickmaster time to light his batons then you’ll be in good shape. You can tell when Trickmaster is attacking because his legs stiffen up.
Afterwards, he swoops down to attack so dodge and then counter this. If you stand in the corner near the Teddy Bear you can just leap from this chair to the Trickmaster and deal damage to his body – he doesn’t take damage anywhere else while he is standing. After a few combos, Trickmaster will collapse and you can really let him have it. Refrain from using Fire, it will just light his batons and double his damage. Likewise, you can use Blizzard to put out the batons.
If Trickmaster does go to the fireplace and lights his batons then you need to be ready to Dodge Roll as he will shoot Fire at you and it does a lot of damage. Using the table in the center of the room is not a bad idea, it’s just that the Trickmaster can smash it and you’ll have to wait for it to raise again. With all of this knowledge, the simplest way to defeat Trickmaster is stand near the Teddy Bear and just let him have it and he’ll never light his batons and he’ll collapse often so you’ll finish the battle relatively quickly.


Traverse Town Pitstop
After the battle you receive a Navi-G Piece and are free to leave. Head back to Traverse Town for a quick pitstop. Go to the cafe and use Blizzard to extinguish the candles then open the chest for a Defense Up . From here go to the Battle LV 2 world, which is in fact the Olympus Coliseum.

 Sign up
No Comments