The Realm of Darkness
Save then move up to the darkness spot. Defeat the Heartless, Shadows and Neo Shadows, then continue to find some Darkballs. Leap upon the ball of dark energy to launch upwards to a new level. Clear the darkness spot and loot the chest for a Balloon Letter . Launch higher then drop into the Lower Zone where you’ll find a chest with a Chaos Crystal . Clear more darkness spots and drop down to a mysterious looking one. Defeat the Heartless here to spawn a ball of dark energy to launch higher.
Drop down for now and clear a darkness spot so you can nab the Blackout . Leave at this exit to return to the Middle Zone where you can grab the Zero Graviga and clear another darkness spot. Return to the area where you just raised a pillar. Climb up and onto that pillar, launching higher onto another platform. There are two darkness spots here, clear them to create a new way up. Towards the top is a chest with a Secret Gem . Head into the next area, the Upper Zone, where you need to clear zones of darkness. Start clearing around the left and you’ll spot a chest with a Megalixir .
Check the platform on the far right for a Triple Firaga then drop down. In this center area you’ll find the final chest, Transcendence , is within. Head back up and enter the main sphere of darkness once you’ve cleared all the other minor locations. You’ll have to clear a large number of Shadow and Neo Shadow Heartless in here, but you’ll get a nice reward when you are done, a Save Point. Head into the next area for the boss, an Unknown Heartless.
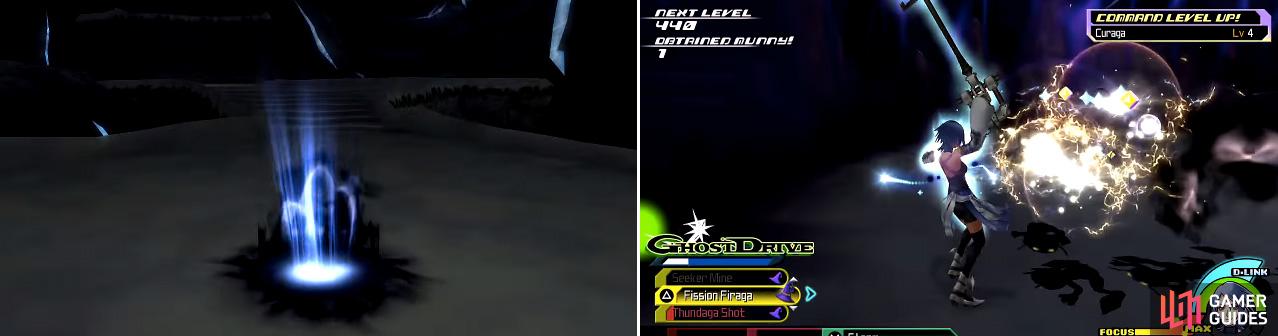
The darkness spots have enemies in them (left). Equipping abilities that have area of effect damage is a must here (right) as you will fight a lot of enemies at once.
BOSS - Dark Hide
The Dark Hide is a fast, fierce, and unpredictable opponent. In the first phase of the battle, the Heartless attacks from within the darkness, visible only by its glowing red eyes. The boss will attempt to charge at Aqua, and when it does the battle shifts to its point of view, turning the scene red, making it hard to dodge. The Heartless also attacks with savage claw swipes and tail spins. The best way to deal damage to the Dark Hide in this phase of the fight is to patiently wait until just after the scene where it looks at you through its point of view, then quickly use Barrier to block the incoming attack and finally to use Aqua’s counter attack to deal damage. The Dark Hide will then just stand there idly for a few seconds before returning to the sanctity of the shadows, so be sure to get as many Keyblade strikes in as you can. If you have Teleport equipped Aqua sometimes will teleport behind the Dark Hide instead of blocking its attack with Barrier. However, this does leave the Heartless vulnerable as all of its attacks in this phase are focused on what’s in front of it. After dealing around one and a half health bars of damage to the Heartless, it will reveal its true form, starting the next phase of the fight.
The second stage of the battle is the same as the first, with the exception of the new attacks in the boss’s arsenal. The boss still retains its claw swipes and spin attacks, but can now charge at Aqua, leaving a trail of flames in its wake. Also, the Dark Hide’s movements become more erratic, making it hard to land hits. However, the Rhythm Mixer Command Style finisher deals great damage to the boss. You have to be patient and try not to get frustrated here. After another round of combat, the Heartless unveils the rest of its attacks.
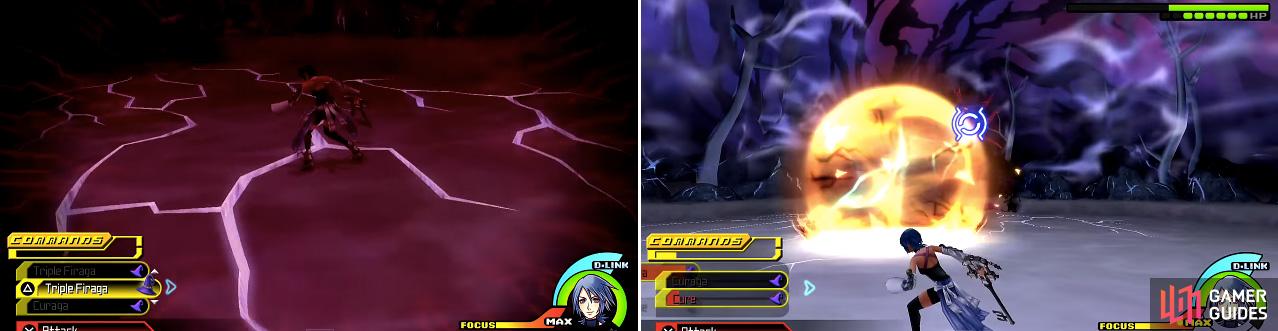
Dark Hide switches to his point of view (left) periodically for the first part of the fight. You can dodge this attack. He also uses an attack like a Mega Flare (right) which must be dodged to avoid massive damage.
In the final round of the fight, the Dark Hide now uses red, blue, and green afterimages of itself for offensive and defensive purposes. It may spin around Aqua, its afterimages charging at her while it slams the ground, creating a shockwave. The boss can also shoot dark energy orbs that, after a few seconds, expand, damaging Aqua if she steps to close. It also utilizes a variant of the Mega Flare command, wherein it shoots a large fireball at Aqua. This battle, along with a couple of others, is the ultimate test of your skills in Birth By Sleep and requires a lot of focus. However, with some patience, Cure and potion commands, and high HP, the Heartless will eventually fall.
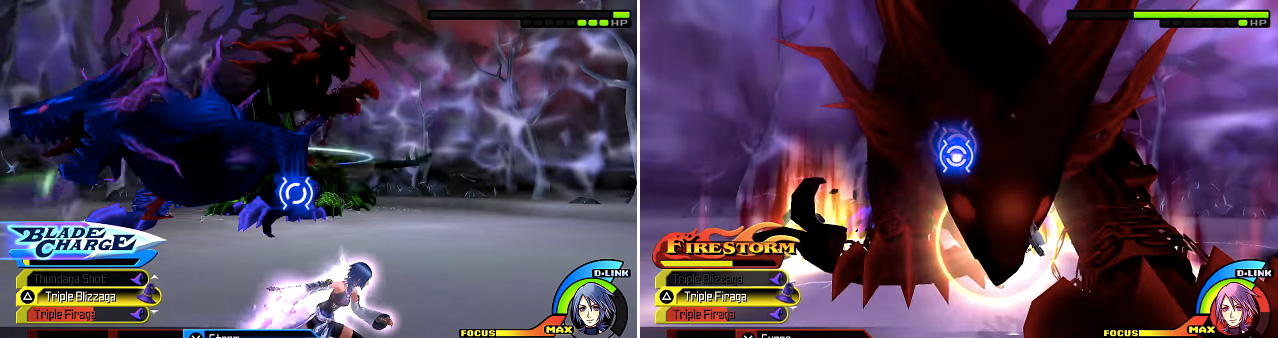
In the final phase, Dark Hide will summon colored copies of himself which he can use to charge you or to protect him from harm.

 Sign up
No Comments