Mirror, Mirror, on the Wall
After the scene leave the room in to the Vault. Search the bottom area for two chests containing an Ether and Balloon Letter . Near the second chest is a fireplace that can be lit with any Fire command. Ride the bubbles that appear to the top and grab the Flame Salvo from the chest. Drop down to another group of bubbles and ride them to another ledge. Defeat the Unversed and open the nearby chest for a Potion and continue your way around this level until you reach the Underground Waterway.
You should immediately notice the wheelshaped switch upon entering this area. Hit it and dash through the gate that opens near where you entered. Open the chest for a Potion then hit the next switch and dash through the next gate located near where the first switch is. Beyond this gate is a chest with the Block Recipe and further beyond this gate is another leading to a Poison Edge and Fire . As you empty those chests the Prize Pods will spawn next to you; defeat them and return to the second switch location. Equip a dash command such as Sliding Dash and look out on the ledge to the left. Jump straight up and use the command at the peak of your jump to grab the Louie Sticker .
Head to the Courtyard and open the chest for a Potion . Check out the shop and open two more chests around the corner for Dwarf Woodlands Map and a Soothing Crystal . Leave through the southern door to meet Snow White, but you are rudely interrupted by Unversed.
Prizes
| Prize Category | Name |
|---|---|
| Deck Command | Air Glide |
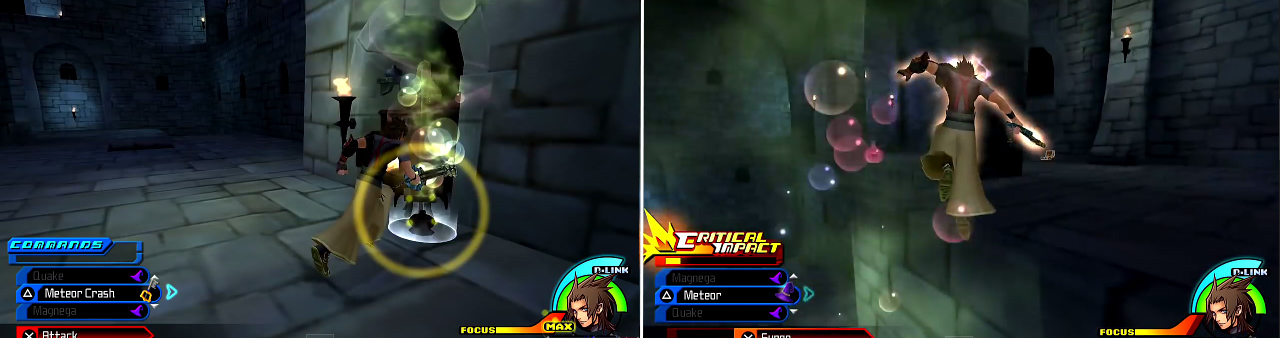
Look for the bubbles (left) to have them lift you up high (right) to ledges with item chests.
Equip Air Glide then open the chest for a Hungry Crystal then grab the Balloon Sticker. Go back to the Courtyard and check out the archway to the west. Find the one spot where the bushes aren’t covering it and jump up on the archway. In the opposite corner is a chest holding Fission Firaga ; leap and use Sliding Dash at your highest point to reach it.
Make your way back to the starting room to trigger a cutscene and another boss fight.
BOSS - Spirit of the Magic Mirror
The Spirit of the Magic Mirror isn’t that difficult. It can warp around the battlefield but you can always do damage with Strike Raid (or any of its many variations) or your Shotlock. When the Spirit duplicates they will all hurl hordes of fireballs so dodge them by dashing. The real Spirit is the one with a sly grin on its face so, when you find it, be sure to unleash a deadly combo.
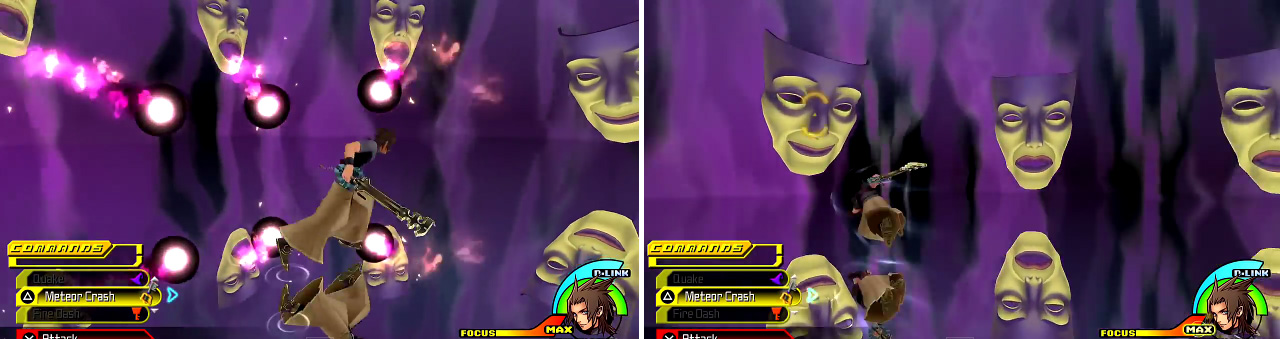
The Mirror’s many faces will spew out fireballs (left) which you can dodge with dash. To find the real Spirit, look for the one with the smug grin (right).
Prizes
| Prize Category | Name |
|---|---|
| Power Up | Maximum HP Up |
| Command Style | Firestorm |
| Keyblade | Treasure Trove |
After the battle there will be another scene. When you are taken back to the World Map, a new area will be unveiled. Head to the Mysterious Tower when you’re ready but just make sure you are getting the rare commands from the Command Board games and leveling up new commands constantly so as to forge more powerful ones such as Firaga or Blizzaga.
Unversed Mission - Survival Bottle
Location : Underground Waterway
Reward : Illusion S
1 Star : 0’00“00 - 0’59“59
2 Star : 1’00“00 - 1’59“59
3 Star : 2’00“00+
The trick here is to load up on a bunch of Cure commands and have a long Shotlock like Meteor Shower or Ragnarok so you can reach the Survival Bottle. The poison will kill you quickly so chase down the Survival Bottle and use Finishers often since you are immune during them (same with Shotlocks). Use a Cure when you can’t reach the Survival Bottle in time and dash to keep up. Just watch out when the Survival Bottle dashes at you; Guard then counter!
 Sign up
No Comments