One-Winged Angel
Sephiroth is available to fight after you’ve restored Hollow Bastion to its rightful self, the Radiant Garden. Approach Sephiroth to start the battle.
Recommended Equipment/Abilities
Equipment : Ultima Weapon, Highest Ribbon, Ribbon x2, Cosmic Chain
Accessories : Cosmic Ring x2, Cosmic Arts x2
Abilities : Guard, Counterguard, Aerial Recovery, High Jump, Aerial Dodge, Glide, Slide Dash, Combo Boost, Air Combo Boost, Finishing Plus, Leaf Bracer, Defender, Second Chance, and Once More.
If you are at a higher level, MP Haste, MP Rage, Berserk Charge, and Retaliating Slash are also helpful.
BOSS - Sephiroth
Sephiroth starts the battle with Flash, an attack that darkens the screen and is also indicated by the command “That’s enough!” Sephiroth then dashes past Sora and hits him multiple times, but you are prompted, albeit shortly, for a Reaction Command to counter this attack but just note that you cannot use it while in mid-air. The Cut Combo is used when you are too near Sephiroth; it’s a flurry of slashes that are easy to dodge or Guard which can allow for a follow-up combo. It’s best to not use a Finisher because Sephiroth will just use Cut Combo again, allowing you to get past the first phase by repeating this simple tactic.
Sitting too far back from Sephiroth will cause him to use Upward Slash, a move where Sephiroth warps behind Sora and knocks him high into the air. It is a hard move to dodge but if you can get Reflect or Guard up quick enough it’s possible. Failing to Guard this knocks Sora into the air where the One-Winged Angel will unleash an Aerial Cut Combo that should be evaded with Aerial Dodge – you can counter from this position. Continue to avoid Sephiroth’s assault and counter until he loses 4.5 bars of health.
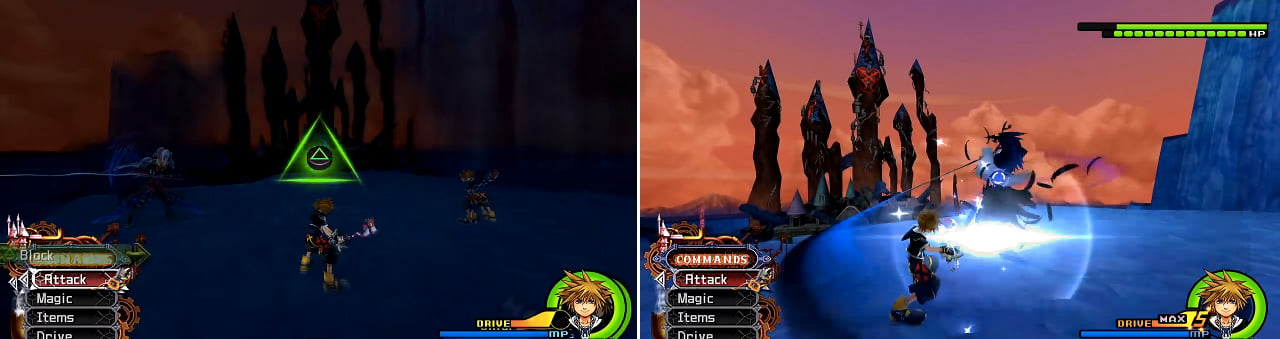
Look for the opportunity to use the Reaction Command during Flash (left). Sephiroth’s sword strokes can be blocked (right) pretty easily.
Phase 2
The command “Know your place” is called out, signifying the next phase where Sephiroth uses Shadow Flare . This attack can be brutal unless you use Reflect so be sure to guard with that spell. Sometimes Flash is initiated right after Shadow Flare, making it easy to dodge with the Reaction Command. His attacks reach a little further and deal a little more damage in this phase, making you pay for mistakes. The other mainstay of this phase is the Firaga Wall , an attack that draws Sora into the flaming pillars – use Quick Run to avoid taking damage.
In addition to all this, Sephiroth begins using his most deadly attack, Heartless Angel , indicated by the words “Descend… Heartless Angel!” A quick High Jump and Aerial Dodge will allow you to reach Sephiroth quickly and interrupt the casting of this attack. Should you get hit you need to use an Elixir immediately since you’ll be at 1 HP and 0 MP. Keep up through this phase and you’ll see Sephiroth use Meteor after losing nearly 10 bars of health.
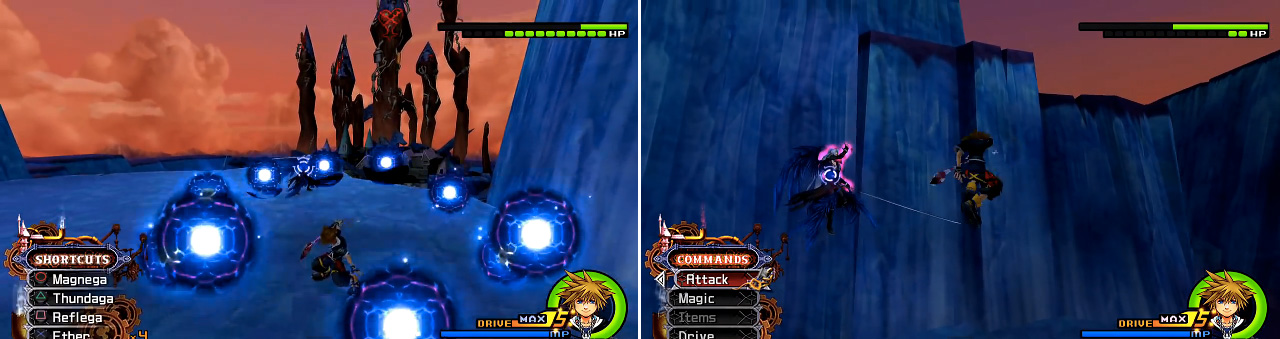
Shadow Flare (left) can be reflected but beware of Flash during this attack too. When Sephiroth starts glowing red and rising up (right) he is about to use Heartless Angel. Meet him up there to prevent this.
Phase 3
Meteor is the first attack and it can be avoided with Aerial Dodge, Reflect, and some skilled Quick Runs but if you have trouble, switch to Limit Form to use Sonic Blade where you are invulnerable (you won’t do damage). In fact, the entire last phase can be beaten easily with Sonic Blade if you have enough MP to do it since it deals heavy damage and makes you unable to take damage. Sephiroth doesn’t really change tactics, he’s just a little faster from Phase 2 and uses Meteor now.
Reward : Drive Gauge +1 (Sora)
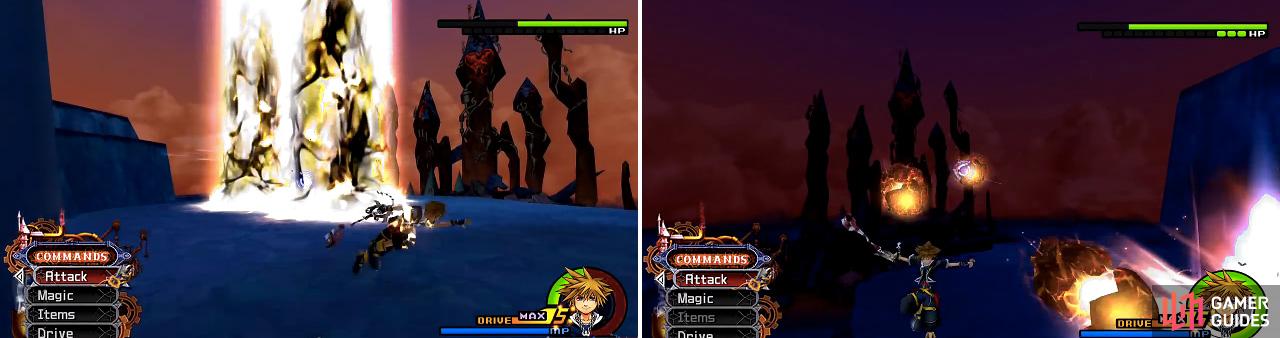
The Firaga Wall (left) is used from Phase 2 onwards and more often as Sephiroth gets near to death. Meteor (right) is used a lot in the final phase. Aerial dash from side to side of the arena to avoid it.
After defeating Sephiroth, head back to the Marketplace to speak with Cloud. Return to the Dark Depths to view an awesome scene and receive the Fenrir Keyblade.


 Sign up
No Comments