Trouble with Pete
After the opening scene search the area for the Naval Map (1/14), a Dark Shard (3/14), Heart #7 , and a Mythril Stone (2/14). Head down the steps to find Pete talking with Captain Barbossa. You have to take out the Undead Pirates but they won’t take damage! A short scene takes over where the moon comes out so they can take damage now, Pete also lets slip that magic hurts them a lot. Fire will deal increased damage, Blizzard freezes them, and Thunder causes them to move slowly.
Monster - Undead Pirate
There are three types of Undead Pirates: versions A, B, and C. Version A has darker skin and attacks at close range with two hatches. Its Reaction Command is “Backshuffle” which leads to “High Counter” dealing triple damage. Undead Pirate C wears a white shirt and fires bolts from a distance. Use the Reaction Command “Return Fire” to reflect the bolt. Undead Pirate B is defensive and tosses bombs.
Monster - Cannon Gun
This Heartless will avoid Sora and attempt to lock on with a target emblem on the floor. It then fires cannon bombs which can deal some hefty damage. It can also use a Recoil Shot to fire horizontally but the only threat you have of this Heartless is a bunch of aggressive ones that join it and buy time for the Cannon Gun to deal its damage while you are preoccupied. Focus this enemy in battle to avoid a bad situation altogether.
Into Town
Follow Pete into town where you’ll have to clear out some Heartless. After the battle, go down the left side to acquire Two Sides #11 then continue to the northeast to find a chest containing a Dark Stone (4/14). Smash a hole in the wall to reach the middle section; there is a chest here with a Mythril Shard (6/14). Bust another hole in the wall to find an AP Boost (5/14) in a chest then leap up in this area to snag Edge #7 . Continue to the north end where you can break the crates and claim the Mythril Gem (7/14). Go to the Harbor where you meet Jack Sparrow… Captain, Jack Sparrow.
Isla de Muerta
You start aboard the Interceptor. Take this time to go to the Hold where you can save and shop at Morlock’s Moogle Shop.
Morlock’s Moogle Shop
| Item | Price |
|---|---|
| Hammer Staff | 100 |
| Victory Bell | 400 |
| Adamant Shield | 100 |
| Chain Gear | 400 |
| Potion | 40 |
| Ether | 120 |
| Tent | 100 |
Speak with Jack and set course for the Black Pearl; this will cause a battle to break out on deck. Defeat the Heartless then you will arrive at the Isla de Muerta. Head up into the next area where you will face a new Heartless, the Air Pirate.
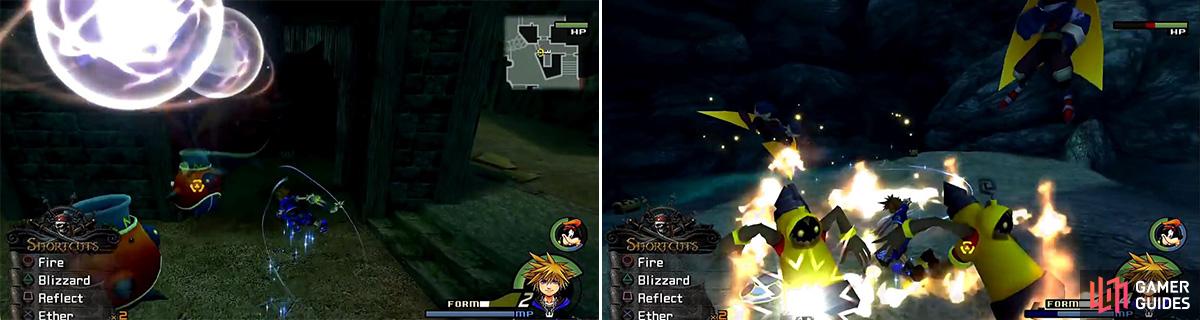
Beware of these guys appearing from the sky (left). The Air Pirates (right) can swarm you in a group so be aware and don’t get carried away.
Monster - Air Pirate
Air Pirates aren’t that difficult; a Thunder or Blizzard spell is good enough to bring one down. Aerial Combos are the best way to deal with Air Pirates but if you are clever you can hit the Air Pirate once and create some space. This will force the Heartless to charge you and allow for the Reaction Command “Air Twister” to be used against the other Heartless in the area. Defeat this Heartless when you have the chance though it isn’t a high priority.
Open the two chests in this area to find a Bright Shard (8/14) and a Mythril Shard (9/14). As you move to the next area you are forced to survive for 1 minute against the Undead Pirates which is a simple task. After the scene you receive the Isla De Muerta Map and must sail back to Port Royal.
Protect the Medallion
You don’t actually make it to Port Royal because the Black Pearl intercepts (sorry) the Interceptor and you must protect the medallion. If an Undead Pirate takes it then you have 1 minute to get it back. Use the cannons to blast the Black Pearl and temporarily halt their cannon fire to ease things up.
BONUS : Aerial Spiral (Sora) Draw (Donald) HP +5 (Goofy)
After a scene you are stuck on the ship and there are five burning barrels of gunpowder that are about to blow the ship into pieces. It’s far from a difficult task. Run around the ship and press Triangle to smash the barrels out into the sea, addressing the ones that start to flash with priority. Air Pirates and Cannon Guns will try to stop you, but you don’t need to defeat them.
BONUS : Item Slot (Sora) HP +4 (Donald) Second Chance (Goofy) HP +10 (Jack)
Breaking the Curse
Back on the Isla de Muerta you can challenge Larxen’s Absent Silhouette now, it is located just outside the save point. Continue on to the next area here, blowing up the crates to keep the Undead Pirates in moonlight. Open the chest to the left for an AP Boost (11/14) then continue onward. Defeat some more Undead Pirates and claim two puzzle pieces: Heart #5 and Two Sides #4. The last hidden area has a chest with another AP Boost (10/14) so grab it and head to the Moonlight Nook. Defeat the Undead Pirates here and loot the three chests to find a Mythril Shard (12/14), Serenity Gem (13/14), and a Power Stone (14/14). Enter the final area for the boss fight against Barbossa!
BOSS - Barbossa
There is an Illuminator in this battle; it darkens the room and thus no moonlight. It has low HP so quickly defeat it and turn your attention to Barbossa. He uses a flurry of sword attacks that are easily Guarded and then countered. The gunshot can knock Sora back but just remember to recover. He rarely uses bombs but they do some damage. With Jack on one side and Sora on the other it’s possible to use “Twin Counter” to deal damage with “Sonic Drive” afterwards. As the battle draws on the Illuminator may return so just be sure to defeat it. Barbossa’s attacks get more lethal towards the end so use the “Land” then “Reverse Blade” Reaction Commands to block the attack and counter for some decent damage. Remember to use Valor and Wisdom form to speed things up.
Rewards : Drive Gauge +1 (Sora), Aerial Finish (Sora), HP +4 (Donald), Teamwork (Goofy), Auto Limit (Goofy), HP +15 (Jack)
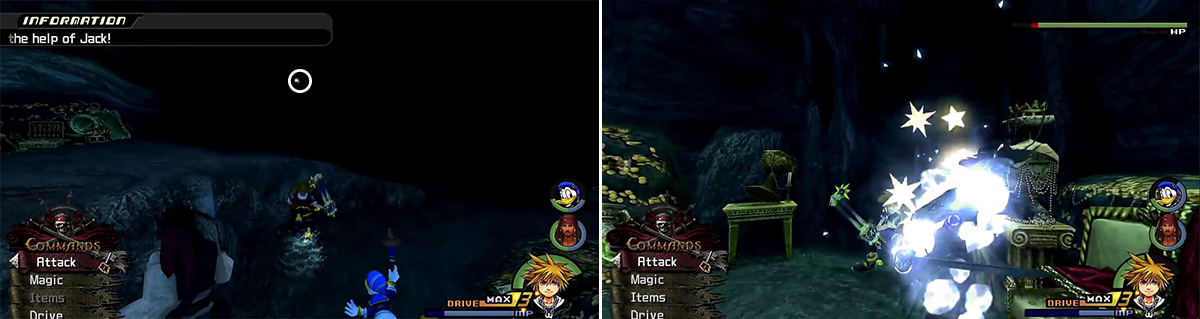
Kill the Illuminator as soon as the battle starts (left). You can freeze Barbossa (right) in place and pummel him with attacks.
After the battle you receive the Follow the Wind Keyblade . Set a course to Agrabah through the Ancient Highway.
 Sign up
No Comments