

Once you enter the city and watch the scene, talk to the active doorman, and he’ll let you take some of his enthusiasm! You’ll automatically open your magic menu, so choose ‘Take Heart’ to use it on the doorman. Once you have his enthusiasm, approach the other doorman and talk to him; again, with your magic menu open, choose ‘Give Heart’ to give him the first doorman’s enthusiasm!
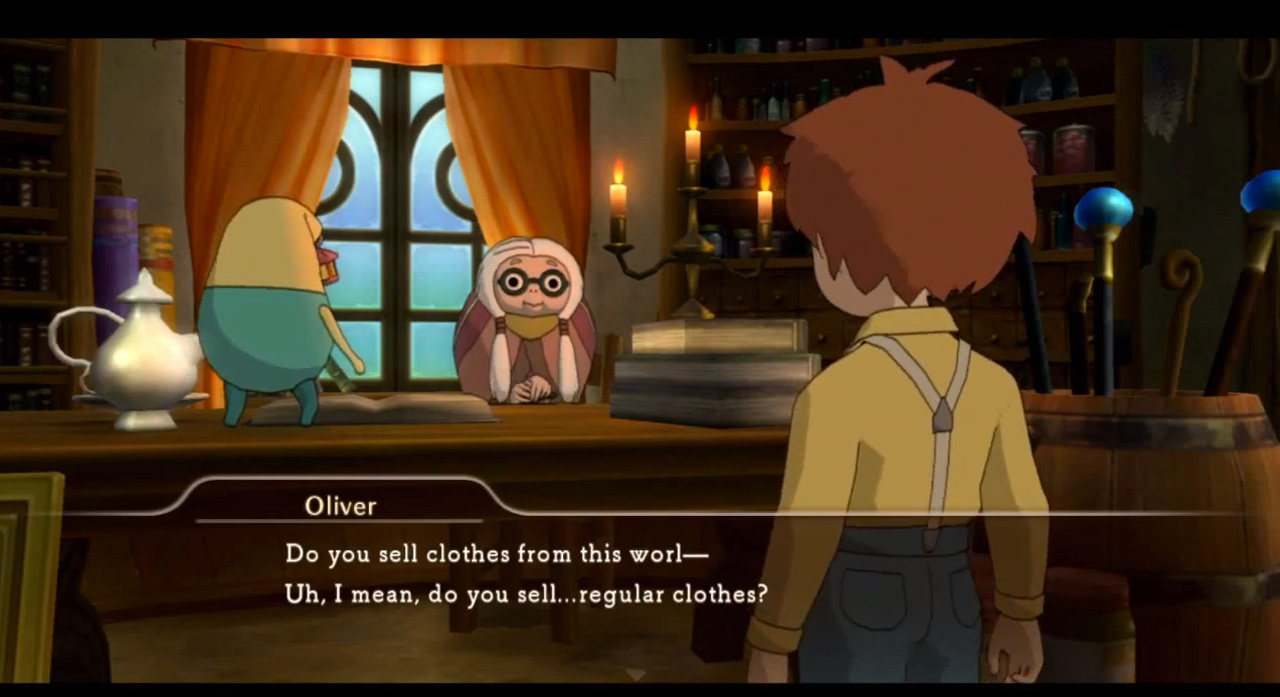
With that, you’ll now gain access to the city after a few scenes. Start making your way northwest, but before going through the archway, check the urn to the left of the arch for [5 - 15 G] . Now go through the arch for a scene, where you’ll decide that you need a new outfit.
| **Hootique** | **Cawtermaster’s Store** |
|---|---|
| 20 G | White Bread |
| 200 G | Iced Coffee |
| 20 G | Poison-Be-Gone |
| 40 G | Blindness-Be-Gone |
| 20 G | Chocolate |
| 20 G | Flan |
| 20 G | Cake |
| 20 G | Sundae |
| 20 G | Ice Cream |
| 50 G | Bumbler Honey |
| 50 G | Dumpty Egg |
| 50 G | Crispy Lettuce |
| 50 G | Crunchy Carrot |
| 60 G | Tender Beef |
Just to the north and east of where you are is the Hootique, so stop in and talk to Hootenanny. She does have some, but you’ll have to wait til the morning before you can get it, so now’s the time to check out elsewhere.
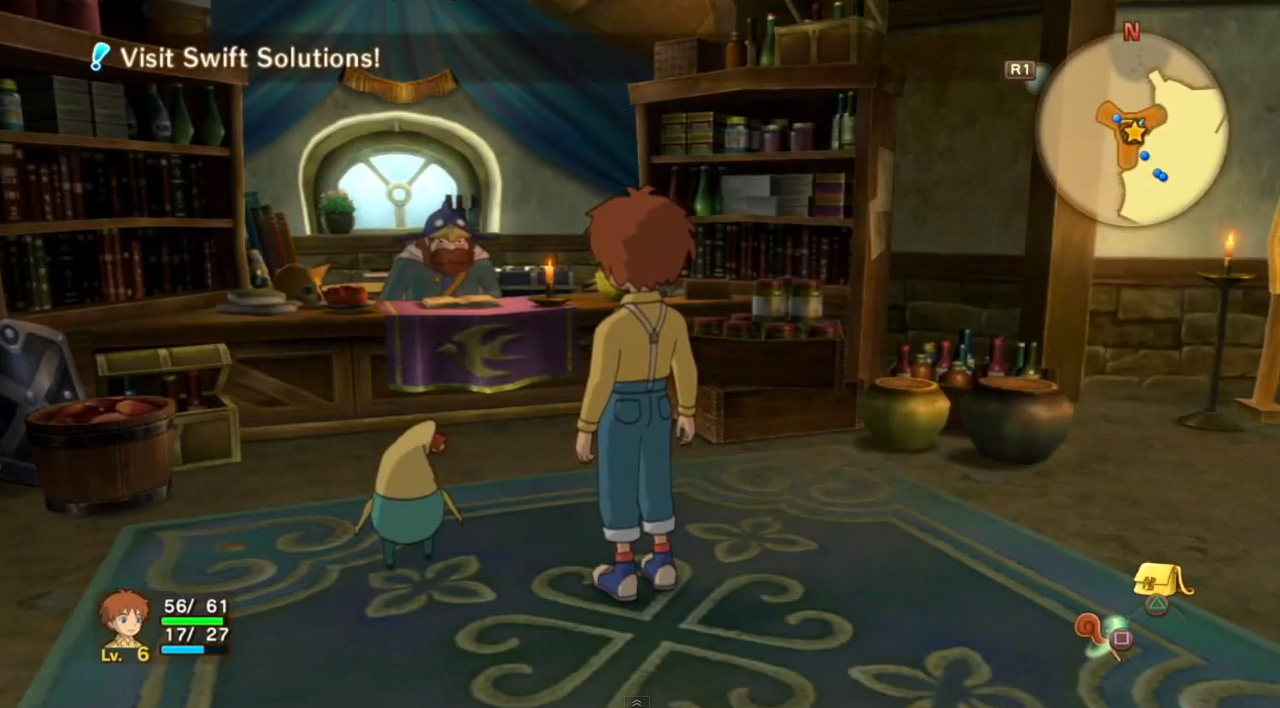
First stop will be Swift Solutions; it’s to your south and west. Inside, you’ll learn about different tasks that you can take on, as well as different bounty hunts that you can partake. You’ll then receive a Merit Stamp Cards from the taskmaster; fill them up, and you can exchange them for rewards at any Swift Solutions location! With that, you can now access your own Journal to see how you’re progressing in the story, as well as check out your various side tasks. Check out the errand board for new errands and inquire about bounties at the taskmaster.
Errands / Bounties
Errand #041 - A Safe Hiding Place
Description: A young Grimalkin from Ding Dong Dell remembers putting her red earring in a pot…but has forgotten which one.
Goal: Ask the Grimalkin what she wants you to do.
Stamps: 2
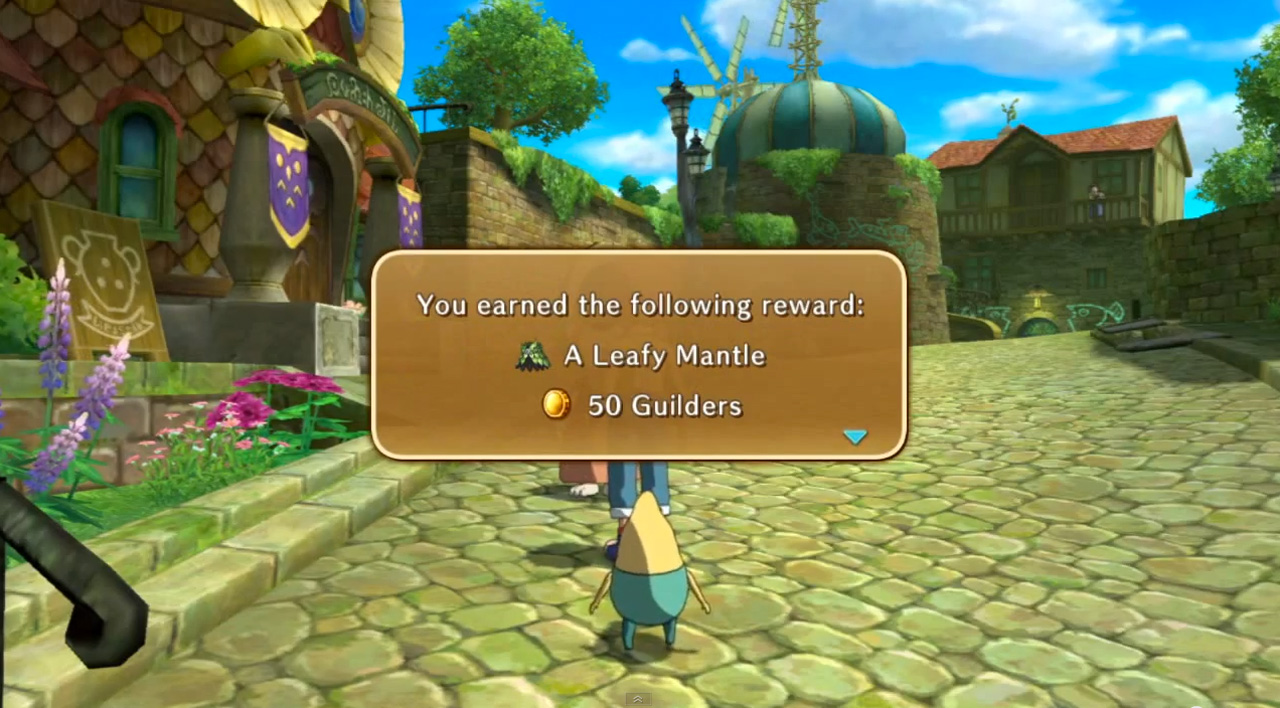
Rewards: Leafy Mantle, 50 G
Items: Red Earring
Errand #042 - A Splash of Color
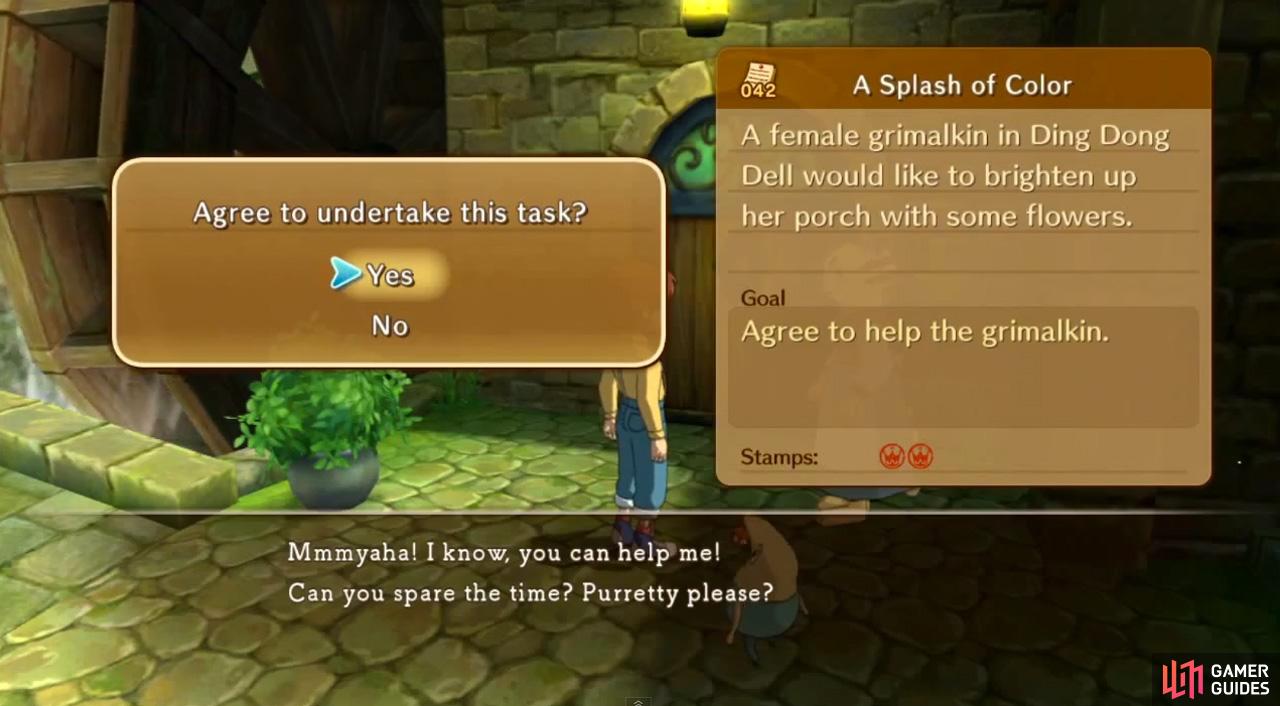
Description: A female grimalkin in Ding Dong Dell would like to brighten up her porch with some flowers.
Goal: Agree to help the Grimalkin.
Stamps: 2
Rewards: Wooden Shield, 50 G
Errand #043 - Hide and Seek
Description: A Ding Dong Dell mother is worried about her sons, who haven’t come home yet.
Goal: Agree to help the mother.
Stamps: 3
Rewards: Sweetie Pie x3, 50 G
Bounty #086 - Vegetable Thief
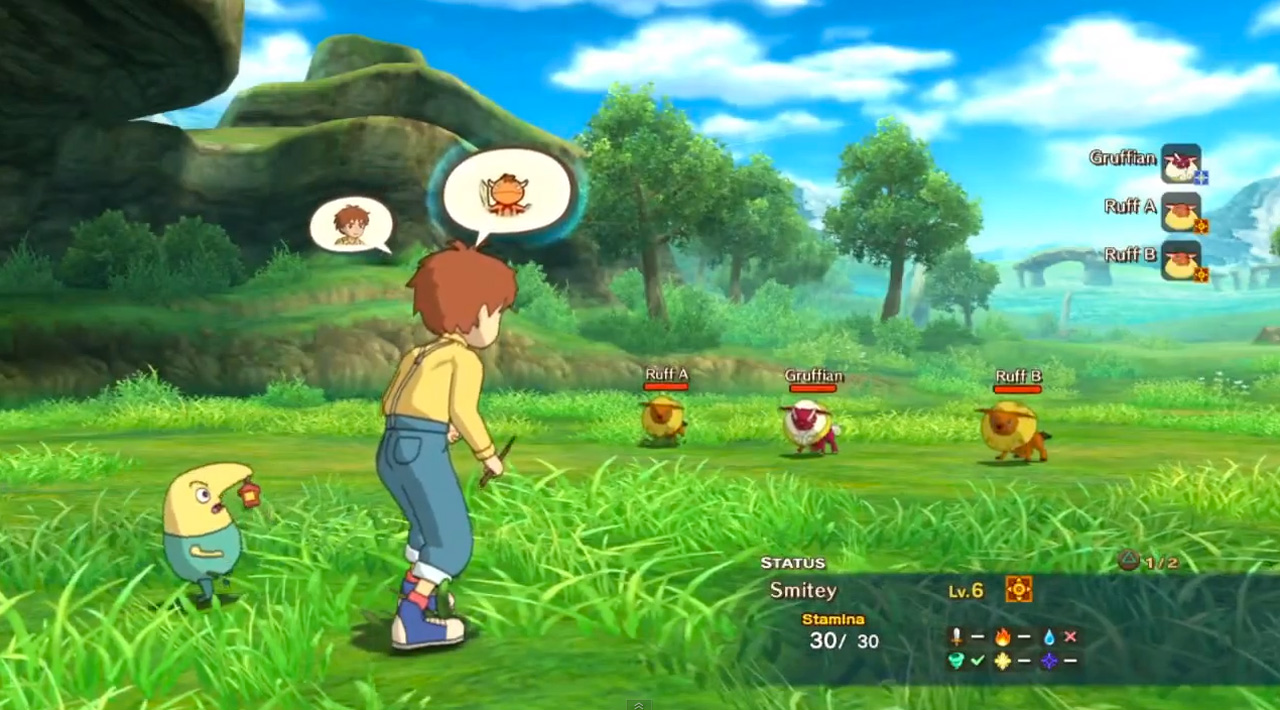
Description: A Gruffian keeps stealing produce from farmers’ fields outside of town. It has to be dealt with quickly–it’s nearly harvest time!
Last Seen: Southeast of Ding Dong Dell (Summerlands)
Stamps: 2
Rewards: Well Worn Sword, 50 G
Enemies: Gruffian, Ruff
Spoils: 30 EXP, 25 G
When you’re done with the optional errands and bounties, feel free to explore the town a little and proceed with the main storyline.
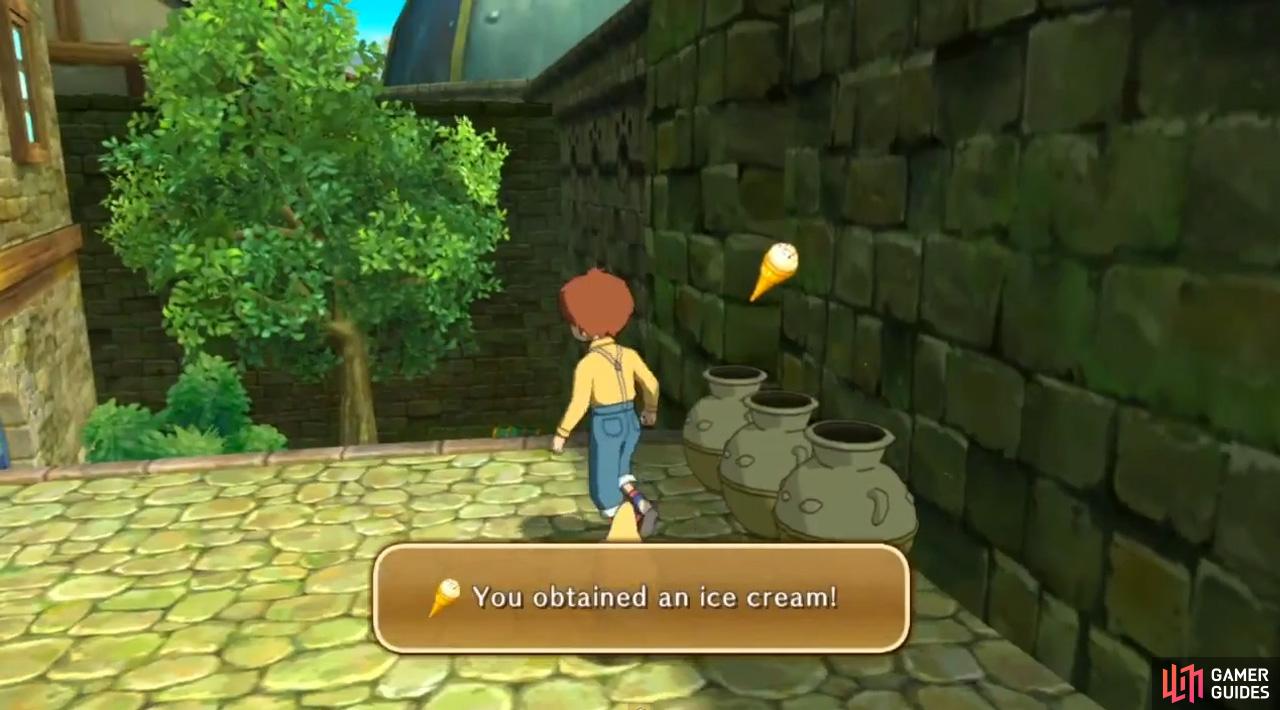
On the southern side of the Swift Solutions building is a twinkling urn with [10 G] , so grab it, then head south and hug the wall as you go southeast. You should find another twinkling urn; examine it for some [ICE CREAM] .
Next, head (north) east from Swift Solutions and head through the gate. When you see the road widen just a bit on both sides, check the northern side for yet another twinkling urn, this time with a loaf of [WHITE BREAD] .
To your east is the Cawtermaster’s Store; head inside first and open the chest there for a [SUNDAE] , then return outside and check the leafy area to the immediate south to find another chest behind a tree, this time with a bottle of [ICED COFFEE] .
Next up, head to the Cat’s Cradle, which is the first building to the north after entering the city. Examine the twinkling urn here for some [CAKE] , then talk to the proprietor to stay overnight for a measly 10 G. By staying here, you will also unlock a Regions of the World page, [THE SUMMERLANDS: NORTH] !
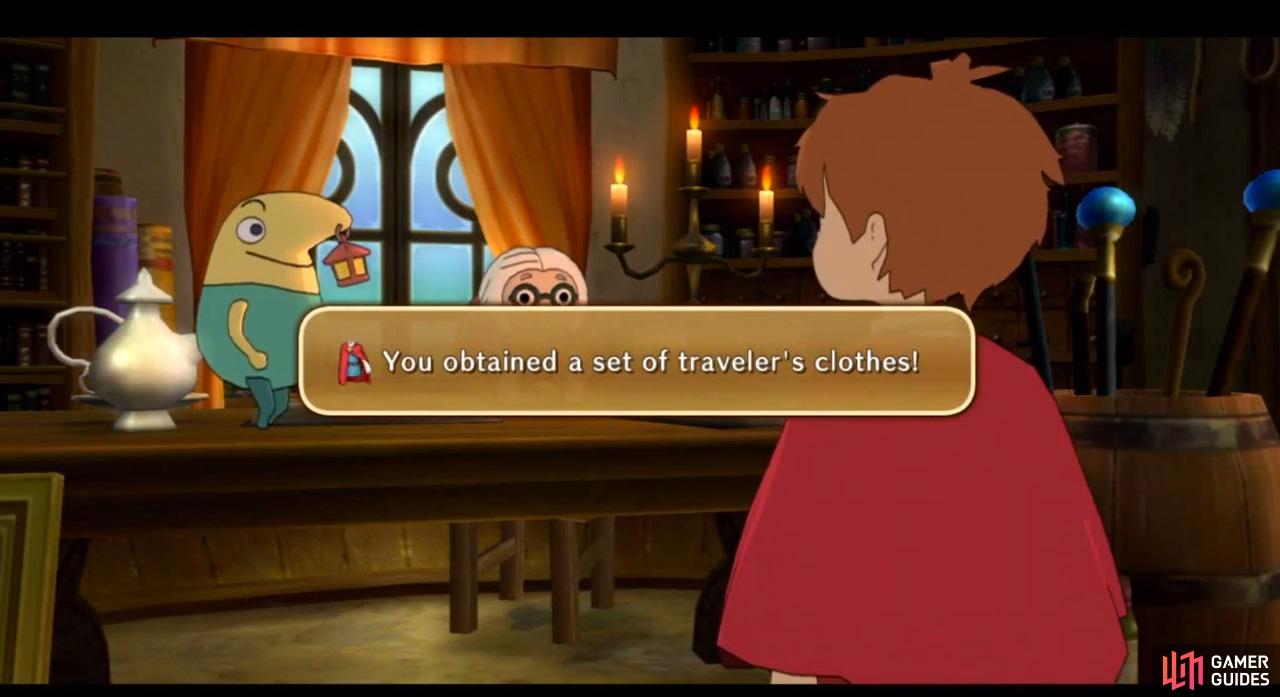
Leave the Cat’s Cradle and make your way back to the Hootique, where you’ll receive a set of [TRAVELER’S CLOTHES] . Now that you look the part, you can see the King! Proceed north to the second area of the city.
Just a few steps forward after entering, look to your right/east to find a twinkling urn; this one has a [POISON-BE-GONE] . Head north a bit, just up the stairs and past the fountain, then turn east and check the southeaster corner of this area to find a chest containing a loaf of [WHITE BREAD].
Make your way further east by going through the archway to the Grave of the Sage, then by going southeast. In the area just to the south of the actual grave, check out the twinkling urn here for a slice of [PIE] .
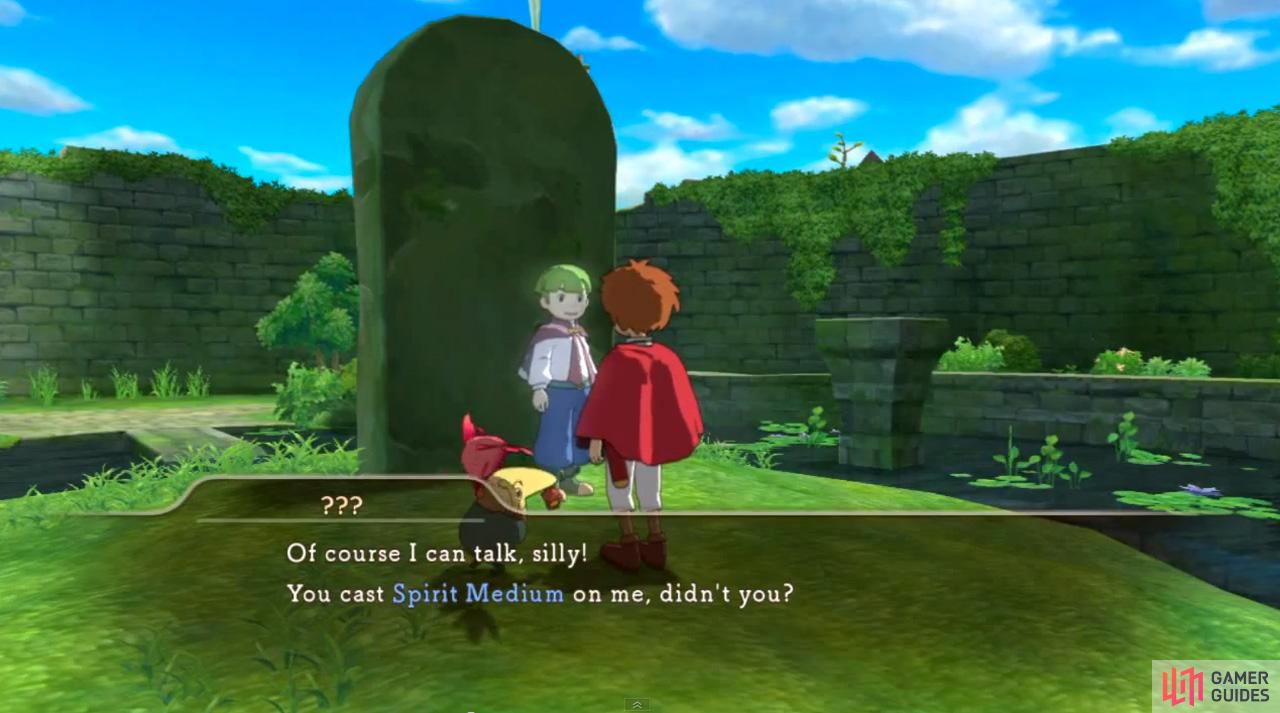
Next, make your way to the actual Grave of the Sage. Check behind the stone to find a boy. He can’t talk, but he’ll give you the [SPIRIT MEDIUM] spell, at which point, you’ll need to turn around and cast the ‘Spirit Medium’ spell itself back onto him. With it, you can now talk to him and learn more about the boy–Horace, the Sage of Ages! You’ll see him again later on.
Head back to the square and proceed north, talking to the guards here to find out that we can’t actually see the King. Why? Well, one of his aides lost his precious red herring, so now we have to find it before we can do anything. Head back to south Ding Dong Dell so we can start looking.
Just to the north of Swift Solutions is a dock; Drippy will spot the red herring, so hop on the wooden poles to have Oliver spot the fish himself, only to have it retreat back toward the palace, so get back to dry land and head back to north Ding Dong Dell.
Go back to the Grave of the Sage, where you’ll actually catch the red herring in shallow water. With Drippy holding on to the floppy fish, run back to the guards at the palace entrance to hand the fish over. Doing so grants you the audience with the King, so watch the scene inside the palace before you’re left back in town with more questions than answers.
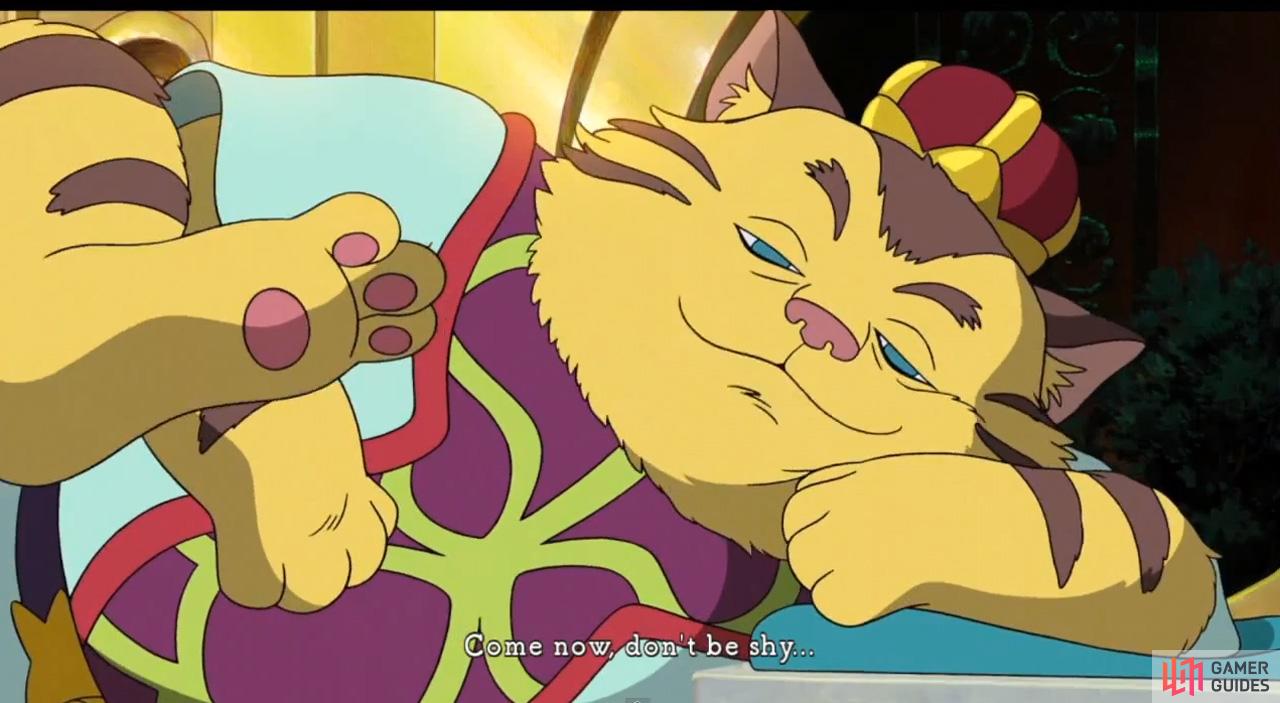
Enter the Telling Stone! He tells you that the Locket will glow when there are people nearby with pieces of heart that you need, so when you regain control, hop back down to south Ding Dong Dell. Your target is in the north-eastern corner of the area, just before the stairs leading down to a watery area. Talk to the boy with the broom, then use ‘Take Heart’ to get his extra enthusiasm.
With that in hand, make your way back to the palace and talk to the King once more, choosing ‘Give Heart’ when the Spell Menu pops up to finally bring King Tom back to his normal self. He will reward you with his wand–once he finds it–but in the mean time, you’ll receive the [SPRING LOCK] spell and the [REJUVENATE] spell from him.
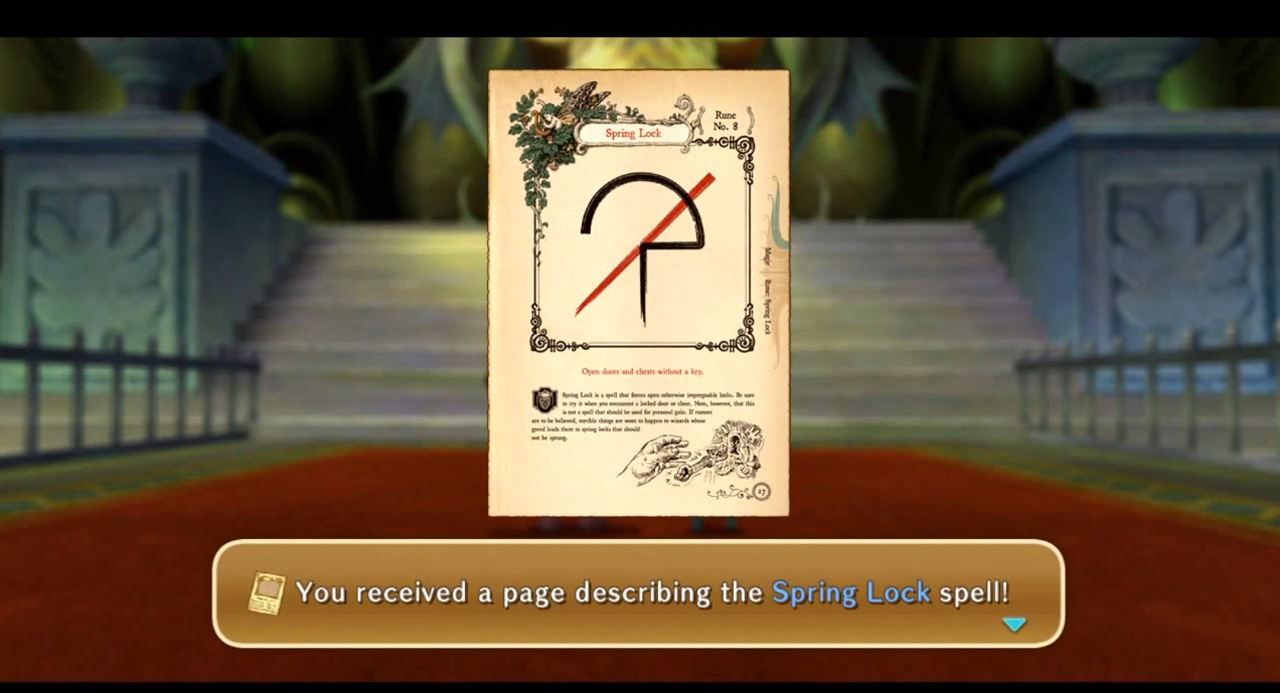
Travel back to the south end of Ding Dong Dell. First, stop inside the Hootique and check out the chest on the north side of the room; open your Spell Menu and choose ‘Spring Lock’ to spring the chest open for a [SANDWICH] ! Next, pay a visit to the Cawtermaster’s Store. You’ll learn more about equipping your familiars (which you should have already done with the Mite’s weapon that we found) and you’ll also finally be able to shop. There’s nothing worth grabbing just yet (as we either already found or will soon find suitable equipment), so leave the shop and head back to the palace to claim your prize.
As chance would have it, as the King was looking for the wand, he mysteriously disappeared, so we have to go searching once again to figure out where he went. Thanks to Drippy’s keen brain, we’ll start looking in Motorville, so open your Spell Menu and choose Gateway to reopen the gate back to Motorville. This will earn you the “Out of this World” trophy.


To Motorville
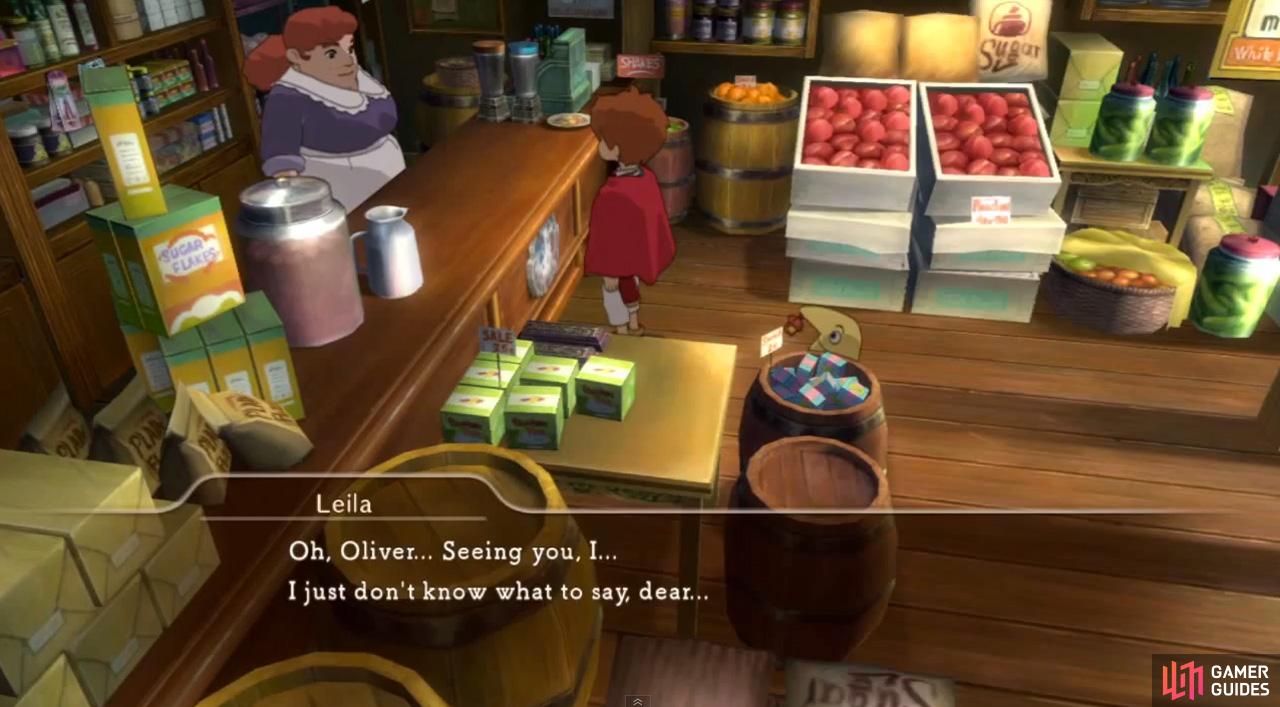
Here, visit Leila’s shop and talk to her to find out Timmy’s gone missing as well. Head over to the front of Oliver’s house to meet the green-haired girl once again; she’ll finally introduce herself as Pea, and she’ll lead you to Timmy. Follow her as she leads you around in a roundabout way to the south end of town to the striped feline. Drippy will load the cat onto his back, so lead the way back to Leila’s to help him out.
With Timmy back in Leila’s arms and another clue in hand, return to the street and cast Gateway to return to Ding Dong Dell.
Back to Ding Dong Dell
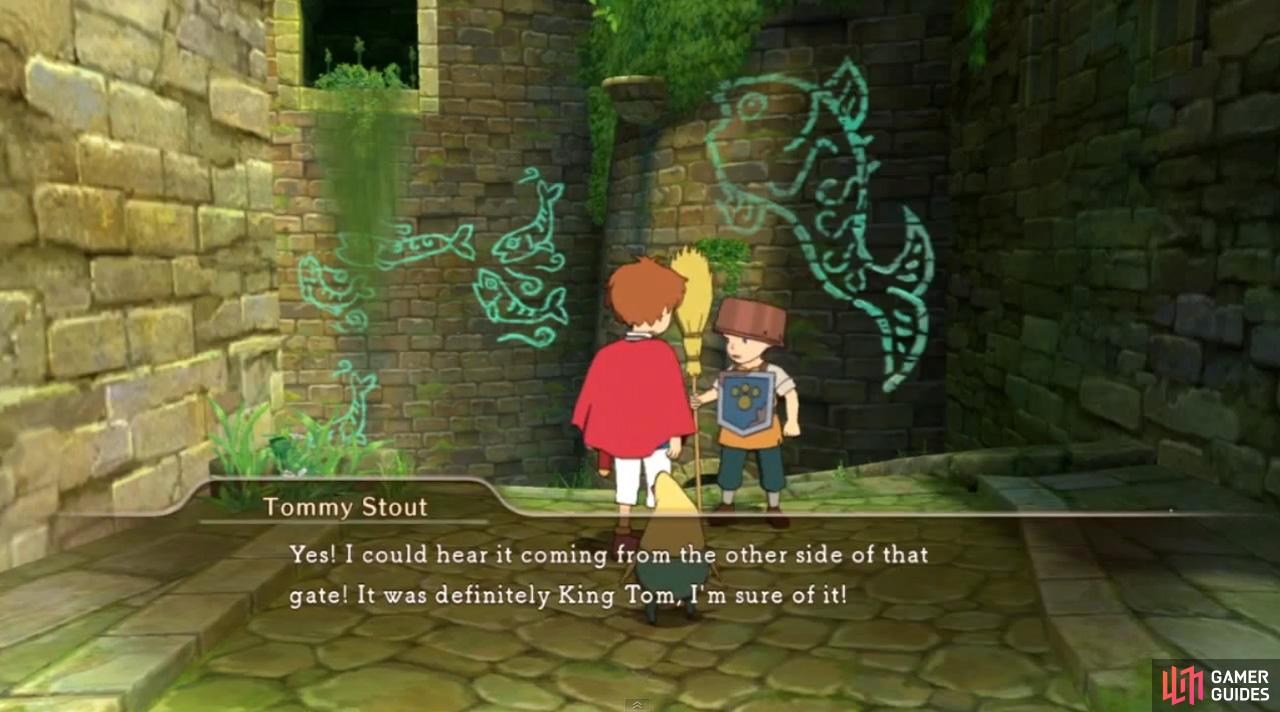
Go back to the north-eastern part of the first area of Ding Dong Dell to where you got the enthusiasm from Tommy; talking to him will reveal that King Tom is actually down in the well! He wants to go with you, but since Drippy refuses to let him, he’ll give you the familiar that was following him around instead! You now have two familiars; the Mite and the Thumbelemur!
You’ll get another lecture on familiar’s abilities here, as your new one can cancel enemy attacks. When you regain control, proceed north to the entrance of the Ding Dong Well. Examine it for a quick tip from Drippy, then open your Spell Menu and choose ‘Spring Lock’ to open the gate! Off to the well we go!

 Sign up
No Comments