

This area is between Oleg’s Trading Post and the Abandoned Hut, along the northernmost edge of the Northern Narlmarches. You’ll most likely spot it during your trip to the Abandoned Hut, and if you can get it to appear, you might as well attempt it. The directions to reach the Oak-That-Strayed from Oleg’s Trading Post are as follows:
- South
- West
- West
- Southwest
At the third empty node to the west of Oleg’s Trading Post, save your game, then venture northwest. If you’re lucky, the Oak-That-Strayed should appear north of the path you’re on.
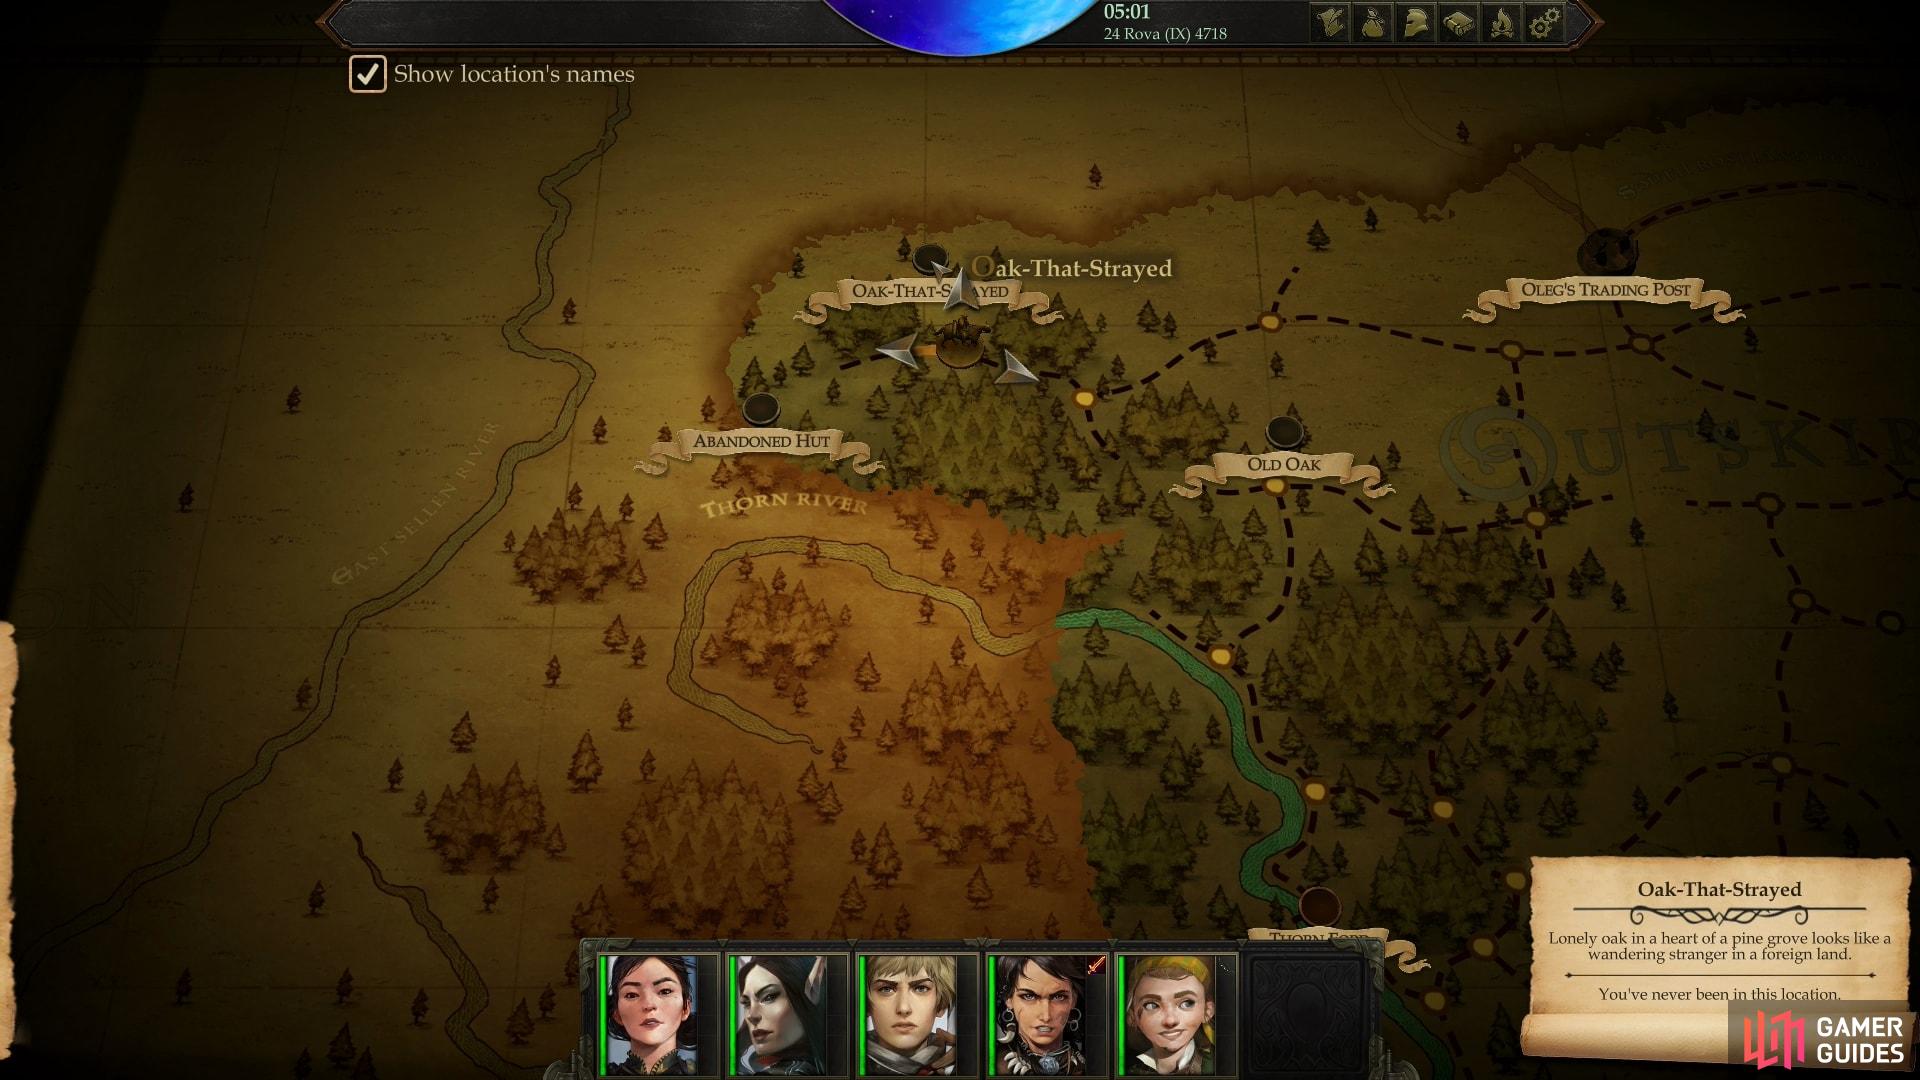
The location of the Oak That Strayed area on the map.
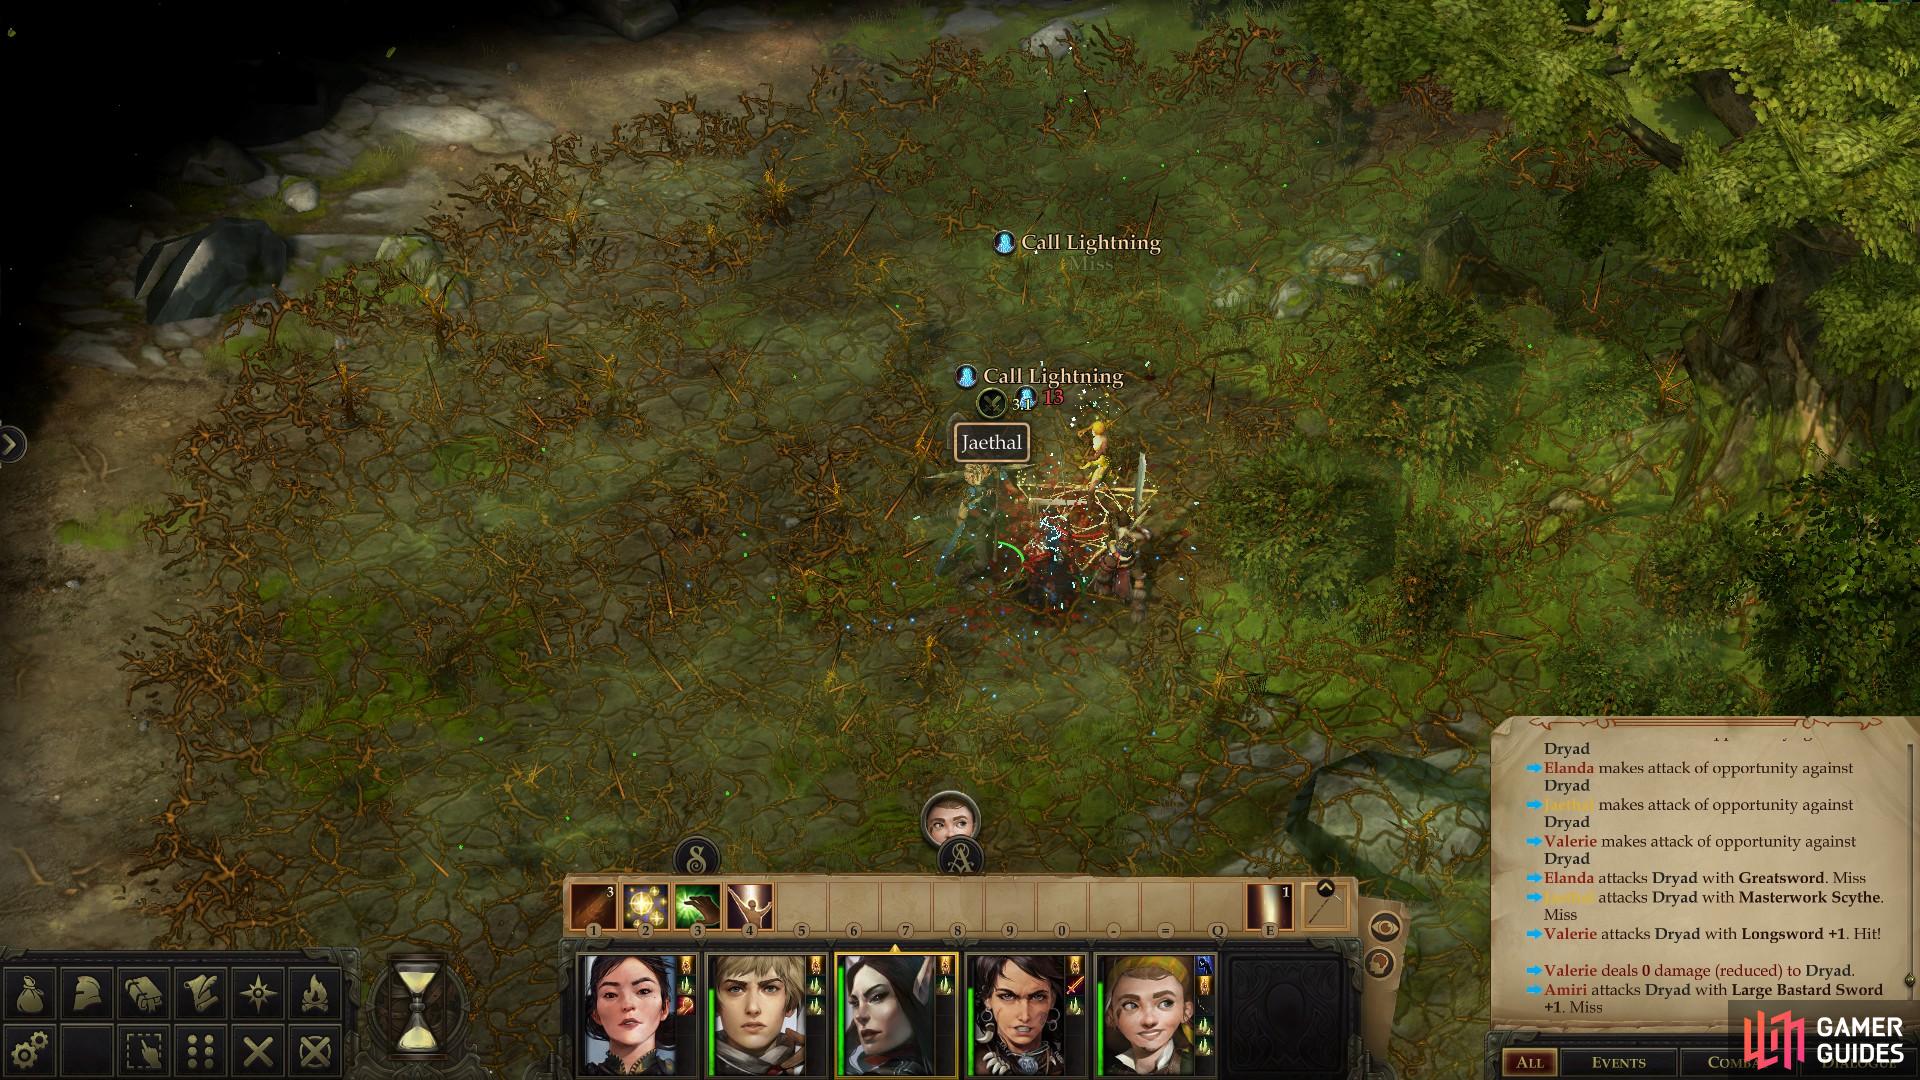
Enter the area and head north from where you arrive, where you’ll find the eponymous oak the area is named after. The tree isn’t alone, however, as a Dryad lurks nearby, and she’s not a fan of intruders. Her first act in combat is to cast Spike Stones, making a large area unsafe to walk across. Moving on this area will force a character to make a [Reflex 20] save or take damage. After that, the Dryad will largely content herself casting Call Lightning on random foes, dealing a fair amount of damage with each of the strikes the spell calls down.
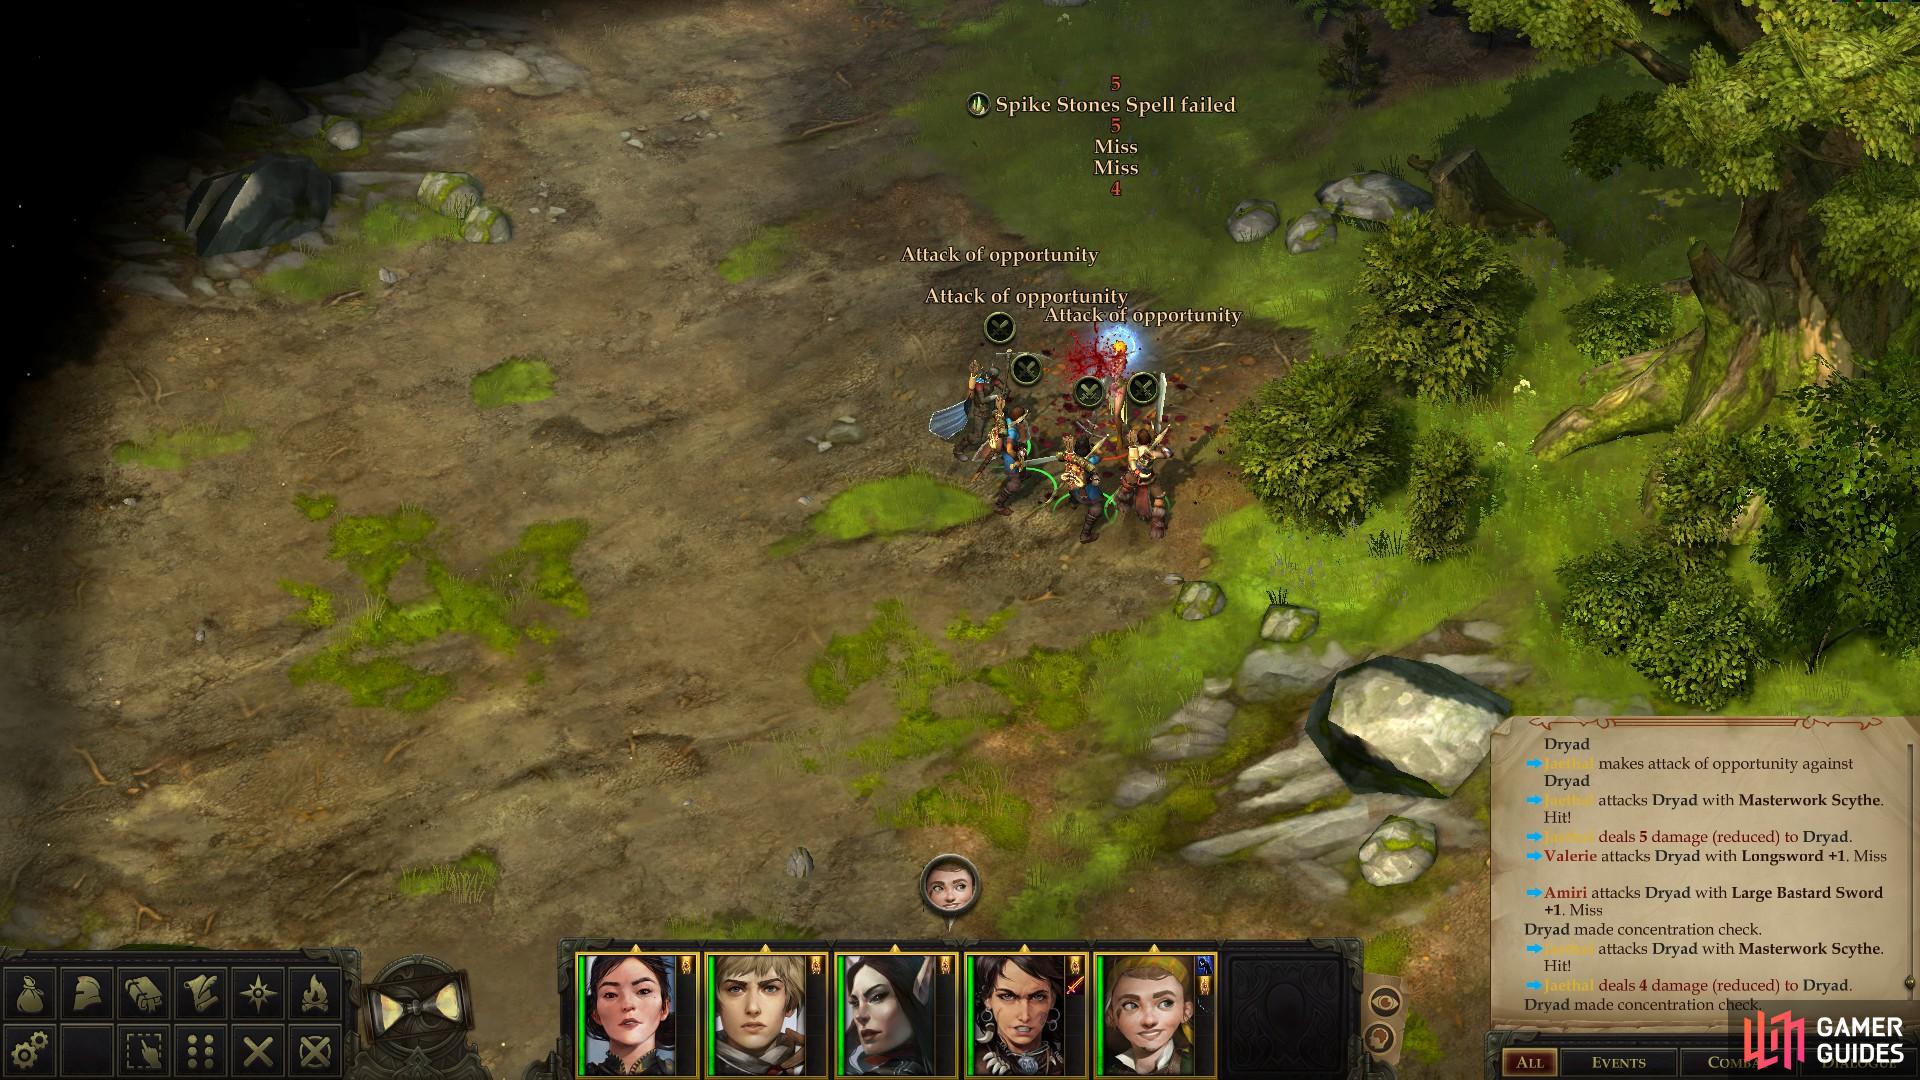
Meandering about is not recommended, so make all your melee combatants charge the Dryad and hopefully avoid having to move over this spell effect - you may have to manually direct characters so they don’t get caught up on each other and pace around unnecessarily. Best case scenario, you’ll disrupt the spell as she cast it (although she’s smart enough to cast defensively, so don’t expect many free Attacks of Opportunity), and you should do everything in your power to facilitate this outcome even if it means removing the armor your warriors are wearing to ensure they reach her quickly. She won’t likely be using melee attacks against you, anyway.
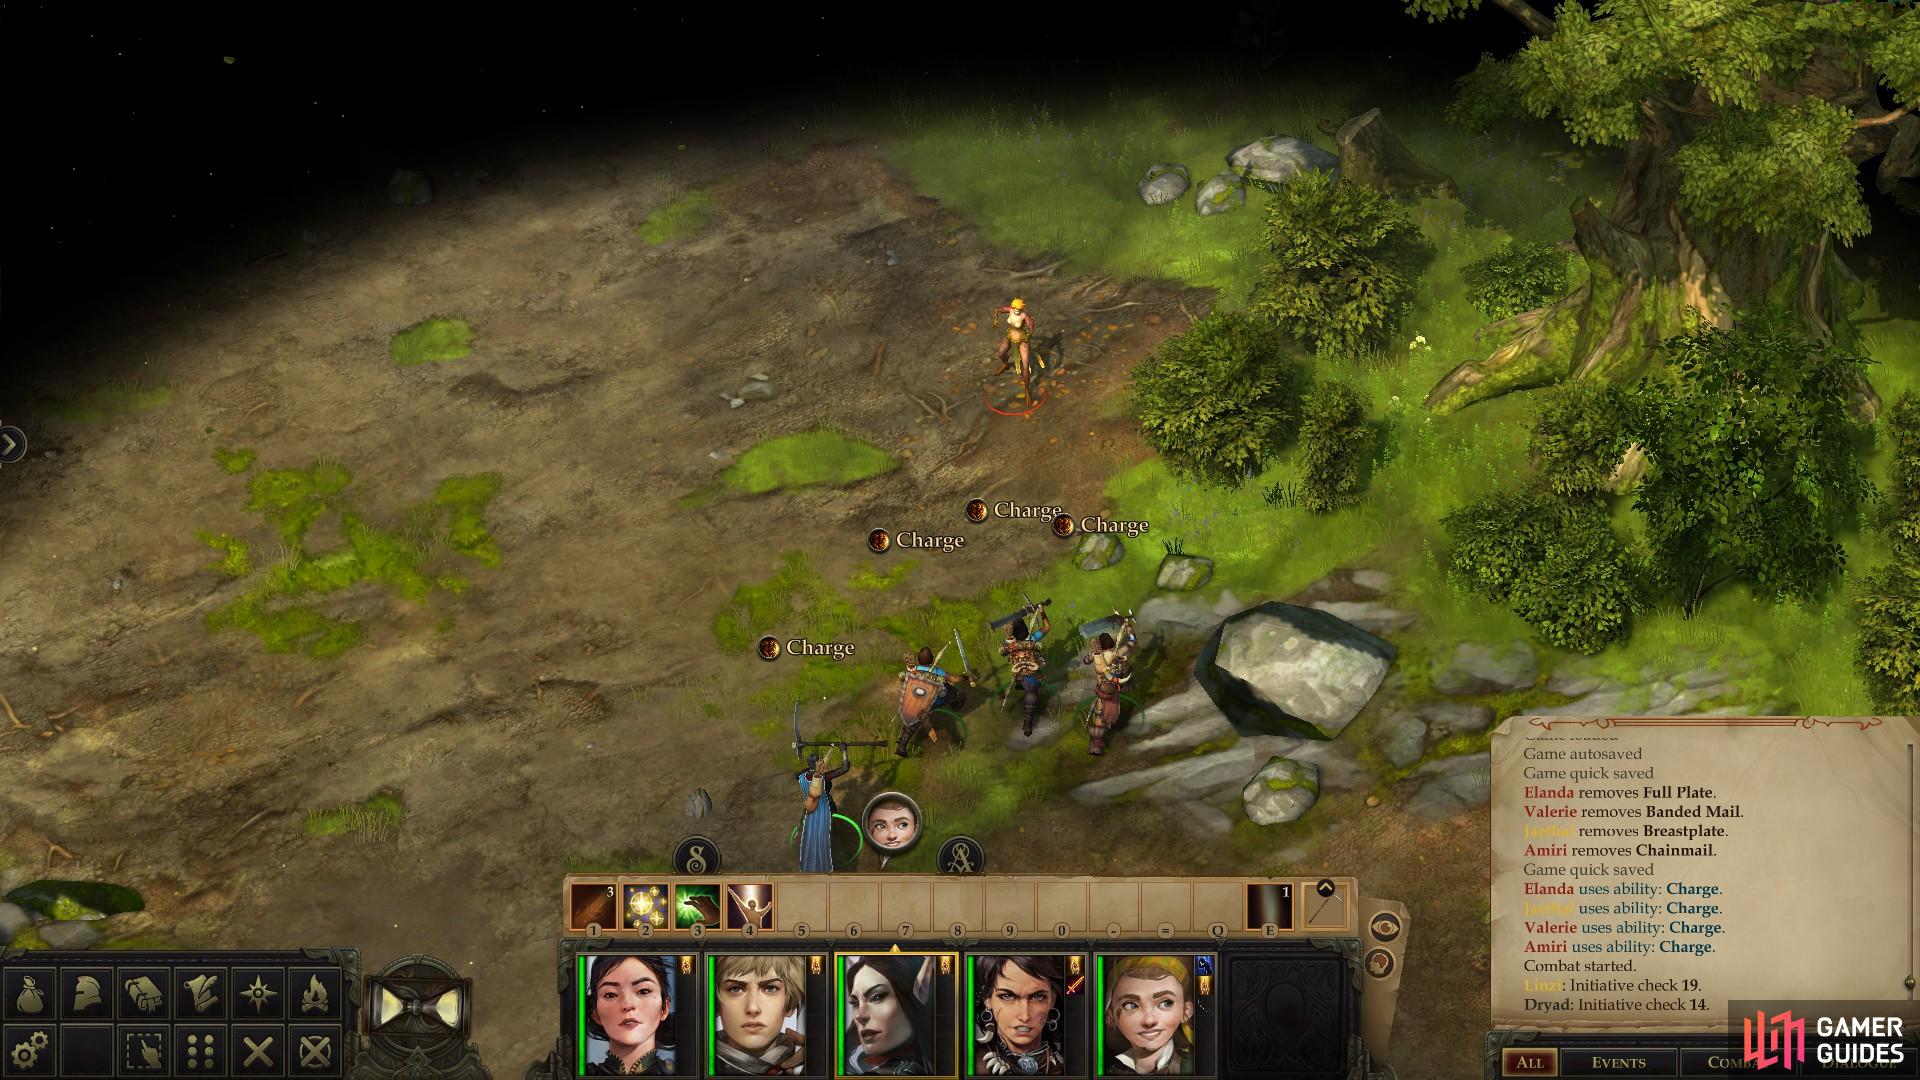
(1 of 3) While simple and straightforward, simply charging with all your warriors has a high chance of success.
She may sound like a rough customer, but even a sloppy assault against her has a good chance to succeed, as her Armor Class isn’t terribly high. Her concentration score is decent, though, and she’ll resist five points of damage from each attack due to Damage Reduction (DR 5/cold iron, in this case), which will further increase her odds of keeping her focus as she casts. Lacking any support, she can usually be slain by rushing her and cutting her down, although she’ll probably inflict her fair share of damage, too.
After you consign the Dryad to the compost heap, you’ll still have to deal with the lingering effects of the Spike Stones spell she cast, which persists after her demise. Your only options now are to wait for the spell to expire (with a duration of one hour per caster level, this is going to be a wretchedly long wait), or to move your characters out of it, hoping for good Reflex Saves or, more likely, watching them take damage, flopping over into unconsciousness, then quickly rising back up - you’re not in combat any more, after all. Even after you escape the Spike Stones area of effect, you’ll have to deal with persistent foot injuries slowing your characters down for a while. Truly a nuisance of a spell.
Loot a stump near the oak tree the Dryad guarded to score a Keen Sickle +1 and a Scroll of Freedom of Movement. The former makes exploring this area worth it as the weapon itself is quite powerful at this stage of the game. Not only is the enhancement bonus something desirable enough, but the Keen property doubles the effective critical hit range of the weapon. Good stuff, and barring your protagonist needing such a device, Harrim will make good enough use of it. Failing either of those two things, however, it also sells for a whopping 2,075 GP, should you desire the cash, instead.
If that’s not enough loot for you, make your way to the northwestern edge of the area to find a pile of rocks, which hide a Restovic Sorceress’s Discharged Staff, another artifact that may interest an antiquarian. In the meantime, hold onto it. Once that’s done, be sure to heal your party and rest before moving on, if necessary.

 Sign up
No Comments