

In the Old Sycamore Depths you’ll encounter a new, spitting variety of centipede.
Spitting Centipedes
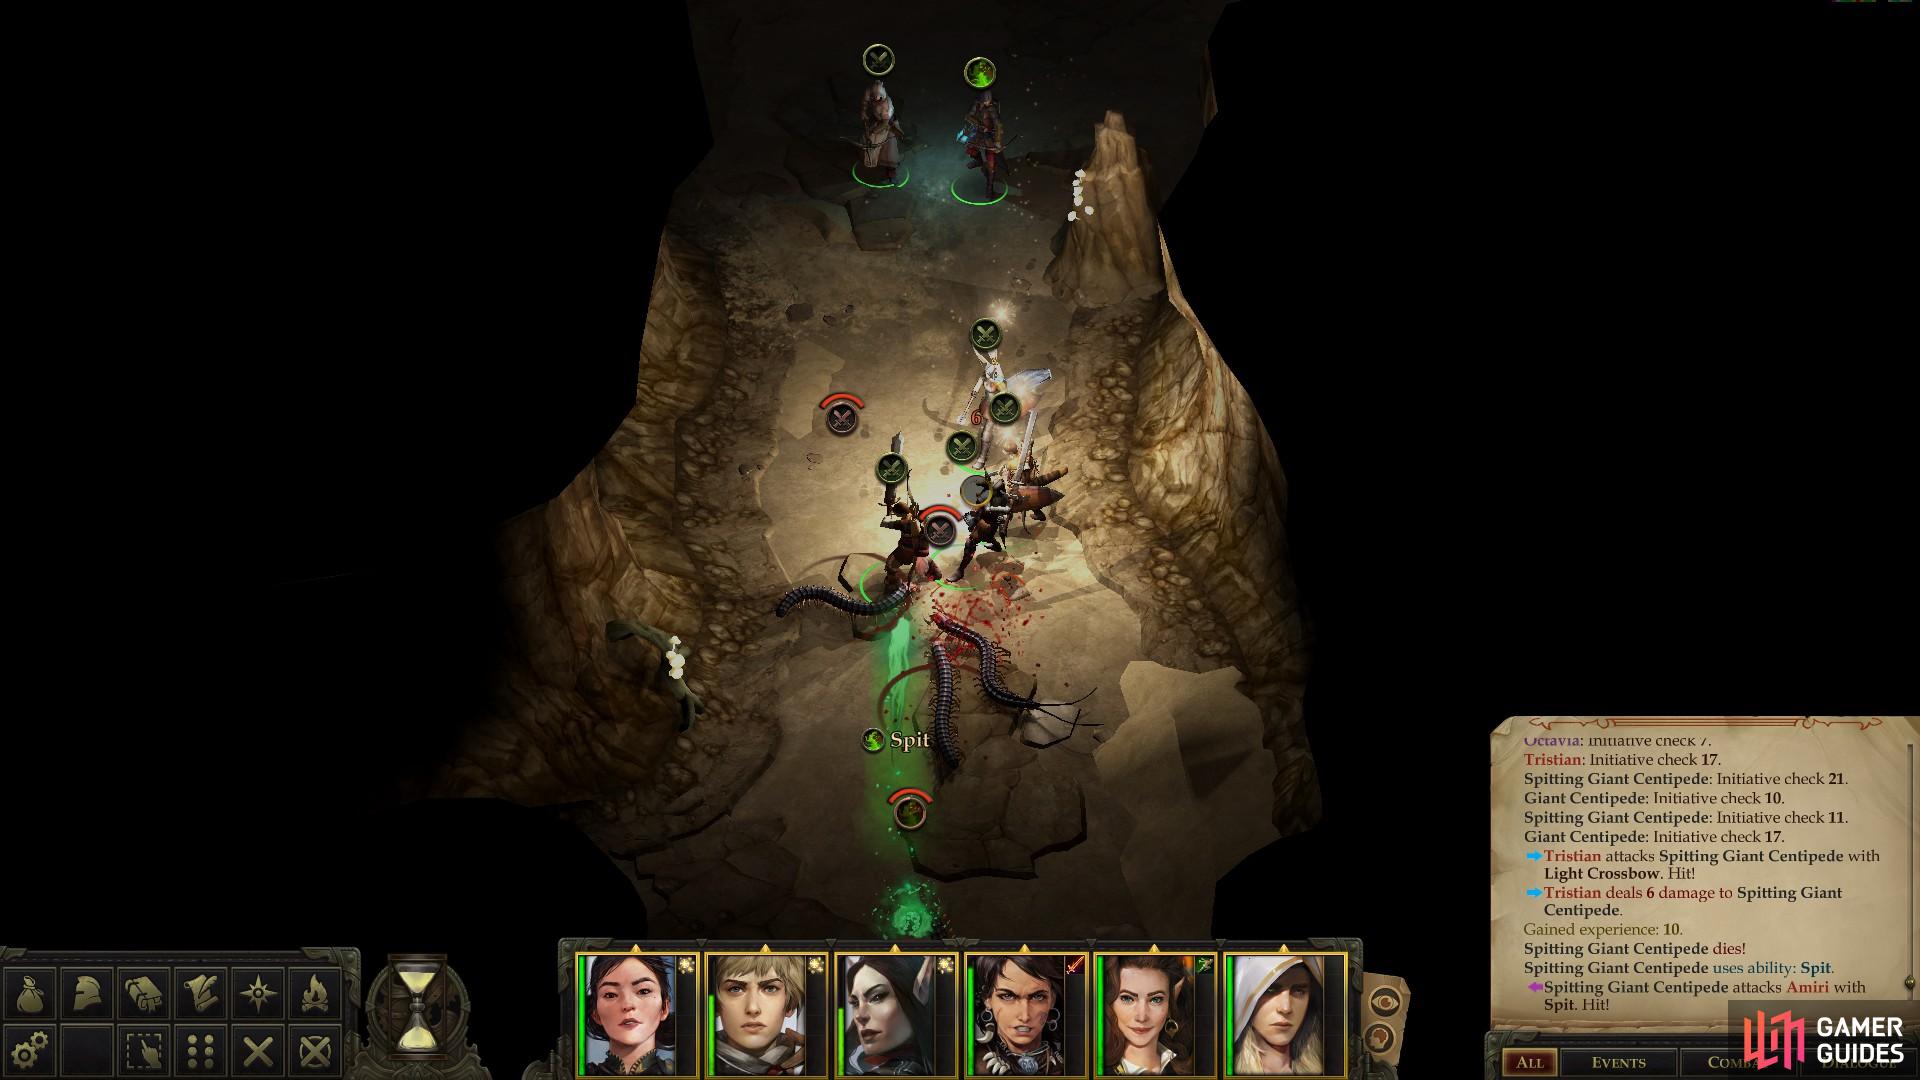
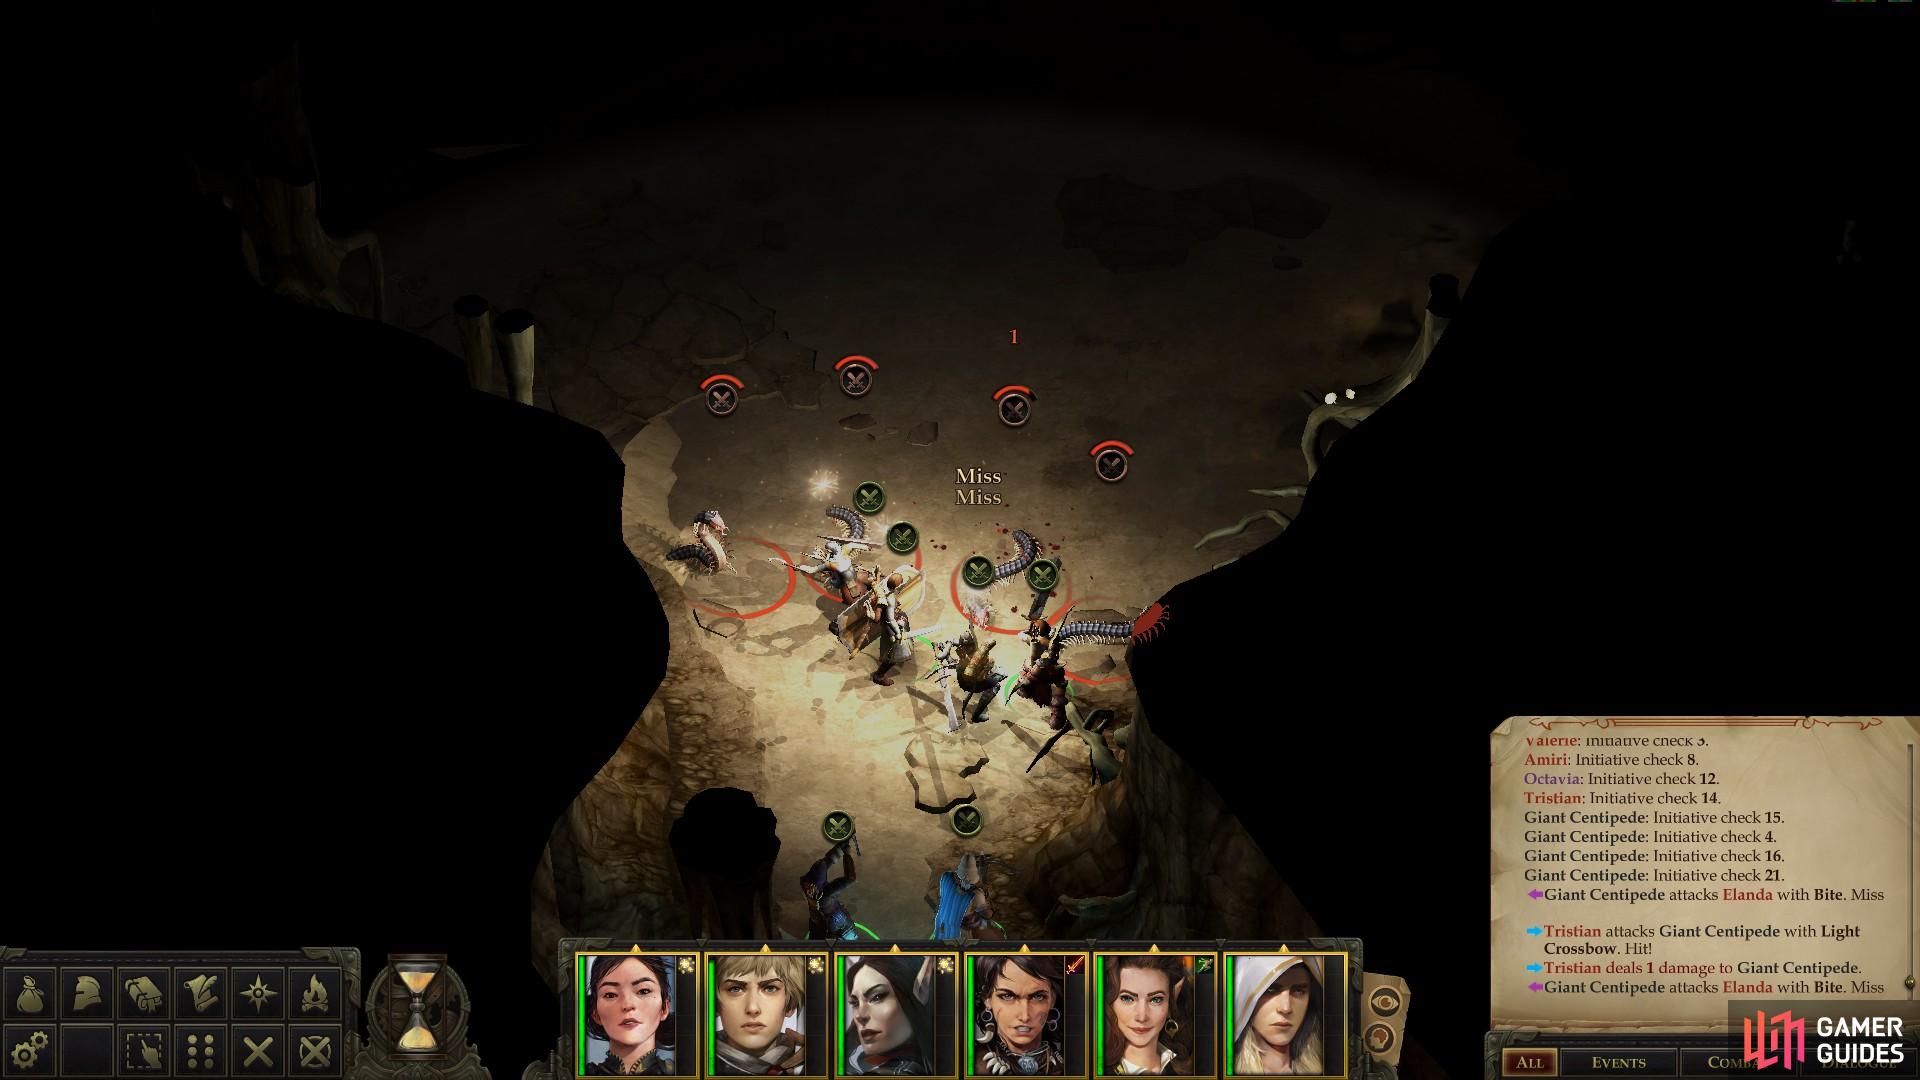
Assuming you’re following the walkthrough chronologically, you should find yourself along the northeastern edge of the Old Sycamore Depths. From where you start, head south to find more Giant Centipedes, this time joined by a new variant - the Spitting Giant Centipede. As their name suggests, they attack by spitting acid, which only deals 1d4 damage, but it’s a Ranged Touch Attack, meaning your Armor, Shield and Natural bonuses to Armor Class do not apply, making your typical warrior much more vulnerable to them. To see what your Touch Armor Class is, press “C” to bring up your character menu, and find the “Touch” entry under the “Armor Class & Saving Throws” section of your character sheet.
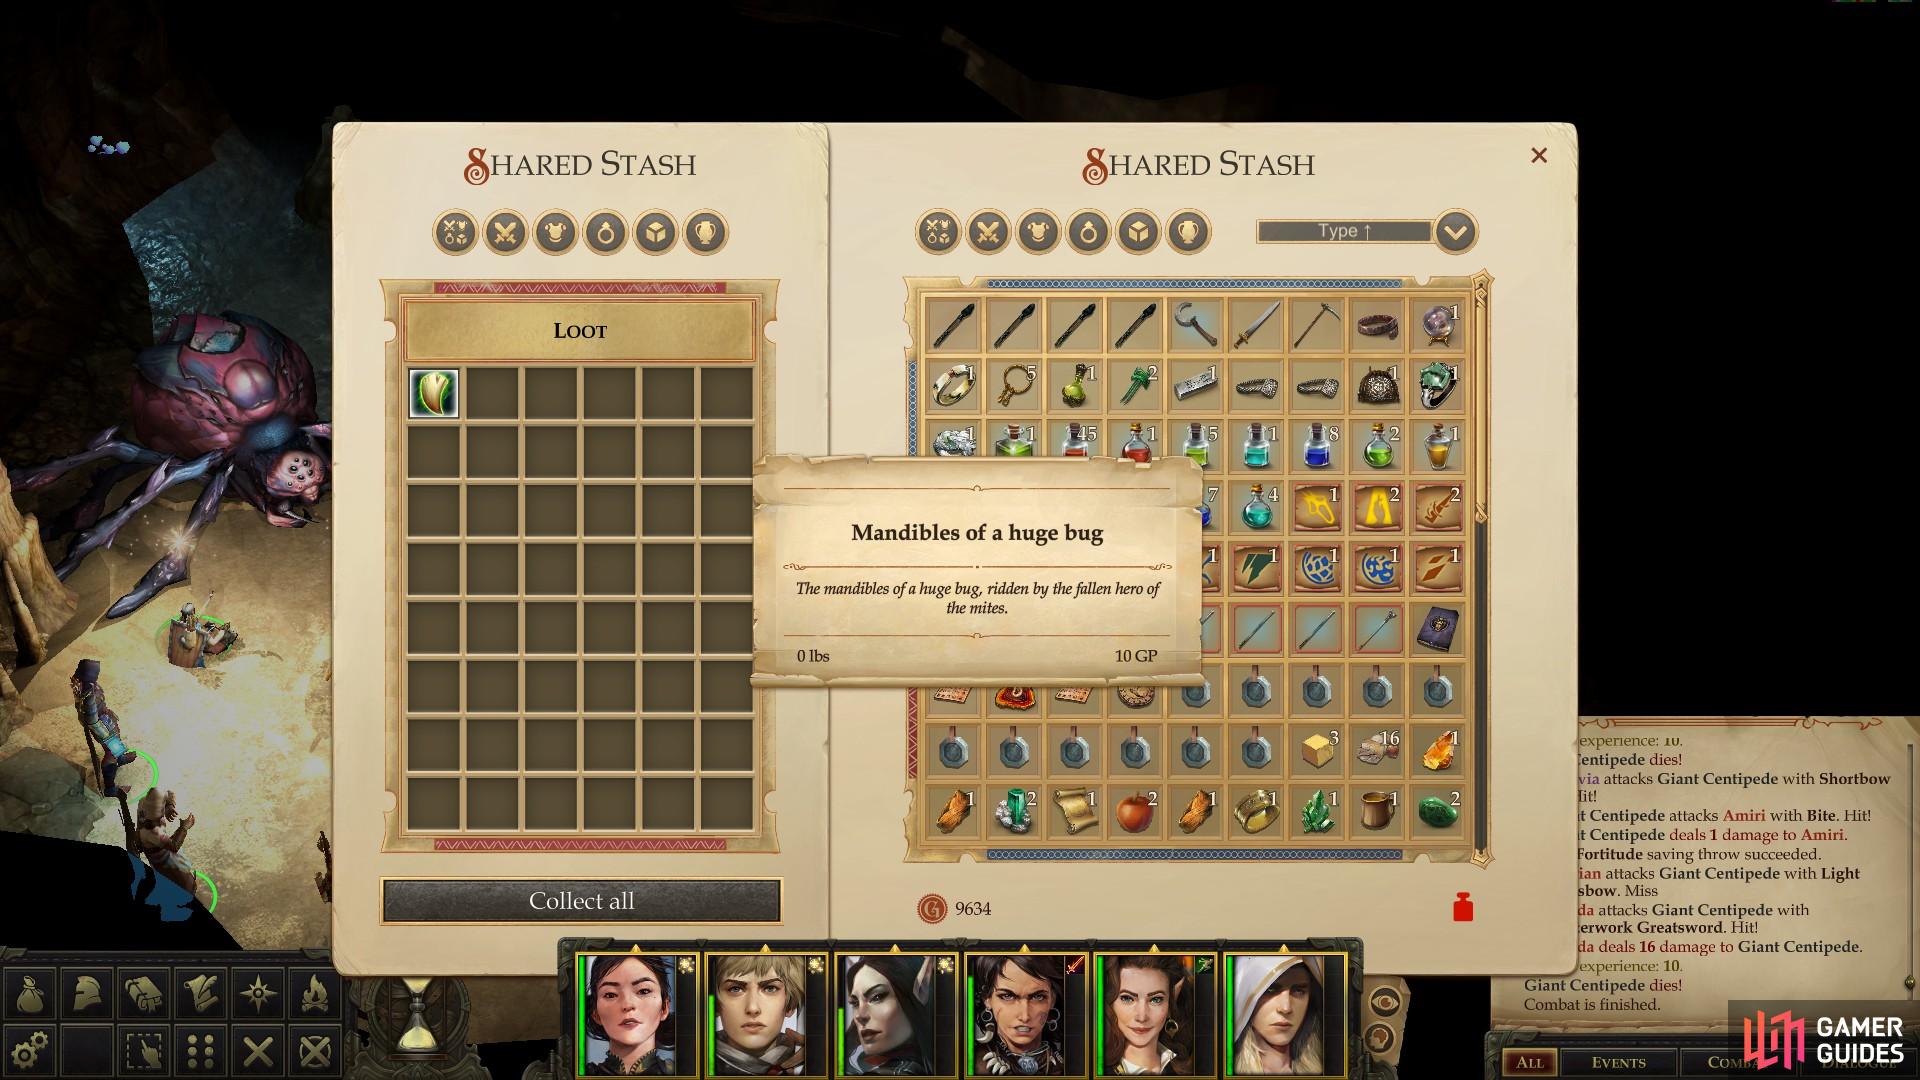
(1 of 3) Grab the Mandible of a Huge Bug off a monstrously large spider.
Mandible Jewelry
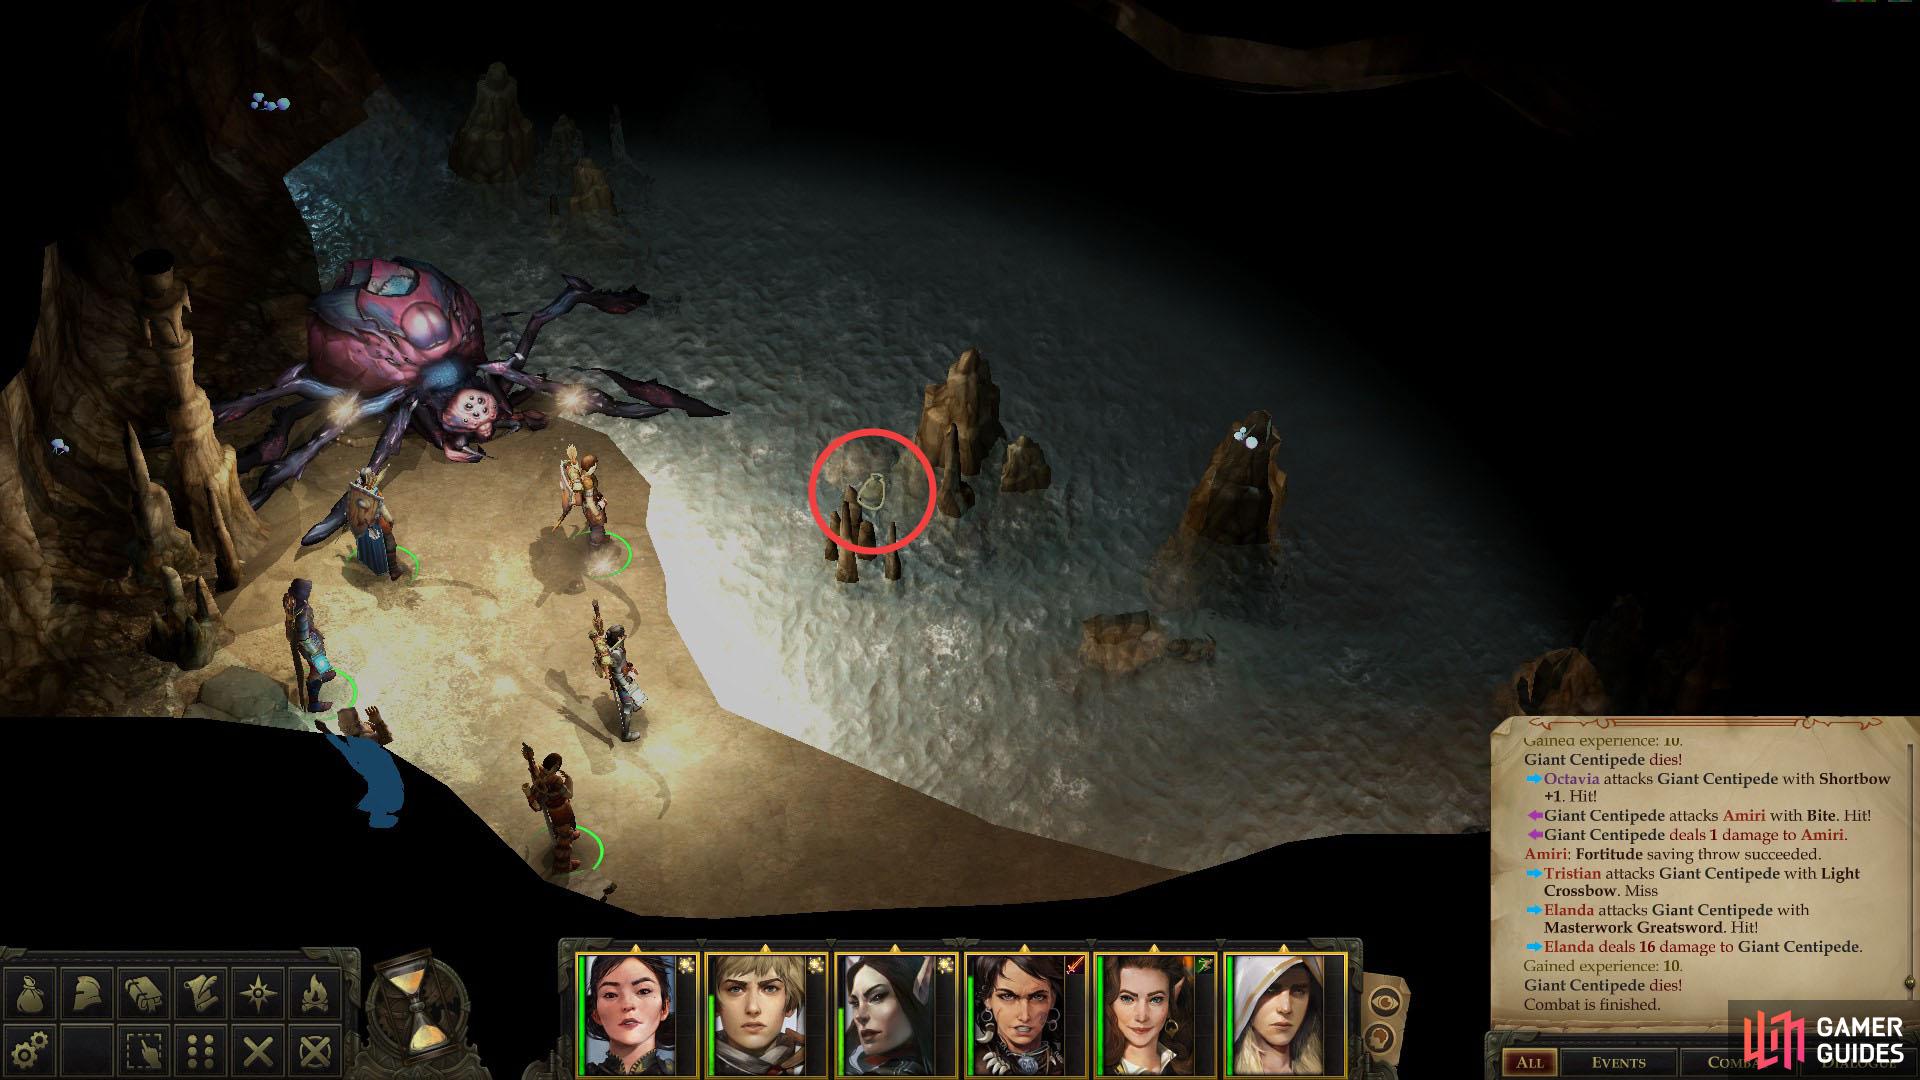
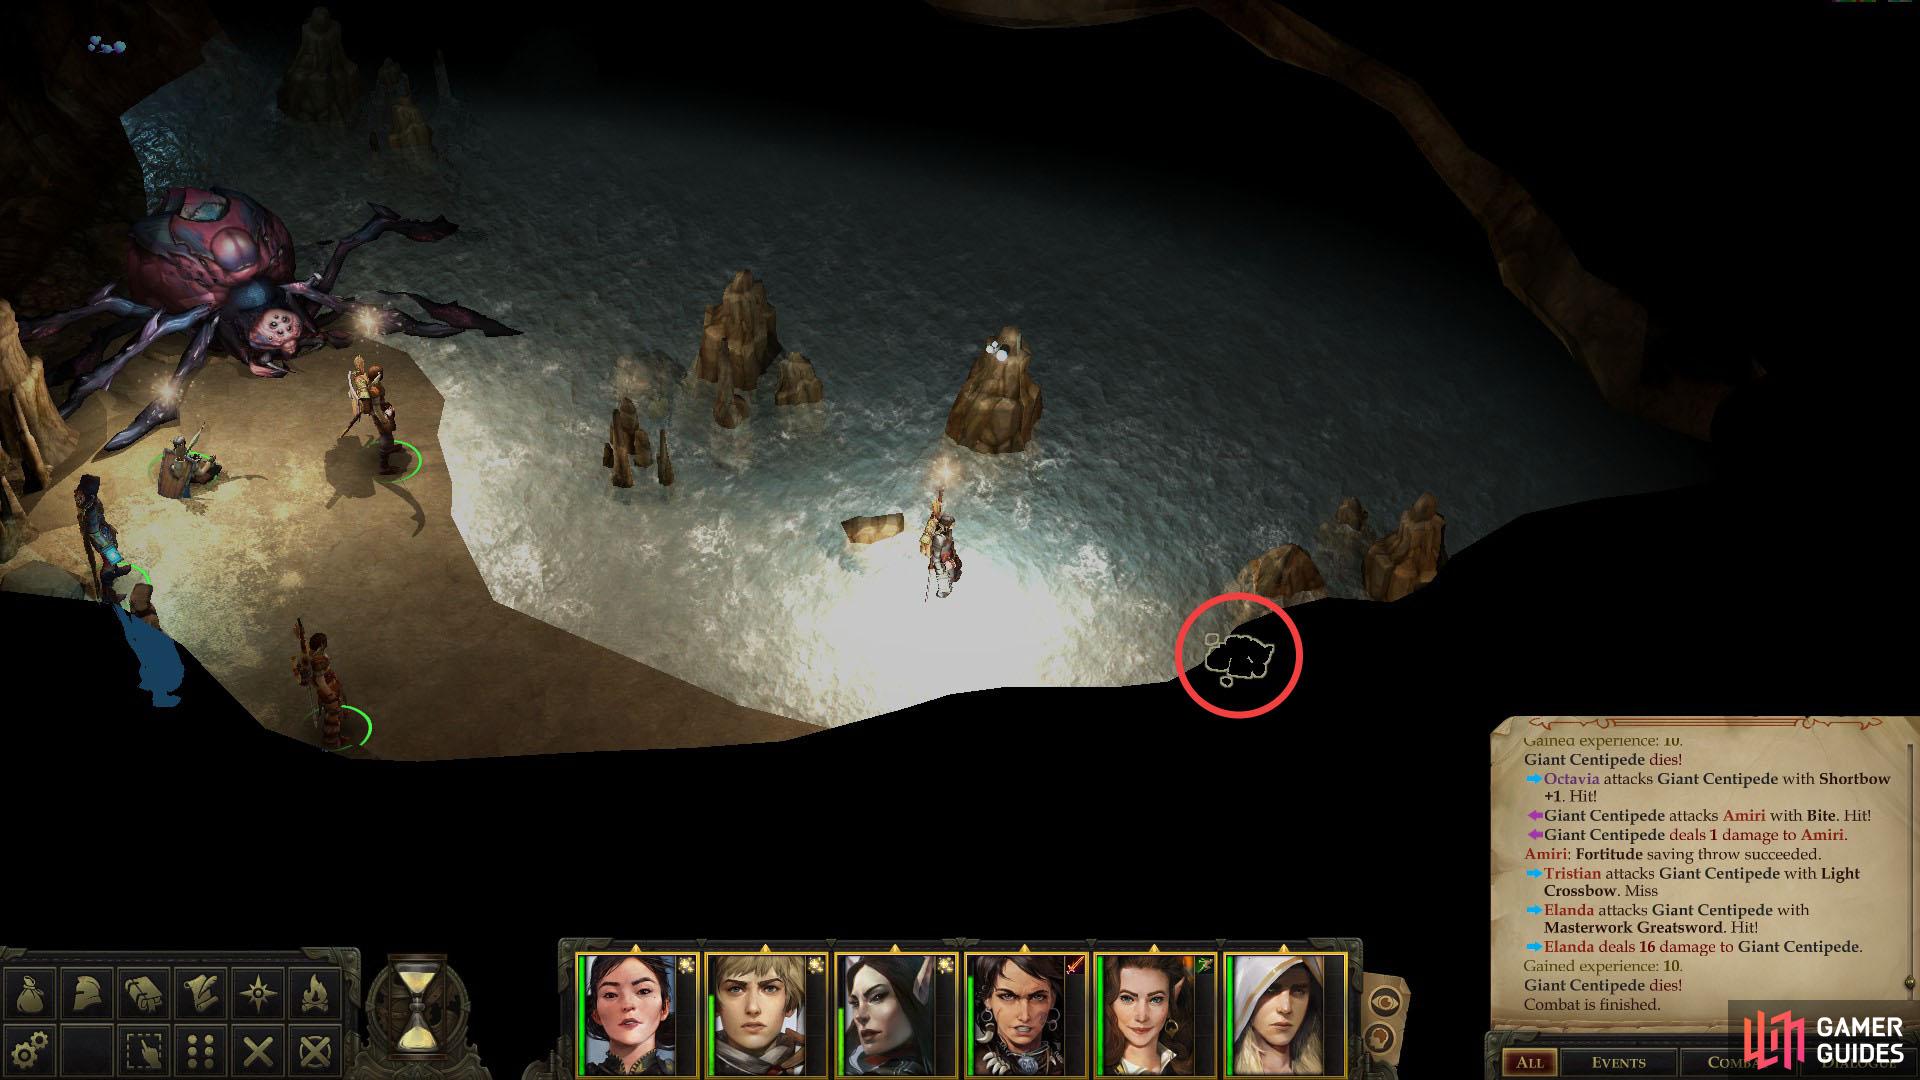
Shortly after the fight with the centipedes, the path will fork. Ignore the branch to the southwest and continue south until you find… another fork! This time take the fork to the east and follow it until you reach a watery chamber guarded by two Giant Centipedes. Smite them, then loot a submerged sack to the east to find the Recipe: Jeweled Rice and a pile of rocks further east (also submerged) to find a Scorched Fragment of a Necklace. With that mundane loot accounted for, turn yourself to the… ah… giant bug in the northwestern corner of the chamber, which you can search for the Mandibles of a Huge Bug.
| Reward: For bringing Gatekeeper Quoggy a Mandible of a Huge Bug |
|---|
| 200 XP |
Treasure in No-Man’s-Land
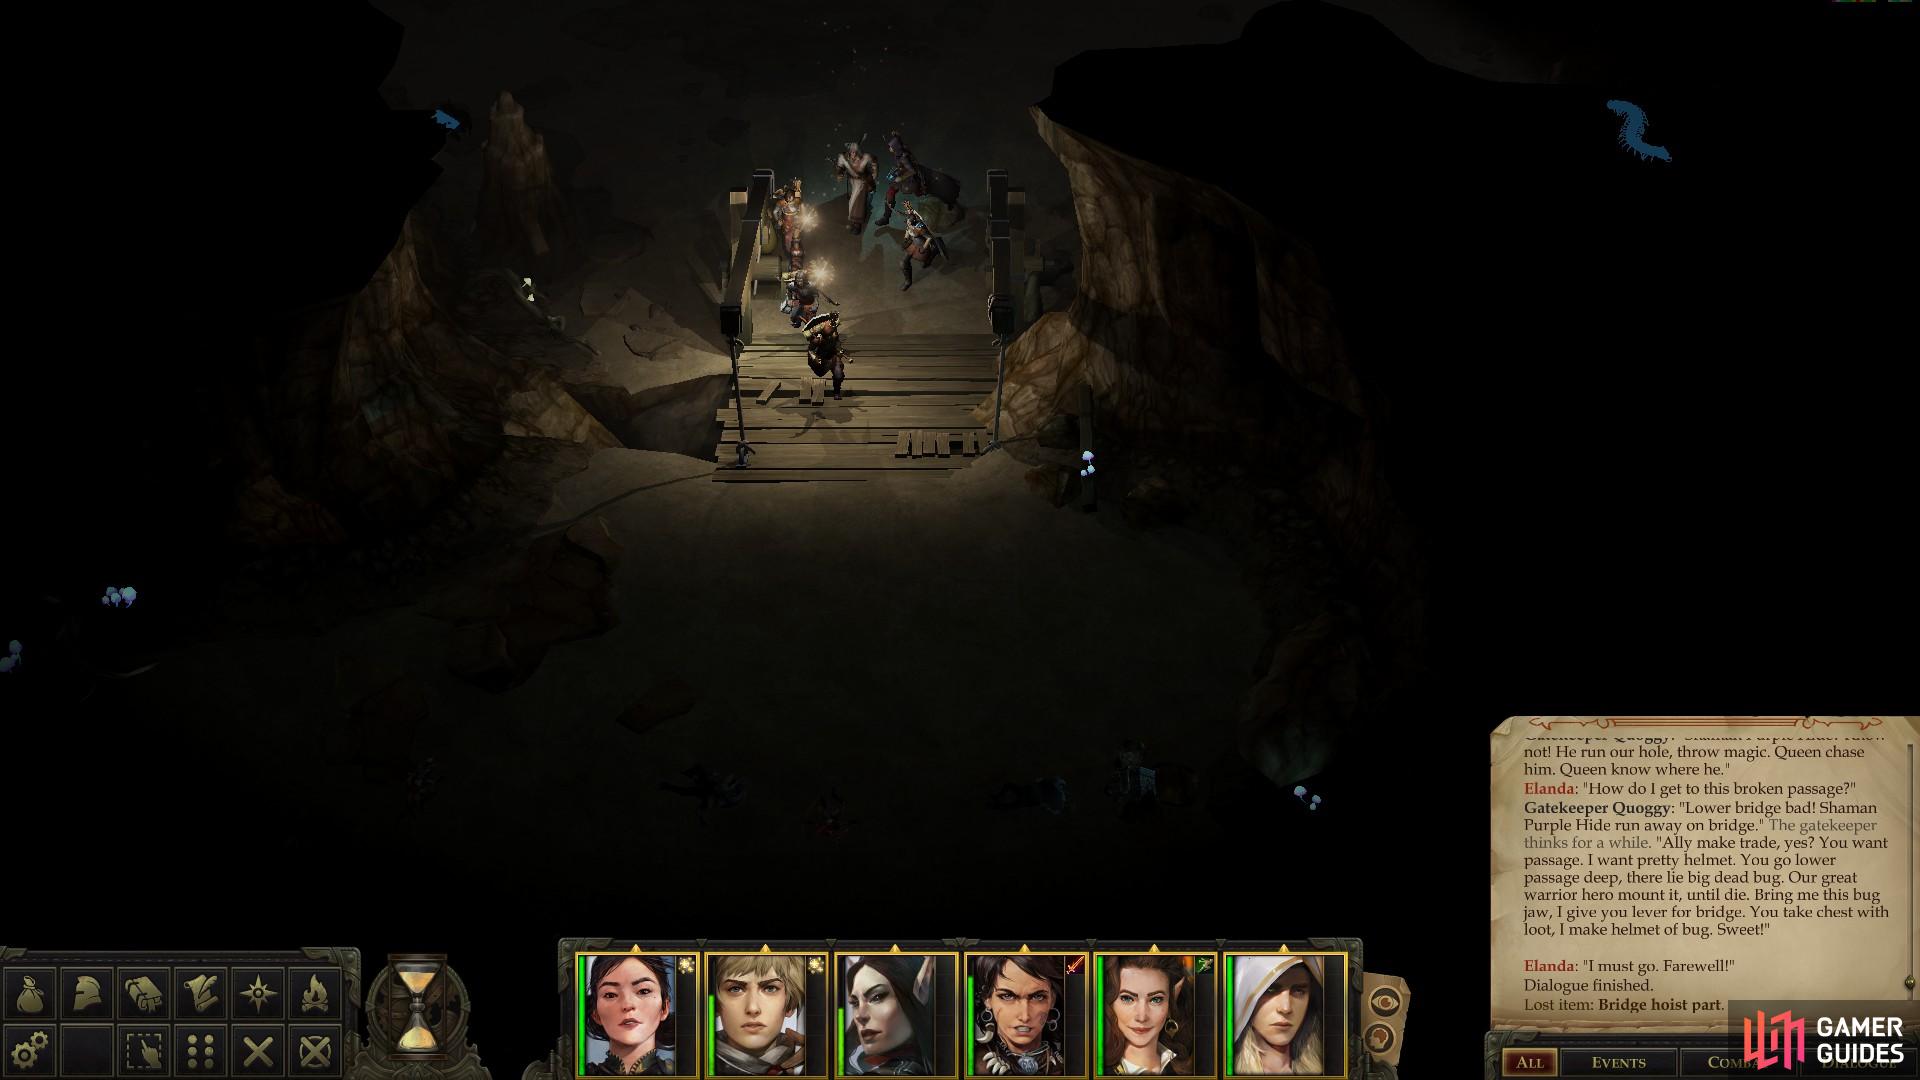
With the Mandibles of a Huge Bug in your hands, it’s time to leave the Old Sycamore Depths for a bit and finish up the caves above. Depending on your past actions, you can return to Gatekeeper Quoggy and claim the Bridge Hoist Part, should you not have claimed the device earlier through violence. However you managed it, now that everybody has this Bridge Hoist Part you can finally finish off the Old Sycamore Caves area and claim the treasure in the no-man’s-land. From Gatekeeper Quoggy, head south to the cavern in which the Mites are (or were) sorting junk, and from there take a passage in the southwestern corner of the chamber, which leads south to another chamber full of Mites.
Combat-wise you’ll find a Mite Sentinel, two Mites, a Mite Scout and two Mite Butchers, all of which are simple melee foes. Loot a sack near the center of the area and notice two pens in the chamber which reveal… Well, war is a harsh teacher, and the Mites have been learning cruel lessons.
Talk to one of the Mites near the northern cage where a live Kobold is kept captive and he’ll tell you that they’re playing a little game of target practice. Pick the [Neutral Good] option to save the Kobold, although the Mites clearly don’t learn their lesson, while if you pick the [Lawful Neutral] option you’ll grant the Kobold the mercy of a swift death. If you pick the [Chaotic Evil], [Dexterity 10] option you’ll partake in the game and win, earning a Gold Ring for your trouble, which will sell for about 25 GP. Finally, you can just pick the [Attack] option to abruptly end your alliance in light of this wickedness.
(1 of 2) If you appeased Gatekeeper Quoggy you’ll be able to lower a drawbridge
If you appeased Gatekeeper Quoggy you’ll be able to lower a drawbridge (left), and loot the treasure in no man’s land. (right)
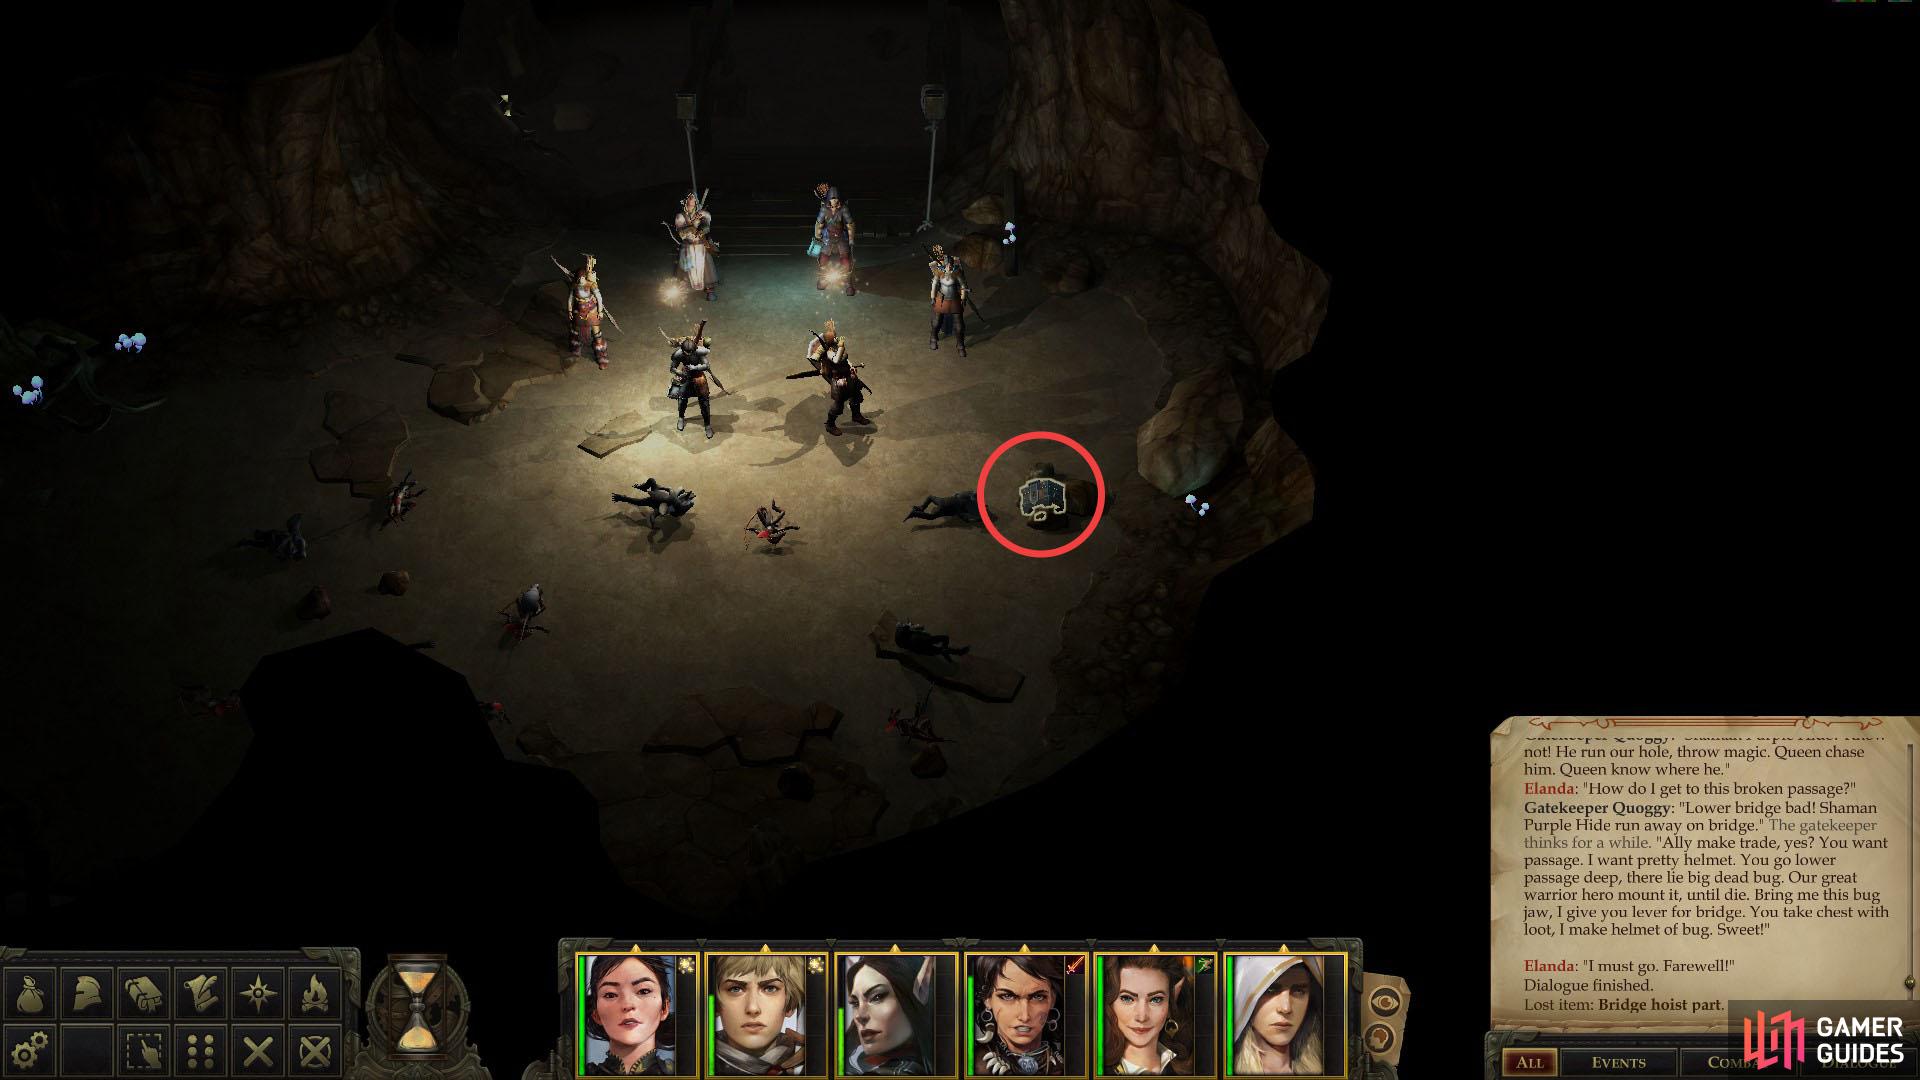
Do what you will regarding the Mites, then head south to find the raised drawbridge… a rather more elegant solution than the Kobolds had, truth be told. If you have the Bridge Hoist Part interact with the bridge, then cross to the south to reach a chamber which clearly saw a great battle in the recent past. Loot some rocks to the west to obtain a Scorched Fragment of a Necklace, then loot a chest along the eastern end of the cavern to find some trinkets and a Greatsword +1.
(1 of 3) In some verdant chambers you’ll find a Token of the Dryad
Acquire the Headband of Inspired Wisdom
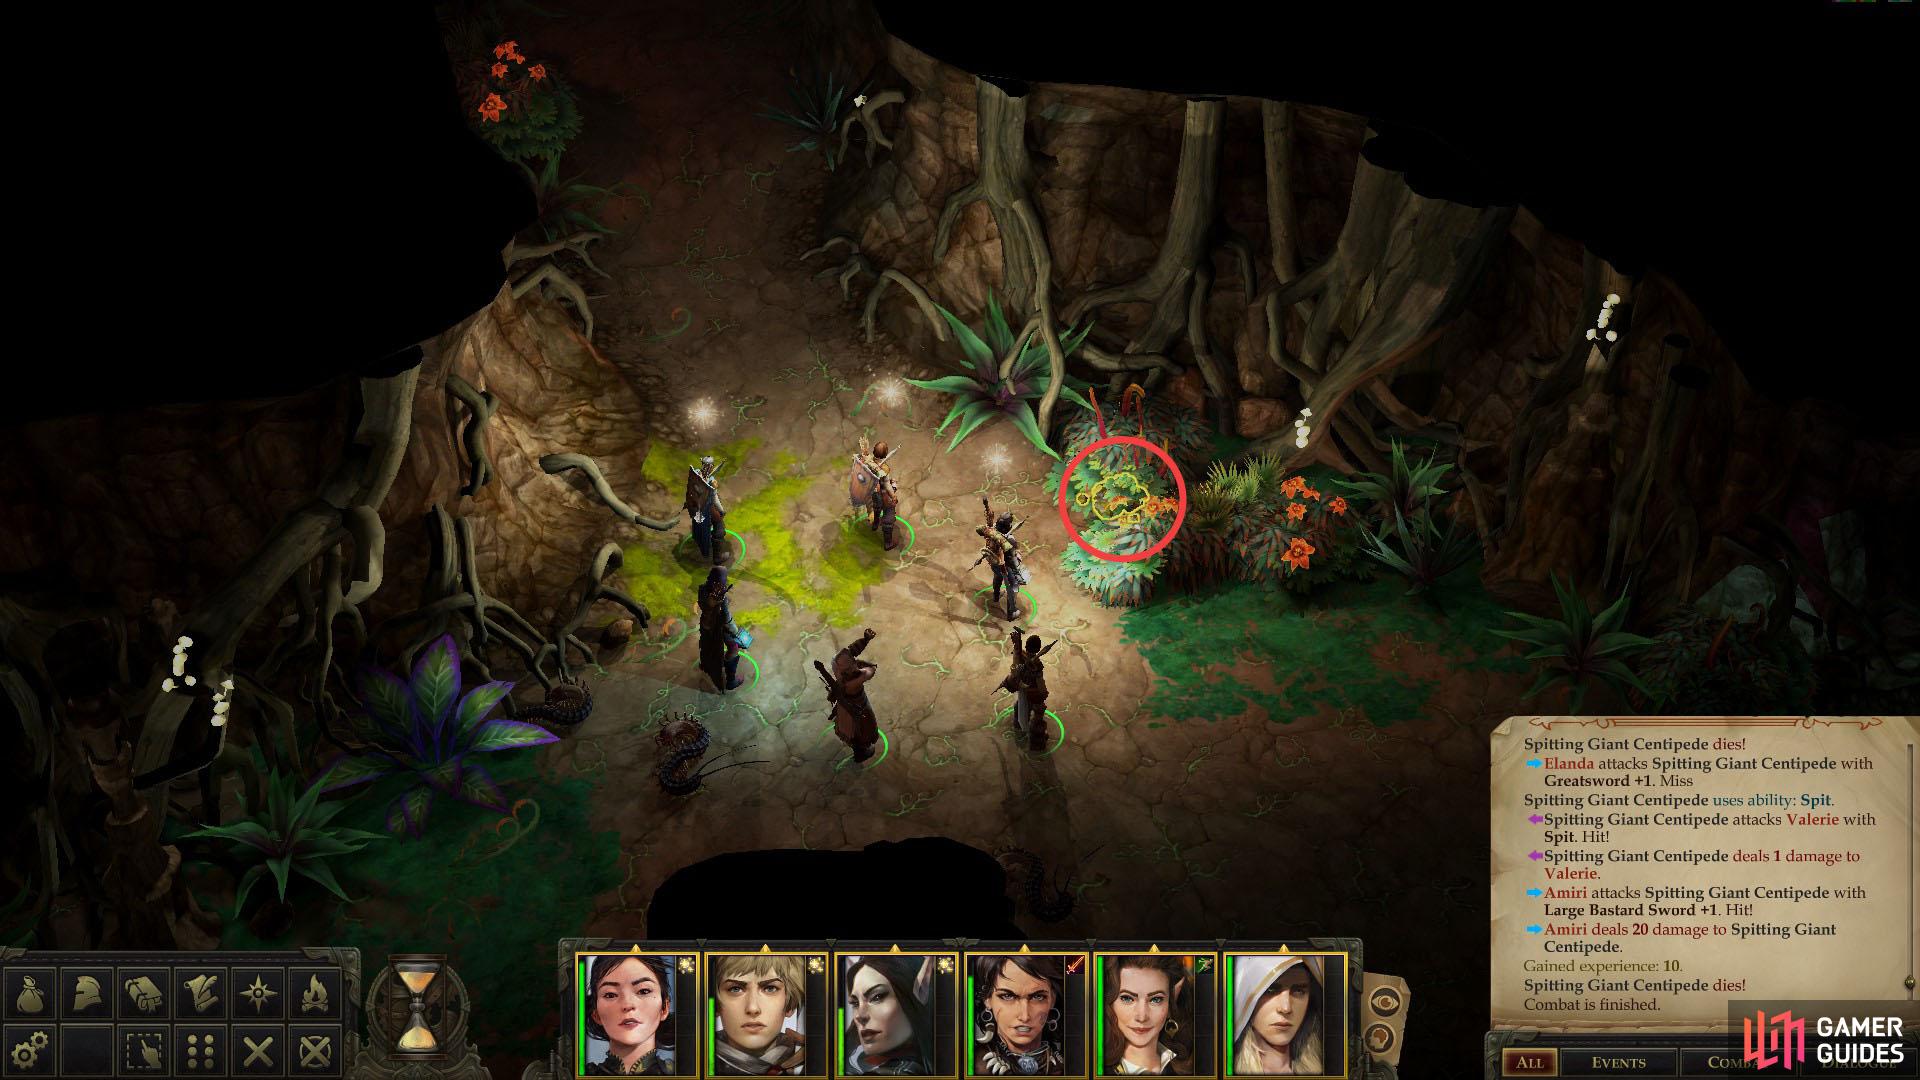
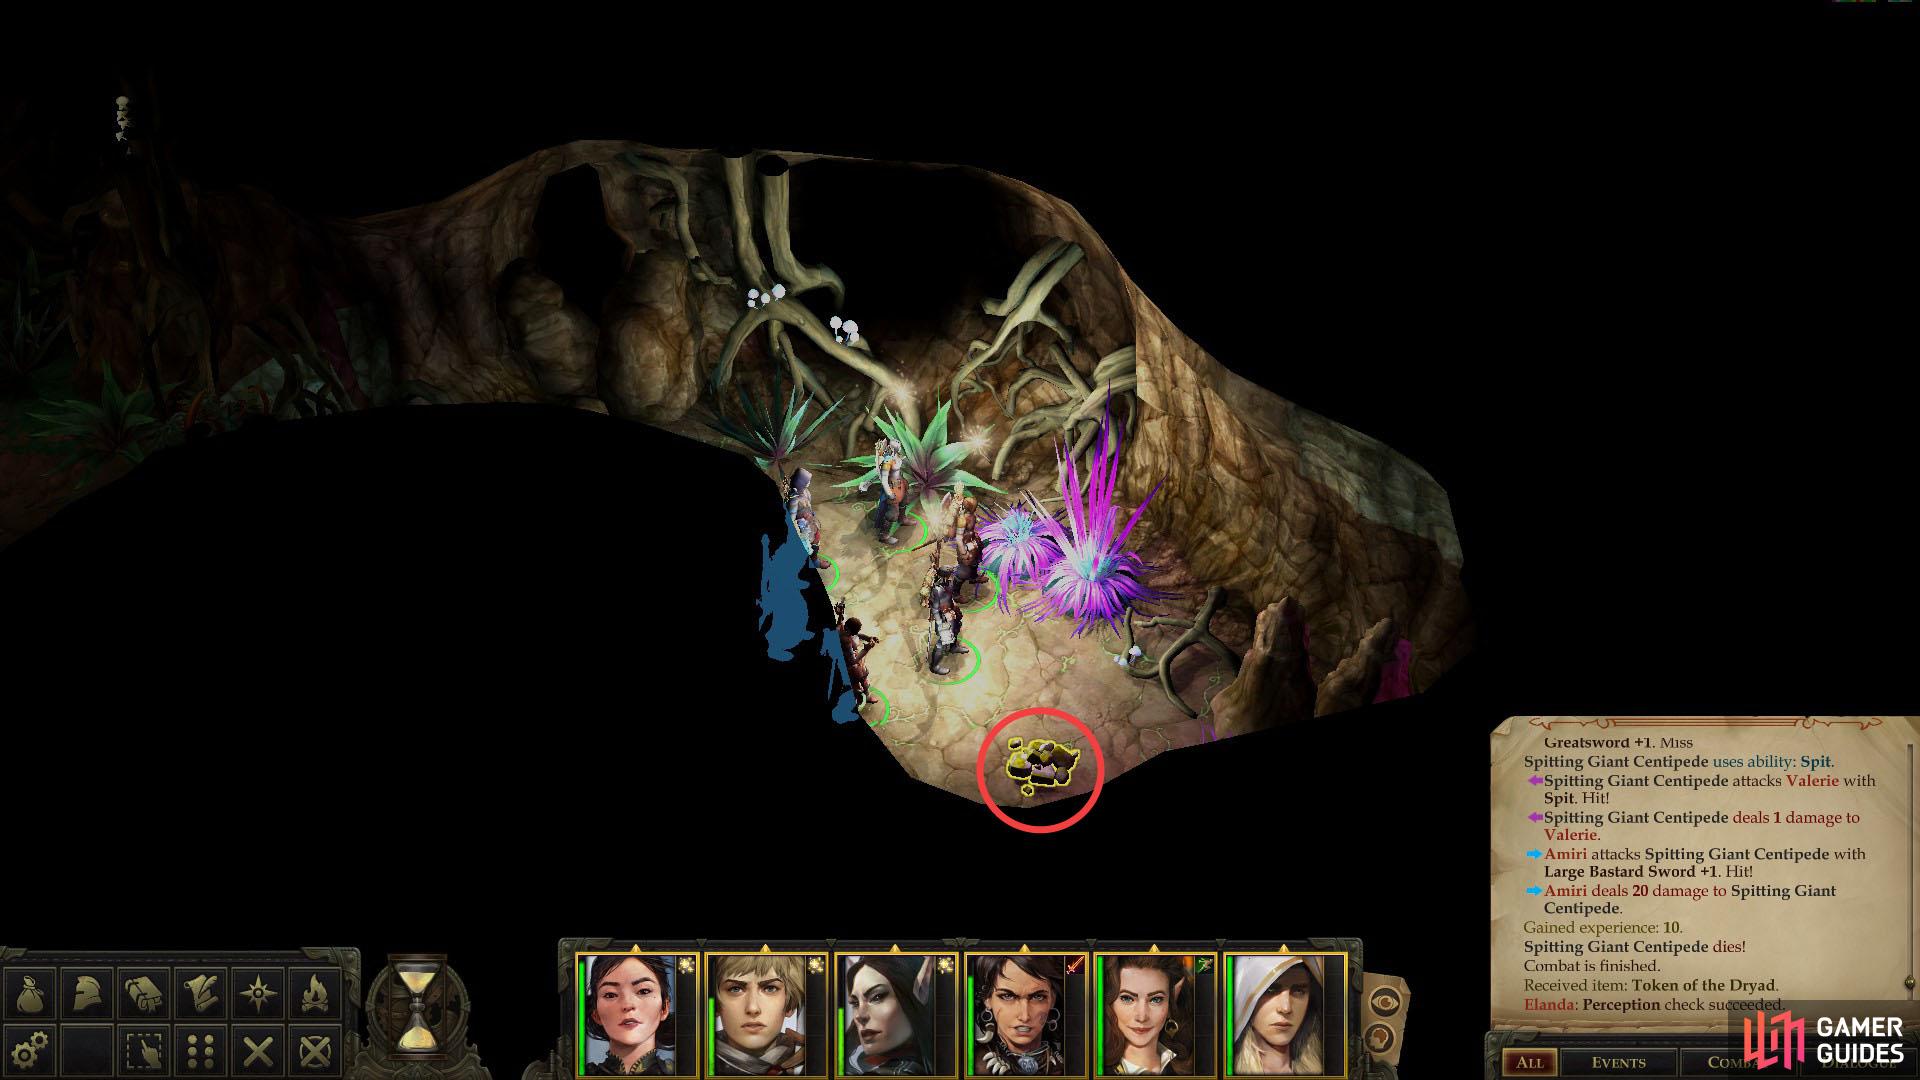
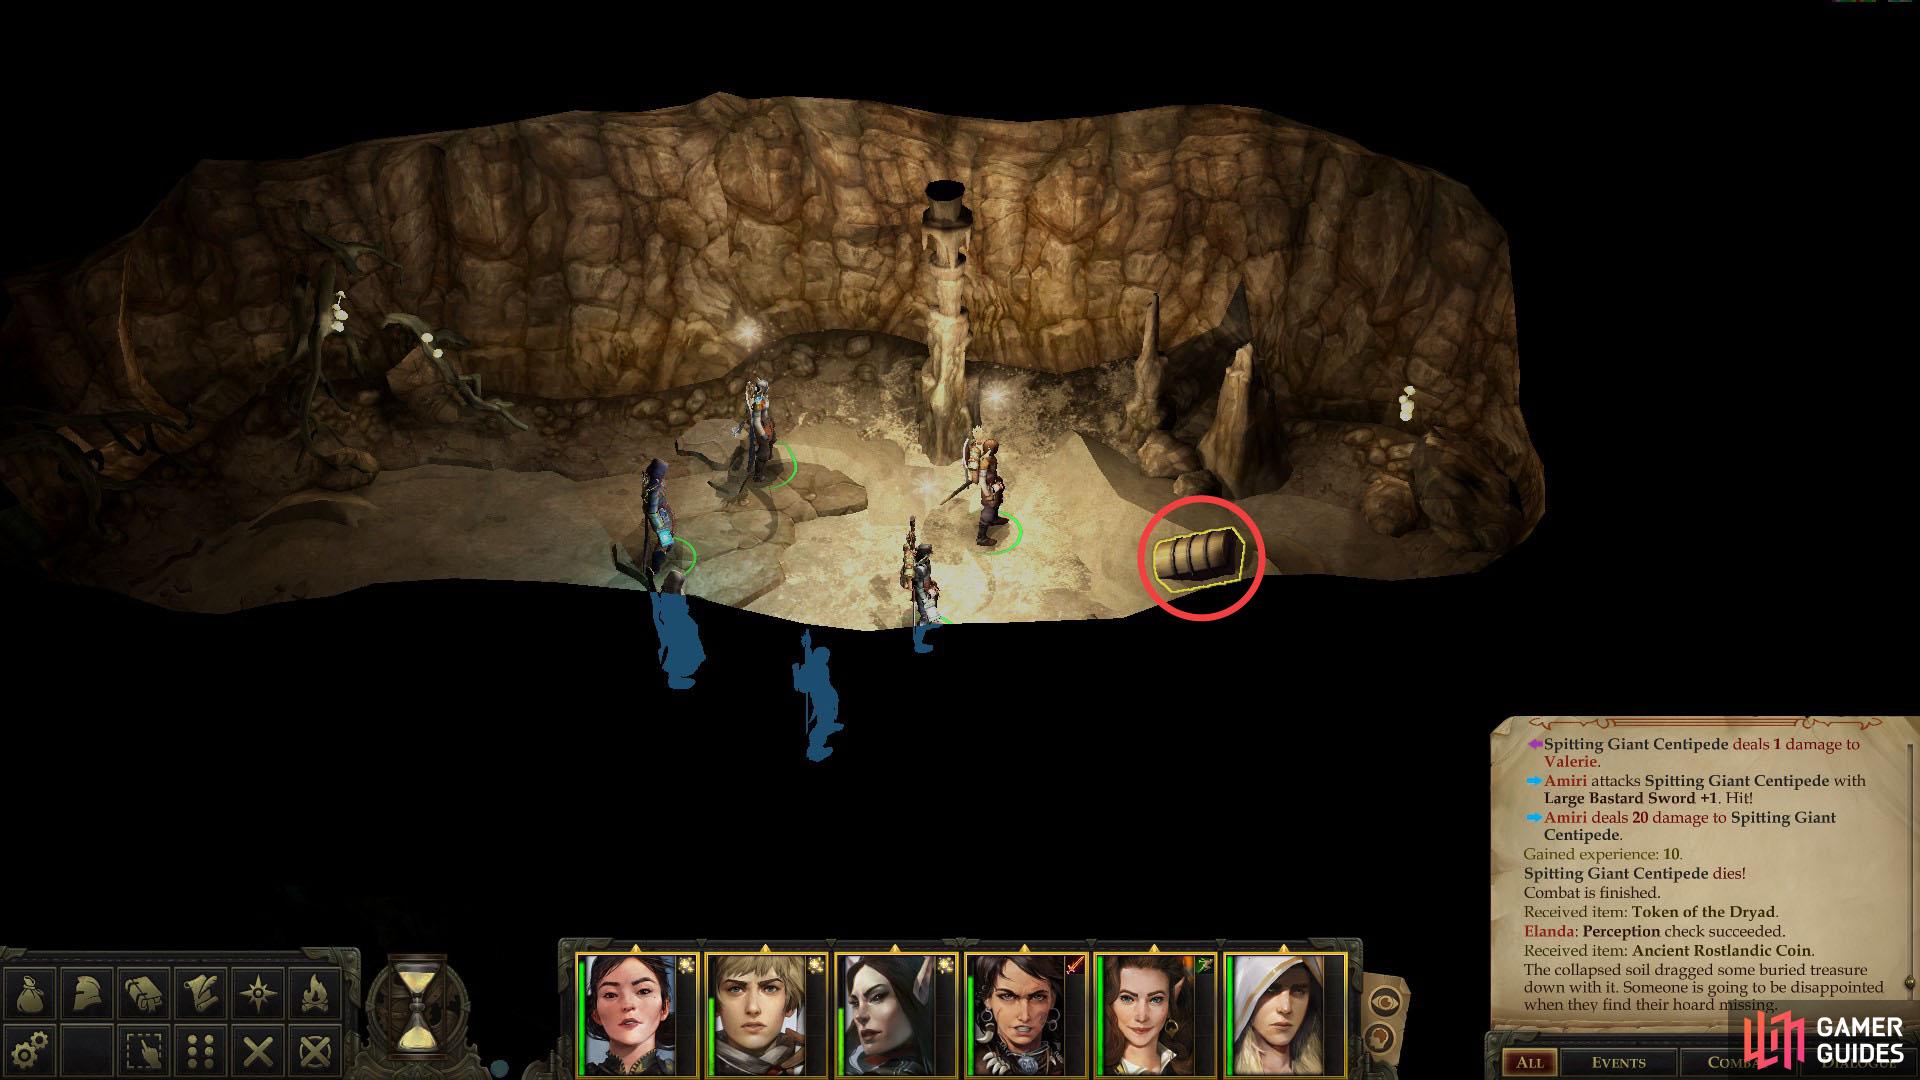
Return to Queen Bdaah’s chamber and use the area transition to return back down to the Old Sycamore Depths, then follow the tunnel ahead of you south past the two forks, continuing on until you reach a large, surprisingly verdant cavern crawling with Giant Centipedes, both normal and spitting. Kill them, then pass a [Perception 6] check to locate some rocks along the northeastern edge of the chamber, in which you’ll find a Token of the Dryad.
There are two exits to this chamber, one to the east and one to the south. Go east first, pass a [Perception 10] check to spot some rocks, then pick An Ancient Rostland Coin out of said rocks.
If that doesn’t seem like a suitable enough reward for exploring down here, return to the passage connecting this small chamber to the larger one to the west. Midway down this short tunnel you’ll spot an interactive icon on the northern wall if you hold down the “Tab” key. Interact with this icon to squeeze through the rocks and locate a hidden chamber, along the eastern end of which is a chest containing a Scroll of Snowball and a Headband of Inspired Wisdom +2. This is a fine gift for your Cleric - presumably either Harrim or Tristian - as it’ll increase the DC of their spells and potentially give them a bonus spell, not to mention increasing their Will Save.
Slay the Southern Spiders
Return to the verdant chamber to the west, then head down the previously neglected tunnel to the south to reach a chamber filled with corpses… and Centipedes. Engage them in the tunnel so you can bottleneck them, a tactic that’s less effective than usual due to the two Spitting Centipedes in the back. Once you massacre the bugs, turn your attention to the corpses scattered across the floor of the chamber - obviously the site of a large battle between the Kobolds and the Mites. The winners in the end? The centipedes.
(1 of 2) You can find a Miner’s Lever in a chest
You can find a Miner’s Lever in a chest (left), which you can use to propel a minecart into a barricade. (right)
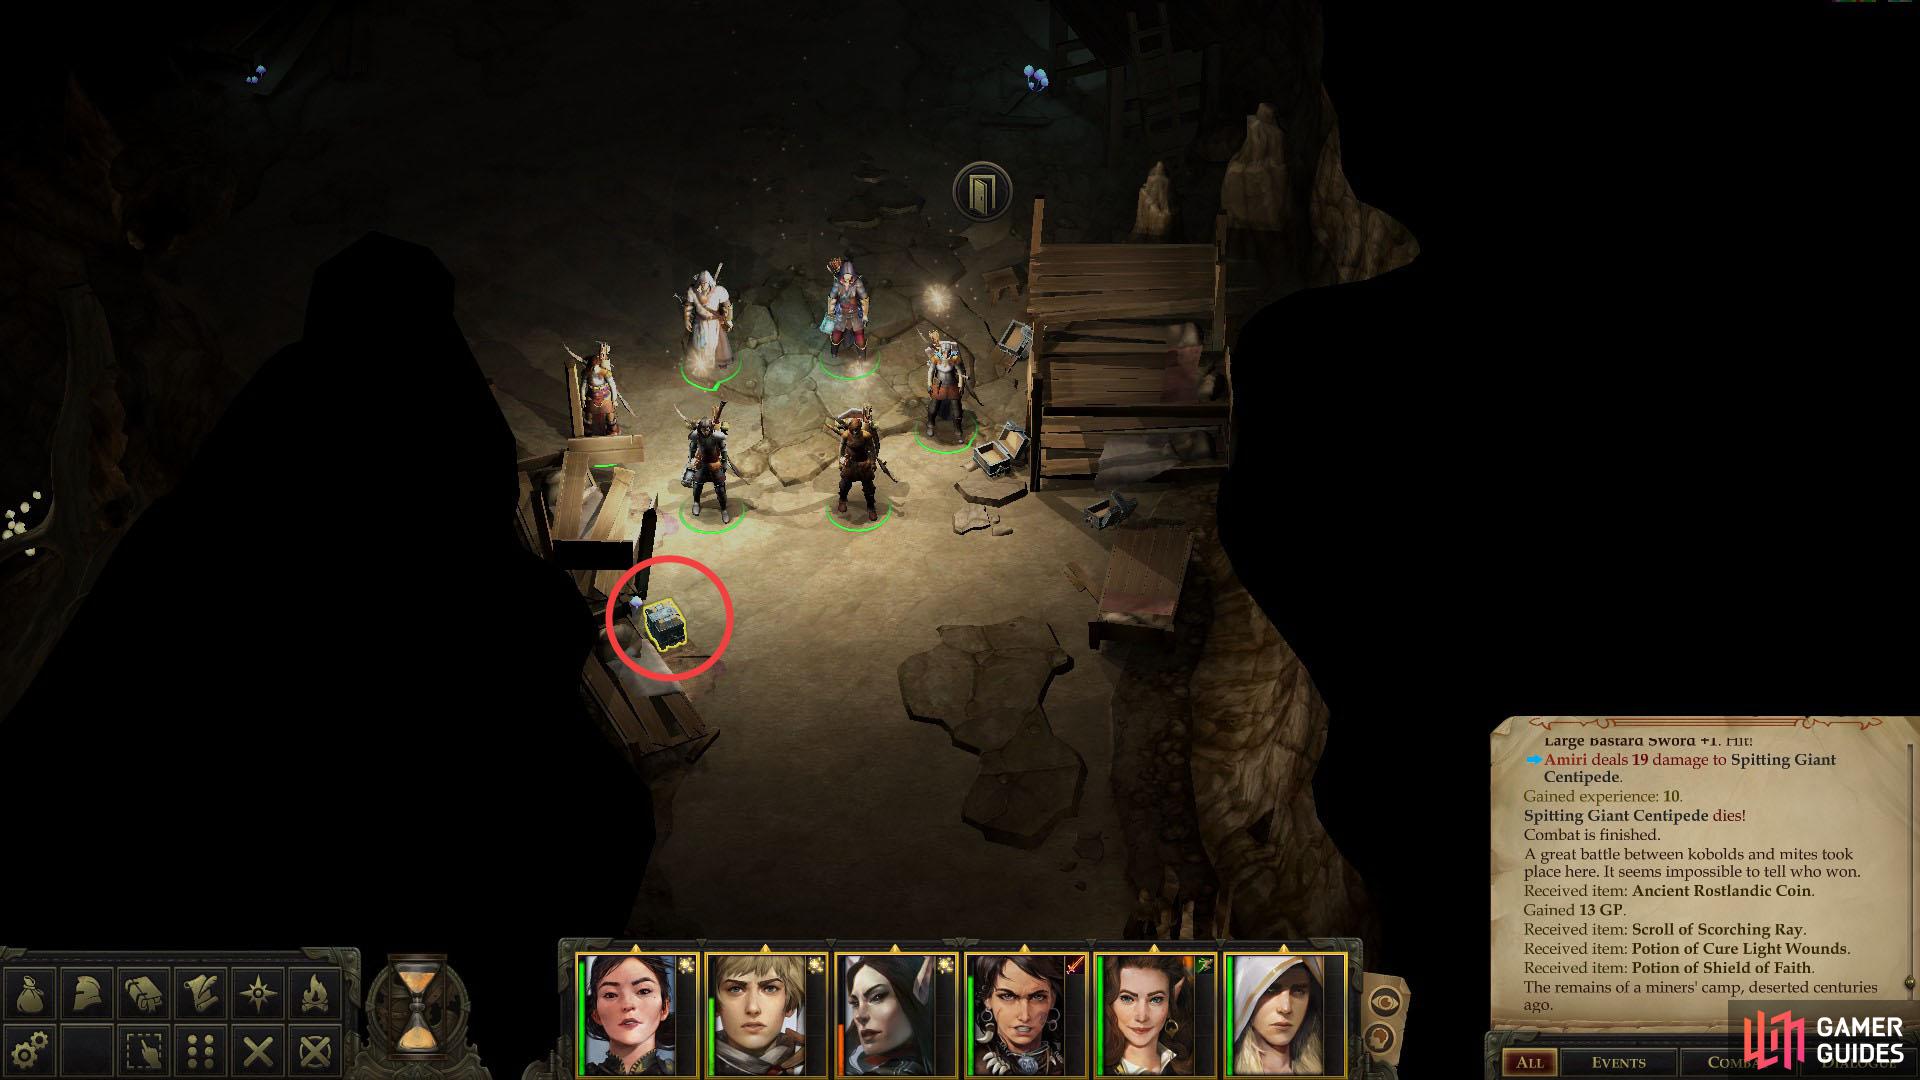
There are numerous forks leading off this chamber, including one to the east, one to the south and one to the northwest. Go south first and loot some rocks to find An Ancient Rostland Coin, then head down the eastern tunnel. At the end of this tunnel hold down “Tab” at the end of the tunnel to find another interact icon, which if used will take you up to a higher chamber to the east. Loot a crate to the north to score a Scroll of Scorching Ray, a Potion of Cure Light Wounds and a Potion of Shield of Faith, while to the south you’ll find a Miner’s Lever. With this device you can use the cart near the Kobold barricade on the level above, which will destroy the barricade and allow you to access the no-man’s-land from the Kobold caves, if you should for whatever reason find it necessary to do so. Speaking of which, if you use the area transition to the east you’ll surface in the Old Sycamore Caves, near Sootscale’s lair.

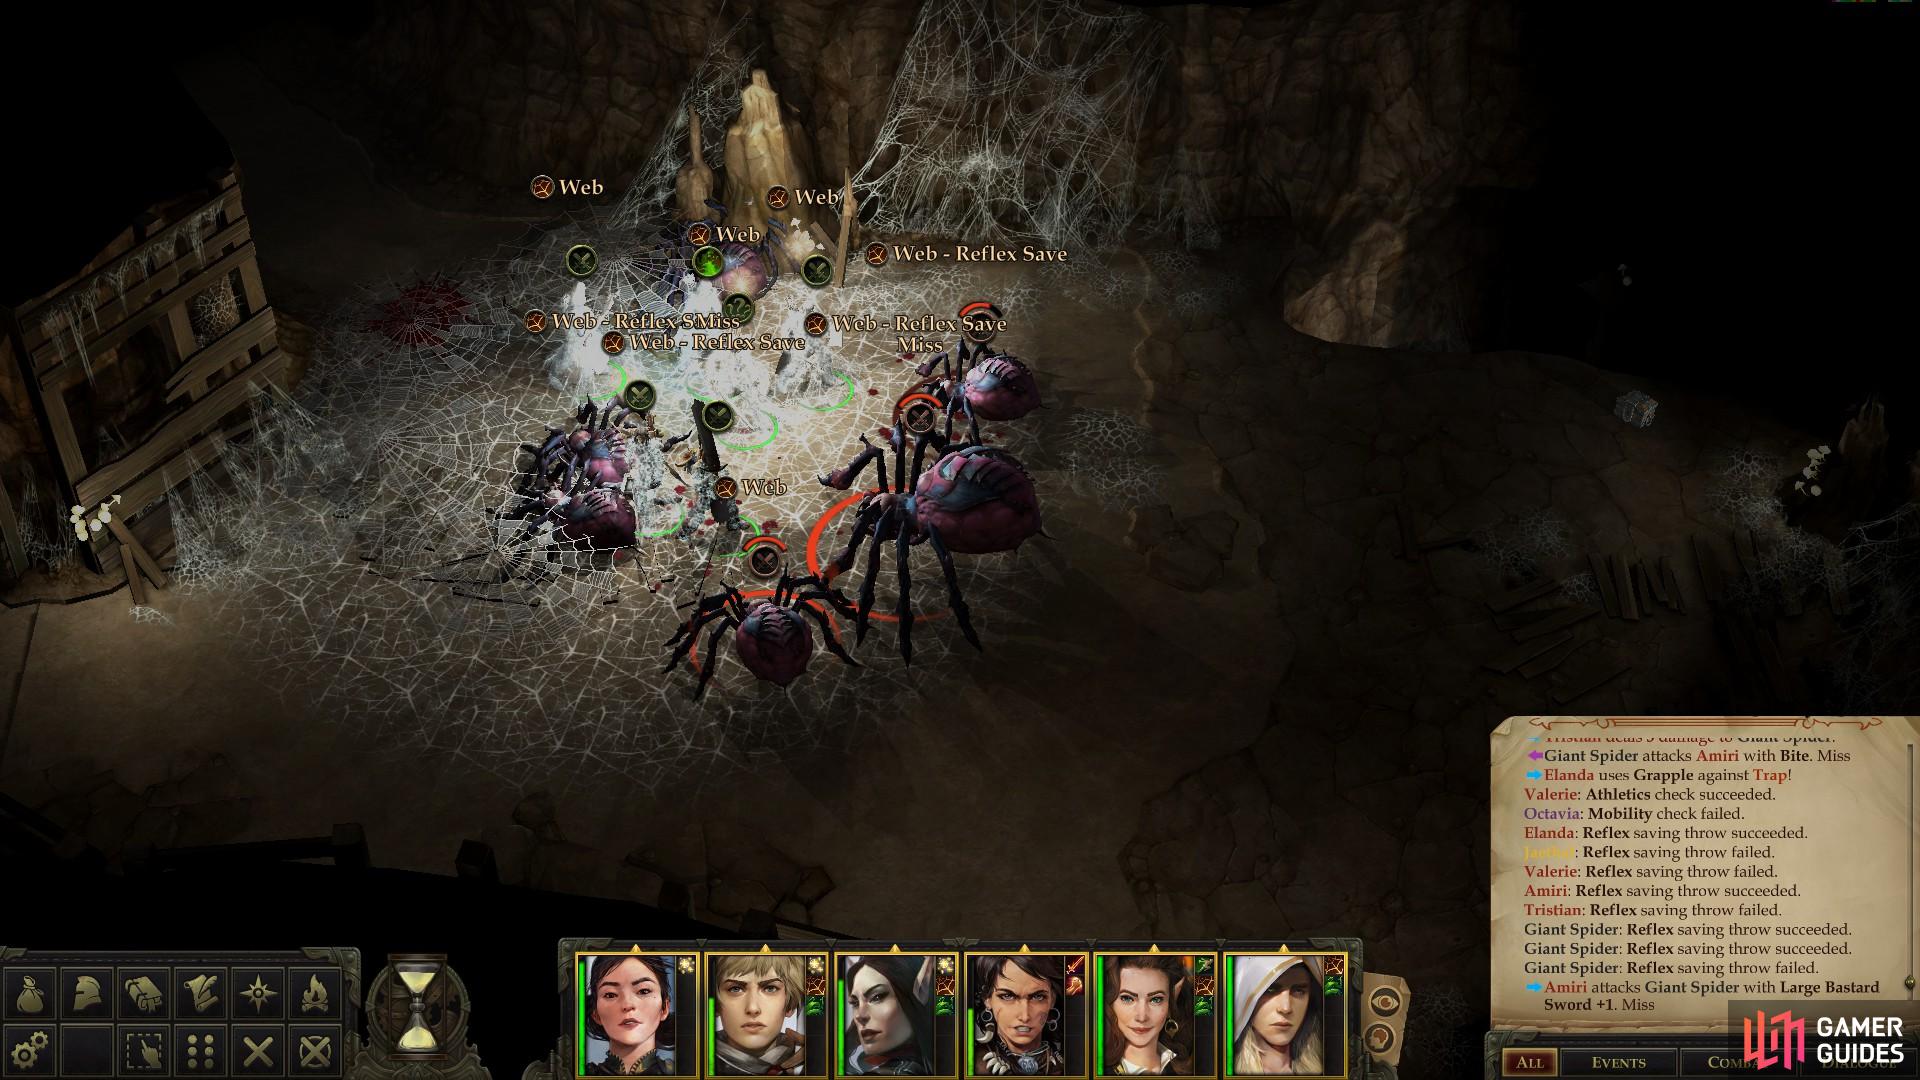
(1 of 3) Kill several giant spiders
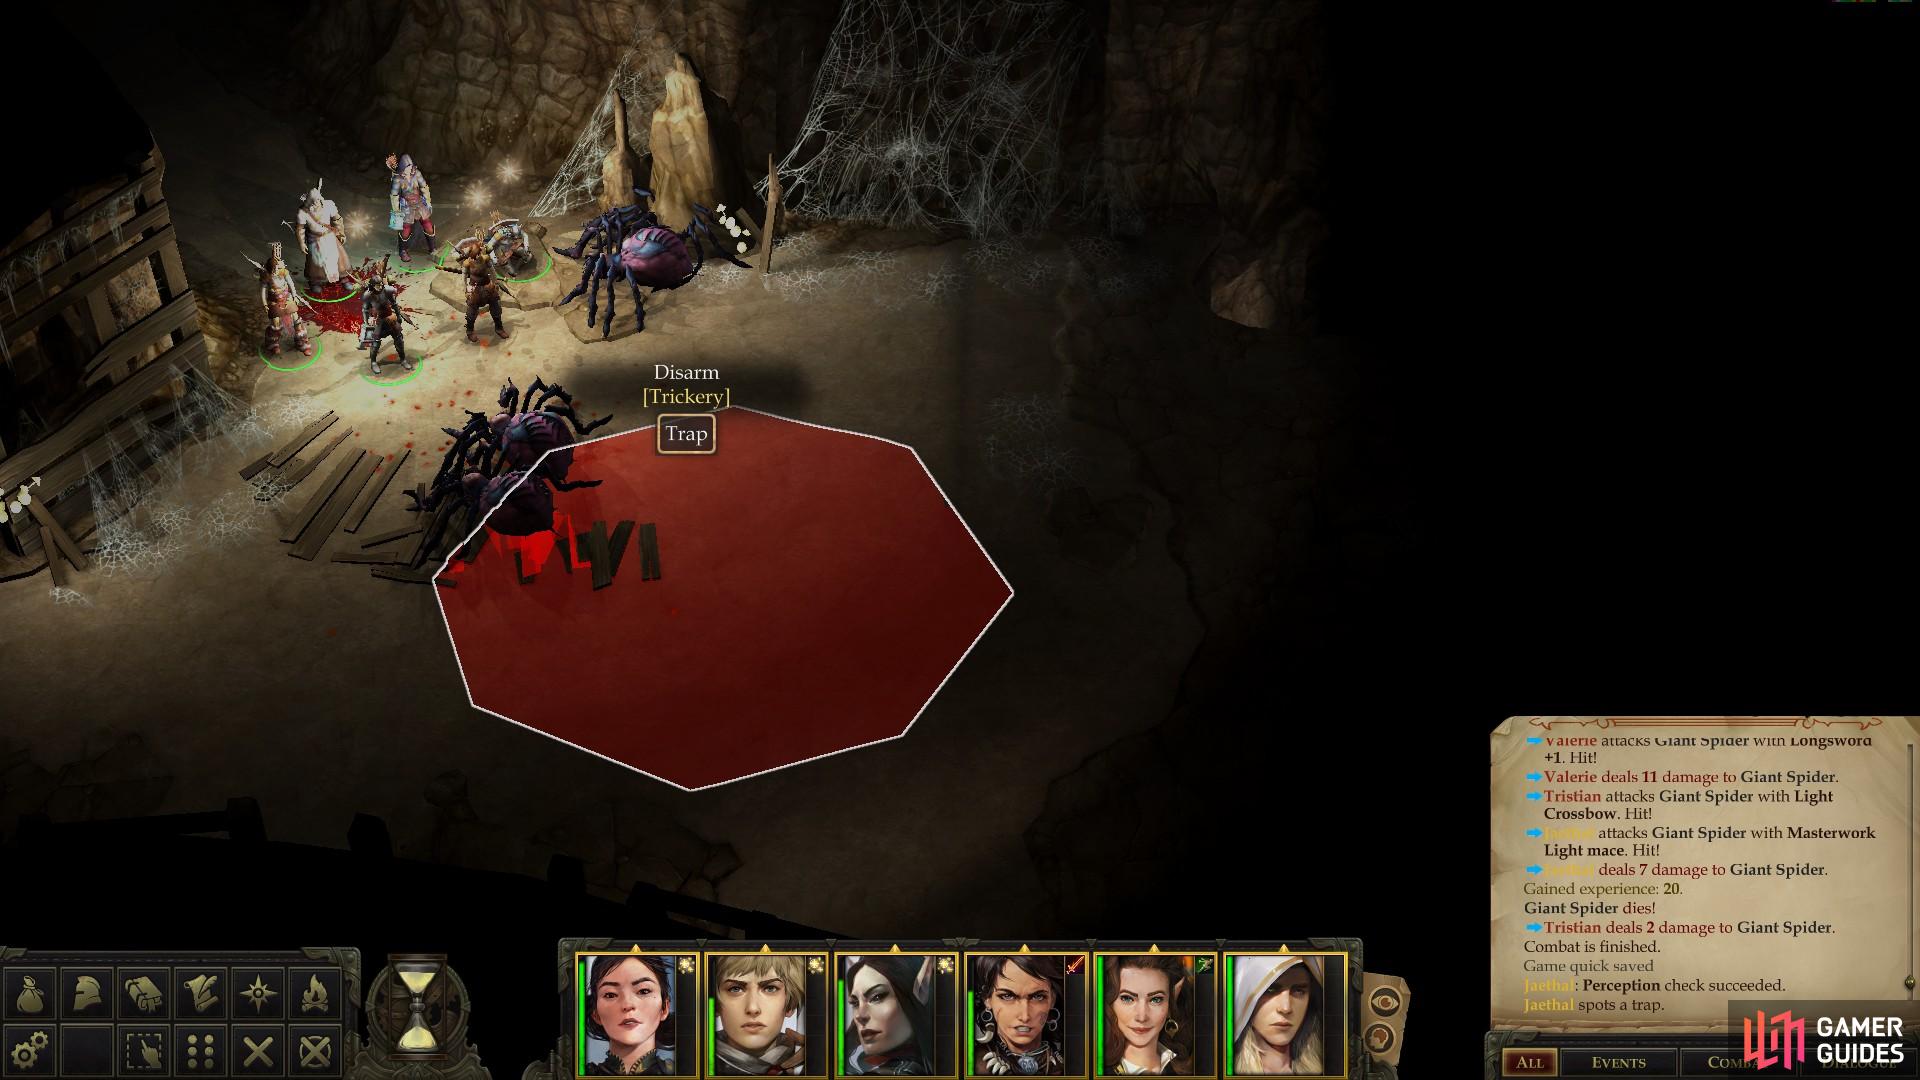
Leave the chamber where you found the Miner’s Lever and head into a tunnel to the south, where you’ll find a familiar old foe: Giant Spiders. Kill three of them and follow the passage as it winds west, then turns southeast and opens into a chamber where another five Giant Spiders lurk. Don’t fight these later five spiders in the chamber they occupy, however, as there’s a Web trap in there that’ll make the fight much, much more complicated. Lure them into the tunnel where you have better numerical odds, then, when the last arachnid is smote, search for the trap [Perception 23] and disarm it [Trickery 18].
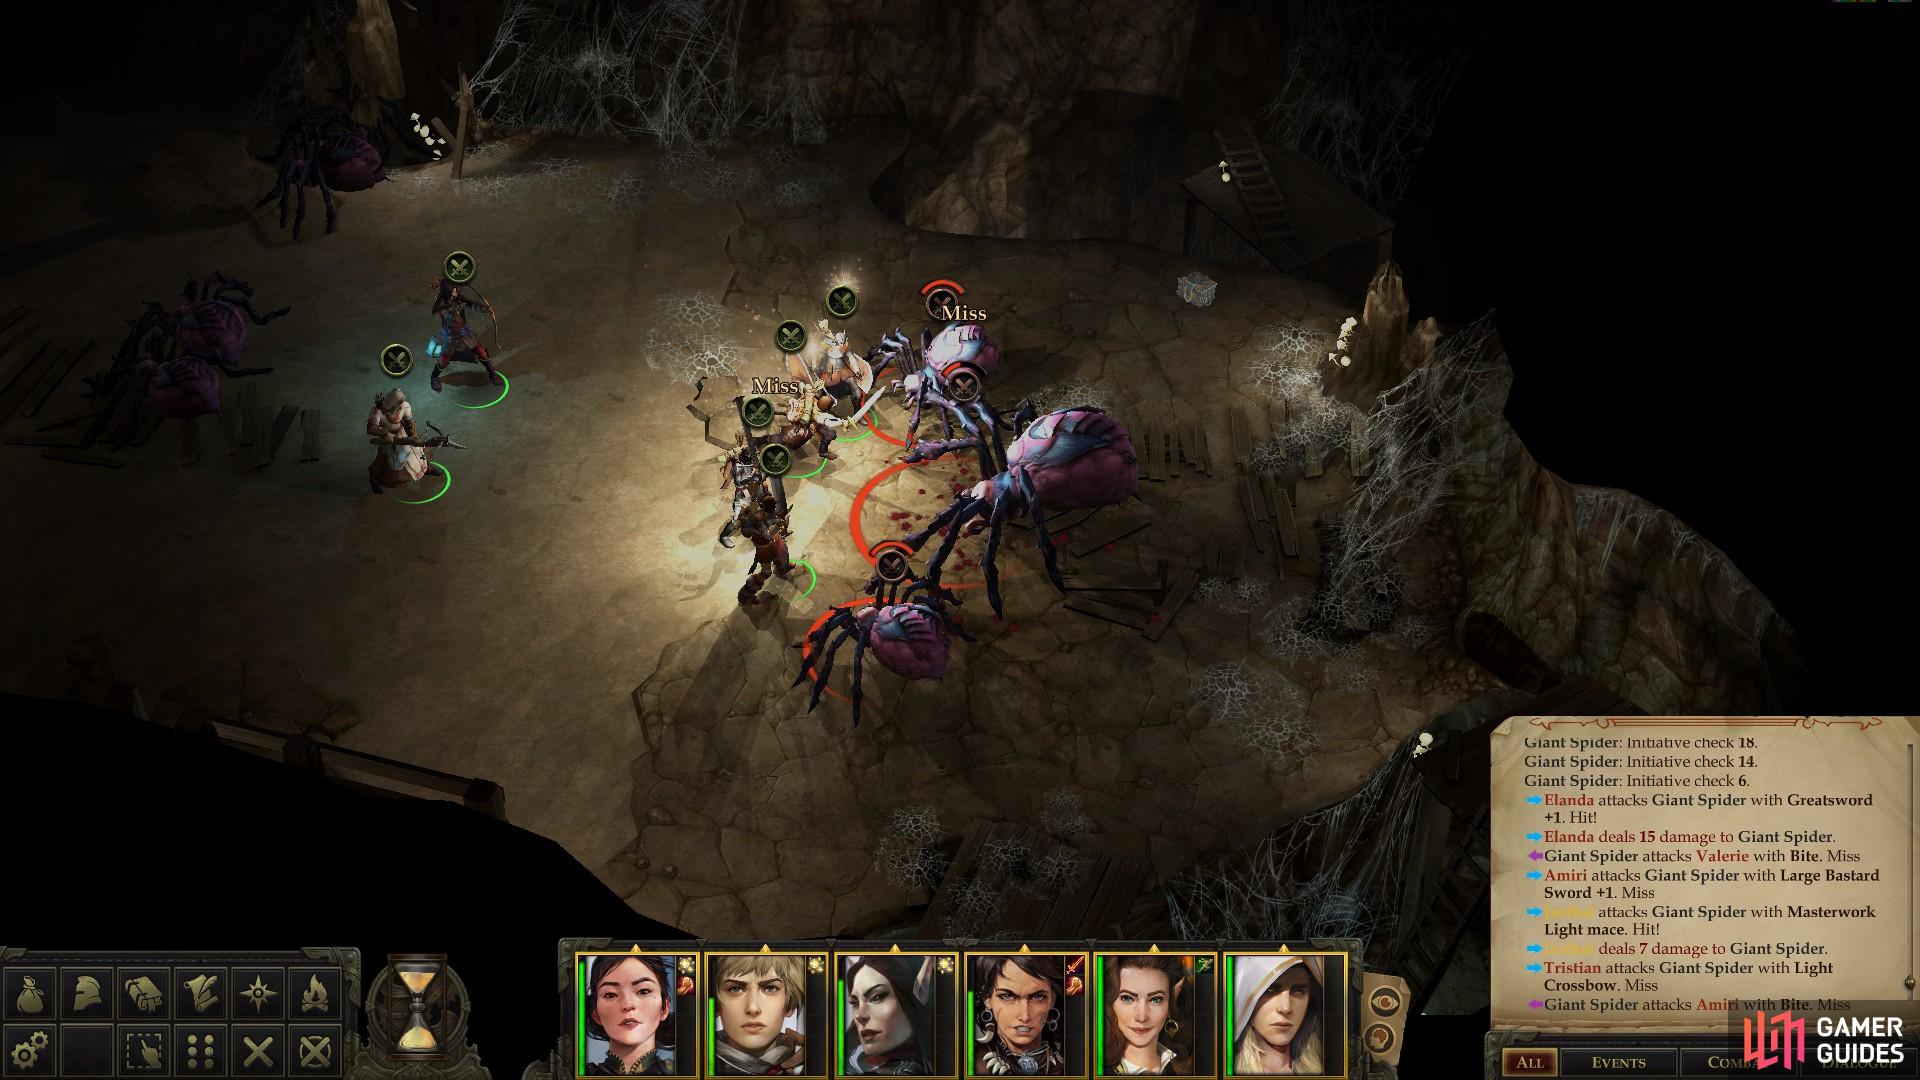
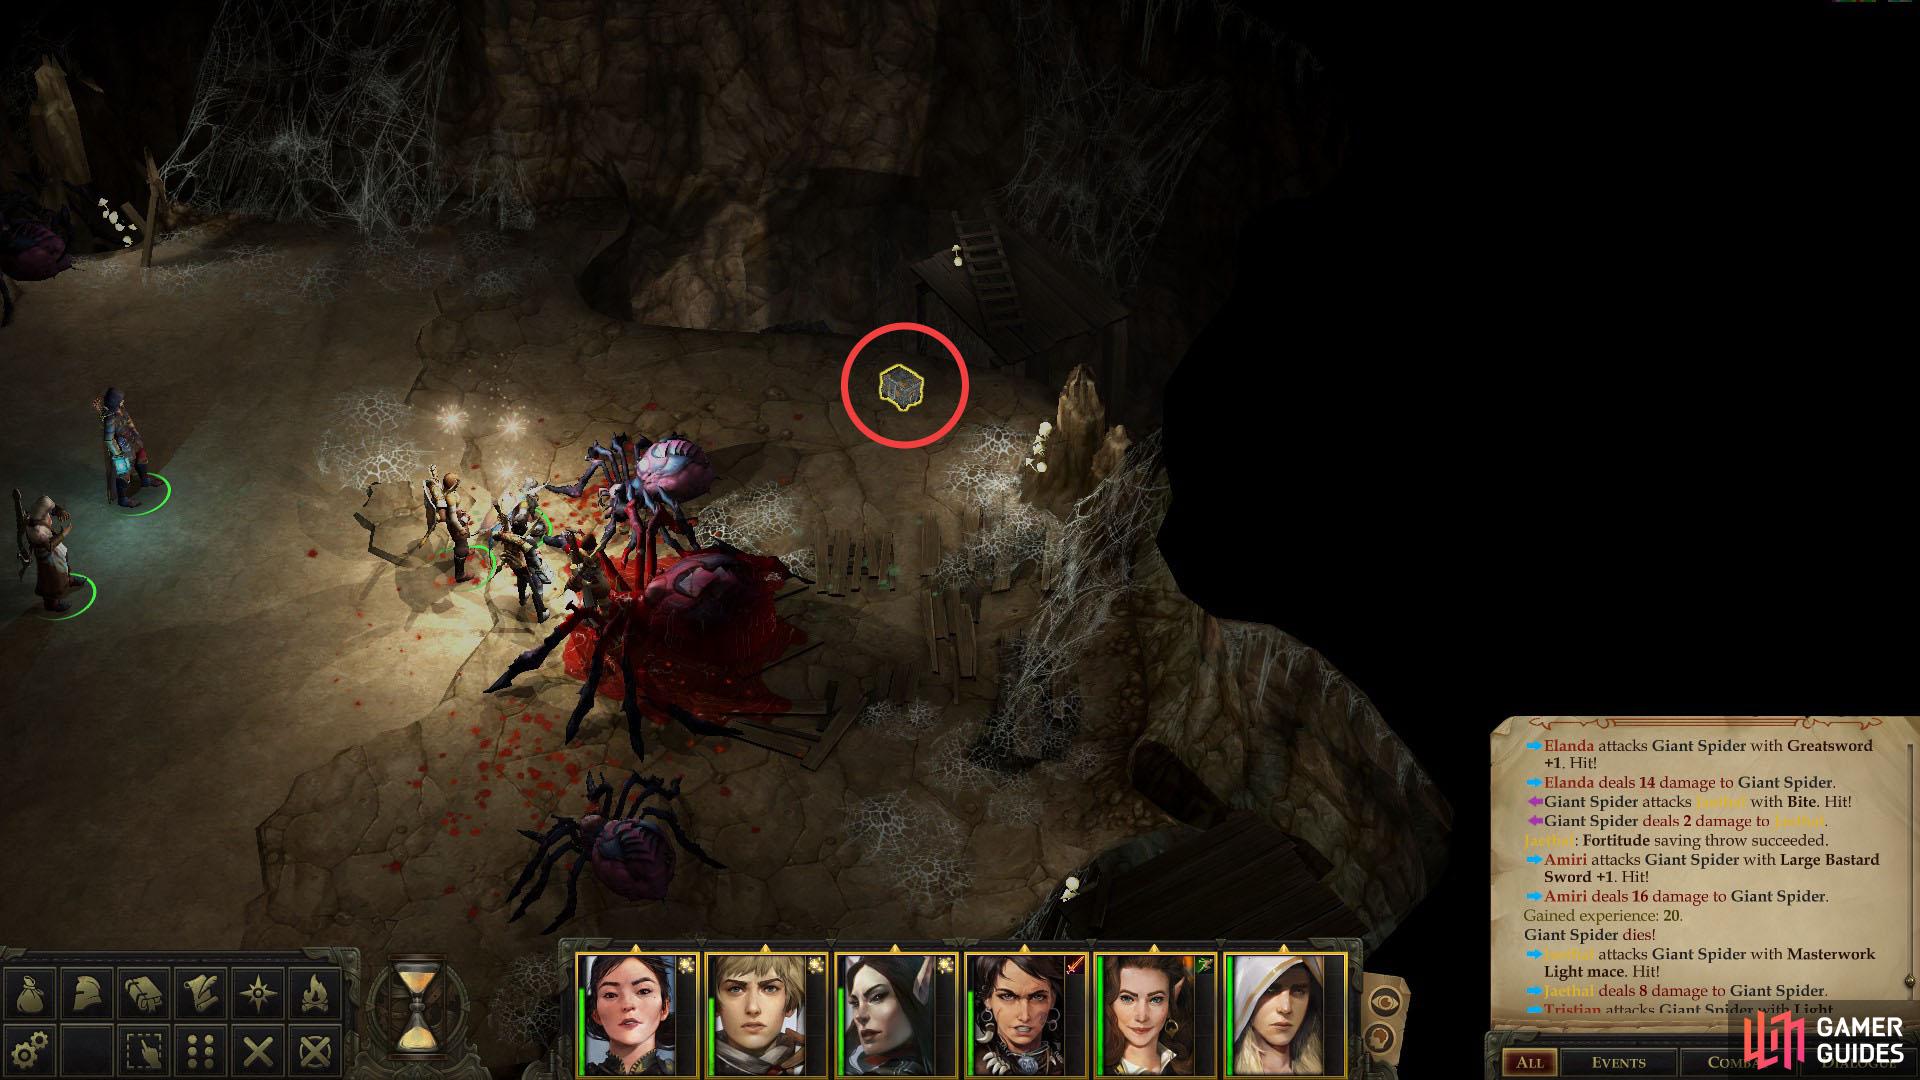
(1 of 2) Kill the second group of spiders along the eastern end of the chamber
Kill the second group of spiders along the eastern end of the chamber (left), and plunder the treasure they guard. (right)
If you find yourself unable to deal with the trap, just carefully move across the northern edge of the area to avoid it, but be wary, as another three Giant Spiders (including one double-sized monstrosity!) can be found along the eastern edge of the cavern. If you have the misfortune to fall afoul of this trap, those spiders will come to investigate their prey. Despite the hazards, the reward is worth the risk, as in a chest at the eastern end of the cavern you’ll find an Restovic Swordlord’s Empty Sheath, a Wand of True Strike and a Cloak of Resistance +1.
With that treasure secured, make your way to the western end of the cavern and take the southern of the two tunnels to the west. This is a long, largely uninteresting tunnel occasionally occupied by a trio of spiders. Fight your way west until you reach a fork, at which head down a slope to the northwest to reach a corpse-strewn cavern. This is where the hatch in the Kobold tunnels would have dropped you if you failed your Trickery check earlier. Loot a corpse to find a Potion of Vanish, then backtrack to the previous fork.
This time take the southwestern passage and follow it west along the southern edge of the area, killing another trio of Giant Spiders as you go. There’s a cubby to the north you can explore, but aside from some flavor text stating the obvious, there’s little point. Venture west until you reach the southwestern edge of the area, where you’ll find an area transition that’ll lead you up to the southwestern end of the Kobold caves, should you feel like using that Miner’s Lever for some reason. Loot a chest along the northern end of the chamber to find a Scroll of Protection From Law and some other treasure, then note a tunnel leading northeast.
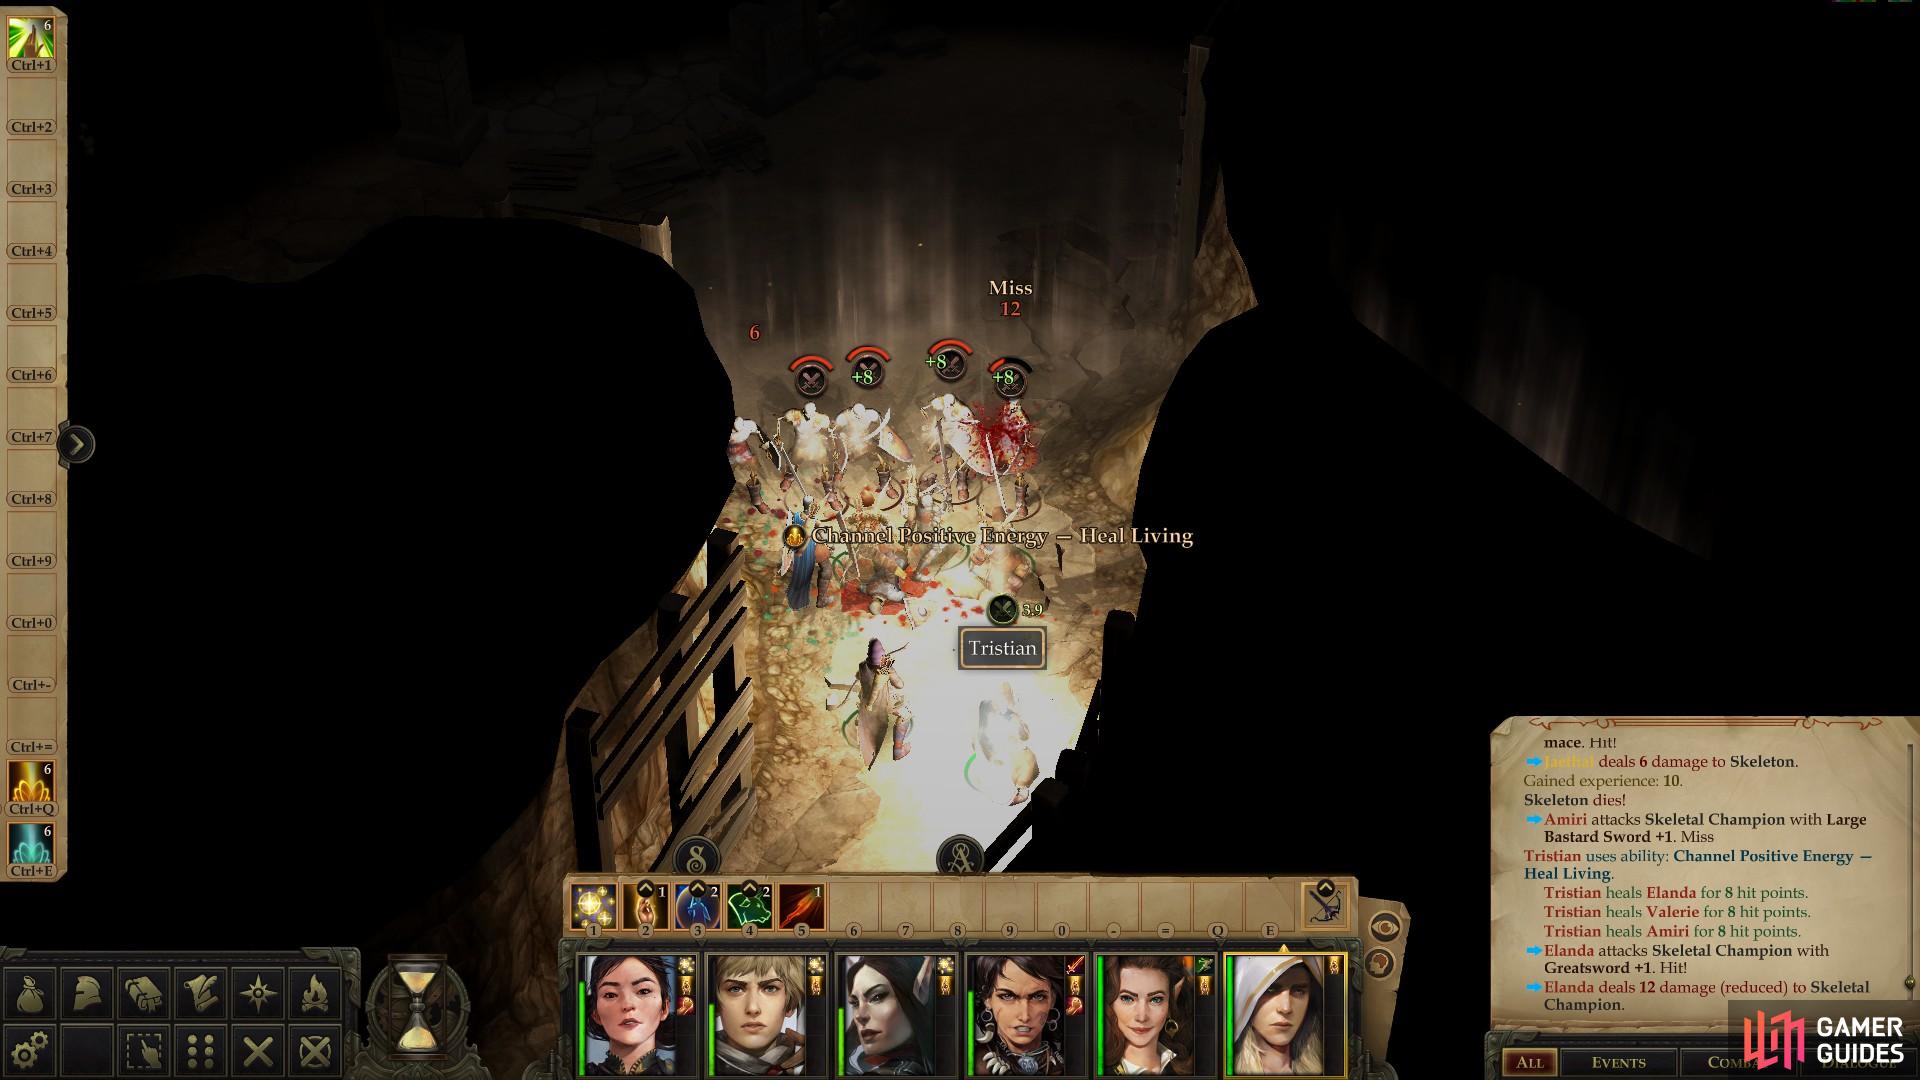
(1 of 2) Kill a mob of skeletons lurking in the tunnels
Kill a mob of skeletons lurking in the tunnels (left), then loot the shrine they protected. (right)
Tomb in the Old Sycamore Depths
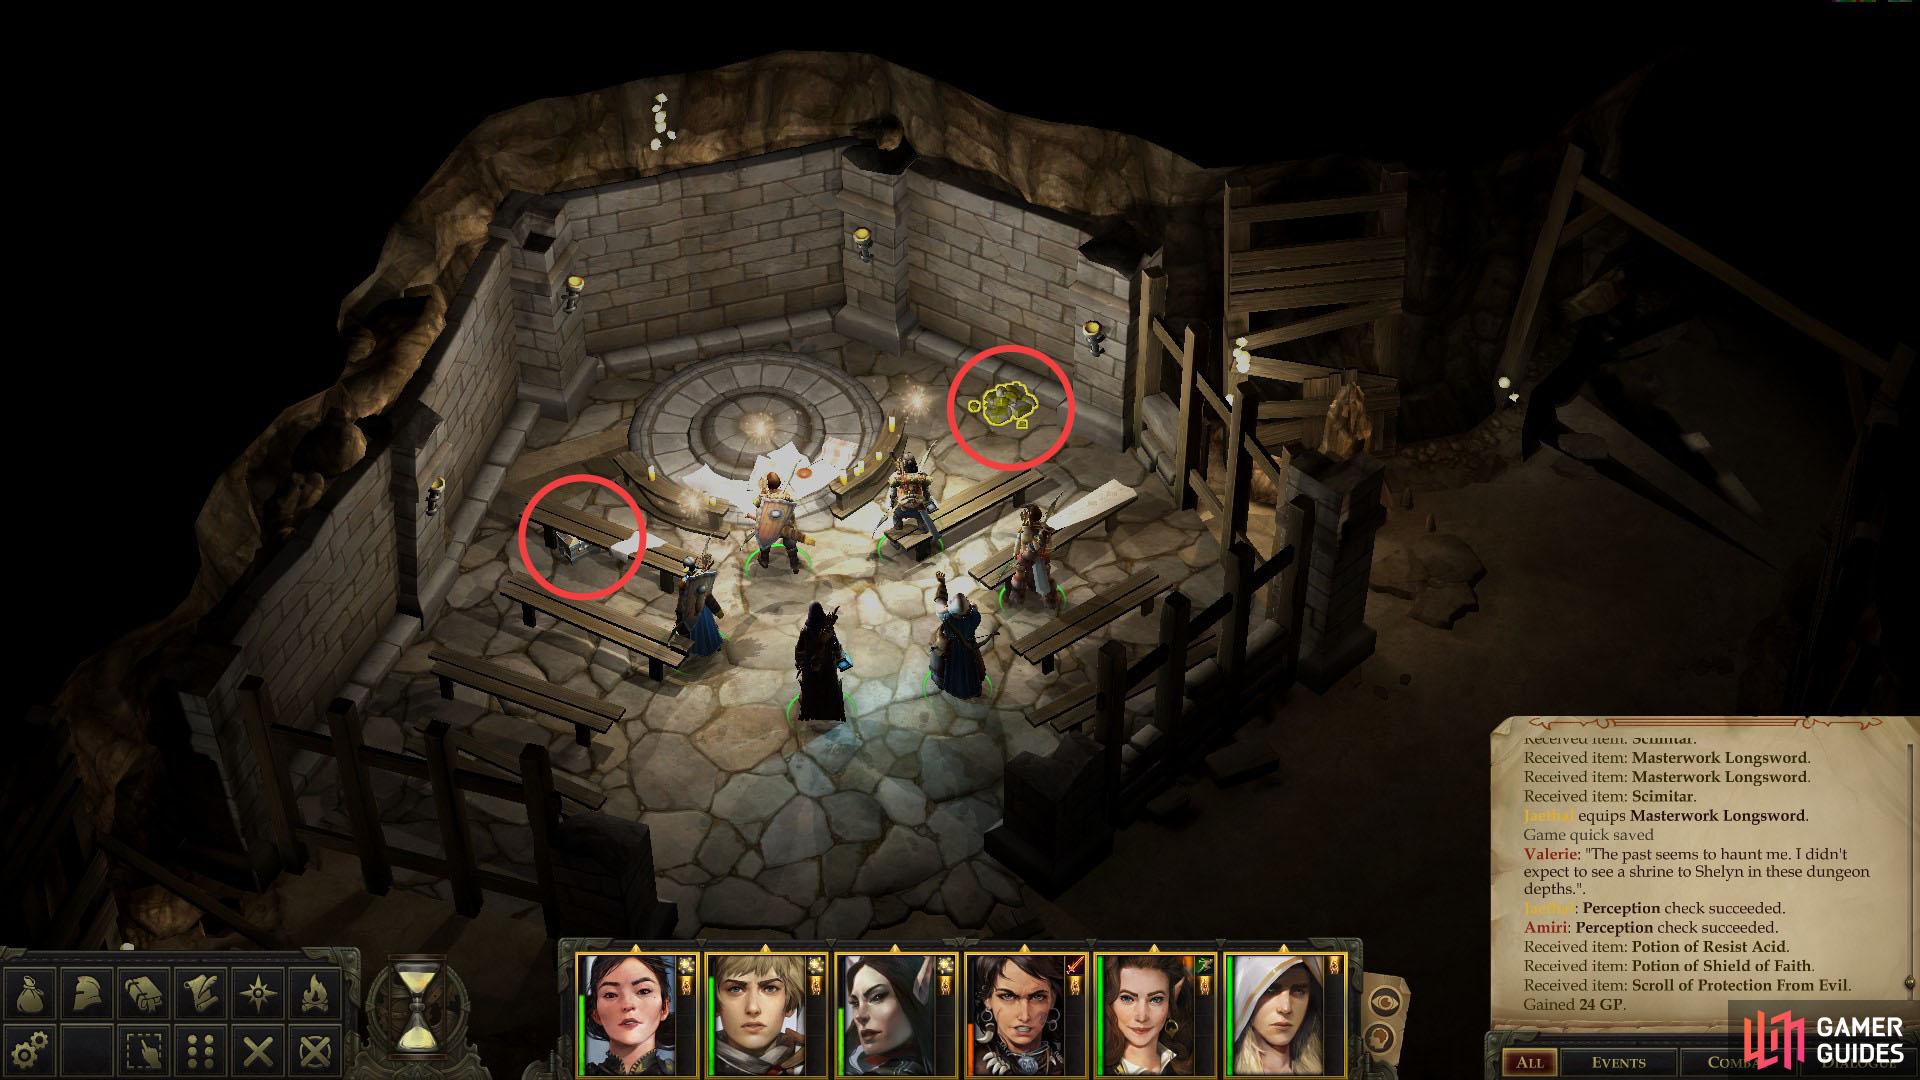
Line your warriors up along the mouth of this tunnel so as to bottleneck would-be attackers from the north, then send an unencumbered character north to reach another chamber crawling with undead, including four Skeletons and two Skeleton Champions. The latter are much more dangerous combatants, having a higher enough Armor Class to slow down your offense. Lure them all south to your waiting warriors and try to bottleneck them in the tunnel so you can bring more warriors to bear than they can.
Defeat your undead foes, then head north into the chamber they occupied to find a shrine to Shelyn - probably a shrine that served the miners who worked here long ago. Succeed at a [Perception 14] check to find a chest hidden amidst the benches inside of which you’ll find a Potion of Resist Acid, a Potion of Shield of Faith and a Scroll of Protection From Evil. If you can pass a [Perception 17] check you’ll also find a pile of rocks with a Taldan Warrior’s Dog Tag hidden in it.
Grab the treasure, then continue up a passage to the northeast and kill two Giant Centipedes at a fork. After that paltry encounter, note the path to the southeast, then promptly ignore it and turn northwest to reach another fork guarded by Giant Centipedes - four of them this time. Once again, acknowledge the fork you intend to neglect (the tunnel to the northeast) and head west instead to find an area transition that leads to the surface. Once you use this area transition, you’ll be able to return to the Old Sycamore Depths from the surface, which is useful.
From this area transition head north, dispatch another cluster of Giant Centipedes, then continue north until you reach a most unusual dead-end. Instead of some natural stone wall you’ll come across an obviously man-made wall blocking your path, with no obvious means of ingress. Examine two investigation spots that’ll appear if you hold down “Tab” for flavor, then pass a [Perception 8] check to notice a hidden mechanism along the western end of the wall.
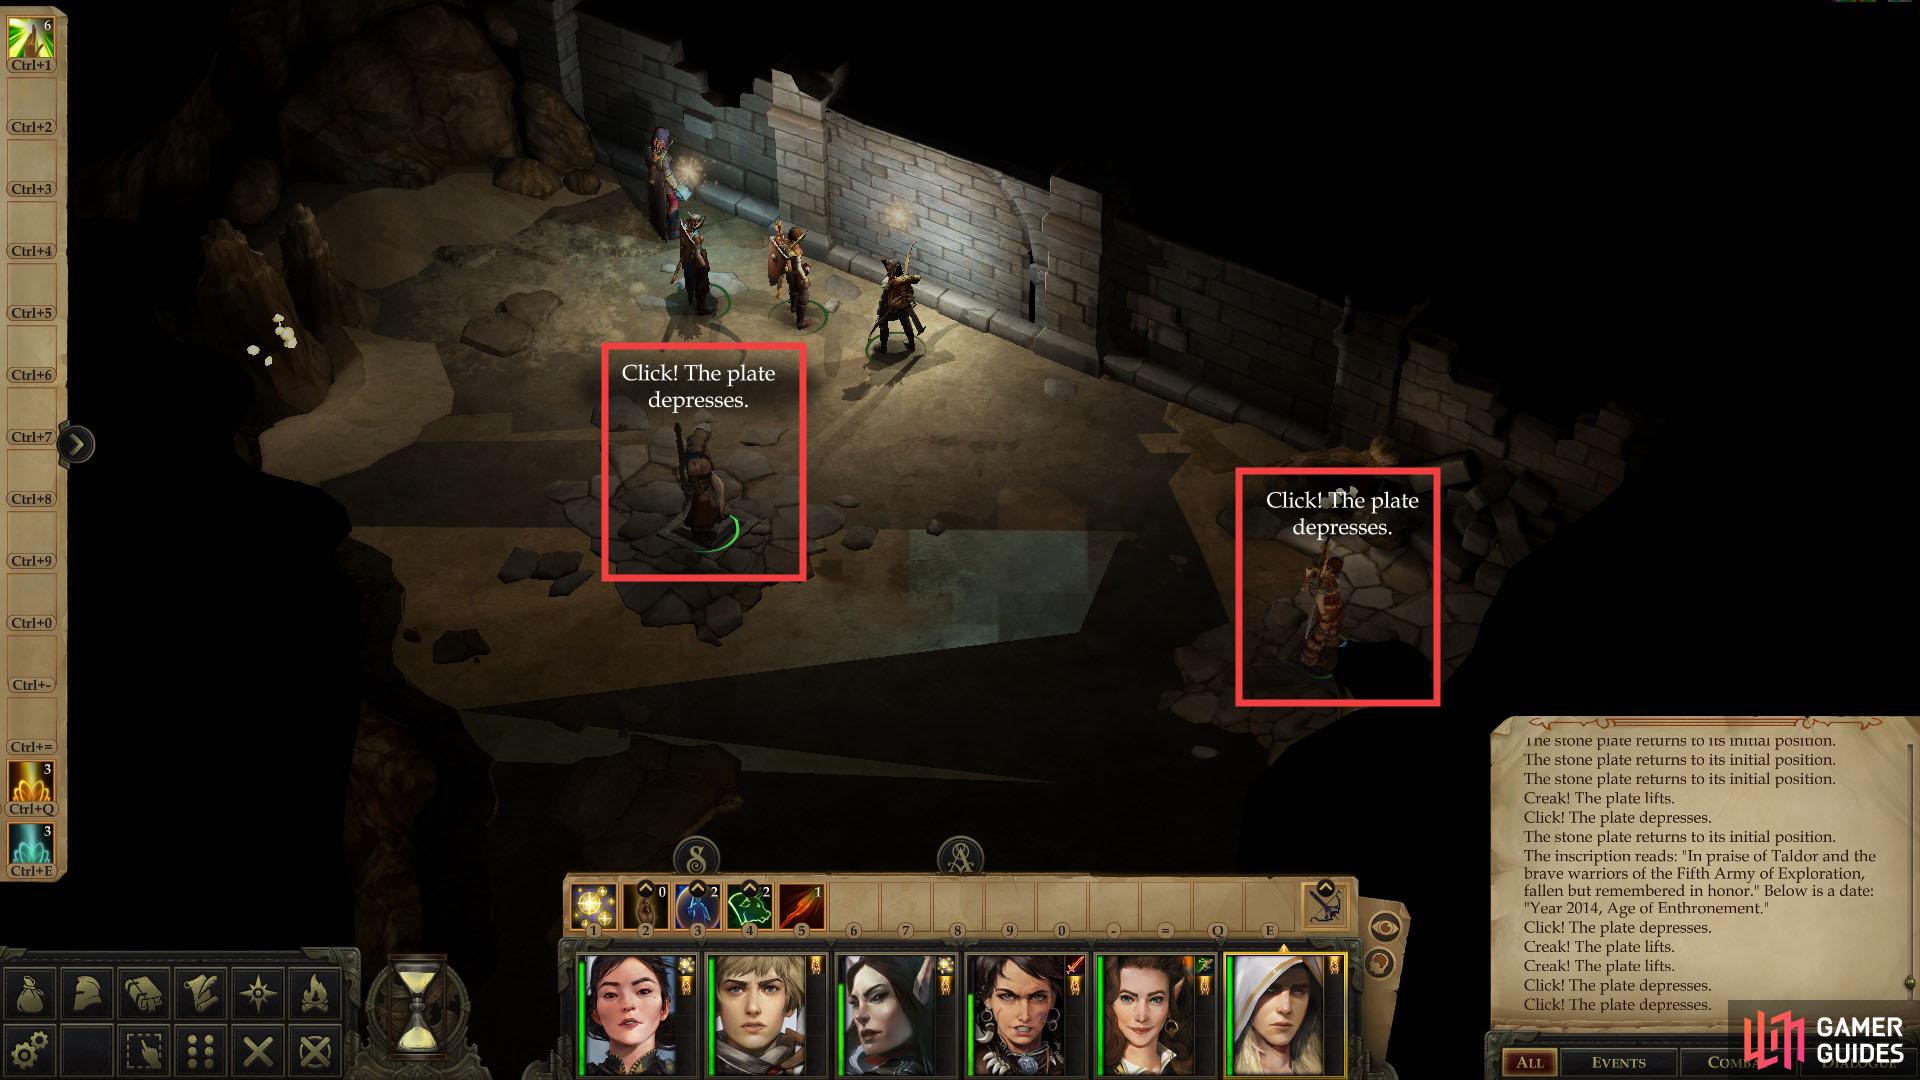
(1 of 3) Stand on two pressure plates so that a third character can press a button.
Puzzle time! This one is quite simple, just look around the floor to find two pressure plates on the ground (locations marked on image) and position some characters on each of them. Once done, form a line with your warriors in front of the middle wall section, then interact with the hidden mechanism on the western wall.
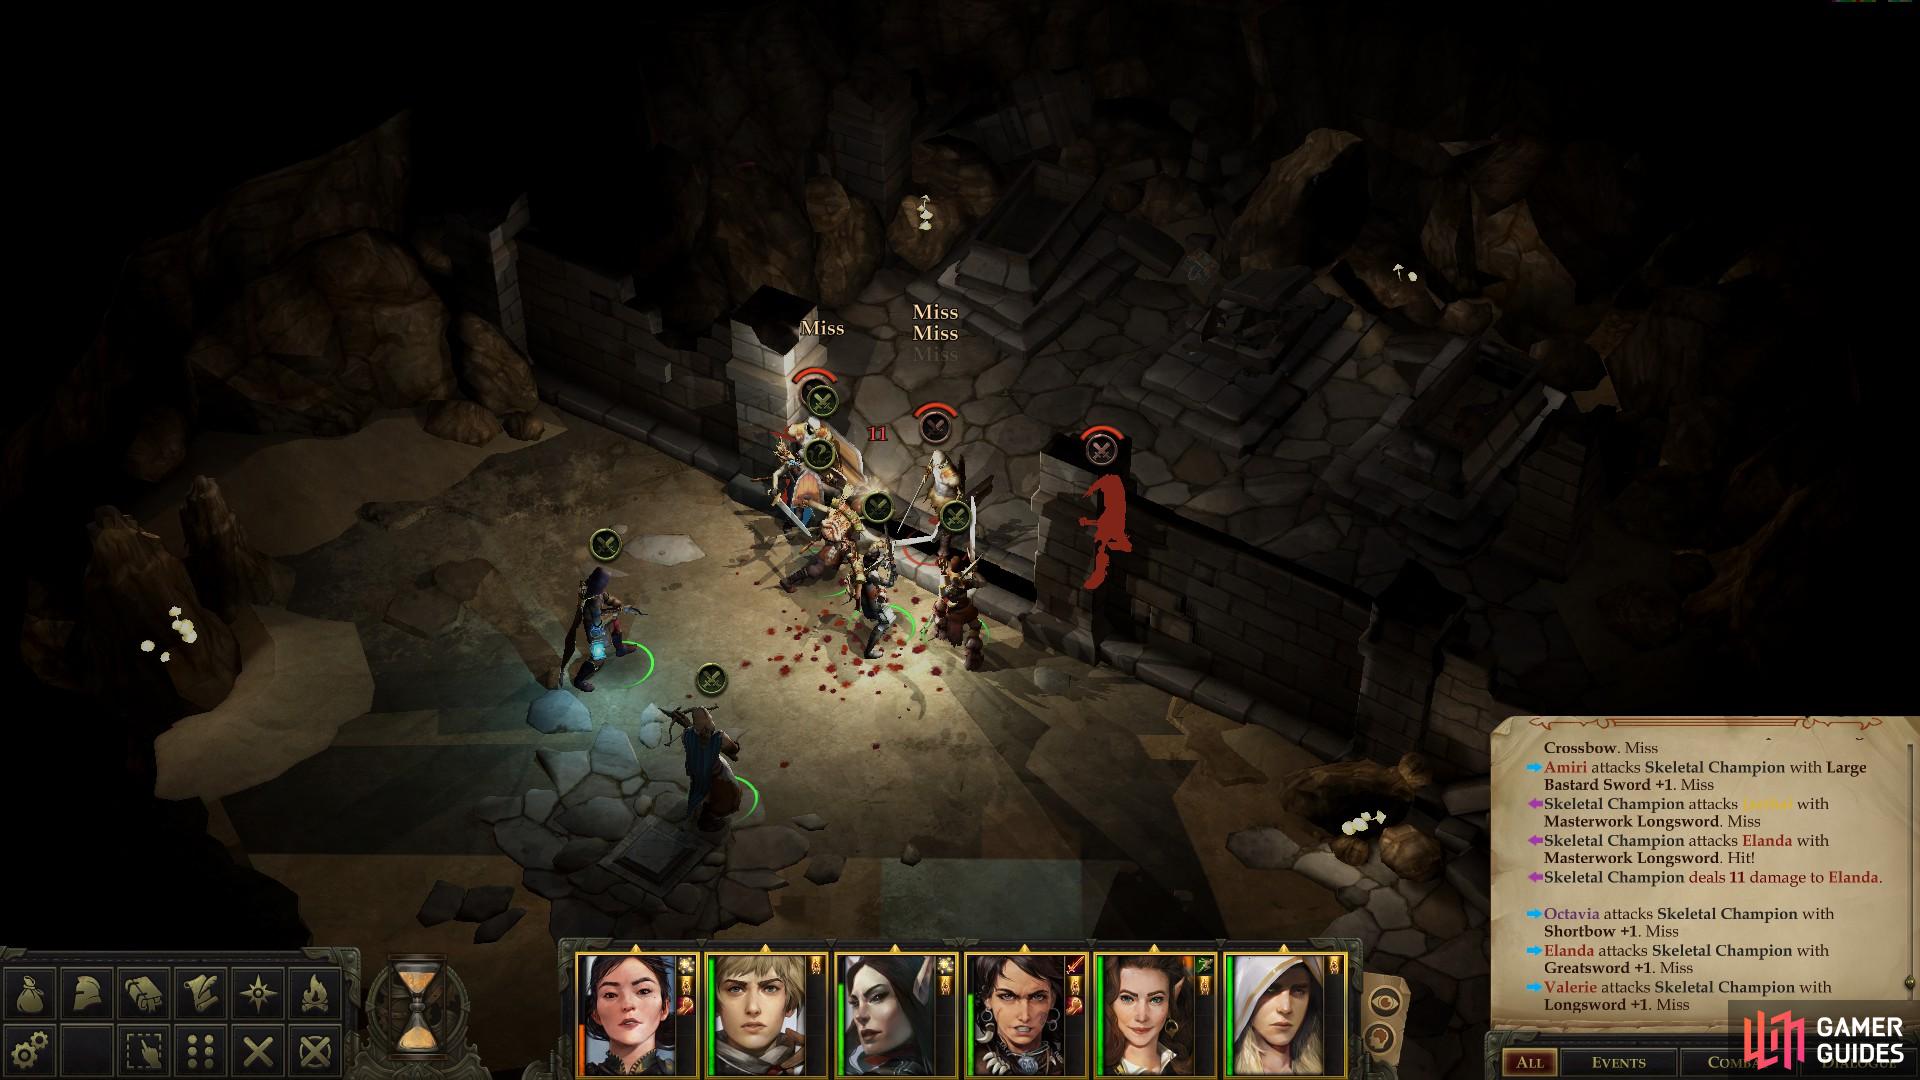
This should open the middle wall section your warriors are standing in front of. Rush them to bottleneck them in the chamber they were trapped in, and focus all your might on them one at a time. These are unusually strong foes, so it may not be a bad idea to buff up before the fight. Two of them wield Masterwork Longswords, Tower Shields and wear Half-Plate, giving them a high Armor Class, while a third bears a Masterwork Greataxe and a Breastplate. The two Skeleton Champions with Masterwork Longswords fortunately aren’t terribly dangerous, offensively, but their staying power makes them a threat. The Skeleton Champion armed with a Masterwork Greataxe hits harder and strikes truer, but it isn’t as well protected, so take it down first.
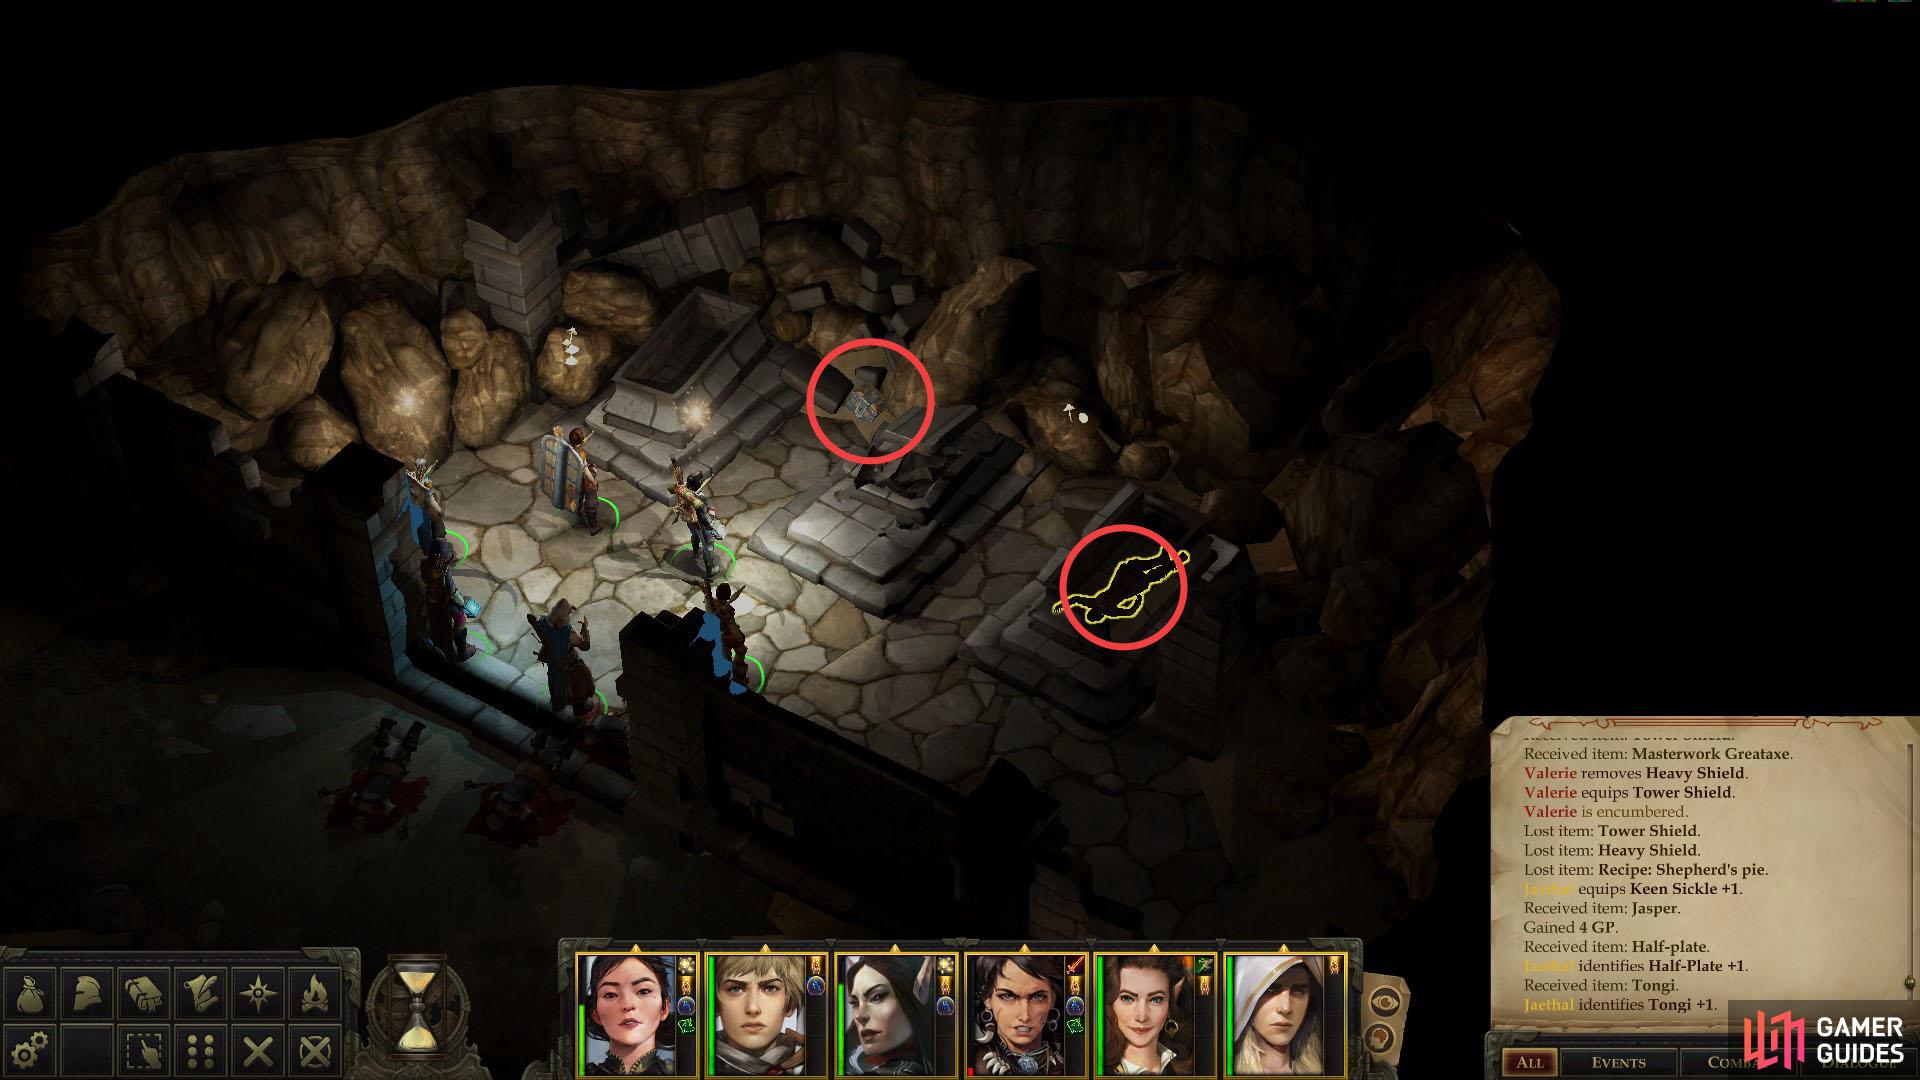
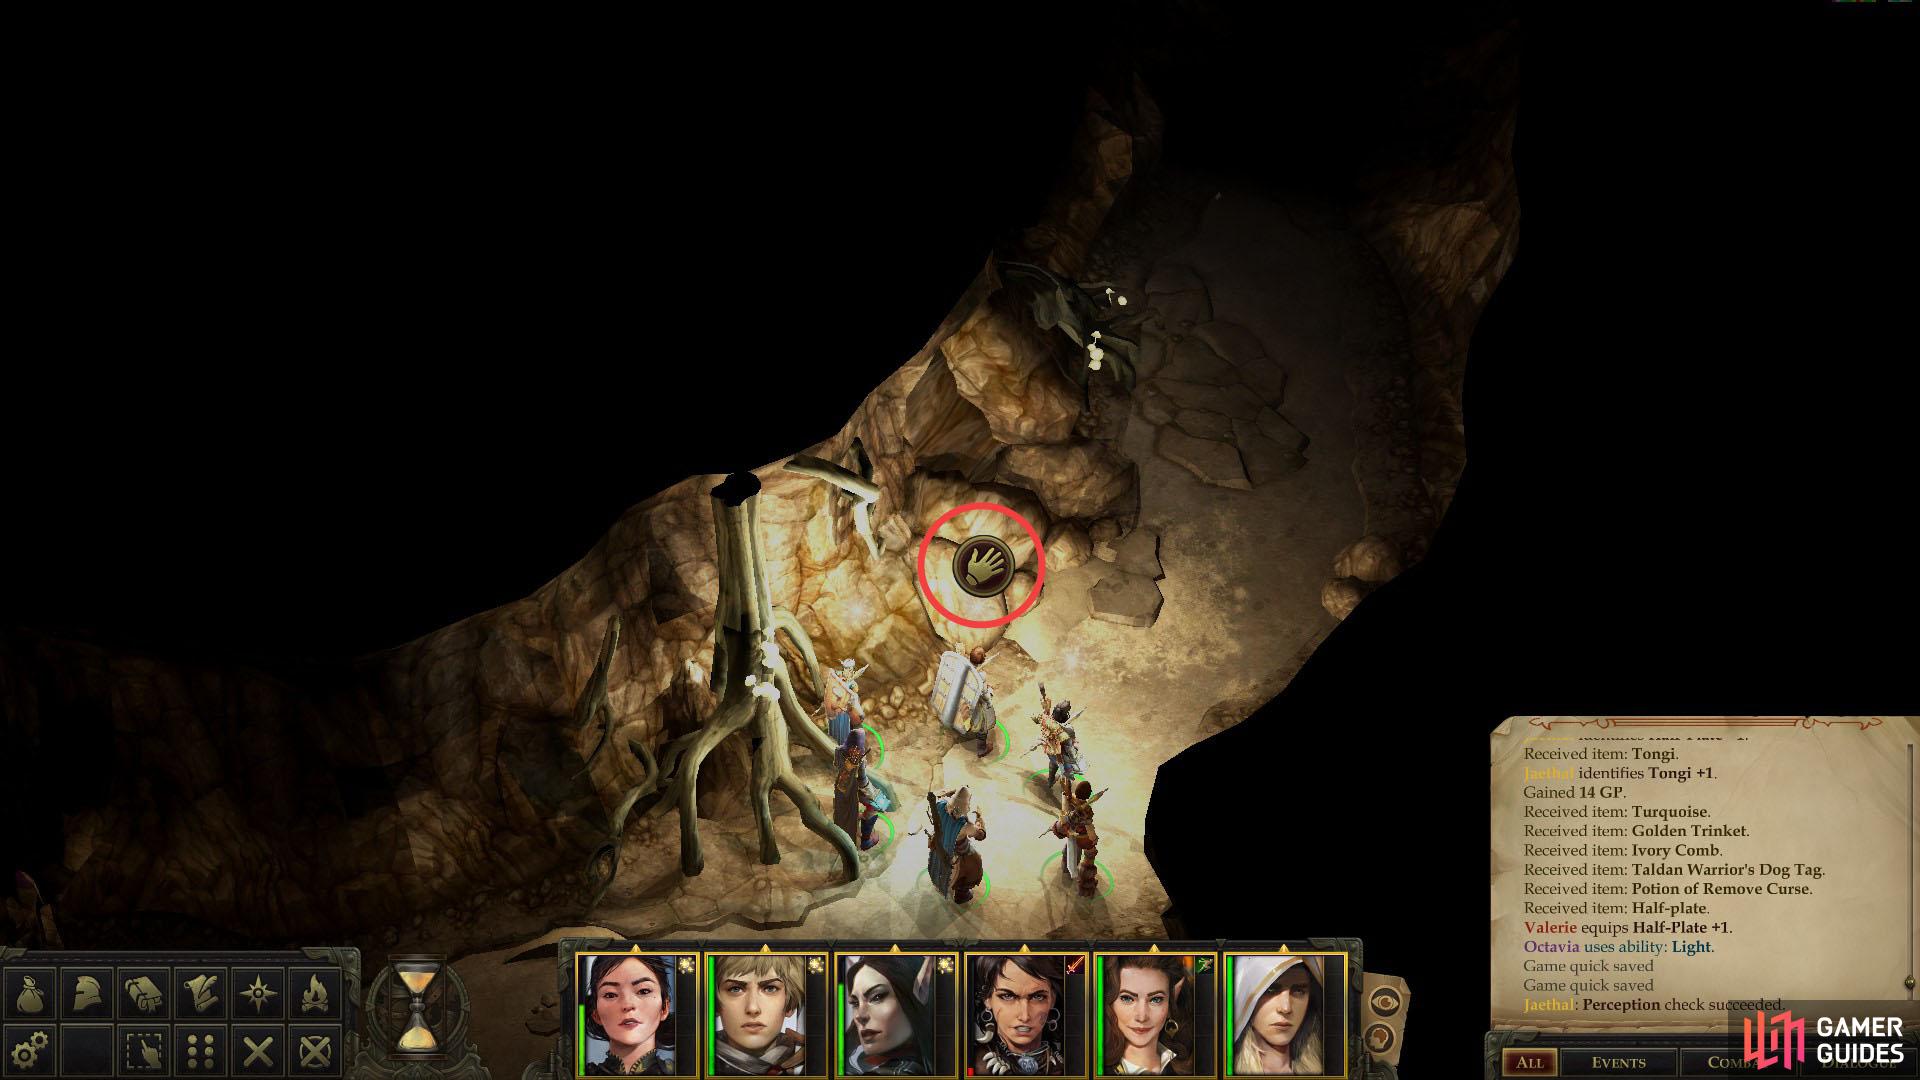
Once they’re smote, loot them for their two Masterwork Longswords and the Masterwork Greataxe, then enter the area they guarded - apparently a tomb - and plunder a corpse to obtain a Taldan Warrior’s Dog Tag and a Potion of Remove Curse, then loot a chest wherein you can find a suit of Half-Plate +1 and a Tongi +1. How can grave-robbing be bad when the rewards are so good?
(1 of 3) Find the hidden entrance to the Mite Hermit’s lair.
The Mite Hermit
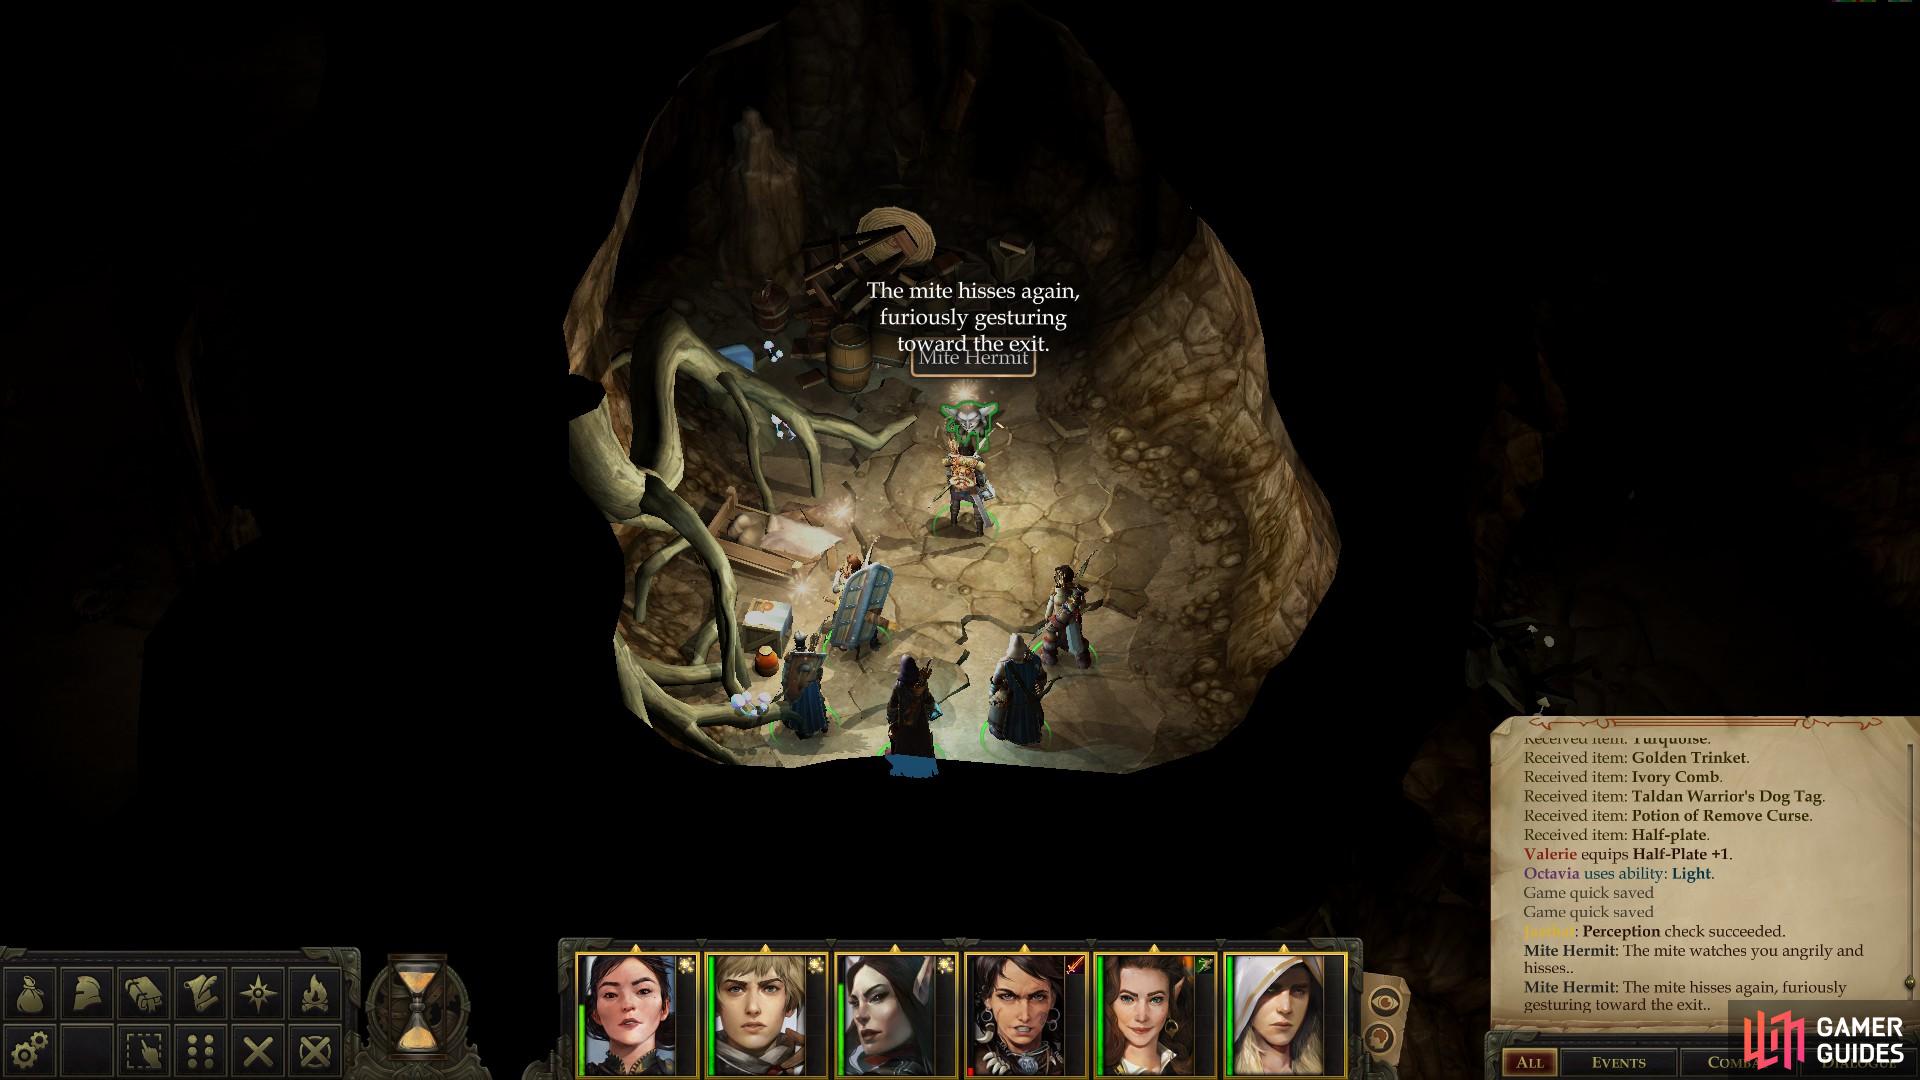
It’s time to check out those forks which when neglected earlier, explore the center of this area, and finally be done with this business. Backtrack south to the area transition, then east to the second of the two forks that didn’t get fully explored. Head up the previously unexplored northeastern passage and pass a [Perception 10] check to find another hidden chamber, which you can access by pressing “Tab” and using the interact icon along the western wall.
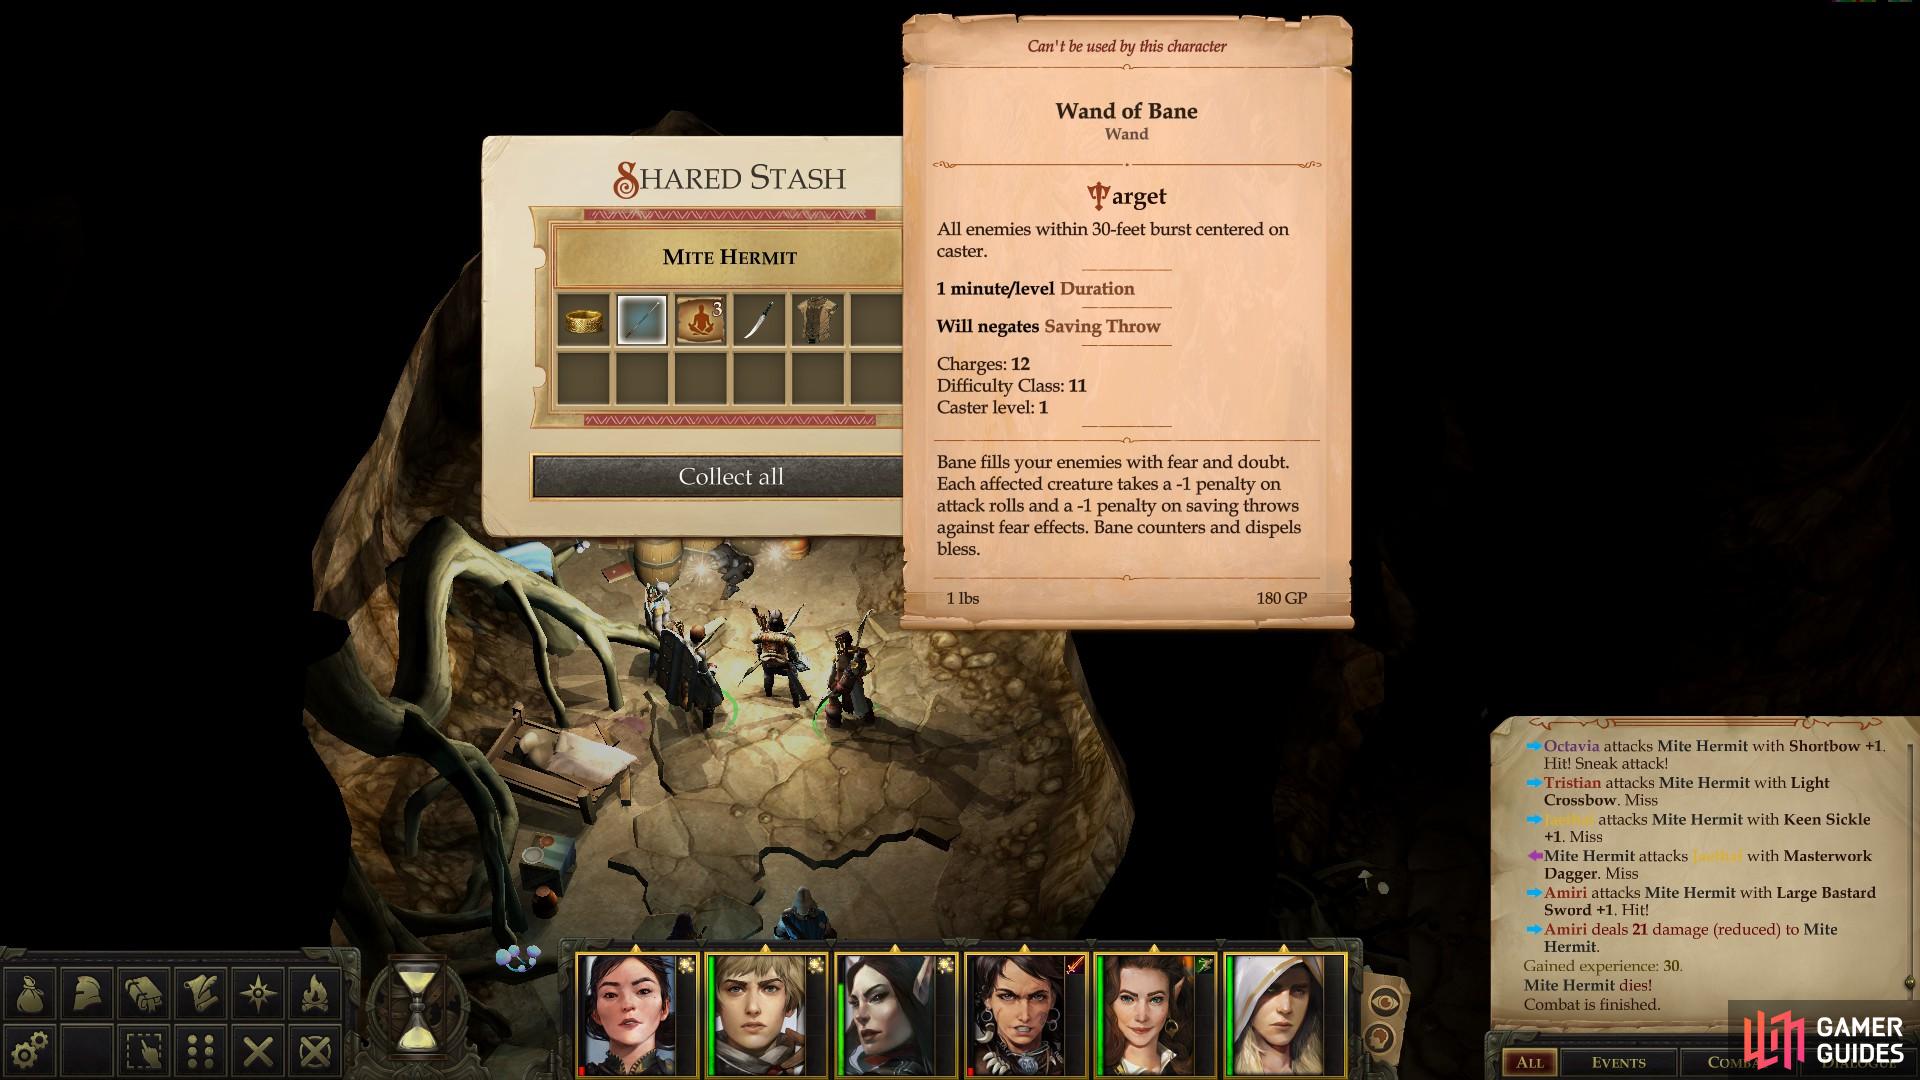
In the hidden chamber you’ll find a Mite Hermit, which lives up to its name by being rather ornery. Try to talk to it three times, and after two warning hisses it’ll turn hostile and attack. While stronger than your average Mite, it’s nothing your party can’t easily handle. Cut it down, then loot it for a Masterwork Dagger, a Wand of Bane, and three Scrolls of Restoration, Lesser, among other, less notable loot.
The Centipede Lair
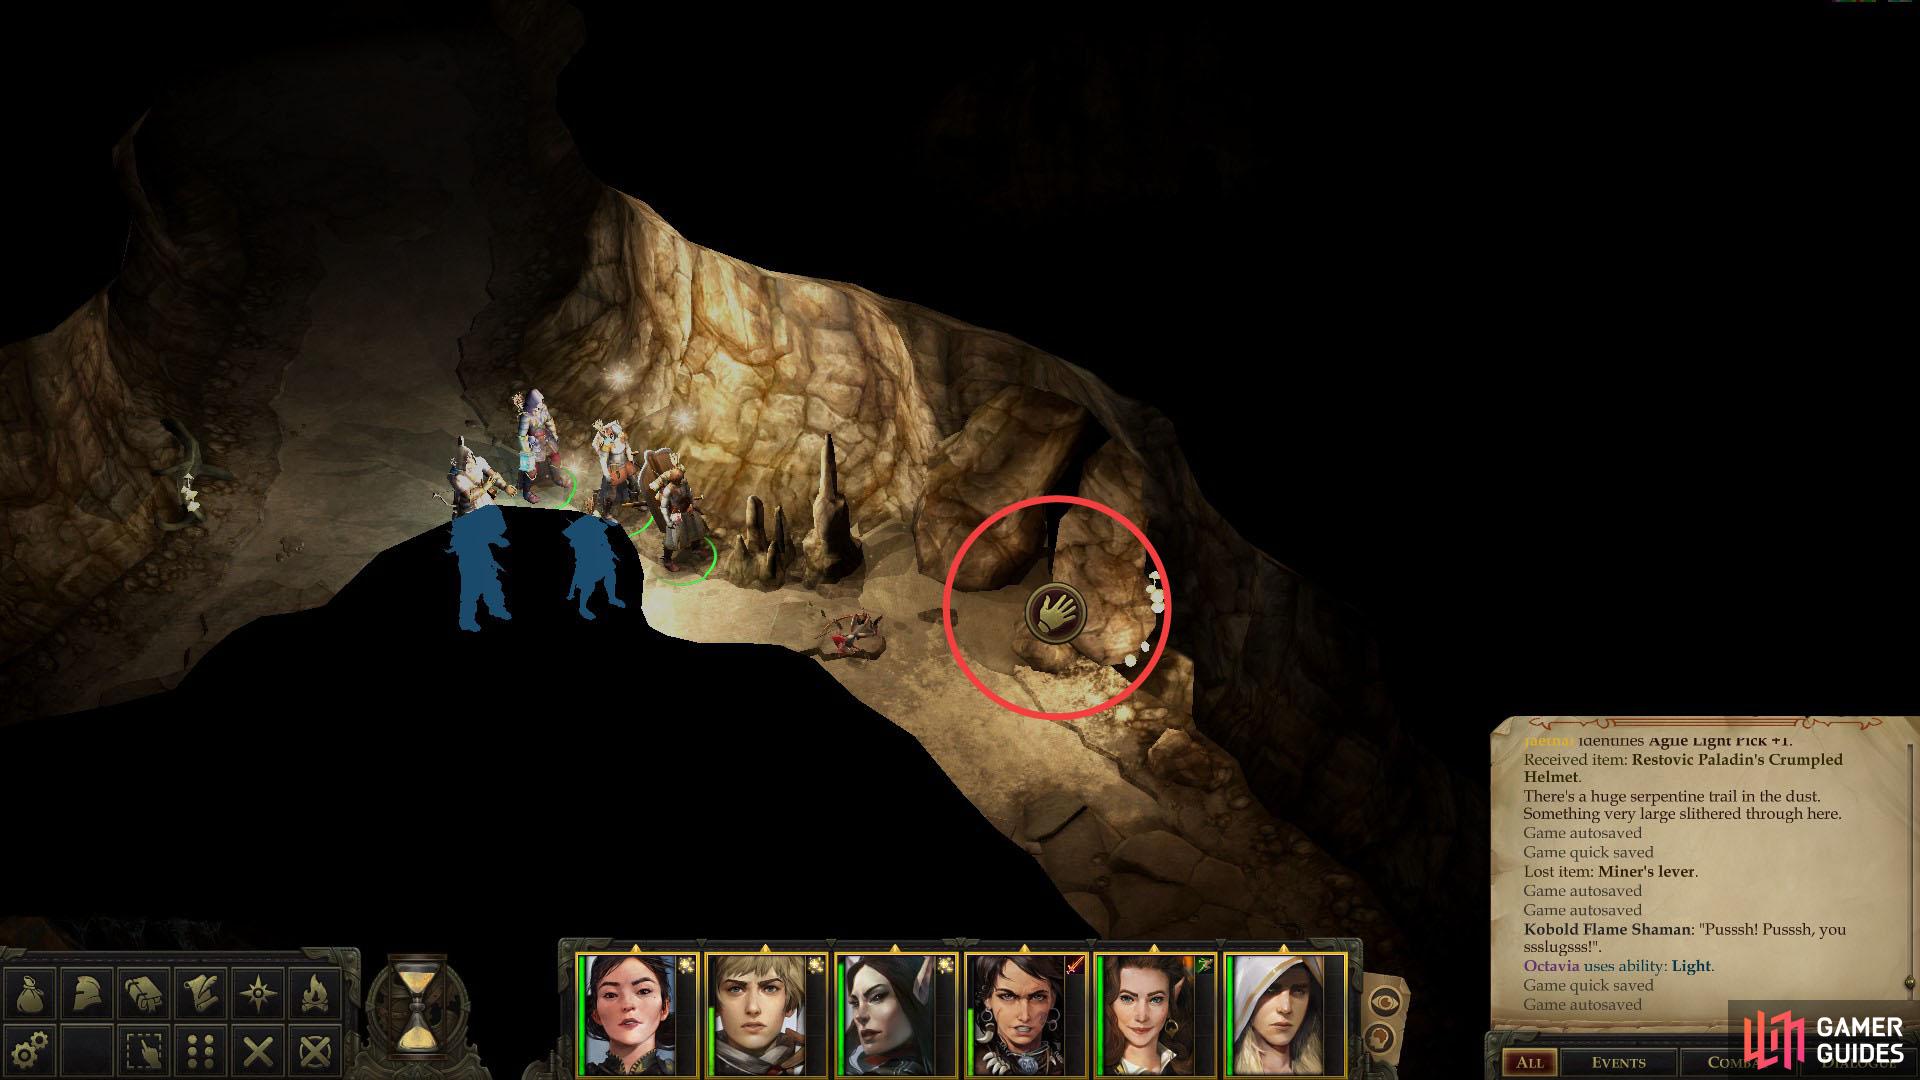
Leave the Mite Hermit’s lair and explore to the northeast if you wish, where you’ll find another area transition leading to the Old Sycamore Caves. That being the case, head southwest to return to the fork, then head southeast to reach the first such fork. From this fork head southeast to reach a cliff, which you can climb down by pressing “Tab” and searching for an interact button. Once down head east and dispatch another four Giant Centipedes, including two Spitting Giant Centipedes. Shortly beyond them you’ll find… another fork!

(1 of 2) Find the hidden entrance to the kobold’s shrine
Find the hidden entrance to the kobold’s shrine (left), inside of which you can find an Ancient Rostland Coin. (right)
This won’t take too long to resolve, fortunately. Head down the eastern tunnel first and pass a [Perception 6] check to spot a cleft in the northern wall you can squeeze through (again, hold down “Tab” to summon the interact icon, then use it to pass into a hidden chamber). In the hidden chamber beyond this cleft you’ll find another Kobold shrine, identical to the one on the level above. Not sure why the runts needed a secret one, but hey, at least they left a bunch of treasure lying about! Speaking of which, pass another [Perception 10] check to spot a sack you can loot to gain some food-stuffs, loot a pile of rocks in the corner to score An Ancient Rostland Coin and finally loot the obvious chest in the center of the room to obtain a variety of valuable baubles.
(1 of 3) Defeat a wave of smaller centipedes
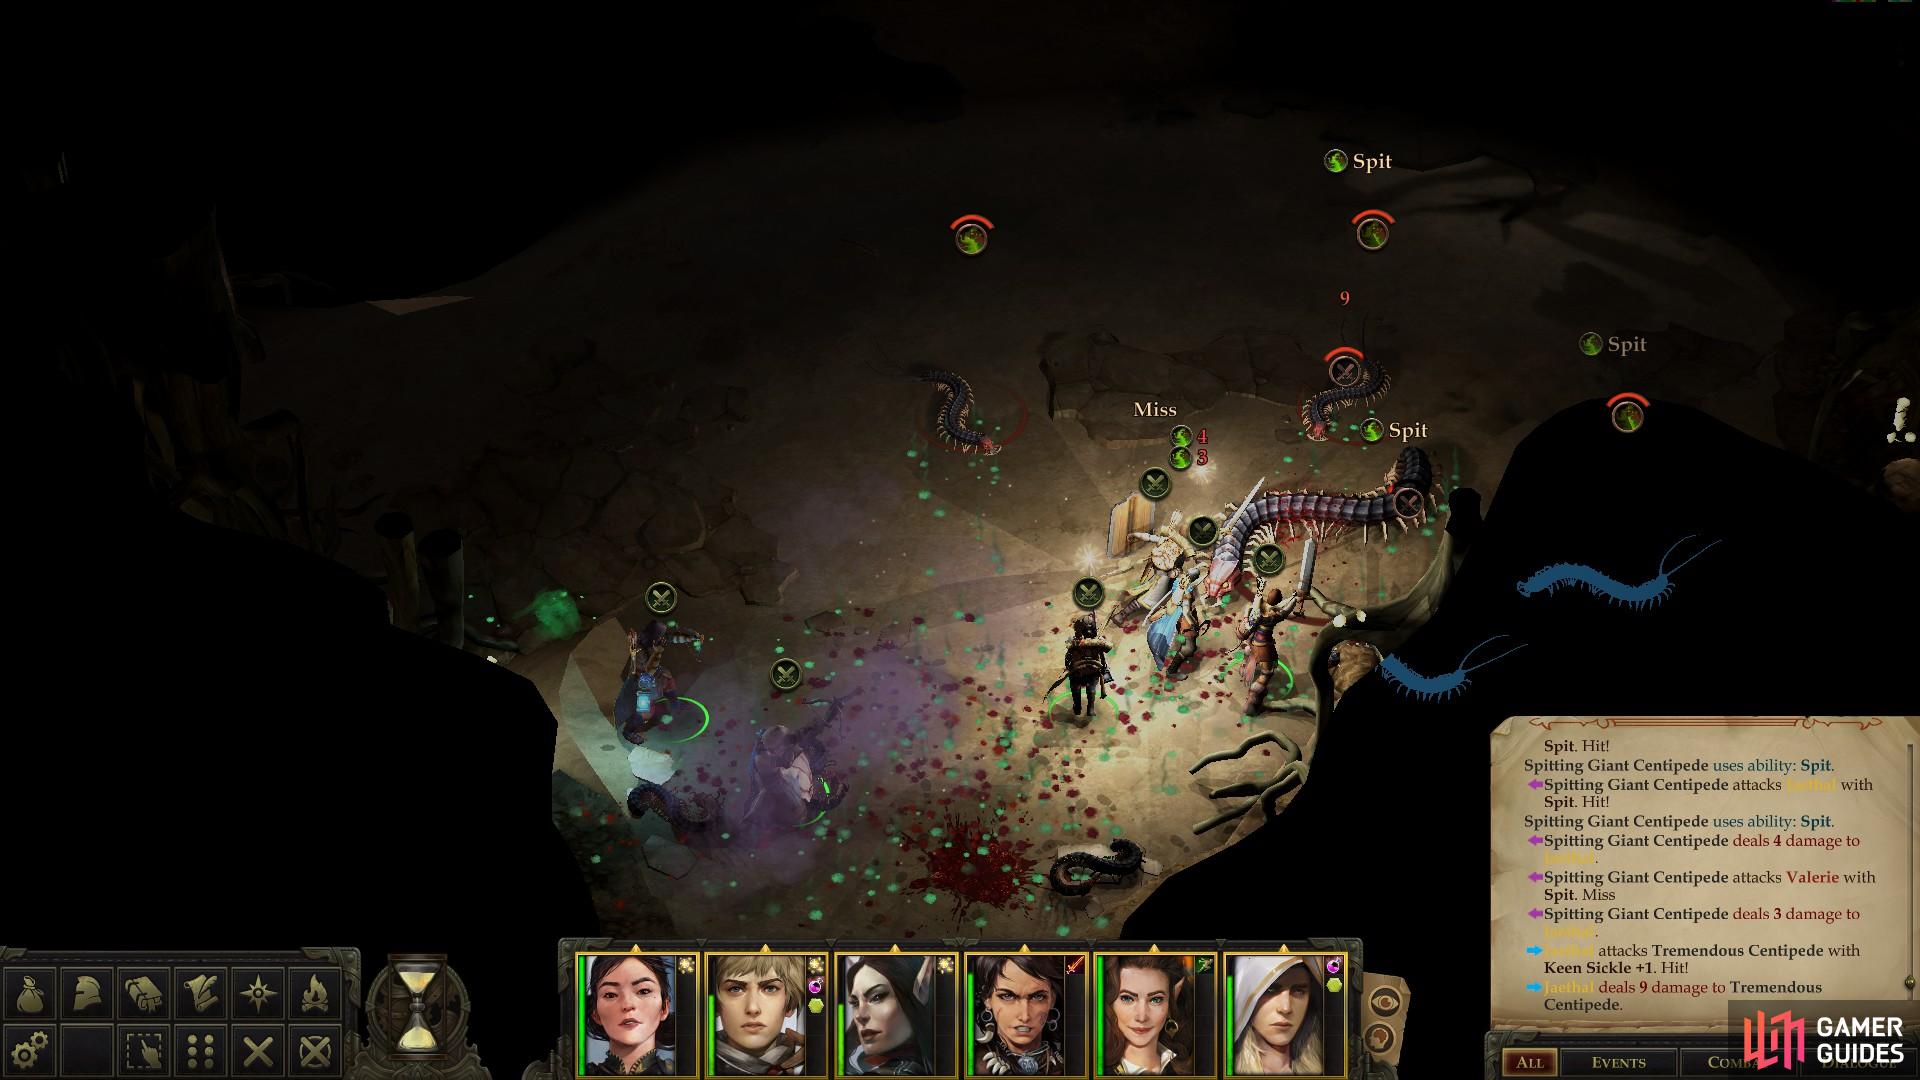
Leave the hidden chamber and go northwest back to the fork, and from there go north - going southeast from the hidden chamber just leads to a dead-end. At the end of this northern tunnel you reach a large chamber, where at first only four Giant Centipedes lurk. Engage them, however, and more Spitting Giant Centipedes will show up down various tunnels, including one spawning behind you in the southern tunnel you came from.
Adding to the reinforcements will be a Spitting Giant Centipede (coming from the northeastern-most tunnel) of unusual size, an aptly named Tremendous Centipede. Not only is this beast sturdier than most of its kin, having more HP and a better Armor Class, but its bite is also much more lethal, hitting harder and more often, thanks to its high Attack bonus. Worse still, it’ll start combat by lobbing poison at its target, potentially poisoning numerous characters at once.
Once the dust (and venom) has settled, head to the northeastern-most passage running off this chamber to find the egg lair of the centipedes. Loot a corpse to obtain a Restovic Paladin’s Crumpled Helmet and an Agile Light Pick +1.
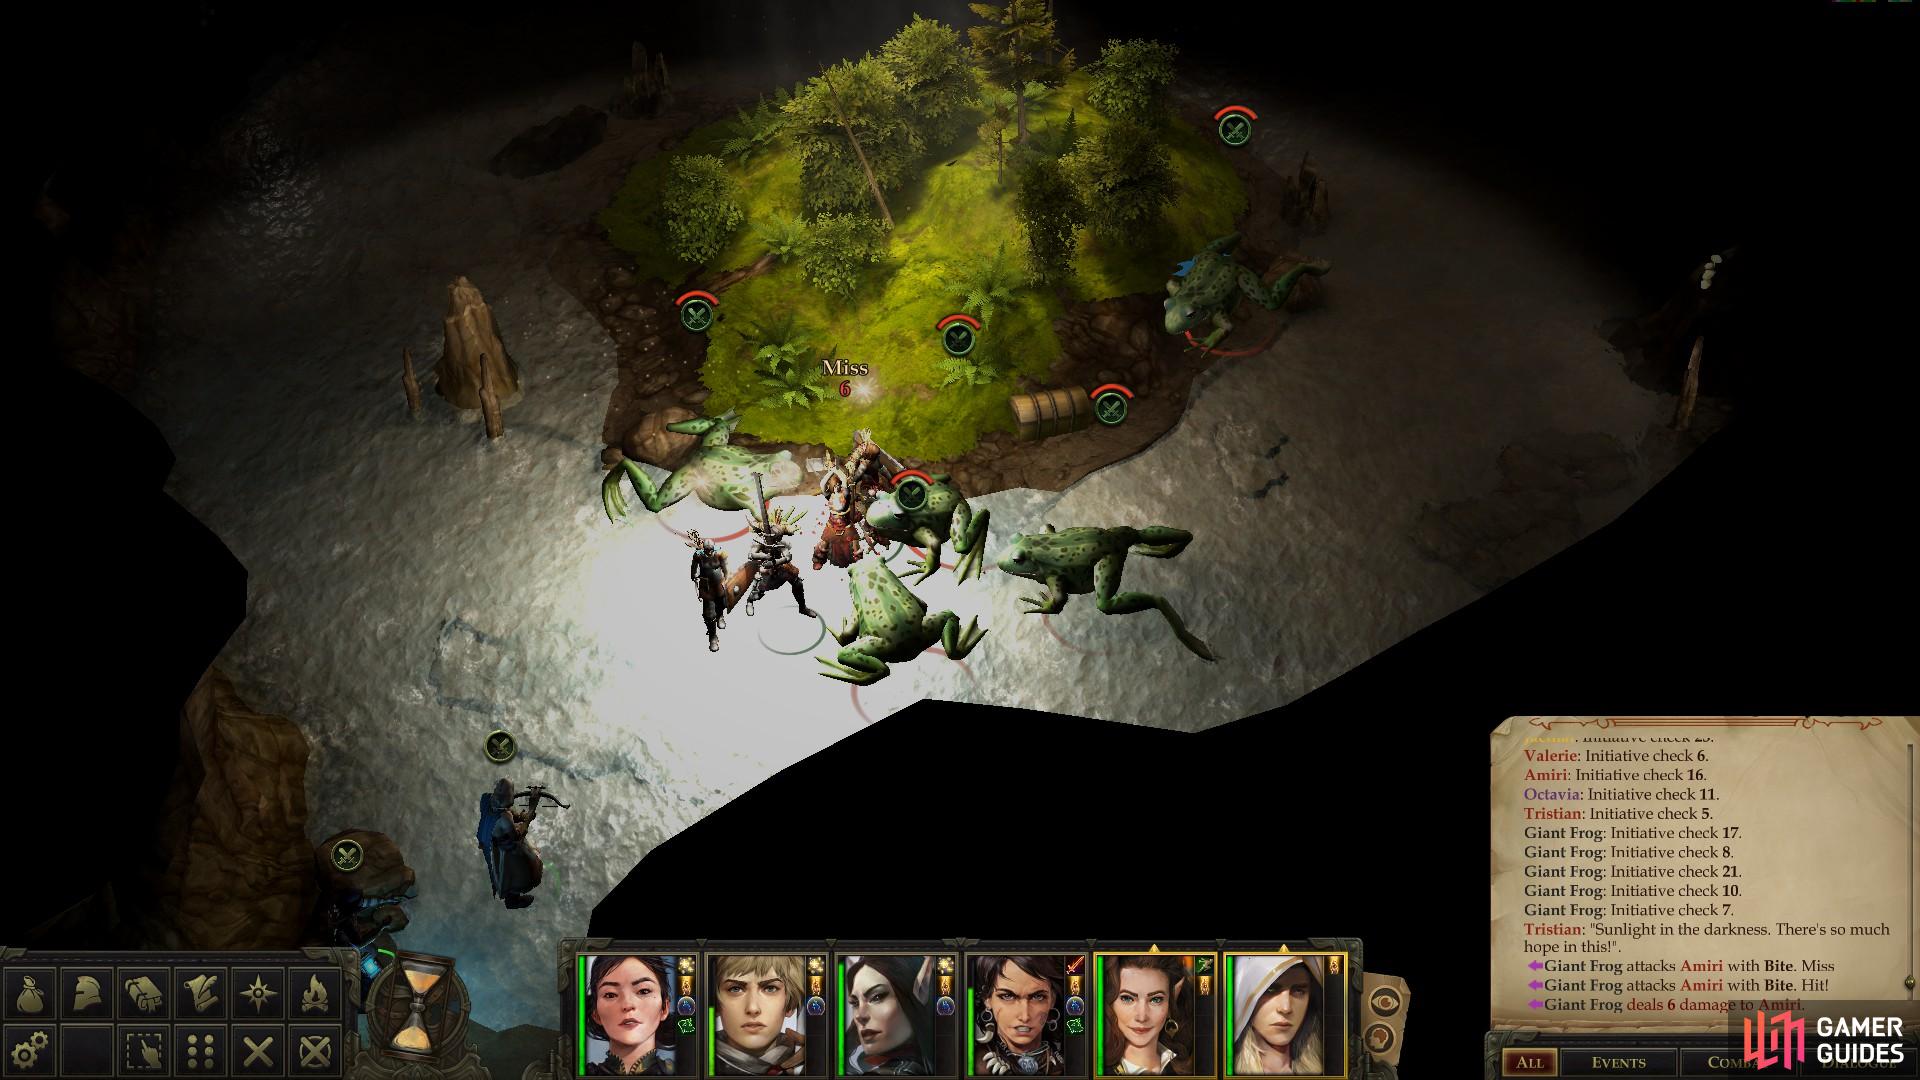
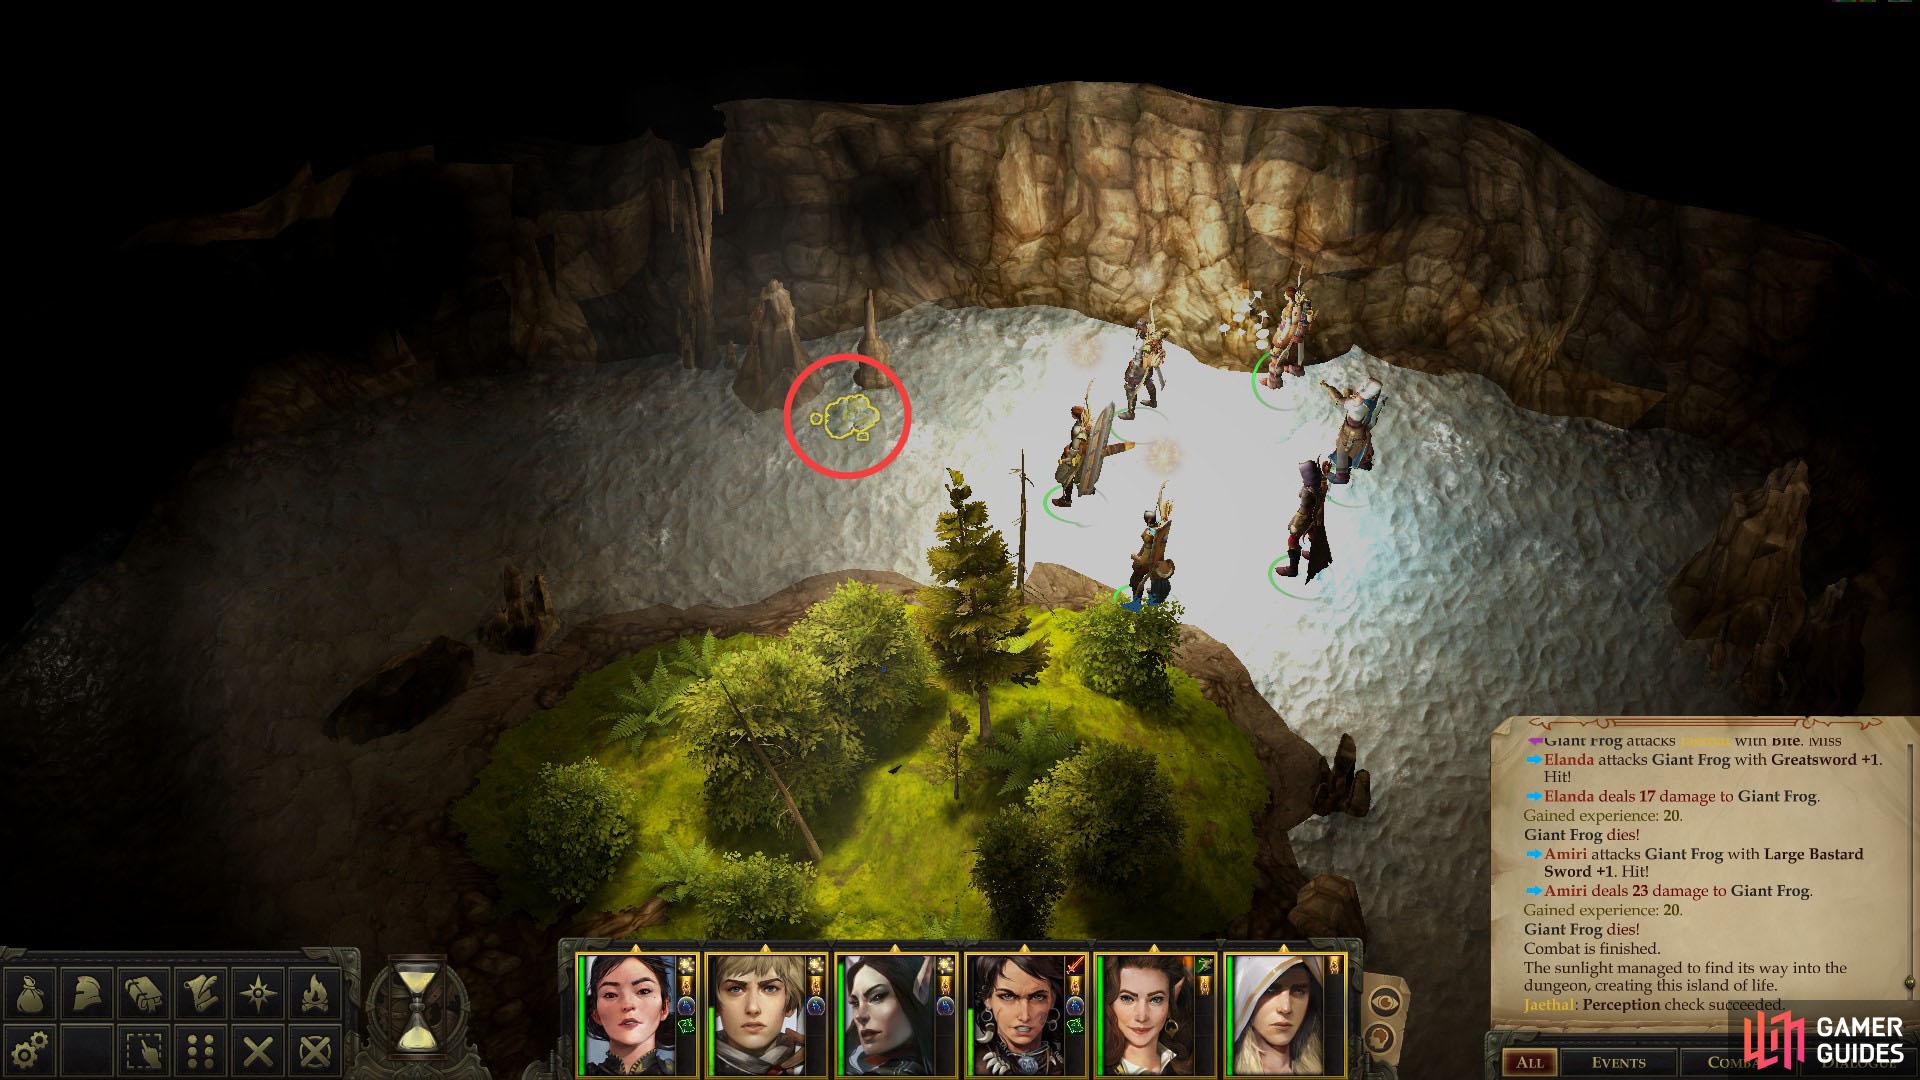
(1 of 3) There’s treasure waiting for you in a watery cave
Oasis in the Depths
Return to the larger chamber to the west, then head up a tunnel to the north and kill another trio of Giant Centipedes. Past them you’ll find yet another fork. If you take the southern of the two passages to the northeast you’ll return to near where you started exploring this area, so ignore it and instead continue north and follow the northern of the two tunnels.
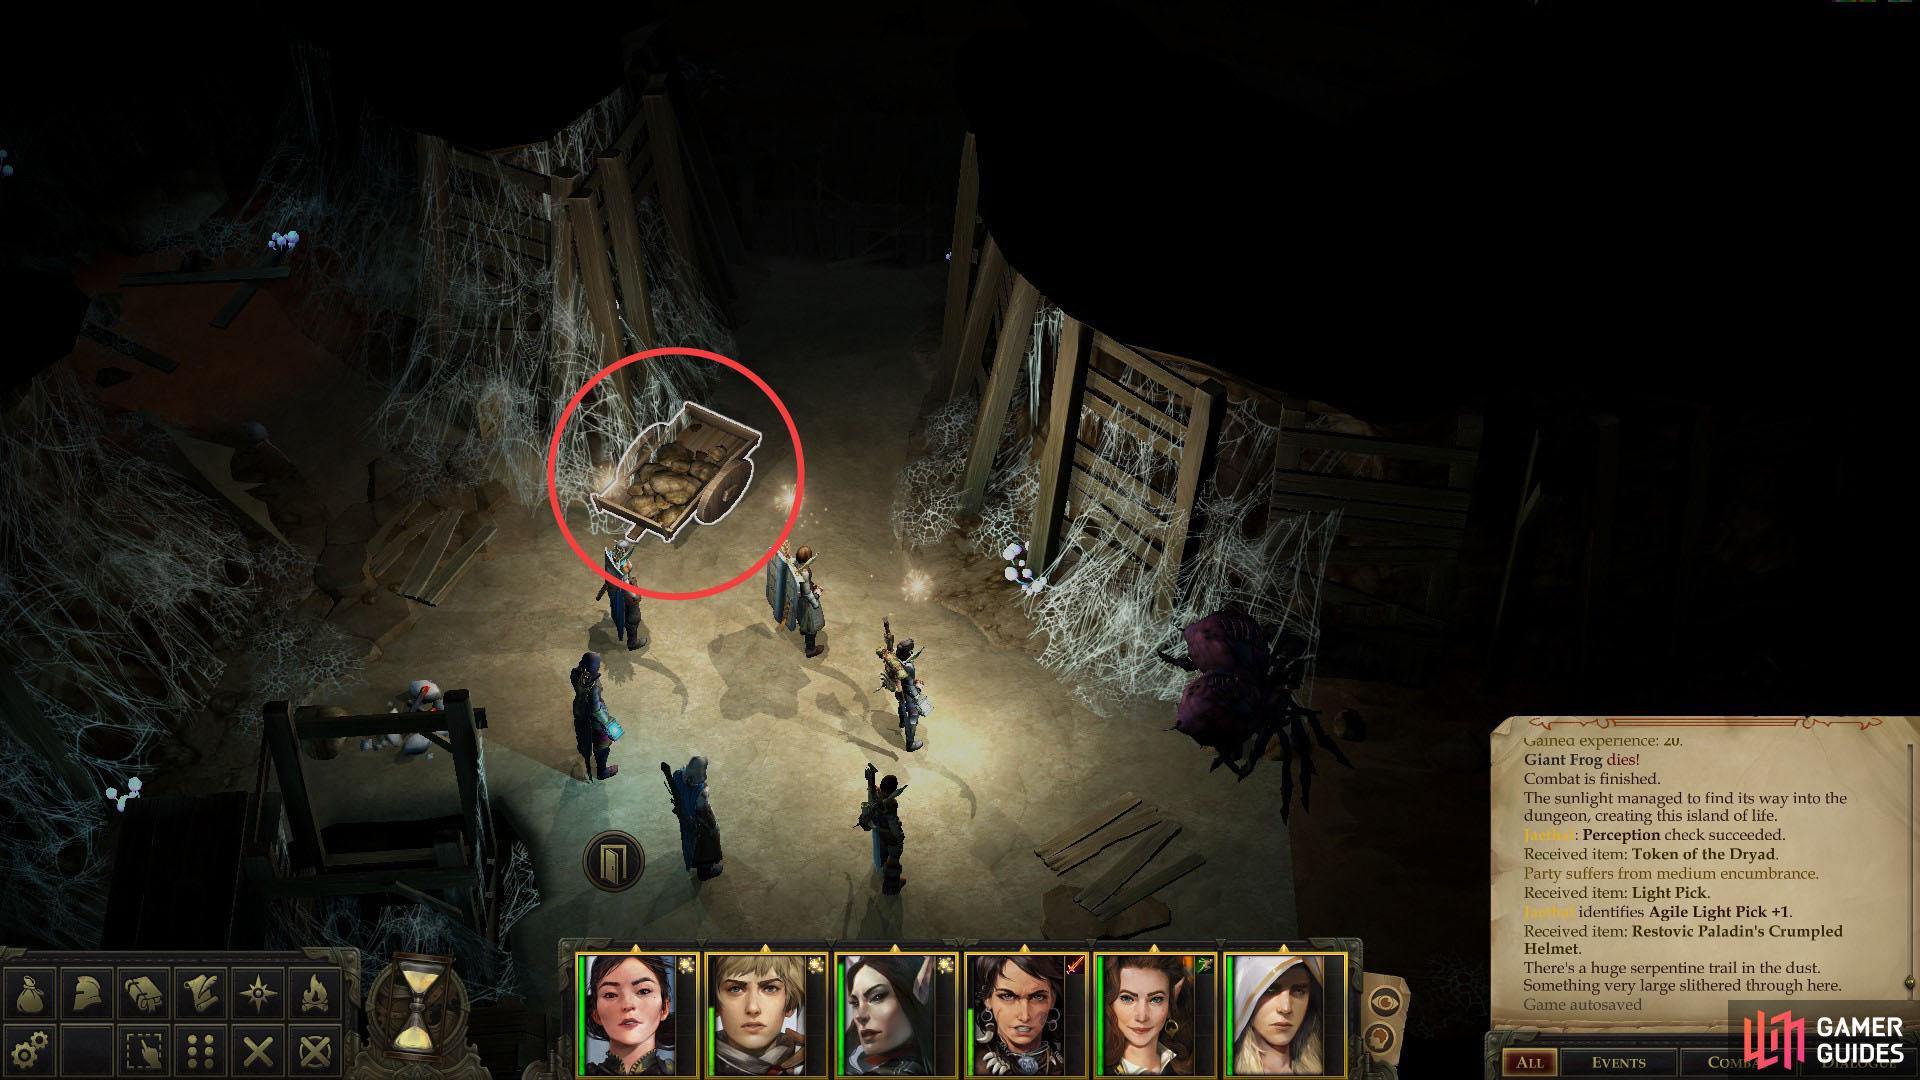
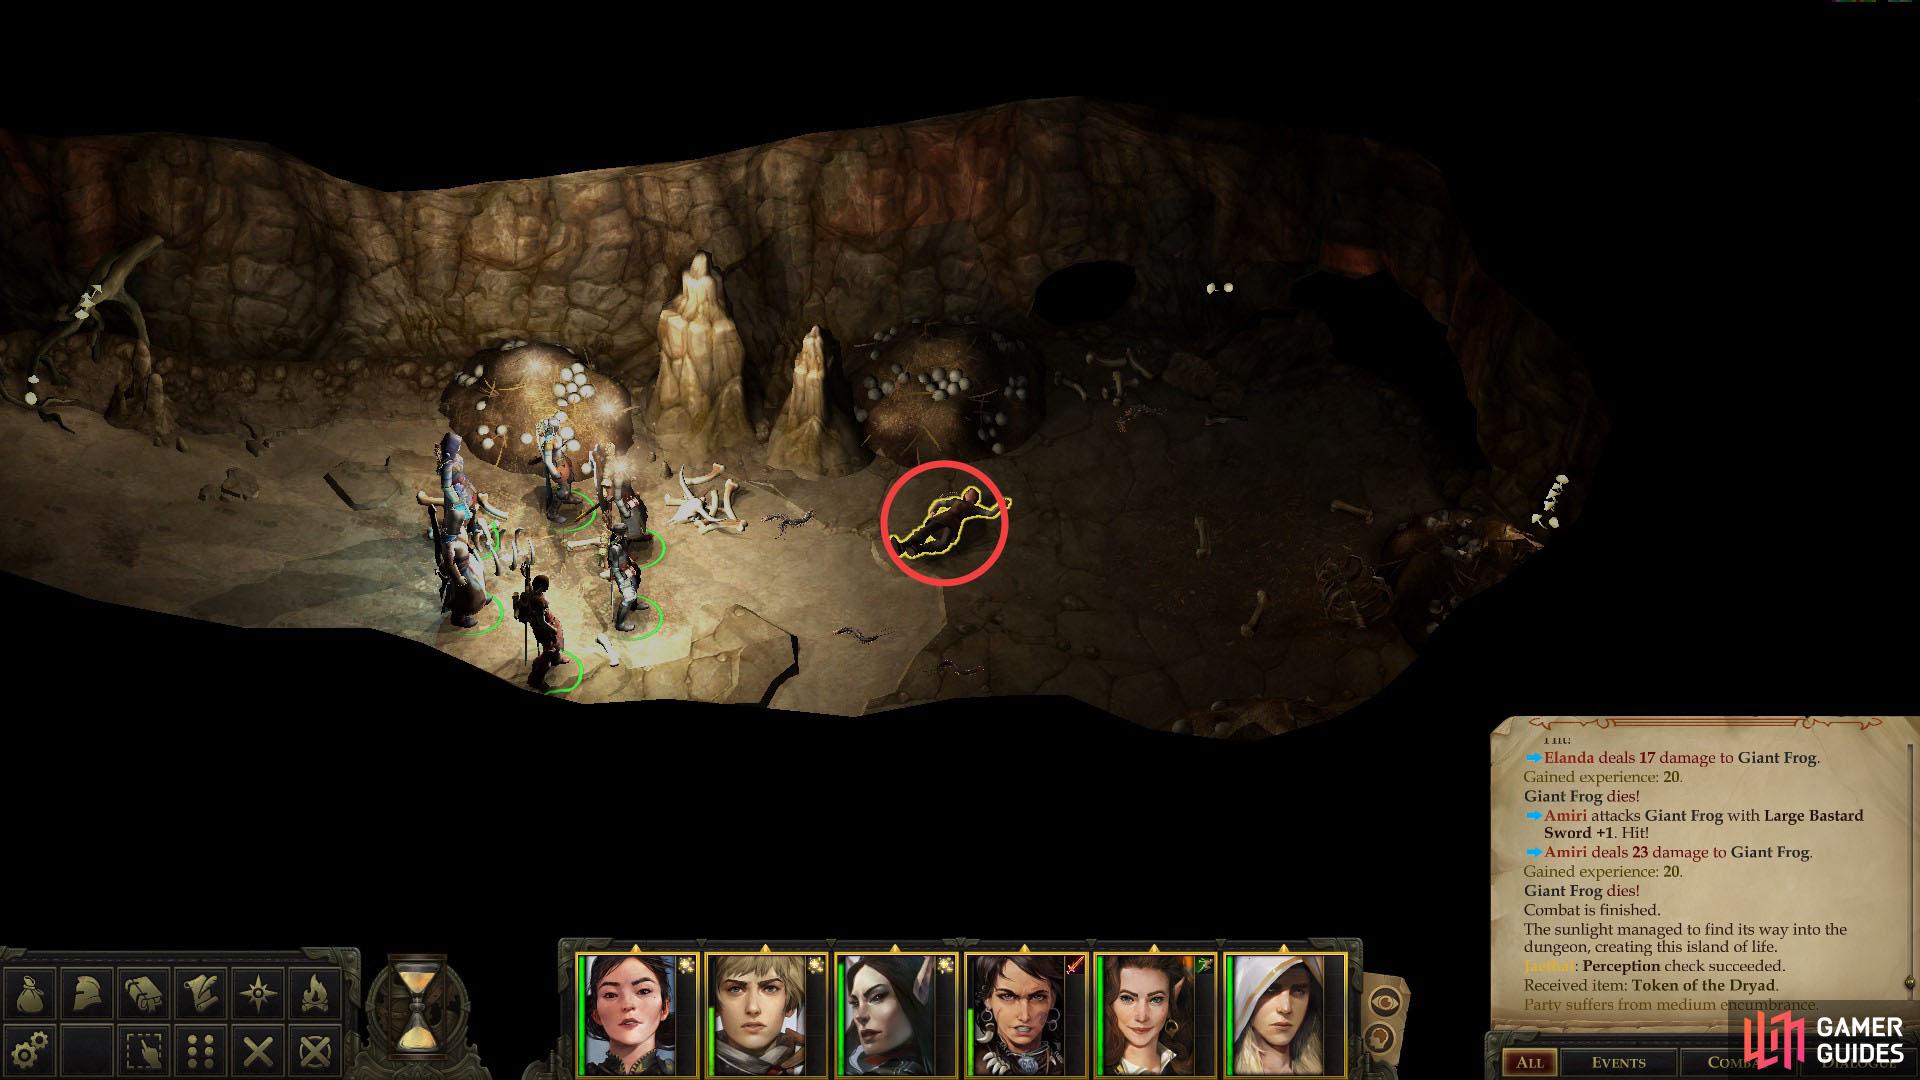
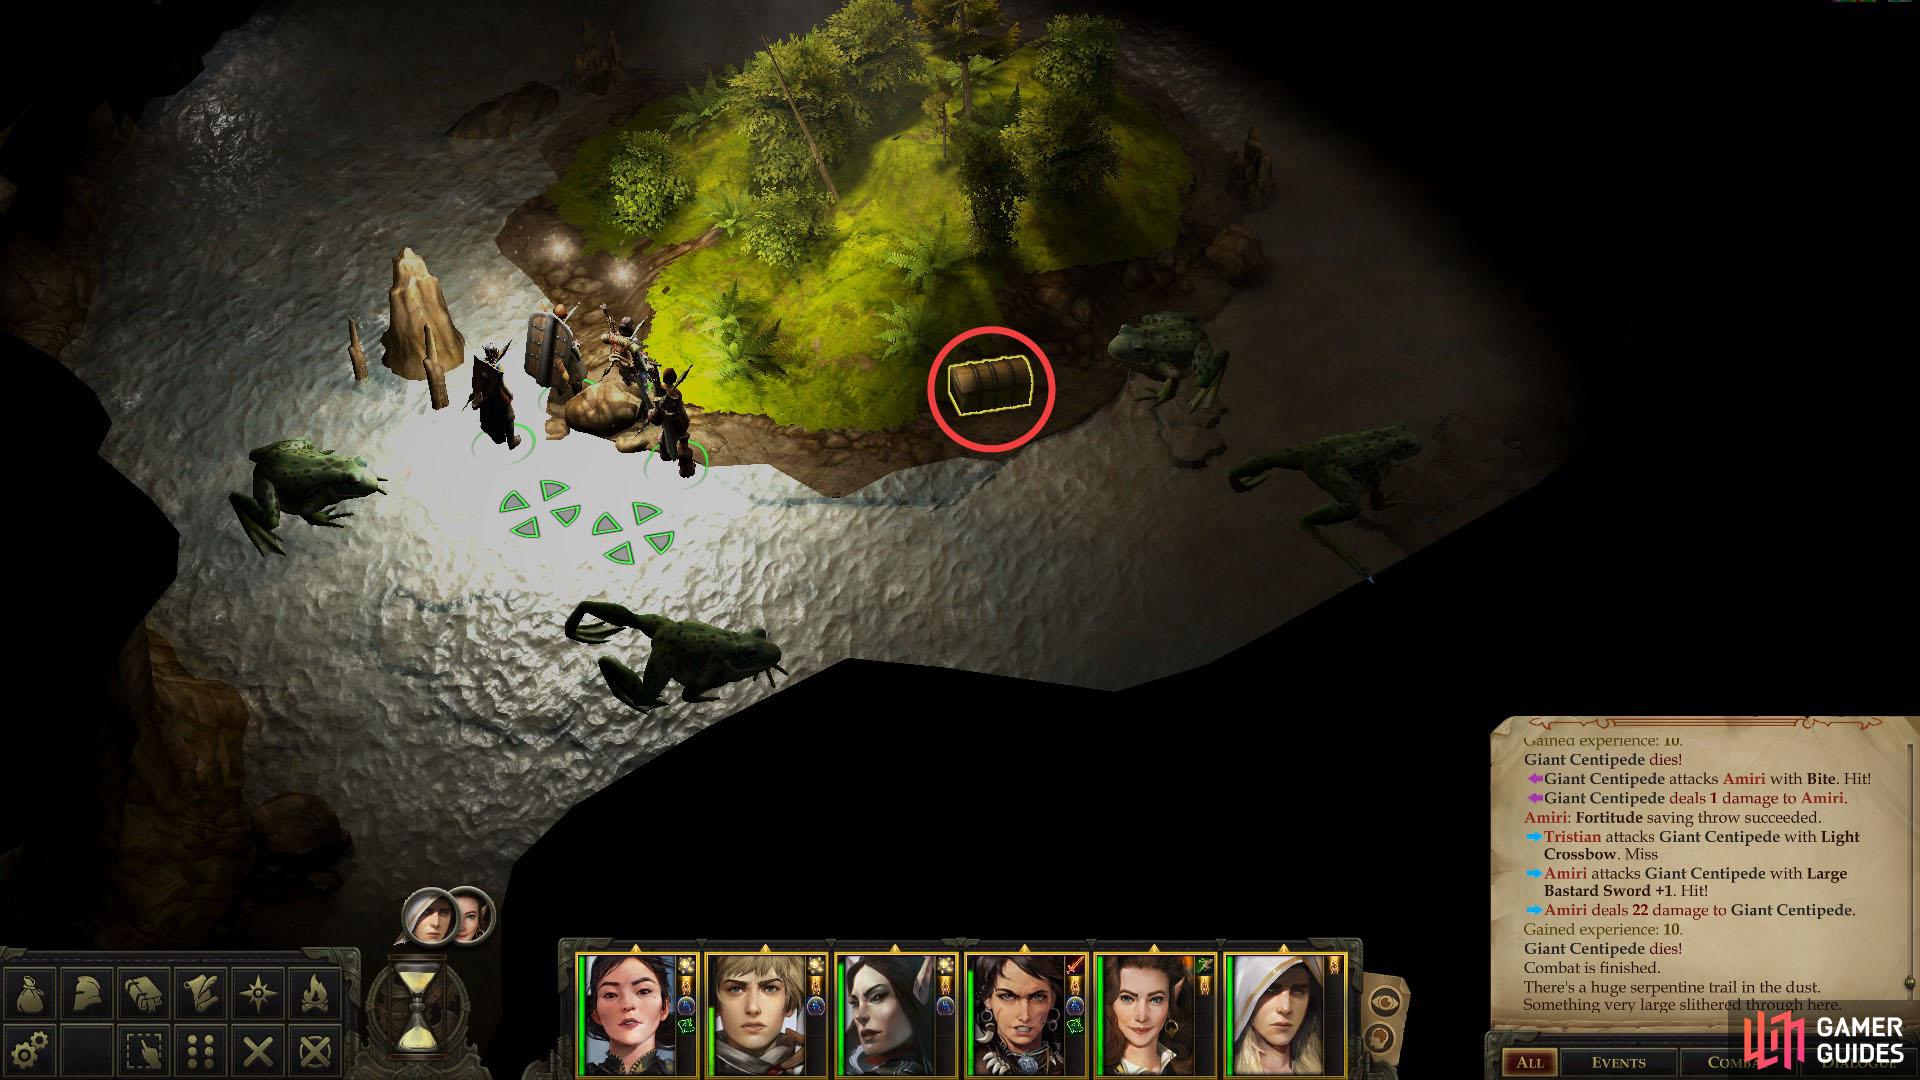
This passage shortly will deposit you in another verdant chamber, which is teeming with life due to a breach in the ceiling that allows sunlight to filter down into the depths. An island of surface flora persists on a hill, around which several Giant Frogs and two Giant Poisonous Frogs (higher stats, and their poison deals Constitution damage) pace, and a chest sits enticingly on the southern end of this little island. For whatever reason, the frogs are strangely materialistic, and they will become hostile if you attempt to pocket the treasures in their chest. Plunder the chest to score a Golden Toad, fight off the Giant Frogs, then head to the northern end of the chamber and pass a [Perception 6] check to find a Token of the Dryad hiding in some rocks.
The Golden Toad is actually an amulet which… does nothing besides burden you with ten pounds of encumbrance. Maybe it’s this game’s version of the Golden Pantaloons?
With that, you’re finally done exploring, time to finish up this area’s two major questlines, which are covered below, in End of the Rivalry.
 Sign up
No Comments