

This phase of Season of Bloom will become available after you clear the Goblin Fort area and learn the location of the Womb of Lamashtu. Jhod and Kesten are both in mortal peril, the former from the monsters that certainly appeared in the capital during The Bloom, and the latter… well, because he’s too stupid to not run off into danger unless your protagonist restrains him with a [Lawful]-exclusive dialog option. If you want to save Jhod (at the expense of Kesten’s life), or if you convinced Kesten to return to the capital, you’ll need to return to your capital to deal with the beasts there. If Kesten left for the Womb of Lamashtu and you’d rather keep him alive rather than Jhod, you can skip this page entirely.
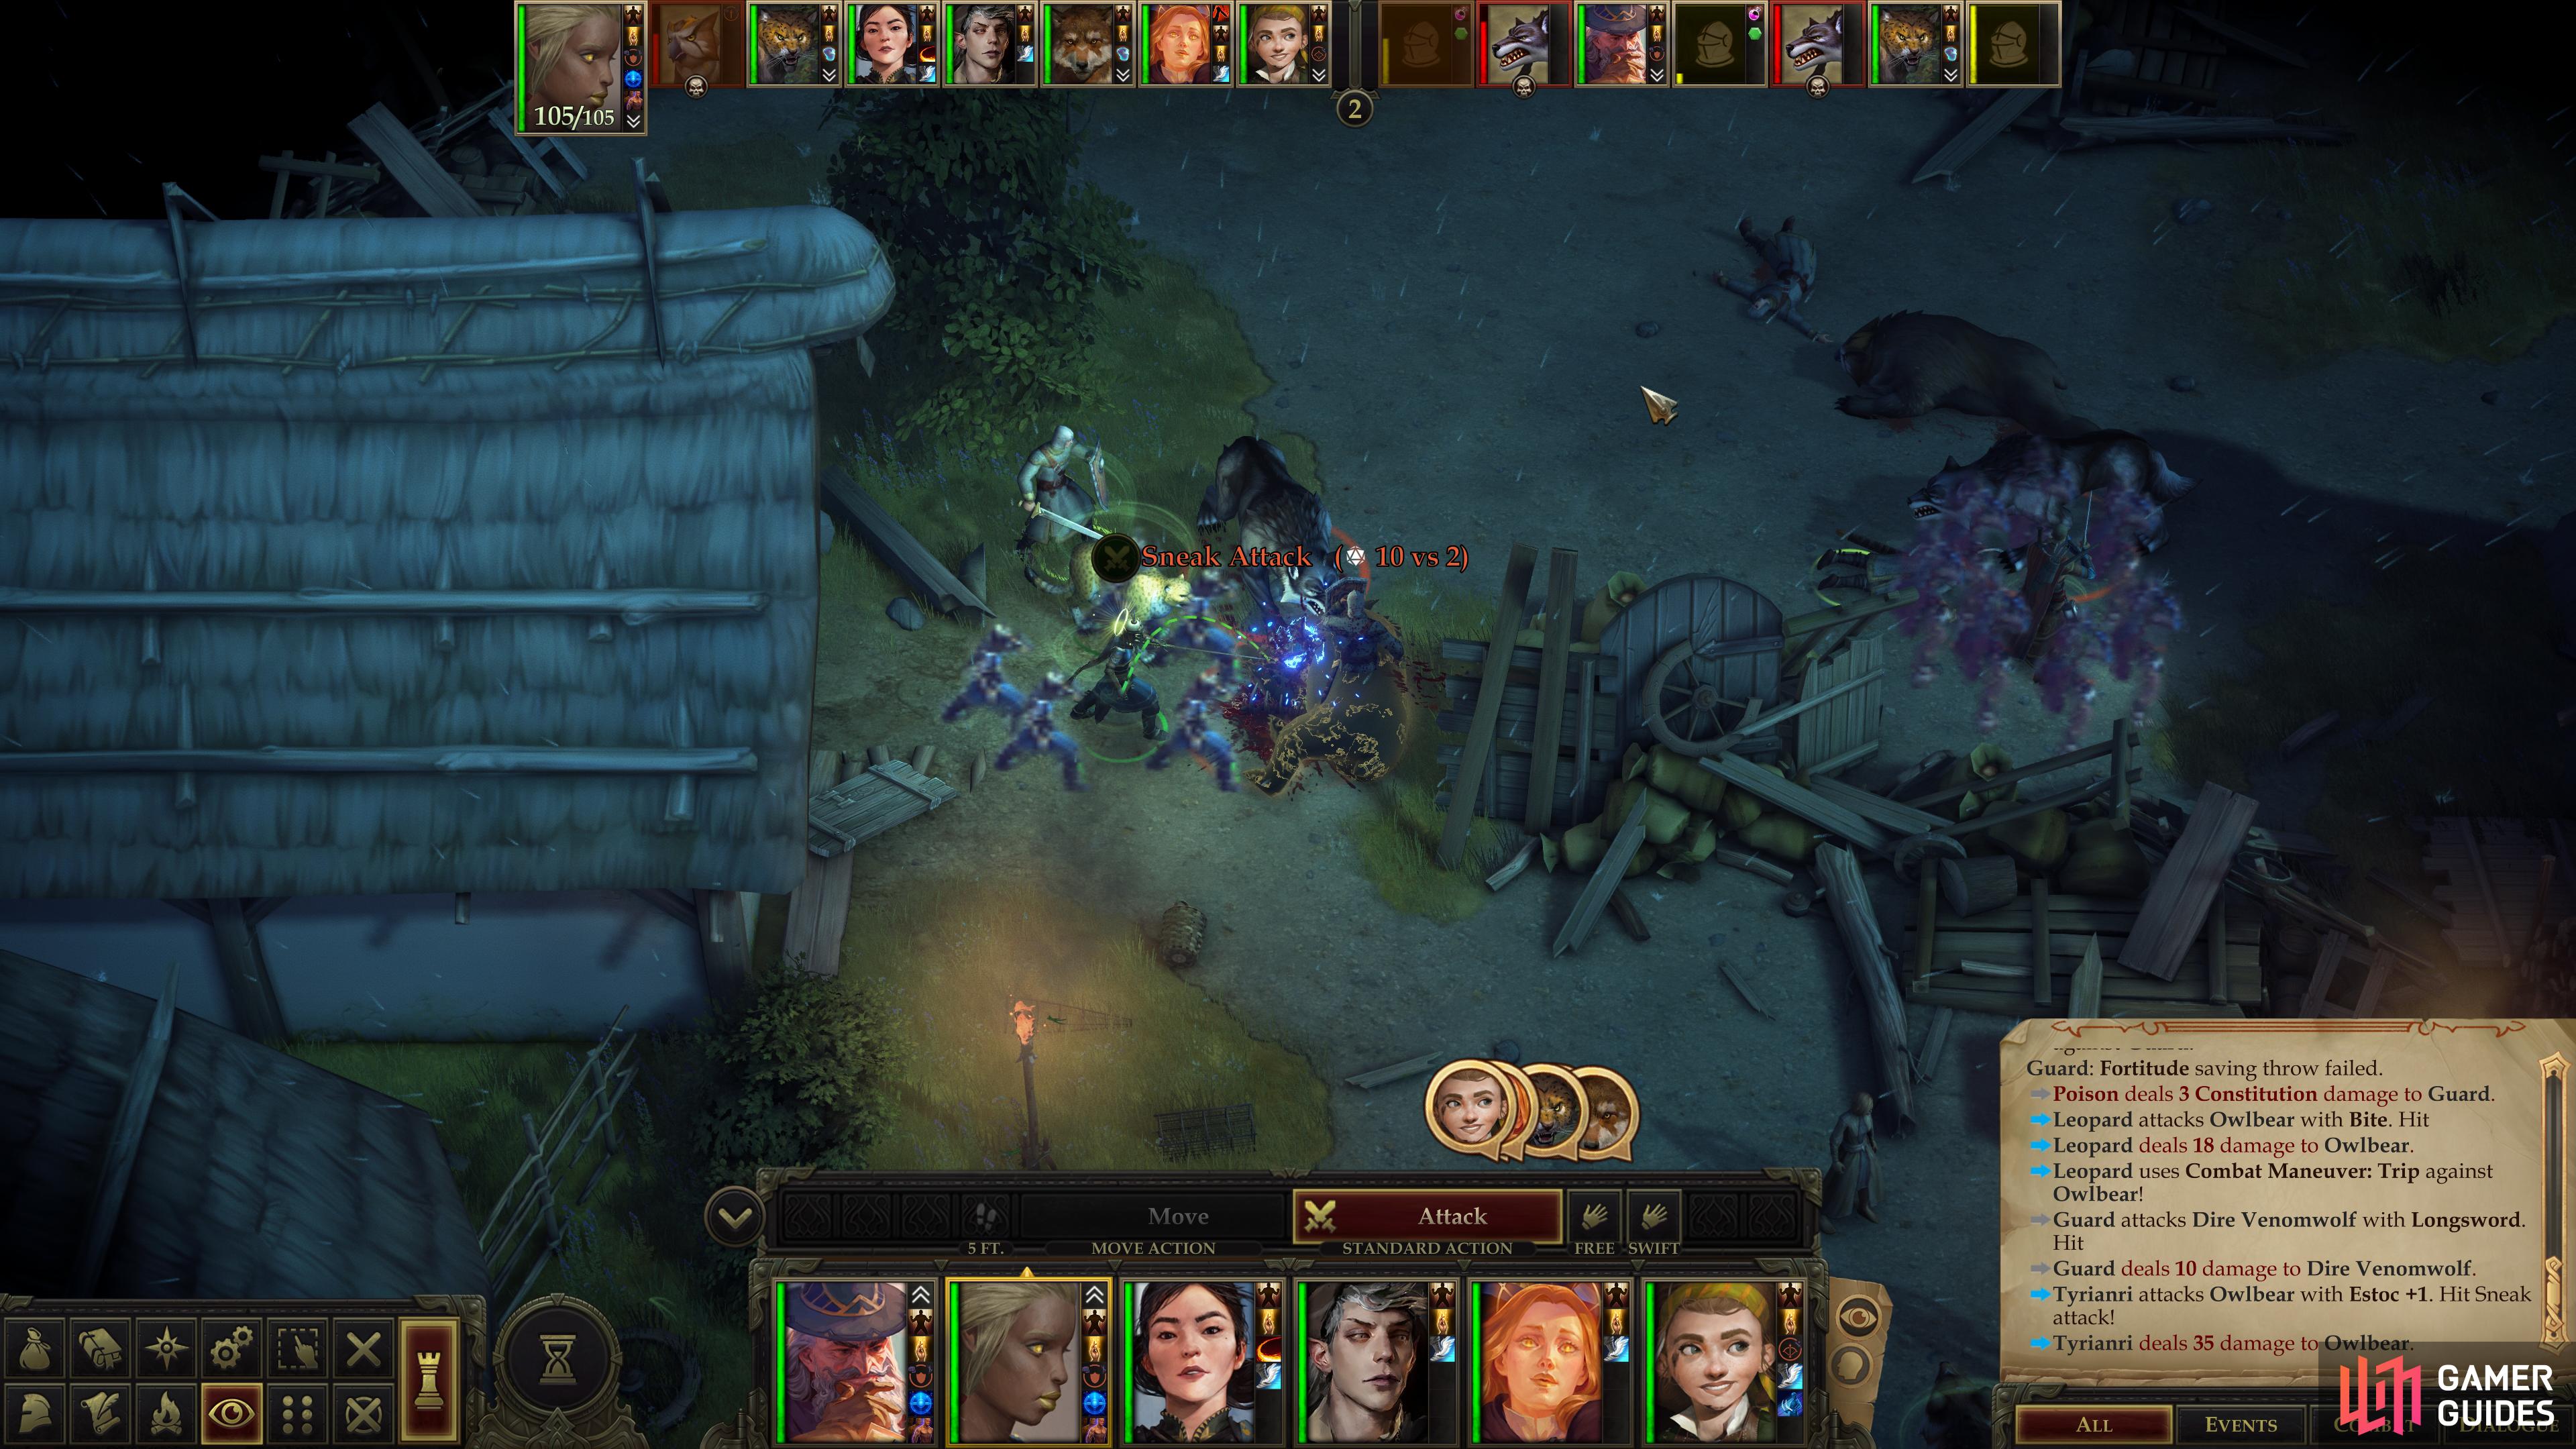
(1 of 2) Fight your way through the crowded barricades,
Fight your way through the crowded barricades, (left), and defeat the beasts crowding your throne room. (right)
Fighting Through Tuskdale
Make your way back west to the capital city (you hopefully don’t need directions at this stage in the game), and when you arrive you’ll find that it’s… seen better days. Sure, it wasn’t a bustling metropolis full of brick and marble, but it was more than a corpse-strewn wreckage! Spell buff thoroughly, then make your way north from where you arrive and a guard named Delia will give you a brief status report, telling you little that a casual glance around couldn’t have informed you of. If you’re feeling generous, pick a [Lawful Good] moral choice to heal her, then venture north.
You’ll find your first batch of monsters just north of the first barricade, which initially includes two Dire Venomwolves, but an Owlbear will soon become an issue, thanks to The Bloom. A properly-buffed party shouldn’t have much trouble with this fight - or most of the fights in the area, but this is more of an endurance effort than a short-duration slugfest. Lead with your tanks and take down beasts one at a time to try to mitigate damage. The guards nearby will help distract the enemies, but this is both a boon and a curse, as they’ll also clog up the narrow lane of attack and waste your time. This can be especially tedious in turn-based mode.
Kill the first group of monsters and continue north to find a second group, which includes a Ferocious Wyvern, a Yellow Dweomanticore, a Yellow Dweomerwyvern (may be distant), two Owlbears (one may be somewhat distant). The Owlbears are, as usual, the greatest threat given their Attack Bonus and sheer damage potential. For all their glowing aura and fancy name, the “Yellow Dweomer” versions of beasts can barely muster half the Attack Bonus of the Owlbears, although they do tend to be resistant to cold and electrical damage.
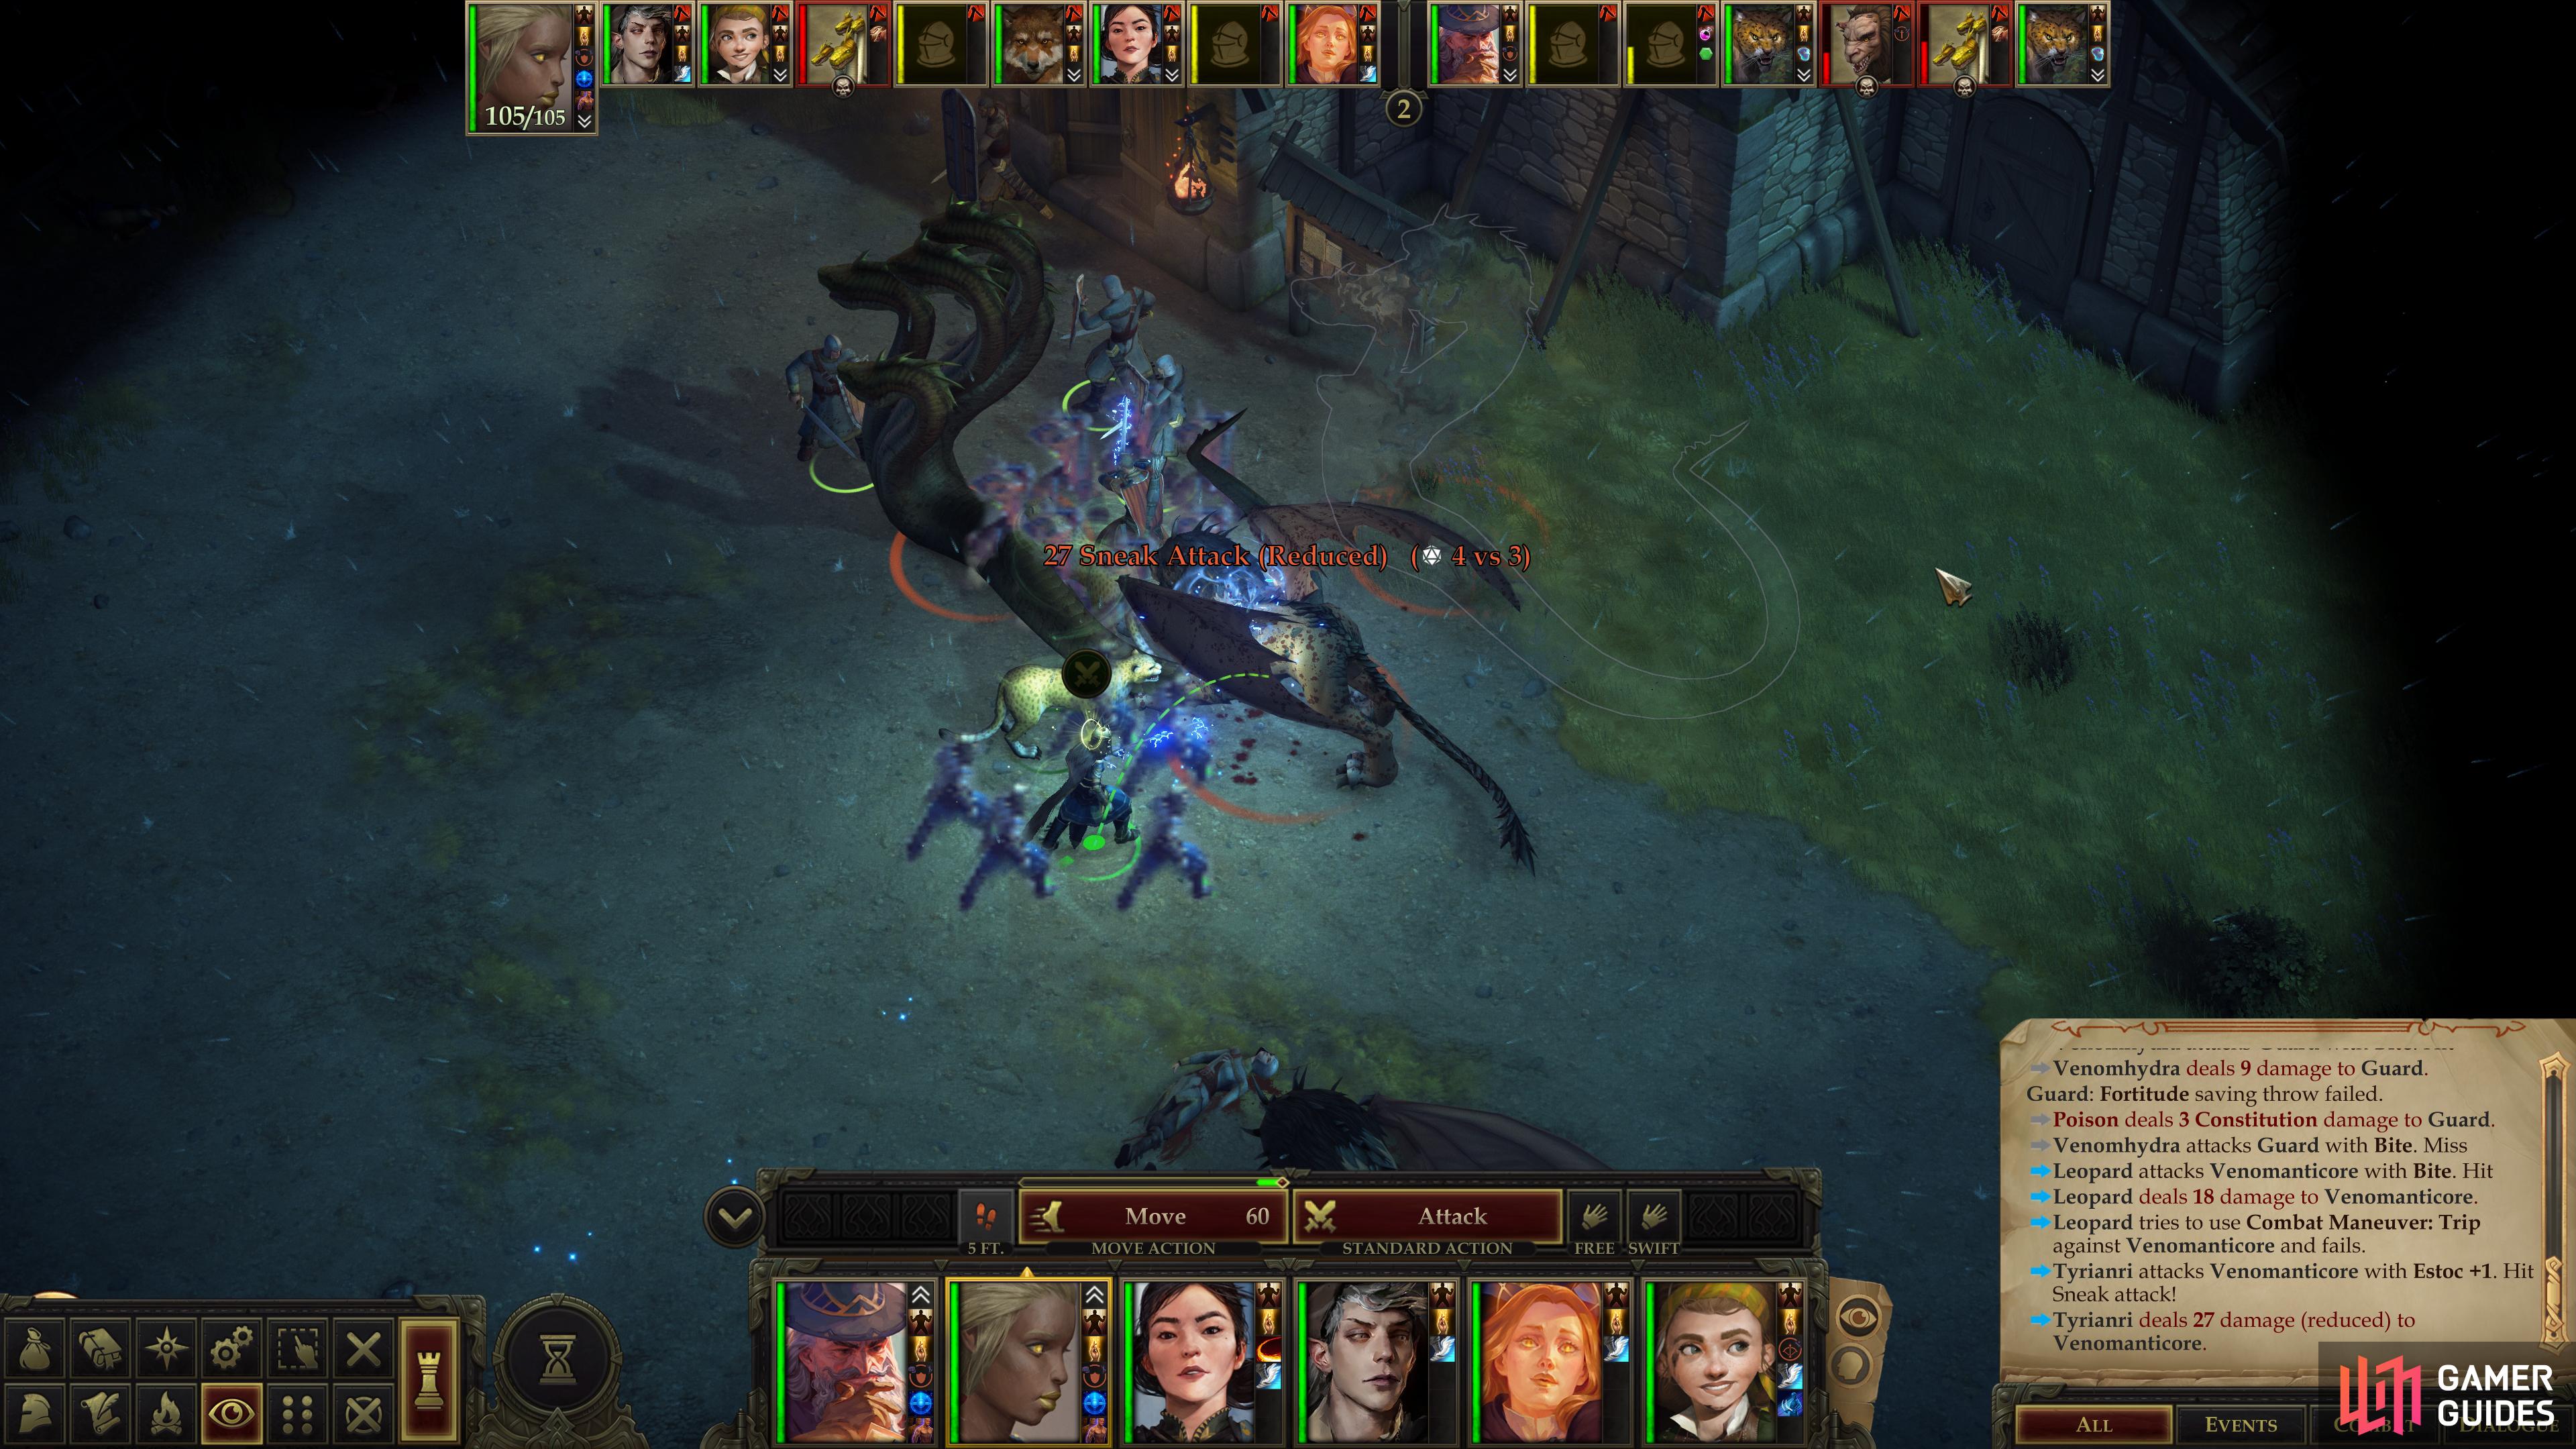
Glowing or not, eradicate the beasts, reapply spell buffs, if necessary, then venture north to reach your throne room, where you’ll have to put down two Venomhydras and a Venomanticore. Like the “Yellow Dweomer” versions of enemies you’ve been facing, these are likely immune to cold and electrical damage, and like the Venom Direwolves earlier, their poison can inflict stat damage if they strike you. However, as the Spartans said to Phillip II of Macedon when he threatened to raze their city if he brought his army to their land: if. Turns out having an impenetrably high Armor Class is proof enough against this sort of poison.
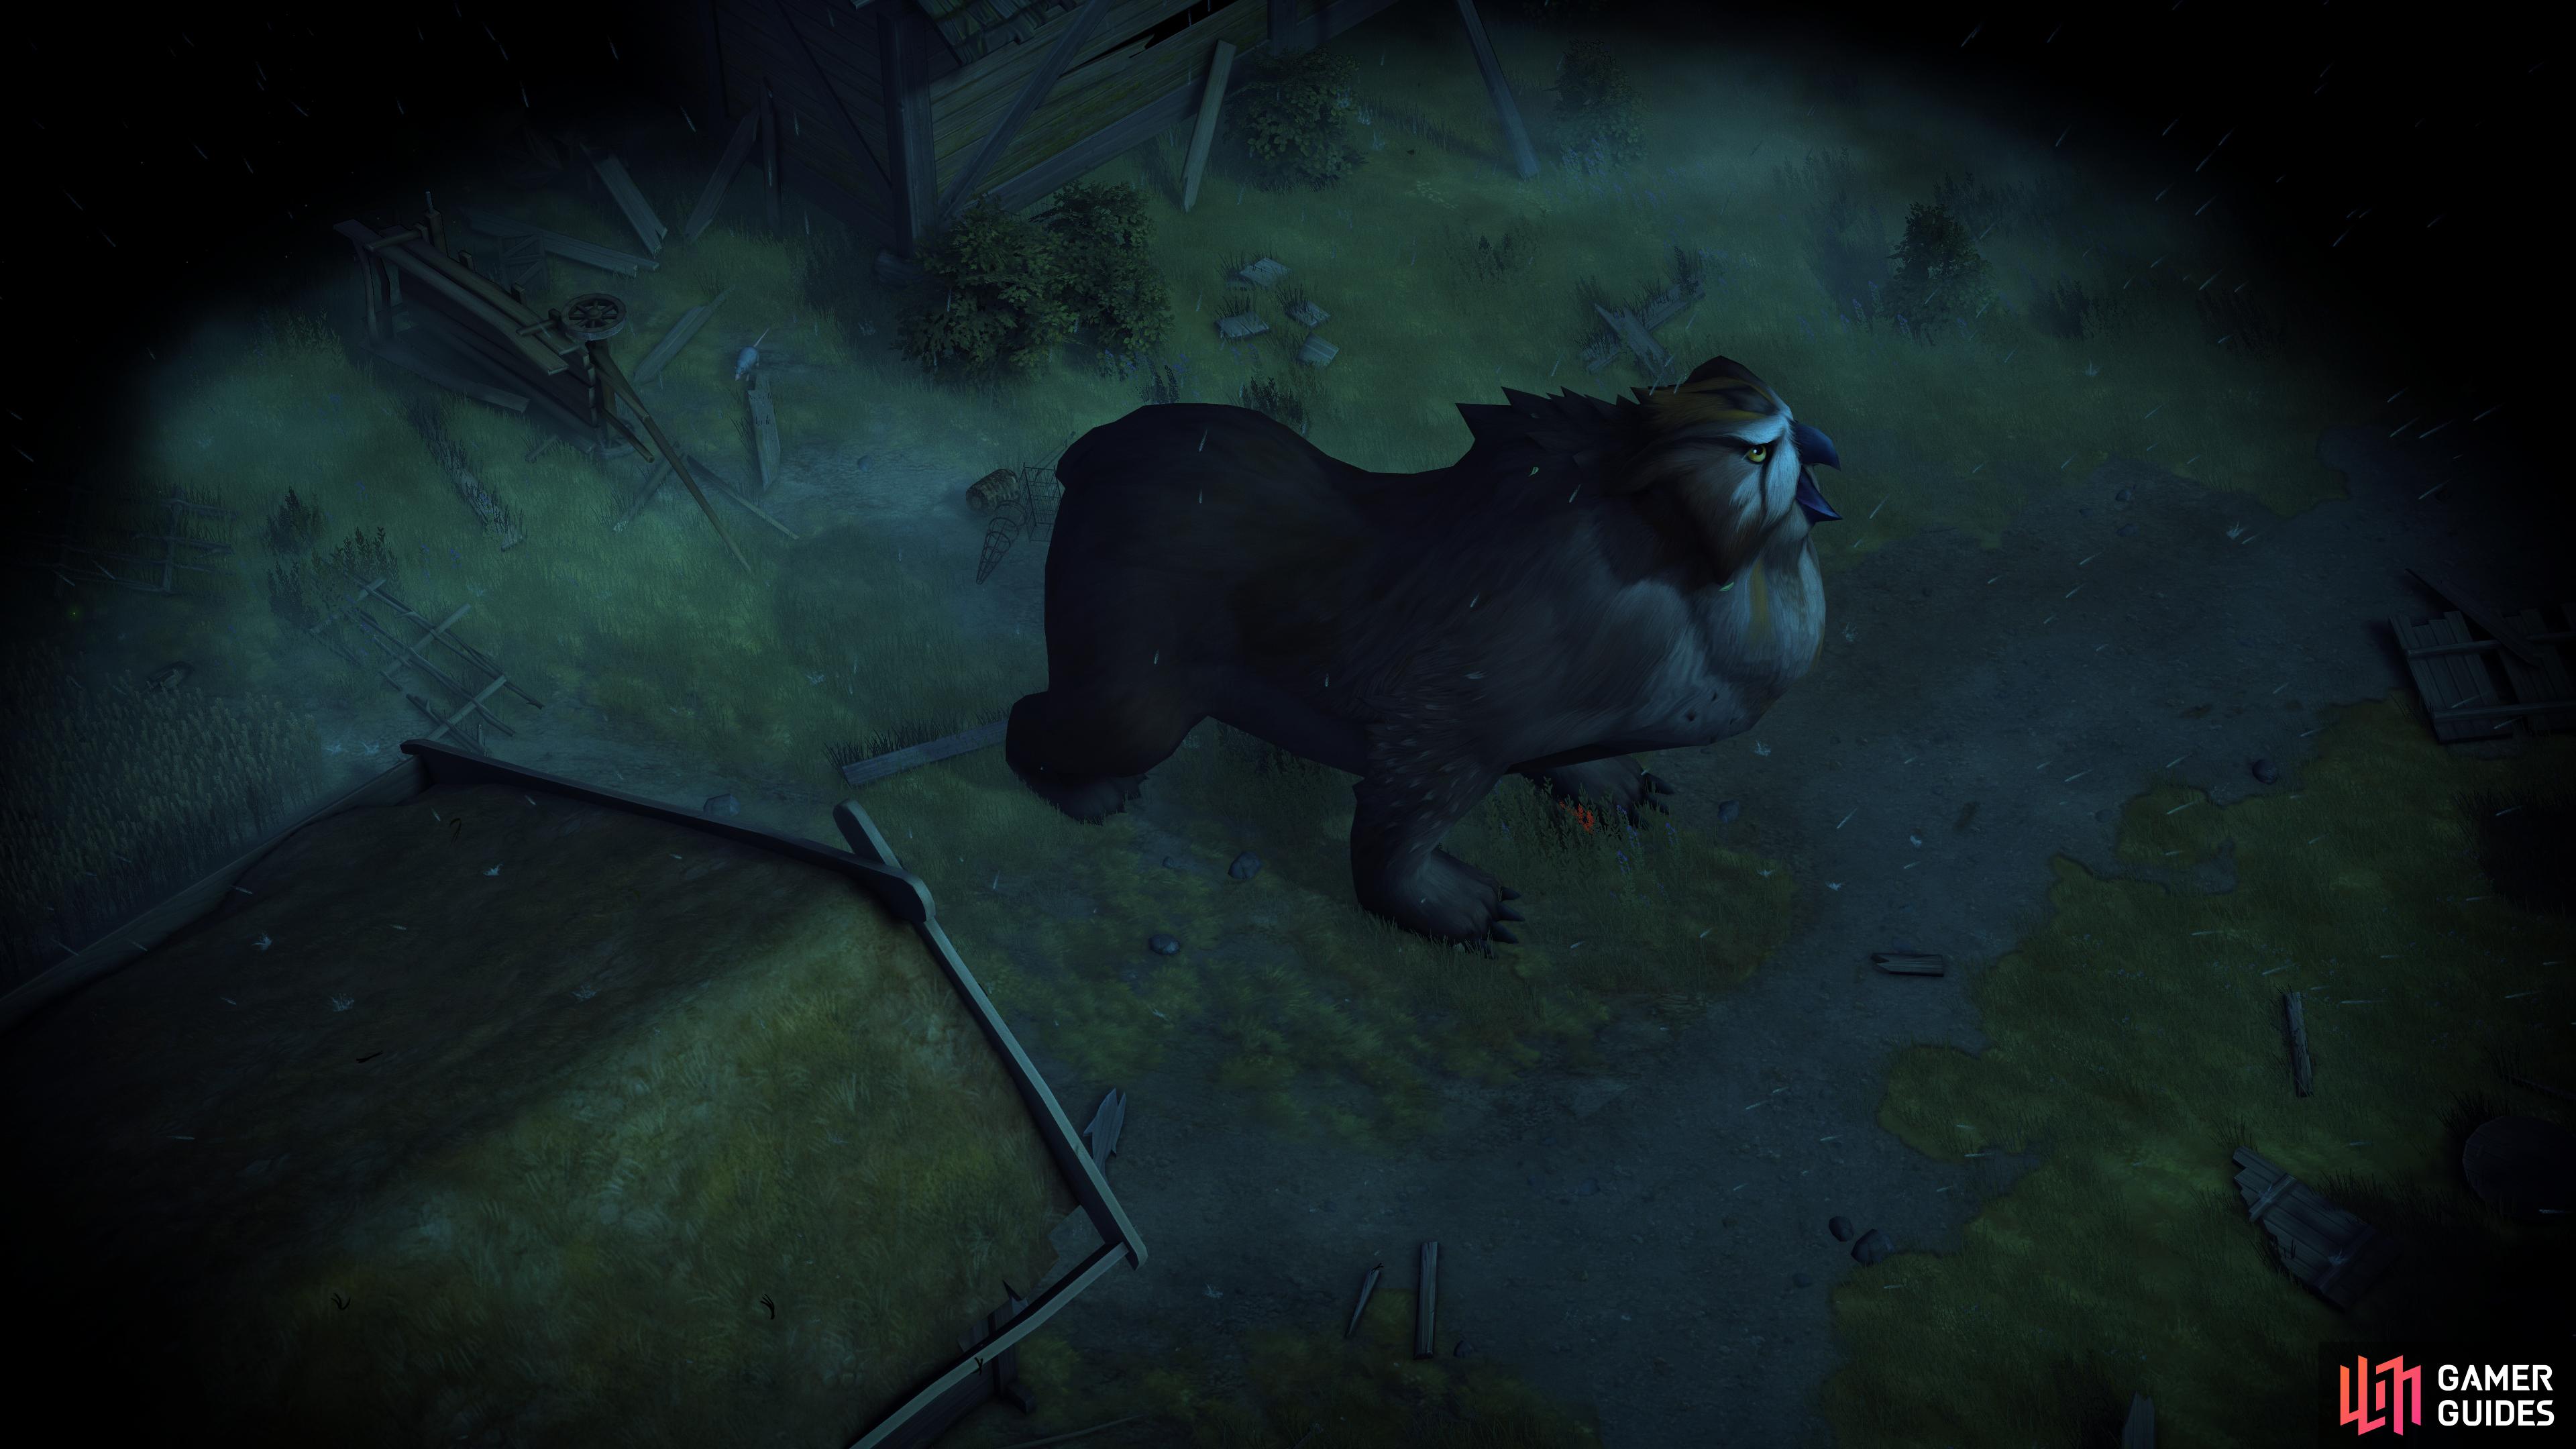
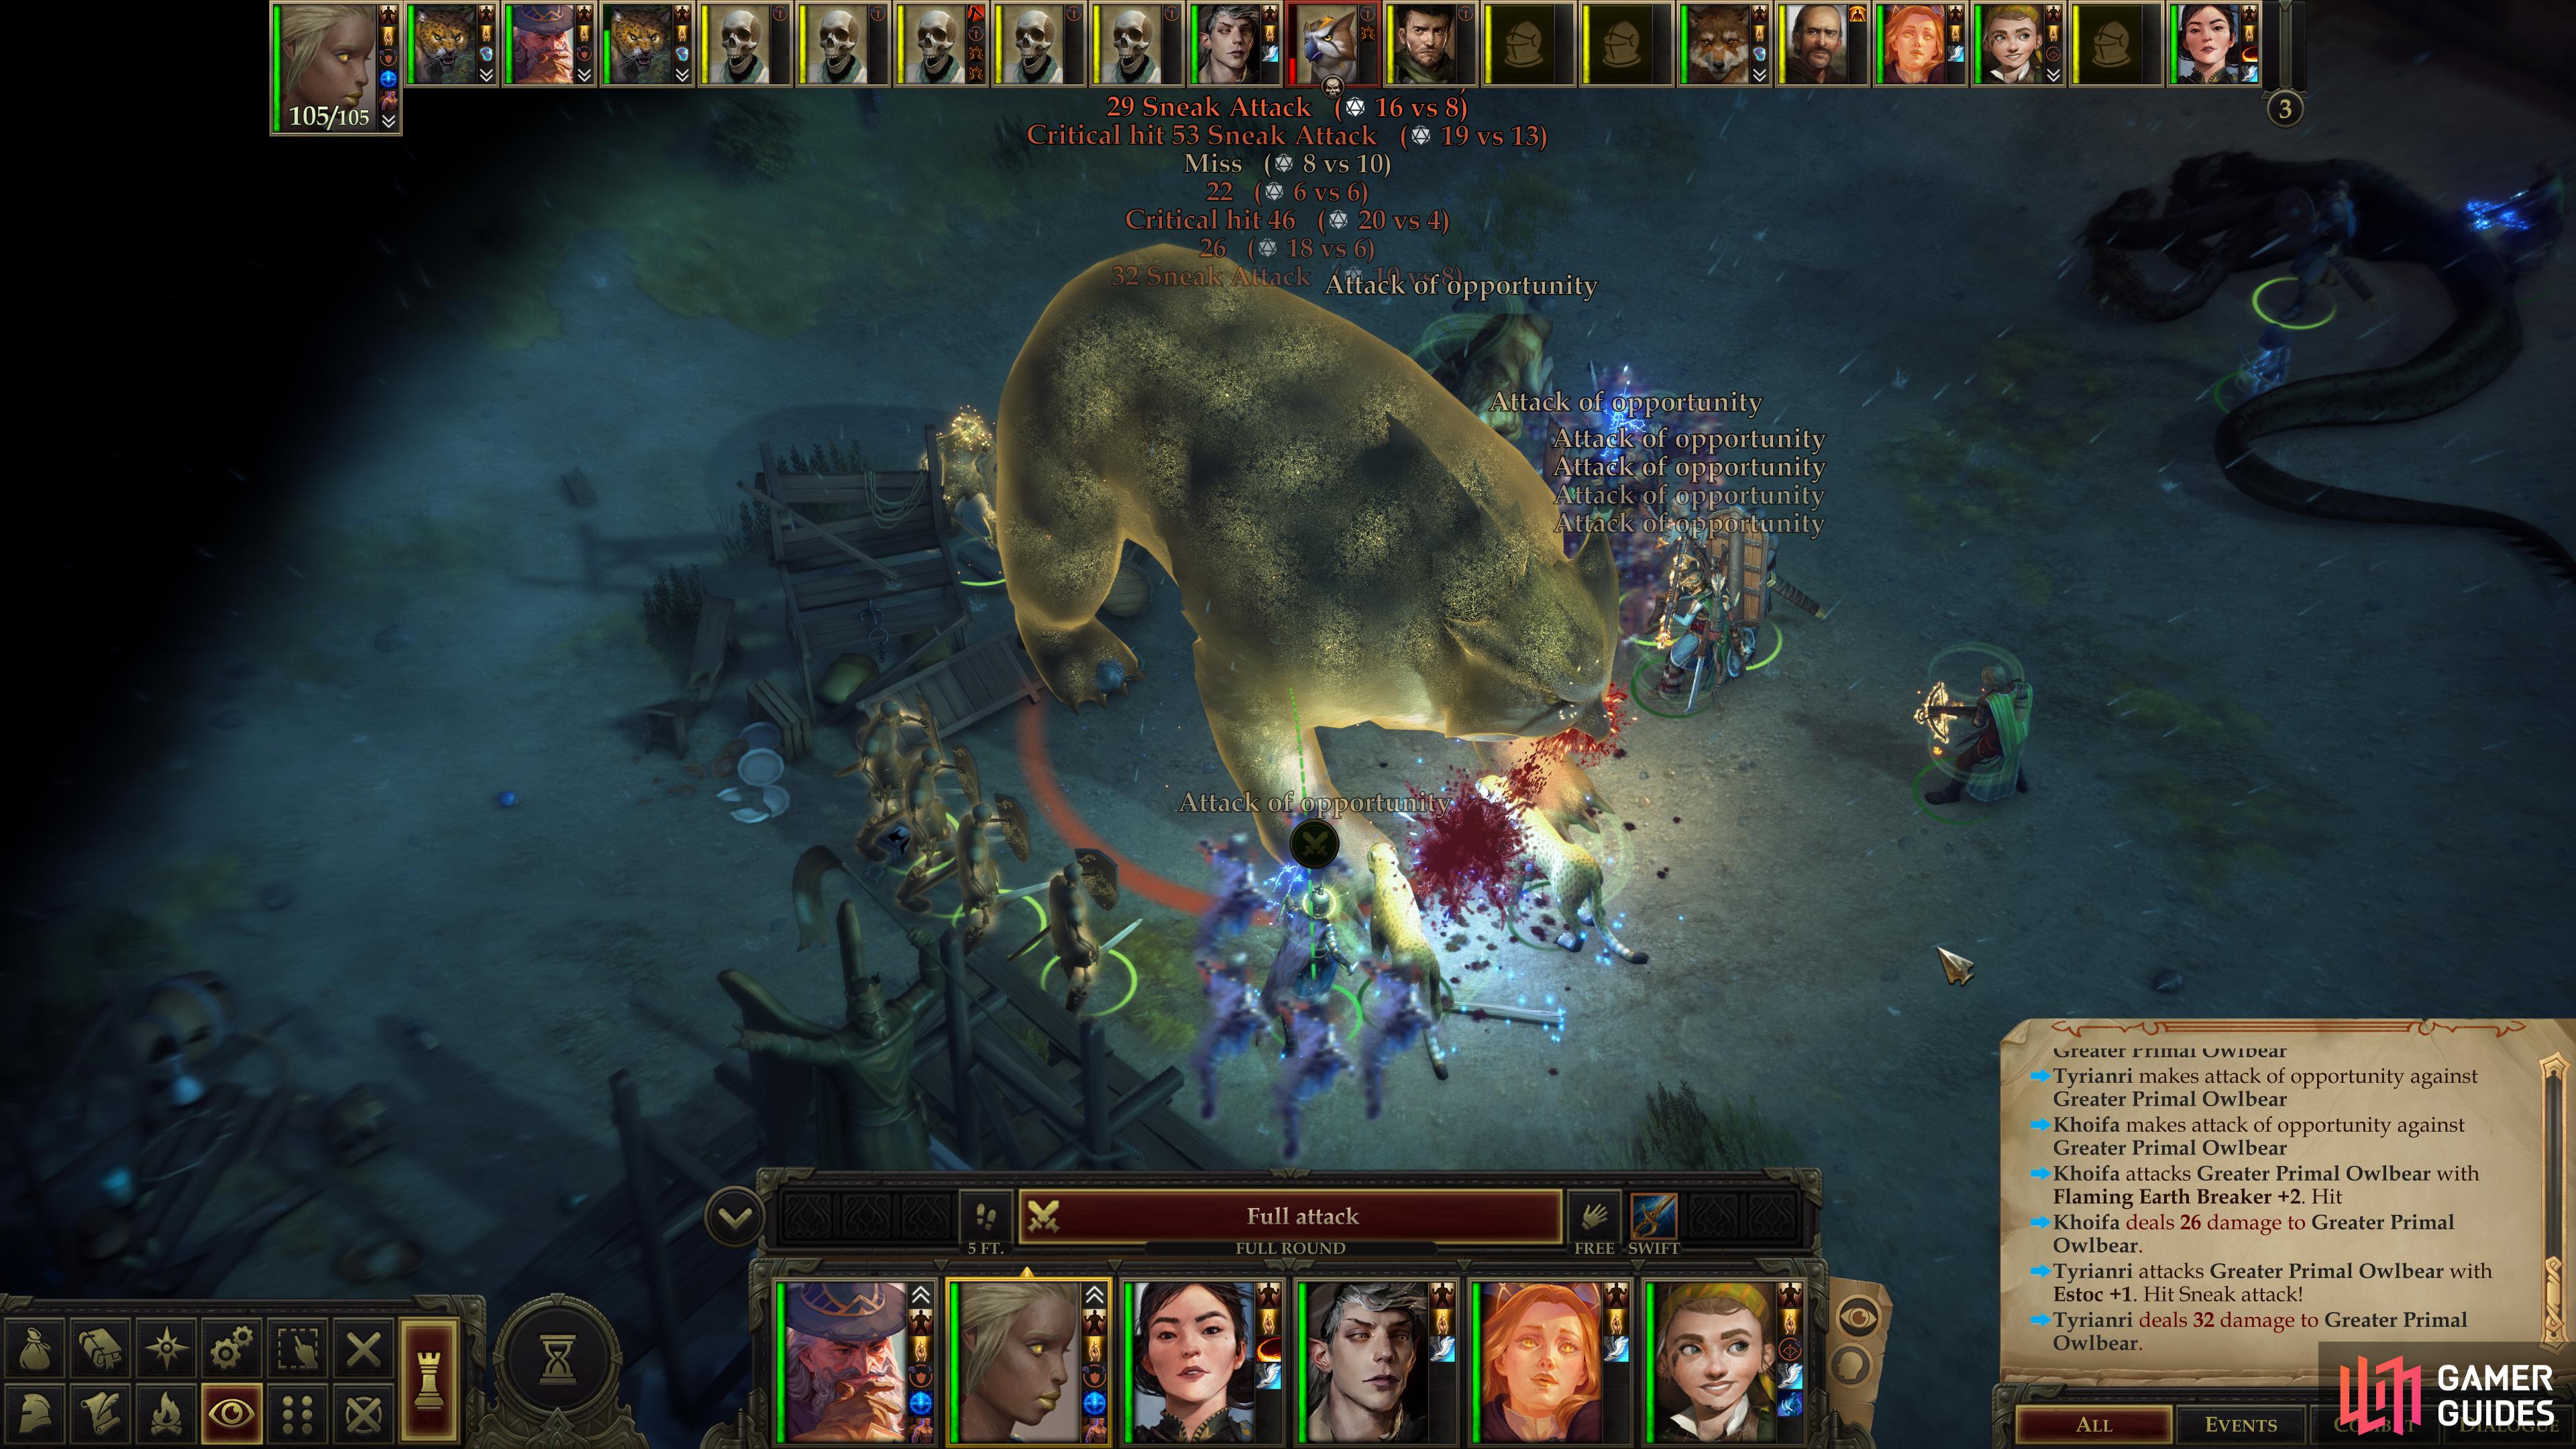
A massive owlbear will appear after you secure the throne room.
Battle: Greater Primal Owlbear
Once this third group of monsters is slain, talk to Hyland, the guard captain, who is quite relieved that you arrived to save them. Exhaust the captain’s dialogue options and make either a [Chaotic Neutral] or [Lawful Neutral] moral choice, if you wish. When you exit the conversation, the ground will shake and the mother of all Owlbears will appear to the south, quickly making its way towards your throne room. Egads! That’s where you keep all your stuff!
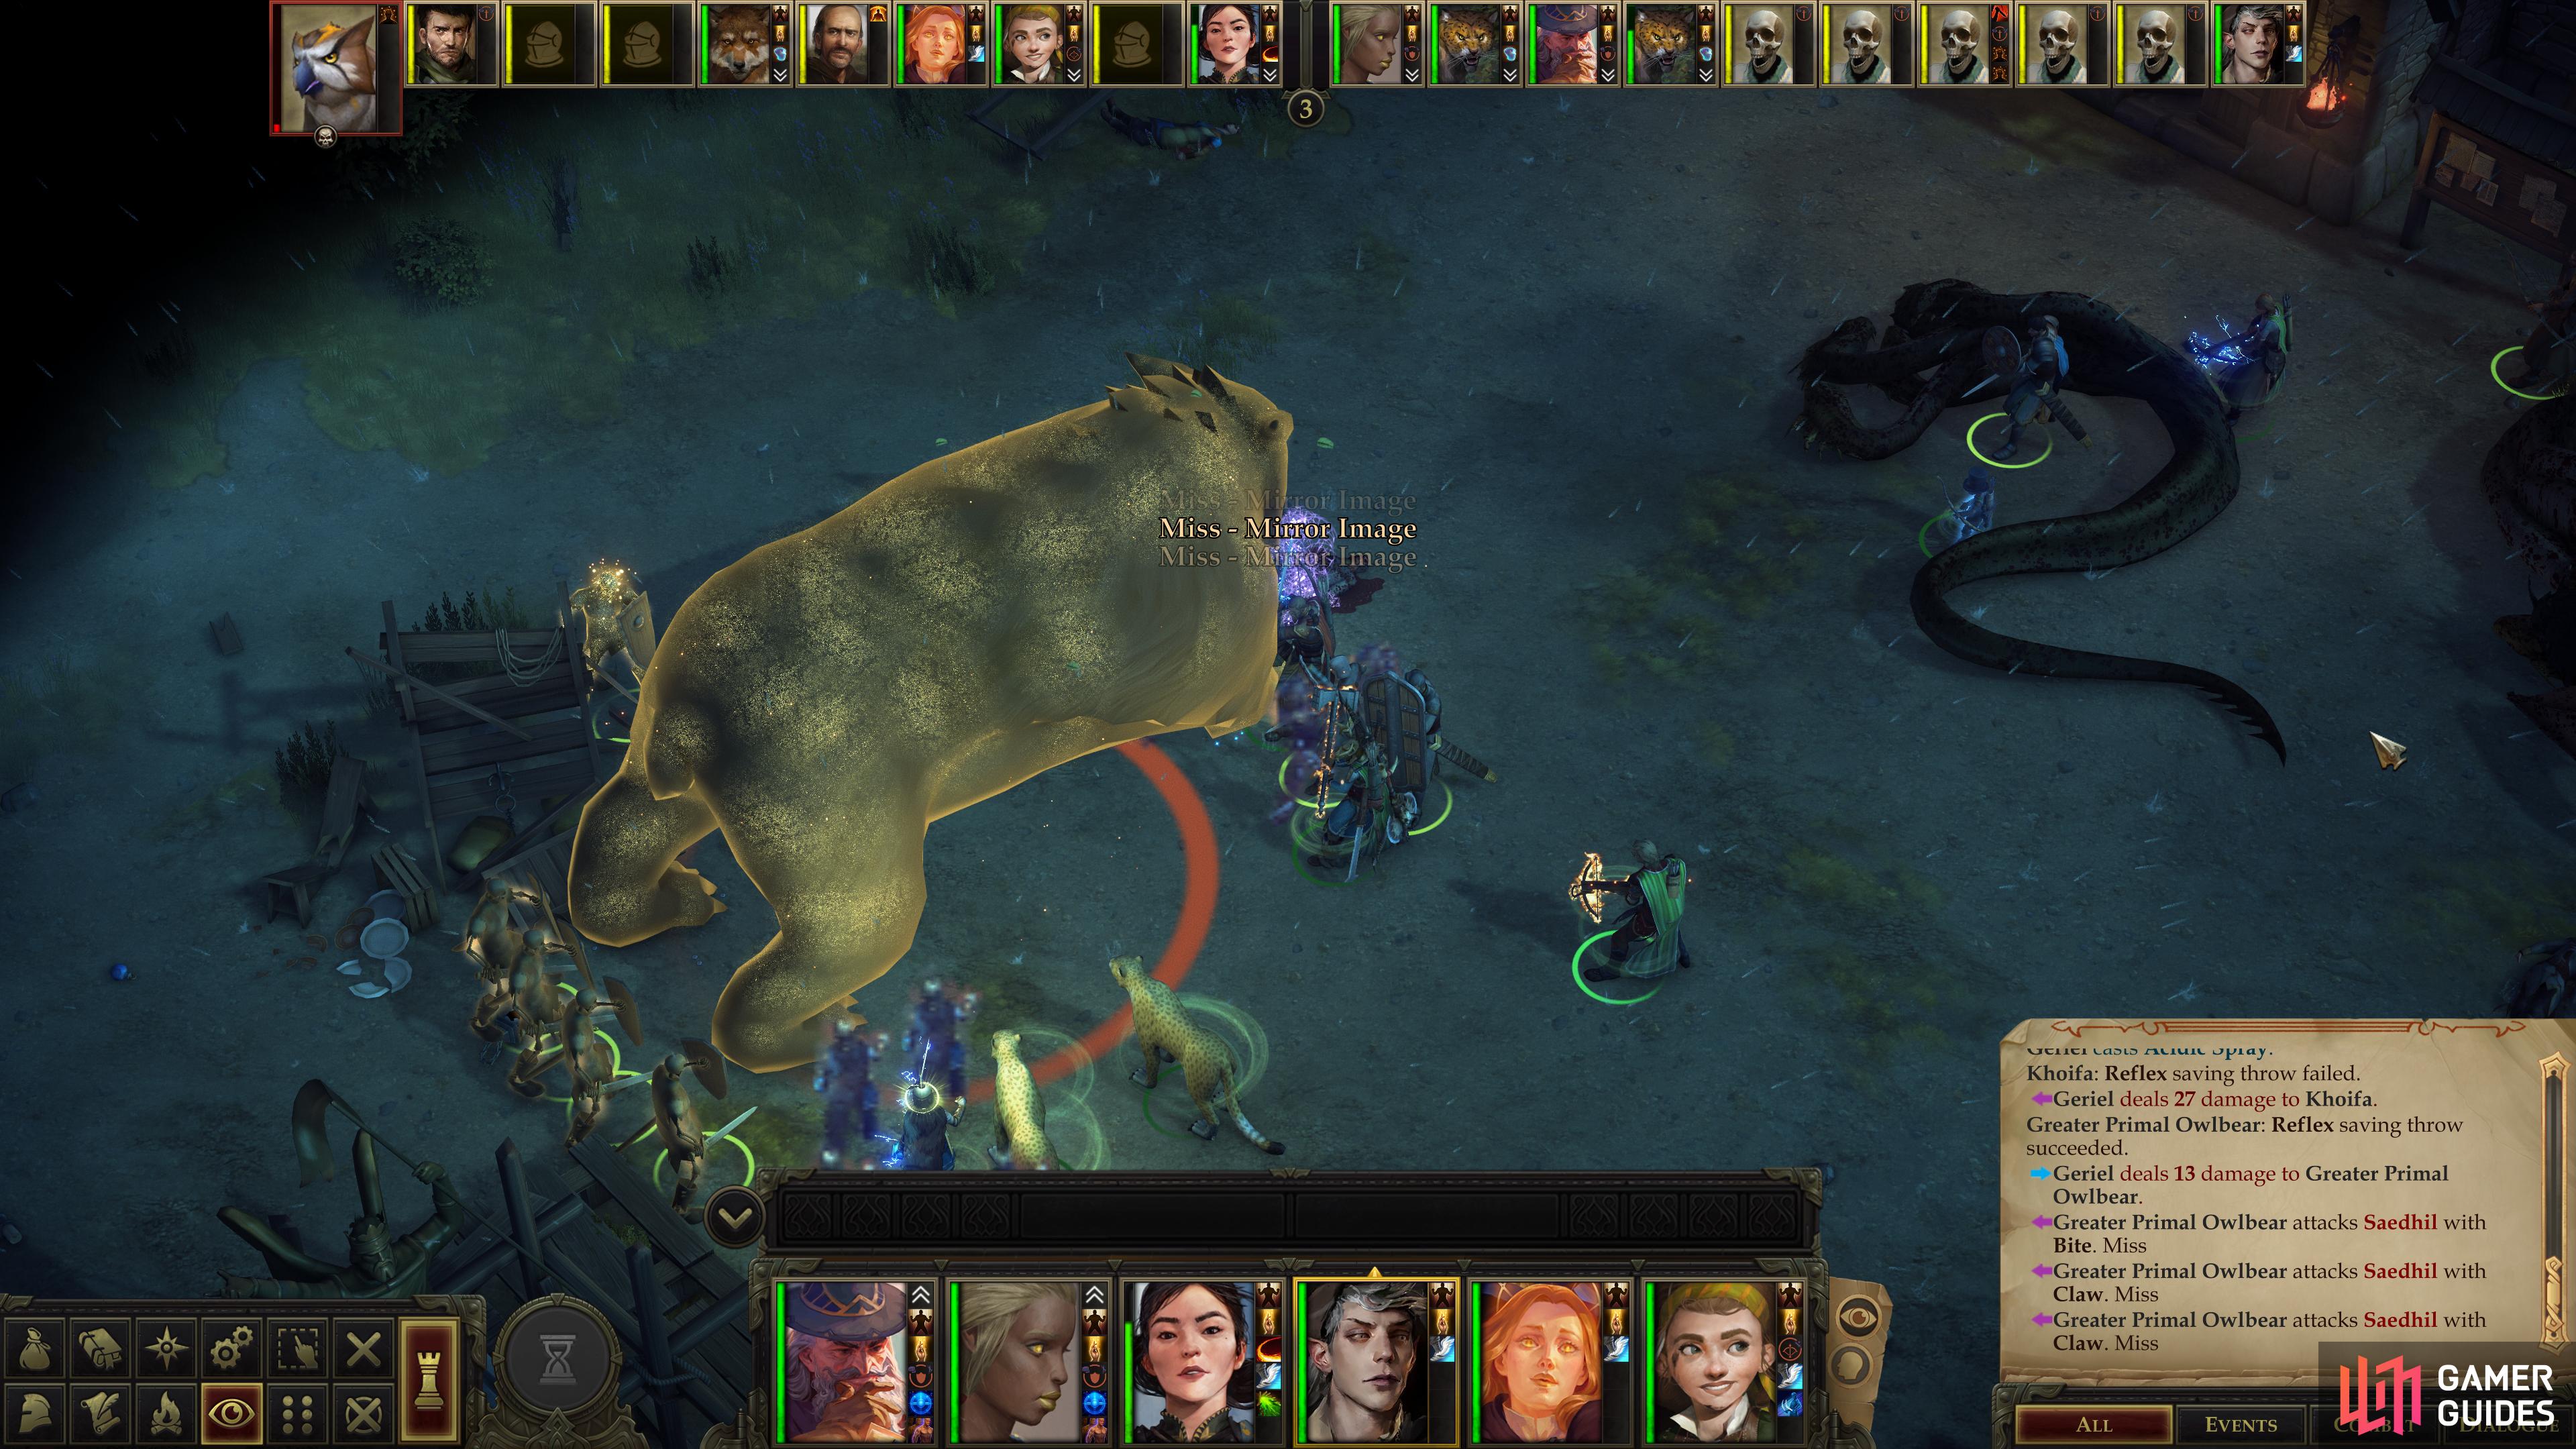
(1 of 3) The massive owlbear’s attacks are potent enough to challenge all but the most well-protected of tanks.
When it comes to owlbears, size does matter, so ignore the generic name of this “Greater Primal Owlbear” and give it the respect it deserves. In terms of offense, it’s a step up from any other foe you’ve faced thus far (save perhaps the Crag Linnorm in the Bridge Over the Gudrin River), and it’ll truly test your mettle. It’s Attack Bonus is nearly +30, so unless you somehow have a tank boasting an Armor Class of 50~, you can expect to take some hits. Even the suggested guide protagonist can’t boast stats that high, and he generally over-performs what is strictly necessary. That said, concealment (Blur, Mirror Image and Displacement) will all help, as will blinding the beast via Glitterdust. Its Will Save isn’t low enough to make this easy, but considering its high Armor Class, your casters probably don’t have anything better to do than try.
It’ll get three attacks per round, each of which has a good chance of hitting most any character unfortunate enough, and it’ll do around 30-40 damage per hit. This offensive power is enough to drop nearly any warrior in a single round, so you’ll need to have luck on your side, a superb tank, and even with those two things… you probably will need to try to end this battle as quickly as possible. To that end, be sure to surround it to improve your chances of hitting and perhaps benefit from feats like “Outflank”. Unlike most owlbears, this monstrosity has a high Armor Class, and it’s almost entirely due to natural armor… although somehow it’s wearing (presumably magical) bracers that give it a +5 armor bonus. Yeah… Anyways, it being flat-footed or blinded won’t help much, only something like a brilliant energy weapon will help. A mid-level Magus might be able to replicate this effect via “Arcane Weapon Enhancement”, but “Arcane Accuracy” will probably work well enough. Other characters will have to hope their attacks land. Suffice to say, Haste is essential for this fight.
Along with its high Armor Class, the Greater Primal Owlbear has a stupendous amount of Hit Points - around 450. Fortunately it doesn’t have any resistances, concealment or damage reduction, and will take sneak attack damage readily enough, further amplifying the importance of flanking.
Jhod, some guards, and perhaps Kesten will all be around to help, but they’re little more than fodder, at best. Speaking of which, summoning some critters might not be a terrible idea - they can lead the charge and/or help flank the beast. Just don’t expect anything you summon to contribute much damage.
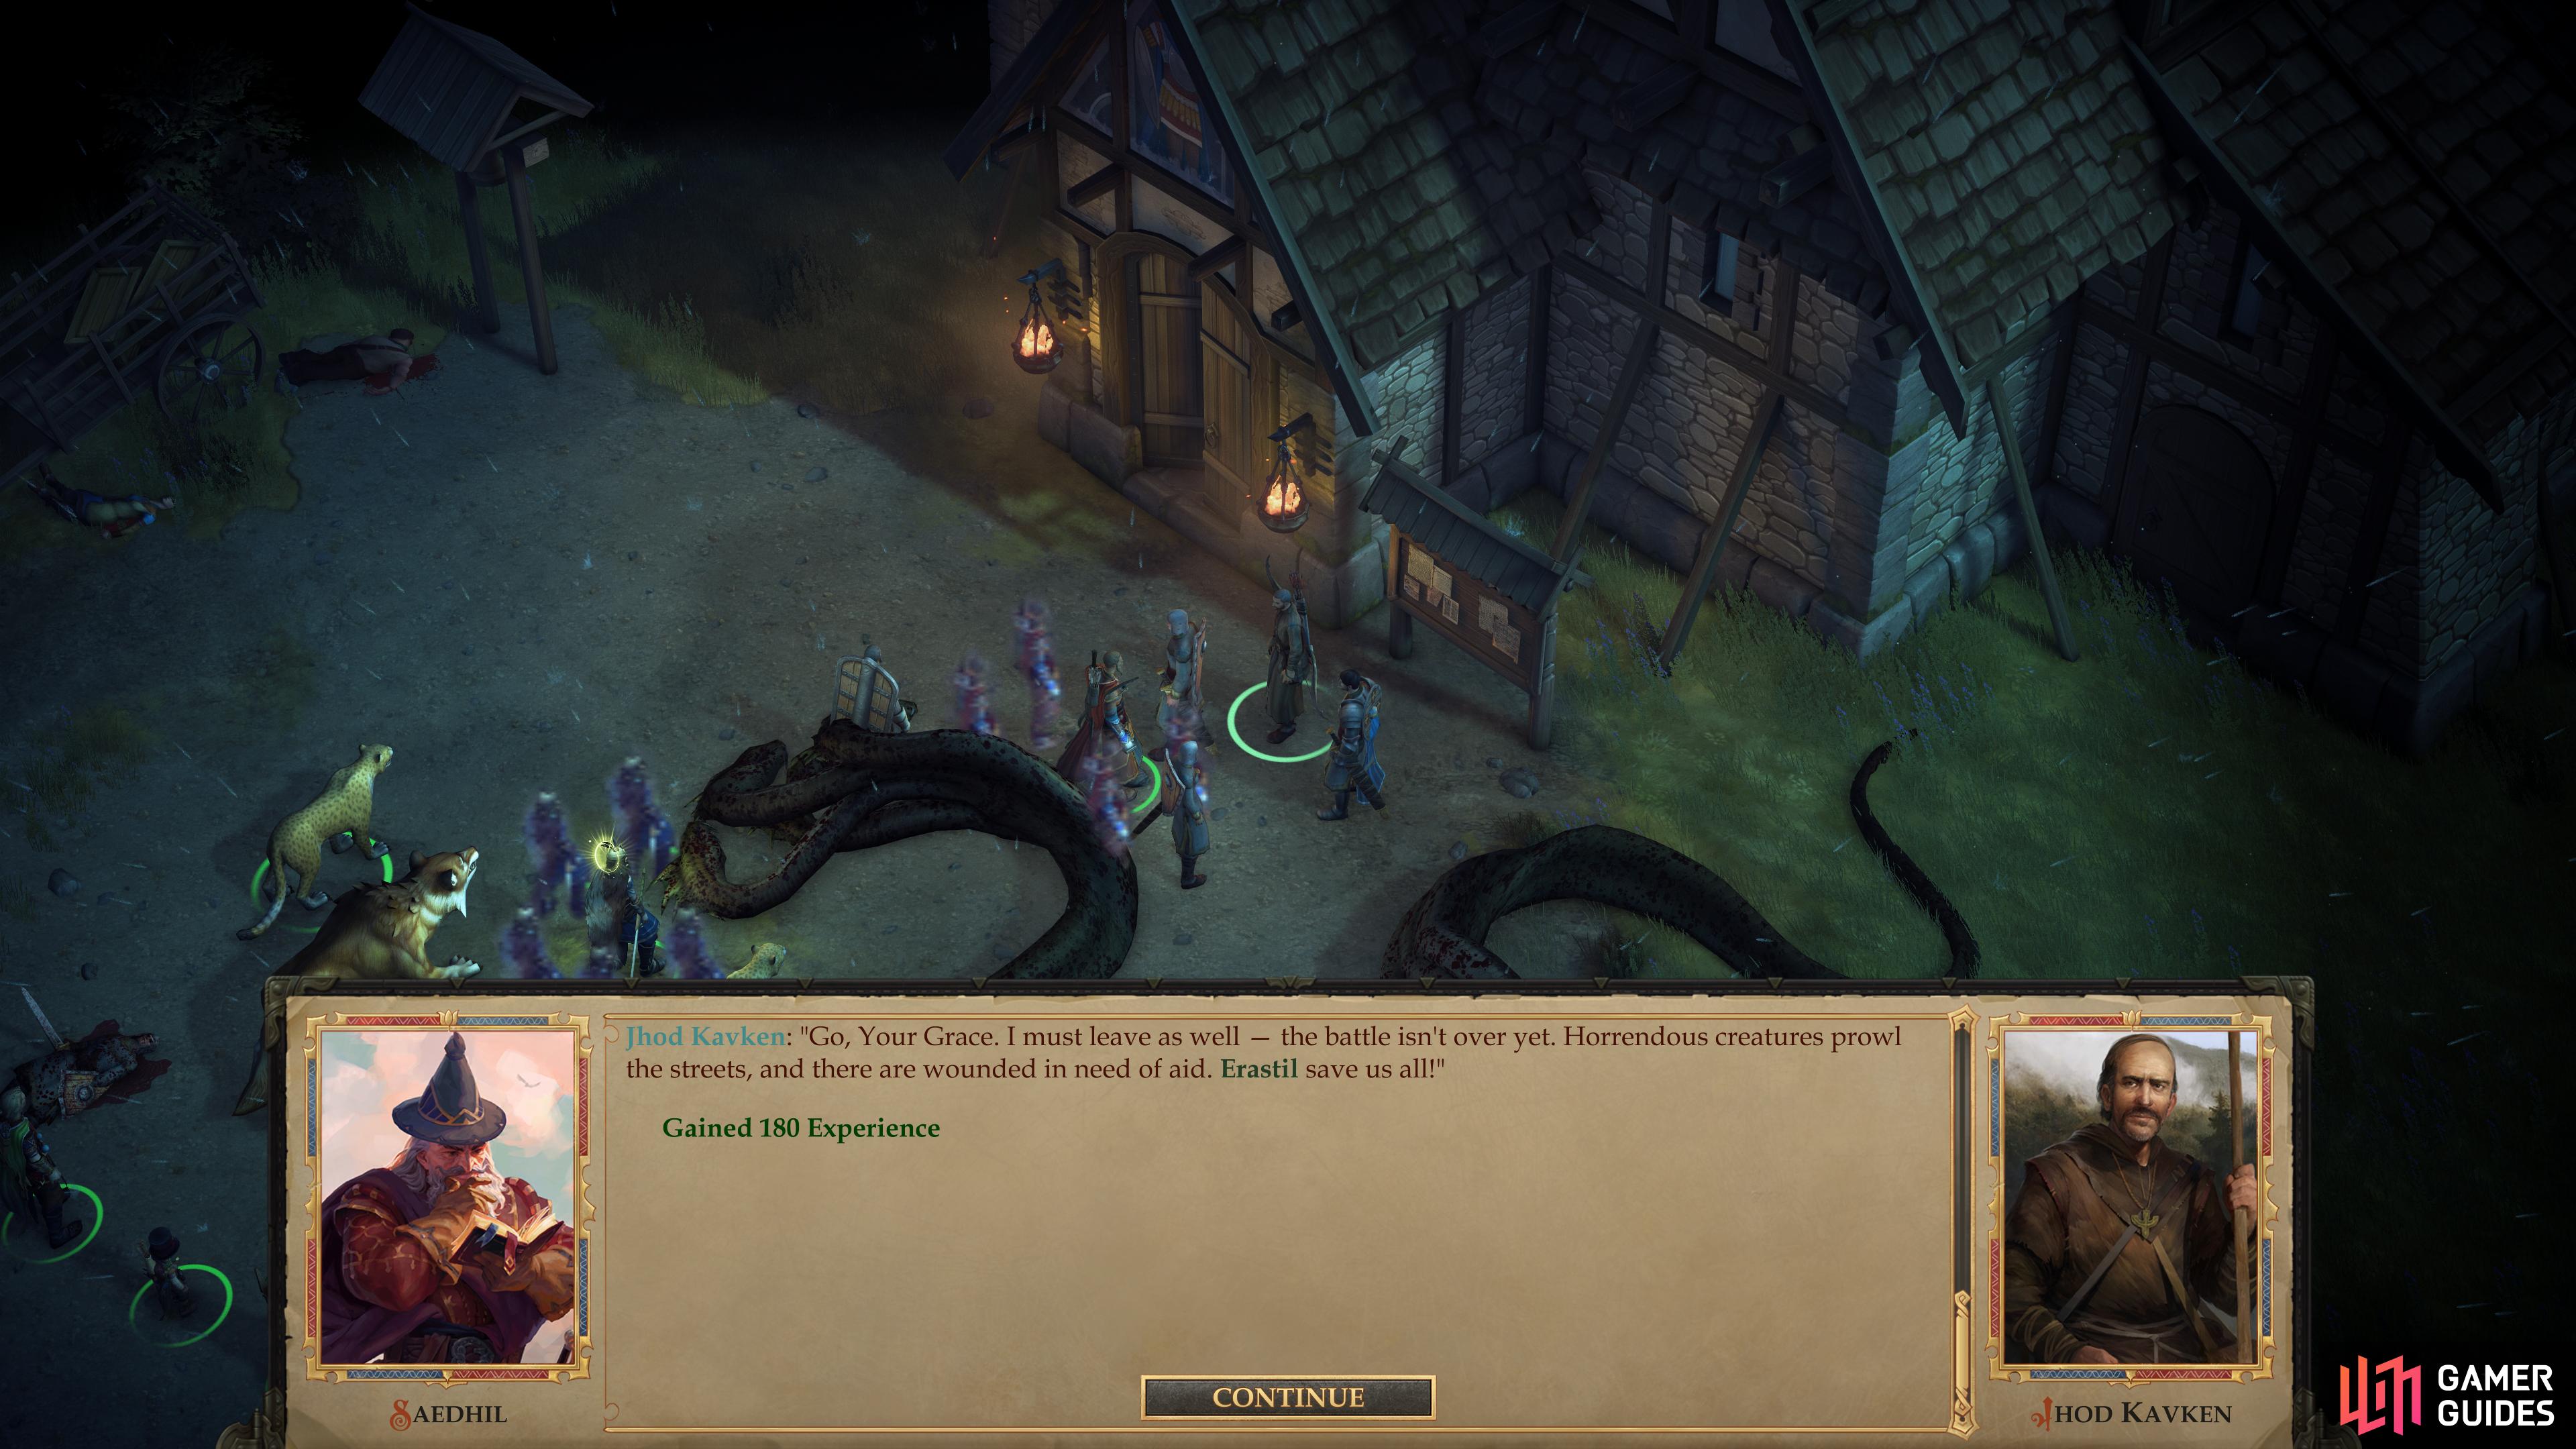
After the fight, turn your attention to Jhod. Assuming you came here before going to the Womb of Lamashtu, he should be alive and well, and if you convinced Kesten to return to the capital he’ll chime in, thanking you for “talking some sense into him”. He’ll even offer to heal you for free! A welcome boon, given the recent fighting. Be sure to loot the massive owlbear for Bracers of Armor +5. How both you and the owlbear are able to wear these things is a mystery for… never. Just enjoy the boon they offer.
| Reward: For rescuing Jhod |
|---|
| 180 XP |
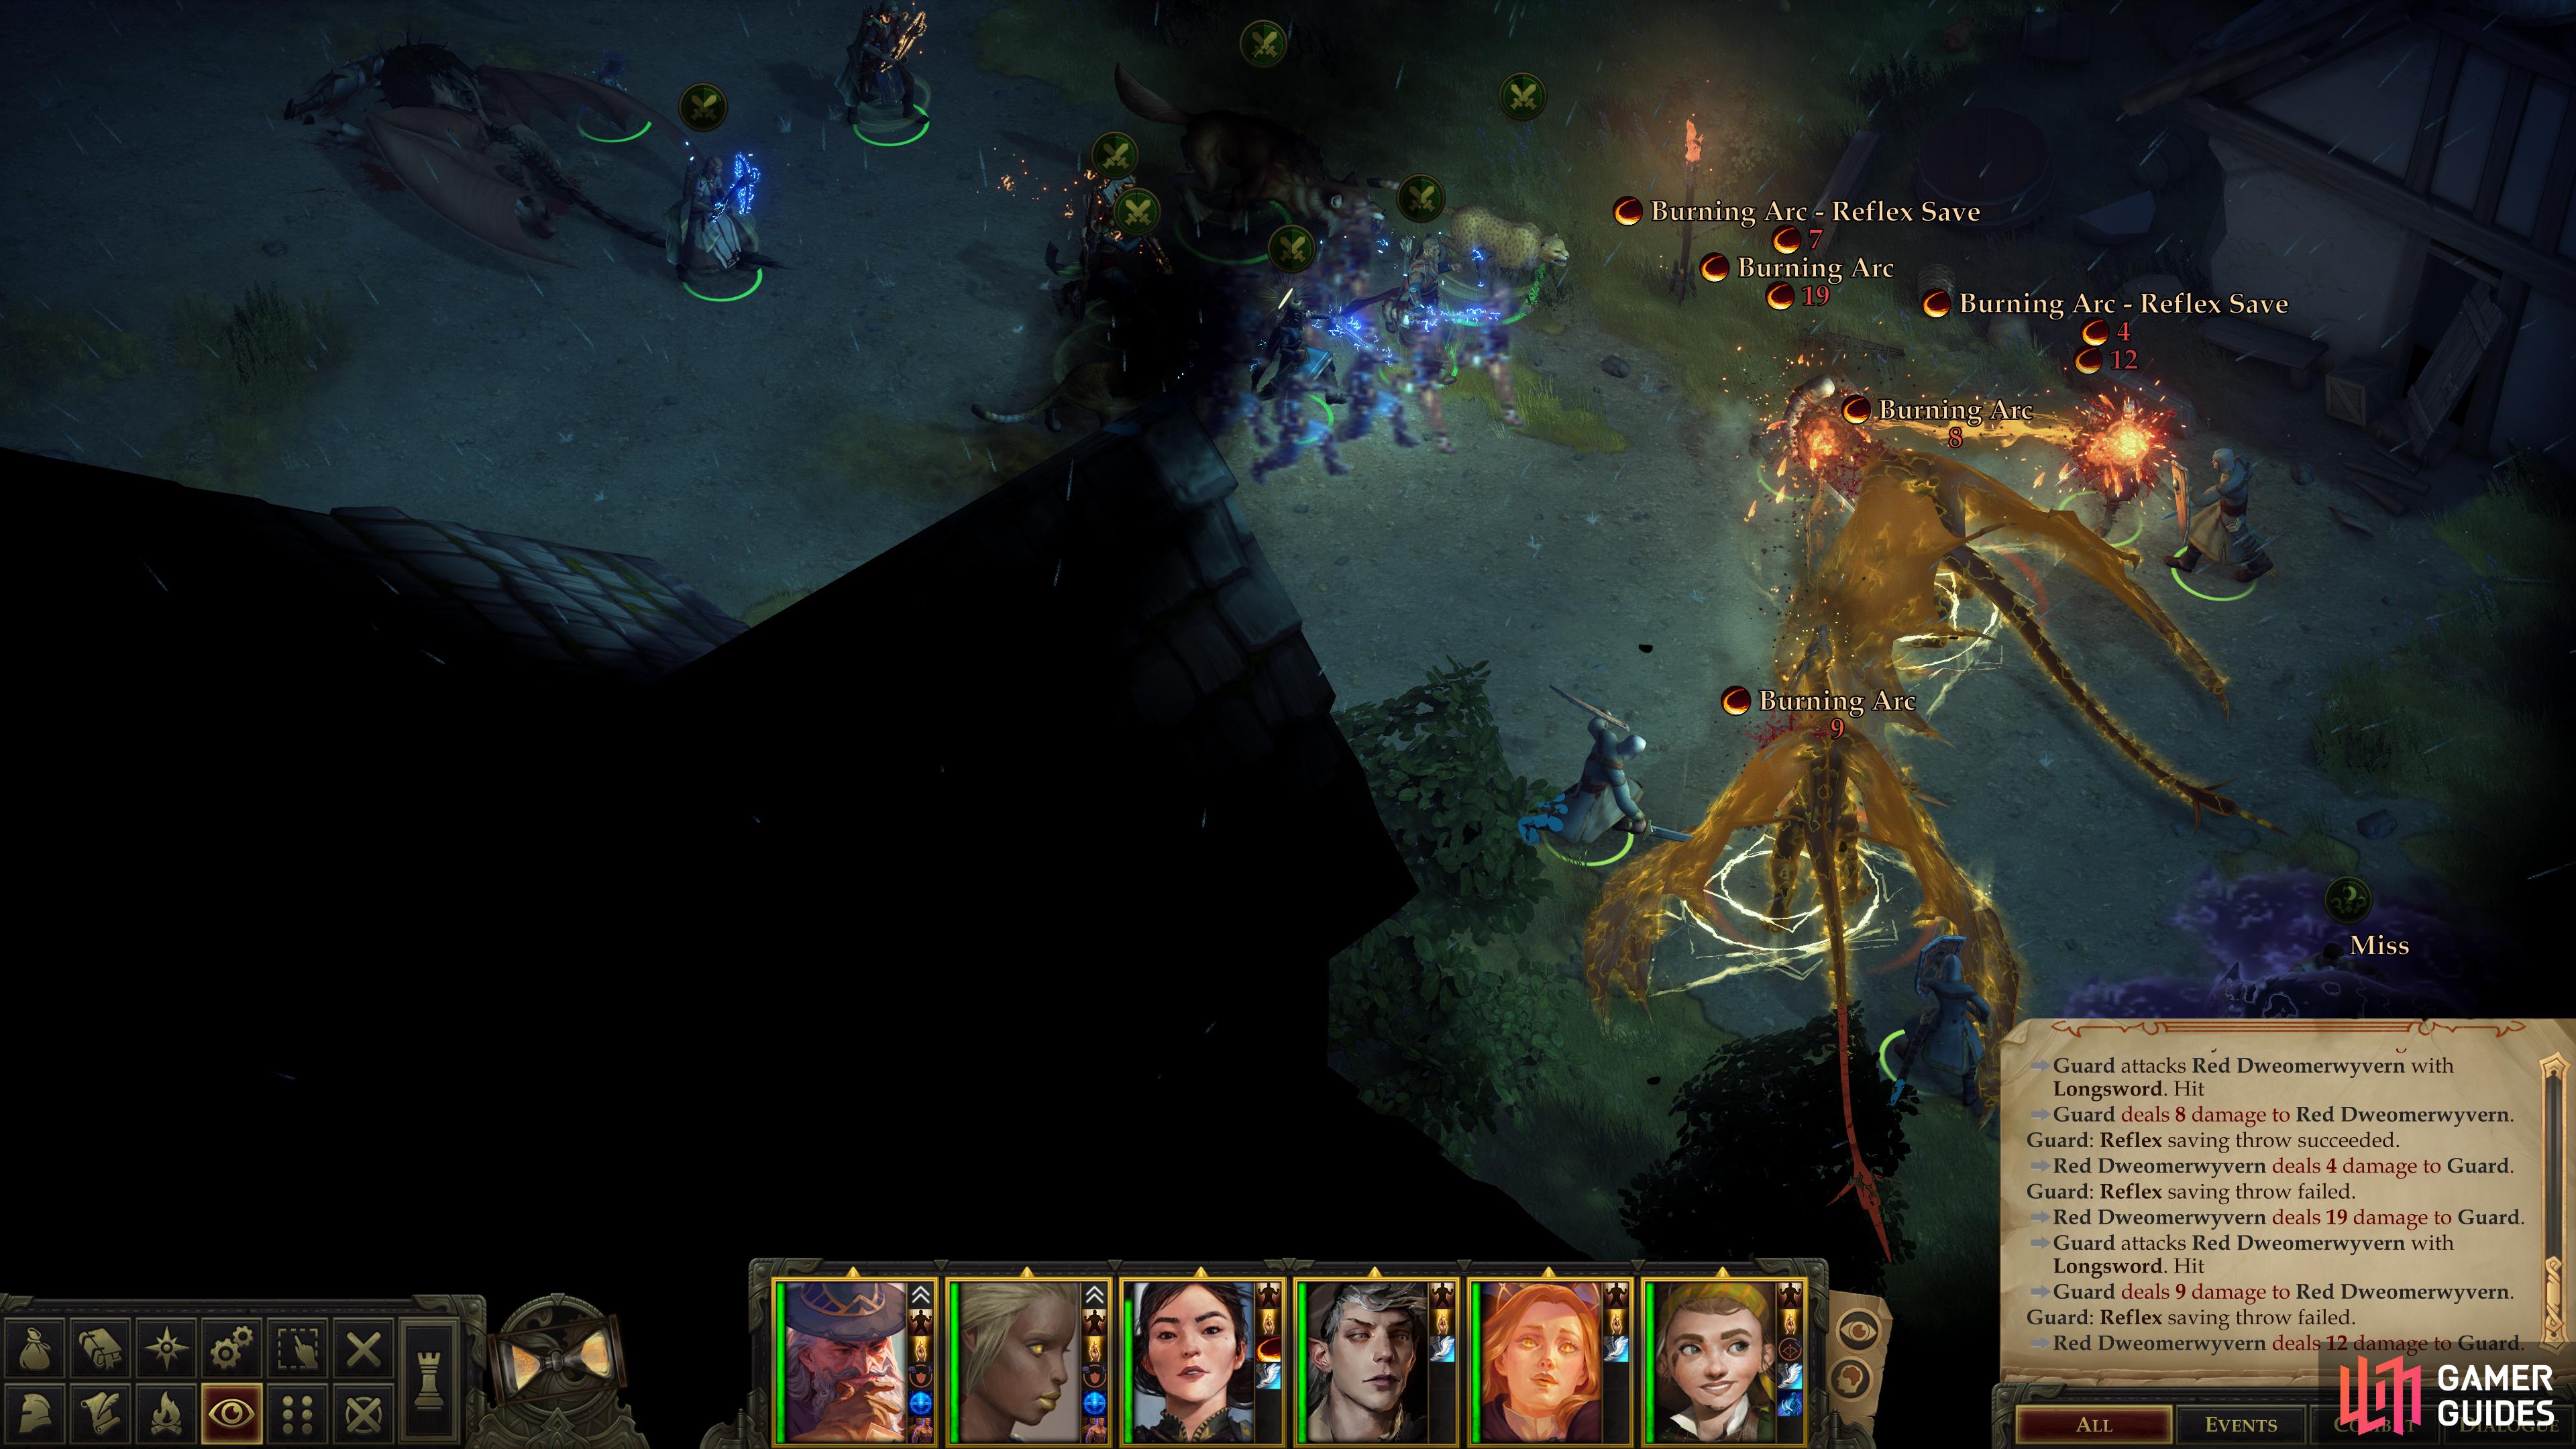
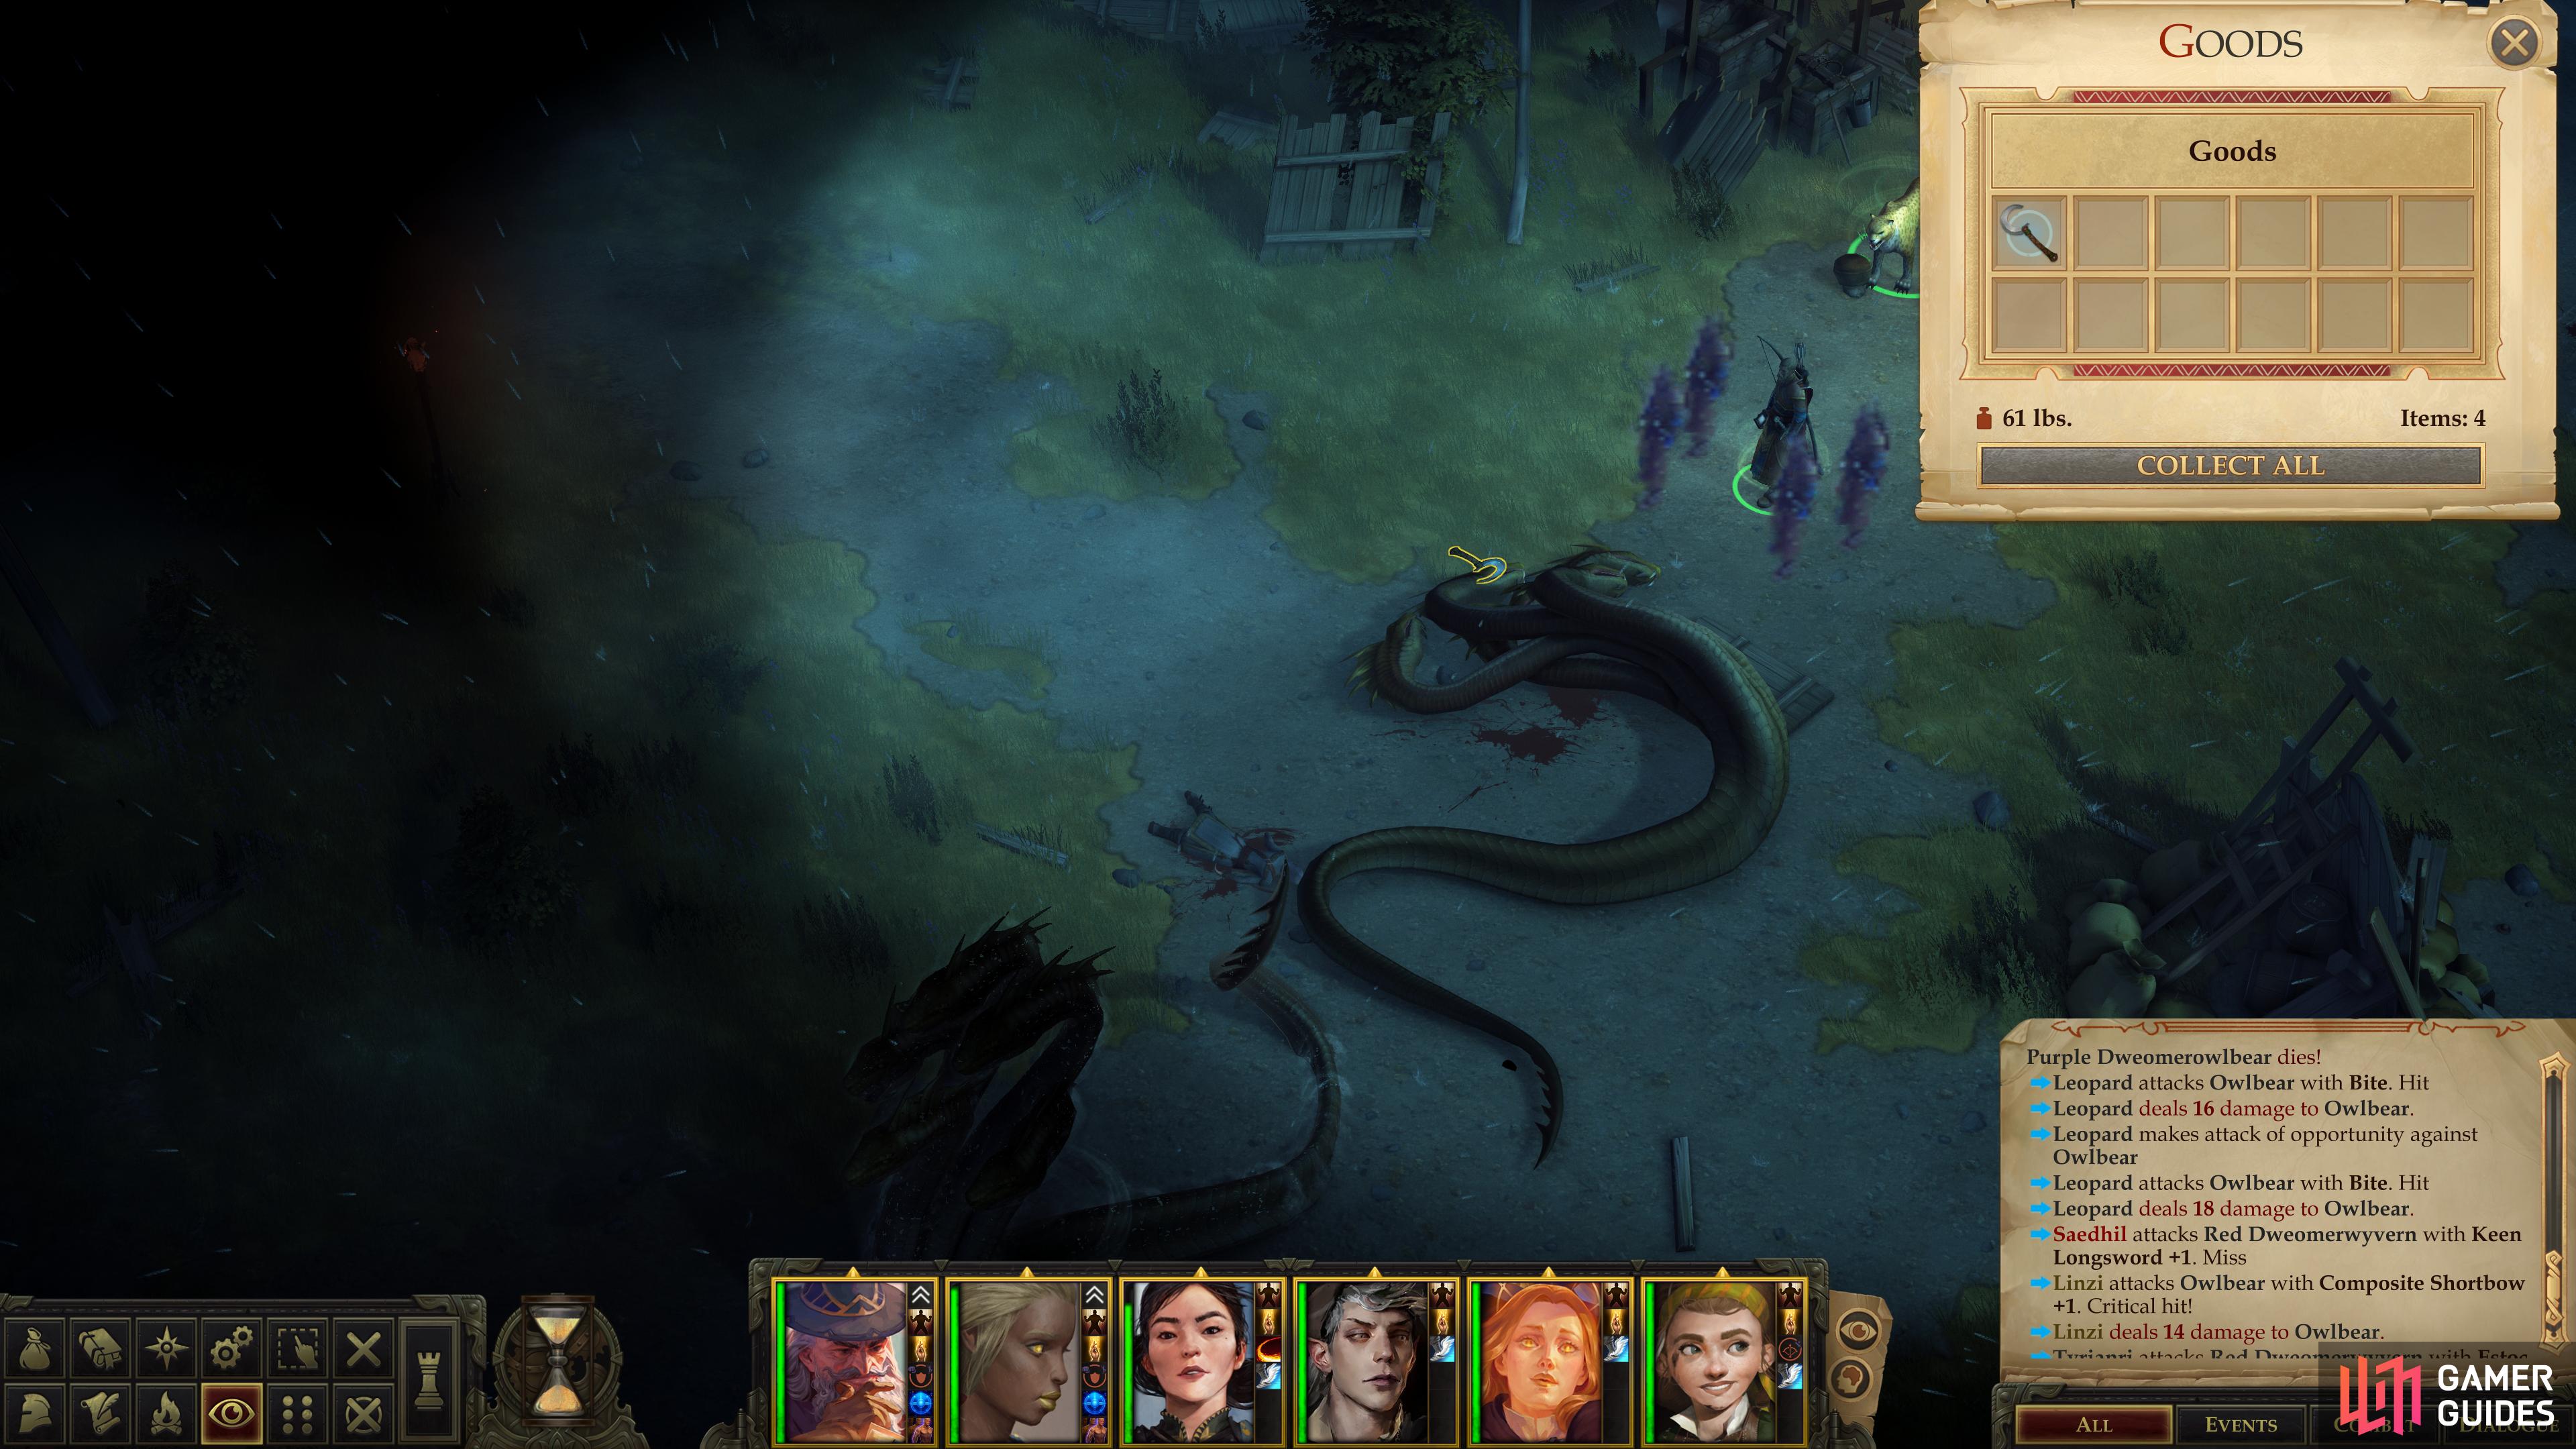
(1 of 2) Some novel enemies to the east include Red Dweomerwyverns and a Purple Dweomerowlbear.
Some novel enemies to the east include Red Dweomerwyverns and a Purple Dweomerowlbear. (left), Help Verdel rescue a guard for some XP. (right)
Finish Off the Monsters
With Jhod saved - and by extension, your capital - your main objective in this area is complete. However, there’s still a few things you can do in the capital if you feel so inclined. You’ll find more monsters lurking around, which you can kill for the bonus XP - and assuming your kingdom is in good shape and the date is early (say over 200 days are left on the timer for [An Ancient Curse, Part 3]) you should be able to spare the time and spells required to kill them. Also, the Womb of Lamashtu is quite a ways distant - you’ll likely need a rest when you get there, so there’s no good reason not to expend your resources here, if you so desire.
First head to the eastern corner of the map (southeast from the throne room), where you’ll find a somewhat challenging group of monsters fighting some of your guards. These include two Red Dweomerwyverns, a Purple Dweomerowlbear and a Ferocious Manticore. The two Red Dweomerwyverns can use Burning Arc, but you shouldn’t need to prepare for that much - just let them use it on the nearby guards and cut the wyverns down before they can do it again. The Purple Dweomerowlbear has similar stats to a normal owlbear, save it comes with Mirror Image active and cold and electrical resistances. One of the nearby guards may transform into an owlbear during the fight.
Slay the monsters, then talk to a woman named Elina, where you can make a [Lawful Good], [Neutral], [Chaotic Neutral] or [Neutral Evil] dialog response. What you say doesn’t really matter here, so go with whatever alignment you fancy most.
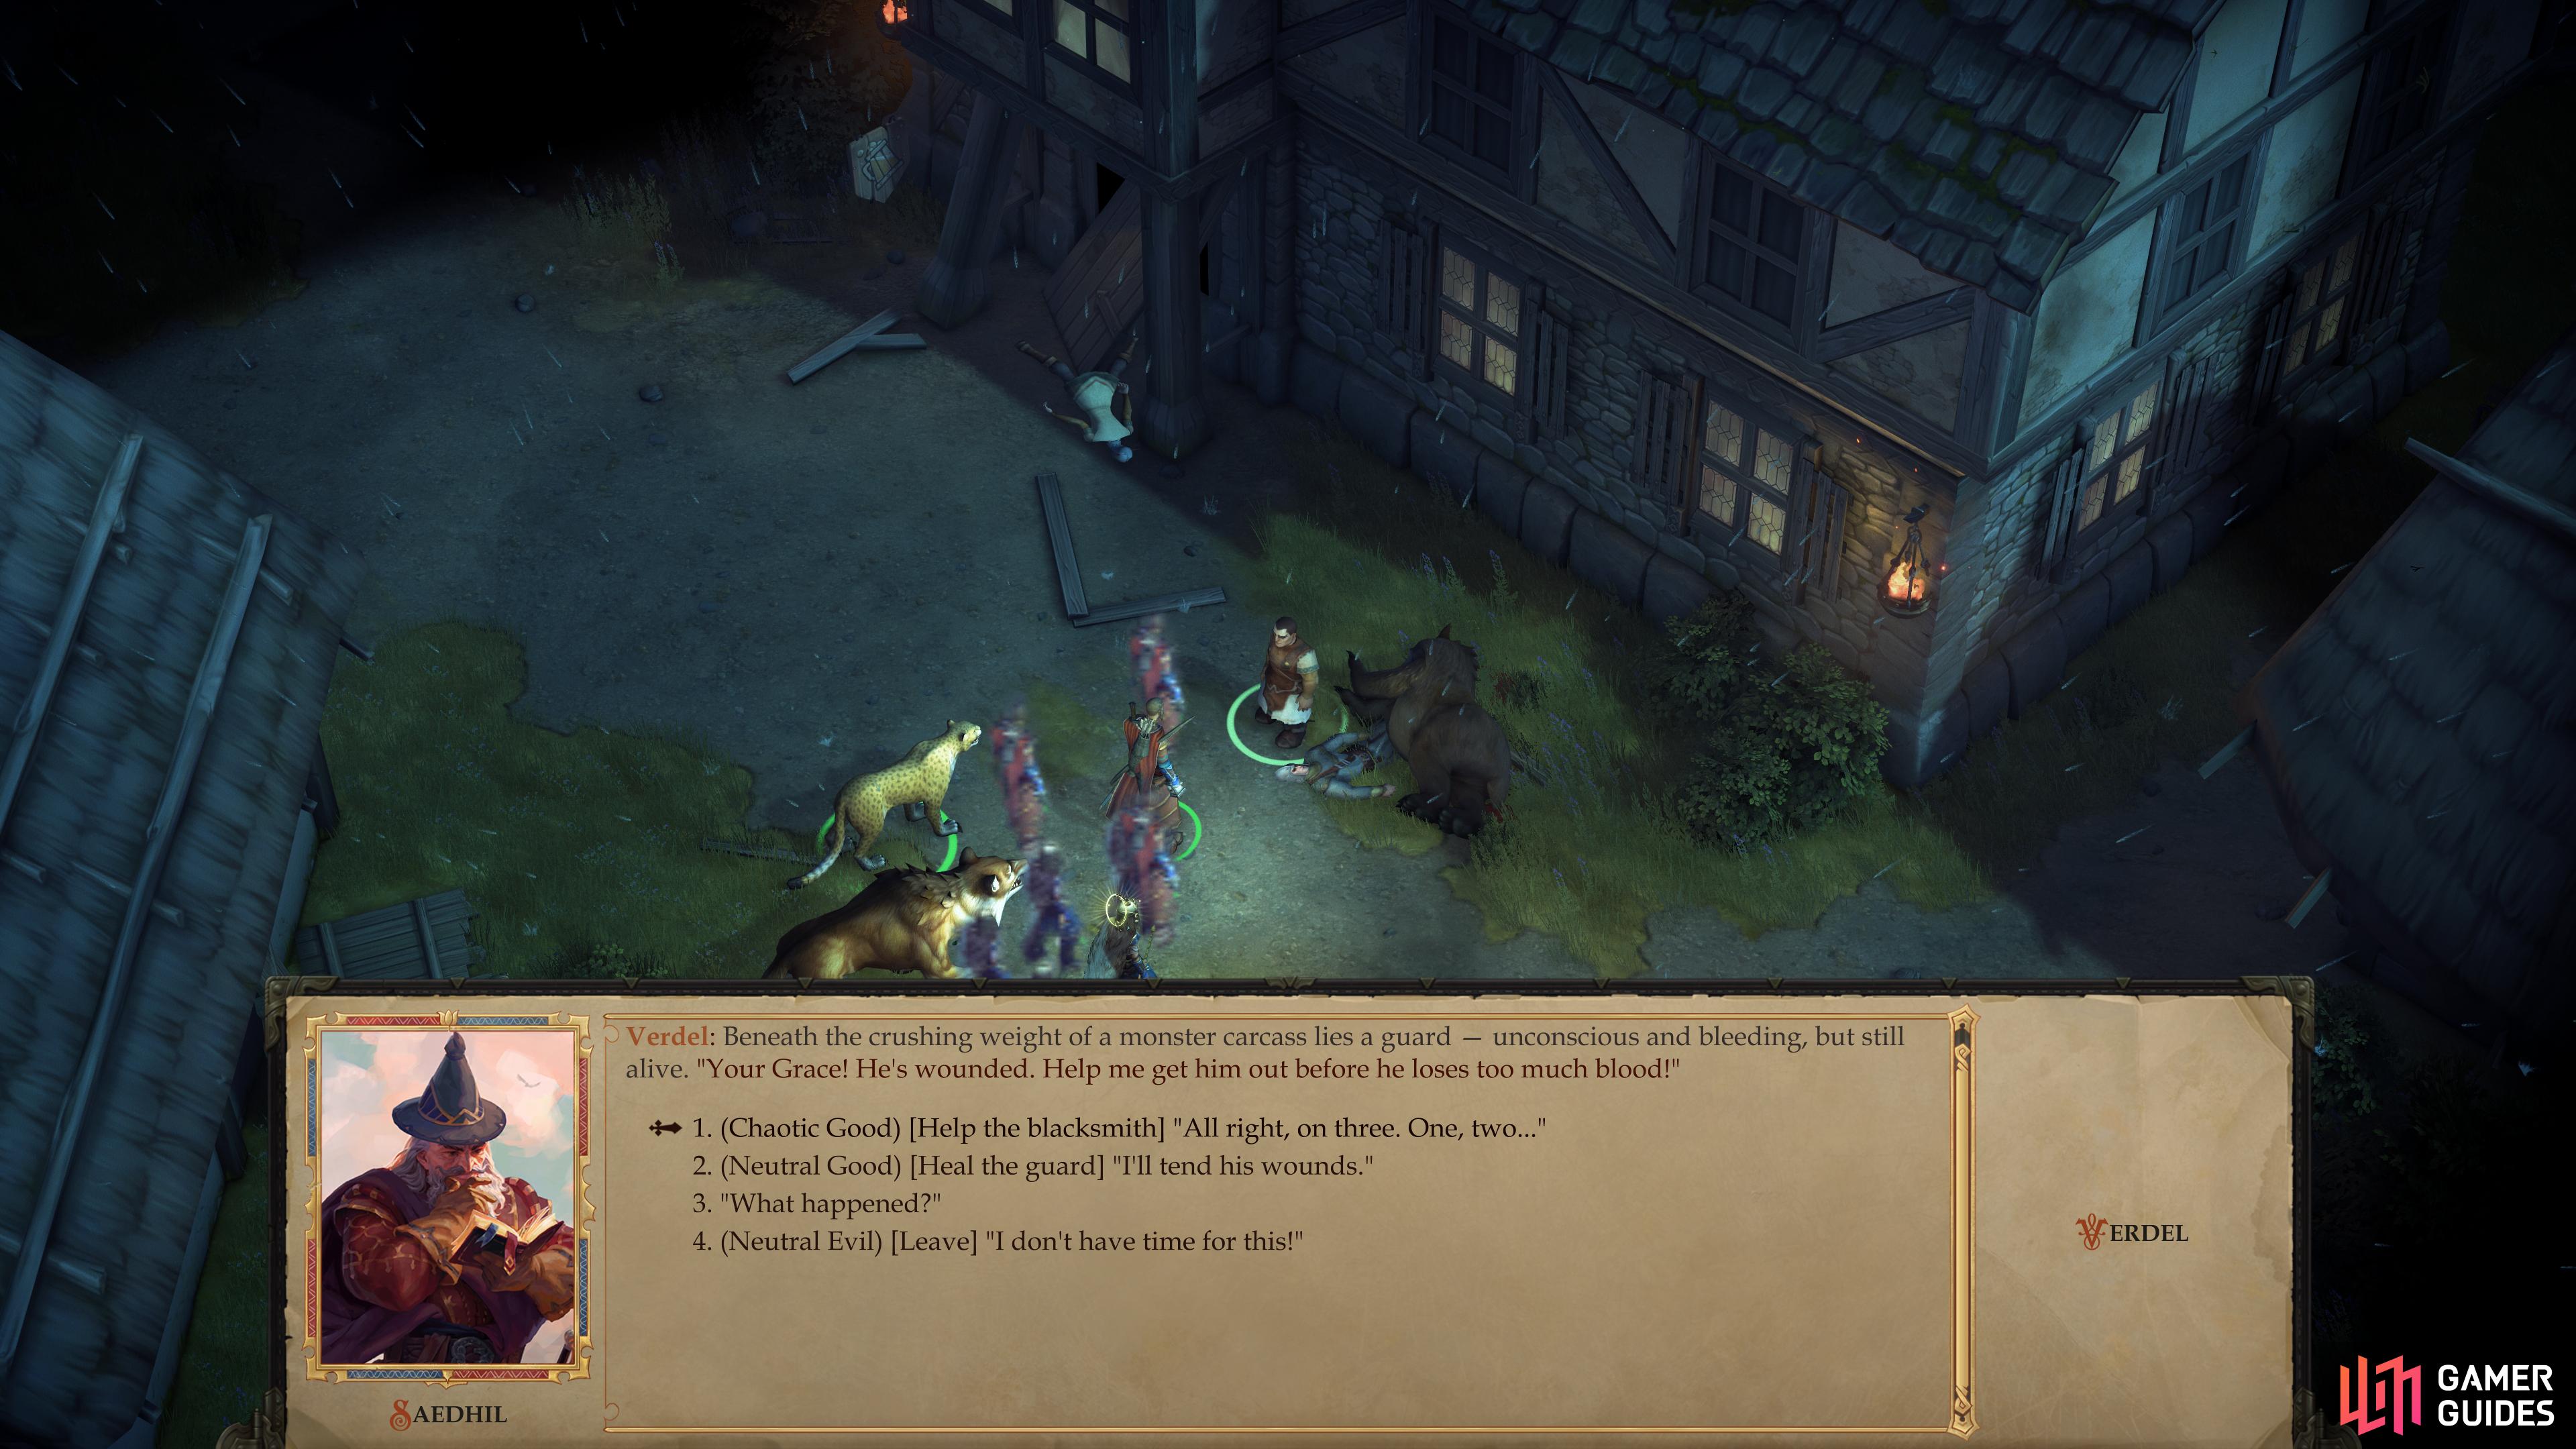
Next make your way southwest around a house to find Verdel, who calls your attention to a guard who managed to find himself under the corpse of an owlbear. Either pick the [Chaotic Good] option to help move the monster corpse, [Neutral Evil] to heal the guard, or [Neutral Evil] to abandon them. Or could jabber on and ask useless questions. Rescue the guard for a bit of XP, after which you’ll be able to conduct business with Verdel. You know, if you need to sell off some monster skins or goblin weapons.
Return to your throne room, and from there head northwest to reach the northern edge of the map. Here you’ll find a Ferocious Owlbear, a Ferocious Wyvern and two Ferocious Hydras threatening some citizens. Your guards will do a good job drawing the attention of the monsters, so you should be able to just walk up and smite them. A peasant may transform into another Ferocous Wyvern after the fight, so watch out for that.
Make your way southwest from your throne room, going past the town square. Southwest of the town square you’ll find a dead hydra with a Sickle +2 embedded in it. Further southwest you’ll find a Quickhydra, and beyond that, a pair of Quickbears (not to be confused with owlbears - they’re much weaker) another Quickhydra and a Black Dweomerowlbear. The owlbear is, as usual, the greatest threat.
(1 of 2) Snatch a “Sickle +2” from the corpse of a hydra,
Snatch a “Sickle +2” from the corpse of a hydra, (left), then pass judgement on some marauders. (right)
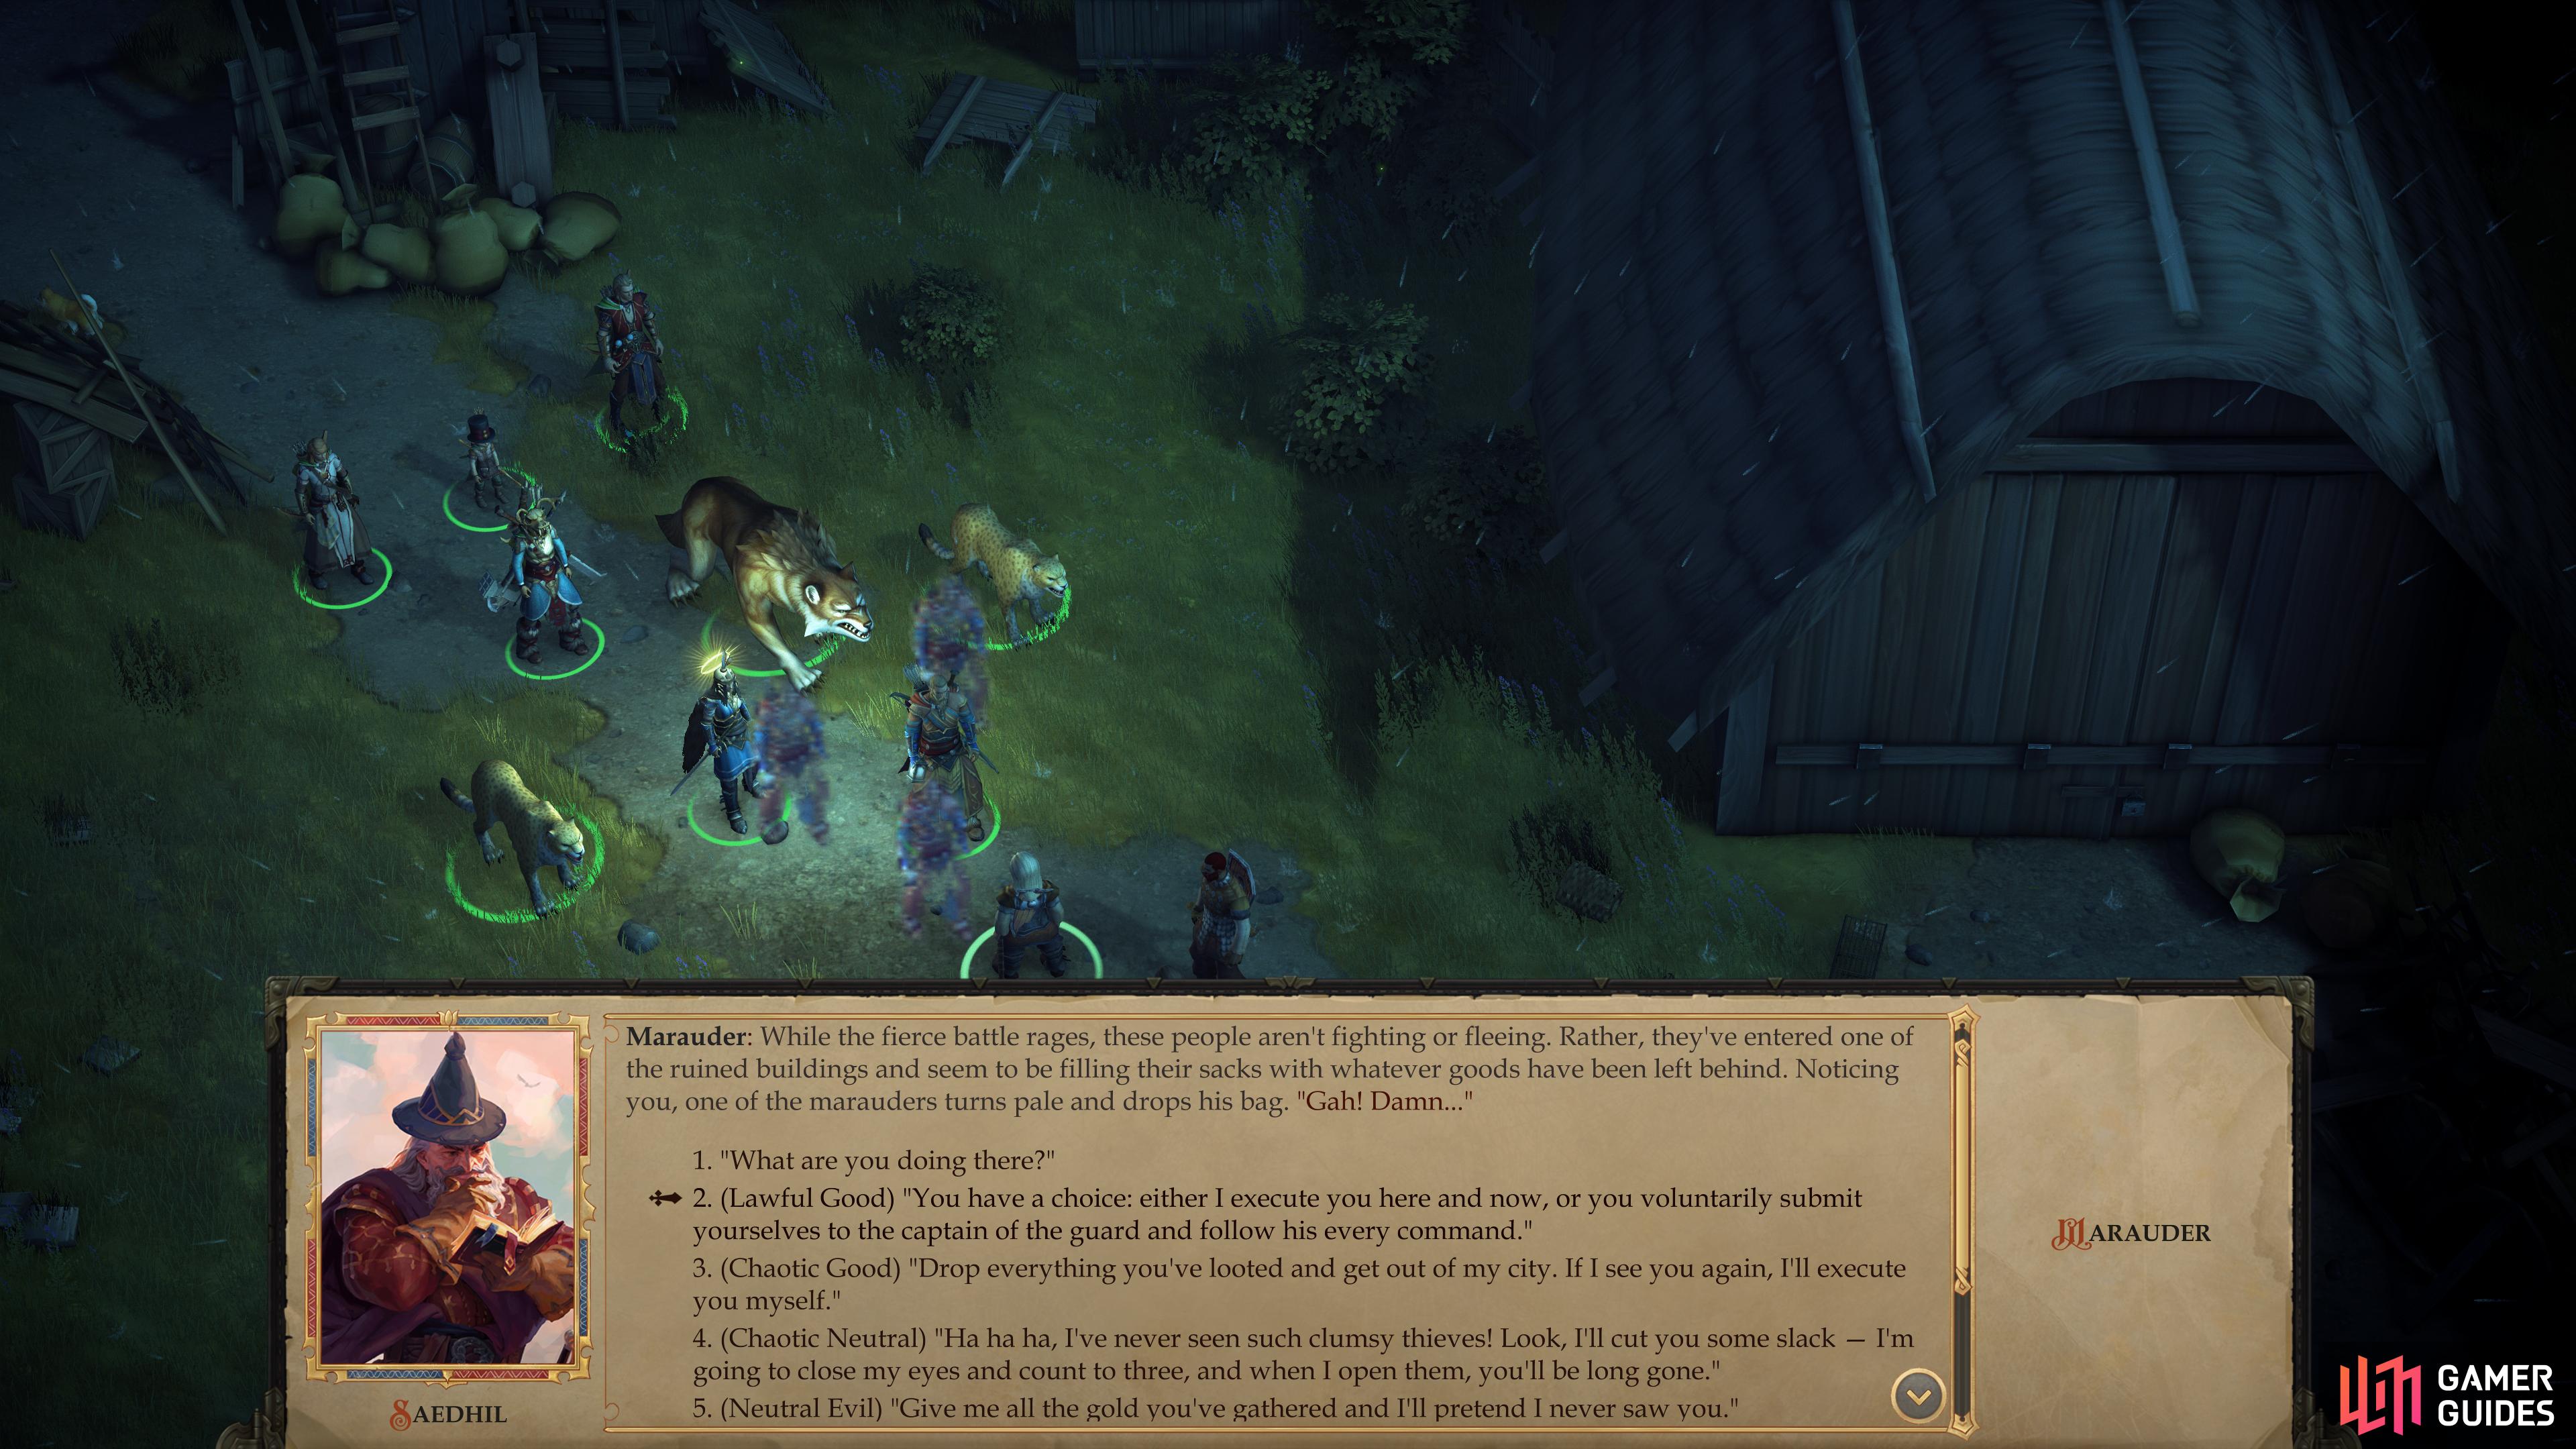
Deal With the Marauders
Sadly, not all monsters have scales and claws. Make your way southeast from this final group of monsters to find some marauders busily looting houses, taking full advantage of the mayhem to enrich themselves. These marauders can be found just northwest of the area transition on the southern edge of the map. Talk to them and you’ll get a wide variety of moral choices, covering every possible alignment save Neutral Good. That said, most choices boil down to chasing the marauders off ([Chaotic Good], [Chaotic Neutral]), punishing them in some form ([Lawful Good], [Neutral Evil]), letting them go ([Neutral], [Chaotic Evil]) or killing them ([Lawful Neutral], [Lawful Evil]).
If you do pick a fight, the marauders are generally lower-tier enemies by now, although one is an alchemist, and others are wedged in behind boxes that can make it difficult for you to reach them. More a nuisance than a genuinely challenging battle, and not terribly lucrative, either.
Deal with the marauders however you wish, after which you’re done with your business in Tuskdale. Time to head to the Womb of Lamashtu and get to the bottom of this Bloom business.

 Sign up
No Comments