
You will be joining up with some Rangers here to defend against the Blargian presence, with another new weapon available to you ( Warmonger at 28,000 Bolts). Upon landing, you will see that there are two objectives here, one of which pertains to a grindrail. Ignore that for now and take the other path, where you will find a bunch of enemies. Defeat them all and feel free to solve the Trespasser puzzle if you please (it’s optional), leading you to a RYNO Holocard ; there’s also a Gold Bolt on the roof of the very same building. Anyway, go to the next area and clear it of the enemies, then drop down to the lower section and do the same. When it’s clear, use the bolt crank to extend the bridge above you.
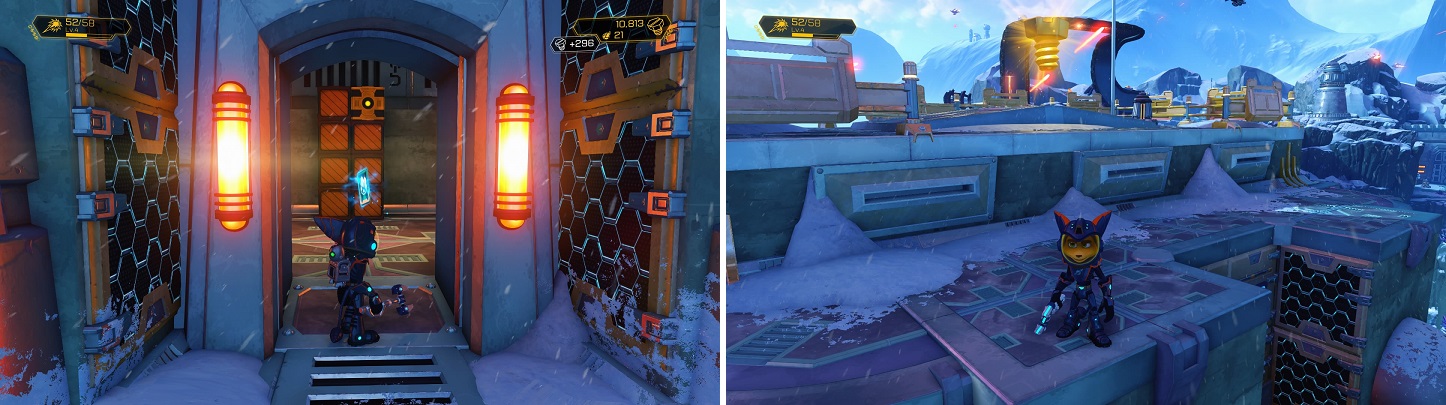
Solve the Trespasser puzzle near the beginning to get a RYNO Holocard (left). You can also find a Gold Bolt on the top of the same building (right).
Of course, as soon as you finish with the bolt crank, a tank gets sent out for you. One of the easier ways of dealing with the tank is to make it dance (yes, dance) with the Groovitron, then pound it with your strongest weapons while it’s helpless. To continue, slide down the icy hill nearby to find more enemies. This will include more tanks, so if you had success with the previous tactic (or whatever you devised to work), do it again here. Once everything is finished, use the bolt crank to create another bridge, then cross it to come to a short cutscene. Those two turrets will completely annihilate you should you try to cross that way, so you’ll need to find another way inside.
Luckily, there’s an ionized track nearby that allows you to use your Magneboots. Walk along it, keep an eye on the few hazards in your way, two of which are lasers that you can jump over, with another being a mine at the end you can knock away with your wrench. This track will lead you to a fort with a few enemies, which shouldn’t be too much trouble. Your goal at the fort is to find a bolt crank, but you will be able to find a lot of crates laying around, as well as a Gold Bolt sitting on top of one of the walls. When you find the bolt crank, use it to disable the turrets and extend a bridge for your fellow Ranger.
Once she’s inside, a few enemies will attack you, then follow Cora to the structure ahead of you, where two tanks will bust out to attack. If that isn’t the worst of it, some more enemies will appear behind the tanks, so you’re going to need to quickly take them out. Thankfully, you can go to the sides of the building to get a jump on the enemies inside, as well as use the pillars left behind as cover. Open the door after the coast is clear, then go to the cannon. Unfortunately, it’s deactivated, so you’re going to need to reactivate it via a Trespasser puzzle. This one introduces the concept of deactivating a ring, which also removes the blockers. To quickly solve this one, deactivate the middle one to easily match the other two lasers.
With the cannon back online, it’s time to take down those battleships. There’s a total of four ships you need to destroy, but the normal fire will not put a dent in them. Instead, you’re going to need to charge up the ion cannon, which is done by shooting the smaller ships flying through the air. Once the bar in the middle of the screen is full, you can fire the ion cannon at the battleships to destroy them. While the first one is free, the other battleships will begin firing missiles at you, which are presented on your screen as red/black “!” markers, so make sure you destroy them before they reach you. These missiles become more frequent when there’s only one or two ships left, and the smaller ships will begin making formations in front of you to attack, too. When you’ve downed all four battleships, take the taxi back to your ship.


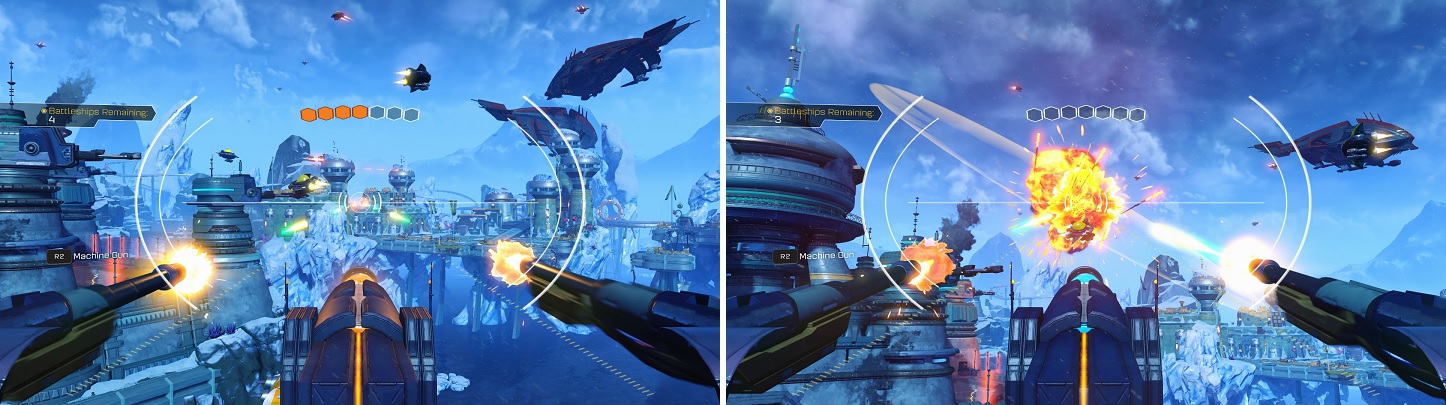
Charge the main cannon by shooting the smaller ships (left) and when it’s ready, let loose on the battleships (right).
Ride the Rail
Back at your ship, there is one other objective to do here before taking off, which is to grind the rail. This section is a lot more complicated than the ones you’ve had so far, with a lot more obstacles and even one little detour for an item. On the second set of rails, you will encounter electric rings that must be jumped through; do not get off the rails until you’ve come full circle, as there is a Holocard sitting in the middle of one of those rings. As you continue forward, there will be more obstacles to jump over, as well as mines to hit with your wrench, and even points at the end of certain tracks to avoid by jumping over to another track. At the end of everything, you’ll land on a small platform with an Infobot, allowing you to go to Pokitaru, our next stop.

 Sign up
No Comments