Objective: Search the Command Centre for a way to open the gate
When you regain control, you’ll be in an outdoor helipad-type area behind cover with 10 enemies occupying the zone ahead of you. Before we do anything, you’ll want to craft some arrows so hit the RT button to fill your quiver. When you are ready to kick some ass, scope out the area.
If we are stealthy, we can make it through this area relatively quickly, however as per usual, the second you are detected, the guards will break off and behave erratically, leaving you to use more traditional shooter methods to take them all out. Before you have been detected however, from our initial position, you’ll find enemies in the following locations:
- One patrolling along the top of a shipping container on the far side of the area, to the left of the Communications building.
- Two soldiers in the guard towers to the right (one in each).
- Two outside to the right of the Communications building beneath the guard towers.
- Two behind the truck in front, just next to the Communications building.
- One on the roof of the Communications building.
- One inside the communications building.
- One located behind the Communications building.
To begin with, you’ll want to pull out your bow and headshot the fellow patrolling along the wall to the left of the Communications building.


Next, you’ll want to headshot the guard in the nearest guard tower. Climb up on top of the short roof nearby. From here, you can shoot the guard in the second guard tower and the fellow on the rooftop of the Communications building. Cross the beam to the first guard tower and use the zip line to reach the roof of the Communications building.
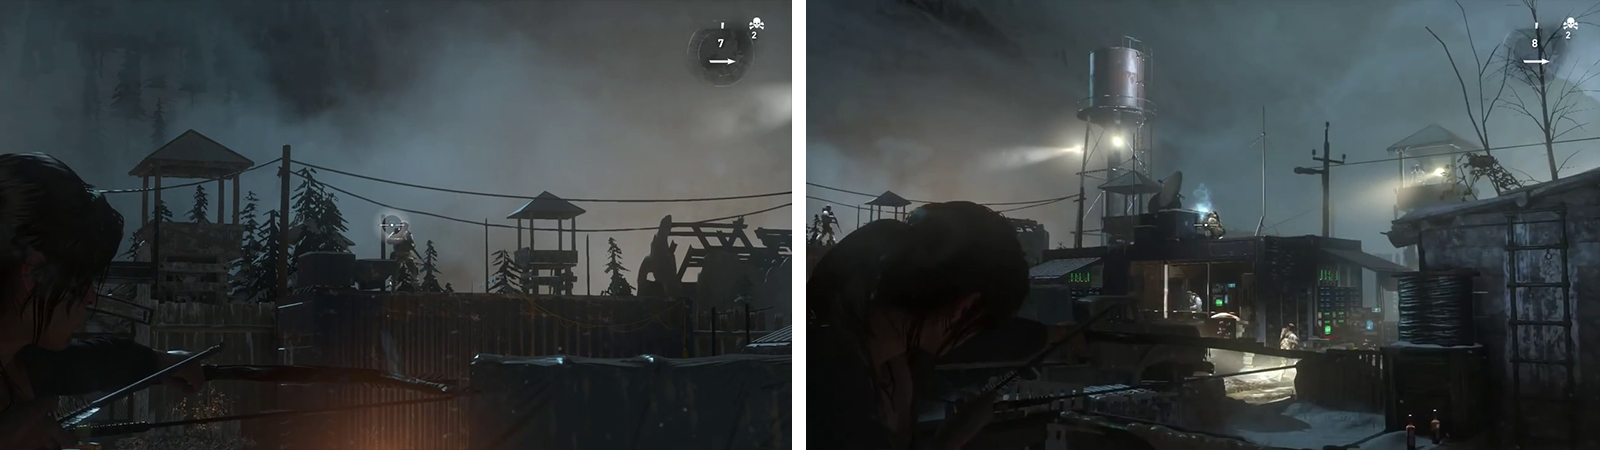
Take out the lookout on the raised walkway first (left) before focusing on the other enemies (right).
At the far end of the rooftop, wait for the enemy to start working on the generator below. As he does, use a silent takedown attack (and hit the follow up button prompt) to kill him quietly. Turn around and head through the open door to enter the Communications building. Sneak up and choke out the guard inside.
Grab the box of Ammo in the far left corner and the Document [13/26] from the desk by the window. Destroy the Laptop [Data Corruption Challenge 01/10] on the desk and a second Laptop [Data Corruption Challenge 02/10] on the wall opposite the guard we choked out. Hit the button in front of the window to open the gate across the courtyard.
Objective: Meet Jacob
Exit the door opposite the bottom and sneak to the right. There are a pair of enemies just around the corner here and if you are careful, you should be able to sneak up and kill each of them quietly. Destroy the Laptop the second guard was working on [Data Corruption Challenge 03/10]. From here, look to the center of the area and hit one of the two guards with a Poison Arrow to kill them both (or take them both down quickly. Where they were standing, you’ll find another Laptop [Data Corruption Challenge 04/10].
To the right of this location, near the fence you’ll find some trees/bushes and a deer carcass we can interact with for some reagents and a cylinder containing some reagents on the wooden platform behind the statue. There is also a small shack near our initial entry point with some cloth if required.
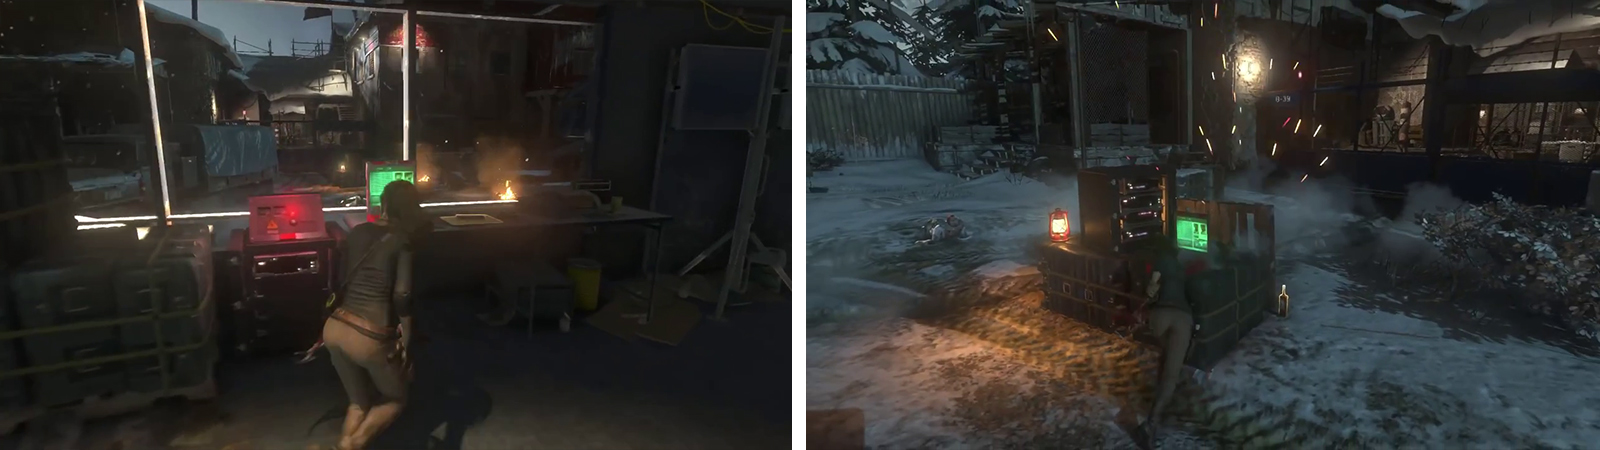
After opening the gate from the communications building (left). Destroy the Laptops in the courtyard before proceeding (right).
Approach the gate that we opened and you’ll find another Laptop [Data Corruption Challenge 05/10] on a crate in front of it. Enter the gate and immediately look to the right to see a sixth Laptop [Data Corruption Challenge 06/10] . Check out the locked cabinet at the back of the area for some XP.
When you are ready to continue, stand beside the wooden pillar topped with rope and shoot a Rope Arrow at the roped beam above. Lara will tie the rope to the pillar and create a zip line we can climb up. Do so to reach the platform at the top of the broken stairs.
Climb the wall to the right and use the window frames and guttering to shimmy around the corner of the building and enter via the open window for a scene.
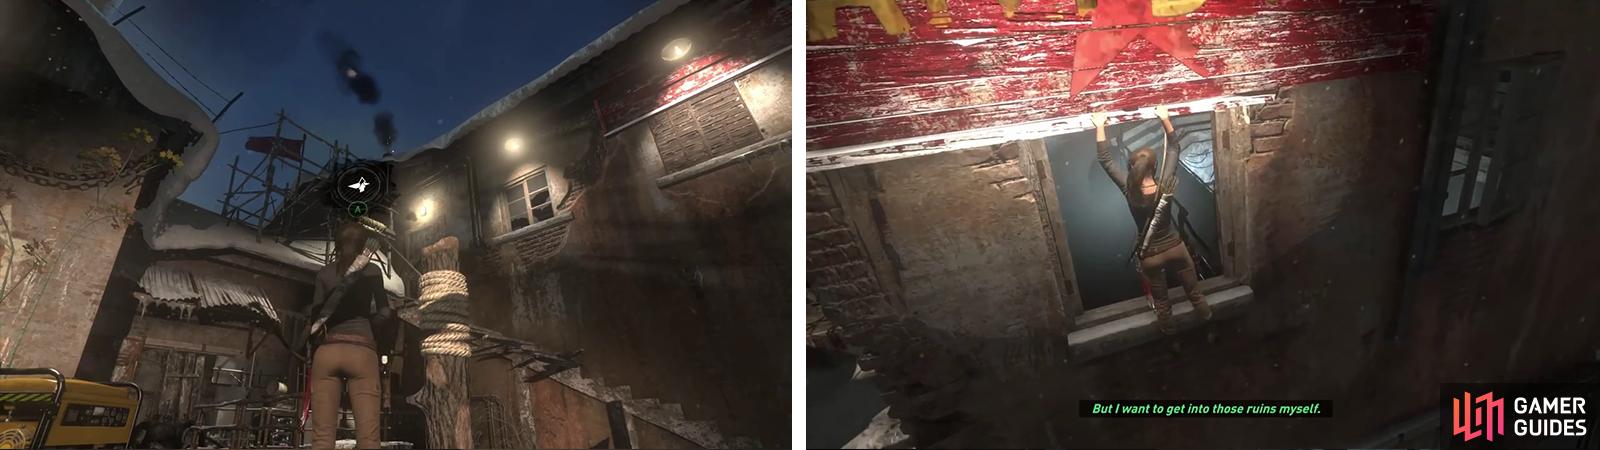
Use the Rope Arrows to reach the top of the broken stairs (left). Shimmy around the handholds and enter the open window (right).
Objective: Hide from the Trinity Soldiers
You’ll regain control of Lara in waist deep water. Simply wade to the far end of the passage and climb out through the hole at the end.

 Sign up
No Comments