Objective: Get through the first gate
After the scene, turn around and behind Lara there will be another Mushroom to loot (if required). Follow the platform to the north, past the zip line to find a camp fire. Approach this to unlock a new Base Camp ‘Threshold of Kitezh’. You can use the Base Camp here to apply any upgrades you require and spend any skill points you have. Exit the Base Camp menu when you are ready to continue.
On top of the railing directly behind the zip line there is a Document [01/08 - Mongolian]. Grab this before using the zip line to reach the next area below.

Grab Document 01 (left) before sliding down the zipline to continue (right).
From the building that you land on, drop down to the ledge below to find a Bell – we’ll need to cut these down for the ‘For Whom the Bell Tolls’ area challenge. Approach the Bell and cut the rope [For Whom the Bell Tolls 01/05] .
There is a slanted wooden platform leading to another rooftop nearby. From here, you’ll see another Bell above. Before climbing up, look on the wall below and to the left you should be able to spot a Deathless Banners (they look like small, square banners with a red, circular cross formation on them) – hitting these with a Fire Arrow will destroy them and count towards the ‘Banner Wars’ area challenge. Shoot this Banner [Banner Wars 01/08].
Now jump and scramble up into the Bell room at the top of the building to the east to find another Bell [For Whom the Bell Tolls 02/05] . Look for the wheel mechanism on the balcony here and look from this down into the building to the northeast to spy a trapdoor. Hit this with a Rope Arrow and use the mechanism to open it. Ignore it for now though, we’ll be back for it in a bit!
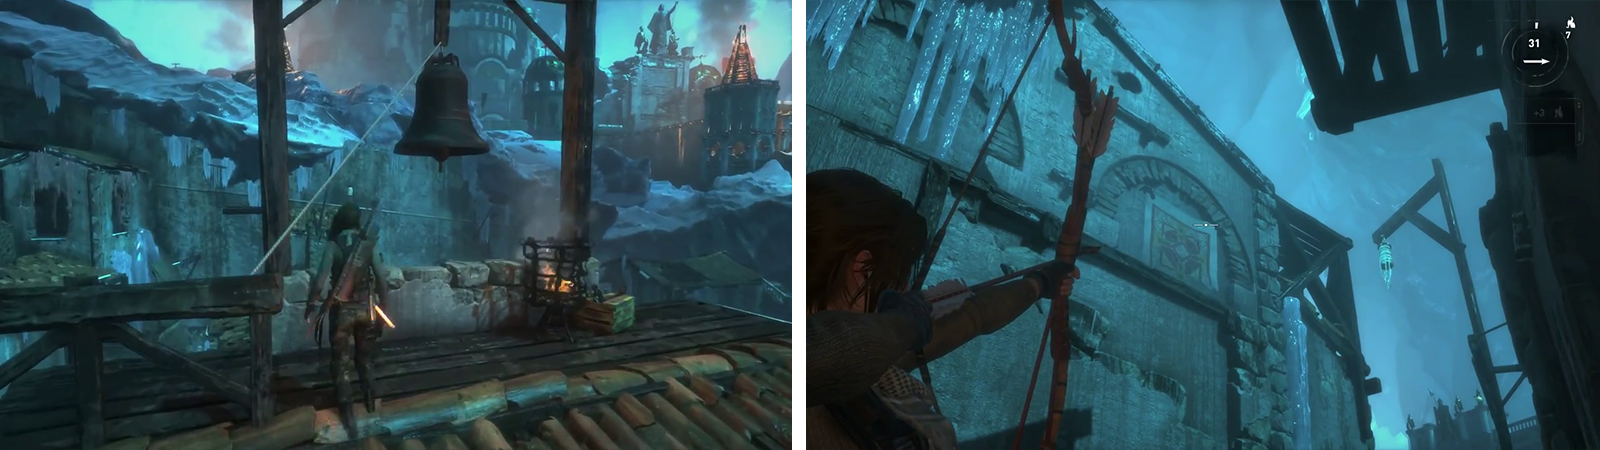
As you explore the area search for bells to cut down (left) and Banners to burn (right) for the area challenges.
Drop down to the previous rooftop and you should see a third Bell in the distance. Before heading over, look on the building in the foreground on the wall facing you, there is another Banner. Shoot this [Banner Wars 02/08] before running over to the Bell to cut it down [For Whom the Bell Tolls 03/05] . Grab the crate of Salvage beside this.
Return to rooftop we reached from the zip line. Move to the eastern side and look below. There are a pair of deathless soldiers below. One who will remain stationary by the eastern wall of this building and another who will patrol around the side of the building with the statues to the northeast and back. Drop down and eliminate both of them with stealth kills.
At ground level, check out the ground by the southern wall of this building to find a Survival Cache [01/06] . With the building to your back, follow the icy cliff face to the right until you find a Monolith decipher this (requires level 2 Mongolian) to unlock the Coin Cache positions.
From the Monolith we can also find two more Deathless Banners. The first Banner can be found on the wall in the distance directly south of the Monolith [Banner Wars 03/08]. The second Banner [Banner Wars 04/08] is found on the building directly north of the Monolith. On the ground beside this second Banner, you’ll also find a Coin Cache [01/03].
After deciphering the Monolith, Coin Cache 01 is nearby (left). Relic 01 (right) can be found in a building at the base of the stairs by where we ziplined into the area.
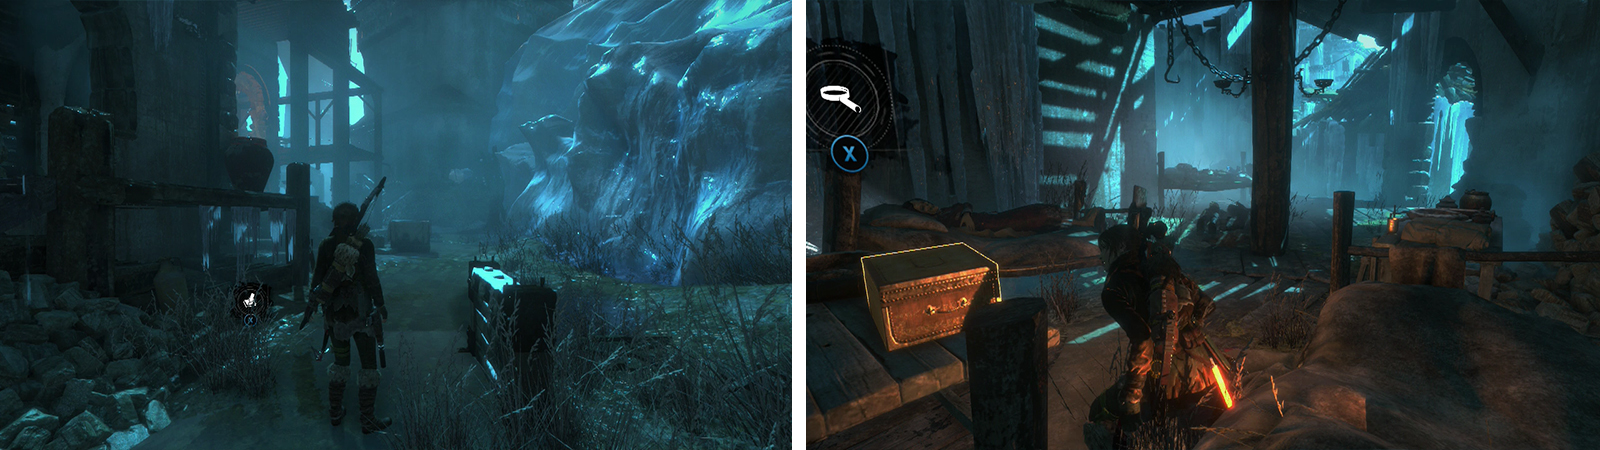
Return to the base of the building that we zip lined into the area onto. Move up the right hand side of the building to the north to find some stairs leading down. At the bottom, turn to the left and enter the building via the open window. Inside there is a chest containing a Relic [01/10 – Amber Necklace] .
Exit the building via the same window we entered and backtrack up the stairs. At the top, to the left you’ll see a large staircase in front of a building. At the top of the stairs there is a crate of Salvage and a Mural [01/03 - Greek]. There is also a statue here that we can destroy with gun fire to kick off the ‘Vandal’ area challenge [Vandal 01/08] .
Drop down from the platform here and follow the very eastern wall of the map to the north. At the bottom of the first set of stairs, look to the right side of the puddle in the path to find Survival Cache [02/06] .
Enter the building opposite using the window at ground level. On a table to the left as you enter is a pile of Byzantine Coins . Use the wall beside the wooden latticework to scramble up to a handhold above. On the second floor, drop into the trapdoor we opened earlier for a basket of Herbs and an Archivist’s Map . Use the Rope Arrow to remove the blockage from the door to return outside.
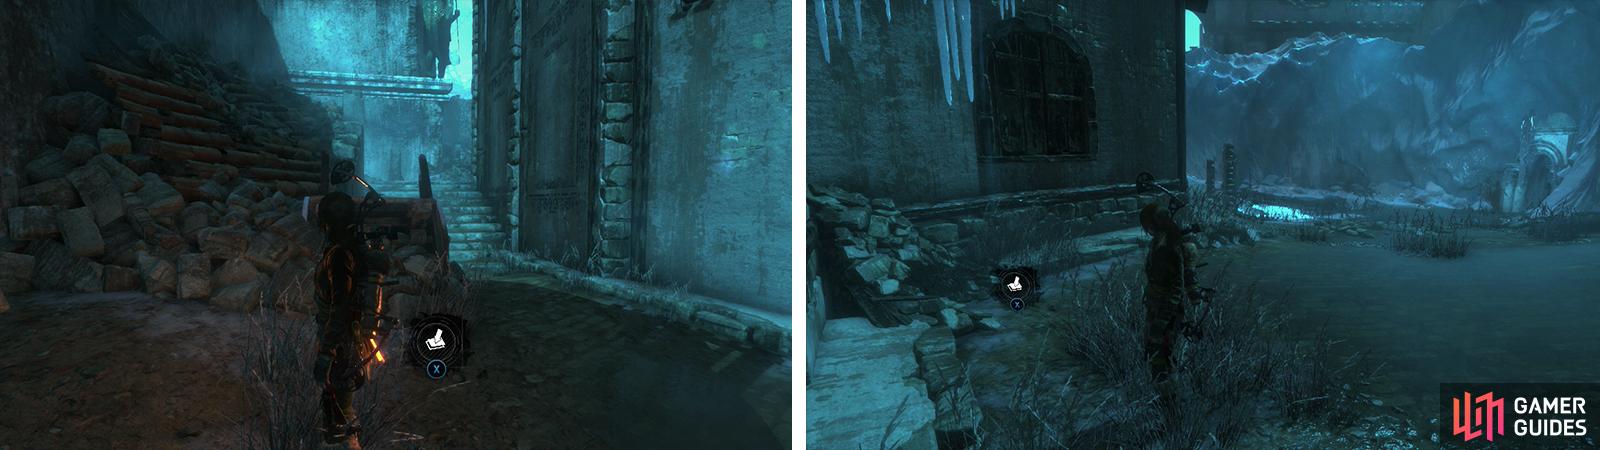
By the base of the stairs you’ll find Survival Cache 02 (left) and Coin Cache 02 (right) by the buildings opposite the entrance to the Challenge Tomb.
This time, follow the eastern wall of the map all the way to the north until you reach a clearing. Turn back to look back at the building we just rank past. On the right side of the wall facing us there is another Banner [Banner Wars 05/08]. At the base of the window of the building just to the right of this is another Coin Cache [02/03].
At the far, eastern end of the clearing we’ll find an archway built into an icy cliff face. this happens to be the entrance to a Challenge Tomb. Let’s check it out, shall we?

 Sign up
No Comments