
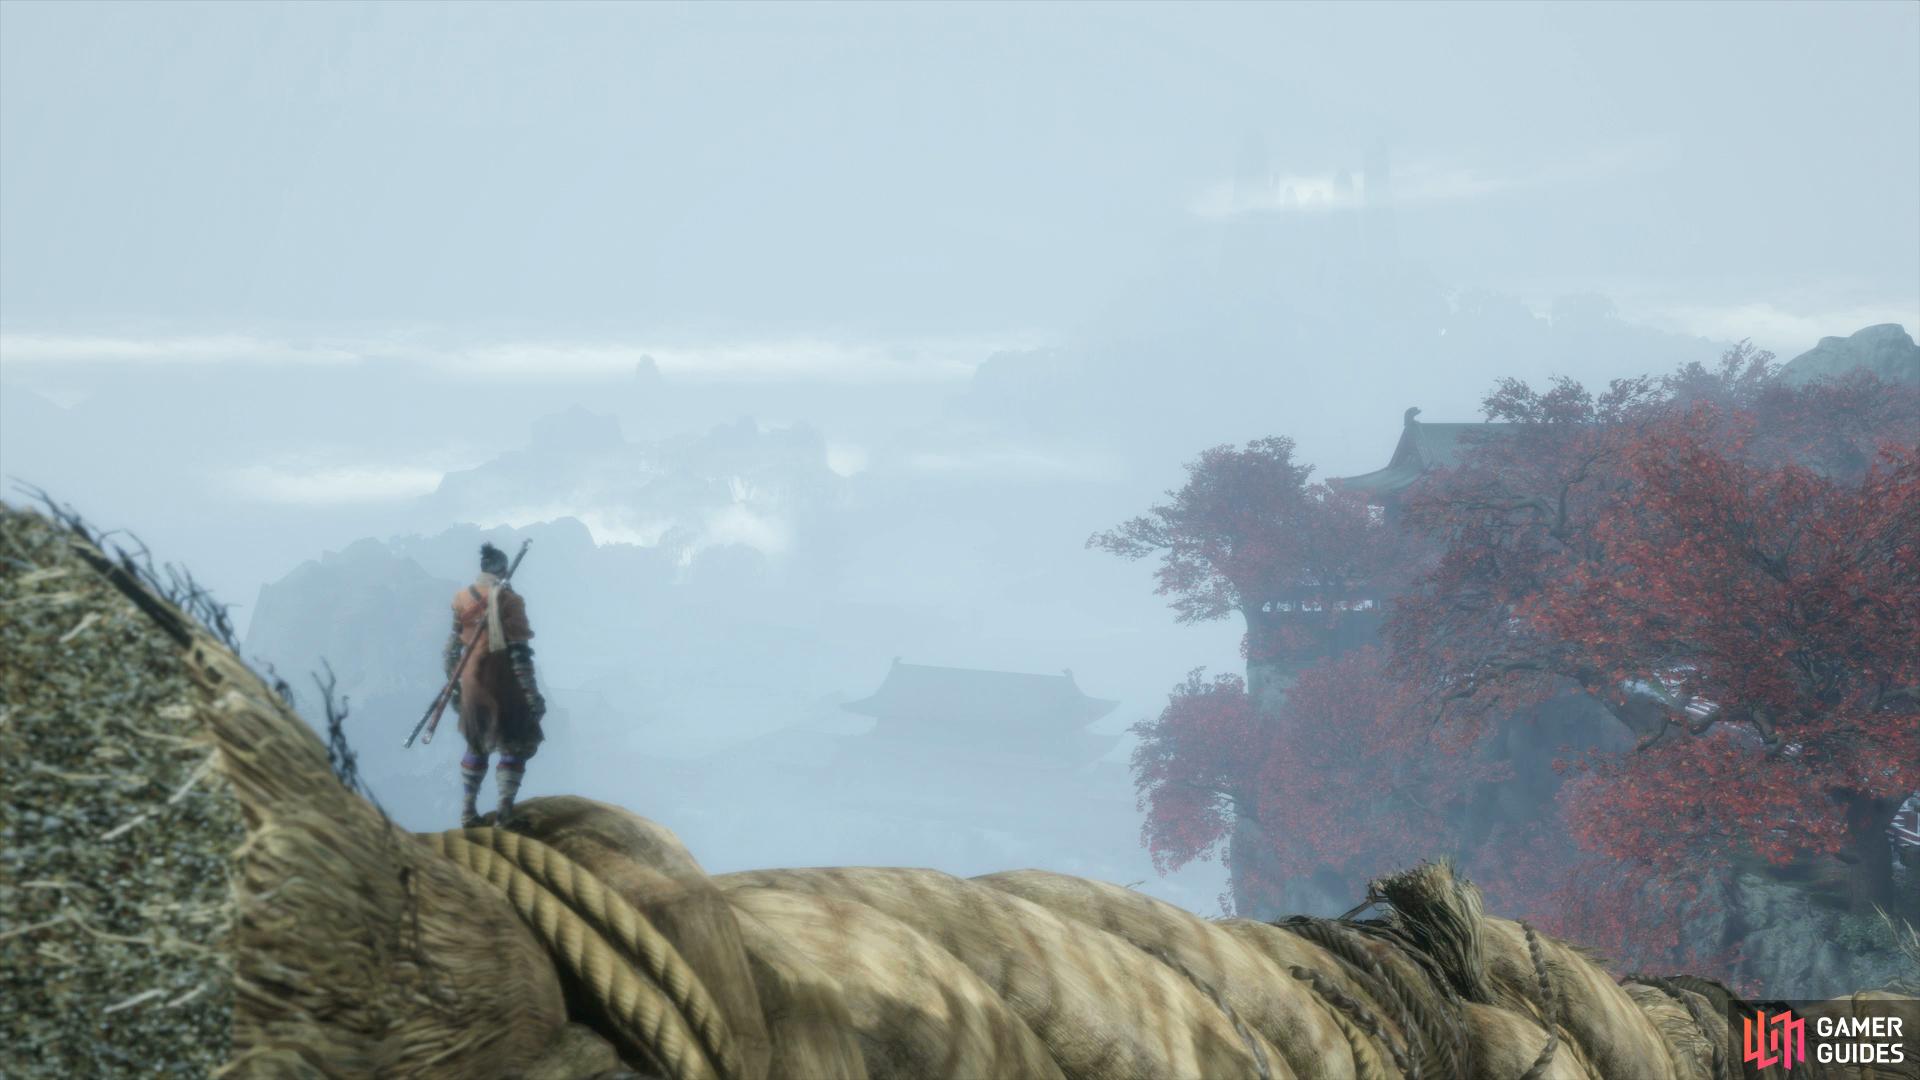
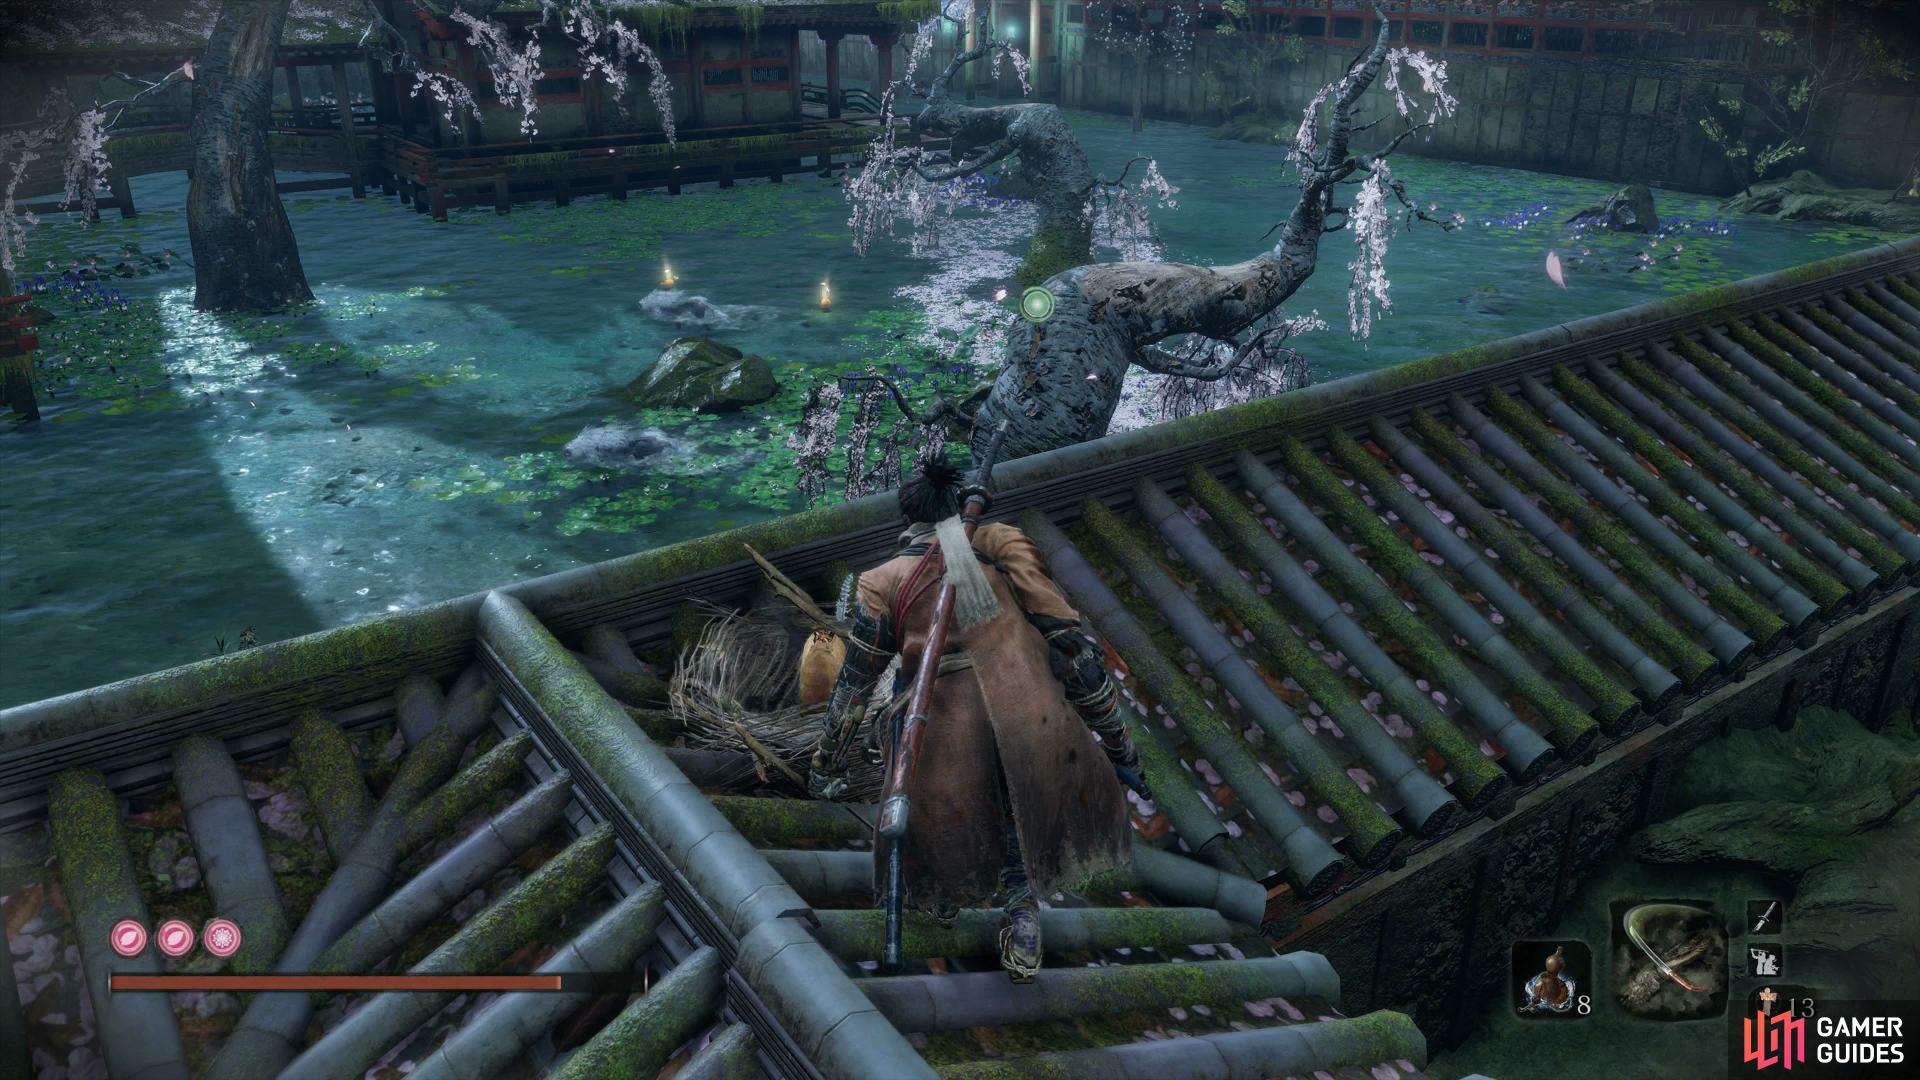
Begin by making your way back to the Wedding Cave Door Idol in the Ashina Depths and make your way forward to the Palanquin you saw when claiming the Shelter Stone. Head inside and choose to Pray to begin an event that will take you over to the Fountainhead Palace. Once you regain control, head down the Strawman’s arm and drop down to the ground below, heading back towards the cliff’s edge to pocket some Pellets. Head forward now, claim the Sculptor’s Idol and prepare for the battle ahead by assigning the Firecracker to your Shinobi Tools along with Pacifying Agents/Purple Mottled Gourd and Snap Seeds to your Quick Slots.
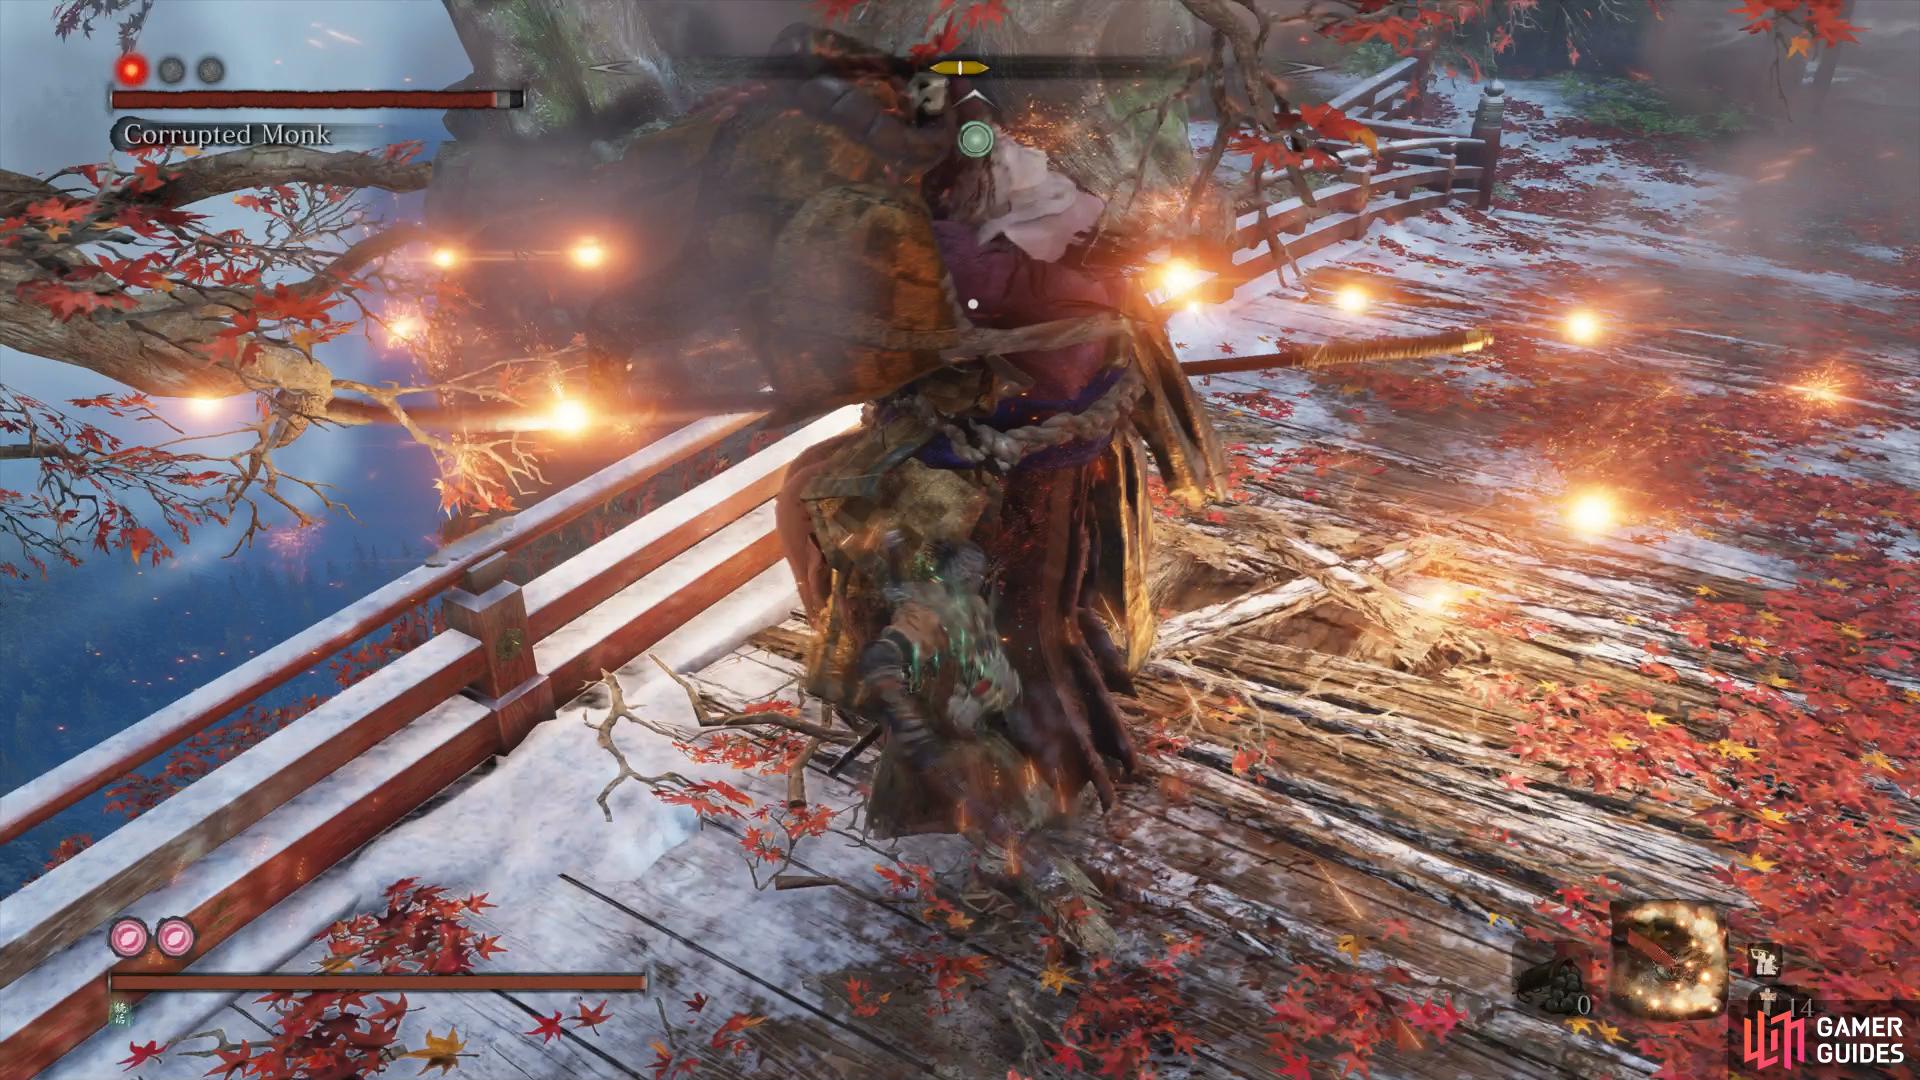
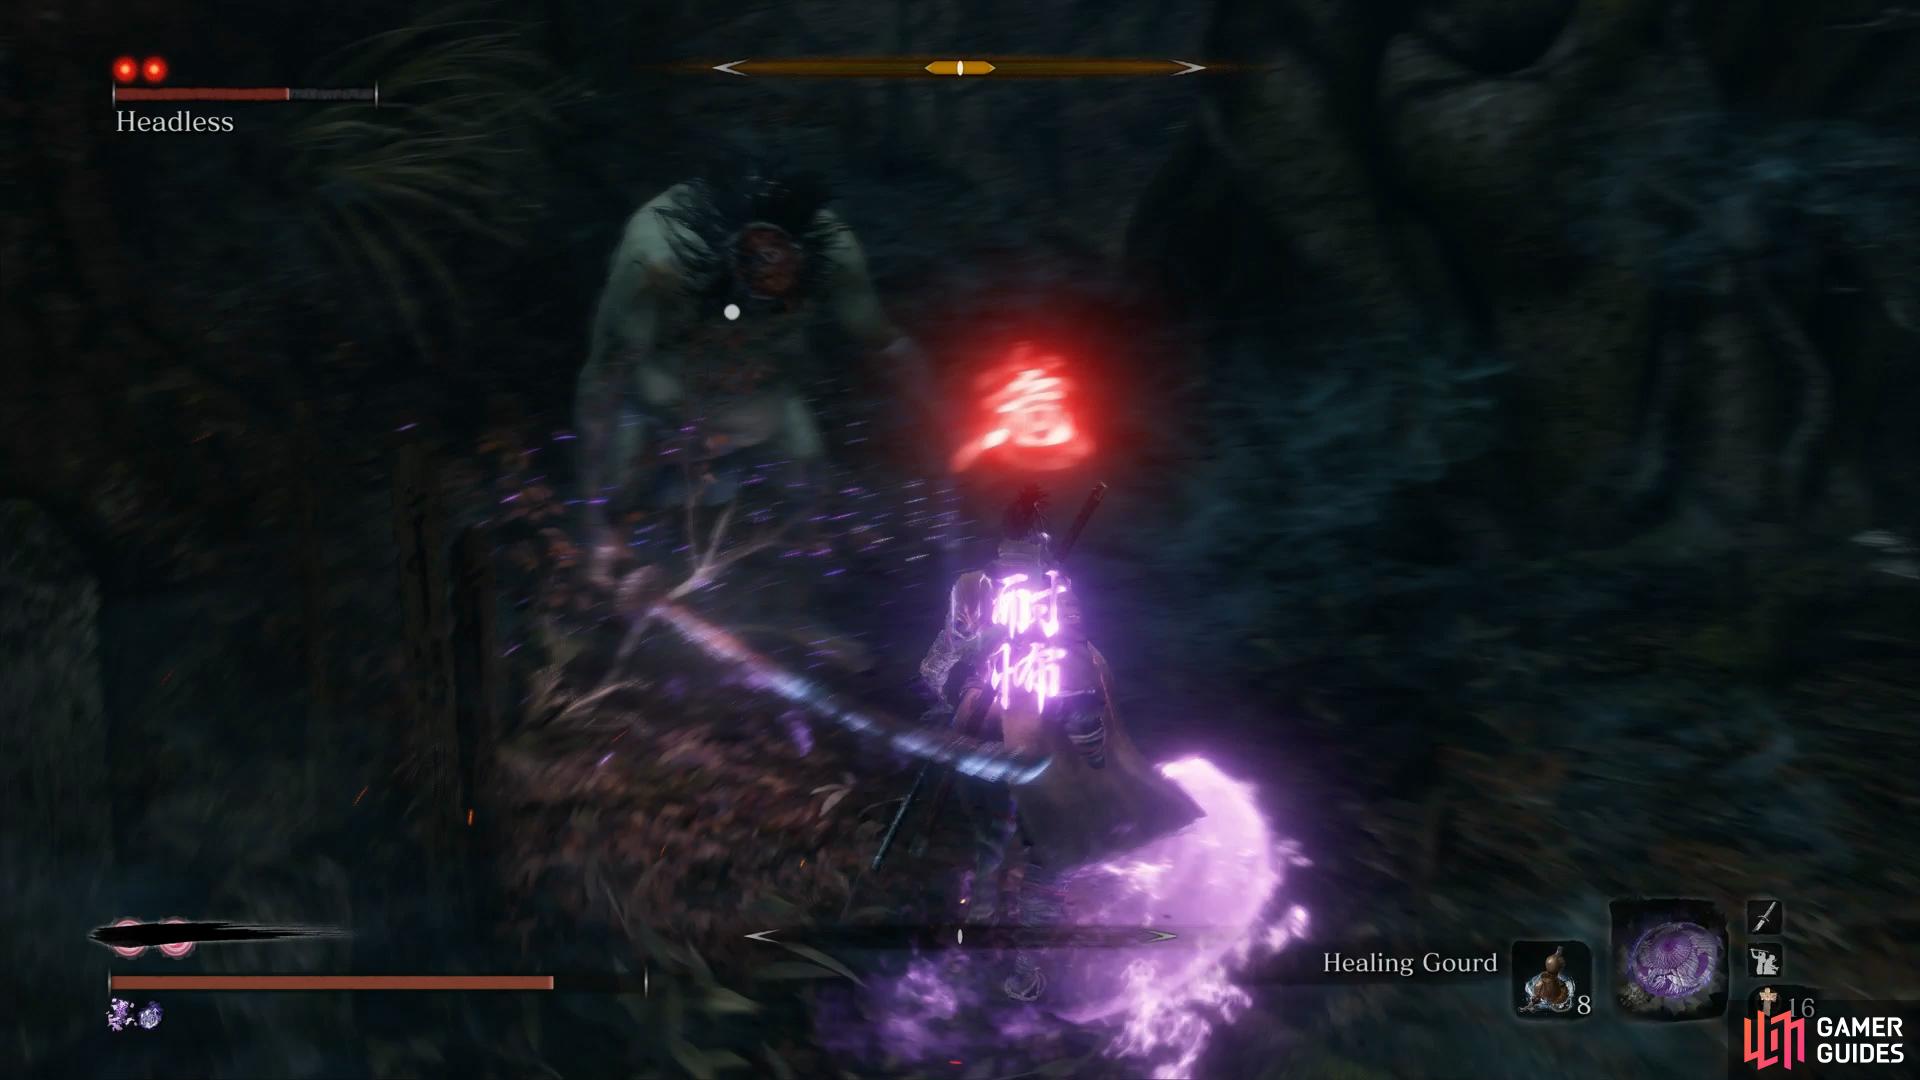
Boss: Corrupted Monk
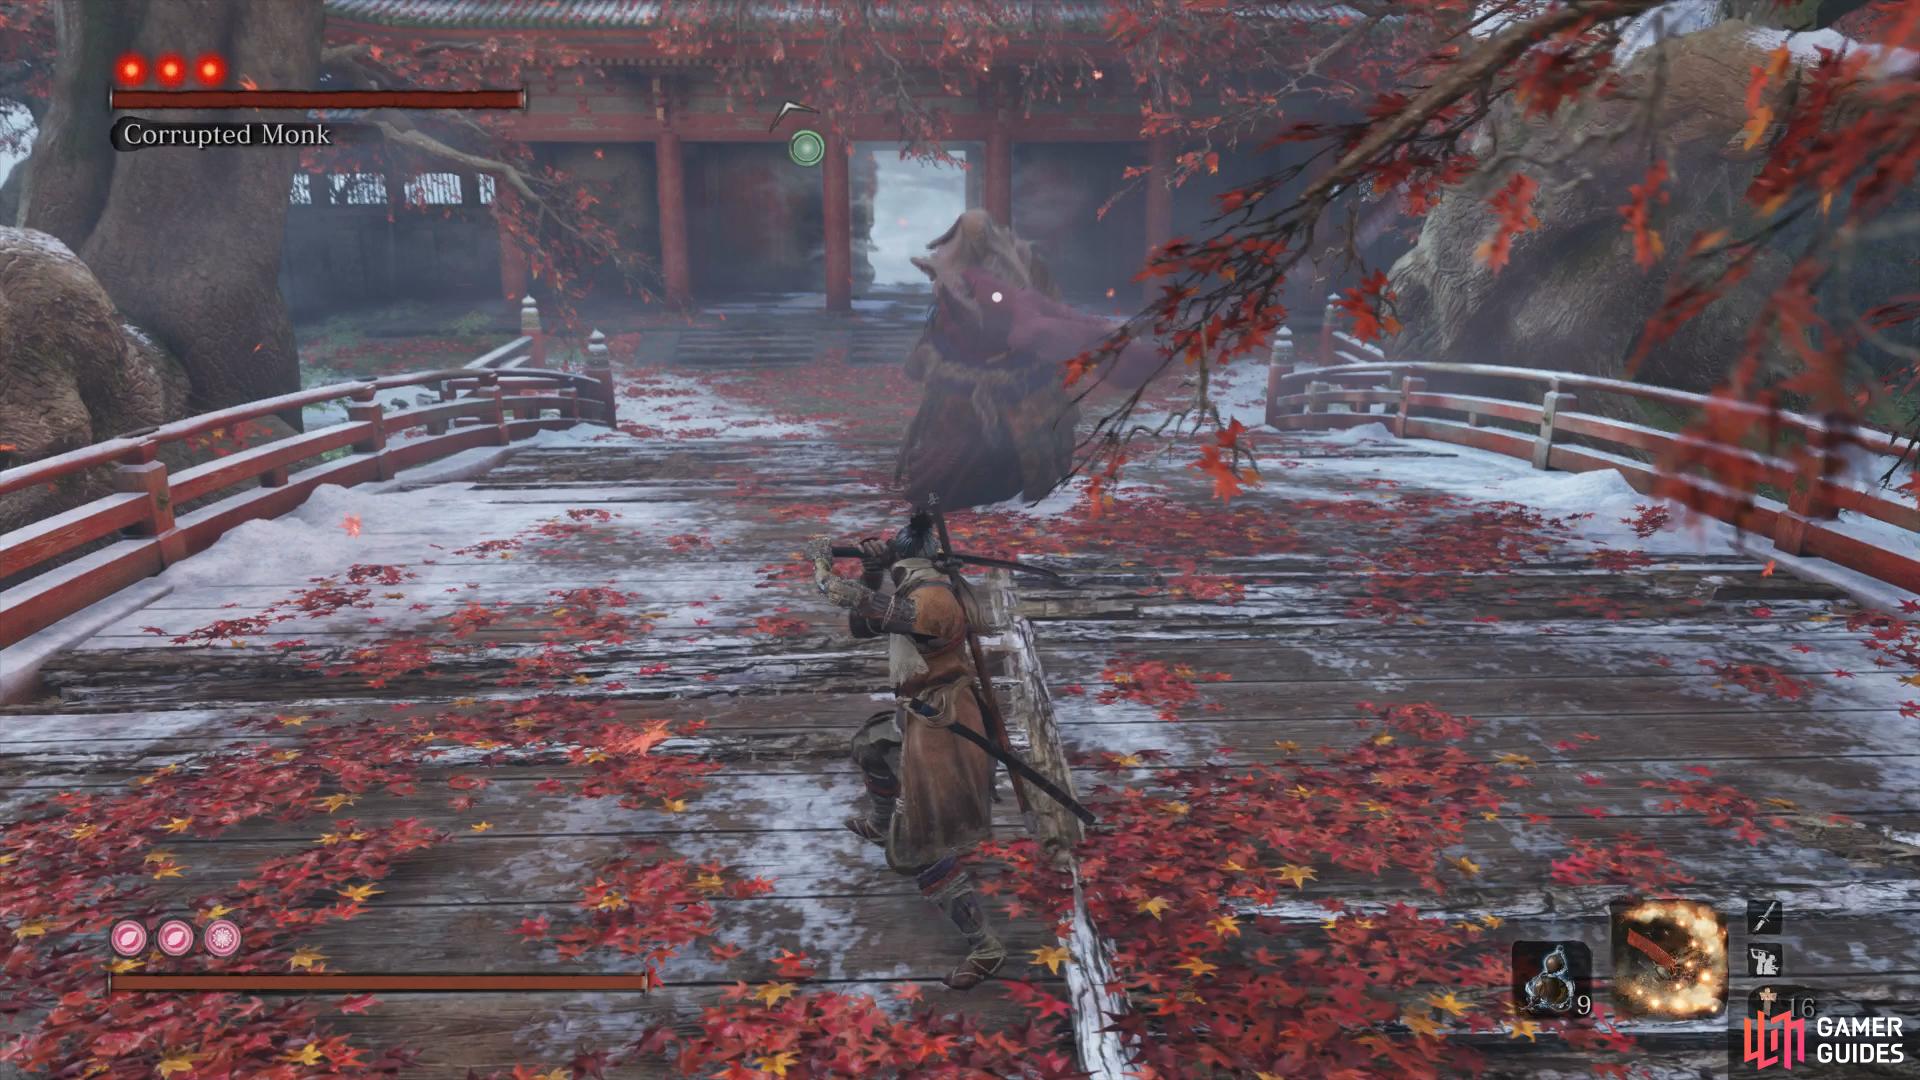
You’ll be fighting the true form of the Corrupted Monk in an arena that’s a lot more narrow. Take note of the face that she has three Deathblow Circles and you’ll know that you’re in for a long fight. Take a look around at the arena too, you’ll notice that there are three branches you can grapple to above the bridge and they’ll come in handy as the fight goes on.
To begin with, the first phase plays out exactly the same as the first phase back at Mibu Village with the exeception that she doesn’t use her Naginata Spin attack just yet. Take your time and conserve your items as you repeat the same tactics employed there. Once you deliver the first Deathblow, get ready as there’s a tactic you can use to make the battle a lot easier on you.
As soon as the first Deathblow is inflicted, she will disappear so quickly grapple to the branch that is to the back left (if you’re facing the entrance to the palace) and wait for her to reappear below you, once she does, drop down for an Air Deathblow to skip this phase entirely. Sometimes however, it doesn’t go to plan and you’ll have to fight the second phase fairly in which case get ready for a deadly attack.
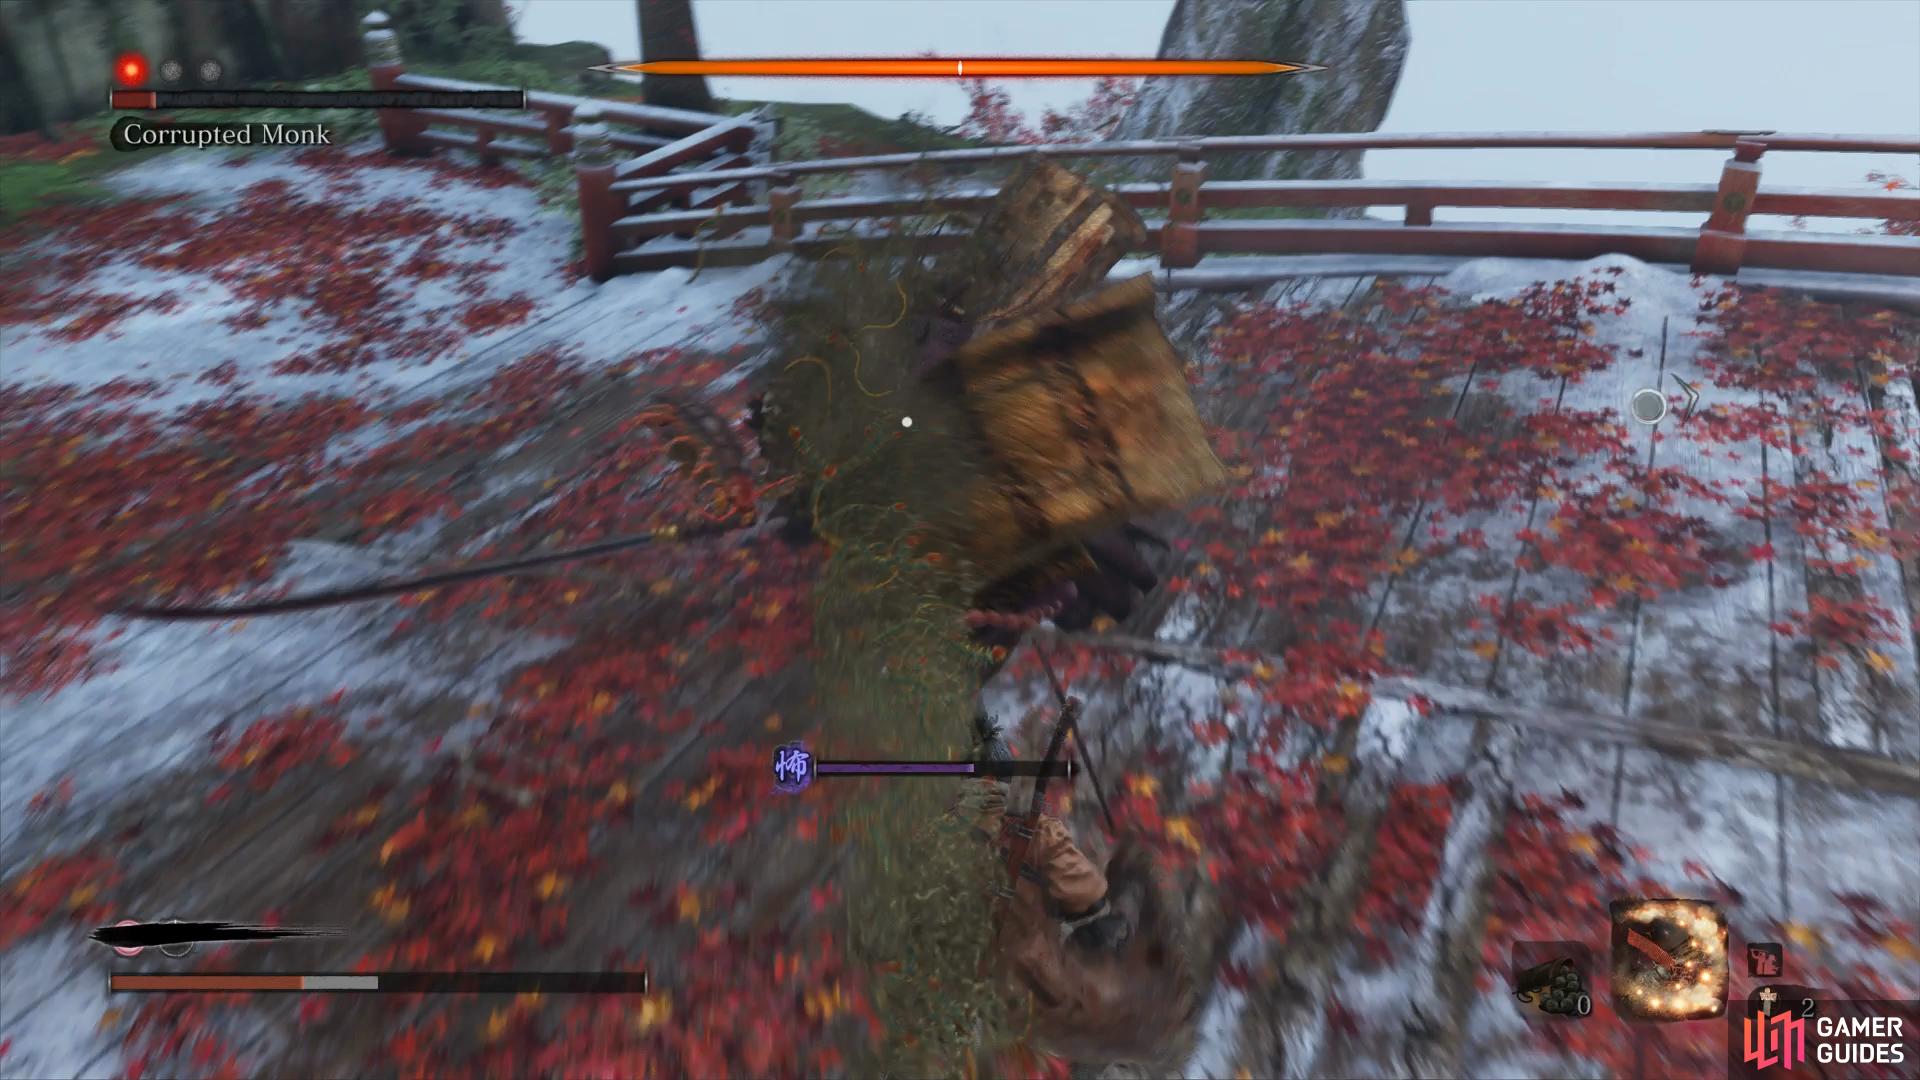
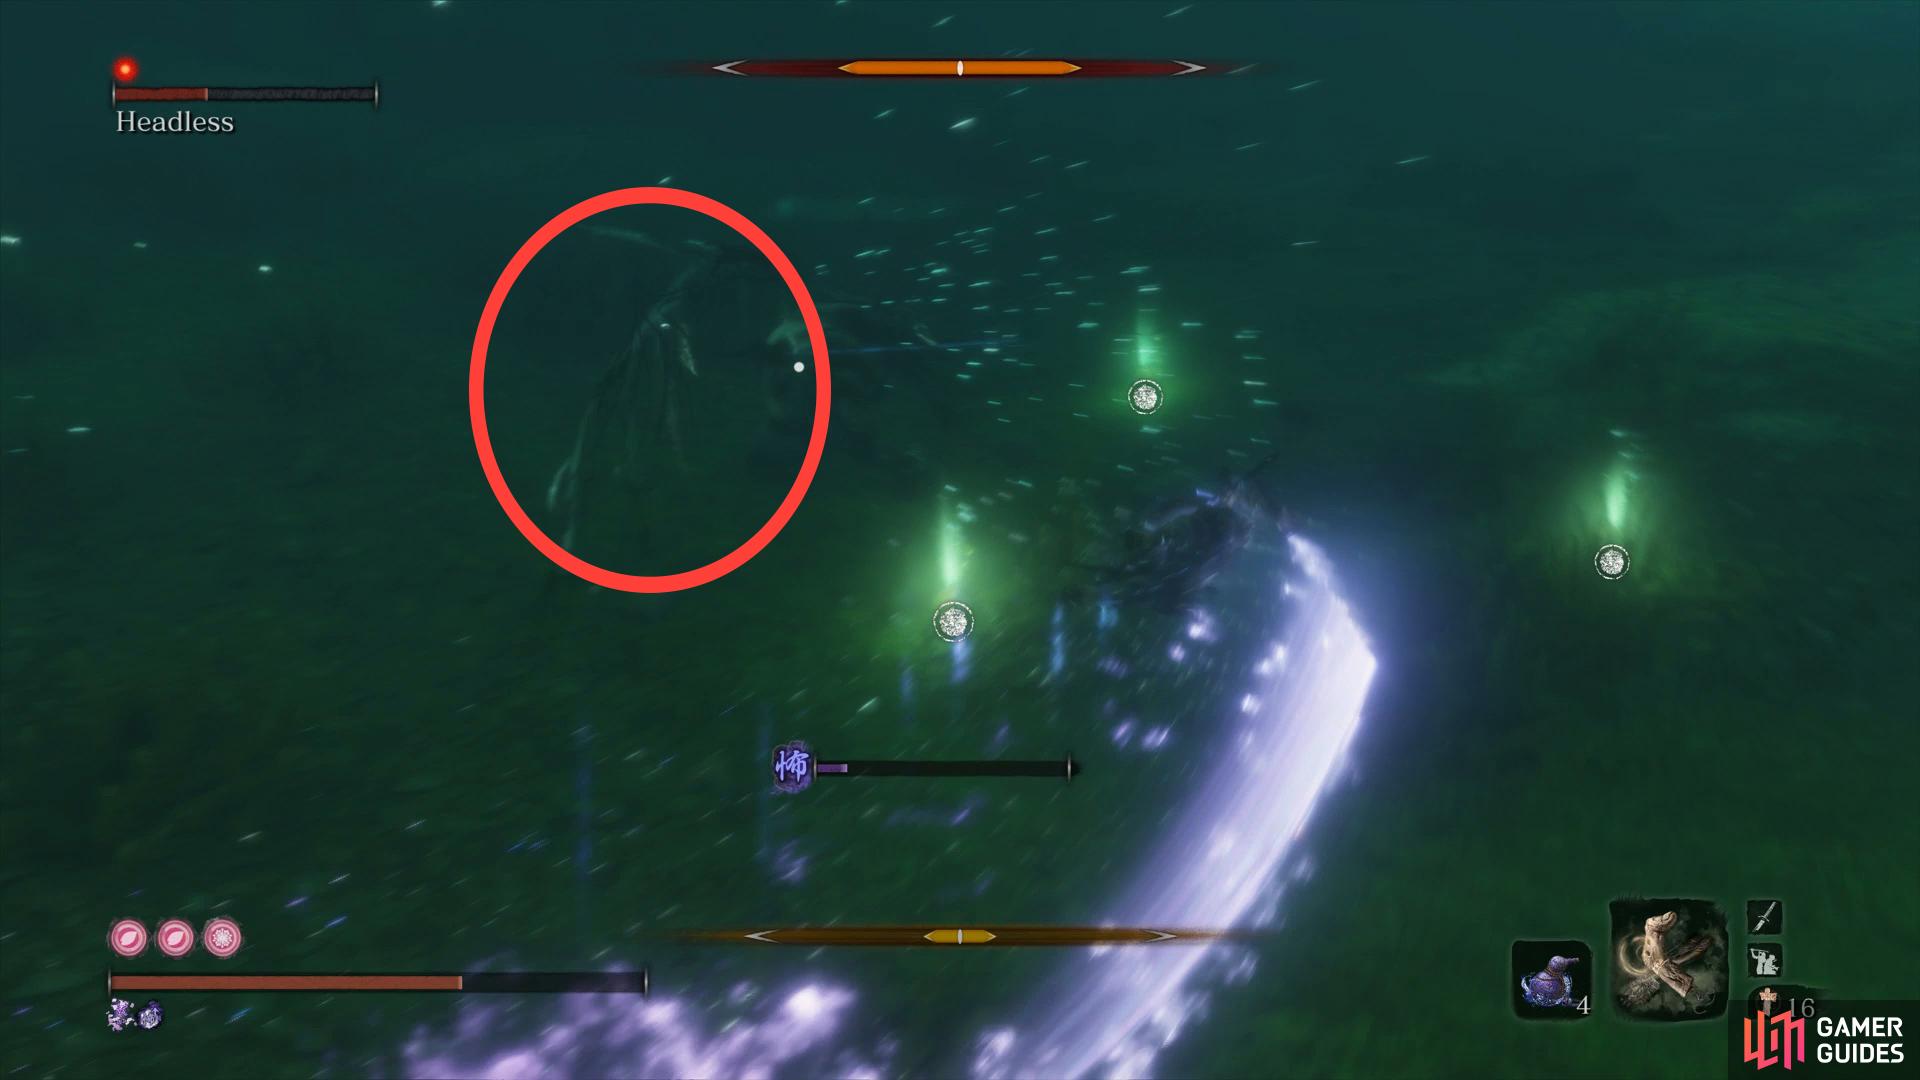
The Corrupted Monk will spread a mist around the arena and spawn three Illusions of herself to attack you one after the other, if you’re caught in the attack then this can kill you outright. Note that the branches can be used to grapple between to avoid the attacks until it’s over or you can try and deflect each hit. Finally, you can make use of Snap Seeds to dispel the Illusions and get the attack over with quicker. Once the attack ends, the battle follows the same pattern as the first phase however note that she will call more Illusions if the battle drags on.
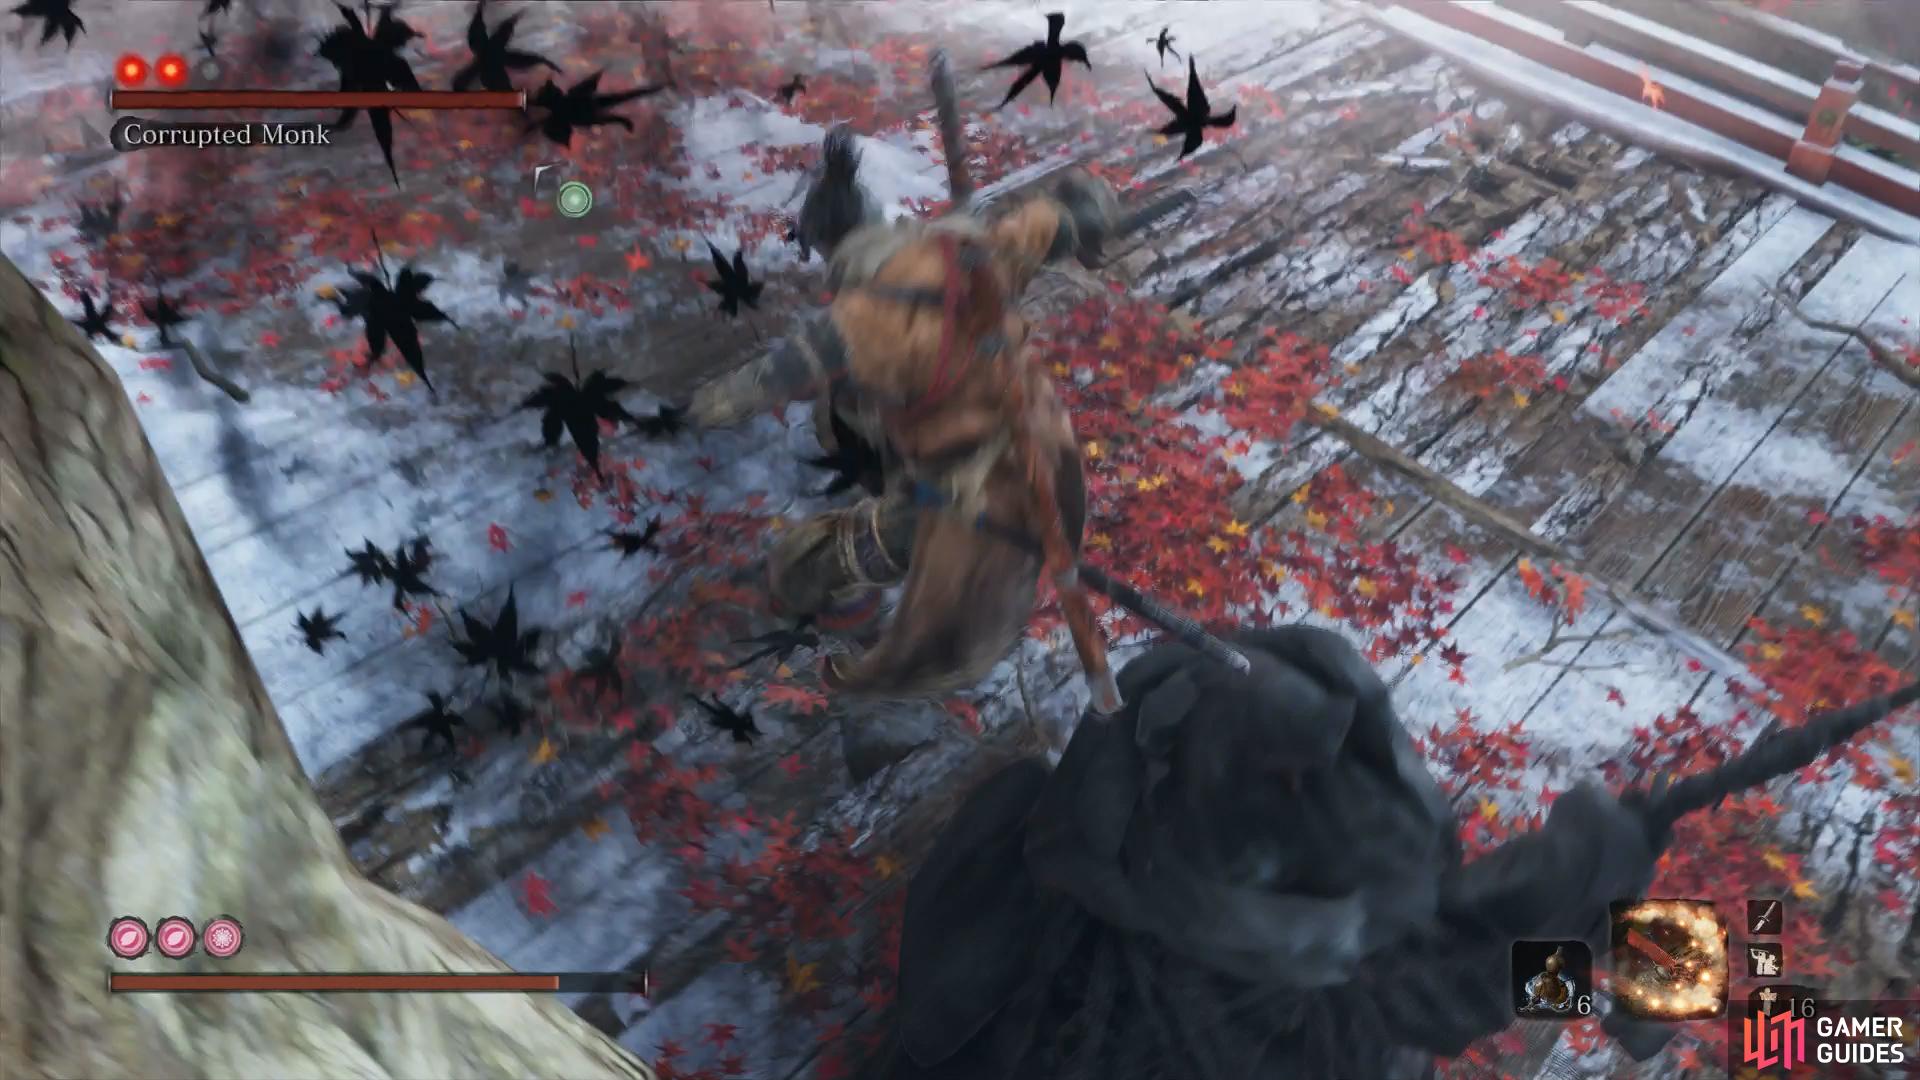
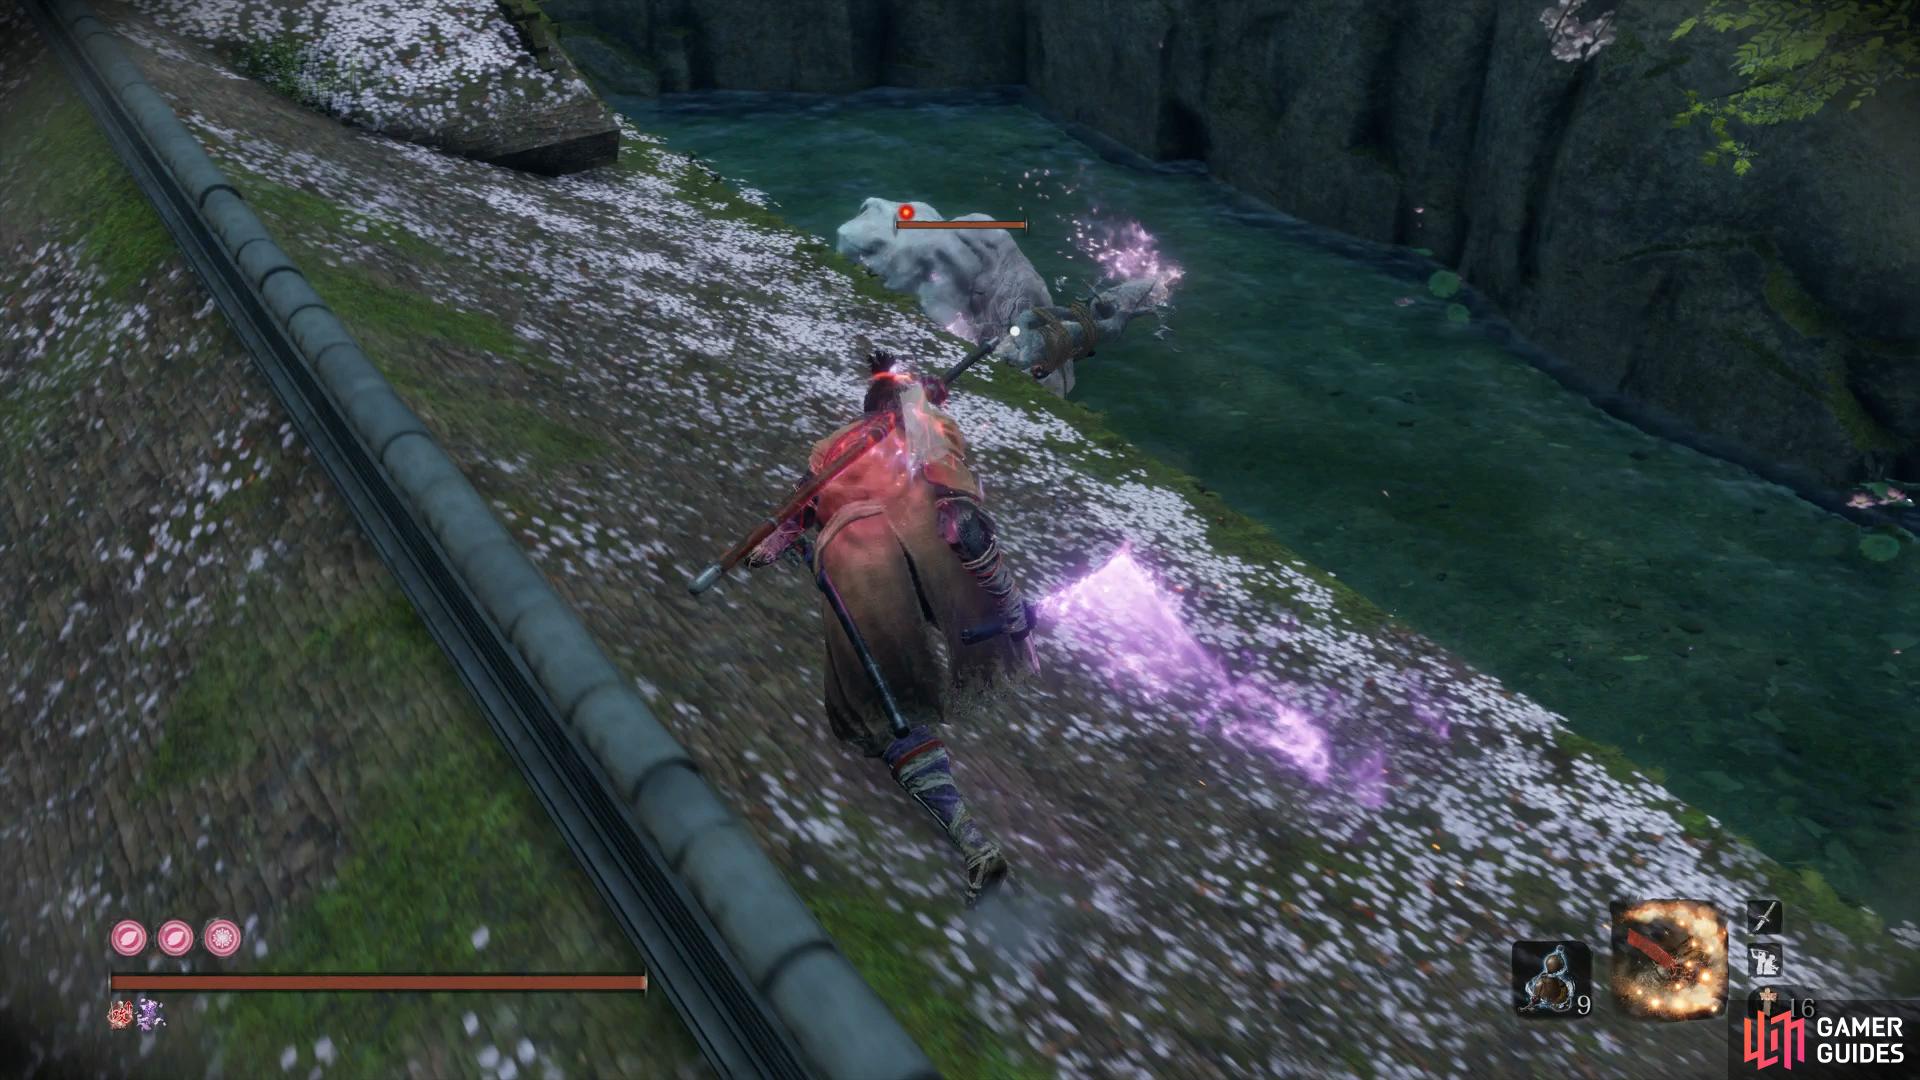
Regardless of how you reach it, the third phase is the most challenging. A Centipede has now given rise and will add some new attacks to the Monk’s arsenal. To begin with, she will have a Perilous Toxic Spew attack which, if caught in, will deal Terror damage so be sure to heal it if you’re caught up in it. You can use this attack to get around her and inflict some easy strikes if you manage to dodge the attack successfully.
She will also perform regular Toxic Clouds around the arena which are not Perilous but cause massive harm all the same. On top of that, she will use all her regular attacks along with adding in the Naginata Spin from Mibu Village again, keep your distance while she spins it five times and then close in for the attack.
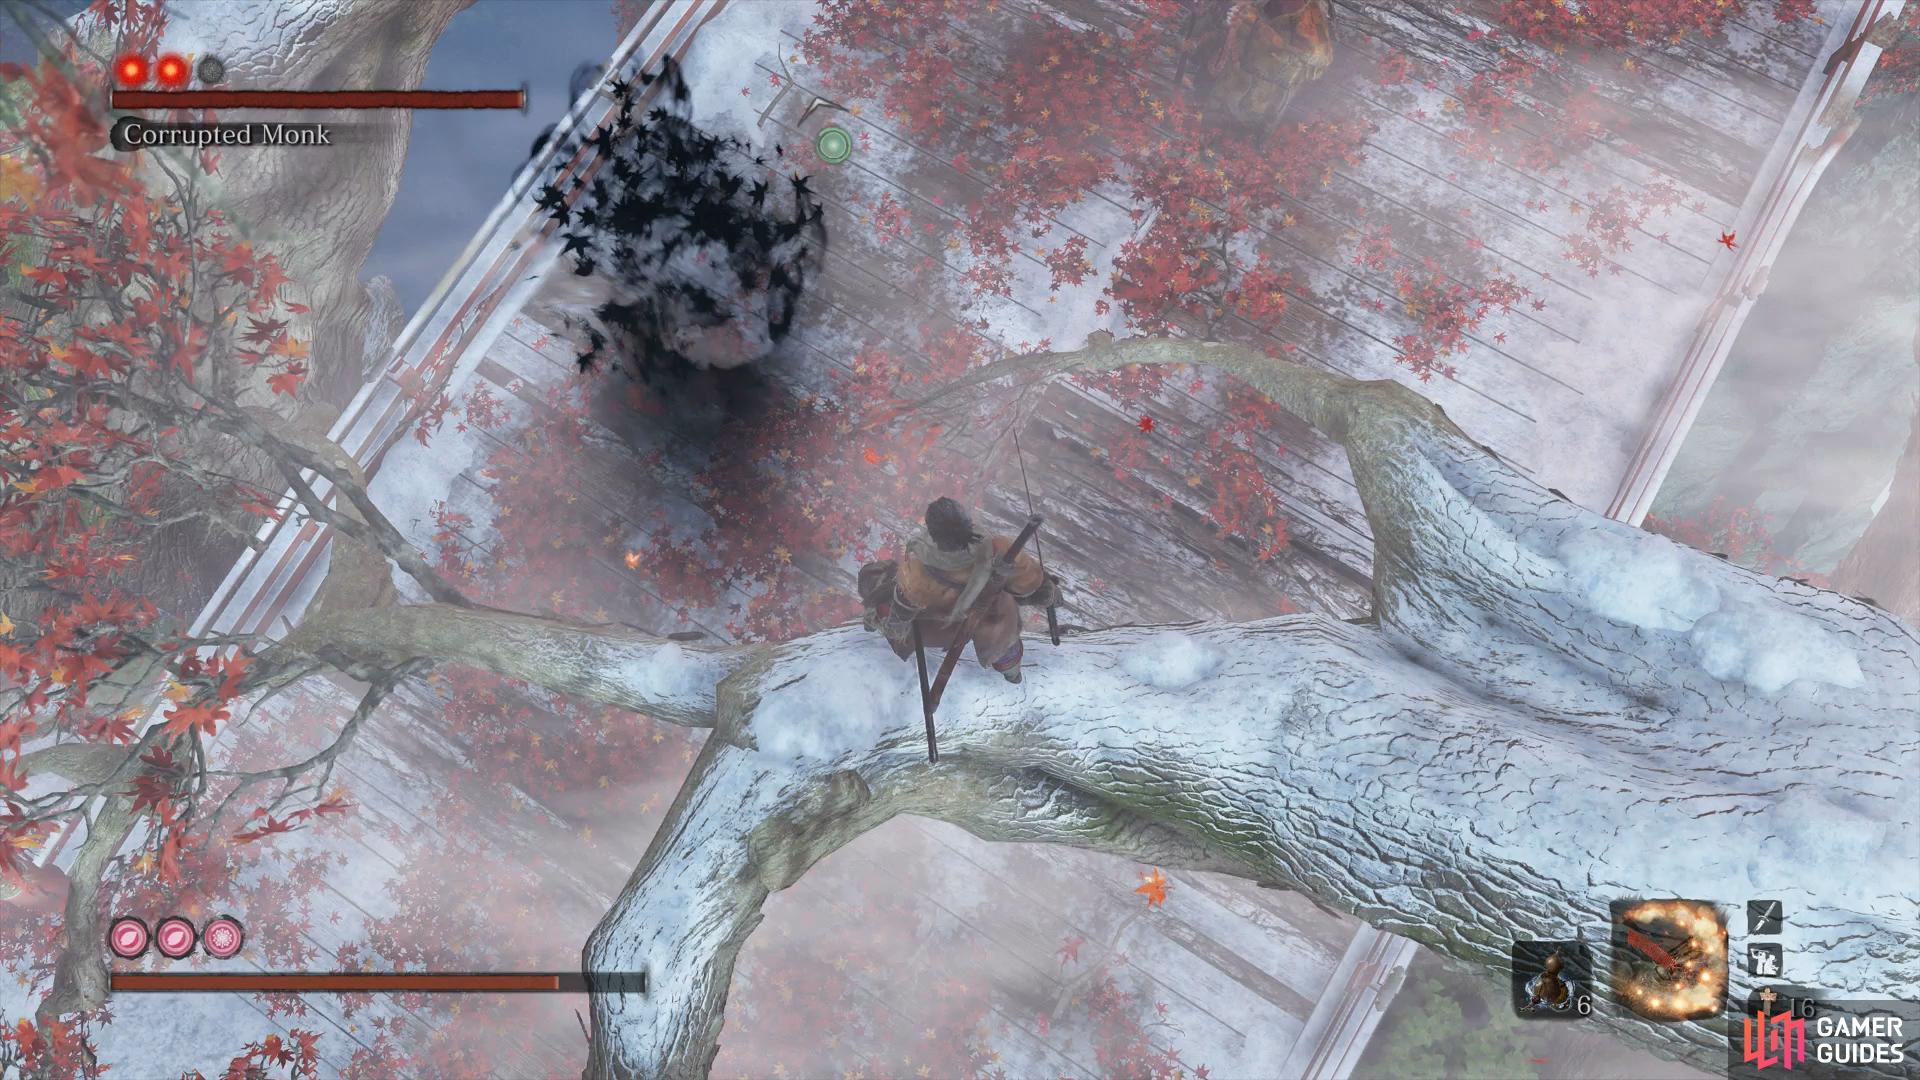
(1 of 4) You can score an easy Deathblow for phase two from here
Throughout the fight, she is extremely vulnerable to Firecrackers, this will allow you to get around four strikes in however it’s best to save this for the more difficult third phase. Alternatively, Fistful of Ash serve the same purpose and you can also use the Flame Vent to great affect on the third phase. Finally, as the Centipede is present for the third phase, you can coat your weapon with Divine Confetti to increase it’s damage.


With the battle over, you’ll obtain the Memory: True Monk along with the Dragon’s Tally Board. Light the nearby Idol and then return to the Dilapidated Temple to take care of some tasks with the Dragon’s Tally Board.
Taking out the Apparitions
With the Dragon’s Tally Board now in hand, you will unlock new items at the merchants including an unlimited stock of Divine Confettis. With this possibility now available, you can safely take on all of the Headless and Shicimen Warriors you’ve left for now knowing that you can always buy more should you need them. Make sure you have the Phoenix’s Lilac Umbrella along with the Malcontent if you can, having both will make these battles a lot easier.
Once you’re ready, begin by travelling back to the Hidden Forest Idol in the Ashina Depths. Head down to the bottom and make your wya to the left to finally face your first battle with the Headless.
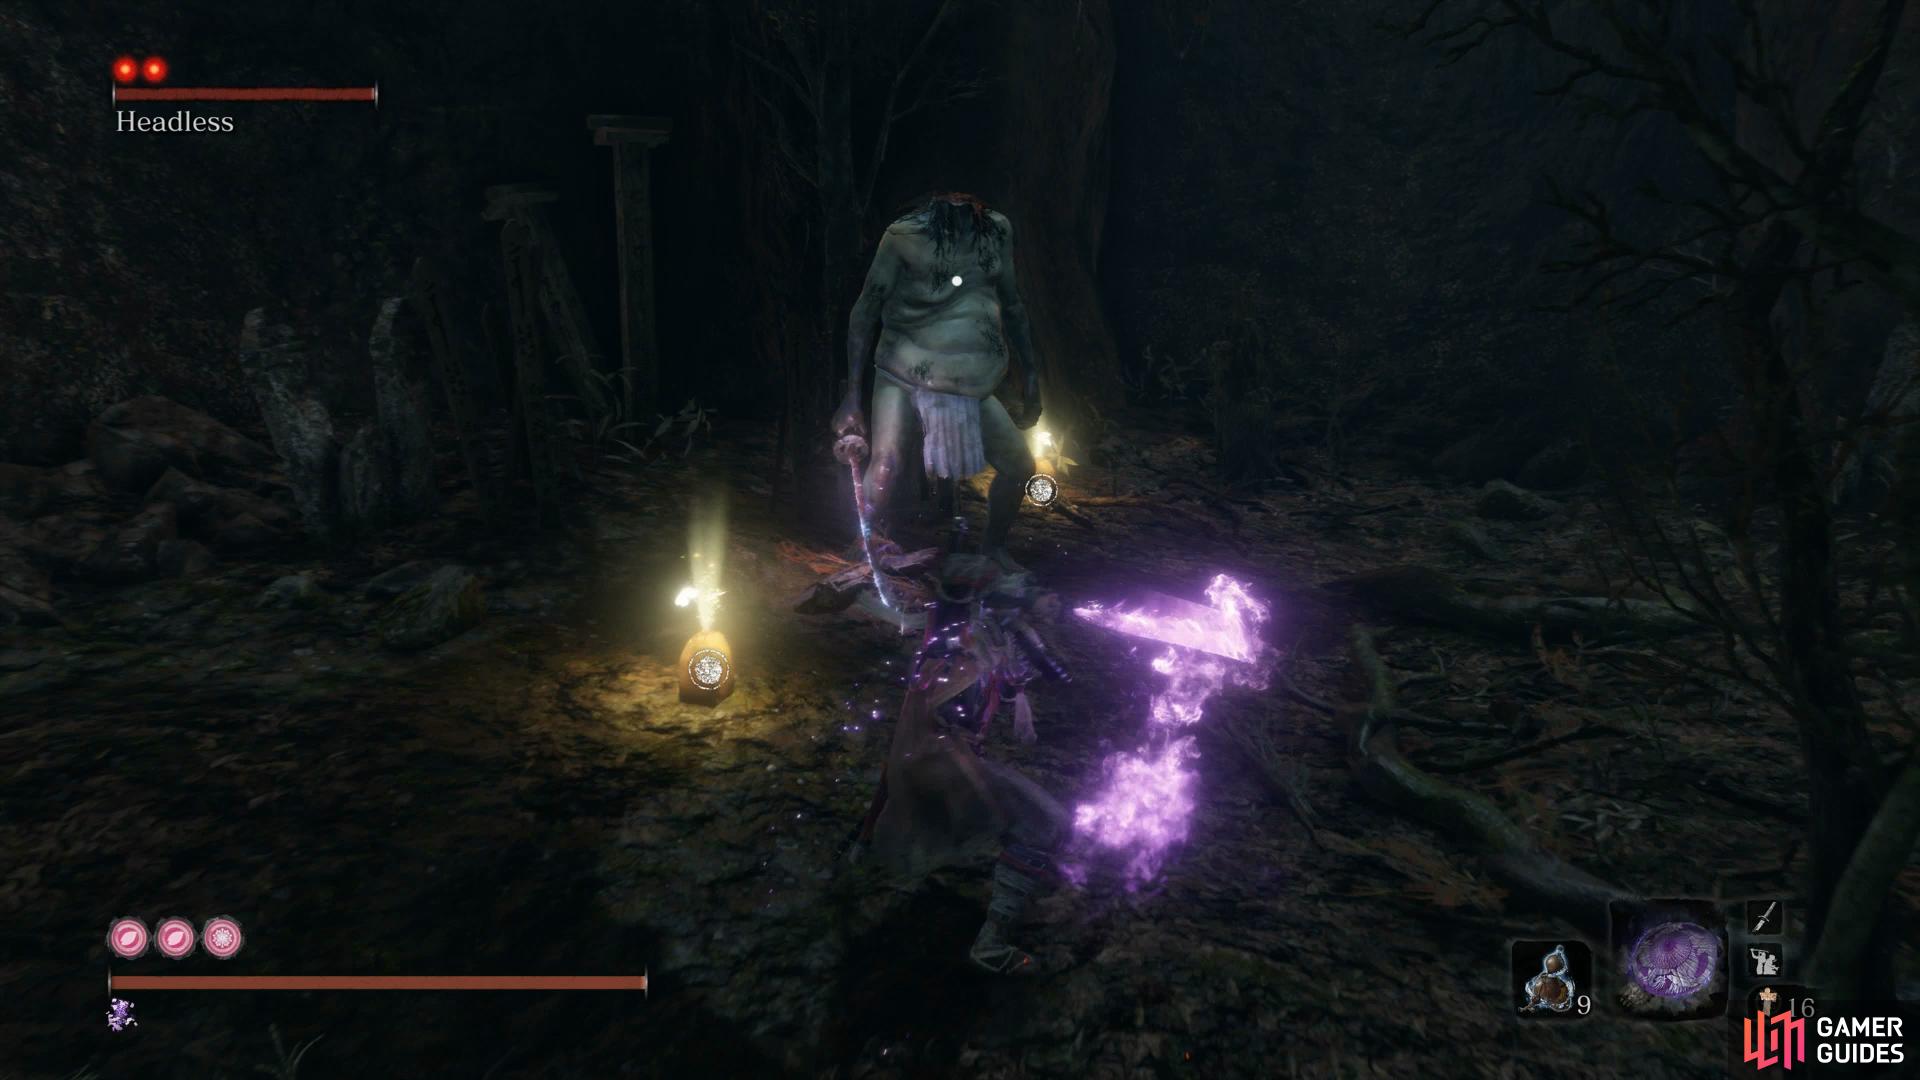
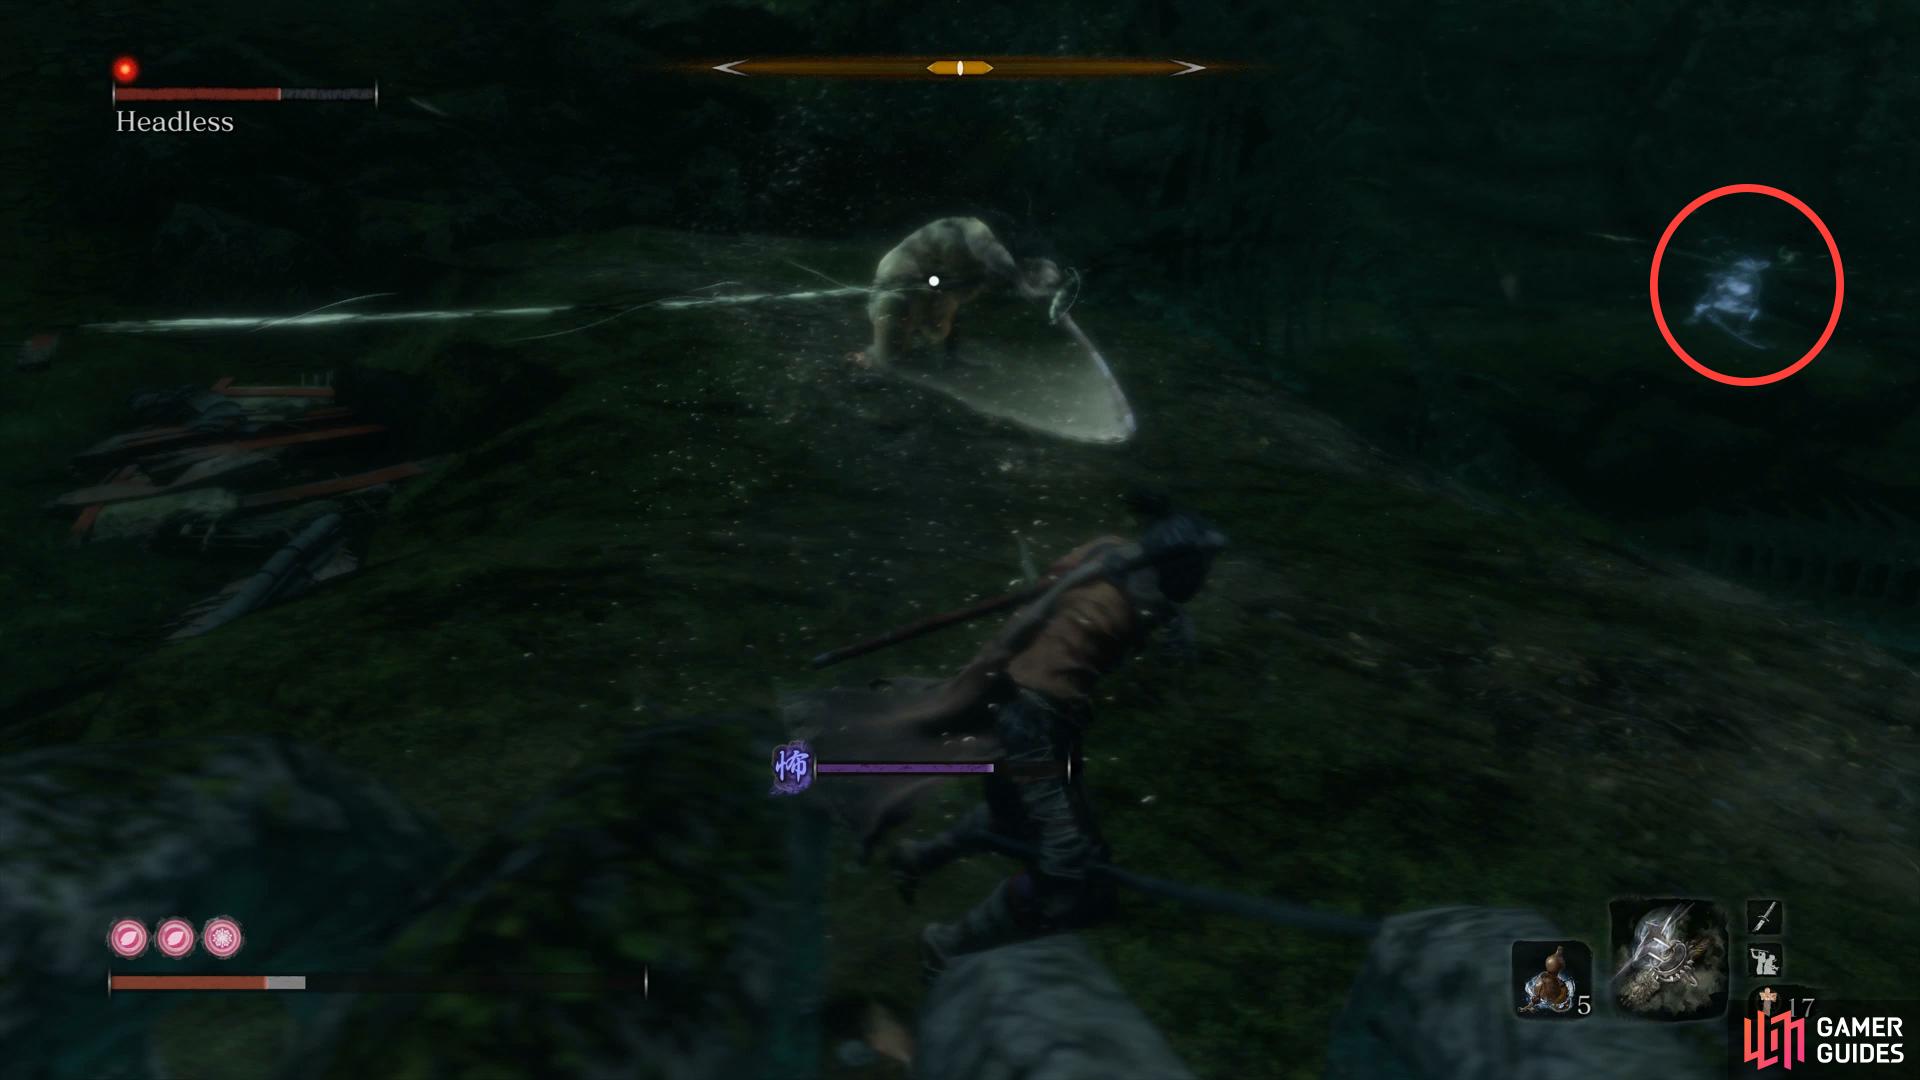
Mini-boss: Headless
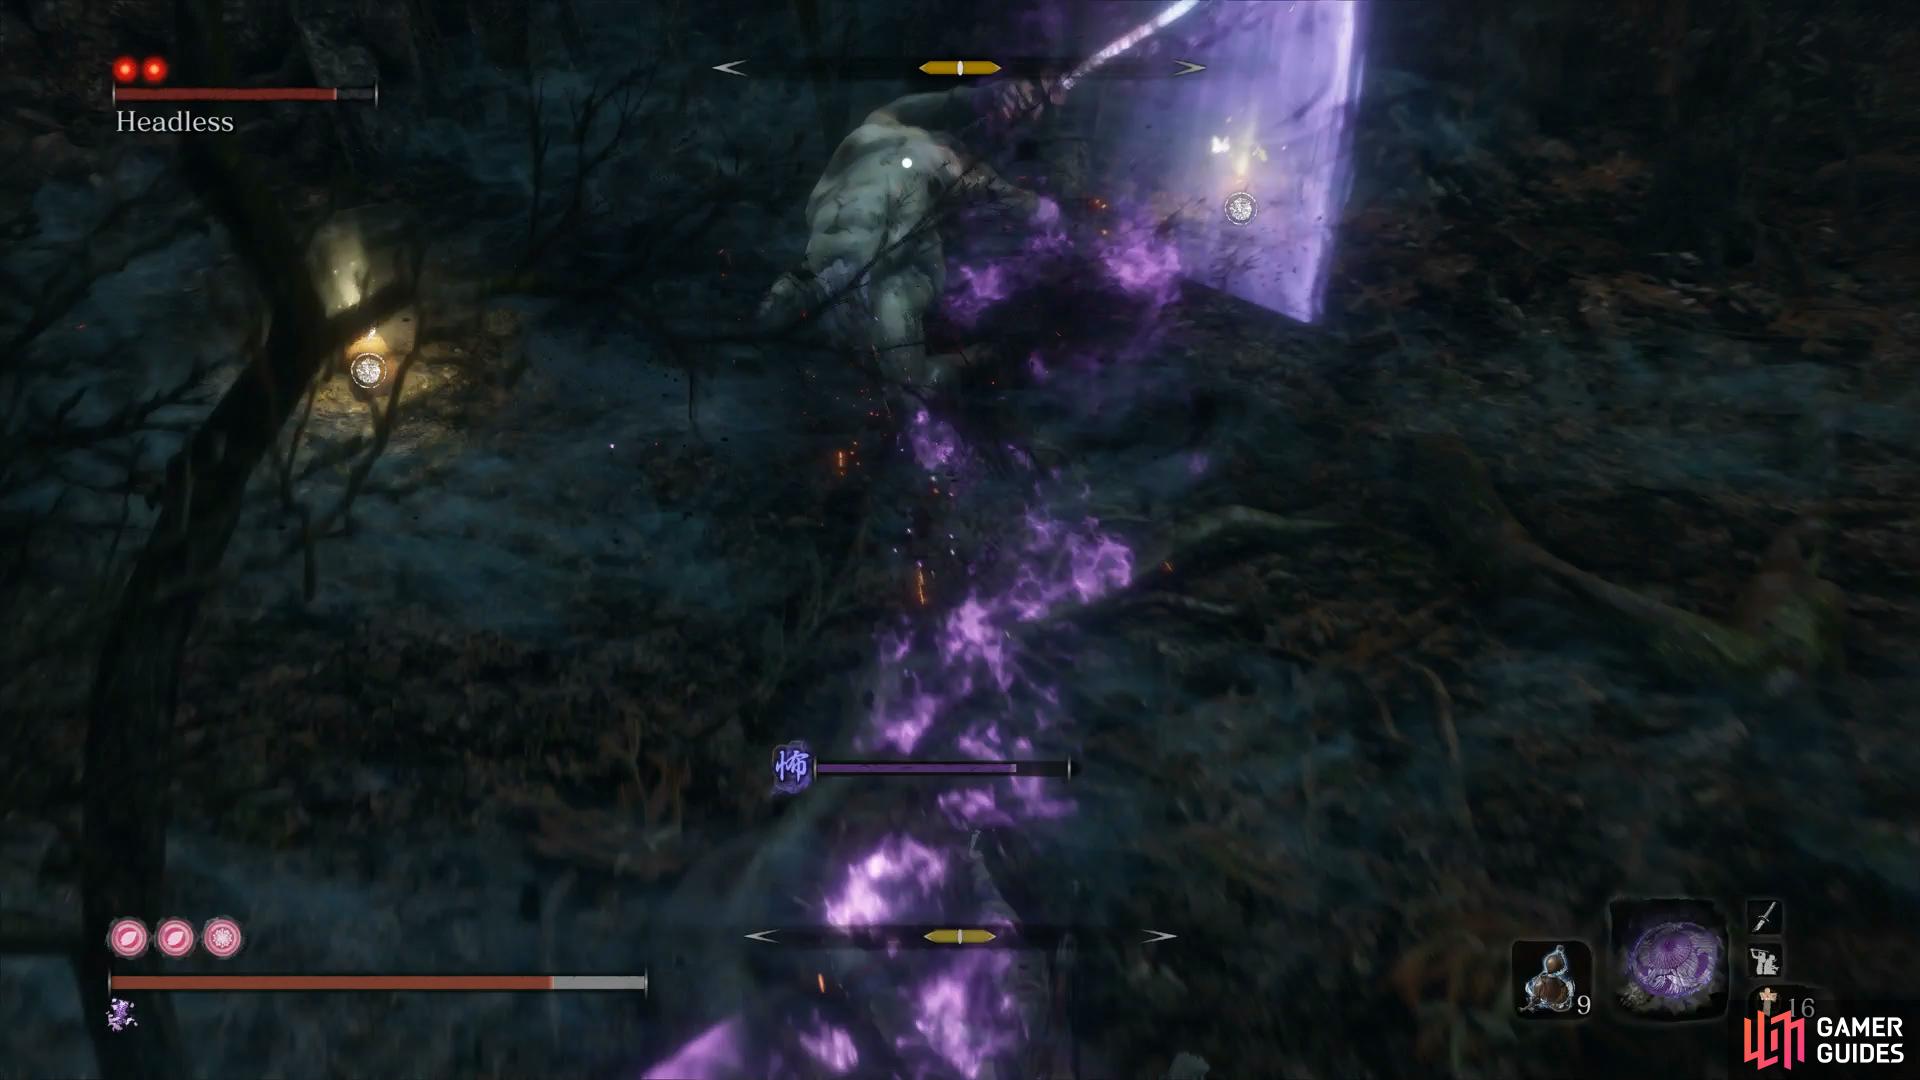
The Headless enemies will create a mist around them that slows everyone inside it, itself included. For this reason, you’ll need to jump around a lot just to be able to dodge the attacks. On top of this, you won’t be able to harm it without Divine Confetti and you’ll need to dodge it’s wide arcing attacks while making sure to recover your Terror gauge as and when needed.
It’s attacks are rather simple, it has a simple slow 360° radius so leap over this and take the opportunity to get some free swings in. On top of that, it can disappear at will and then reappear behind you, immediately get away from this as it will attempt a Grab that will outright kill you if you’re caught in it.
(1 of 3) Keep Divine Confetti on your weapon at all times
To aid you in these battles, you can make good use of the Phoenix’s Lilac Umbrella to block it’s attacks and the Malcontent up to three times per battle to stun it in place. Regardless of how you defeat it, your reward for this particular Headless is Gachiin’s Spiritfall. With this item, you can use an unlimited amount of Gachiin’s Sugar at the cost of a few Spirit Emblems. Before you leave this area, be sure to loot the Lump of Fat Wax and Scrap Magnetite.
Next up, travel to the Upper Tower - Antechamber Idol in Ashina Castle and head out the window you came through to reach this Idol. From here you can drop down into the moat at the back and dive under to encounter a different type of Headless.
Seeing as you’re underwater, you’ll need to apply Divine Confetti before going under and then you’ll have to focus on dodging the attacks only. Be sure to have your Terror removing items ready and dodge to the side of the Terror Beams he shoots from his sword. Finally, the Perilous Grab will actually pull you in so dodge to the side and then behind to get some more strikes in.
Your reward for this battle is the Ungo’s Spiritfall which, like the previous one, allows you to cast an ulimited amount of Ungo’s Sugar provided you have the Spirit Emblems on hand. You’ll also find in the water here three Heavy Coin Purses, a Yashariku’s Sugar and some Mibu Possession Balloons.
Avoid the Terror Darts, they home in on you.
For the next Headless, travel to the Under-Shrine Valley Idol and make your way to the left and along the cliff to where the graves were. You can ignore the enemies when you drop down from the branch and make a beeline to the pool of water and dive in. Swim through the cave and out the other side to come face to face with your next Headless.
You should already be aware of how to kill these normally by now so repeat the same tactics as before, making good use of the Phoenix’s Lilac Umbrella and Malcontent to turn the tides in your favor. The reward for this battle is the Gokan’s Spiritfall along with the items laying around containing a Lump of Grave Wax and Divine Grass.
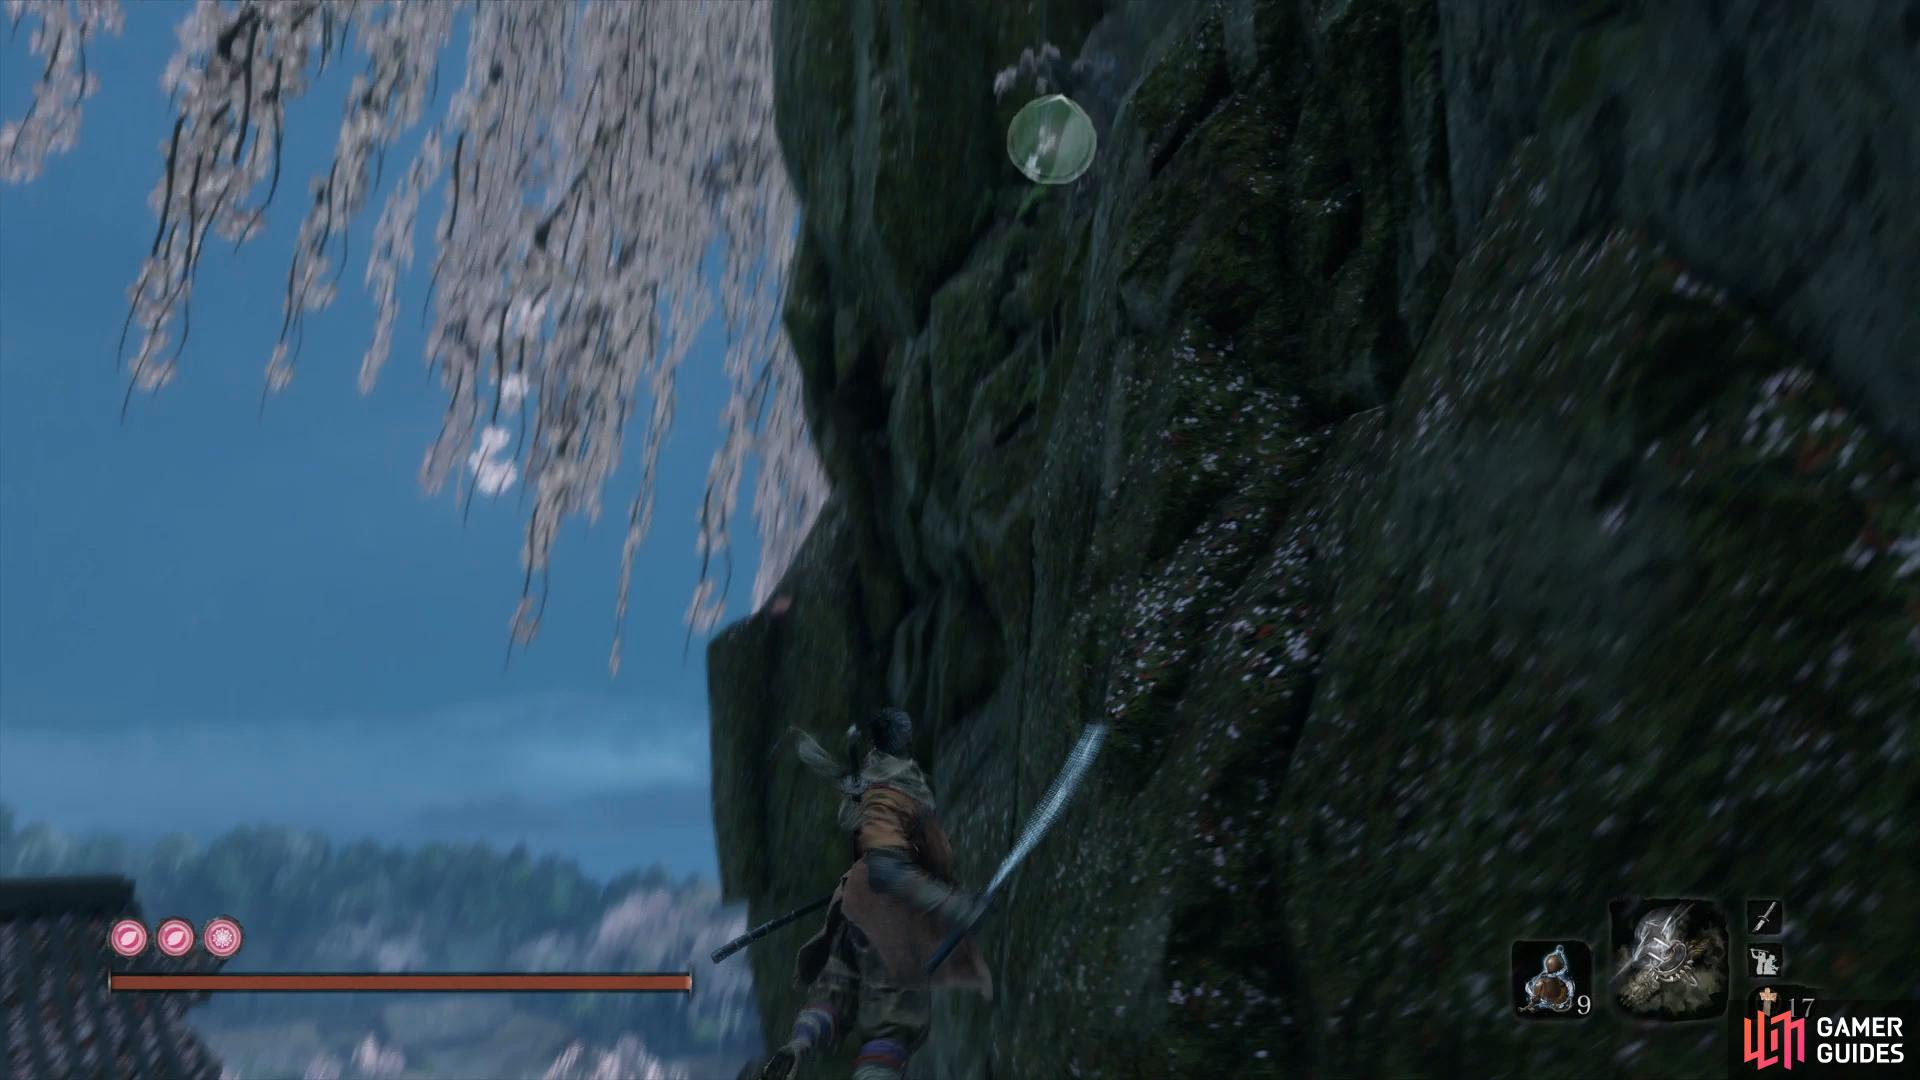
Three Headless down, one to go for now and return to the Underbridge Valley Idol at the Ashina Outskirts. Grapple up to the bridge and follow the path around to the left where you found the note on the small shrine. Head to the edge, grapple over to the branch and then jump to the cliff and hang on to shimmy over to some Gachiin’s Sugar.
From here, you can drop down to the area below and enter the cave, following the path through to an opening containing the last Headless for now. Coat your weapon with Divine Confetti before hand and use a candy to up your attack power if you wish before dropping in to defeat it. Your reward for this one is the Ako’s Spiritfall, the last of the items to increase your Attack at the cost of Spirit Emblems.
There’s one final enemy to take care of so make your way out of the cave via the right exit and follow the path to reach a ruined house with a Gachiin’s Sugar. From here, grapple to the hole in the building above to pocket a Divine Grass and Antidote Powder before unlocking the door and returning to the Idol. This time around, travel to the Abandoned Dungeon Entrance Idol at Ashina Castle and purchase more Divine Confetti if you need them.
Once you’re ready, head down the stairs and drop down, taking the path to the right to a tunnel. At the end of this path you’ll come across the second Shichimen Warrior and you should have already defeated one back at the end of the Sunken Valley. Remember to make good use of the Phoenix’s Lilac Umbrella to block it’s Terror Beam and use the Malcontent three times to stun it.
Your reward for this battle is the Ceremonial Tanto, an item which when used, consumes some health in exchange for five blood Spirit Emblems. Be sure to loot the Scrap Magnetite and Black Gunpowder while down here and then claim the Bottomless Hole Idol to travel back to the Fountainhead Palace at last.
Vermillion Bridge
Head forward from the Idol and gaze at the spectacular grounds of the Fountainhead Palace. It should be noted that for a large part of your time here, avoid stepping foot in the deeper water, a Mini-boss you can’t reach until later will strike you with deadly lightning from afar. For now, grapple down the ledges on the right and then drop down to the grounds itself.
Head forward to the first building and grab the Mibu Balloon of Soul before waiting for the Palace Noble to turn it’s back and backstab it. Continue behind it and go to the left of the folding screen to take care of another Palace Noble, clearing out this room.
Always attack Palace Nobles from behind.
Leave this building and grapple to the roof to your left, staying in stealth and head around to the right to meet your first Okami Warriors.
These enemies attack fast and have the ability to strike you with Lightning so have some Eel Livers on hand should you find yourself shocked. Also take note of the fact that the Sabimaru will Poison these Okami creatures with ease so it’s a good tool to have equipped on you. Regardless, backstab the one on his own to the right and then head over to the other side to dispatch the other two.
From here, drop down a level of the roof to dispatch another Okami Warrior and then on the ground, two further Okami Warrior’s await, this time wielding swords. Take care to deflect their blows and you shouldn’t have too much trouble with them at this point, especially if you only take them on one at a time. With the area clear, loot the Mibu Balloon of Wealth (taking care of the Palace Noble to the left) where the two Okami Warriors were patrolling and then head back the way you came along the waterfall to spot a Light Coin Purse in the birds nest.
(1 of 2) All Okami Warriors are weak to the Sabimaru
All Okami Warriors are weak to the Sabimaru (left), take out Okami Wolves from afar with Shurikens. (right)
Head to the opposite side of the house (facing the lake) to spot a lone Okami Warrior dancing, take him out and pocket the Lump of Grave Wax. From here, quickly make your way to the sinking house to your right and loot the Adamantite Scrap before escaping back to the shore to avoid the Lightning Strikes.
Head back to the left now and grapple to the roofs once more to pocket some Ceramic Shards and take note of the Okami Wolves by the tree. Although still easily defeated with a single Shuriken toss, these Wolves now have the capacity to strike you with bolts of Lightning so be quick about taking them out. Once all three are dead, drop down and loot the items near the tree to obtain an Ungo’s Sugar and Heavy Coin Purse.
Head to the front of the house now and dispatch a Palace Noble along with three more Okami Wolves. Once the room is clear, loot the Adamantite Scrap and then head across the bridge to another room with two more Okami Wolves to dispatch. This will alert another two Okami Wolves from outside, let them come to you and take them out as well. Finally, once you head outside, go to the left to find the final three Okami Wolves to dispatch to obtain some Precious Bait along with looting the Eel Livers. The final item near the tree are some Yashariku’s Sugars and you’ll find the next Sculptor’s Idol just beyond the door.
Mibu Manor
You’ll notice from the outset that the door in front won’t open so head right and take out the first Palace Noble. As you head forward, you’ll encounter an Old Woman who doesn’t appear to be hostile. Upon speaking with her you learn that it’s in your best interest to take the long way around the courtyard along with some information regarding her father.
Keep that in mind and head behind the folding screens to your left to loot some Bite Downs before heading left as soon as you leave this room to dispatch a Palace Noble along with the one on the bridge. Head back to where you took out the first Palace Noble and loot the Ako’s Sugars by the tree before heading to the room to the left of the bridge.
Take out the Okami Warrior in this room and then rush the Palace Noble to the left to clear the room and loot the Eel Livers. Head back to where you dispatched the Palace Noble and follow the corridor to the end to pocket some Yellow Gunpowders. In the corridor to the right of where you killed the Okami Warrior is a patrol of a Palace Noble and two Okami Warriors, dispatch the Noble first and then use the Sabimaru to aid you in taking out the Warriors.
(1 of 2) Drop into the water here
Drop into the water here (left), to gain access to the secret room. (right)
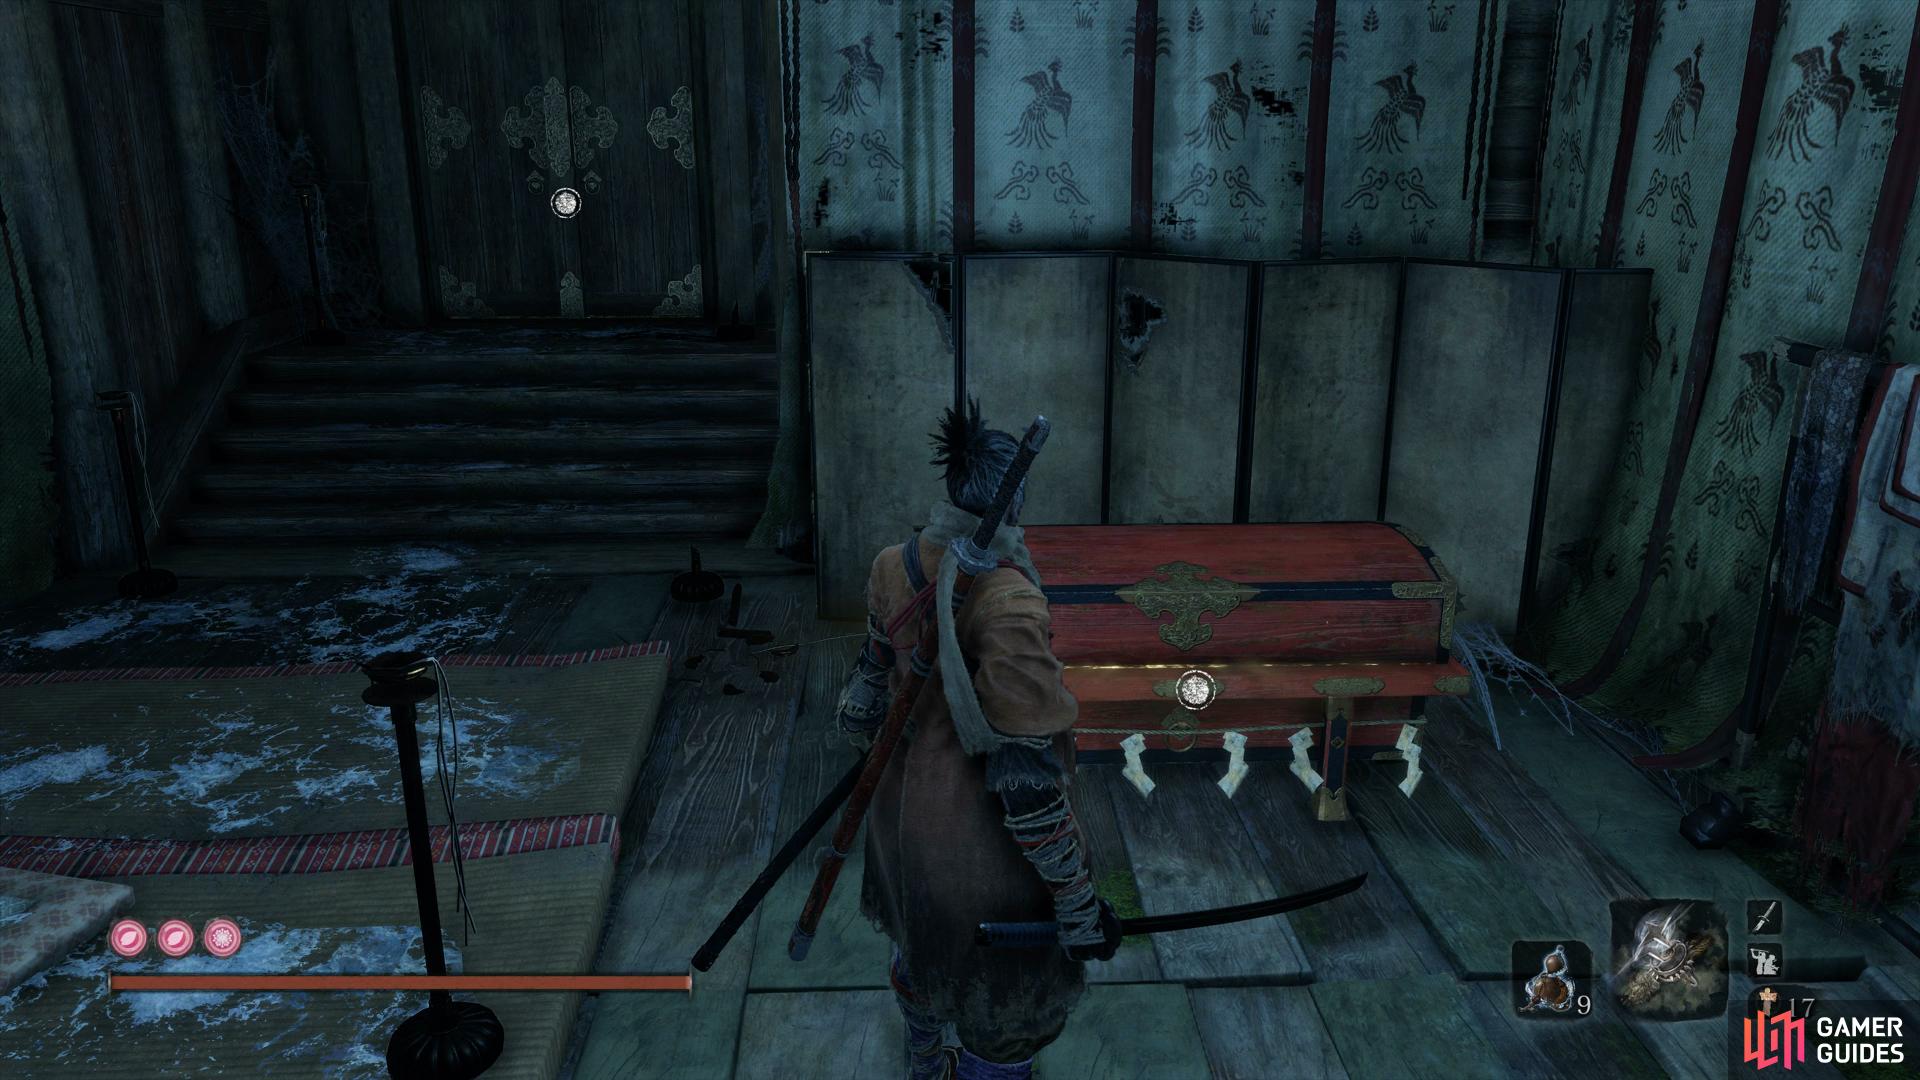
With the enemies dead, head down the end to loot some Divine Confetti and then grapple above where you dispatched that last group. Drop down the hole next to it to defeat another Palace Noble and then loot the Lump of Grave Wax in the shrine nearby. Return to where you found the Divine Confetti and hug the wall as you continue to the right, you’ll spot a hole in the floorboards with some water you can dive into. Once underwater, swim forward a little and then rise again to find yourself in a room that is otherwise inaccessible. Inside, you’ll find three Treasure Carp Scales along with a chest containing the Water of the Palace.
Return to where you dived underwater and head forward to take care of another Palace Noble and an Okami Warrior wielding a Spear. Make good use of the Sabimaru and be prepared to leap over it’s Perilous Sweeps and you should have no trouble. With the enemies dead, head to the left of them to find the next Sculptor’s Idol and rest if you need to (although there is more to do in the courtyard).
Return to the main courtyard and dispatch the first Palace Noble around the corner to the left and if you’re lucky, this will draw out two Okami Warriors, one with a Spear so make use of the Sabimaru once again to dispatch them and then finish off the Palace Nobles after. With the area clear, loot the Adamantite Scrap in the room along with a chest containing a Divine Grass along with some Pellets by the tree in the courtyard.
Flower Viewing Stage
Return to the Idol and rest up now, you’ve fully looted the Mibu Manor of everything. Head left from this Idol to find a building with some Divine Confetti at the back of it and then grapple over to the rooftops of the manor to your left. You’ll spot a nearby Okami Warrior you can get behind for a backstab and then two more up ahead. Begin by heading to the one at the far back for a backstab before finishing off the one in the middle.
With the rooftops clear, you’ll notice your next Mini-boss is pacing around the outside of the manor. Before you begin the battle, take the time to equip the Firecrackers along with using an Ako’s Sugar (or Spiritfall) and Divine Confetti.
Mini-boss: Sakura Bull of the Palace
Wait for the Bull to pass underneath you and perform a Stealth Deathblow to begin the battle with a huge chunk of Vitality removed from it. The rest of the battle follows the same rules as the Blazing Bull back at Ashina Castle. Just remember to stick to it’s back and slash when the opening presents itself along with using Firecrackers to stun it at times.
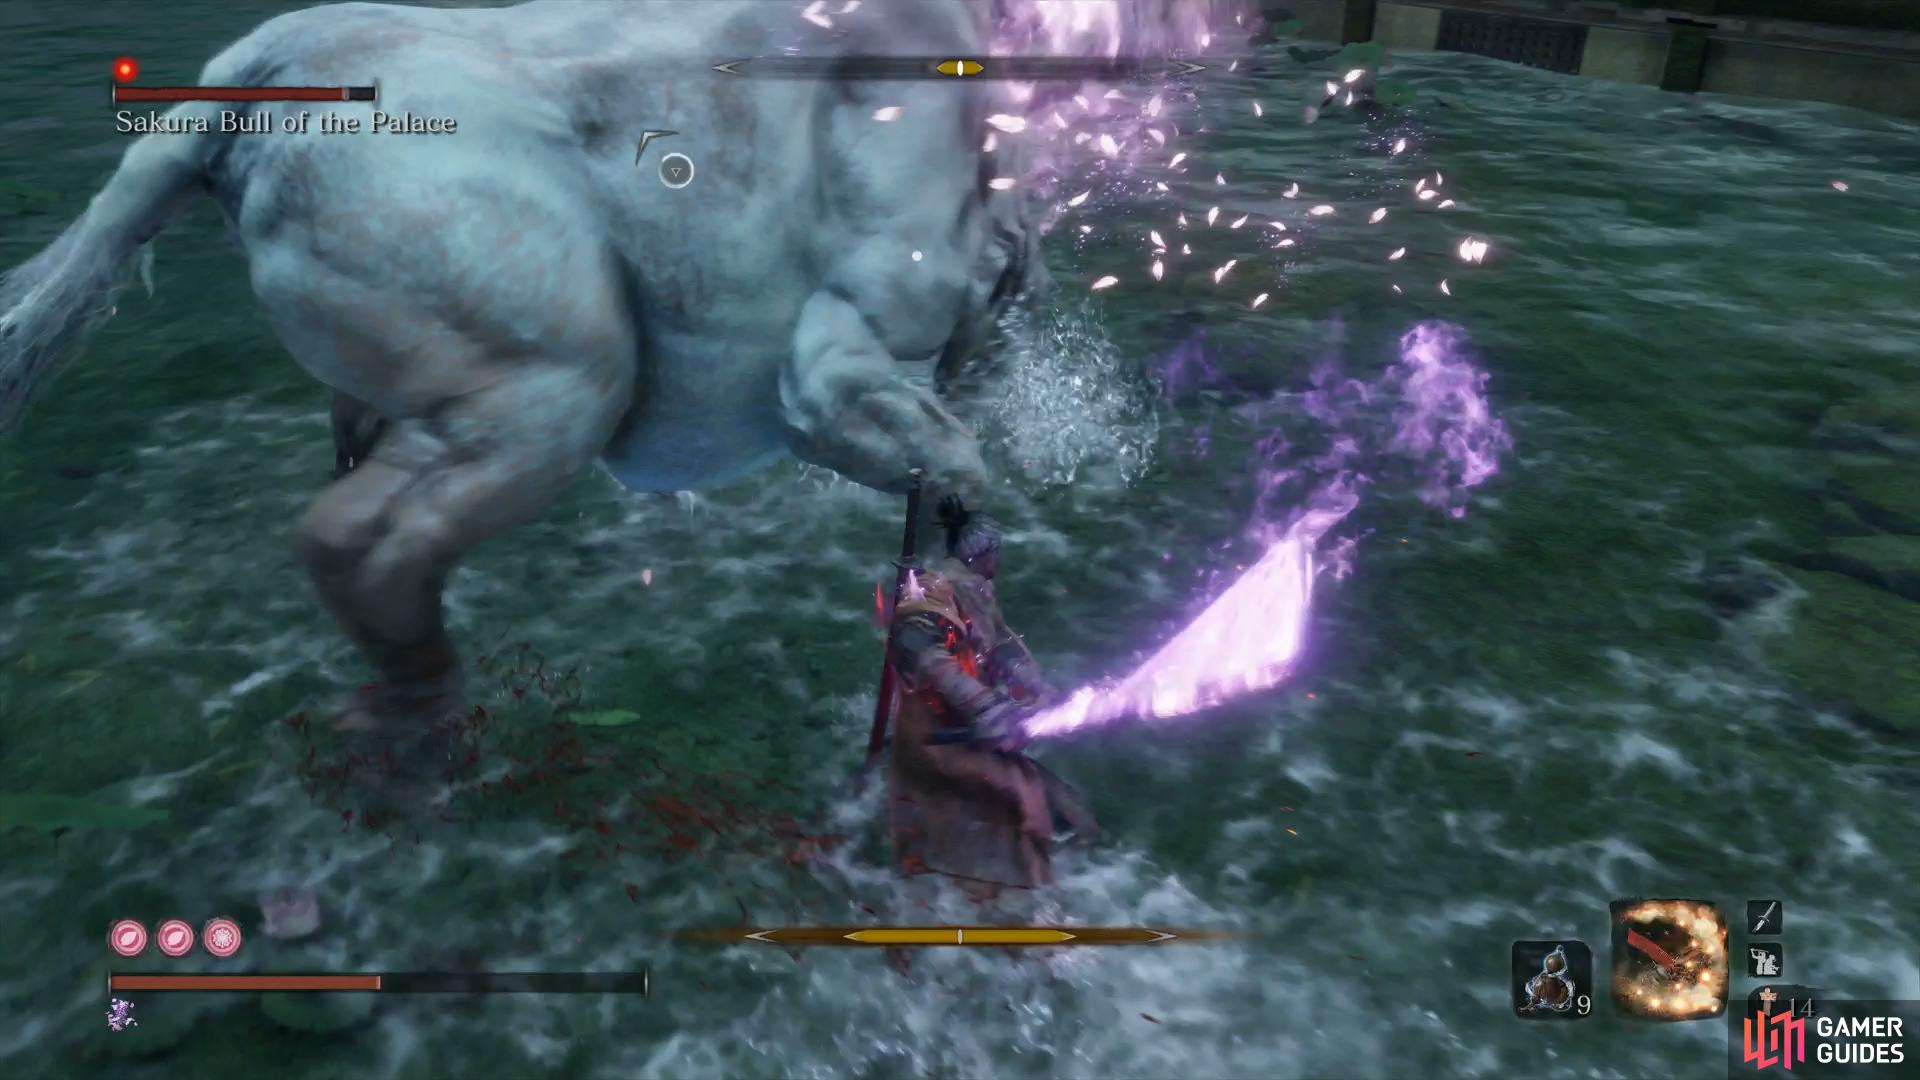
(1 of 2) Begin by performing an Air Deathblow
Begin by performing an Air Deathblow (left), then stick to the side and back of the Bull. (right)
Your reward for this battle is another Prayer Bead and the A Beast’s Karma skill granting you another Spirit Emblem to your max total. You’ll also find nearby some Pellets and then follow the wall south to find a Bulging Coin Purse, Adamantite Scrap and Yashariku’s Sugar.
Return to the Idol to continue your journey through the Fountainhead Palace and as you attempt to cross the bridge, a Giant Carp will take it out leaving you to grapple across to the ledge to the right and then drop down on the other side of the bridge. Search under the bridge to the right briefly to loot the Mibu Balloon of Soul and then continue left to the first building.
You’ll find yet another Mibu Balloon of Soul outside the door and the grapple to the tree at the back and over to the nearby ledge to the right to kill an Okami Warrior (this type of Okami Warrior will launch balls from a distance) and then grapple over to the roof of the previous building to backstab another Okami Warrior.
The path becomes a lot more open at this point but begin by returning to where you took out the Okami Warrior on the rocks and grapple up to the platform at the back to dispatch a lone Okami Archer and then head down the stairs to the right to dispatch a further two Okami Warriors. With this group defeated, drop to the roof to your right and then look down and to the left to spot a patrol of another two Okami Warriors to take out. Finally, head out to the platform facing the lake to take out two more Okami Warriors.

Try to avoid taking on more than two Okami Warriors at a time.
Return to where you took out the lone Okami Archer at the back and look down near the waterfall against the rocks to spot two Okami Wolves to dispatch with Shurikens before looting the Eel Livers there along with some Ceramic Shards under the bridge to the left. Continue along to the left and up towards another waterfall to dispatch another three Okami Wolves and claim the Mibu Possession Balloons.
Return to where the first waterfall is and grapple back up to the rocks and dispatch the two Okami Warriors (Spears) to the left along with the patrol and an additional two Okami Warriors further down the platform and clear out this side. From here, grapple up the rocks at the back by the waterfall and then over to the right where the main stairs are.
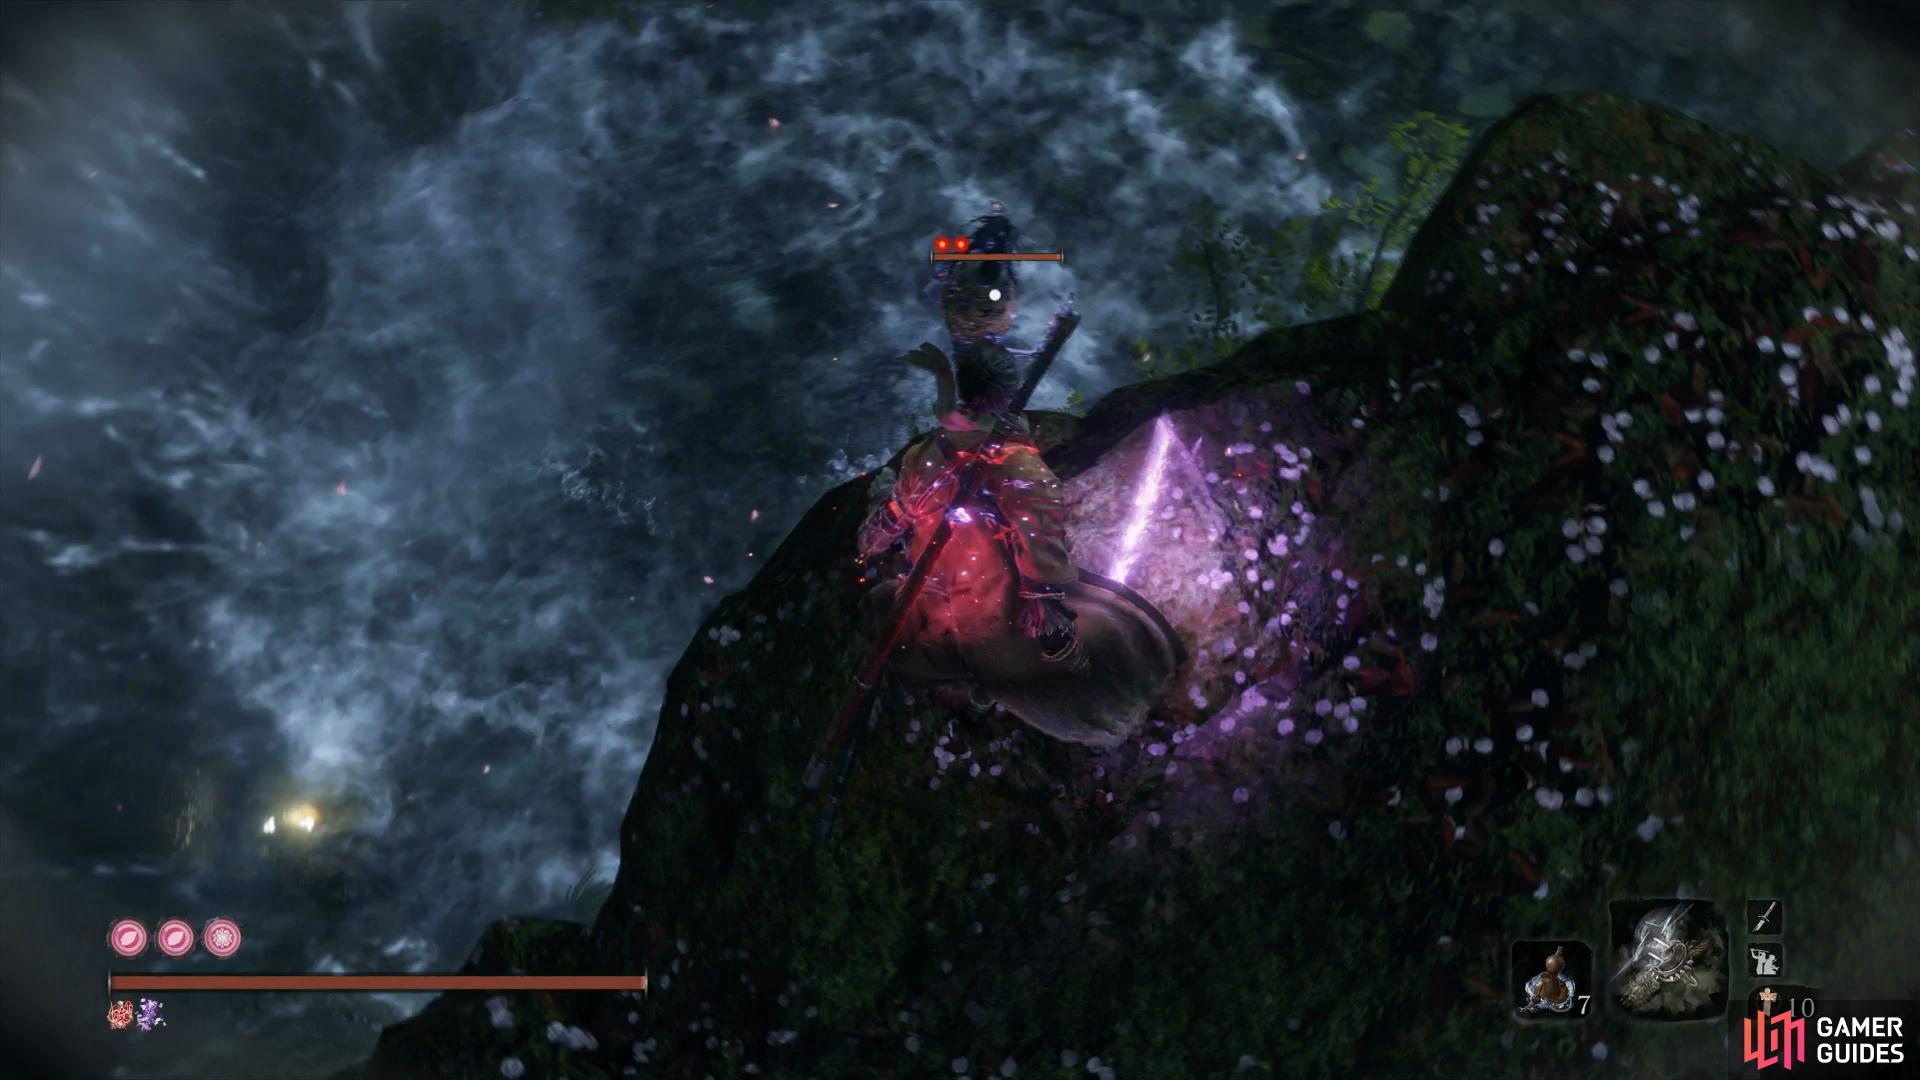
You’ll noticed the door is shut tight for now so make your way down the stairs and dispatch the two Okami Archers before heading ot the right at the intersection to claim some Pellets. Make your way back to the intersection and through the open room where you’ll spot a large group of Okami Warriors on the platform below. Ignore these for now however and drop down a level to your right and head around the back to find two more Okami Warriors to dispatch. Look to the back and right to spot your next Mini-boss near the waterfall.
Mini-boss: Shichimen Warrior
This is the last Shichimen Warrior you’ll come up against and you should have killed two of them by now so you should know how the flow of the battle works by now. Jump down to the rocks in front of the two Okami Warriors you just killed and head to the top to be able to begin the battle with a Deathblow.
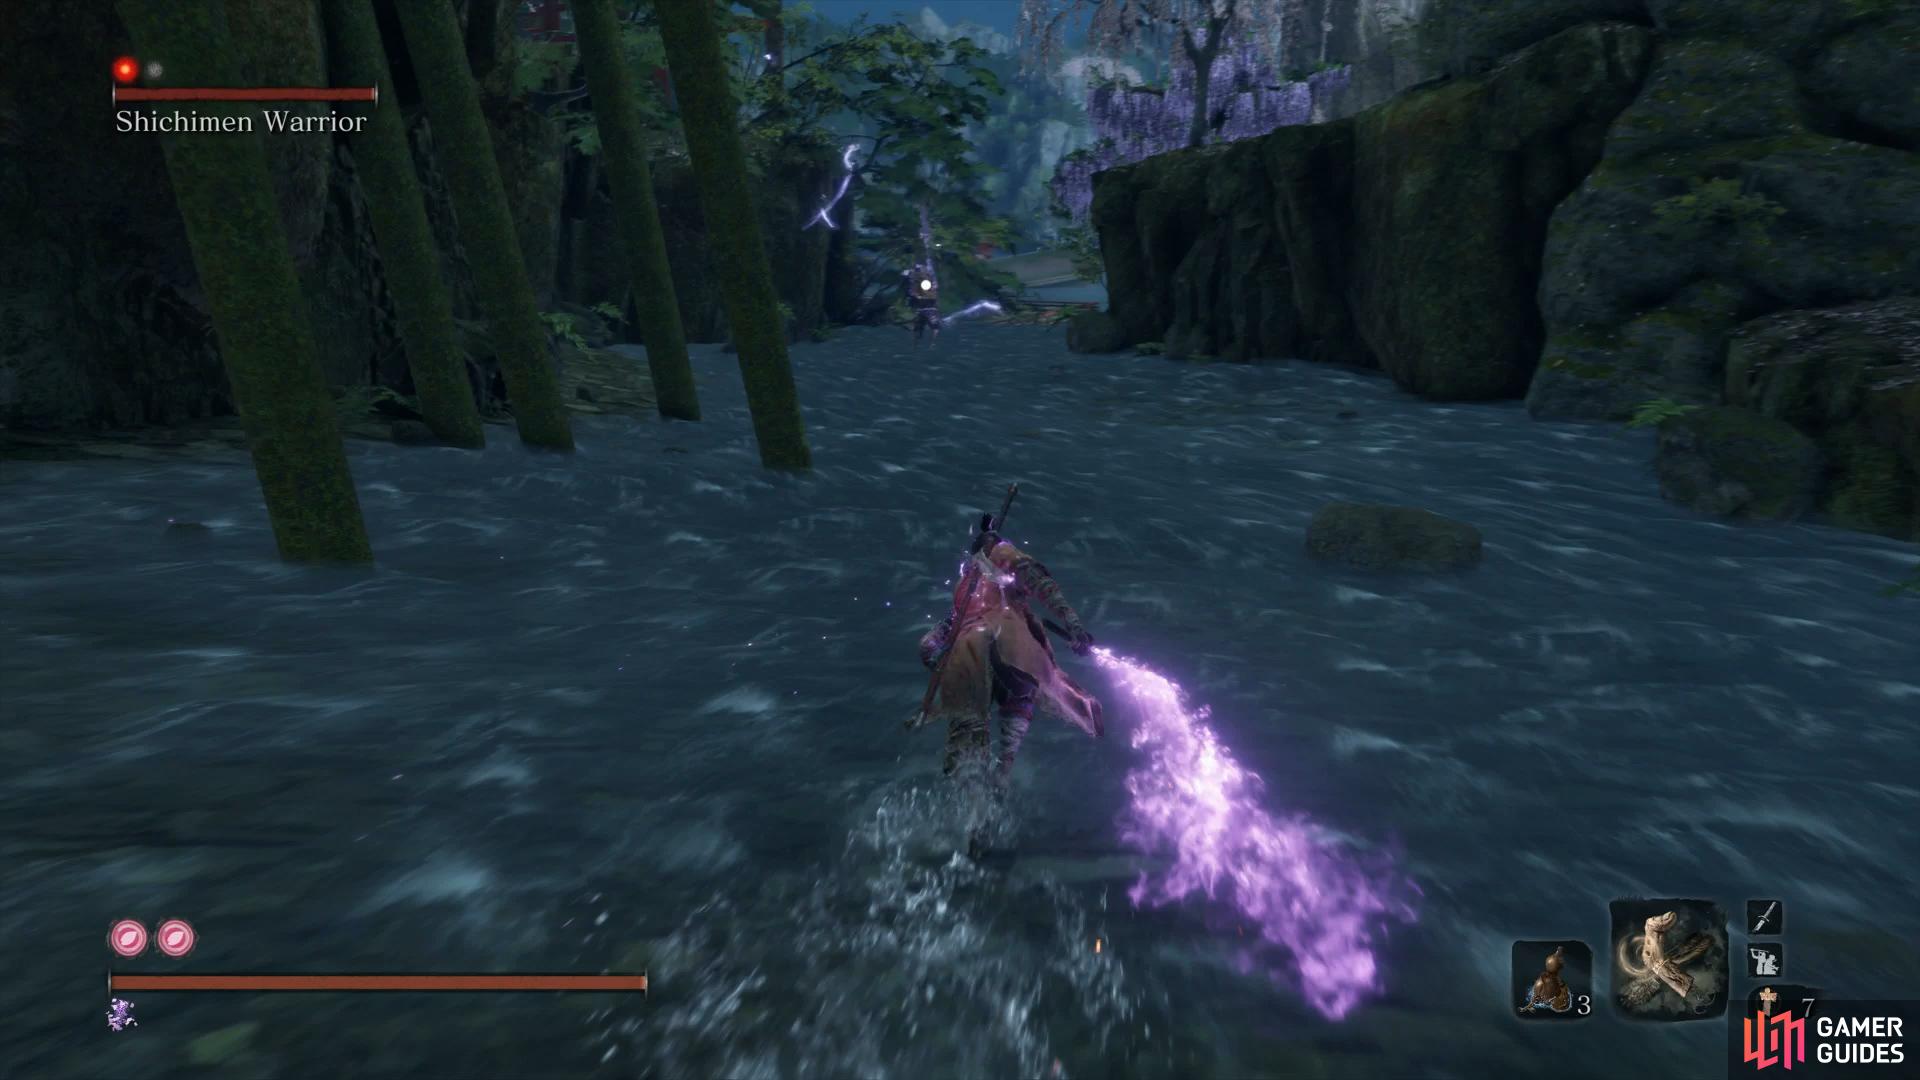
(1 of 2) Begin by landing a Deathblow from here
Begin by landing a Deathblow from here (left), the Shichimen Warrior will teleport over here. (right)
From here, focus on removing the Okami Wolves in the vicinity before taking down the Shicimen Warrior in the usual way, using Malcontent to make it easier should you have the Spirit Emblems still on hand. Your reward for this difficult encounter is your first Lapis Lazuli, a material required for the final tier of Prosthetic Upgrades of which there are only five per playthrough. You’ll also find a Bundled Jizo Statue at the back of the waterfall for your troubles.
Follow the water down from here and take out two more Okami Wolves near the large tree before looting the Light Coin Purse and Heavy Coin Purse around the roots of the tree. Make your way back towards the main stairs leading to the locked door and head down through the open room to reach the group of Okami Warriors again. What you’ll want to do here is to stand off to the right on the level below and toss a Shuriken to try to lure them to you in more manageable numbers.
Once you take down the final Okami Warrior you’ll obtain some Dragonspring Sake along with Great Sakura Suclptor’s Idol and this is a great time to take a rest to restore your Health Gourds.
Great Sakura
From here, you can grapple over to the tree in front of you to confront the Okami Warrior that’s been shooting bolts of Lightning at you since you first arrived here. Although he’s designated a Mini-boss, he’s no different from the regular Okami Warriors so put your Sabimaru to work and slay him to obtain a Prayer Bead along with removing the threat from heading into the water. Drop down to the branch to the left of where you defeated Okami Leader Shizu to loot a Bulging Coin Purse.
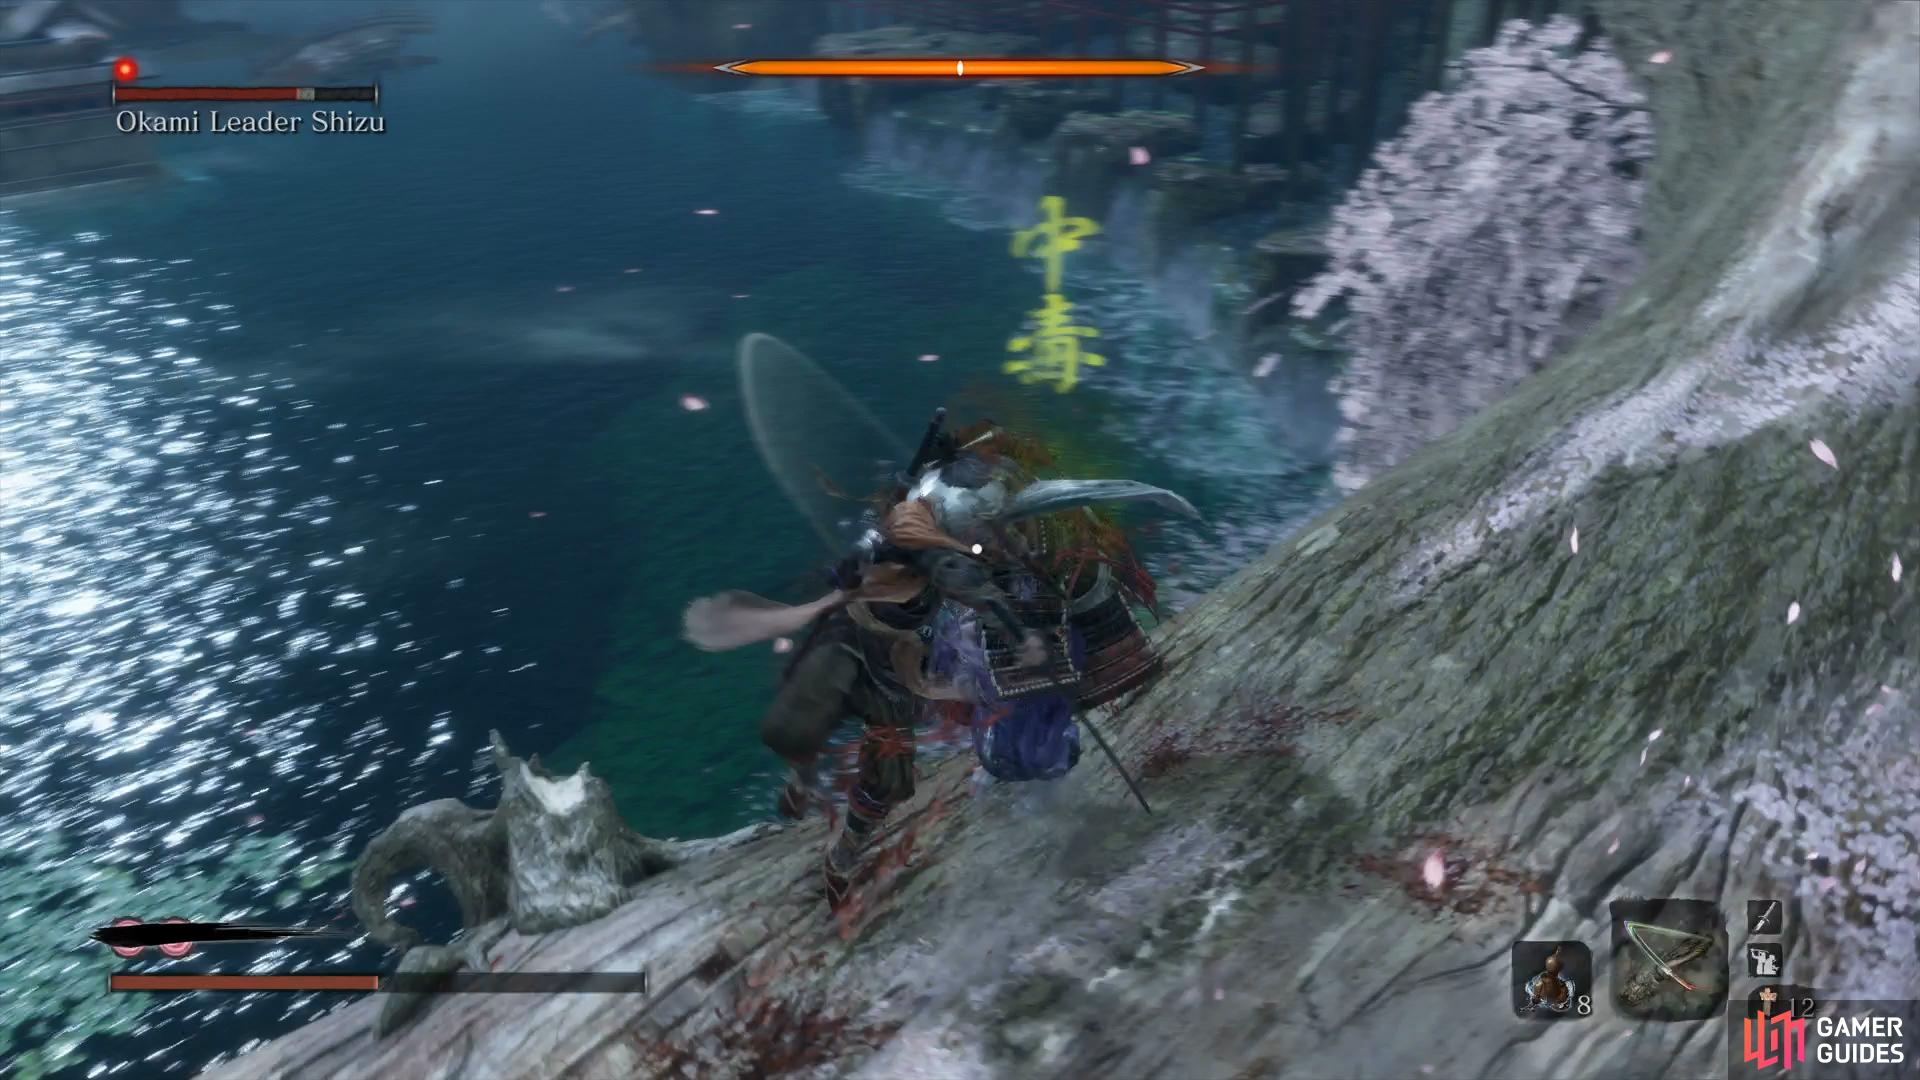
Use the Sabimaru to weaken Shizu.
Leap into the water (but not under just yet) and swim out to the partialy submerged building to your left to find another Old Woman to converse with twice. You’ll learn the route to the Palace along with a request to open the doors. Jump back into the water and swim ahead to find a Lump of Grave Wax.
Dive underwater here and swim to the building to the right of where you are to find three Treasure Carp Scales and then swim back to where the Old Woman is to find another Lump of Grave Wax. Continue to swim towards the Palace from here and you’ll find a Treasure Carp you can kill for another Treasure Carp Scale along with some Precious Bait.
From here, swim right to find another two Treasure Carps to kill for Treasure Carp Scales along with a large group of regular Fish to dispatch. Now from here you’ll be able to swim a lot deeper and you’ll notice something near the bottom, your next Mini-boss.
Mini-boss: Headless
This is the last Headless you’ll encounter in the game and not only is it an underwater battle, you’ll also discover that you’ll be up against two of them. Note however that you only need to kill one of them for both of them to be dispatched so employ the same hit and dash tactics you employed against the first underwater battle and put the Headless down for good.
Beware of the second Headless shooting Terror Beams at you from a distance.
Your reward for this battle is the Yashariku’s Spiritfall and you’ll now be safe to explore the rest of the water. Nearby you’ll find two Treasure Carp Scales along with a chest containing a Prayer Bead. You’ll see a house behind you and up a little, to the right of this in the corner is another Precious Bait, pocket it and then search inside the house for a Light Coin Purse.
Swim up a little and to the left is another ruined building with a Precious Bait under it then swim up and towards the Moon to find a Red Lump on your right. Continue along this way and at the end you’ll come across a Light Coin Purse and a Scrap Magnetite. Swim towards the first part of the Fountainhead Palace now and you’ll find an Adamantite Scrap on the rooftop along with two more Treasure Carp to the left for another two Treasure Carp Scales.
Return to the nearby Idol to recover from the previous Headless battle and enhance your Physical Attributes for your Ninth Prayer Necklace. Dive back underwater and head left from the last two Treasure Carps you killed to find another two to dispatch, awarding you a further two more Treasure Carp Scales.
Swim towards the Palace now and to the right to find a large cave, pocket the nearby Ceramic Shards and then swim through, keeping inside the building to the left. As you swim through, the Great Colored Carp will rush you so heal if you need to and swim as quickly as possible through to the other side. Once you swim through the building and up the other side, use the branches to grapple all the way to the top and a new Sculptor’s Idol.
The Great Colored Carp (Optional)
Begin by heading in the nearby house and killing all of the Palace Nobles before opening the large doors back to the previous area. with the door now open, rest again to find the Old Woman from the Mibu Manor as she takes out her revenge on the Nobles.
(1 of 2) Grapple here to reach a secret tunnel
Grapple here to reach a secret tunnel (left), leading to a well hidden Sculptor’s Idol. (right)
From here, head out the doors but don’t go down the stairs, instead head along the wall to the right and you’ll spot a grapple point, head to the corner and jump and grapple up to a hidden tunnel full of Lizards waiting to be killed. Follow this tunnel out and grapple over to the roof and then drop down to the right to find another Sculptor’s Idol. Claim it and then speak to another Pot Noble near the edge of the cliff.
| Items (Quantity) | Cost (Treasure Carp Scales) |
|---|---|
| Dragon’s Blood Droplet (1) | 1 |
| Lapis Lazuli (2) | 6 |
| Mask Fragment: Left | 12 |
If you’ve been following this walkthrough, you should have enough for the Lapis Lazulis and then grab the Mask Fragment: Left next. If you have the other two pieces of the Mask then they’ll combine to create the Dancing Dragon Mask, an item that will allow you to exchance Skill Points for Attack Power increases.
Be sure to grab the Divine Confetti to the left of him and then travel back to the Palace Grounds Idol. Head through the building nearby and look to your right to find a chest containing the final Gourd Seed and then open the door. Ignore the forward path for now and head around the corner of the building you just left to find a grapple point to the roof.
The final Gourd Seed awaits in the building next to the Idol.
Follow this back across the roof towards the previous area and look to your left to find another grapple point and then over to the roof. To your left are two Okami Wolves to deal with along with an Okami Warrior on the roof so grapple over to the Warrior first and then make your way along the roof to another to the right.
From here, drop down to the ground below to dispatch an Okami Wolf and loot the Ako’s Sugar before heading down the center roof to reach a new Sculptor’s Idol, Feeding Grounds. You’ll find the Feeding Ground Attendant here who happens to be the father of the Old Women you met earlier. Heed his advice and ring the nearby bell to feed the Great Colored Carp with the Precious Bait in your inventory to obtain another four Treasure Carp Scales.
(1 of 2) Head around the back to find the first grapple point
Head around the back to find the first grapple point (left), then over the roof and to the left for the second. (right)
This should be enough to purchase the final item from Pot Noble Koremori at the Near Pot Noble Idol and then speak to him until he reveals his secret and hands over the Truly Precious Bait. Be sure you’ve purchased everything from the Pot Noble Merchants before the next step and then return to the Feeding Grounds Idol. Ring the bell and feed the Great Colored Carp the Truly Precious Bait and then rest at the nearby Idol.
Speak to the Attendant again to learn that the Great Colored Carp has vanished so return to the Idol and this time travel to the Bodhisattva Valley Idol in the Sunken Valley to come across the corpse of the Great Colored Carp in the lake below. Drop down, claim the Great White Whisker and then travel back to the Feeding Grounds Idol once again. Head over to the Attendant again and hand over the Great White Whisker, the grateful Attendant will hand over a Divine Grass. Rest at the Idol one final time to see the conclusion of this storyline.

You’ll find the remains of the Great Colored Carp where the Guardian Ape resided.

With the Great Colored Carp now defeated, you can return to the cave you swam through to reach the Palace Grounds Idol and loot the Light Coin Purse and Adamantite Scrap. Return to the Palace Grounds Idol from here and before continuing on, return to the Dilapidated Temple to give the final Gourd Seed to Emma along with creating your first Lazuli Prosthetic Tool should you have the resources. It should noted that the Shuriken and Sabimaru provide the best improvements with the Shuriken being the outright winner.


Palace Grounds
Return to the Palace Grounds at last to continue your journey and make your way through the building again. Once on the other side, drop into the water to loot the Mibu Balloon of Souls and then use the ledges to climb back up. Grapple across the branches to make your way above the waterfall and then make your way up the stairs.
To the right is an Okami Warrior who can use Lightning along with another two just up ahead, use the Sabimaru to take them down with ease and then claim the final Sculptor’s Idol at the top of the stairs.
Once you’re happy that you’ve progressed everything along as much as you can, head into the cave and Pray to begin the next boss.
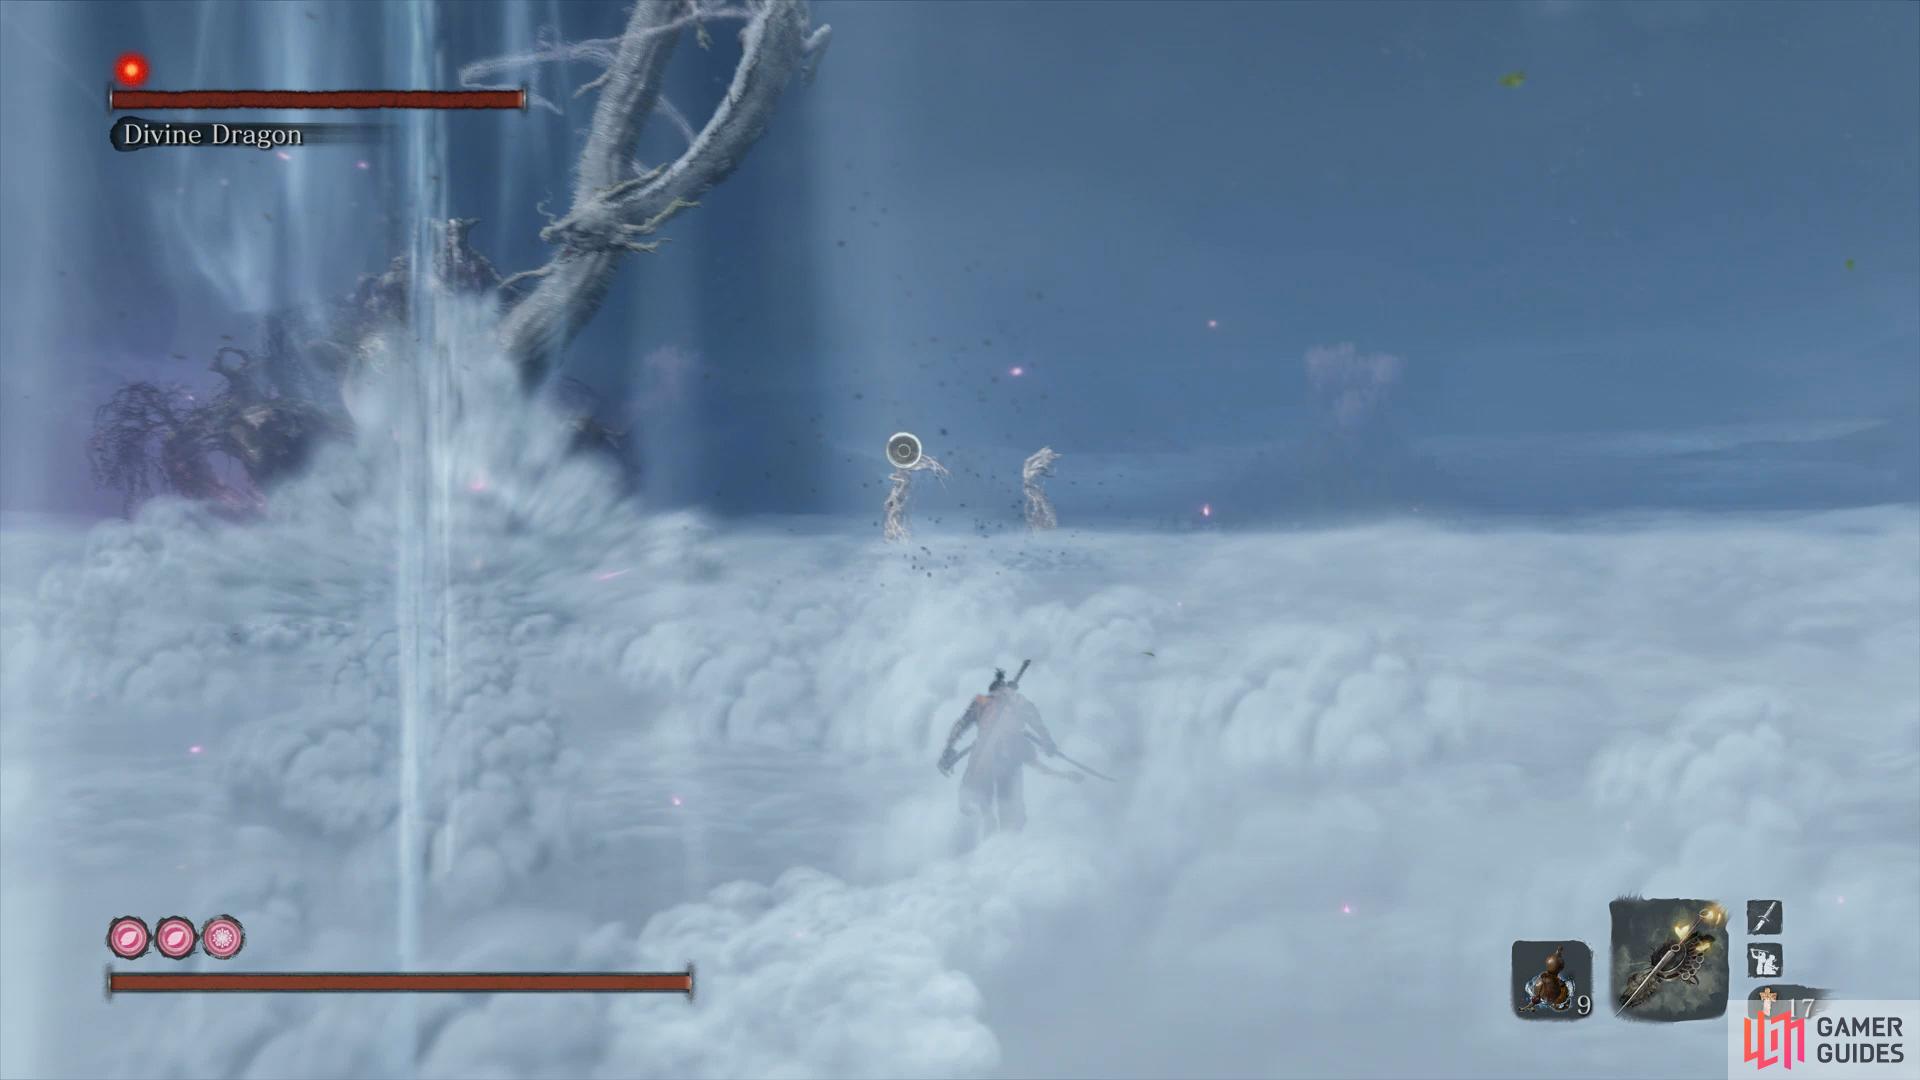
Boss: Divine Dragon
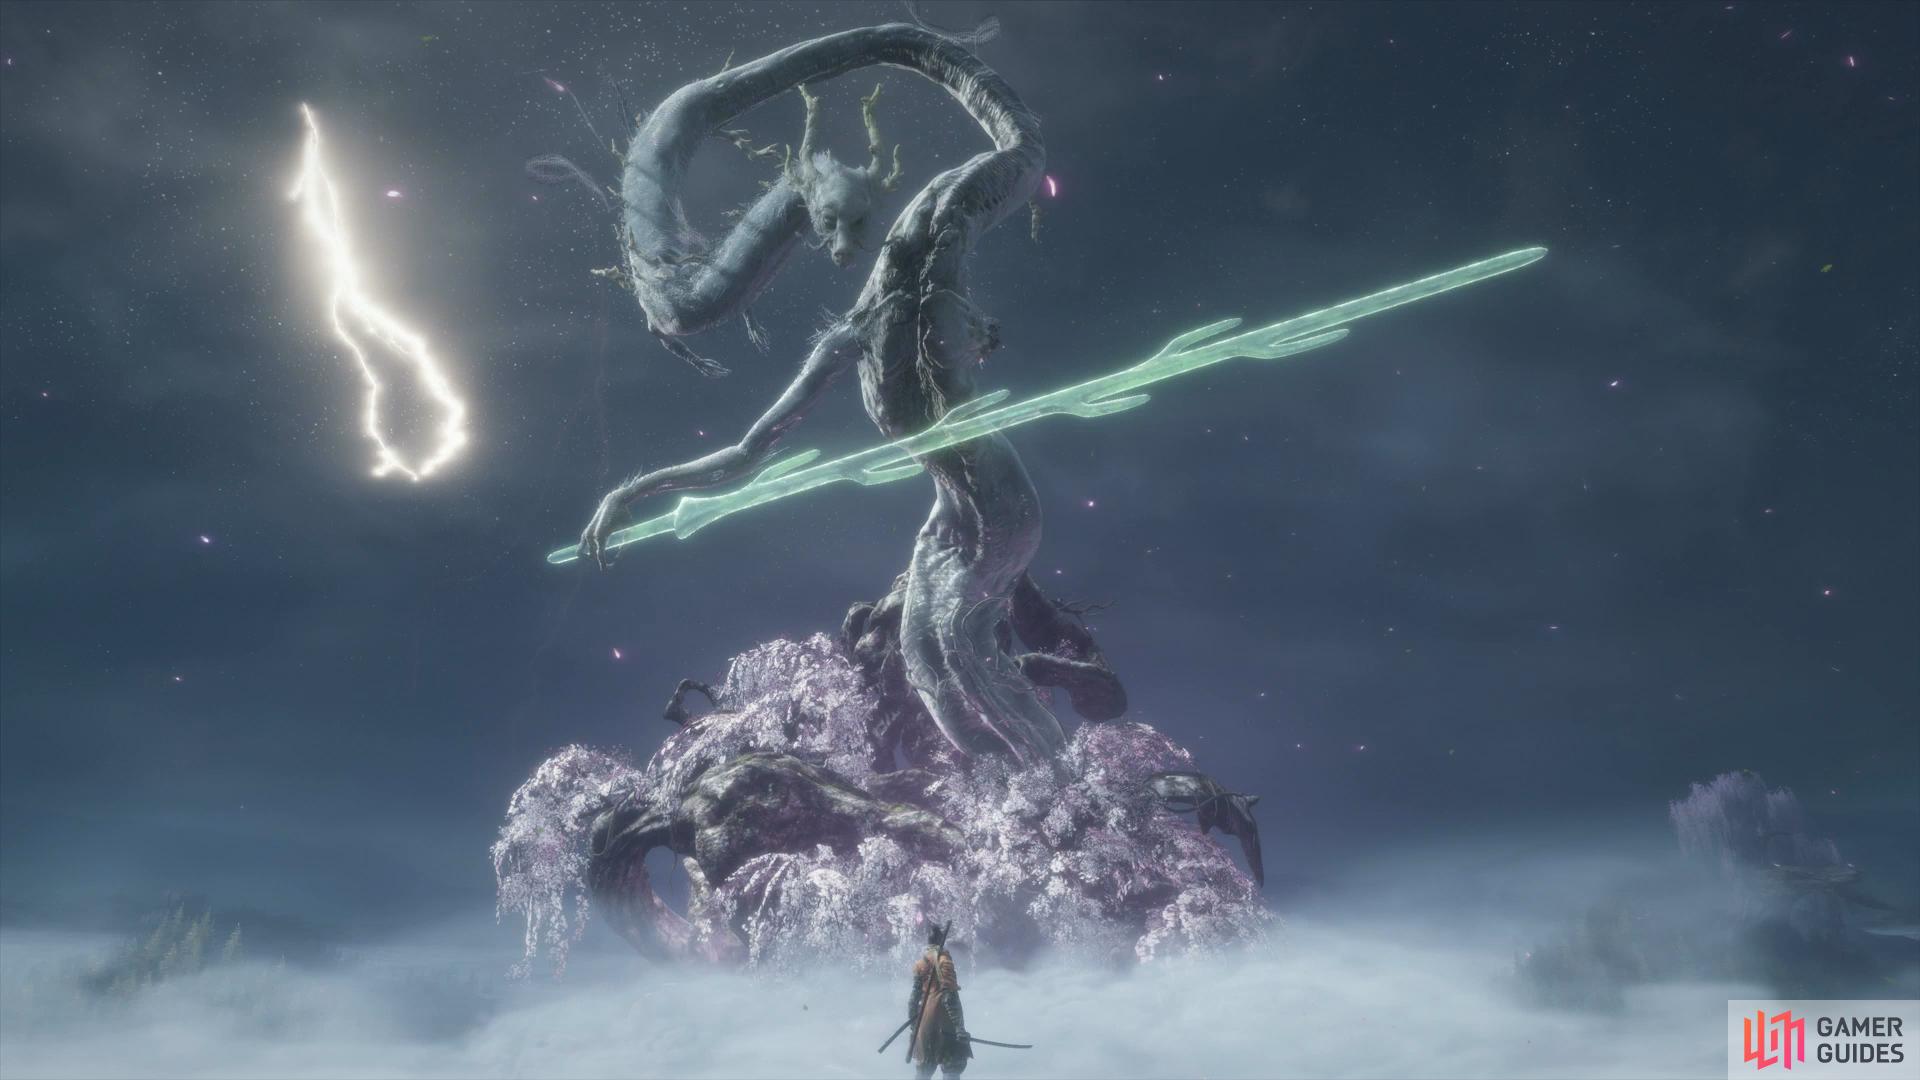
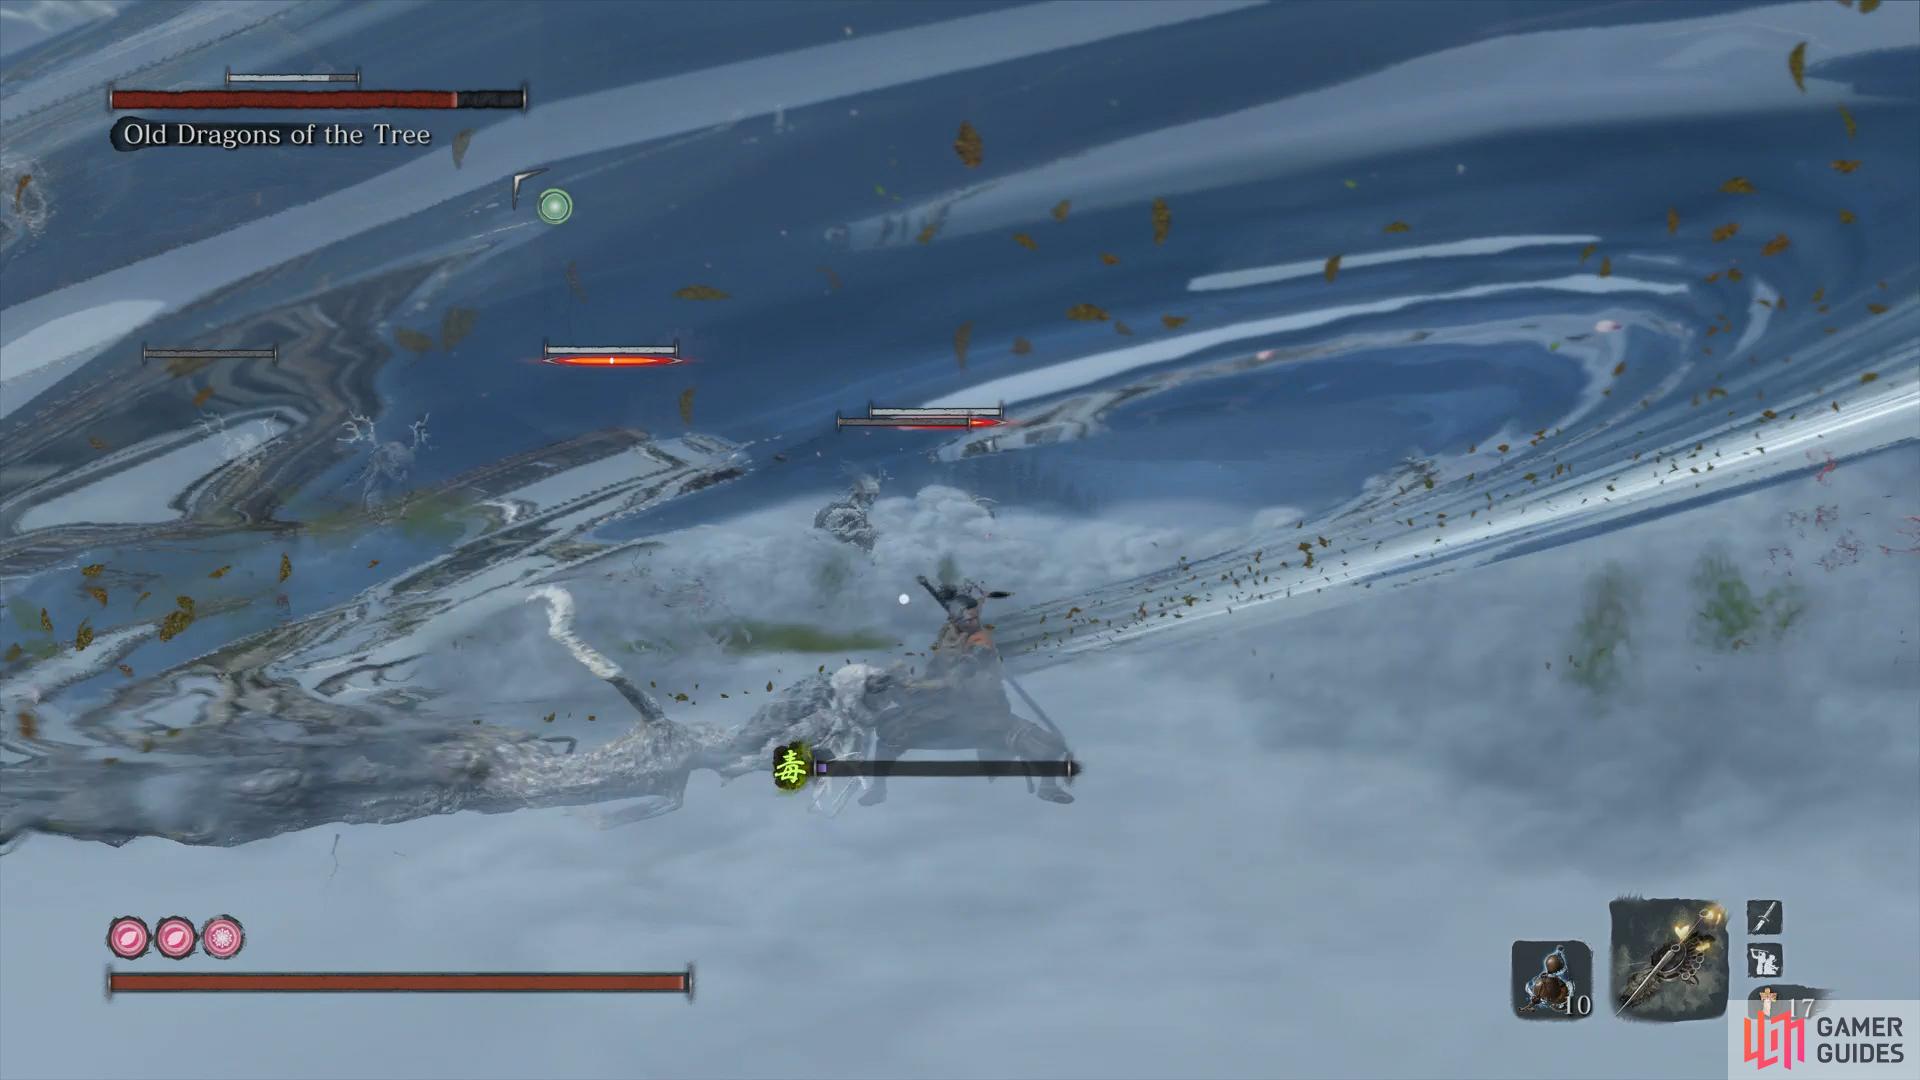
Before you can even challenge the Divine Dragon itself, you’ll have to deal with it’s protectors, the Old Dragons of the Tree. This is more simple than you might believe as they go down with ease and you can use the tree that appears to perform a Deathblow, causing Wolf to slash in a wide arc at multiple enemies at once.
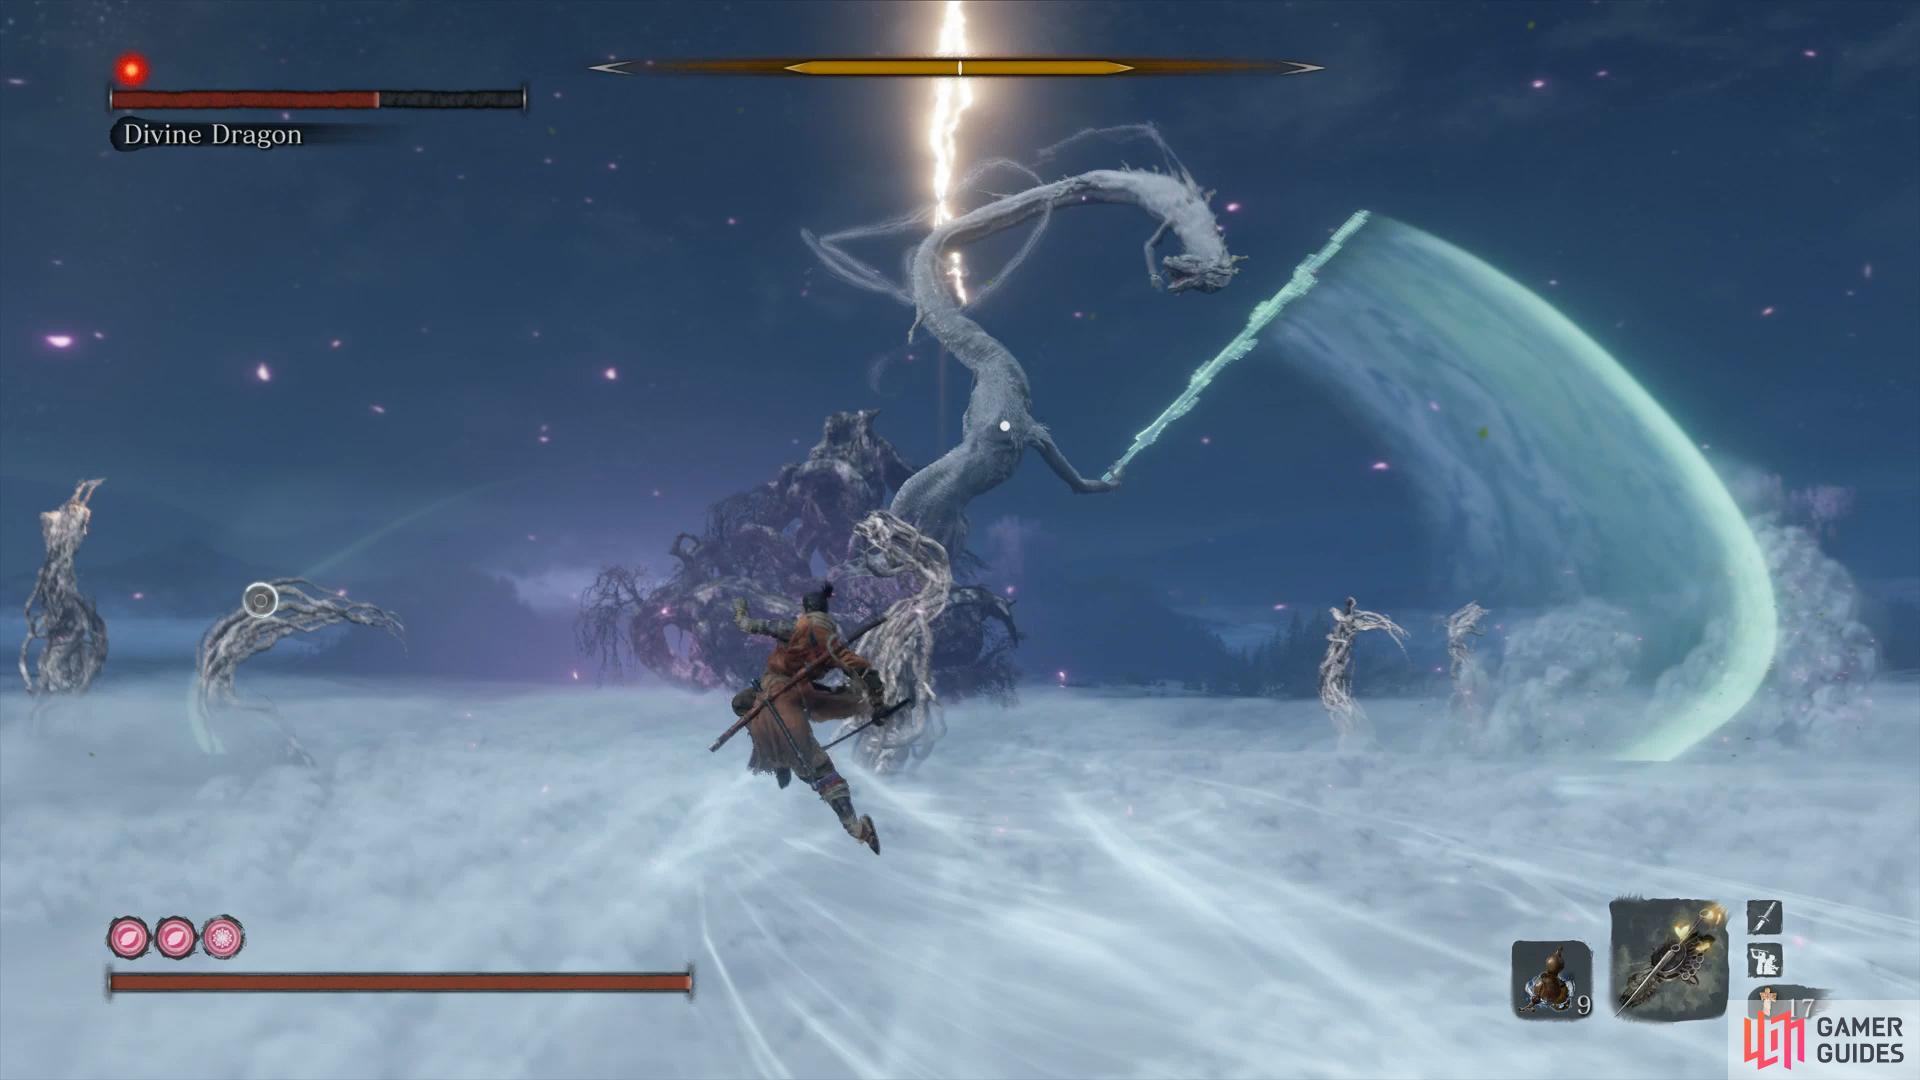
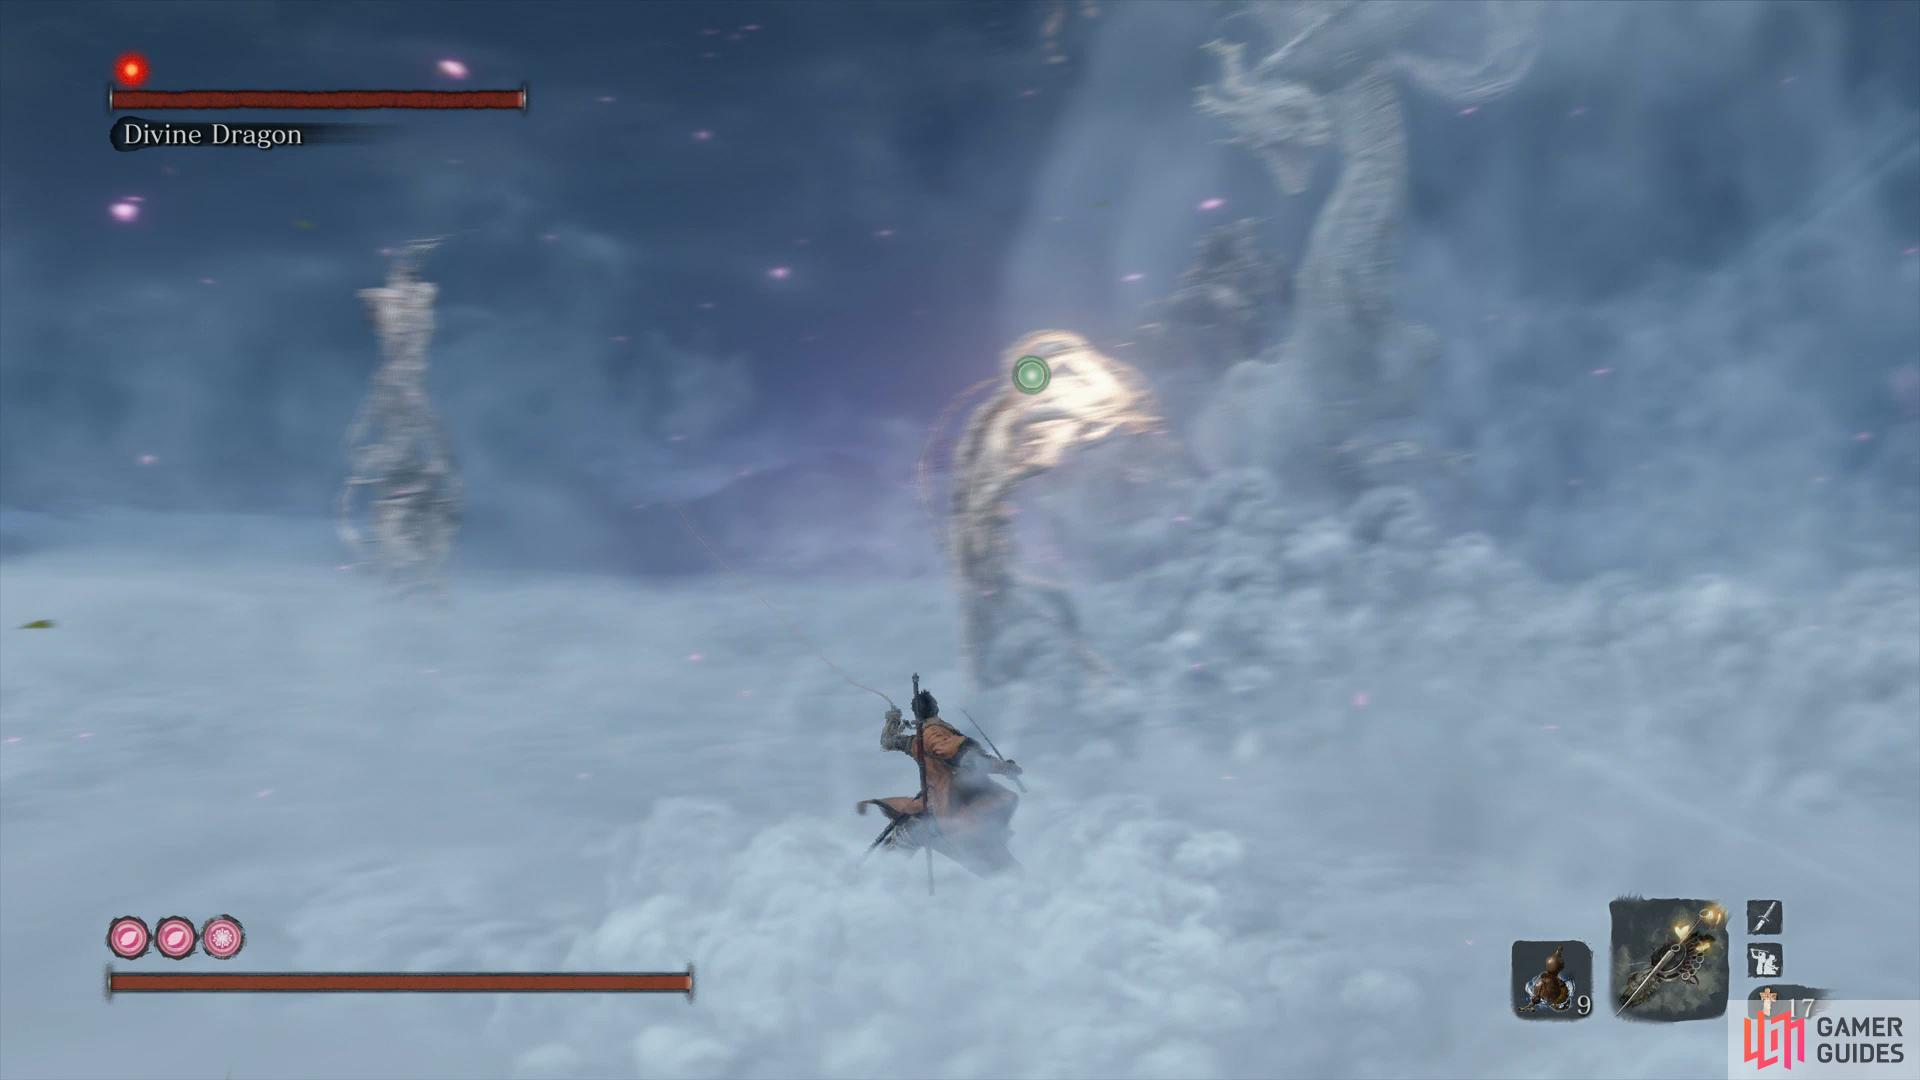
Once the Divine Dragon itself makes an appearance, the battle begins for real. The Divine Dragon will stay at the back of the arena while you need to make your way to the branches close to him. As you do, you may notice that one of the branches is being struck by Lightning so grapple to this one and return the Lightning back at the Divine Dragon to damage it.
While this is going on however, the Divine Dragon will use it’s sword to launch Shockwaves toward you, be they vertical or horizontal so make sure to jump if you see a horizontal one coming your way. The easiest way to avoid this however is to run at an angle towards the branches rather than in a straight line. Once the Divine Dragon has taken multiple hits, the branches will vanish and you’ll need to spend the next period dodging the Shockwaves until it appears again. Get to the branch with Lightning and perform one final strike to bring the Divine Dragon down.
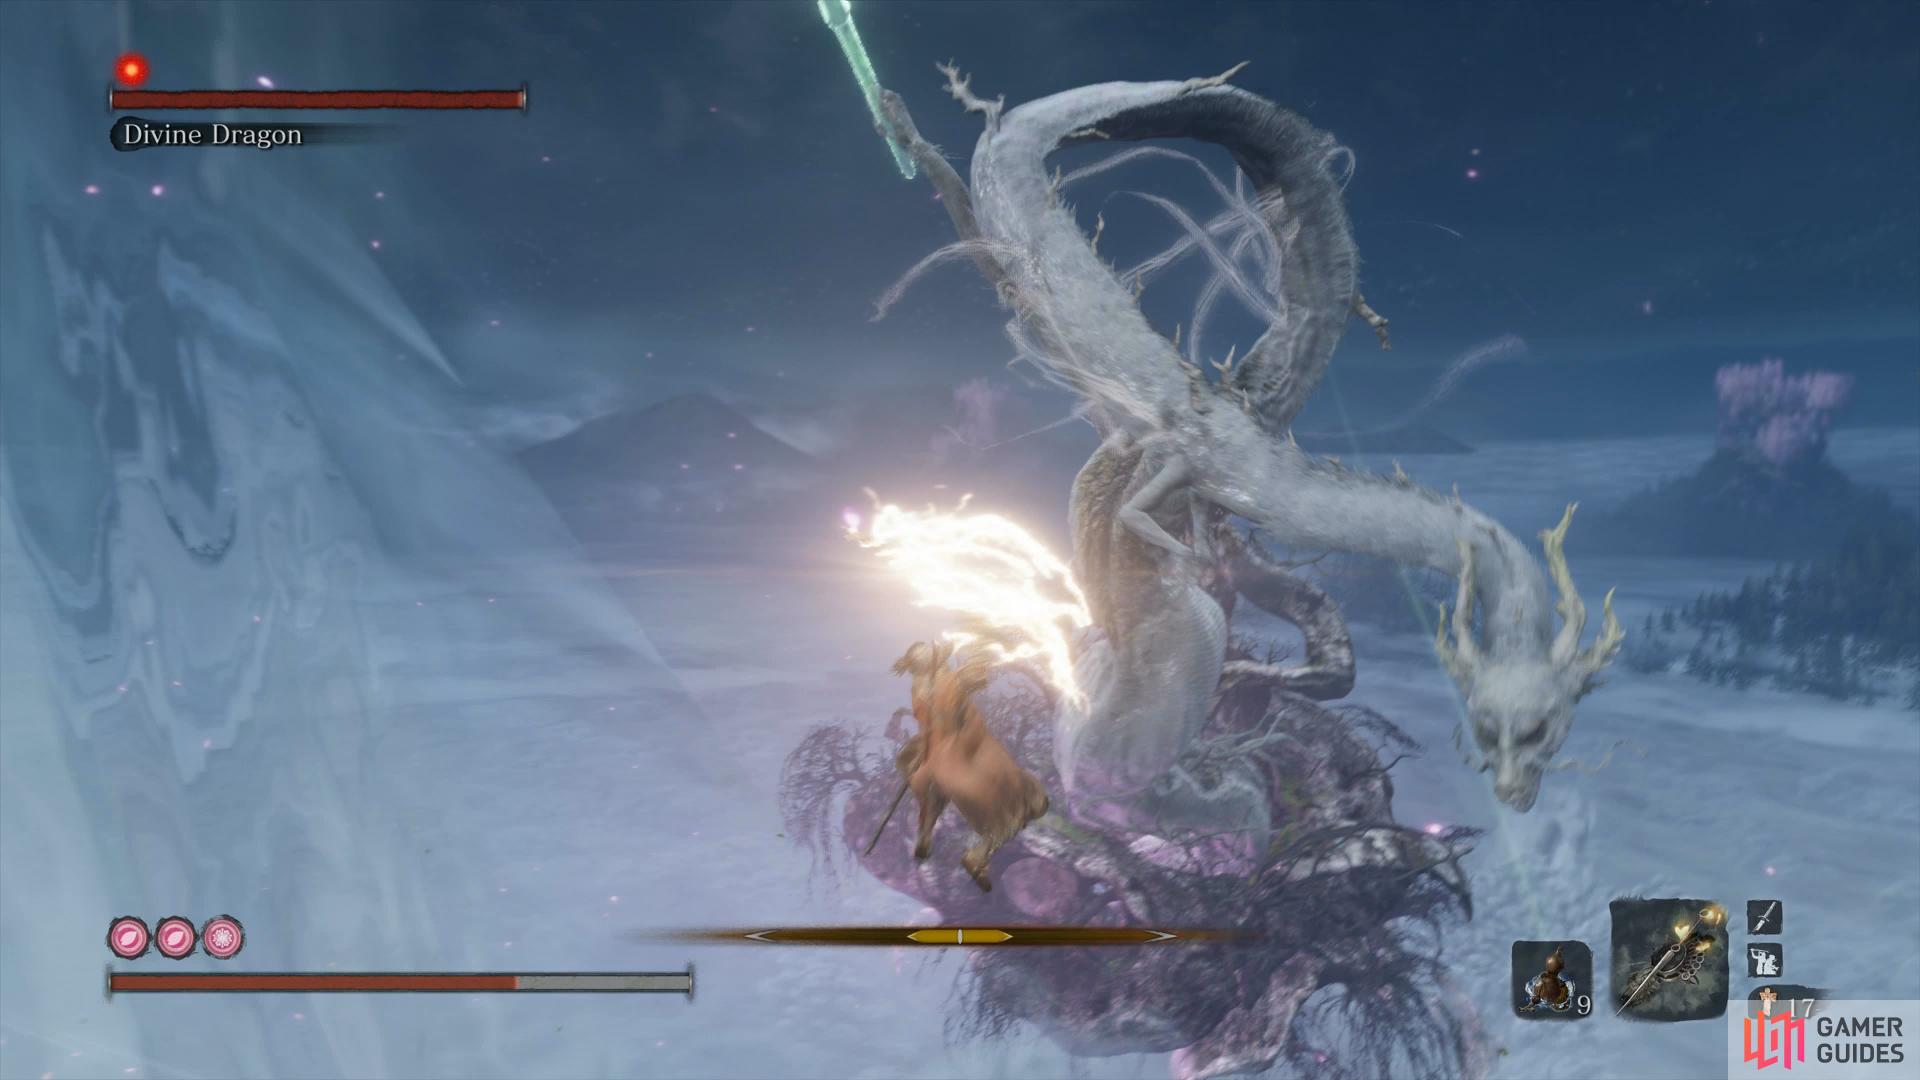

The battle is not over there however, while it’s down, you’ll need to dash towards the sword and run up it to get the final Deathblow with the Mortal Blade and put it down. You’ll obtain the Memory: Divine Dragon along with the Divine Dragon’s Tears for your victory as you’re taken back to the incense burner in Lord Kuro’s room.


 Sign up
No Comments