As you begin your approach towards the island, the King of Red Lions points out the island. From what he tells you, you must ask the sky spirit Valoo for the Din’s Pearl. To get to him, you’ll have to ask the Rito population of the island.
As you begin to leave, the King of Red Lions hands you a little white baton. In ancient times, it was used to borrow the power of the gods, but has little use at the moment, as you (or the King of Red Lions, from what goes on later in the game) know none of the songs you have to conduct.
The King of Red Lions has you practice in the 3/4 time (move the C-Stick in the correct direction) and 4/4 time (move the Control Stick left and move the C-Stick in the right direction). He also mentions 6/4 time, where you hold the Control Stick to the right while moving the C-Stick. You are then given the Wind Waker (the white baton from earlier) to keep!
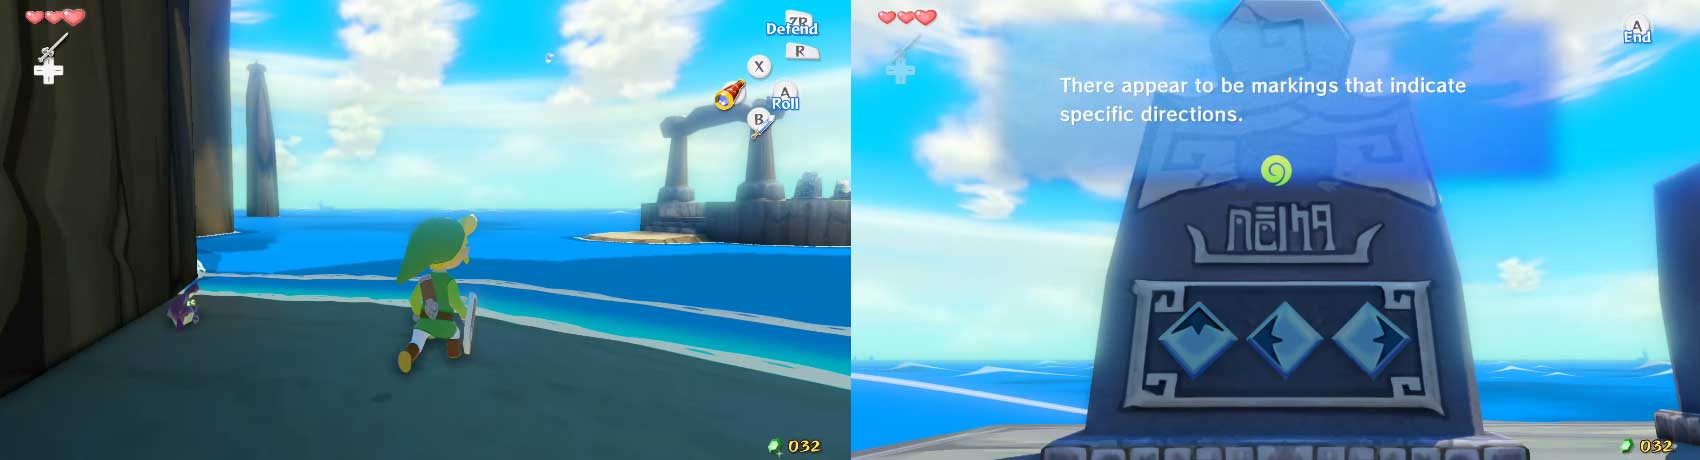
Since you have the Wind Waker, it is time to make use of the shrine behind the island. In front of you is a tunnel; follow it until you reach the coast behind the island. From there, you should be able to spot a tinier island. Swim to it and examine the un-fragmented stone tablet on the left.
The markings seem to indicate specific directions. Use the Wind Waker and the directions (up, left, right) will appear on the bottom part of the screen and play twice. Play the song on the Wind Waker to learn the Wind’s Requiem, a song that controls the direction in which the wind is blowing. A cloud-riding frog-thing named Zephos then comes down to Link.
He introduces himself as the wind god and mentions his brother, Cyclos. Cyclos’s monument was broken, angering him, and he now summons cyclones (or tornadoes, whichever you prefer) across the Great Sea. Remember this bit of information for later, then return to front of the island.
To one side of you, near the pond, is a ramp that is being blocked by a large boulder - too large for you to lift at the moment. Nearby are some Bomb Flowers that, obviously, bloom Bombs. Press A near one to pick it up - soon afterwards, it’ll explode. Place one near the large boulder to get rid of it. Climb up the ramp.
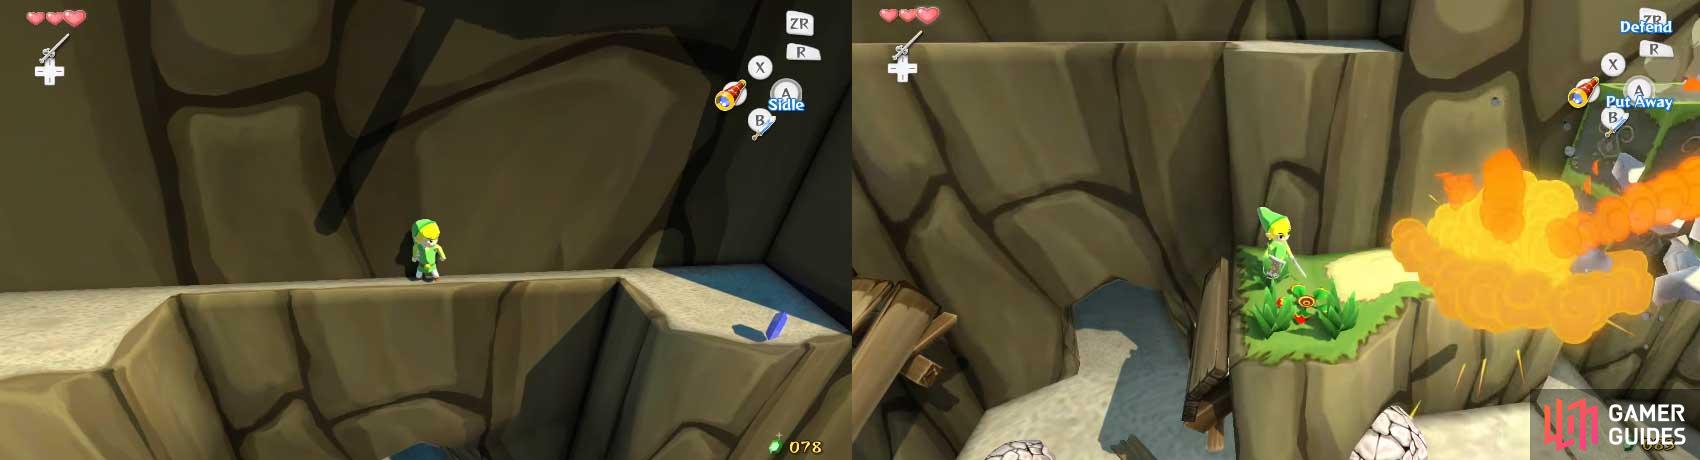
Continue in a similar manner, using Bomb Flowers to blow up rocks. Soon, you’ll come to a gap too large to jump. Like in the Forsaken Fortress, sidle across the gap. Nearby is a smaller rock (still too heavy to lift at this time) and a Bomb Flower. Use the Bomb Flower to blow up the rock. The two blocks above it then fall.
Pull the bottom one out until the one above it falls - this creates a handy short-cut so you don’t have to do this every time you come back. Continue through the tunnel and you’ll meet the postman that served your island the day Aryll got kidnapped and got you onto the pirate’s ship. He’s pleased to see you once again.
He also asks about Aryll - he easily gets the message just from the look on your face. He tries to reassure you, then leaves to announce to the other Rito that you’re coming. Continue along the path then enter the mountain.
As you enter, the Rito’s chieftain is asking someone about the cause of Valoo’s anger - definitely not a good sign. Head up the nearby ramp and enter through the first doorway you see. Talk to the smaller Rito - Medli. She seems to recognize your Hero’s Clothes and says that she is an attendant to Valoo - well, training to become one.
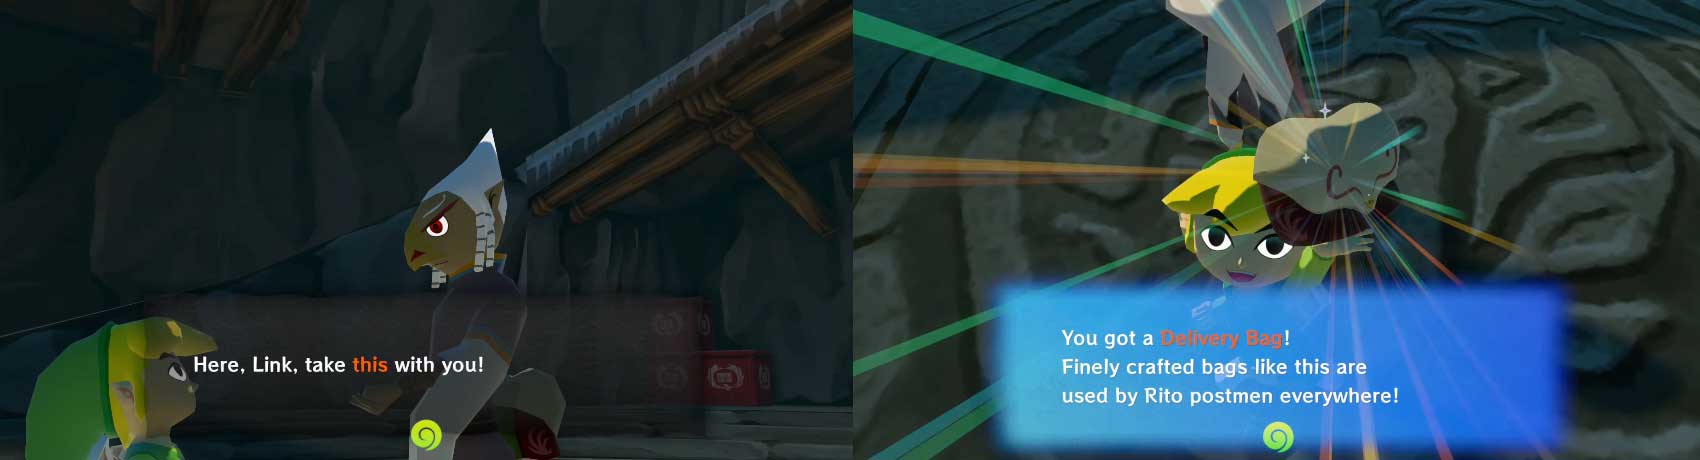
She remembers that the chieftain gave her something. She gives it to you, which you put in the Delivery Bag.
She also asks you for a favor - meet her in front of the entrance to Dragon Roost Cave later for the details. Leave this room and go to the lower floor. The room opposite the entrance is the hallway going to Komali’s room. Go down this hall and through the door.
Inside, Komali is sitting on his bed, holding a pearl with an odd symbol on it that you’d recognize if you played the Oracle of Ages, another Zelda game. Set the letter from the chieftain to X, Y, or Z then press the button while near Komali.
Leave the room and take the doorway on the lower floor that you haven’t yet used. It goes outside, where you can see ash blowing through the air. There are several wilted Bomb Flowers nearby. Inside the large pit is a small pool of water surrounding a very large boulder.
Nearby is where a bridge probably was at one point, but the bridge probably fell some time ago. Head to that point and go into the pit. Medli is already there. She says there used to be a spring here, but it has been blocked by that large boulder. When you tell Medli about what happened with Komali, she seems concerned.
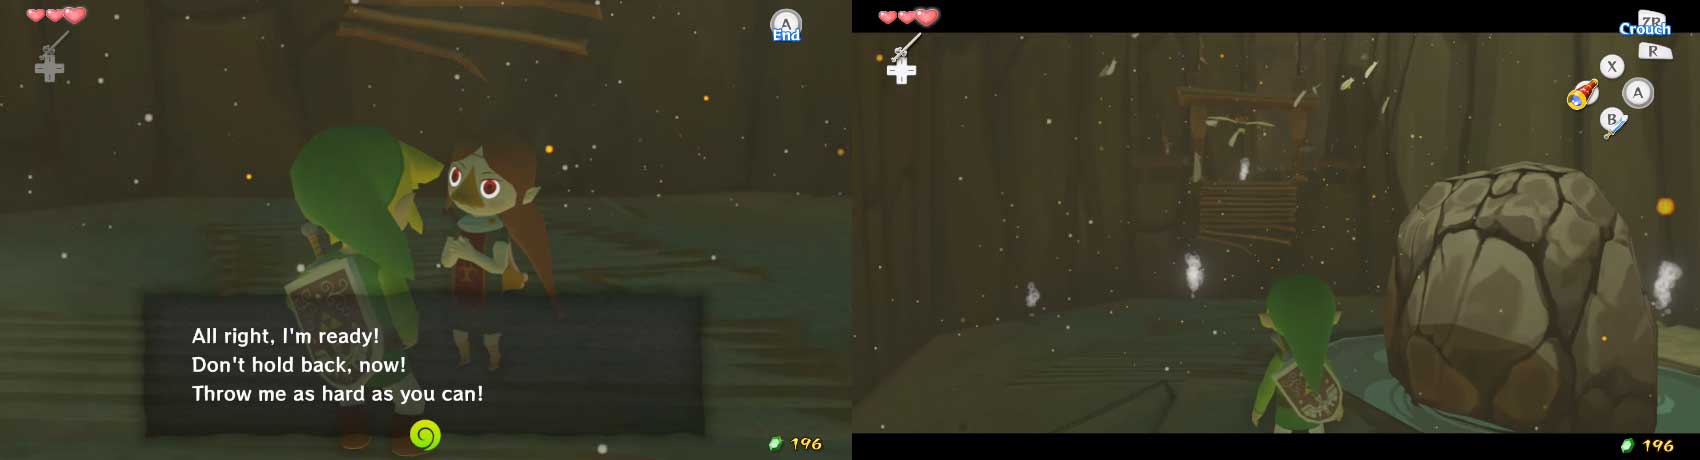
She wants you to lift her and throw her onto the ledge. First, get onto the rock behind you and face towards the ledge.
Wait for the wind to blow towards the ledge (use the falling ash as an indicator). When it blows in that direction, throw her. When she gets onto the ledge, she says that she is going to visit Valoo. She also hands you an empty bottle, then leaves. It may seem useless, but its true worth will show in time (you’ll see later in the dungeon what I mean…).
First, enter the tiny spring and fill the bottle with water. Climb up the broken bridge. Drizzle some water on one of the withered Bomb Flowers to make it bloom. Pick up the bomb and walk over to the railing. Wait a few seconds and then throw it at the boulder. With the right timing, the bomb will blow up the boulder.
This unblocks the spring; the water will fill the pit. Walk to the spring and swim across. There are now two statues holding pots. There are also some Bomb Flowers nearby. Throw a Bomb Flower into the right-hand statue first. If it gets into the pot, the statue will fall over. If not, keep trying.
Now, once the statue has fallen over, pick up another Bomb Flower and jump onto the fallen statue. Try to throw this Bomb Flower into the pot. Again, keep trying until the bomb gets in. After it does, the fallen statues will make a bridge across the lava. Cross it and enter the cave - your first dungeon!

 Sign up
No Comments