The beginning room is no more than a beam of light that will take you back to the surface and a door that is across a somewhat-large gap. Pick Medli up, then jump across while holding her. Pick her again, if needed, then go through the door.
This room is larger and has three Moblins in it. Set Medli down and defeat the monsters. One will be on the staircase on left, another near the pillar in the center of the room, and the third one will be near the sealed exit on the right side of the room. After defeating them, pick Medli up and go up the stairs.
From the platform at their peak, have Medli fly you across to the platform with the switch. Make Link stand on the switch and then take control of Medli by using the Command Melody. Make her fly to the other ledge with the switch and stand on the switch.
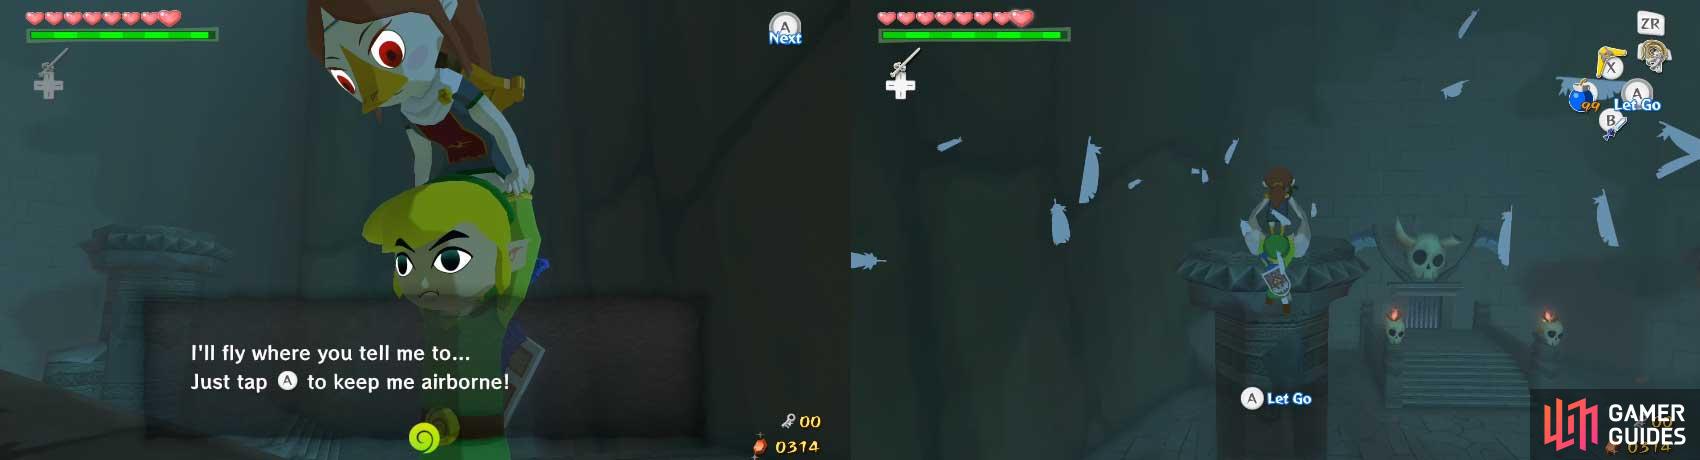
The door will then become unsealed. While still in control of Medli, have her fly down to the door, then retake control of Link. Have Link jump down from the platform, pick Medli up, and go through the door.
This room is filled with Chuchus. There are several Red and Green ones, but there is also a new type - Dark Chuchus. These, while they attack in a similar manner, are invulnerable to everything. However, it they get hit with light, they will turn to stone. While in this form, hitting them with the Skull Hammer will fully destroy them.
There is a beam of light conveniently shining in the near-center of the room. Put Medli in the light and you’ll notice that her harp reflect light. Defeat the Red and Green Chuchus next. Now, go back to Medli and walk around her. She will face you if you stay close. This will also change how the light reflects.
In this manner, “aim” the light at the Dark Chuchus and kill their stoned forms with the Skull Hammer. Next, take control of Medli with the Command Medli. On the side of the room opposite the light is a chest, but is merely shimmering. As Medli, reflect some light at it to make it solidify. You can also shine some light at the nearby statues to reveal refills and such.
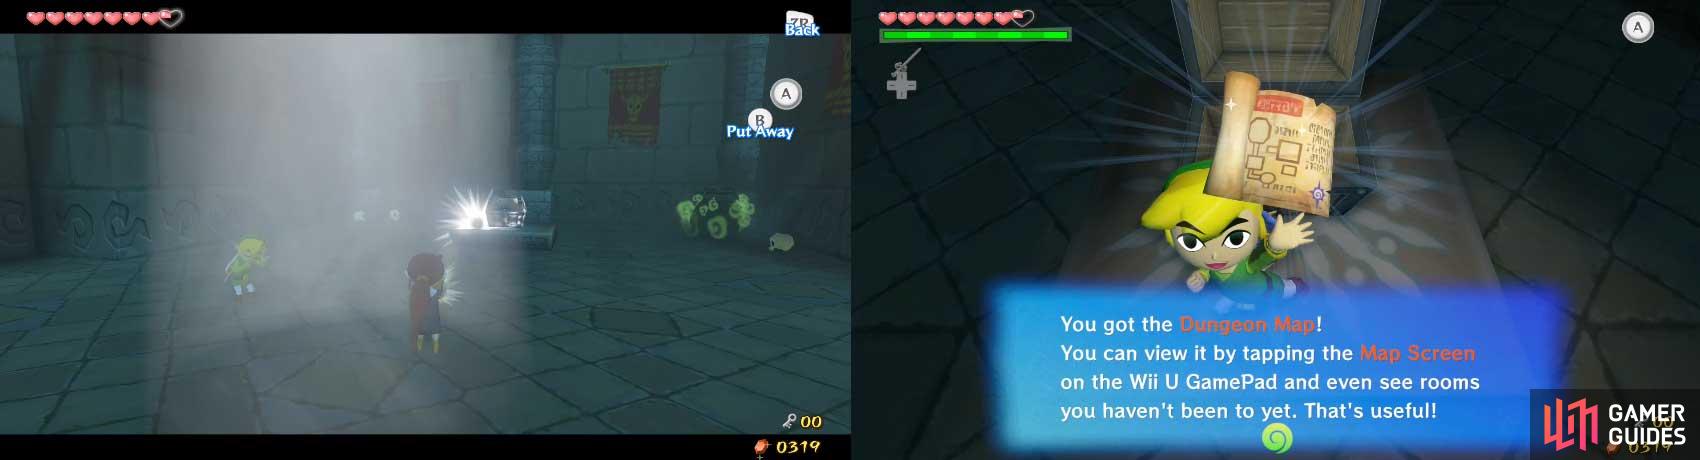
When that is done, take control of Link. Open the chest to get the Dungeon Map. Finally, place a Bomb near the warping jar to blow off the cover blocking you from entering it. Pick up Medli and go to the next room.
This room is somewhat large. On the opposite side, a devilishly-grinning face dominates the upper side of the room. Below it is a blue fog. You may never have fought of fog as bad, but this is. Whenever you touch it, you cannot use items or your sword for a few moments or until you step into light. So how are you going to get to that peg you see?
How about this: control Medli and her stand in one of the beams of light and reflect some light at the peg. The light actually makes fog that is near it dissipate! Okay, now equip the Skull Hammer and walk near (not IN - the light will be blocked) the light and get to the peg. Smack it with the Hammer to knock it into the ground, unsealing the door on the right side of the room. Go back to Medli, pick her up, and go through the door.
When the door closes behind you, set Medli down and walk toward the two coffins in front of you. As you get close, they will open and two Red Bubbles will appear. Kill them and move forward. To your left, you’ll find a ladder. Climb up it and pull the block on the ledge towards you. When you do, a hole behind it is revealed, sending a beam of light on the floor
Play the Command Melody to control Medli and take her to the beam of light. Reflect it at the translucent treasure chest on the south side of the room. When the chest appears, have Medli walk onto the platform it is on for later. Press R to retake control of Link and open the chest to receive a small key.

When you get the key, two Floormasters - the holes in the floor with hands that will take you away to the start of the previous room - will appear.
The one closer to the chest, you, and Medli will only take Medli - at this time, she is out of its reach. Get close enough to it to have its hand come out of the ground, then quickly L-target and hit it with the Boomerang.
At this point, I usually use arrows, as I have problems hitting it with the Master Sword while it’s stunned, but you can do what you want. Repeat this with the other Floormaster, but beware: it will grab you OR Medli. Once they are dead or you have successfully dodged them, return to the previous room.
Here, go to the opposite side of the room with the locked door. Since you have a small key, you can unlock the door and go through it. Make sure to grab Medli before doing so!
Once you enter the room, set Medli down and equip the Hero’s Bow. Aim a Fire Arrow at the curtain near the roof to the left that has light shining through it. This burns away the curtain, shining a light on the floor. The other curtains may or may not have other spoils behind them - use the previous method to grab them.
After burning away the curtain, quite a few Red, Green, and Dark Chuchus will appear. As before, kill the Red and Green Chuchus and use the “aiming” technique from earlier to petrify the Dark Chuchus. However, don’t use the Skull Hammer to kill them. Instead, pick two of them up and set them down on the switches near the beam of light.

When both of the switches have been activated, a set of stone slabs on the opposite side of the room will lower to make a staircase.
Quickly, before the Dark Chuchus un-petrify, pick up Medli and climb up the staircase. If you want a shortcut for another trip or something, push the nearby block down and go through the door.
In this room, you’ll find a Floormaster in the somewhat-lowered portion of the room of in front of you. Stun it and then kill it using any method you wish. Now, you will also find several blocks in this part of the room as well. Push the one nearby on the track into a little groove with a scorpion-pattern.
This will make a skylight open, letting some light in. Use the Command Melody and take control of Medli. Have her walk into the beam of light and use her harp to reflect light onto the statue on one of the blocks, and each of the sections of the wall with the yellowish swirly marking.
If the light sets on these long enough, that statue or section of wall will disintegrate into nothingness. Behind one of these walls, you’ll find another block. Press R and retake control of Link. Have him move the block that used to have a statue on it and the block behind the wall along their tracks into their scorpion-patterned grooves.
A chest will be revealed on the higher ledge and the other block will provide a way up to the now-unsealed door.
Remember, there is also a warp jar in this room, behind a wall in case you wish to come back or go somewhere. When you’re ready, throw Medli onto the higher ledge and then climb up there yourself. Open the chest to obtain the Compass.
As usual, it will locate any treasure chests in the dungeon, but it will also show you Medli’s location with a pink-purple dot. There is a pot on this ledge that contains a few fairies, so grab one in any empty bottles you have and use one yourself if needed. Once ready, pick Medli up and go through the door.
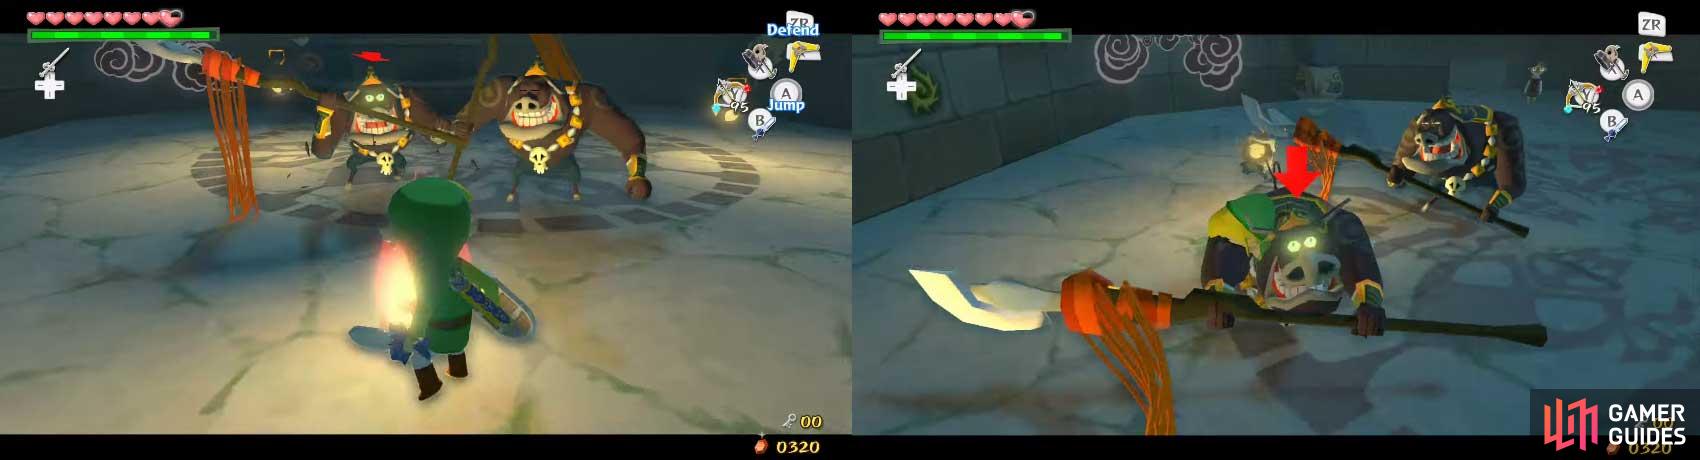
When you enter the room, set Medli down. Go up the stairs to fight some more enemies. There are two Moblins and three new ghost-like enemies called Poes. At this time, the Poes cannot be damaged. You can only knock their lanterns away from them via sword attacks, then get possessed with reversed controls, then wait about twenty seconds until the ghost leaves you.
As for the Moblins, defeat them the way you usually do. Once the enemies are gone, some stone slabs will be lowered, revealing a staircase. However, before going up, have Medli fly up into the alcove with the light beam, then reflect it onto the statues on the opposite side of the room.
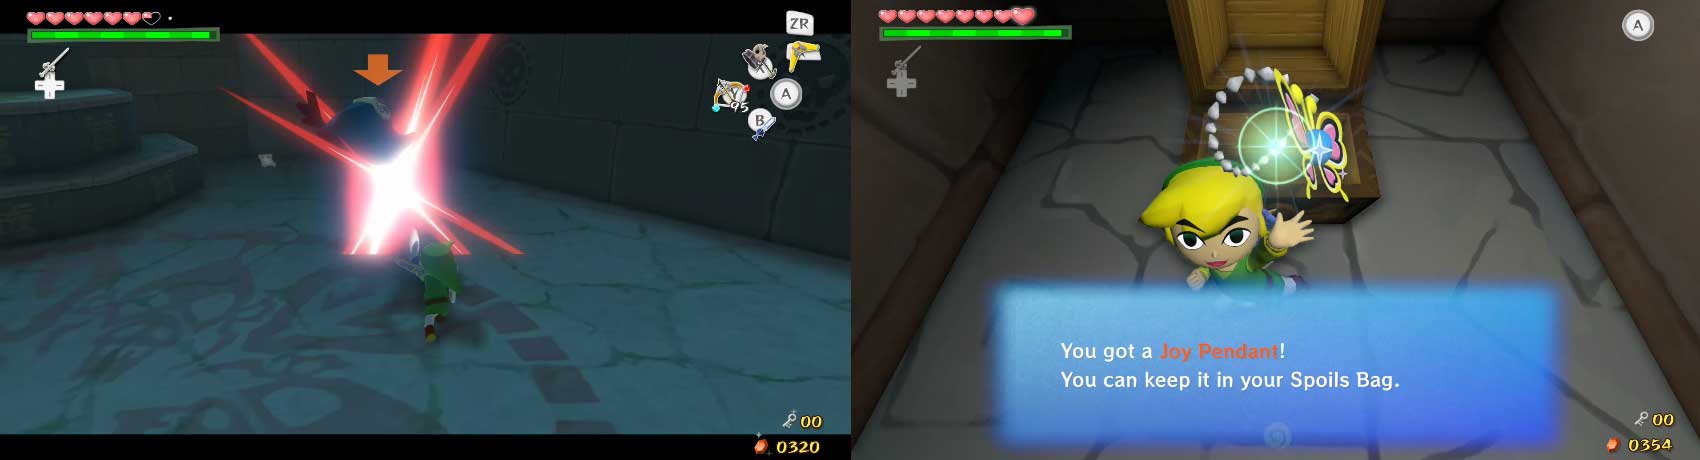
Behind them, you’ll find a treasure chest which contains a Joy Pendant.

 Sign up
No Comments