Back in Ganons Tower
When the final symbol on the door lights up after defeating your fourth boss, a red face will light up as well. The stone will crumble, and then the bone bars soon afterwards. This creates a tunnel to the next room. Obviously, go through it.
I have no clue why the stairs are here; maybe to allow room for some more rooms, or Ganondorf just likes stairs. There are only a few Miniblin along it, so just ascend as quickly as you can.
When you enter this room, you notice two things off the bat: the change in music and the door in front of you. This door will have no importance until later. As for the two doors, go through the one on the right.
This room surrounds a seemingly bottomless pit. It has some torches on the walls and a stone tablet with a riddle on it to your left. Now, I want to you pay attention to the torches. There is a pattern, one that I want you as so:
As you leave, the King of Red Lions contacts you to try to let you know the importance of patterns. Got any other advice? Go to the previous room, then the unused room.
This room is in a very similar shape, except the torches are crystal switches, the pit is filled with water, and there isn’t a stone tablet. When you enter, the camera will focus on the switches in the same pattern as mentioned before and in the other room. Use the Boomerang to hit them in that order by targeting them one at a time.
When you let the Boomerang loose and the four switches are activated, a dark portal, similar to the one from the Tower of the Gods that led you to Hyrule, appears. The King of Red Lions will also sail in, startling Link. (Couldn’t we have come in this way?) The King of Red Lions believes that this is the way Ganondorf was able to make his excursions to the world above. If you have ANYTHING you believe you need to do, do so.
How? Get into the boat and sail into the portal. You’ll emerge at the Forsaken Fortress if you do so. Do your business in the world above, then return to Ganon’s Tower and continue the dungeon. When you’re ready, return to the room with the pit.
Here, you may only think that the pit is bottomless. However, reading the stone tablet nearby implies that it is not. Therefore, jump into it.
You, indeed, land in a room that is part of an immense labyrinth. In most of these rooms, you will fight the Phantom Ganon – I’m fairly sure that you can still remember your second trip to the Forsaken Fortress. You can use the method of hitting the white electric ball to defeat him.
He also has one new attack. He can summon a ball of red and black energy above his head, then hurl it at you to make twenty or so homing missles. If you use a Spin Attack, you can reflect most or all of these missles, usually making Phantom Ganon fall onto the ground instantly. Whenever he is brought down, you will need to strike him once, just once, to make him disappear and leave his sword behind.
The stone tablet said that you need to go through the door that is being pointed at with the hilt of the sword that the Phantom Ganon leaves behind. In case you don’t know, that would be the handle. Repeat this six or seven times, then you’ll emerge in a room with a chest. When you enter, the doors seal. You’ll fight Phantom Ganon one more time here. After defeating him once more, a chest will appear. Open it to recieve Light Arrows.
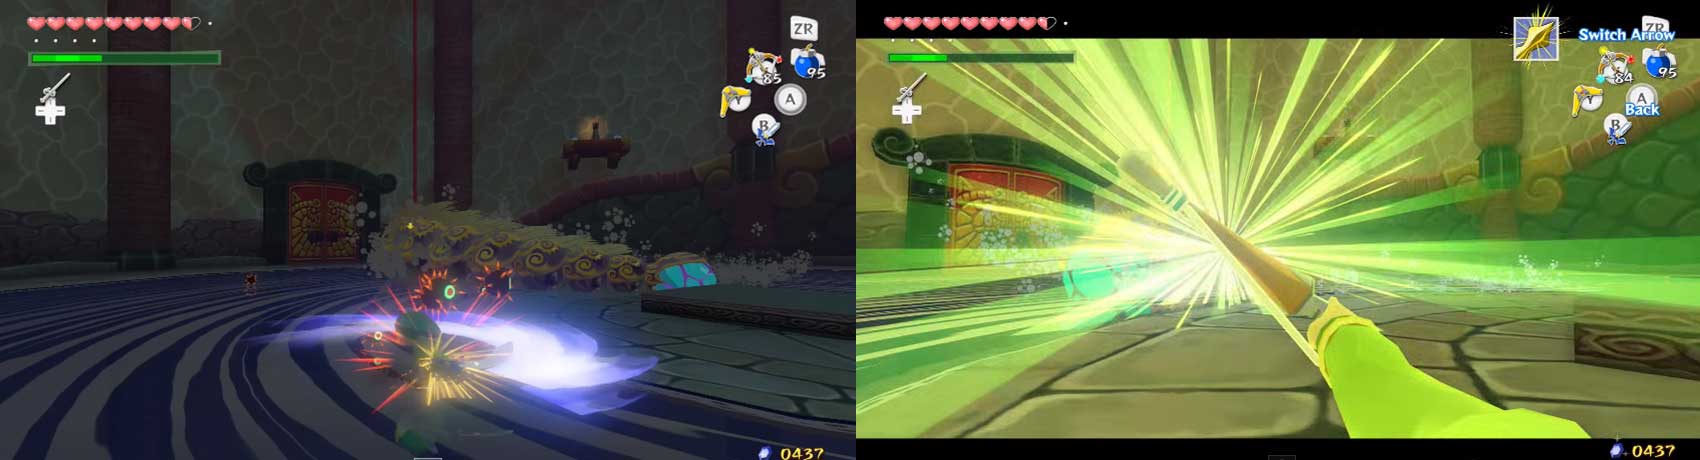
If you have been reading other parts of this guide, you may know that I mentioned an item that is the most powerful or most useful. This… is that item. Firstly, this item, when shot, will pierce any armor - ANY! Secondly, it can kill almost anything in a single shot.
You can switch to these while aiming with the Hero’s Bow as you normally would. Also, you should note that these use about twice the amount of magic as a normal Fire/Ice Arrow. When ready, exit the room.
You’ll appear back in the room with the face on the wall and Phantom Ganon appears yet again. Since you have the Light Arrows, let’s give them a test drive. Lock-on to Phantom Ganon and shoot. Thousands of rays of light emit from inside his body, as he turns brighter, then disappears, killing him forever.
The only remnant he has left was his sword. Pick it up and hit the wall with the face on it with the sword. The wall will shine similarly to how Phantom Ganon did, then crumble away. Go through the newly-revealed tunnel.
You’ll emerge on yet another long staircase. This one has some landings with enemies. You’ll fight a Moblin, then a Darknut, then two Moblins, then two Mighty Darknuts next to the door. As you proceed, simply defeat these enemies with Light Arrows. The pots on each landing and near the door have enough magic pots and Arrows to supply you well.
At the door, the wooden bar will rise if the enemies have been defeated. Once this has happened, use anything not in a bottle to refill your health, magic, and Arrows. Save, and go through the door.
This is likely the largest room ever created in the whole game. It is very large and cylindrical, with very shallow water between the outer edge and a platform in the center. Here, you’ll find a bed surrounded by a curtain, which is somehow moving (maybe there’s a draft somewhere).
Boss Fight - Puppet Ganon
First Form: Moblin
First Form: Moblin
The only attack that I know of this form having is a punch, similar to how a balloon works when you blow it up. The fist will blow up and extend at you. Keese will also come to attack you. These aren’t hard to deal with, as you have the Boomerang and the Master Sword (if the Boomerang is busy, as you’ll soon see).
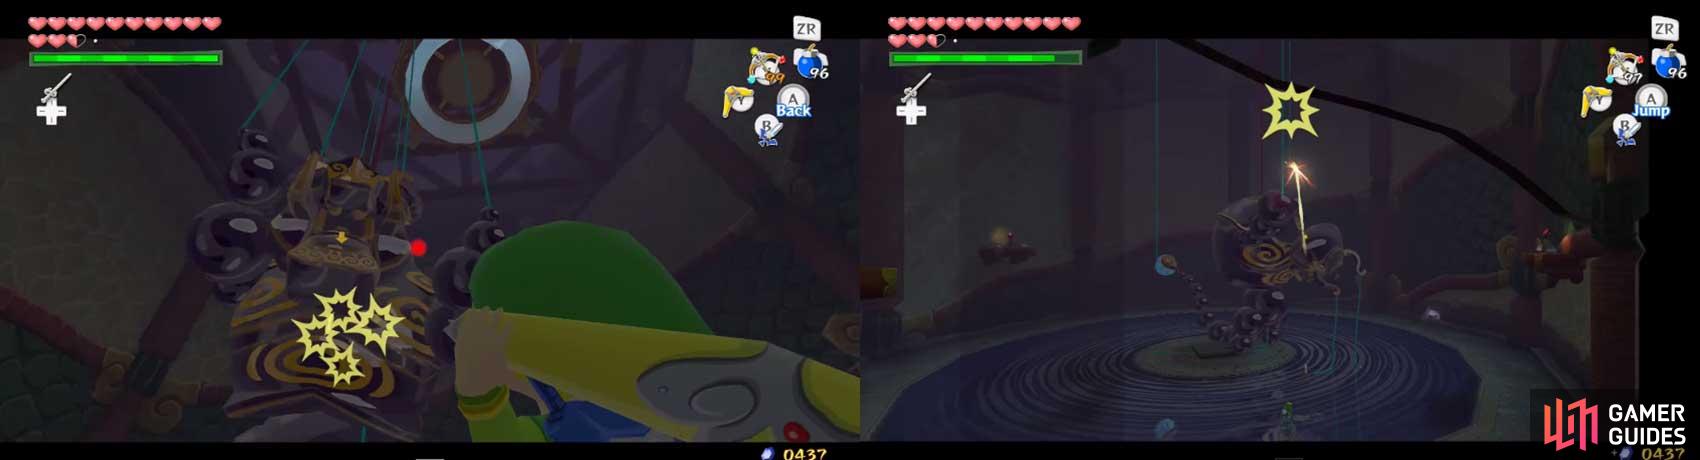
To retaliate, you’ll begin similarly to how you did with Kalle Demos. You’ll have to cut the strings holding Pupper Ganon up (he IS a puppet now, and puppets have strings). Each string will take two hits with the Boomerang to break. Just note that the red string on Puppet Ganon’s back cannot be cut and the strings will repair if you take too long.
It’ll help to remove all of them, but the main one is the tail. When you do this, the tail will twitch until it is cut, then go limp. On the tail, you’ll find a blue orb. Blast it with a Light Arrow to damage Puppet Ganon. Once he is damaged, he’ll retract up to the ceiling and repair himself, then come down again. Repeat this two more times to continue.
Once the first form is defeated, Link jumps around as if this was the only form. However, he’ll stop jumping as the puppet rises to the ceiling and morphs into its next form, a spider!
Second Form: Spider
Second Form: Spider
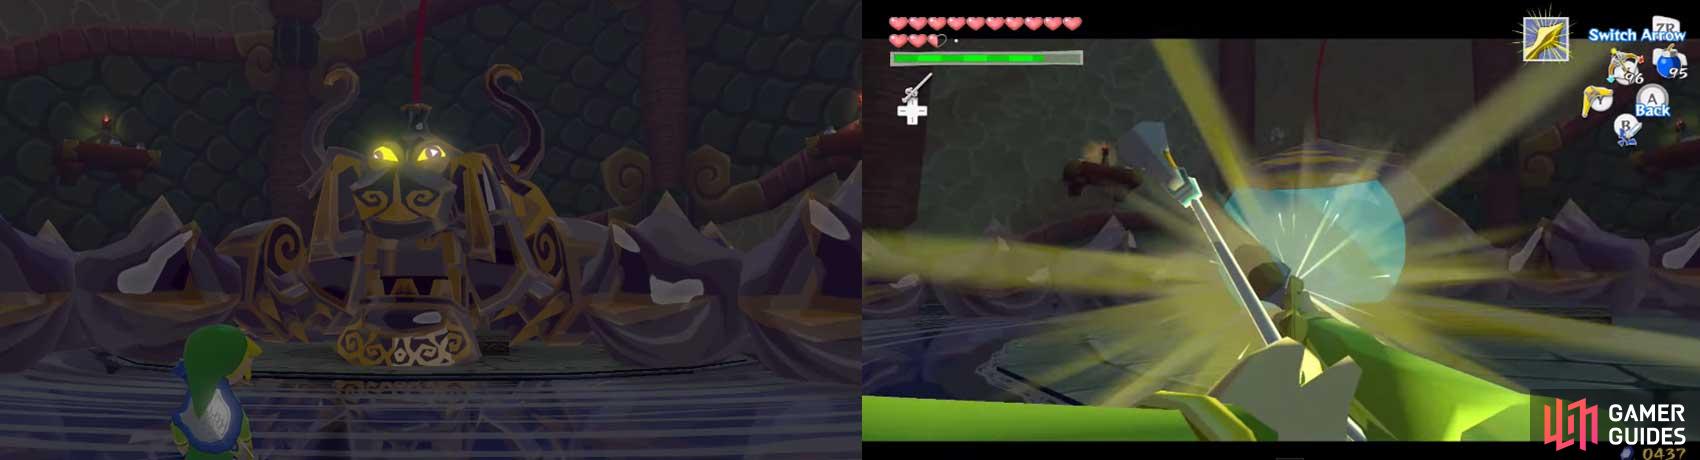
The spider only has one attack, yet again. It’ll lower itself repeatedly from the ceiling onto you, sometimes bringing Keese with it. The blue orb is on his tail, so you would think of going to it. However, as he is falling, Puppet Ganon will rotate. So, how are you going to get at him?
Well, go on the water as Puppet Ganon is rising, then zoom out as much as you possibly can with the C-Stick. In the reflection of the water, you’ll see Puppet Ganon as he falls to the ground. When he stops rotating, you’ll be able to see the position of the tail when he hits the ground. Go to that place and shoot a Light Arrow at the orb to damage him. Do this two more times to defeat this form and continue to his next form.
Third Form: Snake
Third Form: Snake
Even this form only has one attack, and it is tough to avoid. The snake will slide quickly around the room, circling a spot occasionally. If you get in its way, you’ll be clobbered hard. This form will also drop Morths as it goes; these will serve to give you refills.
So, how are you going to damage this form. Well, it’ll be best to wait until the monster starts circling a spot. At that point, fire Light Arrows somewhat randomly. You’ll really need to time it based on the distance. You are aiming for the orb on its tail. You may be able to stop the snake for a few moments with a hit to the head with a Light Arrow or something. I can’t do much more after this other than wish you luck!
After hitting the orb for the final time, the puppet darkens and rises up to the ceiling. On its way, it explodes, leaving the red string to hang limp. It seems that you’ve won… NOT! You heard Ganondorf’s voice far above, challenging you to fight him as he carries Zelda off. Jump at the string from the central platform to grab onto it, then hold R.
Now, you are going to climb quite a distance upwards. Eventually, you’ll reach a peg that Link will climb onto. Next, you’ll have to look for another stick to use the Grappling Hook on. It’ll be on the level above you when you look up. Grapple onto it and climb up. Here, you’ll find a warp jar, pots, and Morths.
Break the pots for refills and put a Bomb near the jar to open it. It’ll go back to the bottom of this room. Do the Grapple-climb thing a few times until you find that you can almost climb onto a ledge with a bluish doorway. Get close to it and Hookshot at the ceiling on the roof of the ledge.

 Sign up
No Comments