
As this chapter starts we’ll be exposed to corrupt guards, whiney thieves, fat jail bullies, and a despicable miscarriage of justice. After the Professor walks free, find the Elven Convict in the corner and play Dice Poker with him… or just enter the screen for it and exit. After winning, losing, or backing out Vincent-the captain of the guard-will offer the prisoners a pardon for exterminating a Cockatrice stalking the sewers.
The Cockatrice and the Conspiracy
Unfortunately our fat friend has decided to volunteer, under the delusion that he can defeat such a monster with his hands. Vincent decides that letting us fight it out is more humane than first-come-first-served, so talk to the “Muscleman” and fistfight him. If you somehow manage to lose, talk to Vincent Meis, who will suggest that-since so much time has passed-you should go check out what happened as the honored runner-up. Either way, you’re given the Witcher’s Silver Sword and some potions.
| Objective | Reward |
|---|---|
| For defeating the Muscleman in a fist fight | 500 XP |
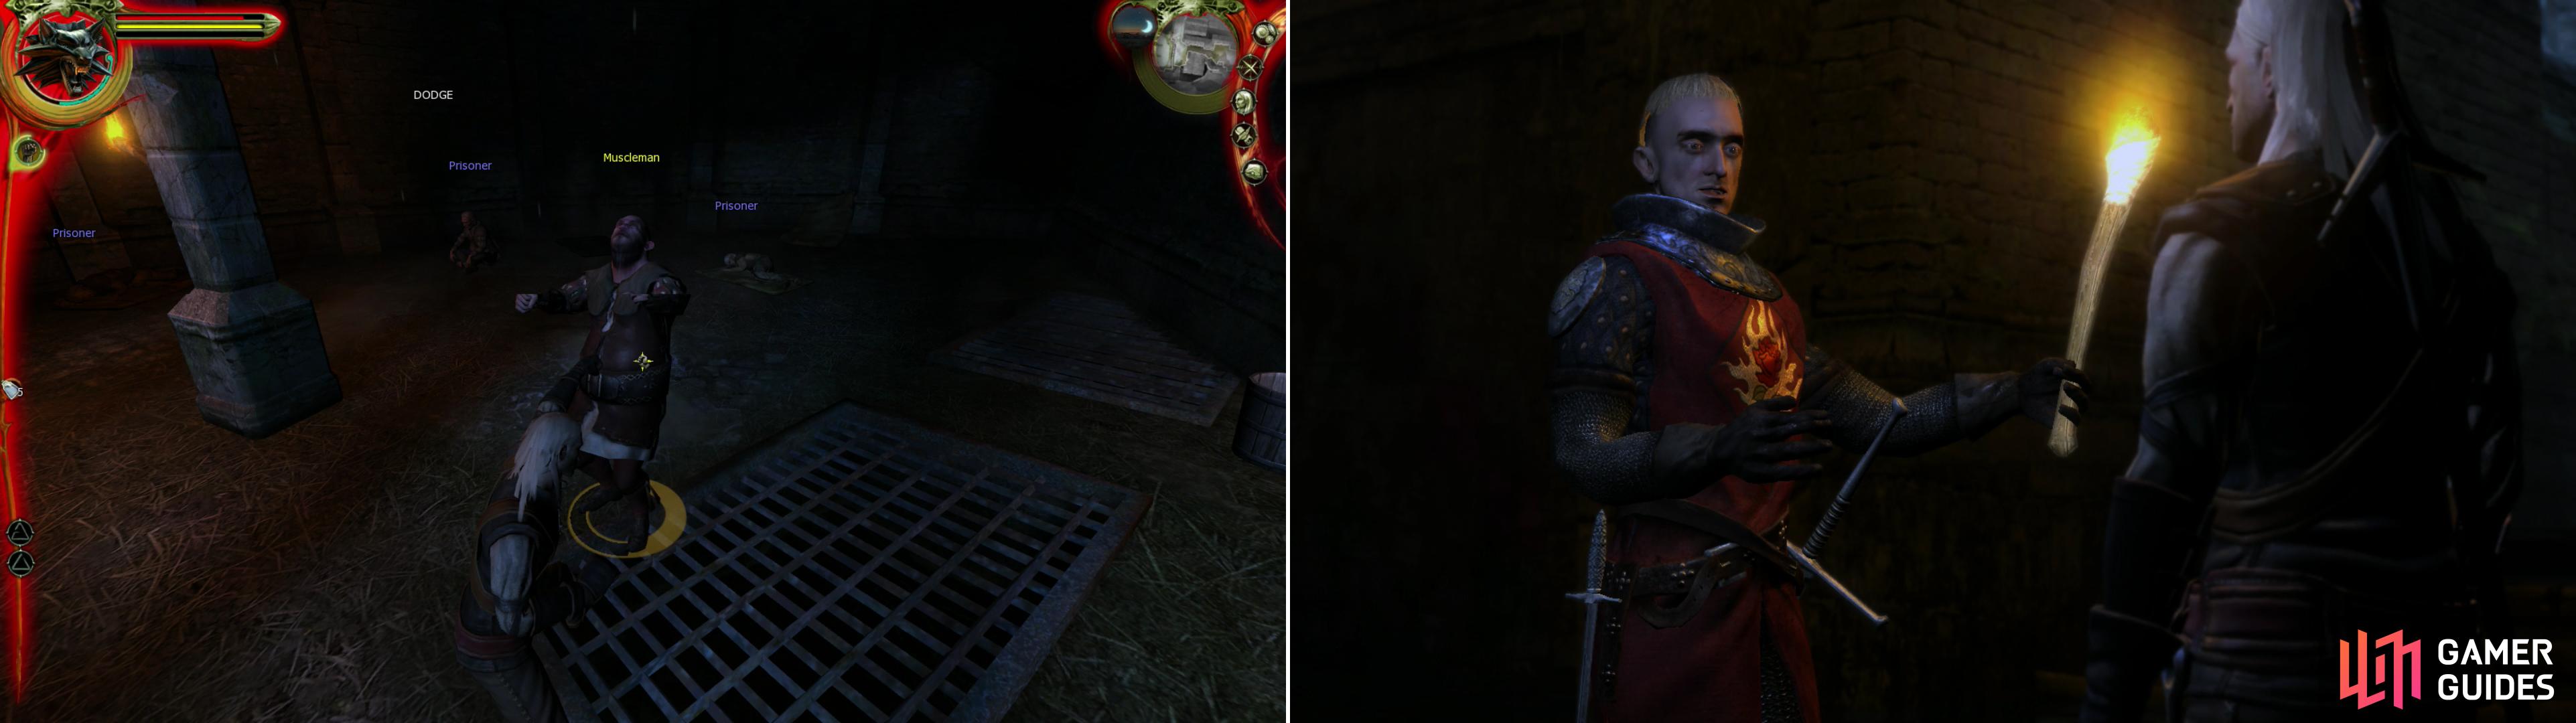
Defeat the Muscleman in fisticuffs to win the right to hunt the Cockatrice (left). In the sewers you’ll meet Siegfried, a valorous knight with noble ambitions… if a bit naïve (right).
Geralt will expertly skewer a Drowner to introduce us to the sewers of Vizima. Wee. Shortly into the sewers we’ll be bothered by a Knight of the Flaming Rose named Siegfried, who will display impressive knowledge of the Cockatrice, and is in general a pretty cool guy. He’ll offer to team up to dispatch the Cockatrice, and your decision will have very minor impact later on in this chapter. Practically, however, he’ll distract enemies and make your job easier, so you might as well take him along.
Take Siegfried along or not, and explore the Sewers as much-or as little-as you wish. It’s not too important right now, and you can’t really stash anything you find yet. You’ll have to fight Drowners and the odd Ghoul along the way, but if anything they’re easier than ever now that we have a proper monster-slaying sword. The location of the “Cockatrice Lair” is already marked on your map, so make your way there. Along the way you’ll find the dead Muscleman if you lost the fight against him, although all he offers up is a Rusty Sword. When you reach the Cockatrice’s Lair the beast will pop up via a cutscene and attempt to ambush you. Use the Fast Silver Style and it shouldn’t really be able to respond effectively.
| Objective | Reward |
|---|---|
| For killing the Cockatrice | 1000 XP |
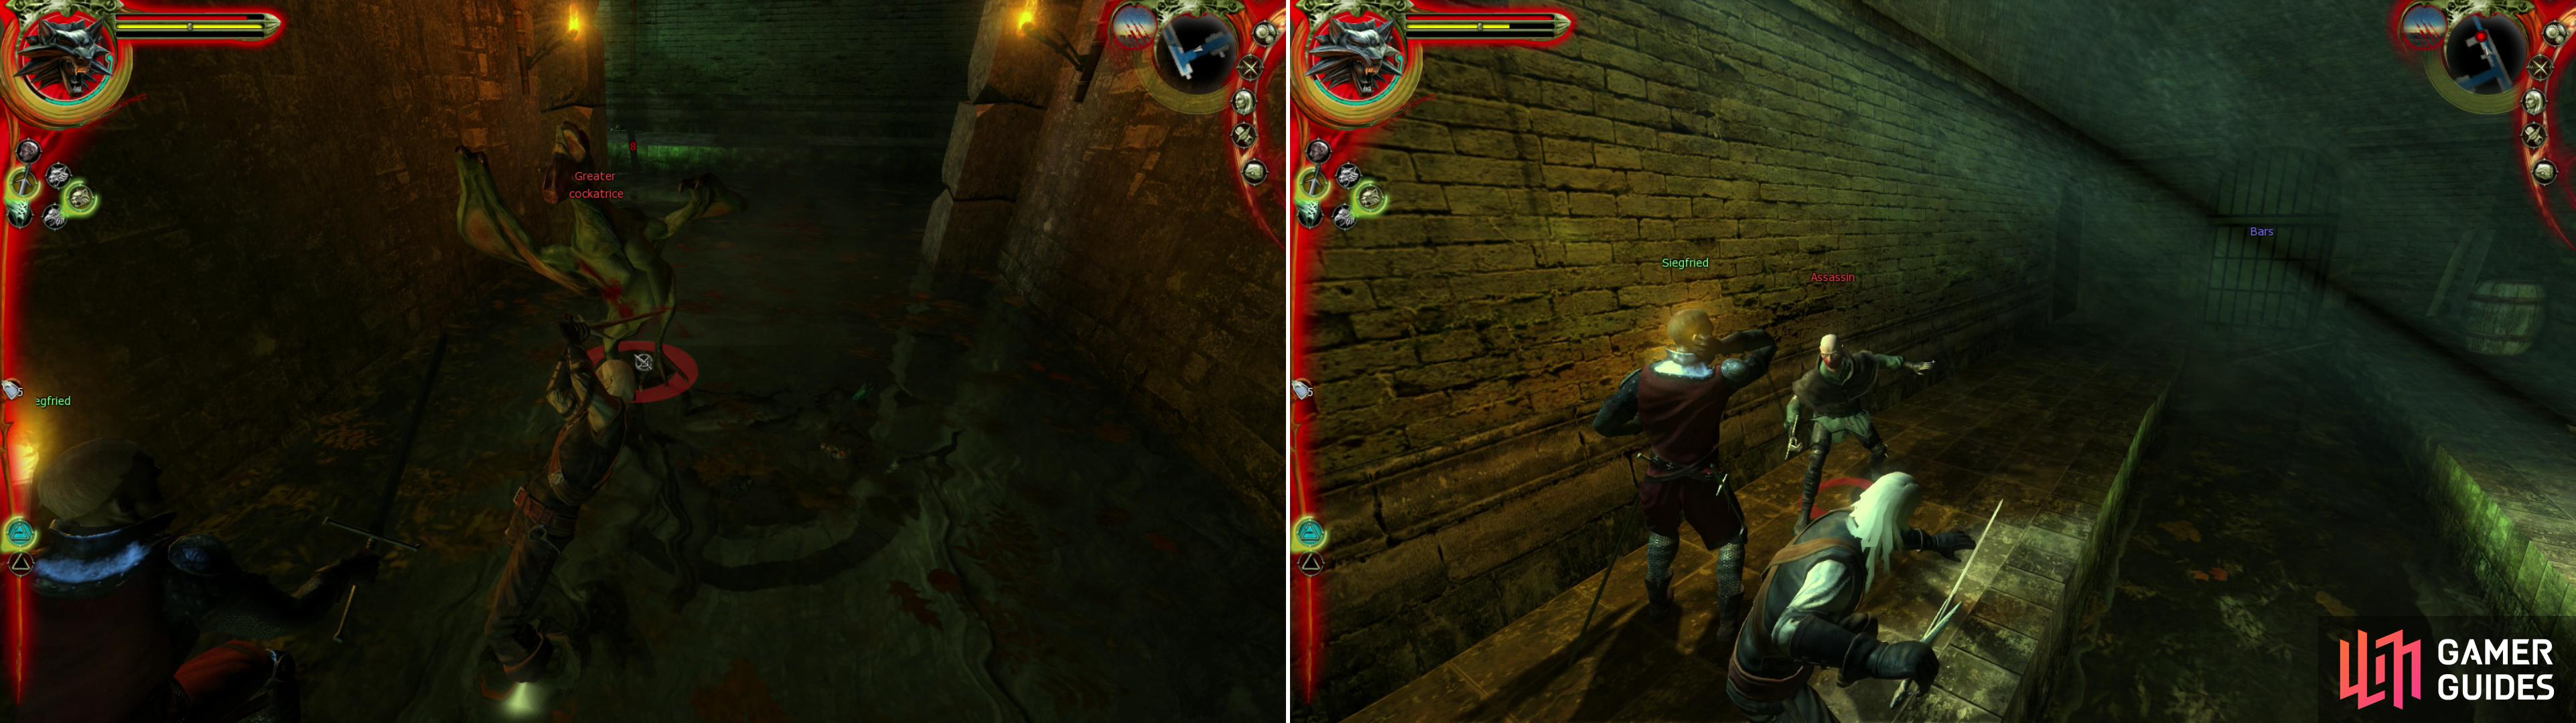
Defeat the Cockatrice in the sewers to earn your pardon (left), and survive an ambush by Salamandra Assassins as you attempt to leave the sewers and claim said pardon (right).
Once it’s dead, loot it for its head, a trophy for which we’ll be rewarded by Vincent Meis, and the “Maal’kad Sephirah” , which is part of another quest, later in this chapter. Siegfried will compliment your skill and offer to show you a way out of the sewers, so follow him. When you near the exit a pair of Salamandra Assassins will show up and attack. Dispatch them and Siegfried will talk to you about the unexpected assassination attempt. Few enough people knew we would be in the sewers, and Siegfried will refer us to a detective he knows in town who might help us figure out who is informing Salamandra of our movements. With that Siegfried will give us the key to the sewers and depart.
| Objective | Reward |
|---|---|
| For defeating the Salamandra Assassins | 500 XP |
The Map, the Stash, and the Sneezing Guard
Now it’s time to go find the Hairy Bear Inn, where we can store our crap. We migh as well do this before we go recover our loot simply so we won’t have to return to the Dungeon more times than necessary. You can find the Hairy Bear Inn along the south-western corner of the Temple Quarter map. If you didn’t read the “Hints & Tips” section before the beginning of the walkthrough, here are some of the more pertinent bits of advice:
Your map is an invaluable tool for getting around. Not only does it show where things are in relation to each other, but most of the important buildings, places, and characters are already marked! For even more precise direction-following, hold down the left mouse button over an area and a text bubble will pop up and show you the name of the location. When you’re instructed to go to Peddler Street, Roper Street, Merchant Street, Little Mahakam, or the Slums, it’s all there on your map. Intimate knowledge of the map wasn’t necessary in Chapter 1, since the entire location was just a big loop anyways and all the locations were distinct, but in a city with multiple districts, it might be worthwhile to know that the hospital is in the middle of the area, the slums are to the south-west, the dike is to the west, the non-human district is to the north, the dungeon is to the south-east, and the merchants line up on merchant street-to the north-east. Notice how your map comes with a little compass? Wonder of wonders-they want you to be able to find things!
Anyways, it’s the beginning of a new chapter, so the first thing we’ll want to do here is grind. Don’t talk to people, start up quests, or go exploring yet. Of course, you shouldn’t be afraid to loot containers you see around town, and boxing for some extra cash is also recommended from time to time. The good news? Our preparations for grinding take much less time in Chapter 2 than they did in Chapter 1.
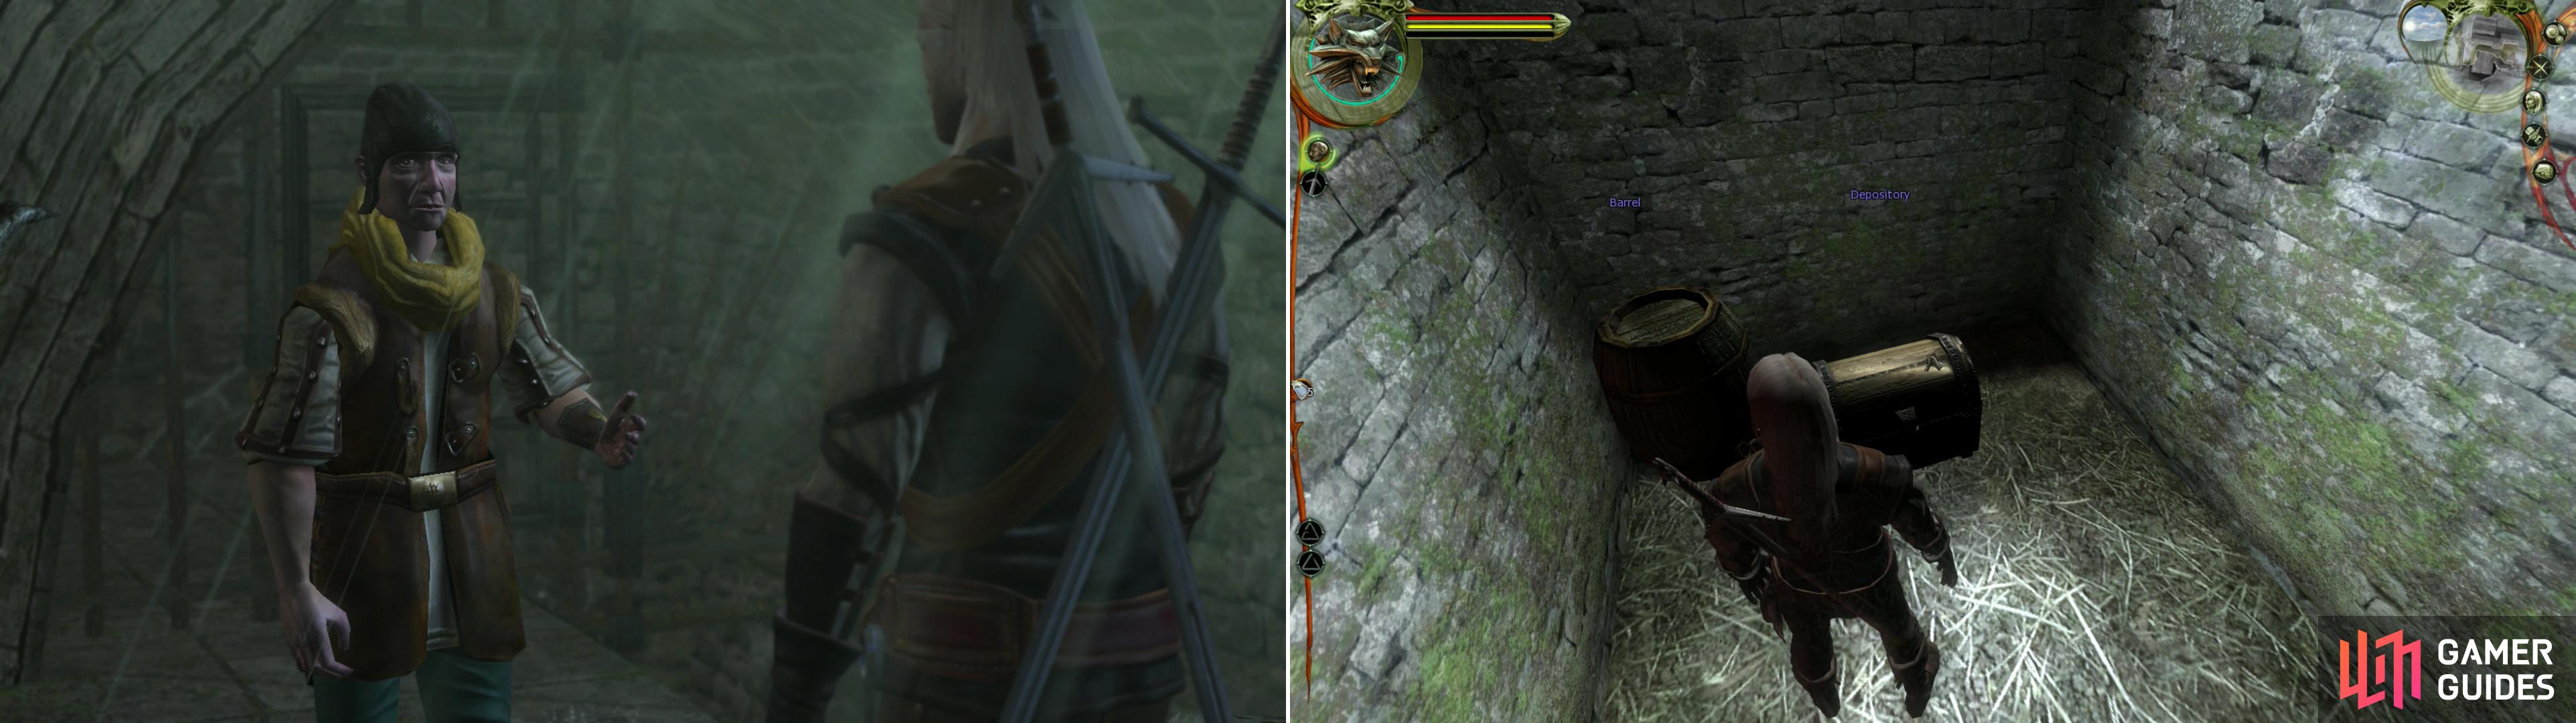
Agree to help the Con Man with a little grave-robbing (left) and recover your confiscated gear from the Dungeon (right)… or at least what’s left of it.
Stash your loot, head back to the Dungeon and talk to Jethro to get your pardon. Now open the bars and loot the “Depository” for your confiscated equipment. If you’re astute you’ll notice that the package we were supposed to deliver to Coleman is gone. You may be tempted to talk to Jethro about the package, or Vincent about the Cockatrice reward, but we can save that for later.
| Objective | Reward |
|---|---|
| For reporting to Jethro and obtaining your pardon | 1500 XP |
The Con Man and the Crypt (Grinding Chapter 2)
Go store your newly reclaimed loot (or what’s left of it, anyways) and head into the sewers. Kill whatever Drowners are nearby, then rest at a Fireplace until 7:00 in the morning. Once done, head back to the Temple Quarter to find a “Con Man” near the entrance to the Sewers. Talk to him and he’ll ask you to retreive an heirloom ring of his from a nearby crypt, and provide you with a key that will give you access. You get to keep all the other loot you find, and he gets the ring, which will allow him to claim his inheritence, pretty fair, right? Of course, you know he’s full of shit because of his name, but that doesn’t matter.
Agree to help him, obtain the key, and head back into the sewers. Go through the bars right near the exit to the Temple Quarter and enter the Crypt. Inside you can find groups of Graviers-essentially third-tier Ghouls (above Alghouls and Ghouls). They can knock you down, which is annoying, and really, it’s just something you’ll have to endure for now. They also deal pretty good damage and have lots of health. Three of them wander around down here, along with random Ghouls that’ll spawn from time to time.
Turn your gamma up to 2.00 in the video options menu so you can navigate the darkness-it’s hideous as all hell, but it works, and it saves you the bother and expense of using Cat Potions. You’ll get over 200 experience per Gravier, so leveling is actually pretty quick-if a tad dangerous-at first. Try to avoid fighting all three at once, and if you kill two of them and get pretty beaten up, just rest and ignore the third. There’s a fireplace down here and everything, so you don’t even need to return to town.
Kill all three Graviers (if possible), then return to the fireplace, rest an hour, and kill them again. Every day or so you should consider returning to the Hairy Bear in order to box, which can get your 90 Orens per run… It’s a good idea, considering you’re going to need a lot of money in this Chapter. Doing this will also give you the opportunity to stash the hordes of Gravier Bones we’ll be finding while we’re grinding. Use the Strong Silver style and grind Graviers until you’re level 15-this will put you ahead of the curve in terms of power, and with some Silver Talents, your Geralt will easily be able to handle the rest of the Chapter. And because of static questing, he’ll only get stronger as the Chapter goes on.
As for how to level up, spend your first Bronze Talents on strengthening the Strong Silver Style, since it is what we’re using to kill these Graviers, after all. Once you hit level 15 you’ll start getting Silver Talents, which you should use to purchase Strength (levels 3 and 4), which will make Geralt significantly stronger. If you plan to level up past 15th level, you might want to consider getting Intelligence (level 3) so you can purchase Ingredient Extraction. It’s not a necessary purchase, but it does speed up your rate of ingredient accumulation. Of course, you could just kill more and scavenge more, but it’s your time.
When (during the questing and killing that will occupy us for most of this chapter) you level up past level 15, consider some of the more useful Strength-tree talents, like Vigor, Stone Skin, and Aggression. Finally, there’s Dexterity (levels 3 and 4), which won’t make you quite as much stronger as Strength did, but the bonuses to Dodge, Parry, and Attack will help. Past level 20, focus on the Aard and Igni signs (levels 3 and 4) before finally turning your attention to Endurance and Intelligence (levels 3 and 4). Being able to deal a large amount of fire damage to groups of Graviers and Ghouls with the Igni sign can make fights go faster-especially if they get Incenerated. After all that, consider spending some Bronze Talents on the secondary talents within the Group Steel and Group Silver trees, like Precise Hit, Critical Hit, Trip, and Knockdown. After all, except for the odd strong monster we’ll encounter in this chapter (like Wyverns), most of the dangerous encounters involve multiple, lesser, foes.
Once you’re done leveling to your hearts’ content, it’ll be time to start tentatively questing in Chapter 2. It’s a big city, so to give this guide a sense of direction and focus, we’ll start out by questing in the Slums. Just like Chapter 1, we’ll head to our local Tavern, chat around, gain quests, beat people up, play some dice, flirt with wenches, and then head off to complete said quests. Our main priority right now, however, is to finish the quest “Hot Potato” , and generally do everything we can do with Coleman-he may not be long for this world, depending on how you handled “Strangers in the Night” in Chapter 1.
Before leaving the Crypt, loot the crate in the room in the north-eastern corner of the map (the same room where the Fireplace can be found). You’ll get a small experience reward for looting the crate, but better awaits when you return to the Temple Quarter and talk to the Con Man again.
| Objective | Reward |
|---|---|
| For recovering the ring from the Crypt | 500 XP |
Killing Cultists and Completing the Cockatrice Contract
First, however, it might be worthwhile to search the Sewers, now that we’re operating under our own time, that is. If you’ve already done so, great, but what you need to make sure to find is a Knight’s Corpse. You’ll find it down a small side-tunnel at the opposite end of the tunnel that leads up to the Temple Quarter. On his body is a Key and a “Letter for Knight Eric”. The latter allows you to enter the “Cultist’s Crypt”, and the former give you an indication of what you’ll find there. After grinding, and with our Steel Sword back, we can handle the cultists within with no real difficulty. Just keep in mind, you’ll need a Cat potion to excavate the Cultists’ lair. There’s also another little lair here, guarded by a pair of Thugs, but we can’t access it in this chapter.
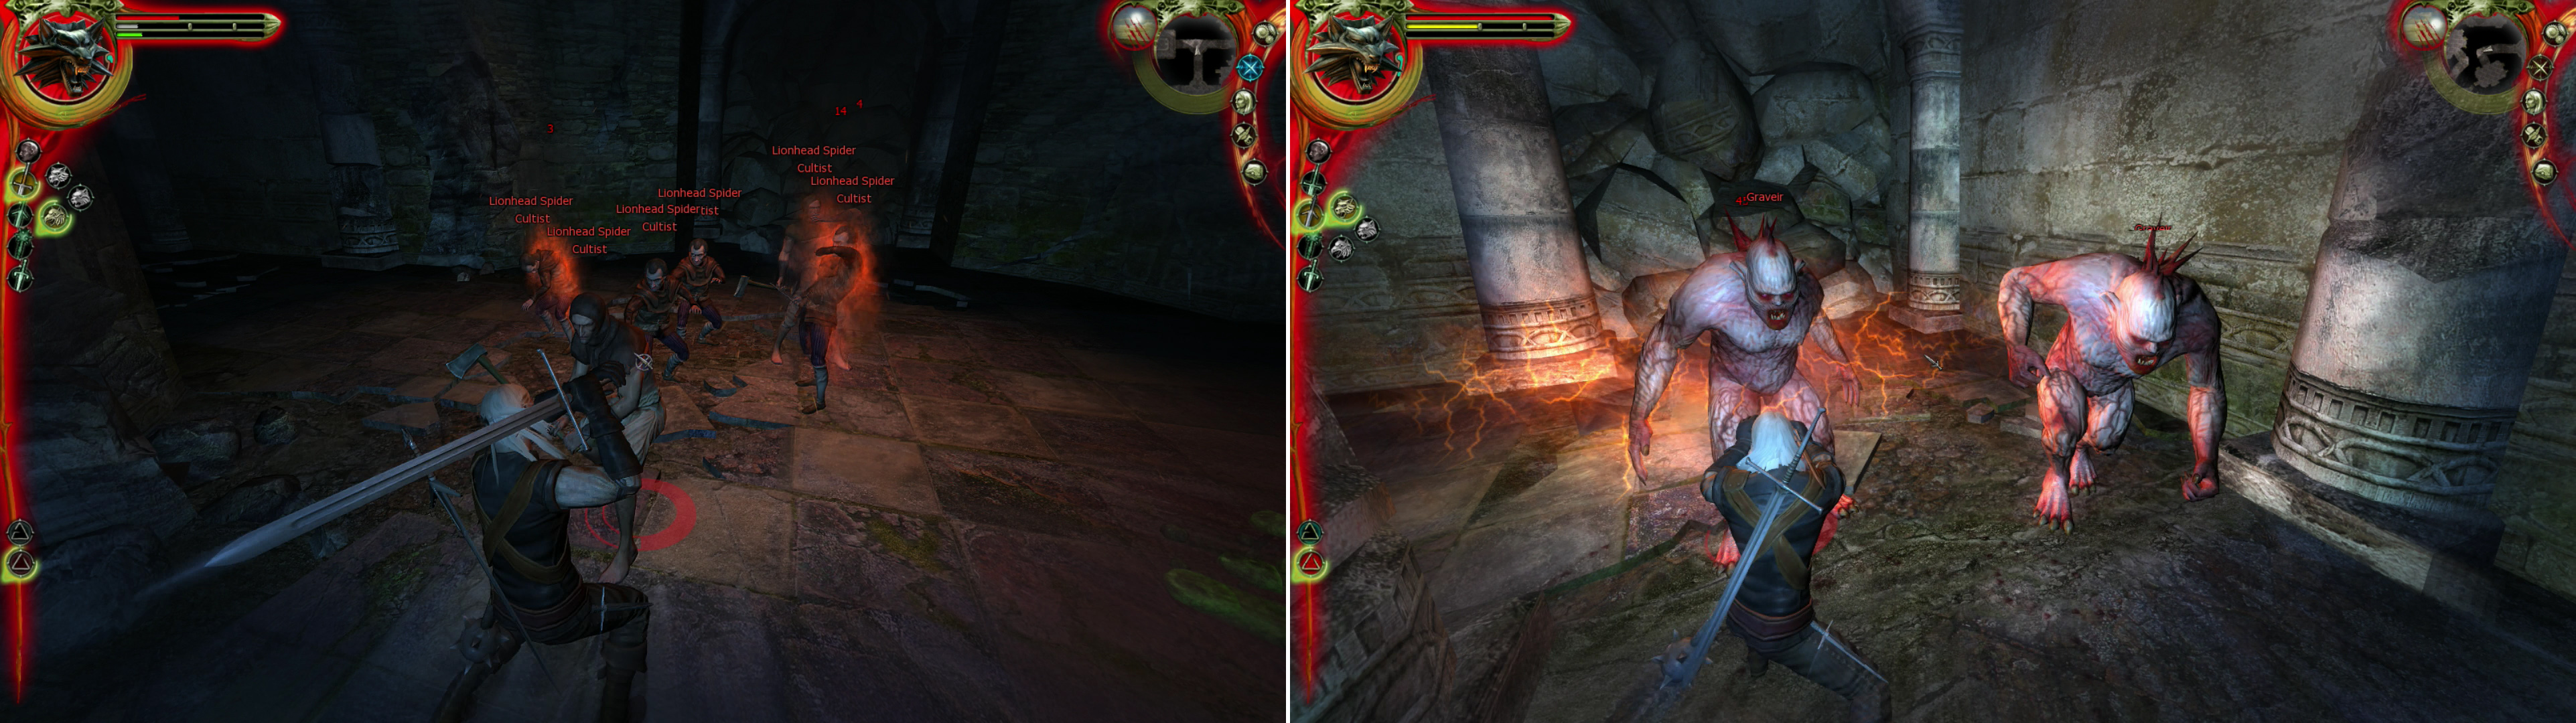
While unnecessary, killing the Lionhead Spider Cultists can prove lucrative (left). Also unnecessary, grinding Graviers can give you a few extra levels, which will make the rest of Chapter 2 easier (right).
| Objective | Reward |
|---|---|
| For returning the ring to the Con Artist | 4000 XP |
Before we run off to the Slums, lets go report back to Vincent and get this ugly Cockatrice head off our belts. Talk to Vincent and he’ll tell you about some “bloodthirsty vegetation” killing people in the swamp-more paying Witcher’s work. He’ll also kindly take that Cockatrice off our hands and give us Orens for the work.
Talk to him again and he’ll reward you for exterminating three monsters-that’s right folks, monster hunts have benchmark rewards… very good ones, in fact, so be sure to hunt down all the beasties in the game (which you’ll do if you follow this guide.) This time he hands you a Svarog Rune Stone . Ask him about the Salamandra investigation while we’re here and he’ll tell you to avoid the Warehouses in the Slums at midnight-which is of course little more than an opportunity for us to ignore him and do just the opposite, as well as advancing the quest “Suspect: Vincent Meis” .
| Objective | Reward |
|---|---|
| For giving Vincent the Cockatrice’s head | 3000 XP 400 Orens |
While we’re here you might as well talk to Jethro and ask about the Professor’s release. He’ll reveal that the money for the Professor’s “bail” was transfered from a Dwarven bank in this quarter. This starts the quest “Suspect: Vivaldi” , which we’ll ignore for some time. Ask him about his sneezing habit, and he’ll refer you to Coleman at the Hairy Bear for some Fisstech. If you inquire about the bounty on the Professor’s head, he’ll tell you that it wasn’t the crown that paid for the bounty-it was a private individual whose representative can be found at the Hairy Bear. This updates the quest “Wanted” . Finally, ask him about your missing package and it’ll become obvious where it went and what it was. This updates the quest “Hot Potato” . If Jethro starts mumbling nonesense about stopping a cavalry charge, just leave the Dungeon and return to get him to start talking again.

 Sign up
No Comments