Reach the Smoke Beacon
The first thing you should do is turn around to speak with Roth multiple times to work on the Chatterbox trophy/achievement and then use the Village Overlook Base Camp .
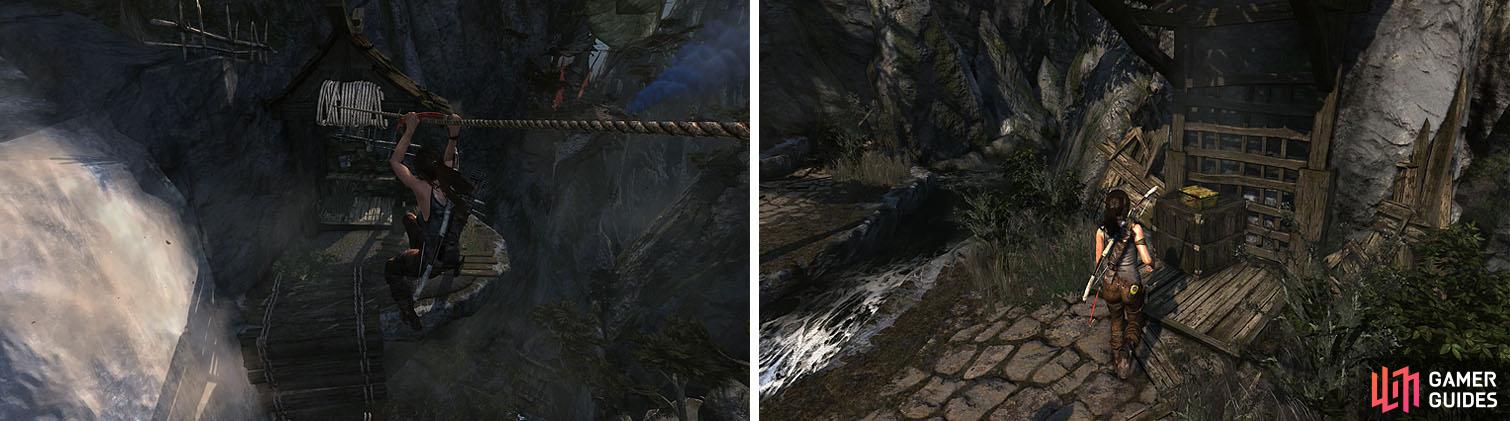
Create a rope bridge to return to the Mountain Village and then hide behind the overturned cart, waiting the third guard to move away entirely and then dispatch the two remaining guards with headshots. There’s some Salvage at the base of the stairs and some more Salvage inside the building.
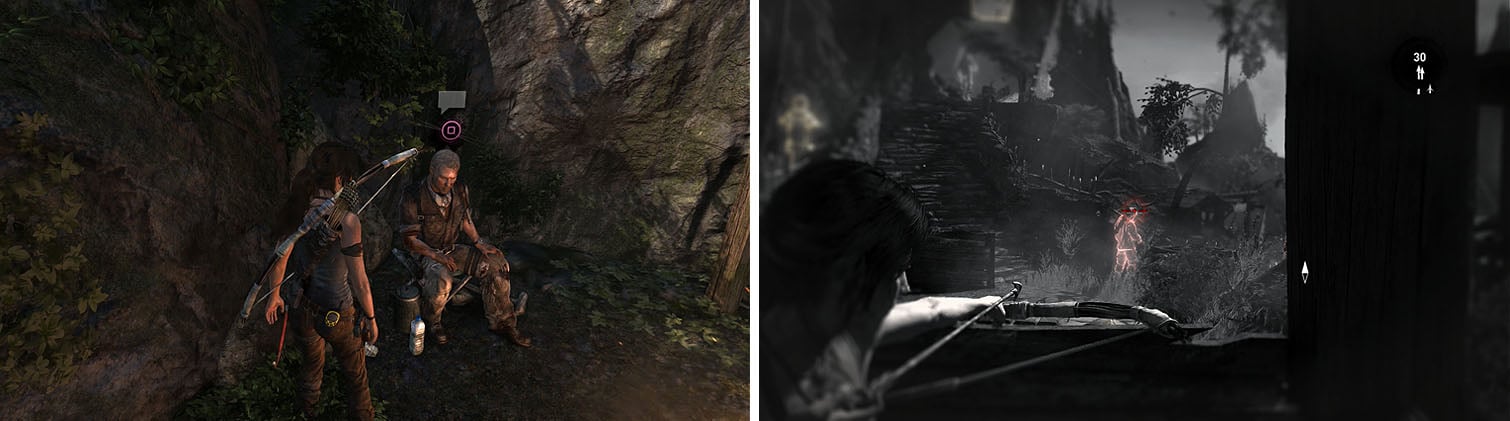
Speak with Roth before you rope down into the village and kill some Solarii.
Make sure to grab the Medicinal Herb Vial from the building before you exit and then head up the staircase to find Statue (3/10) that you can light.
Slide down the rope and search underneath the hut for the GPS Cache 9 before you enter the building to jump across to another ledge with a Statue (4/10) . If you turn around you should see a brazier with some salvage hanging in a net. In order to release the Salvage you’ll need to jump over to the roof, light the torch and rope arrow the brazier to make the net catch fire.
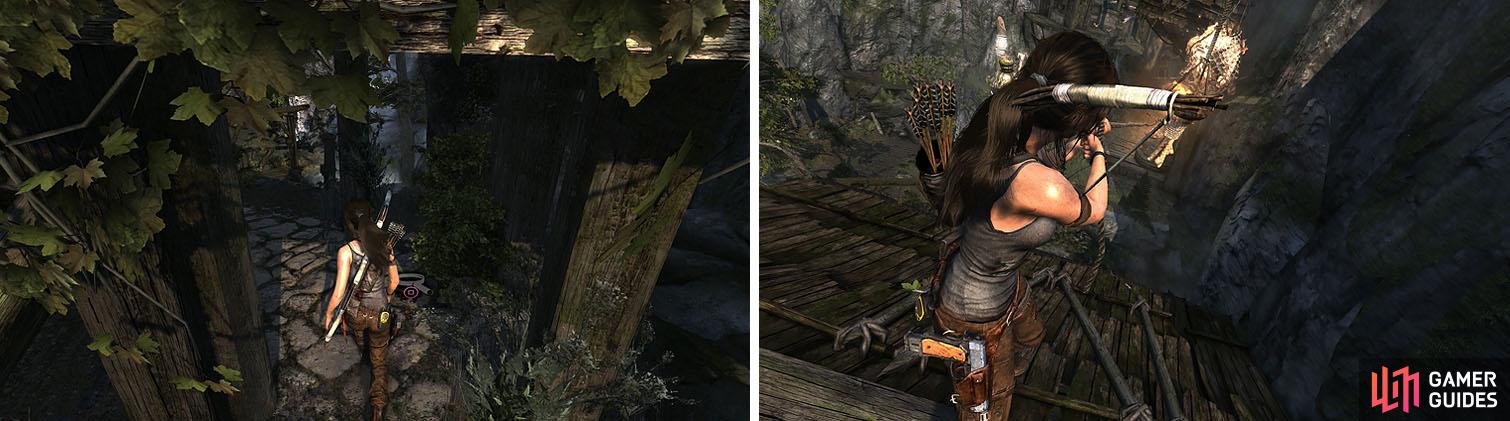
Don’t miss the GPS Cache and the brazier above that will help you get salvage.
You can now optionally backtrack to the village for some extra items and collectibles:
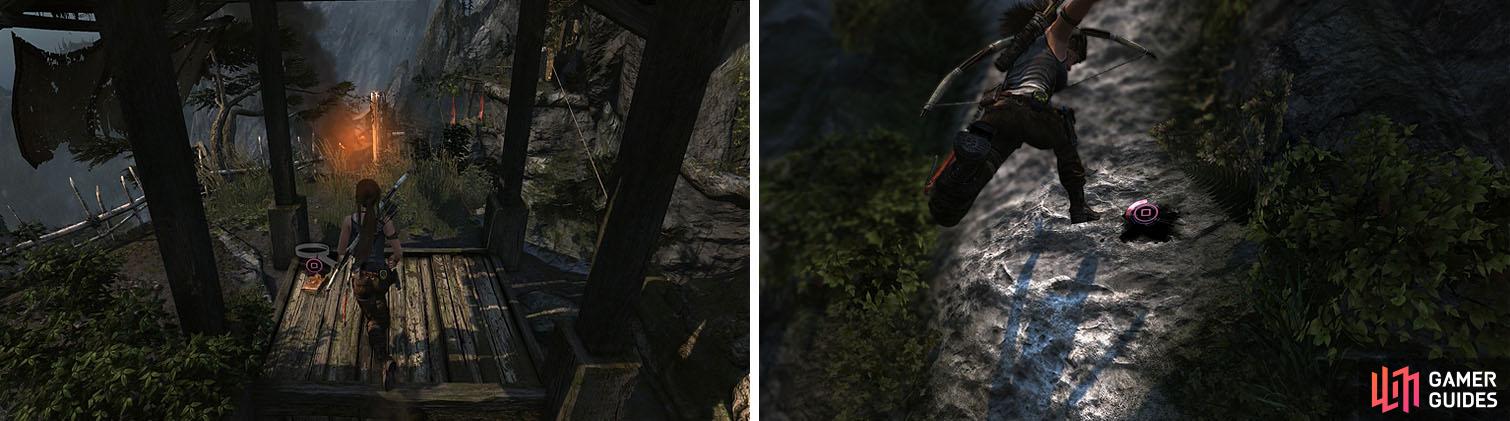
Zipline from the hut to the tail of the crashed plane, collecting Salvage from the house you land in, and then make your way toward the Base Camp where you originally left Roth. There is a Food Cache on the slope created by the crash and another Food Cache near the camp.
At the camp, collect the Endurance Officers - Reyes: Dear Roth document and then cross the river to the right of the crashed plane. Light and pull another brazier to release some Salvage and then climb the nose of the plane to reach more Salvage and the GPS Cache 10 in the grass.

Make your way back to the Base Camp, collecting Caches (left). At the Base Camp make sure to read the revealing document to Roth (right).
Scramble up the wall to find some Salvage in a net and even more Salvage at the top of the stairs and then head back down the stairs and jump into the body of the plane for a Food Cache . Exit the back of the plane to open the metal crate for Salvage and then head up the slope and open another crate on the left side with more Salvage .
Head to the cabin at the back of the area, since the closer one was raided when you arrived, to check the area for a Food Cache and Old Photograph inside the building and some Salvage on the patio. Between the two buildings is a wall you can scramble to find a Statue (5/10) and some Salvage , but the braziers behind you can be a bit tricky.
Light the first brazier and then rope arrow the one behind it to light it as well. You can then jump to the roof of the building to get a better angle when shooting a rope arrow into the second brazier to get the Salvage x2 .
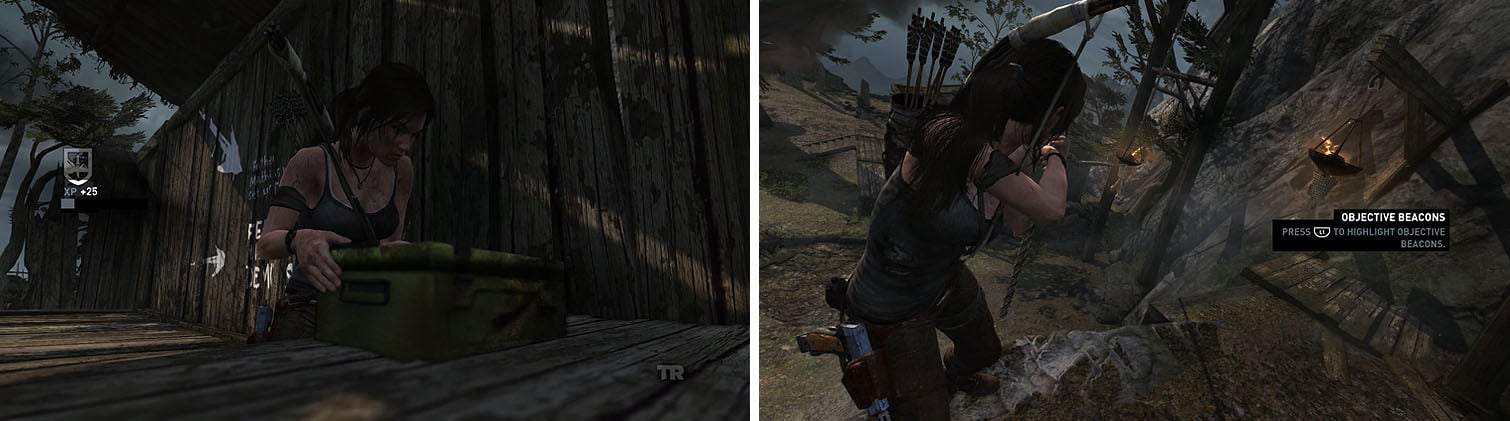
Collect the Old Photograph in one of the houses (left) and then use the braziers to collect the hanging salvage up above (right).
While on the roof you should poach the Eggs (3/5) and then return to the statue after collecting the dropped salvage. Head up the steps to find another Salvage x2 and then check then far corner for the GPS Cache 11 before you return to the plane crash.
Enter the lower part of the village, past the already lit statue, and rope arrow the door to find the Dried Gobo Root and some more Salvage . Now make your way up to the large building above to find another door to gain more Salvage .

You can rope arrow doors in the village to find items you couldn’t access before.
With the village cleared, head back to the zipline near the tail of the crash to return to the upper part of the village.
Follow the path to a post and create a rope bridge to the banister high above and climb up. Carefully climb the rock wall on the other side, since there are two guards at the top that you can melee stealth kill if done quickly. Check the tunnel to the left of the post to light another Statue (6/10) and then return to the post to create another rope bridge, which leads to an optional tomb.
- Hall of Ascension -
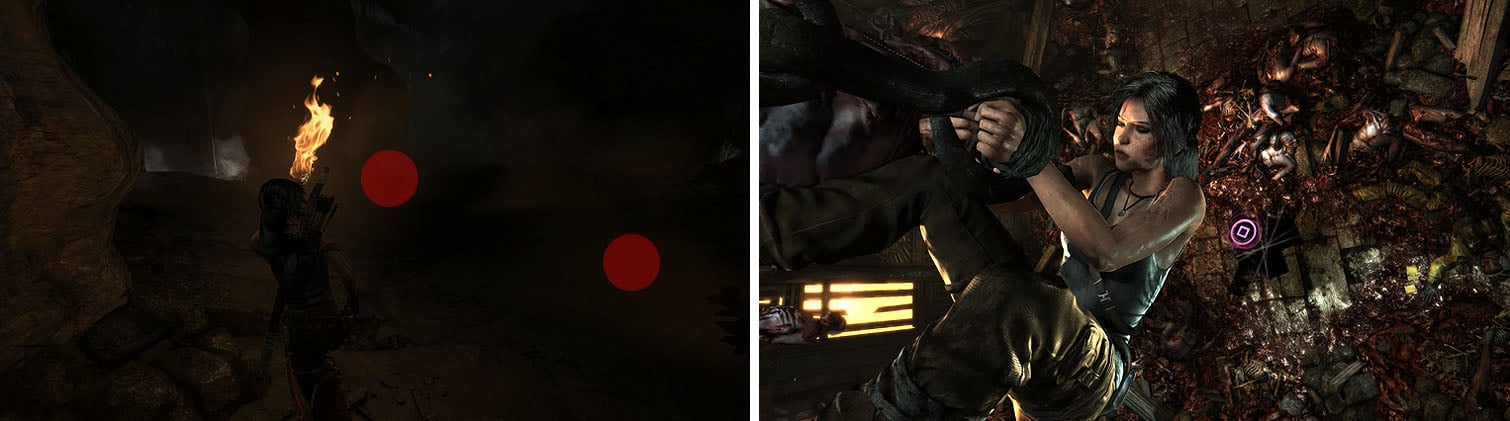
Move through the cave and look for some Salvage near the skeleton with red candles around it. As you enter the tomb you’ll notice two valves: one that controls the shutters and another that controls the lift.
In order to reach the treasure you’ll need to shut the shutters and then raise the lift when the first shutter busts open. This will allow enough time to jump onto the platform before the remaining shutters open and push the lift against the wall. If you raise the lift too early it won’t make it to the wall where you need to scramble to reach a ledge that leads to the treasure. [250 XP]
Inside the treasure chest you’ll find 1250 XP , 250 Salvage , the Mountain Village GPS Cache Map , and a Handgun part.
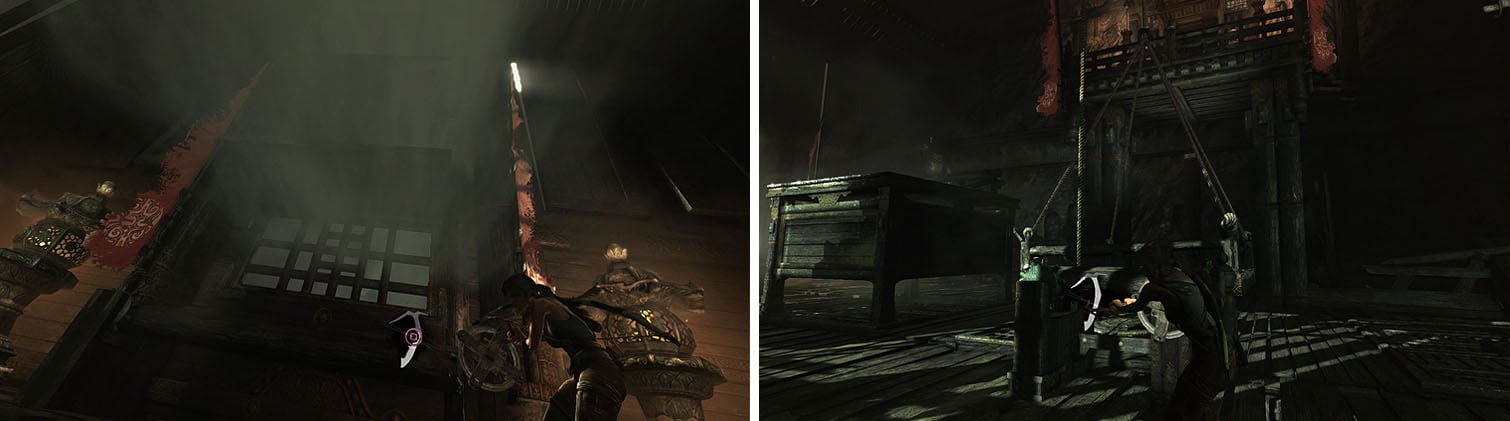
Use the valves to close the shutters and raise the lift in the correct order.
Shoot an arrow into the banister of the building to the left (east) to create a rope bridge and slide down to light a Statue (7/10) . Create another bridge to the building to the east to find the Ancient Scrolls - Hoshi: Answering the Call document on the desk and then shoot another arrow into the rope-wrapped tree.
There is a GPS Cache 12 on the ground and if you look north you’ll spot a nest with more Eggs (4/5) that can be reached with a long jump. Cross the tree to collect the USMC Dogtags and then turn around and create a bridge to another rope-wrapped tree.
Create some rope bridges to reach the Ancient Scroll (left). After crossing back to entrance, walk across the tree to reach the dogtags (right).
Pop open the Salvage nearby and follow the path to another Statue (8/10) and then create a bridge from the post near the statue to the tree across the way. Slide down the rope and scramble up the wall on the other side to find the Ancient Scrolls - Ambassador: Dark Tidings document on the ground and then drop off the ledge to the right for the final group of Eggs (5/5) .
You can now create a rope bridge to reach the pilot’s blue smoke signal, catching the rock wall when you fall. [200 XP]
Collect the document on the last island (left) before you create a rope bridge toward the smoke signal, but be prepared to tap Square/X (right).
Locate the Second Pilot
Follow the mountain pass, sliding down to some Salvage , and continue to hear from Alex. Wait for the conversation to end to collect the Plant on the left side of the road and the Salvage straight ahead. At the day camp you’ll notice there are two paths, with a Salvage in the middle.
Take the left path to find a Food Cache and Salvage around the corner and then move through the cave to collect some Salvage x2 in a well lit cavern. Continue until you trigger a scene and when wiggle the L Analog right and left until Lara plants her feet on the beam and tap Square/X to break free.
Don’t miss the salvage and Food Cache near the day camp (left). Once inside the building, break free from your bonds (right).
You can now move towards the cave via the path not covered in corpse and proceed to the end of this tunnel. [100 XP]

 Sign up
No Comments