
Assuming you went right from Kakariko Village, you will now be at the Blacksmith’s. The camera will pan out and you will see a witch zoom by above; don’t worry about her for now.
Head towards the bottom-right corner of the Blacksmith’s and take the right exit to return to the Hyrule Castle area. Here, continue right, past the big bridge, and take the south exit at the end. Keep walking down, past Link’s House and then take the right exit.
You’ll now be in a new screen, not far from the Eastern Palace. Head right, minding the green bananas and walk up across the big bridge. At the end of the bridge lurk Octoroks; from here, go right, past the statue pillars and exit the screen right. You will see a line of trees with a Crow resting atop one of them.
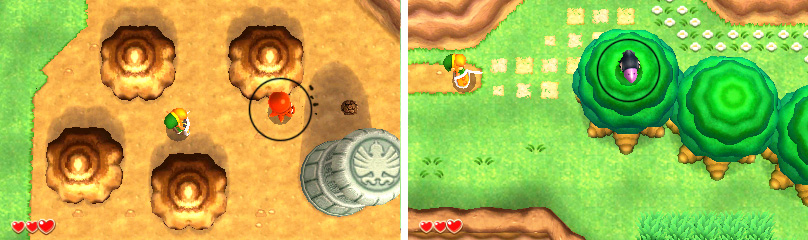
Still in the same screen, go up past the trees and make your way right. Watch out for another crow atop a tree; use the same tactics as before to make mincemeat of it.
In the top-right corner, you should see a cave along the wall of the cliff; go inside to find a Great Fairy, who will restore your health. When you’re back outside again, go left and take the nearby north exit. You will now be in the area of the Eastern Palace–a site of ancient ruins.
Cautiously walk up, minding the Octorok scuttling around between the arches. When you ascend the stairs, the camera will pan and show you a peculiar arrangement of objects.
Check the strange signposts on either side of the closed door to find a hint from Ravio. Also note the pillars with a bow and arrow design on either side of the raised steps. It looks like you’ll need to pay a visit to Ravio back at Link’s House to solve this riddle.
Go back the way you came to reach Link’s House (from your current location, go down one screen, left one screen, go down the bridge and then left another screen).
Inside the house, Link will tell Ravio about seeing his signs at the Eastern Palace. Correctly inform the raving rabbit which symbol you saw atop his pillars (bow and arrow) and he will give Link the Rented Bow free of charge.
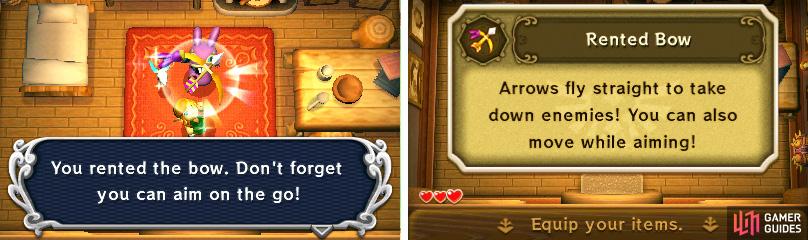
Equip the Rented Bow and press the Y button to shoot an arrow. Arrows can be used to attack monsters from a distance or to strike switches.
Unlike in previous Zelda games, you need not collect arrows to use the bow; instead, firing an arrow uses up a portion of the energy gauge displayed next to Link’s health.
The energy gauge slowly recharges as time passes; should the gauge completely deplete, you will be unable to fire more arrows until it recharges.
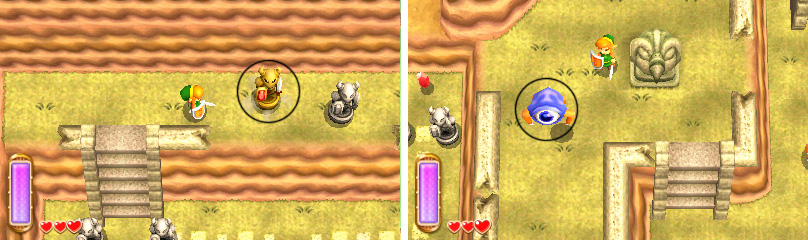
Now return to the Eastern Palace area. If you want, try out the bow and arrow along your way. Where you got stuck, stand at the very end of the raised steps, in front of the door, and face your left or your right. Then let loose an arrow to hit and activate a round switch.
Now face the opposite direction and do the same thing, activating the second switch. The closed door will now open.
Before going through the door, walk right a few paces and head down the stairs. Watch out for the jumping Tektikes. Next, walk right a few paces and go up, where you will see two statues guarding a Red Rupee.
Get close and the statues (Armos) will wake up and try to attack you; keep your distance and slash them with your sword, then claim your prize.
Make your way back and go through the newly-opened door. Go around the pit and head for the top-left corner, then go up the stairs at the end. Next, make your way right. There are a number of Armos along your way, so keep your sword hand ready and primed.
At the end of the road, you will find a chest containing a decent 20 rupees. When you’re done, drop down the ledge to the left or right (where there’s no barrier) and head down.
Descend the stairs to the bottom-right and walk right a few paces, minding the jumping Tektike (or alternatively drop down to the right). Then climb up the next set of stairs; be careful of another Tektike who may try and jump from the right.
To the left is an Armos (and a Tektike who may try and jump from above). To the right is another flight of stairs where two Armos will be waiting for you at the end; dispose of them and go up the flight of stairs to the right.
At the top, Link will meet Osfala and give him Sahasrahla’s warning; Osfala will ignore the warning and head into the depths of the Eastern Palace anyway. Well… that’s smart. Would it really kill people to listen to you once in a while?
Activate the weather vane to the right and save your game if necessary. Finally, enter the big foreboding door to enter the Eastern Palace–the first dungeon of the game.

 Sign up
No Comments