
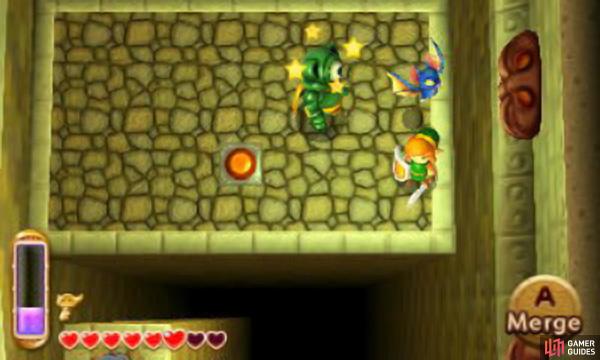
This dungeon has a similar atmosphere to the Eastern Palace, but it’s not quite as claustrophobic. We’re not sure what kind of “house” it is, but it’s still not a place you’d want to stay. From the entrance (1F south), smash the pots ahead to reveal a hidden switch; step on the switch to activate the two fans below. Walk directly under the wind current generated by a fan and use the Tornado Rod; Link will hover the wind will carry him across to higher ground. Take the door to the next room.
You’ll be in a large room (1F north) with some wire mesh above. Watch out for Rats and Keese; clearly the housekeeping isn’t up to scratch. First, head to the top of the room; light the two torches to reveal a chest containing 20 rupees. Next, drop off to the right and go through the door to the right (to 1F north-east). There will be fans blowing and a chasm surrounding the room. Go down and strike the round switch to deactivate the fans; then grab the Monster Guts from the chest
Back in the previous room (1F north), walk a few paces down and then merge into the wall and walk right until you cross the gap. From there, go left a bit, then walk down through the passageway in the wall. At the end, strike the round switch, lowering the wall to the right. Now head back round to the entrance of the room and merge into the wall above. Then walk right and emerge and the other side. Take the door immediately to the right.
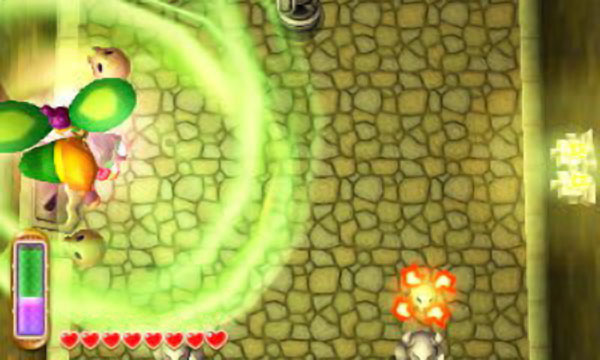
Fire Bubbles are ominous skulls surrounded by flames that bounce around the room like a ball. Quick put out their flames with the Tornado Rod, then pummel them when they’re exposed. Beware that the skulls can still move when their fire has gone out.
The room (1F south-east) will lock and three Fire Bubbles will bounce across the room. Use the Tornado Rod when close to put out their flames–then strike them. Kill all three and a chest will appear, containing a Small Key . Return to the previous room (1F north) and head for the bottom-left corner, where there’s a locked door. The next room (1F south-west) is surrounded by a chasm and there are platforms and jellyfish-like Bari floating above.
Merge into the moving platform to the left, then let it take you across, before emerging. Fire arrows at the Bari, or stun them with the Tornado Rod, Hookshot or Boomerang, before dicing them up. Grab the Compass from the nearby chest. Next, look ahead and wait for a moving platform to stop to its right; when it does so, merge into the wall above and walk left onto the platform. Then let the platform move to its left, before emerging from its left side onto the other side.
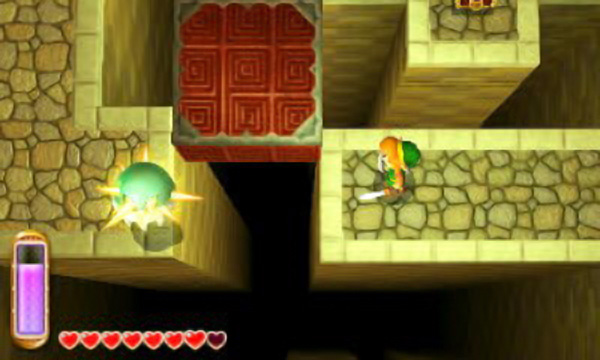
Bari look like jellyfish, except they float in mid-air and charge electricity around their body. If they’re charged, stun them with the Hookshot, Tornado Rod or Boomerang or shoot arrows to slay them. Some Bari may split into smaller jellyfish upon death–deal with them in the exact same way.
Follow the path to the left, taking care not to plummet to your doom. At the end, step on the moving platform to the right and let it take you up. From the stationary platform, move onto the moving platform up ahead and use it to cross to the right. On the other side, step on the red switch to activate a fan, which you can use as a shortcut to return where you currently stand. Then take the right exit.
You’ll be back in the previous room (1F north), but now on top of the wire mesh path. Be careful of the red Bari, because they will split into two smaller ones after taking damage. Go around the mesh path and step on the red switch to activate the fan below. While you’re here, fire an arrow at the round switch to the right to activate the central fan. Step below the wind current and use the Tornado Rod to fly all the way across the room.
After landing, merge into the wall on the left and walk right, then emerge and enter the door to the left. Here (1F north-west), there’s a narrow pathway and lots of Rats; shoot arrows at the Rats on the narrow path. Walk on the narrow path, then drop down when it’s safe. If you want, drop some bombs to wipe out the Rats below; someone really ought to fix this rat problem. Go left and then enter the door below. You’ll be back in the room with the moving platforms (1F south-west).
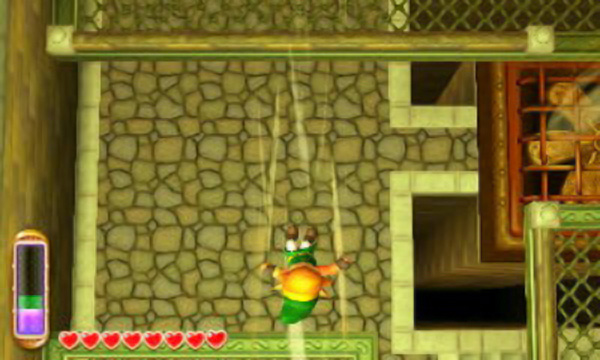
The fans will push you in the direction they’re blowing if you jump up in to the air with the Tornado Rod.
Merge into the wall on the left and walk all the way left to find a chest containing an impressive 100 rupees. After pocketing the rupees, merge into the wall below and then walk left, until you cross the gap. Then head for the direction of the wind current and use the Tornado Rod to let it take you to the room’s exit (to 1F north). On top of the wire mesh again, leap into the wind current again; this time go right, until you’re above the central fan. Jump down into the fan and you’ll be blown up.
Upstairs in Floor 2F, follow the path straight down. Wait for the spiked roller to come in your direction, then use the Tornado Rod to hover out of its way. Smash the pots in the bottom-left corner to uncover a switch; step on the switch to make a Small Key appear, out of reach. Head right and go through the door to the right (to 2F east). Next, you’ll be ambushed by slow-moving Popos; dispose of them and go through the door below.
You’ll be outside the house (2F south); enjoy the lake breeze, but don’t look down! Pull the switch to the right to reveal a big chest, as well as awakening the Armos in front of you. Pulling the switch to the left makes a line of fire appear to the right of entrance; use the Tornado Rod to temporarily put out the flames and get past.
It’s a TRAP! Inside the big chest is the Big Key; after you claim it, a wall of fire will appear around you and the two Armos in front of you will awaken. Use the Tornado Rod to put out the flames and stun the Armos.
When ready, return to the previous room (2F east); now follow the path right and take the left exit. Watch out for Popos trying to ambush you by the stairs. You will be back in the room with the spiked roller (2F north). Walk down a few paces and merge into the wall on the right, then walk right, emerging above the narrow ledge. Carefully walk left and grab the Small Key from before. Drop down and make your way left; open the locked door at the end.
Back outside again (2F south), go left and drop down. Walk all the way left and pull the switch at the far end to set the small platform moving. Pulling the other switches makes enemies appear. Stand below the moving platform; wait until it comes to you, then use the Tornado Rod to hover up and onto it. Let the platform take you left, then go across to the ledge with the locked door. Merge onto the wall left of the door and walk all the way left to find a distant ledge.
Step on the switch there to reveal a Small Key, surrounded by a ring of fire. Go back down and use the Tornado Rod to kill the flames, then grab the Small Key . Return to the locked door (to 2F west) and enter it. Link will be locked in with two fiery Heedles.
After defeating the Heedles, the doors will open and a warp zone to the entrance will appear. Enter the door in the top-right corner. In the next room (2F north), you’ll be walking a narrow path along a chasm. Go around and take the next door to the left. This next room (2F north-west) has a number of fans and floor switches; to cross the chasm, you’ll need to press the right switches. First, step on the left-most switch. Next, step on the switch up above. Finally, step on the top-most switch.
If you step on the wrong switch, you’ll end up back near the entrance; should this occur, leave the room and re-enter to reset the switches. Go through the door in the top-right corner (in 2F north-west) to return to the previous room (2F north), but on the other side. From here, follow the path up; watch out for the Keese hiding in the wall lamps. Then step on the switch at the end to disable the wall fans. Now return in front of the door you came from.
From here, go down and drop down below. Next, follow the path right. Now that the wind currents are gone, you can head up through a new door. In the next room (2F east), there’s a long flight of stairs ahead; go up. At the end, fire an arrow diagonally down-right to strike the round switch; this will activate the big fan further down. Next, drop down to the right; arrow the Eyegore in the eye or slash it when it wakes. Step on the nearby switch to trigger a moving wire mesh platform.
That’s no creepy statue, that’s a creepy Eyegore. These cyclops statues will awake when Link is near and charge in his direction. Skillfully pop an arrow in their eye to quickly slay them or just violently push them back with your sword. After a while, they will temporarily return to sleep.
When the platform comes close, use the Tornado Rod to hover and land on it, then ride the platform across the chasm. At the platform’s destination, follow the wire mesh path down, then drop into the big fan to the left to be blown up. Upstairs in Floor 3F, there are some pots nearby and wind currents blowing across at the top and bottom of the room. Approach the pots and a ring of Popos will ambush you.
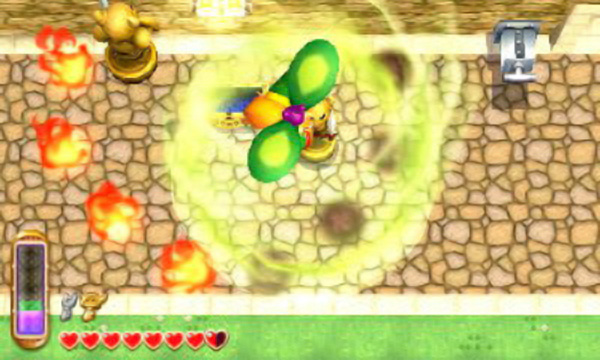
Go down and stop before the wind current. Merge into the nearby wall and walk right to avoid getting blown back by the wind. Past the wind, take the left exit. In the next room (3F south), there’s another Eyegore ready to ambush Link. Once the Eyegore is dust, light the two torch blocks in the centre of the room to open the door to the left, then proceed through it. The next room (3F west) will lock itself and you must defeat several Fire Bubbles to proceed.
When ready, drop down above to take them out. Use the Tornado Rod as they float above the chasm to send them to their doom or try to knock them in. Just be careful that the Tornado Rod eats up about half of the energy gauge, so don’t use it senselessly. It may help to merge into the moving platforms to reach the centre of the room; inside the pot is a vial that restores Link’s energy gauge. Kill all the Fire Bubbles and the doors will open, plus a chest will appear out of reach
Enter the door in the top-right corner. The next room (3F centre) has a chasm in its centre and moving platforms above. Merge into the nearest wall; then walk across the chasm and emerge on the other side. You may need to shoot the Bari with arrows to form a safe path. Through the door to the right, you’ll be back in the first room of this floor (3F east). Go right to obtain the Small Key from the chest. Next, head down and return to the room with the Eyegore and locked door (3F south).
Before entering the locked door, enter the room to the left (3F west) to claim the chest containing 50 rupees. Through the locked door (in 3F south), you’ll be back in the room with the chasm and moving platforms (3F centre). Step on the platform ahead and let it take you up. When the platform moves downwards, use the Tornado Rod to hover and switch to the next moving platform. Shoot an arrow at the Bari if it’s in the way. On the other side is the big door; beyond is the dungeon’s boss.
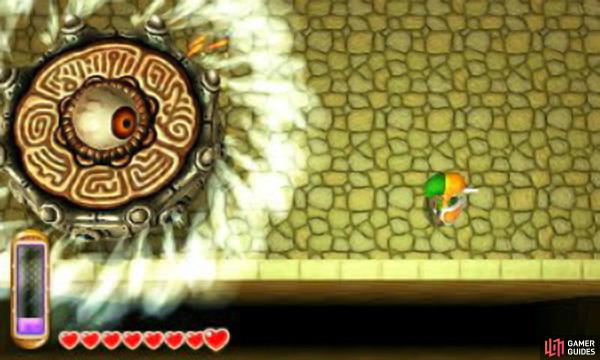
Boss: Margomill
Have your Tornado Rod at the ready, because you’ll need it. Drop down and you’ll meet a peculiar wheel-shaped fiend with a big eyeball in the centre. Pro-tip: if a Zelda boss has a big eyeball, the eyeball is most likely its weak spot. Wait for the boss to slow approach you, then use the Tornado Rod to hover over and on it, stunning it in the process. Whilst on top, slash the eyeball repeatedly. After taking damage, the eyeball will fly up, out of reach. Take this cue to jump off the boss, or you’ll get blown back.
Next, the boss will gather extra layers to make itself taller and its eyeball will retract. Now yiu to need to work to reveal its weak spot again. Approach the boss carefully and slash the exterior; be sure there’s enough space behind you when slashing, as you’ll bounce backwards. You can also fire arrows at the boss from far, which is probably easier as you have greater distance to move around, but you’ll need to watch the energy gauge.
Either way, watch out not to get hit–while the boss itself doesn’t hurt you, it will bounce you back and likely off the stage, making you take fall damage. Try to predict its movements to avoid getting hit. After the exterior takes a few hits, a layer will come off. Repeat until another layer flies off and the eyeball will reveal itself again. Then Tornado Rod yourself to its top and hack away at the eyeball like before.
Using arrows will allow you to destroy its spinning discs whilst keeping you a safe distance from Margomill.
Finally, the boss will gather even more layers, becoming a tower of sorts; it will also move slightly faster. Break off four layers to expose the eyeball, then finish it off. It may help to attack the boss while it’s moving perpendicular to you; if you try to attack it while it comes your way, you’ll likely get knocked off the stage (especially when it’s tallest). When it’s dead, collect the heart container and Pendant of Wisdom . You will then be taken outside the dungeon.

 Sign up
No Comments