
Hinox are the giant red cyclops that can take Lorule beginners by surprise. They throw bombs at great speed and can also charge at Link to deal great damage. Worse, they rarely appear alone. Keep your distance and lure them one at a time, then use the Hookshot or the like to stun lock them into oblivion.
From the Blacksmith’s house, head down the stairs and two bomb-throwers will await you. Ignore them and run back up to the Blacksmith’s house; merge into the wall and navigate around to rescue Maimai #51 . Next, merge back into the wall and emerge on the north side of the house, then go up to the next screen. When safe, drop down below. The monsters here aren’t as bad, but beware of the green rupee that’s actually a Rupee Like monster.
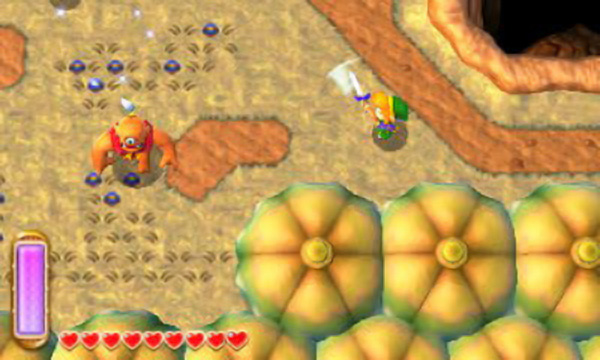
Head for the top-right corner to find the Fortune-Teller’s hut; like before, you probably have no need of it with this guide in hand. From the tent, go down to return to the Blacksmith’s area. Go all the way down and then take the exit to the right. A bit to the right are two more Hinox; this time, you have more space to manoeuvre and defeat them if you wish. Rain sword beams and arrows at them. Alternatively, if you’re feeling daring, stun them with the Hookshot or Boomerang and then hack them repeatedly (stun again if needed).
$$$item 3893
Further right and you’ll be at a castle gate. On the right side of the gate is Maimai #52 . Head up through the gate to find a weather vane and the entrance to Lorule Castle, which is currently sealed by Hilda’s magic. On your way there, watch out for Moblins. Burn the Moblin’s shield with the Fire Rod or snatch it with the Hookshot. When you’re done, head for the bottom-right and dash the tree for Maimai #53.
Down to the next screen and you’ll be in another familiar area–Link’s House in Hyrule. Head left to find Maimai #54 stuck to the wall. Then go right and head downwards, minding the Taros and Moblins. At the end, turn left to find a mysterious gap–your doorway back to Hyrule. Emerge through the gap and Link will be back in Hyrule, where Sahasrahla awaits. If you want, return to your favourite Hyrule locales to stock up on health, potions and fairies, before heading through the gap back to Lorule.
$$$item 3897
Back in Lorule, go up the hill to the left and then activate the nearby weather vane. Next, head around to the back of the vacant house and place a bomb on the north-facing wall to blast the cracked wall. Head on through to find a chest containing an elusive Bottle . When outside, go left to the next screen. Head for the top-right corner and slash the bushes to reveal a hole, leading down; jump on in. Below is a puzzle room that requires the Pegasus Boots.
Head left to find Dungeon Bro and a round switch. Strike the round switch, then dash all the way up, past the two lowered iron bars ahead. Alternatively, leave a bomb by the round switch, then walk past the first iron bar and in front of the second, then pass through the second after the bomb triggers the switch. Next, hit the round switch in the top-left corner and immediately dash right, then dash downward. Both times, be careful not to overshoot your dash or you’ll fall off. If you fail to pass the two iron bars in time, you will have to drop down and start from the beginning.
Finally, place a bomb next to the round switch beside the second Dungeon Bro and wait in front of the iron bar to the left. When it lowers, dash left, then quickly dash upward and, at the end, dash right. Should you pass through the two iron bars successfully, head down, then left and upward to claim a big chest containing a big 300 rupees , as well as praise from the Dungeon Bros. Having grabbed the treasure, drop down and head for the red warp zone to return to the surface.
$$$item 3899
Outside again, head for the exit in the bottom-left corner. In the next screen, turn left. You will now be outside South Woods in Lorule; head up through the trees and you’ll reach a peculiar stadium where you can play the Octoball Derby (basically Lorule’s version of baseball) for 50 rupees. Get a score of 100 points or more to earn a Piece of Heart .
Before leaving the derby, cut down the bushes to the left for Maimai #55 . Head back down to the previous screen; there, head for the bottom-left corner to find another doorway to Hyrule. Go through and you’ll emerge outside the Cucco puzzle room. Look right to find another doorway to Lorule; drop down to the right and go through it. Back in Lorule, you’ll be on higher ground. Next, you have two choices: merge into the wall below and head left for Maimai #56 or hookshot diagonally up-left for a chest containing 100 rupees . After getting one, go back to get the other.
When you’re done, head for the exit in the top-left corner, then in the next screen turn left. Head all the way left and you’ll find the Lorule version of Rupee Rush. The rules are exactly the same (and there’s Maimai #58 to bag inside), but it costs 100 rupees and the layout of the area is different. Earn a score of 200 rupees or more to net yourself a Piece of Heart . You may want to return after you’ve obtained the Sand Rod, to make the game easier.
Either way, head back to the previous screen. Go up to find a house and head on in. Inside you can rent a Big Bomb Flower for 200 rupees. Exit the house to the right to find your Big Bomb Flower. Walk next to it and press A and it will follow Link around. To ignite it, just whack it with your sword or another item (even the Net works), but be careful that monsters touching it will also set it off. To begin with, hit the Big Bomb Flower at its resting spot, destroying the surrounding grass and revealing Maimai #57 .
Next, lead the big bomb down to the big cracked rock and then ignite it. From here, lead the big bomb left and around the house, where another big cracked rock awaits. Set it off here to open up the cave to the Great Rupee Fairy; inside, you can donate rupees–donate a total of 3000 rupees to earn a Bottle . Right now, you may want to save your rupees for other endeavours, such as permanently buying Ravio’s items.
$$$item 3894
While you’re here, go back to the big bomb and lead it one screen right, one screen down. Head for the bottom-left corner, where the doorway to Hyrule and a big cracked rock is. Blow up the rock to find a cave with a chest containing 100 rupees . Finally, well, now probably isn’t a good time. Basically, there are a few more uses of the big bomb yet, but you may not be familiar with the area where it’s needed. For now, warp back to the vacant house.

 Sign up
No Comments