
| Important Items in This Area |
|---|
| Grognak the Barbarian |
| Overdue Book x3 |
| Repair Bobblehead |
| Tales of a Junktown Jerky Vendor |
| Tales of a Junktown Jerky Vendor |
Mystic Pines
Continue zig-zagging your way across the wasteland by heading south-east until you find the Mystic Pines home on the outskirts of Lexington. This house is a nice little treasure trove with nothing inside of it to make tears occur: grab a Nuka Cola Cherry off the floor near a pillar by a Nuka Cola Vending Machine, then pick up an issue of Tales of a Junktown Jerky Vendor from atop a Holotape Player along the western wall in the front room. In the south-eastern corner of the house you’ll find a door [Advanced], beyond which you can loot two First Aid Boxes. In the north-eastern corner of the house you’ll find another door [Advanced], which leads to some stairs, which in turn leads to a generator, from which you can pry a Fusion Core.
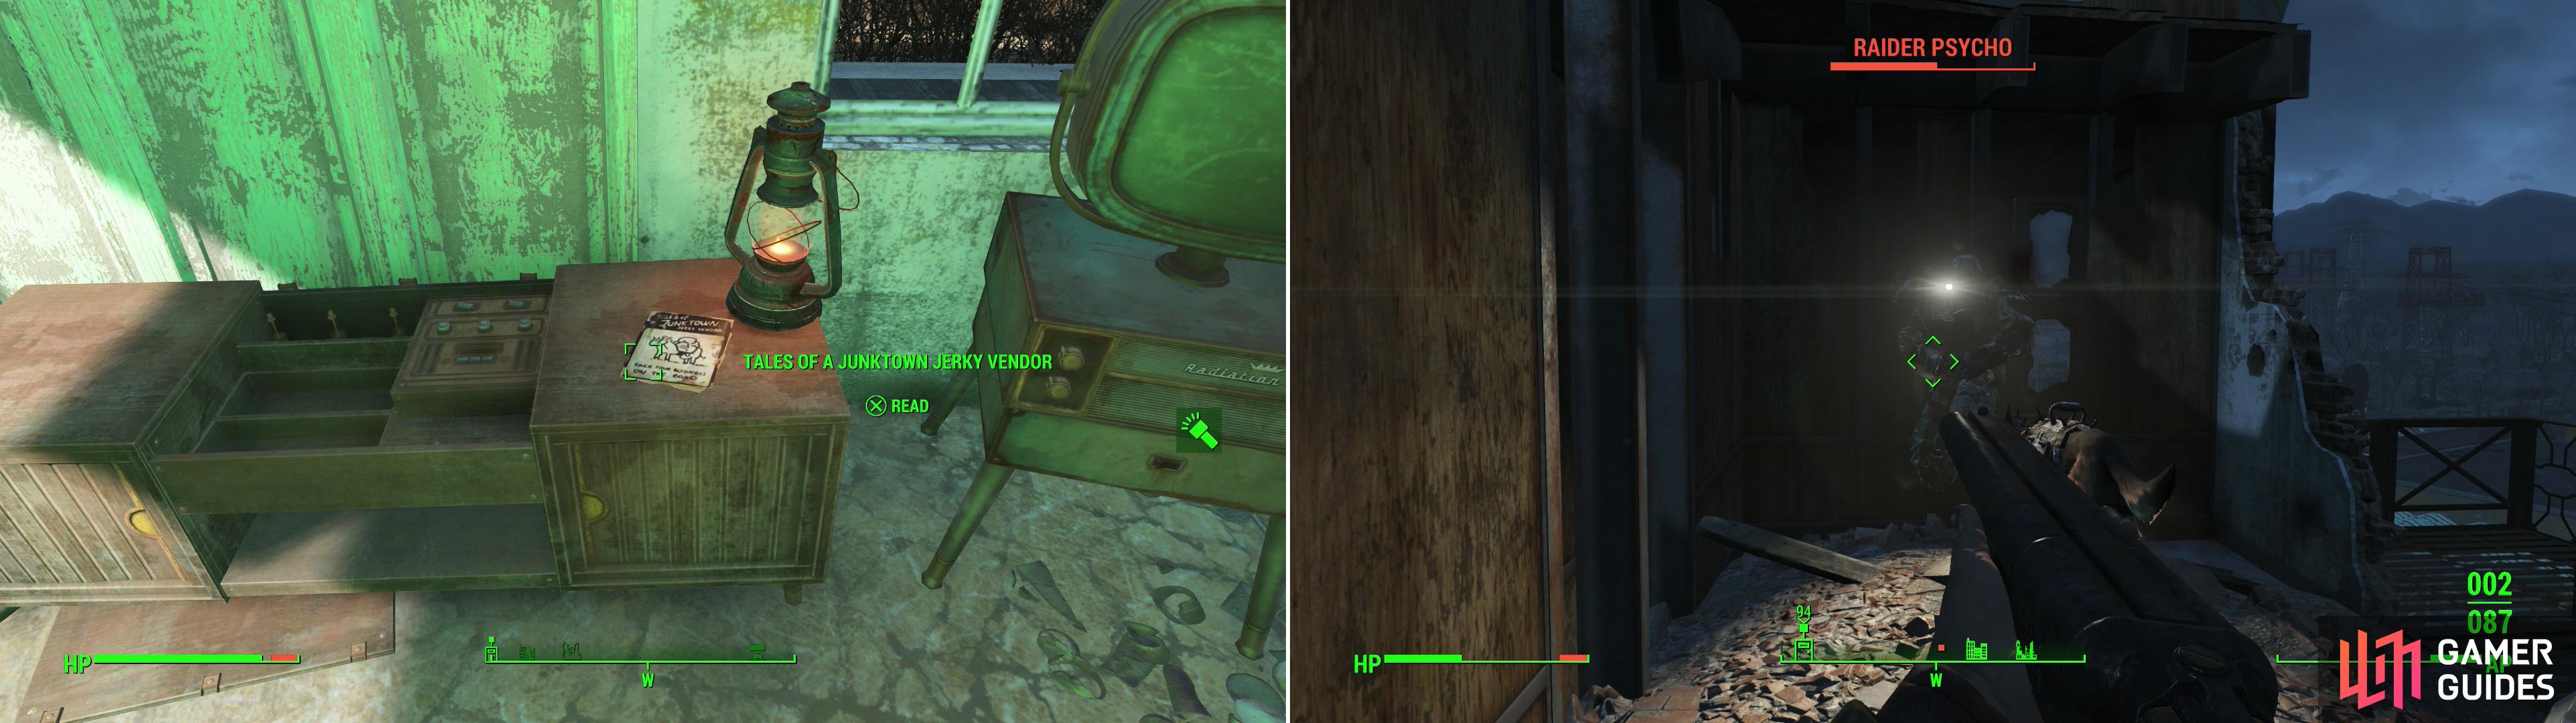
Find a copy of Tales of a Junktown Jerky Vendor in the Mystic Pines building (left). As you explore Lexington, be wary of dangerous Raiders in Power Armor (right).
Lexington
The time for no-tears is over. Time to get back to work. Leave the Mystic Pines house and sneak down a road south. Pass a yellow brick building to the west, then head into a ruined brick building south of the yellow brick building, jump onto a collapsed floor, which now forms a nice little ramp. On the building to the west are some Raiders and two Machinegun Turrets MK I. Demolish them, then return to the upper floor of the collapsed house to find an Ammo Box and a Safe [Expert], inside of which is an Overdue Book . The Corvega Assembly Plant is south, through Lexington, and as the base of a band of Raiders, you should expect resistance as you fight your way through Lexington. On the plus side, however, you can always return to Mystic Pines to rest on one of the beds if you get too hurt.
Continue south along the road a bit, but keep your eyes west to spot some more Raiders on an elevated concrete landing with a railing along the edge. Dispose of them, then search the elevated ground they were standing upon to find a pool that desperately needs some maintenance. More importantly you can find an Explosives to the west and the bodies of several Feral Ghouls - the other obstacle in Lexington.
Lexington Apartments
Most of the interesting stuff in Lexington lies west beyond where the Feral Ghouls were, but for now, return to the road back east and follow said road south to find Lexington Apartments. Might as well explore it while you’re here, right? Head inside and make your way upstairs until you find a dead Settler. Not that interesting in itself, but be wary of the Bottlecap Mine on the floor near the body. To get at it easier, you may want to move the body out of the way (hold down [X/A]). On the next landing you’ll find a tripwire attached to a Grenade Bouquet. Continue upstairs and go through a door to reach a Raider-occupied apartment. Kill them, then loot an Explosives Box from a counter and take an Overdue Book from a dresser near a bed.
Lexington, Cont.
Exit the apartment via a door to reach a roof, from which you can head west and drop down onto the more angular roof of another, shorter building. From there drop off this roof onto the street to the north to land in front of a Pulowski Preservation Shelter, inside of which is a very dead soldier clutching a Mini Nuke. He won’t be needing that anymore. From here you can head south, past a red house, then turn south-east to find a Pharmacy past a bright red car. Inside you can score a few chems, which are always welcome.
Backtrack to the Pulowski Preservation Shelter and from there head across the street to the north-west, over a pile of debris and into a building. Ascend the stairwell until you reach an apartment where a number of Feral Ghouls think they’re being clever by playing dead on the floor. Use some bullets to make their act more convincing, then continue south past a counter, around a corner and up two more flights of stairs. Ignore more stairs up and sneak north-west, around a corner, and turn south-west to find a bridge between buildings; a bridge upon which two Raiders lurk, one of which is in Power Armor and carries a Fat Man… pretty much like Boomer, but this is a random, weaker Raider. Guess who the first target should be? It’s not hard in these confined quarters to get the Raider to waste his Mini Nukes trying to shoot you through walls, but if you can possibly kill him before he fires them to get those Mini Nukes, well, all the better. When he’s dead, loot him for his Power Armor and Fat Man. You can now cross the bridge to reach the other building, but it’s less interesting; only possessing some Feral Ghouls and a Machinegun Turret MK I.
Leave the building the same way you came in and from the door turn west to find the doorway to another building. Kill any Feral Ghouls inside, then hack a Terminal [Advanced] to open the sealed door nearby. Inside you’ll find a Safe [Advanced] which can be picked for some loot. Once done, leave the room and grab a First Aid Box and an Ammo Box to the south-west, near some stairs, then leave the building. From the door of this building head north-east to find a basketball court. From the court, turn south to find a building with a fire escape, which you can climb to reach the roof. Here you’ll encounter another Raider wearing Power Armor, although his weapon is far less dangerous than a Fat Man. Kill him and claim his Raider Power Armor pieces.
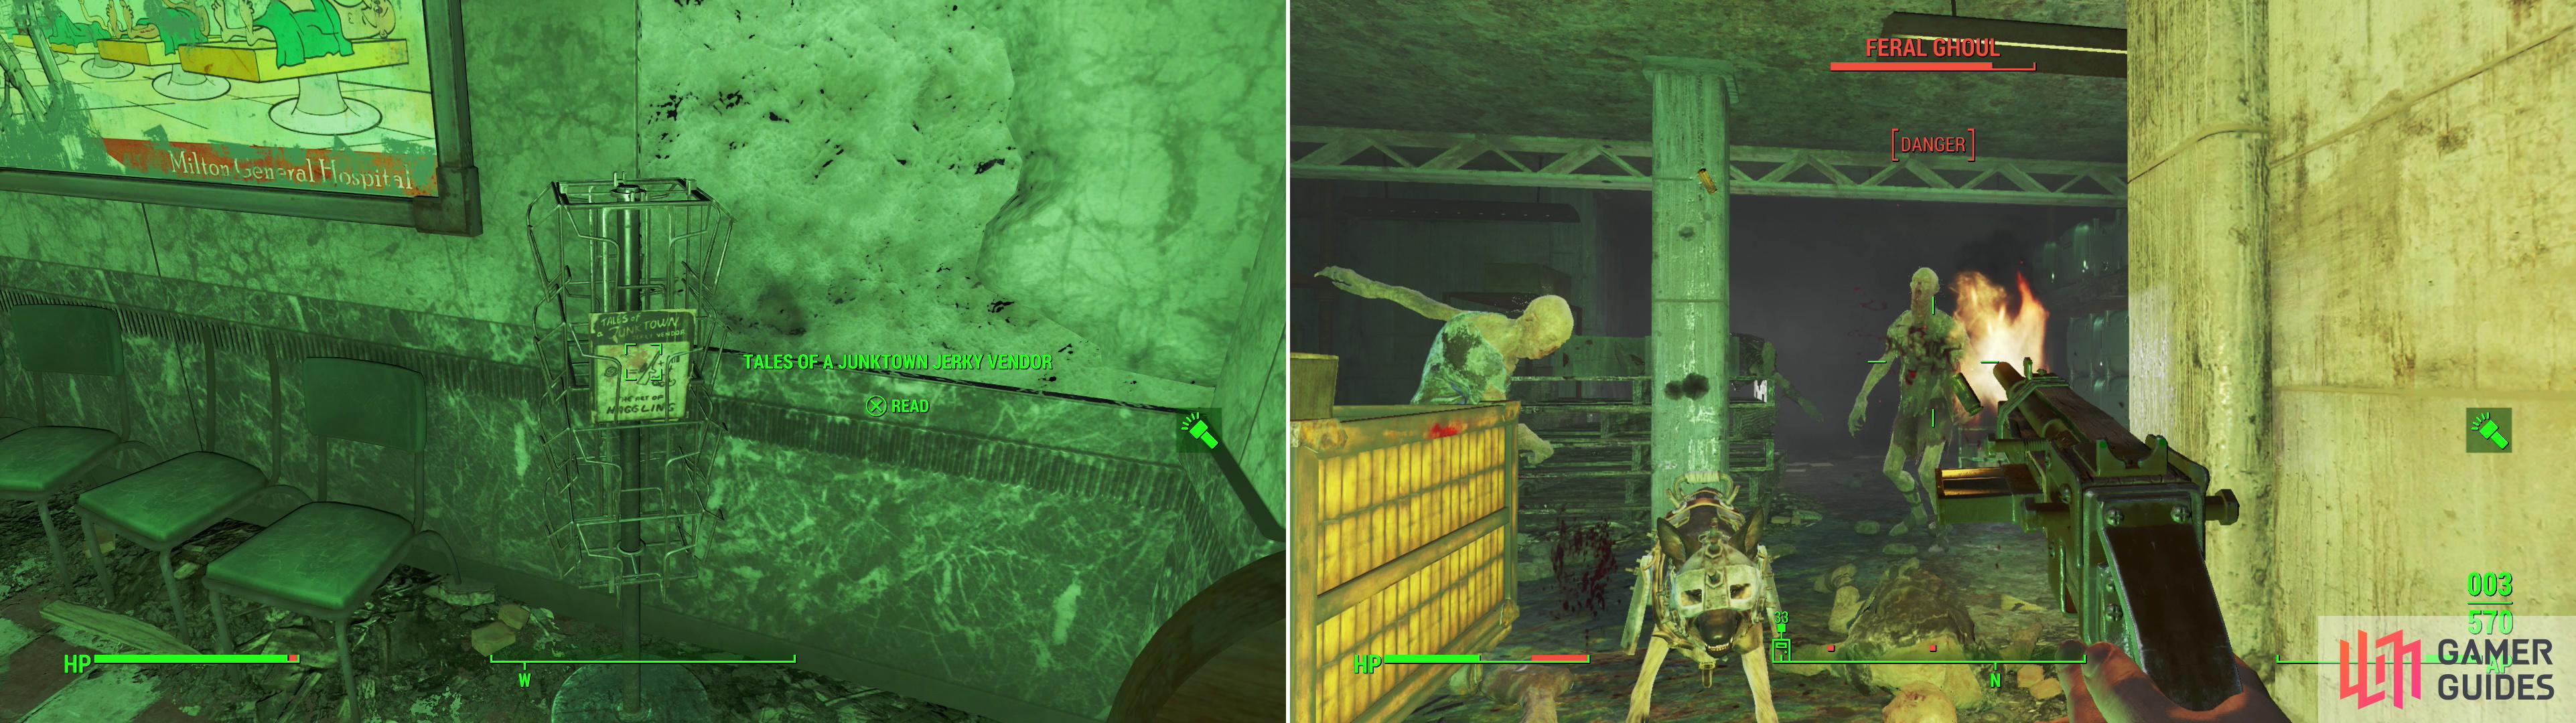
In Super-Duper Mart you’ll find another issue of Tales of a Junktown Jerky Vendor on a magazine stand. Where else? (left). You’ll also find plenty of Feral Ghouls prowling in the ruins of the super store (right).
Super-Duper Mart
Return to ground level and head back south-west from the basketball court to reach the nearby road. Follow this road south, past the Pulowski Preservation Shelter where you found a Mini Nuke earlier, and follow a road at an intersection to the west, then north-west to reach the front of Super-Duper Mart. Be wary, however, as Feral Ghouls tend to congregate in the plaza outside of the store and in the buildings to the south. Once done, turn your attention to the mega-store, which can be entered in two ways. Firstly, just use the front door. Not very glamorous, but, well, the front door is tried and true. Alternatively you can sneak around to the north-eastern end of the building, where you can find a Terminal [Advanced] which opens a door to a service station, in which are some Feral Ghouls. You can then head through a back door to reach the rear of the building. For the purposes of this guide, it’ll be assumed you took the easy route and went through the front door.
If there’s three things you can find in Super-Duper Mart, it’s Ghouls, Ghouls and more Ghouls. Seriously, there are lots of Ghouls in here. They even employ new tricks, like coming from the ceiling! Crafty… From the front entrance head through a doorway to the north-east and search a food corral to find numerous Nuka Colas, a Nuka Cola Cherry and two Nuka Cola Quantums. Neat. Return to the entrance and go through a doorway to the north-west, turning south-west when you can to enter a small office, inside of which is a Terminal [Novice] which can be used to open a Safe [Advanced] and activate a Protectron.
Make your way over to a diner to the north-west and kill the Feral Ghouls playing possum inside, then loot a First Aid Box [Novice]. From the diner head north-east until you find a door to the north-west [Novice] which leads to the pharmacy. Before you head inside the pharmacy, however, check out the waiting area between the diner and the pharmacy and search a magazine rack along the north-western wall to find an issue of Tales of a Junktown Jerky Vendor . Nice. Head into the pharmacy where you can find a pair of Feral Ghouls and a dead Minuteman on a counter, near which is a Laser Musket, some Rad-X and some ammo. In an bathroom you can also find some ammo on the floor near an Ammo Box and a First Aid Box on the wall.
Leave the pharmacy and make your way south-east until you find a doorway to the north-east. Beyond this doorway is the employee-only part of the store, where most of the Feral Ghouls lurk. Head through the doorway and kill whatever Feral Ghouls show themselves, then turn down a hallway to the north-west - not the short, dead-end hallway, the longer one further to the north-east. As you go down this hallway loot a Wooden Crate [Novice] on a shelf, then continue north-west into a small room, where the dead body of a man named Josh lies in front of a Steamer Trunk. Loot Josh and the trunk nearby, then grab some Fusion Cells off the nearby desk before back-tracking to the south-east.
When you make it back to the first room you entered in the employee-only area, turn north-east and go through a doorway, which leads to a hallway running south-east. Follow it and, when it forks you can pick the locked door to the south-west. It merely leads back to the main shopping floor of Super-Duper Mart, but it’s still worth some XP. Continue south-east and when the hallway ends, go through a doorway to the south-west, wherein you can find a Terminal containing silly office banter, a wrongly-imprisoned Teddy Bear that cannot be freed, and a wall Safe [Expert].
Leave the office room and go through the doorway to the north-east, where you’ll face even more Feral Ghouls. Make your way north-west through a hole in the wall and search a wooden crate on a Cabinet to find a Nuka Cherry. Turn around (face east) to find some machinery, from which you can liberate another Fusion Core. If you head down some stairs to the north-west you’ll reach the back door to the Super-Duper Mart. Hooray! Time to leave this place behind.
Parking Garage
Time to press on and continue exploring Lexington. From the entrance to Super-Duper Mart head down a road to the north-west, then turn west to find a parking garage. Venture north into the Parking Garage until you find a doorway (beyond which are some stairs) and a door to the east, both of which lead to the subterranean part of the Parking Garage. It doesn’t matter which you go down, both have their advantages. There’s a mob of Ghouls down below, and if you go the stairs route, you can hack a Terminal [Novice] to activate a Protectron to draw their attention. If you go the door route, you can lure them to you and shoot some explosive barrels near a caged-in area, which should harm or kill the Feral Ghouls caught in the blast. Either way, once they’re dead, pick the locked door [Novice] to the caged-in area, beyond which you can find an Explosives Box and a First Aid Box.
Leave the Parking Garage and head south to find a blue building, which just so happens to be a diner. The diner itself isn’t very interesting, but if you head down some stairs you’ll find a door leading to Slocum Joe’s Basement. There’s no need to bother with this place yet, as it’s part of a quest that has yet to be discovered. South-east of this diner you can find an abandoned Laundromat, which, aside from a First Aid Box in the back office and an Overdue Book on a table, isn’t very interesting. Oh well.
Corvega Assembly Plant
From the Laundromat, make your way west past a Red Rocket gas station, then turn south and follow the road under an overpass. Finally, the humongous industrial building before you is the Corvega Assembly Plant, and as one might expect, it’s crawling with Raiders. If you made it through Lexington, you’re more than capable of taking out the Raiders here. That’s not to say they’re not dangerous in their numbers. For example, outside the entrance along the front of the Corvega Plant you’ll find several Raiders and a Machinegun Turret MK I. Nothing too serious, but on the roof of the plant there are many, many more, and they have no concern for ammo and are more than willing to throw a seemingly infinite supply of Molotov Cocktails down on you. Either counter-snipe them with a long-range weapon, or just retreat away from the front of the building until they lose you.
Once the initial group of Raiders is dead, sneak over to the entrance, or rather, past the entrance. Continue east to find a road going uphill to the south, along which several more Raiders lurk, both on the road and on the elevated structures nearby. These Raiders favor Fragmentation Grenades, so be careful. Clear out the Raiders east of the road, first, as they tend to be closer, then jump onto a concrete roof east of the road and head up some metal stairs where you’ll find more Raiders on the metal structures. Ascend the scaffolding, ever making your way up to the western end of the factory until you see a large blue metal globe. Follow some scaffolding around this globe until it terminates, where you’ll find a Tool Case and the Repair Bobblehead on a wooden crate. Excellent.
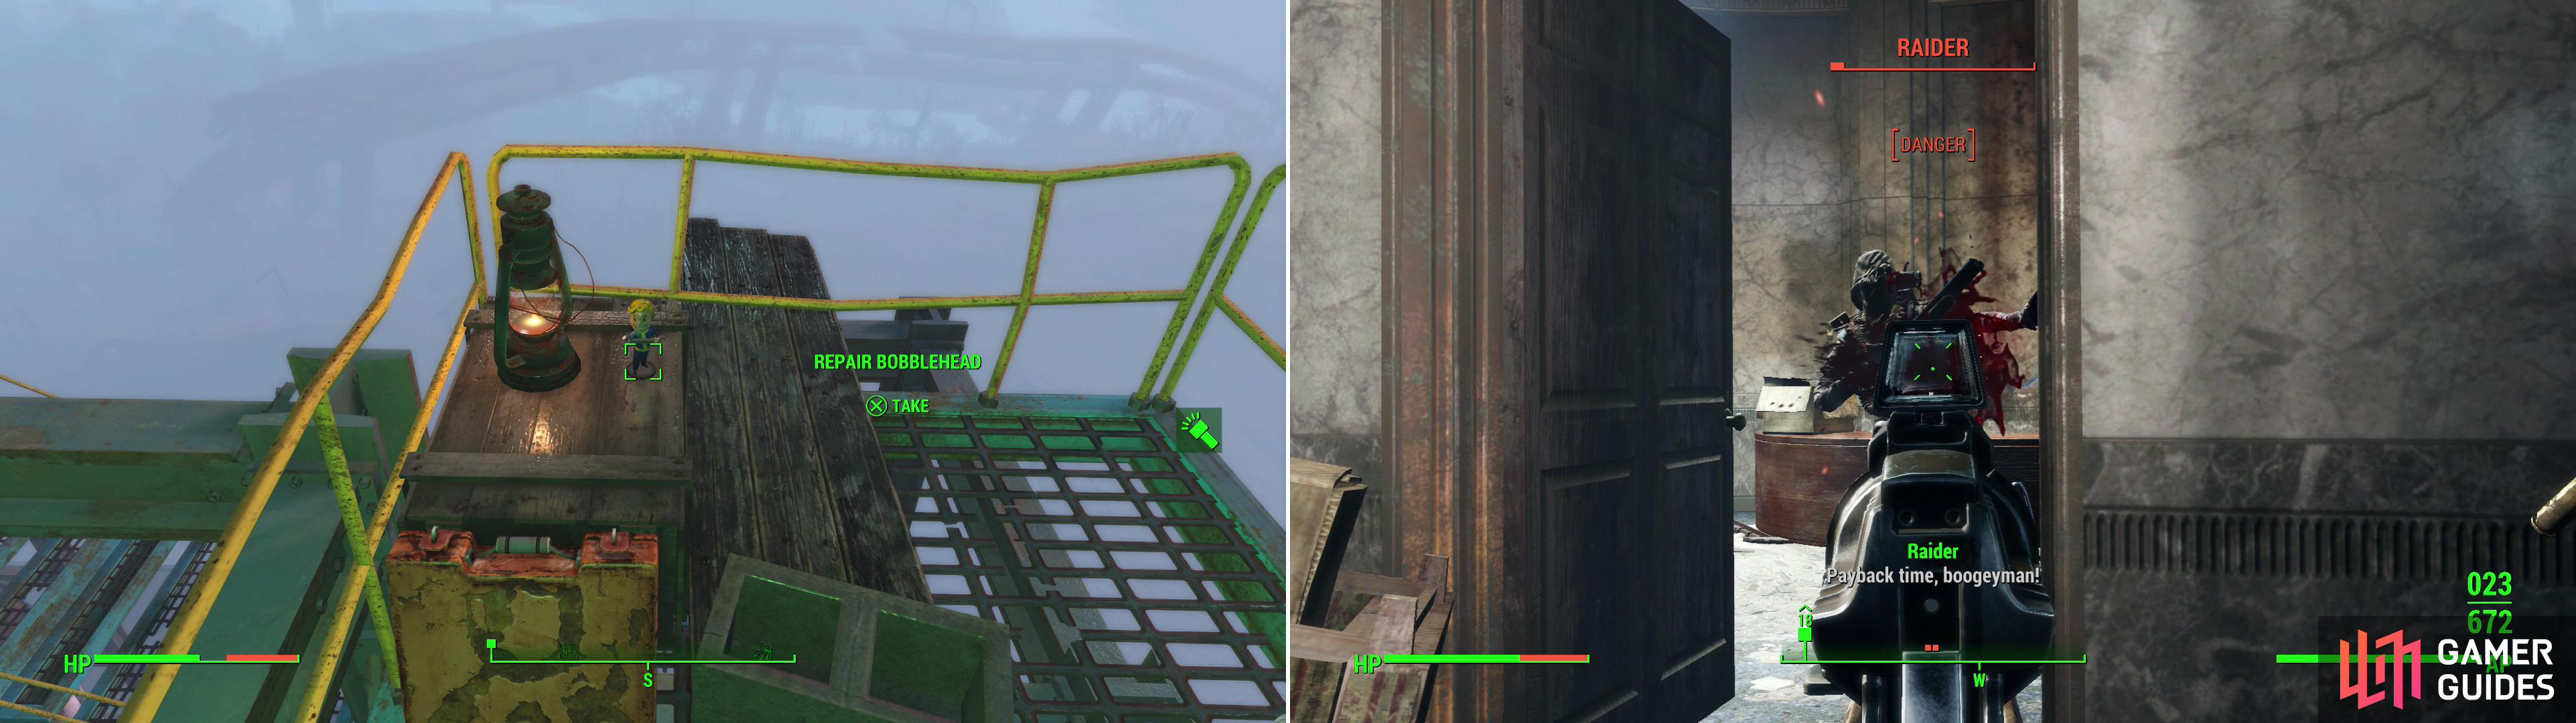
Ascend to the metal walkways above the Corvega Assembly Plant to find the Repair Bobblehead (left). Of course, there’s a horde of Raider around and within you’ll have to deal with to get there (right).
Return to the front of the plant and head into the front entrance, past the Machinegun Turret MK I. In the lobby you’ll probably come across a Raider who lurks around nearby. Disarm a Tripwire near the front desk, then disable a Makeshift Bomb on the wall near a Nuka Cola Vending Machine. Speaking of which, there’s a Nuka Cola Quantum on the floor next to the vending machine. Continue through a door to the south, then head into an office to the west, killing Raiders as you go. Make your way through a hole in the wall to the south, head into a hallway to the north and go through a doorway to the east, then head down some stairs and kill any Raiders around here. If you head up some stairs (or up an elevator near the stairs) to the east, you can reach your goal here… but why not explore the rest of the plant, first?
First, continue down a hallway to the north and kill any Raiders in this large - if cluttered - room. Make your way west from the doors and go up a ramp to the south to reach a small office room. Here you can use that Corvega Storage Key you obtained from Gristle, one of the Raiders you killed in Concord. Open a Security Gate with said key and loot a Duffle Bag, three Ammo Boxes and an Explosives Box [Novice]. To the north you can also find Gristle’s Terminal, which really doesn’t do much save talk about the attack on Concord.
Leave the office room and head up some stairs to the north (stopping long enough to loot a Toolbox [Novice]) and follow a metal walkway to the west to reach another large chamber occupied by Raiders. Follow the walkway until it wraps around and terminates, then search a table to find a Wooden Crate and a Tool Case [Novice]. Once you’ve obtained that loot, head down some stairs to find some assembly lines, where you can grab some junk that can be broken down for steel if for some reason you need such a common material. Head north behind the stairs to find a shelter, where you can find a Bottle Cap Mine and a Chem Box.
Return to the first chamber you entered to the east (the one with the office that houses Gristle’s Terminal adjacent to it). From the doorway that leads back into the hallway head north up another pair of stairs and go through a doorway to the east. Make your way down some stairs and kill another group of Raiders then head east through a doorway to reach a hallway. Make your way south to find a T-junction, at which turn east and go down some stairs, then follow a curving hallway which ends in a watery chamber. Watch a Machinegun Turret MK I mow down some Feral Ghouls, then destroy the turret. Enter a small shelter to the north-east and kill a Raider guarding it, then loot a Toolbox, a Chem Box and an Ammo Box [Novice] before turning your attention to Lonnie’s Terminal on the wall, which details the Raider’s struggles with Ghouls in Lexington. You can enter the pipe and follow it, but all it does it take you back to Lexington.
Instead, backtrack south down the curving hallway and when you return to the T-intersection again, explore the western path, which leads to a door to the south. Enter the large chamber beyond and kill a group of Raiders and their Machinegun Turret MK I along with a pair of Feral Ghouls lying in ambush, then make your way out of this room by heading through a door to the west. Head up some stairs and you’ll find that you’ve now looped around back to the other end of the hallway where this little diversion began.
No sense putting it off anymore, time to hunt down the leader of these Raiders; Jared. Either climb some stairs or go up an elevator to reach the large chamber Jared occupies. He’s got some Raider backup, searchlights and turrets, but you can easily sneak up near him, or just snipe him from a distance with a long-range weapon. You can also activate a Protectron to draw some attention, if you want to go that route.
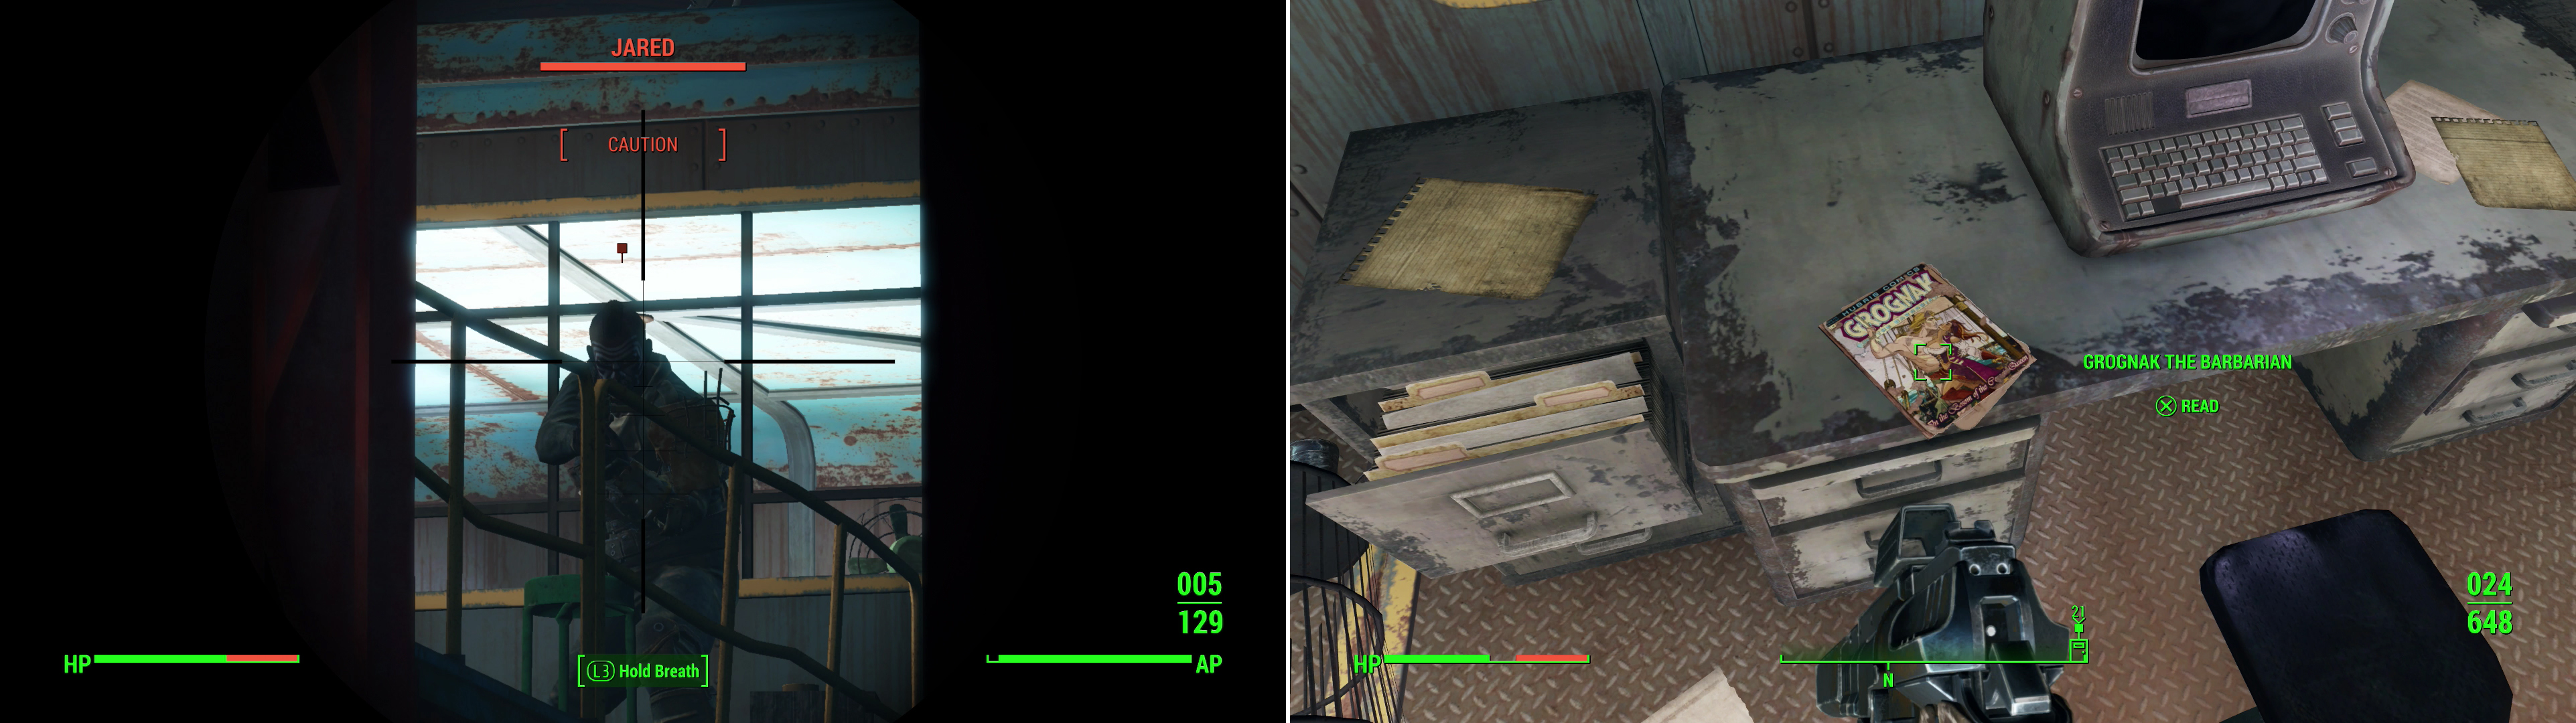
Put a bullet (or several) in the leader of the Corvega Raiders - Jared - to put the good poeple at Tenpines Bluff at east (left). In the offices Jared occupied you’ll find a copy of Grognak the Barbarian (right).
When you get past the defenses, head up some stairs to the south and press a button to extend a bridge. Cross the bridge to the west and pass through a small office room to find where Jared was and presumably his body, which you can loot for the Corvega Safe Key. Next turn your attention to the room to the west to find a Steamer Trunk and a copy of Grognak the Barbarian on a table. Score. You can also mess around with Jared’s Terminal, if you care what he had to say. You can also turn off the spotlights and disable the turrets, if any are still operational. In any event, a few more Raiders will show up to investigate once you start snooping around in this room. Kill them, then leap off the metal scaffolding and head beneath to find a piece of wood with the words “Keep Out” painted on it. Behind those boards is a Safe [Advanced], which can be opened with Jared’s Corvega Safe Key. All you need to do now is exit the factory and report back to Tenpines Bluff. If you leave via the door in the large chamber where you fought Jared, you can reach a chained door on the roof, which you can unchain.


Talk to the Settler who gave you the quest to tell them the good news. In return, the settlers here will decide to join the Minutemen. Hooray! You’ll also be able to manipulate the Tenpines Bluff Settlement, which , aside from the stupid ruined house to the north that you can’t break down, is a pretty nice spot for a farming settlement. All in all, though, your reward is underwhelming. Being a Minuteman sure doesn’t pay… Speaking of which, return to Preston in Sanctuary to get a proper quest reward, after which he’ll tell you about the dissolution of the Minutemen. Given your success where Preston has consistently failed, he’ll nominate you as the new leader - the General - of the Minutemen. Afterwards he’ll tell you about more settlements that need your aid, randomly starting a quest to claim some settlements - since you already cleared the Starlight Drive-In, he should direct you to two of the following three quests: investigating Graygarden (starting the quest “Troubled Waters” ), the Sunshine Co-op (start the quest “Taking Point: Sunshine Tidings Co-op” and/or Finch Farm (starting the quest “Out of the Fire” ). These are radiant quests, and once you clear one, you’ll be able to proceed with the Minutemen main questline. Since they’re radiant quests, they’ll be cleared out based on geography, and not necessarily in a straight shot to complete or continue the questline.
| Objective | Reward |
|---|---|
| For helping the settlers at Tenpines Bluff | 93 Caps |
| For returning to Preston | 345 XP Flare Gun Flare x10 |


 Sign up
No Comments