| Attack/s | Description |
|---|---|
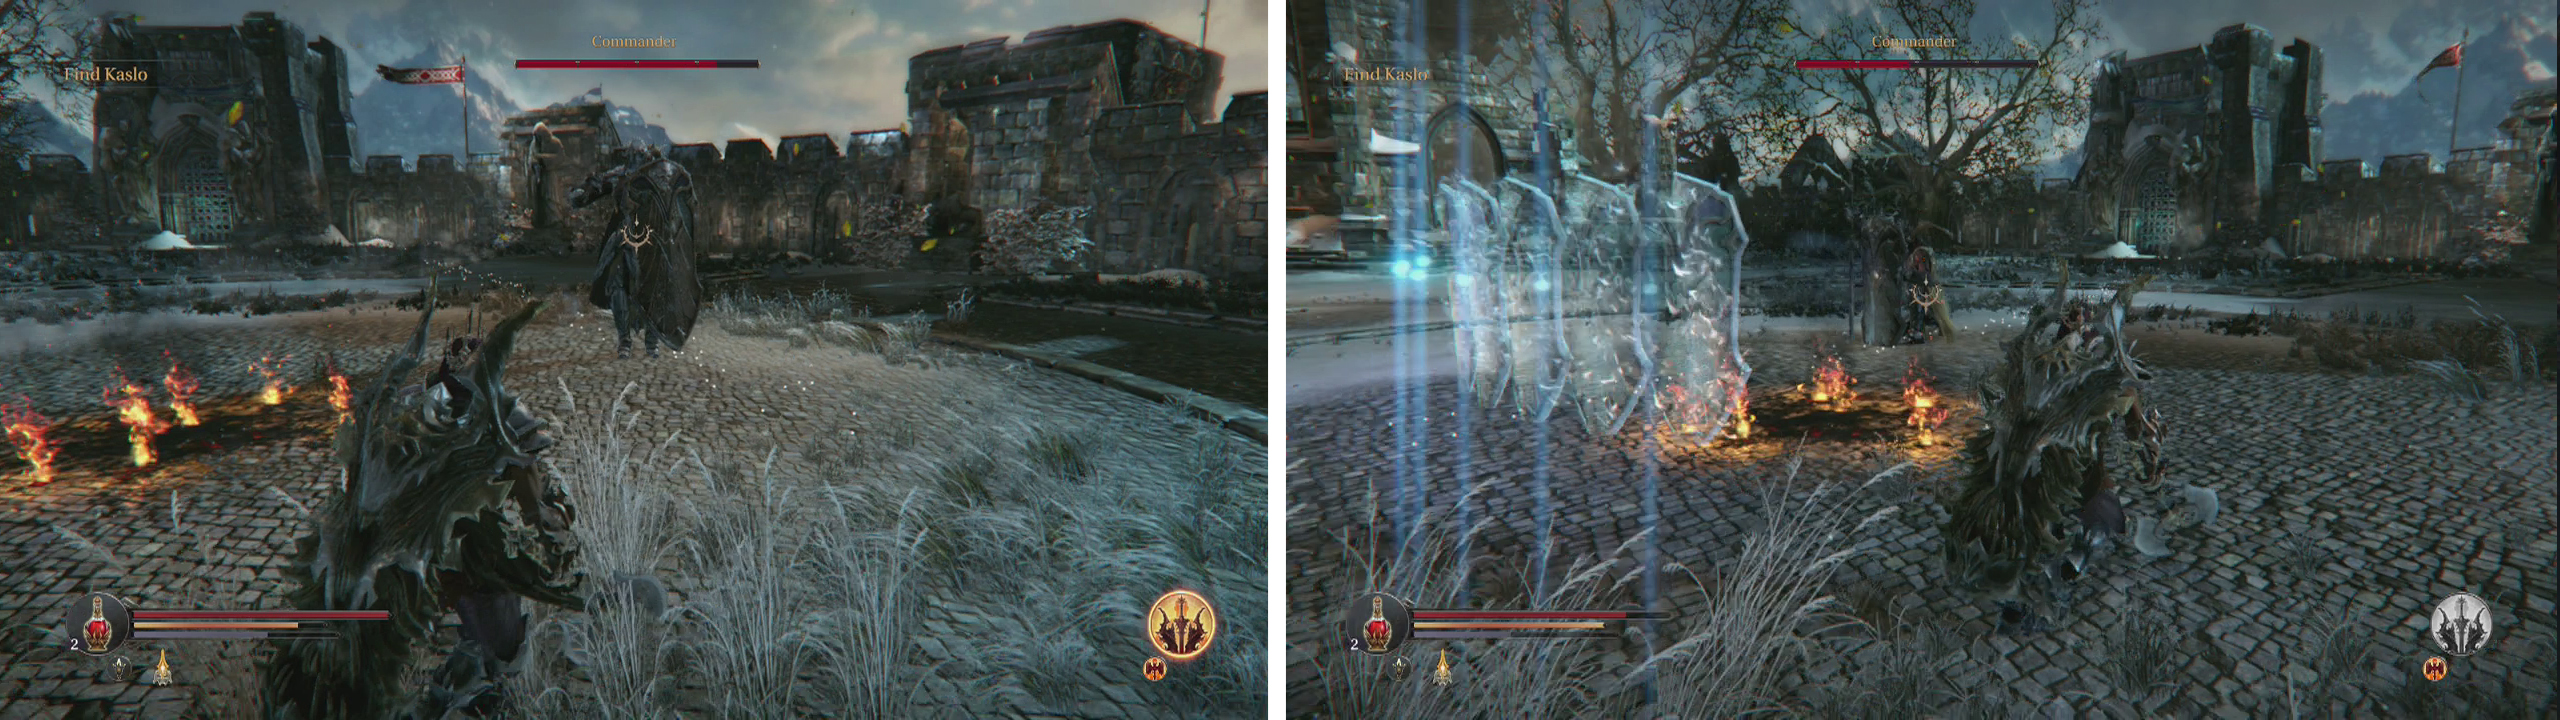
| Melee Swings | The boss can perform between a 1 and 2 hit combo depending on your proximity to him. You will need to dodge or block to avoid the successive swings. |
| Shield Slam | The Commander will slam his shield into the ground, stunning you if you are too close. Towards the end of the fight, this slam attack will also cause energy swords to fall from the sky randomly around the boss which you will need to avoid. |
| Melee Waves | The boss will perform a pair of melee attacks at a distance that will fire out a wave of energy. You will need to dodge both. |
| Charge | The boss will charge at you and either perform a shield bash to stun you or perform a follow up with a two hit melee attack combo. |
| Projectiles | The boss will kneel and shoot a spread of energy shields in an arc out in front of him. |
| Summon | The boss will stop and point at the ground nearby before encasing himself in an impenetrable shield wall. This will summon enemies and depending on the stage of the fight you are at, the types of enemies will differ. |
| Shield Wall | After summoning enemies, the boss will fire off energy shields from his shield wall in all directions in an attempt to hit you. |
Combat Strategy:
As with the First Warden, the Commander’s health bar is divided into four sections, breaking each into roughly 25% of the boss’s total health pool. Reducing the health bar by 25% to each marker will see the boss progressively change tactics. As with the first boss, the strategy to defeating the Commander is to be patient and wait for an opportunity to attack.
Due to his shield, the Commander cannot be tackled head on (left). The boss’s projectile attack leaves him open for attack (right).
For the most part, you want to try and stay close to the boss to limit the attacks that he uses. If you find the sweet spot, you can sit just outside his melee range and he will continue to use the 3 hit combo to attack whilst switching up occasionally to shield slam or summon enemies. Stay at this range and pepper him with your gauntlet attack. Just after shield slam and the 2-3 seconds the boss takes to summon enemies are your best time to attack. Get a good 2-3 hits in on him before quickly backing off to avoid taking damage.
When he does summon enemies, it is imperative that you take them down as soon as possible - you really do not want to have to take on the boss and his subordinates at the same time! When the boss is above 75% health, he will summon a single Marauder, between 50-75% health he will summon a Rogue and when his health drops below 50% he will summon both a Rogue and a Marauder. When below 50%, take out the Rogue as quickly as possible before focusing on the Marauder.
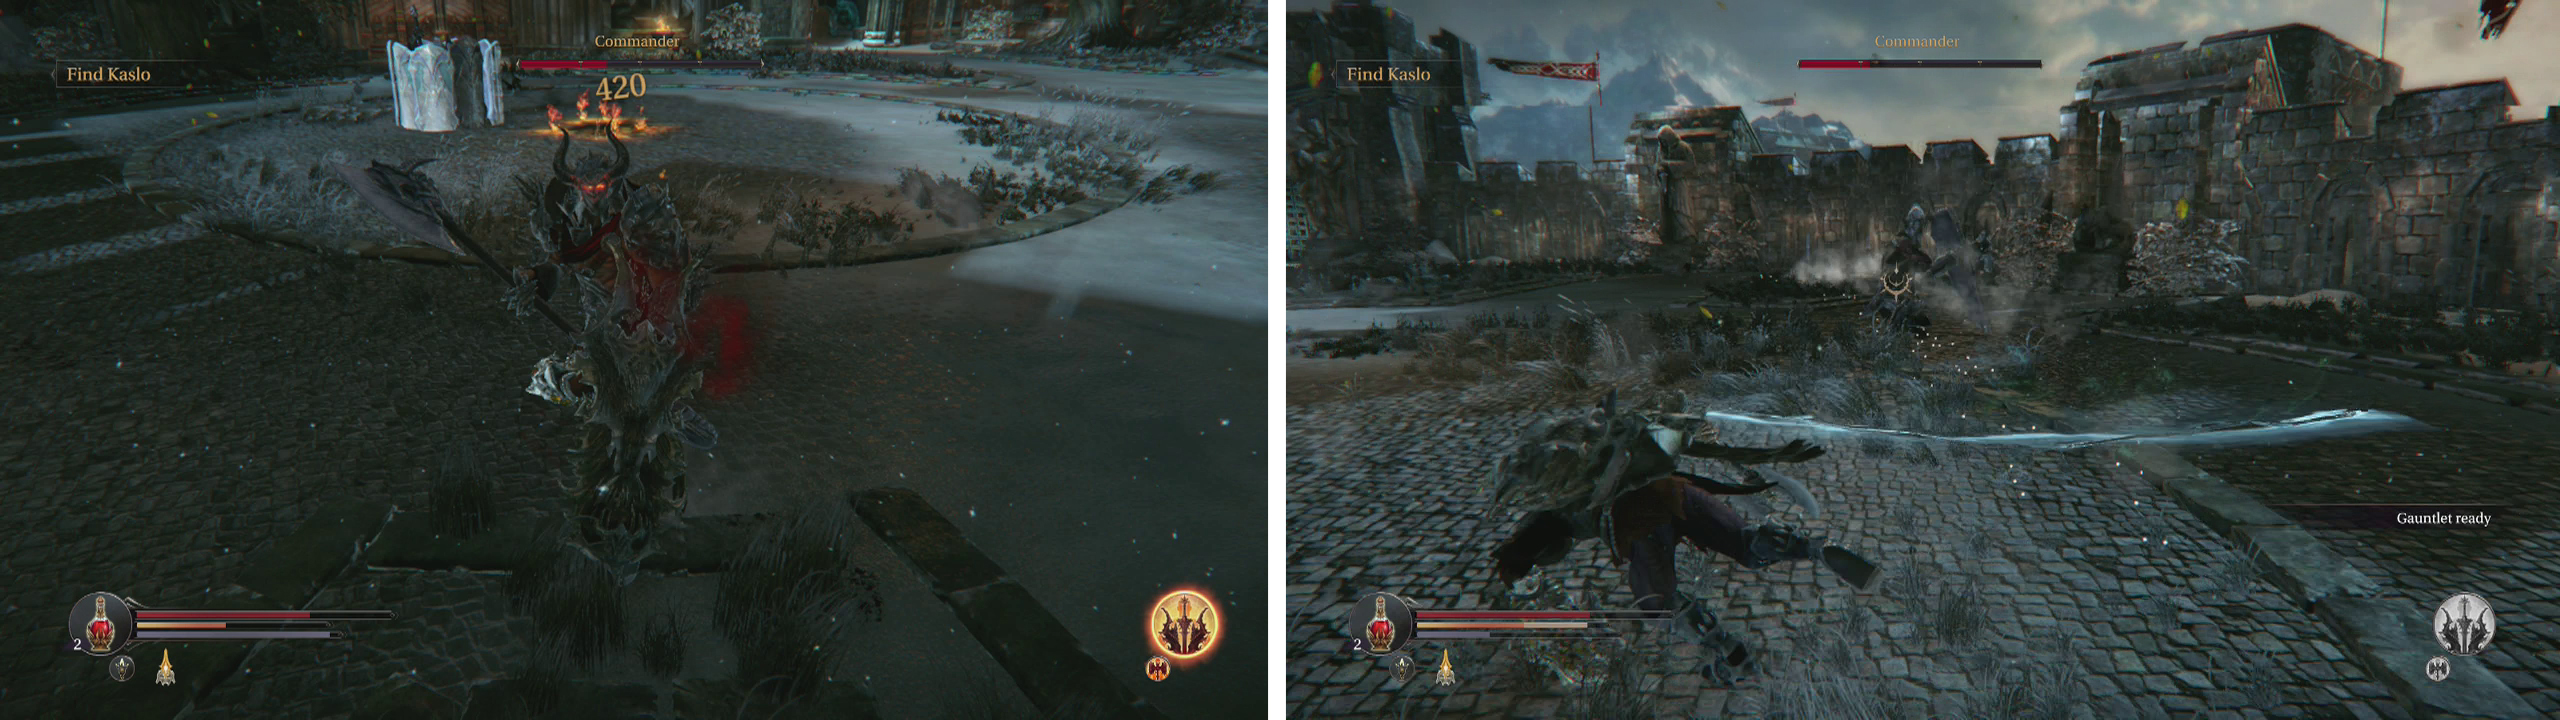
Try to get his summons down as quickly as possible (left). Make sure you roll twice to avoid the projectile blade slashes (right).
When the boss is reduced to 50% health, his shield slam move will begin to start dropping energy swords from the sky, limiting your ability to exploit the down time after the attack. At this point, you will need to be quick and try to dodge the falling blades and get a single attack (don’t get greedy!) in on him before he recovers. You can still pound him when he summons enemies however, so keep doing this until the scene plays to end the fight.


After the fight, loot the boss for Sealed Rune (Big) , a Shield (Tower - Commander Shield) and a Weapon (Fist - Arrowhead) . If you put the Shard of Heroes in a statue, head over to the statue the boss destroyed to loot your new Weapon ( Dagger - Revenge / Sword - Warrior / Hammer - Cleric ).
To continue, head through the large archway opposite the entry to the area and climb the stairs for a cut-scene.
No Comments