| Attack | Description |
|---|---|
| Melee Swings | The boss can perform between a 1 and 4 hit combo depending on your proximity to him. You will need to dodge or block to avoid the successive swings. |
| Overhead Slam | The Warden will peform a downward slashing attack that will do significant damage if it hits. The attack will also send out a shockwave and temporarily stun you if you are hit by it. |
| Charge | The boss will charge at you and either perform a shield bash to stun you or perform a follow up with a two hit melee attack combo. |
| Whirlwind | The boss will spin in circles with his weapon out. |
Combat Strategy:
If you look at the boss’s health bar you will notice that it is divided into four sections. Reducing the health bar by 25% to each marker will see the boss progressively shed pieces of armour. This will slightly increase his movement and attack speed. The key to defeating the boss easily is to be patient and wait for an opportunity to attack.
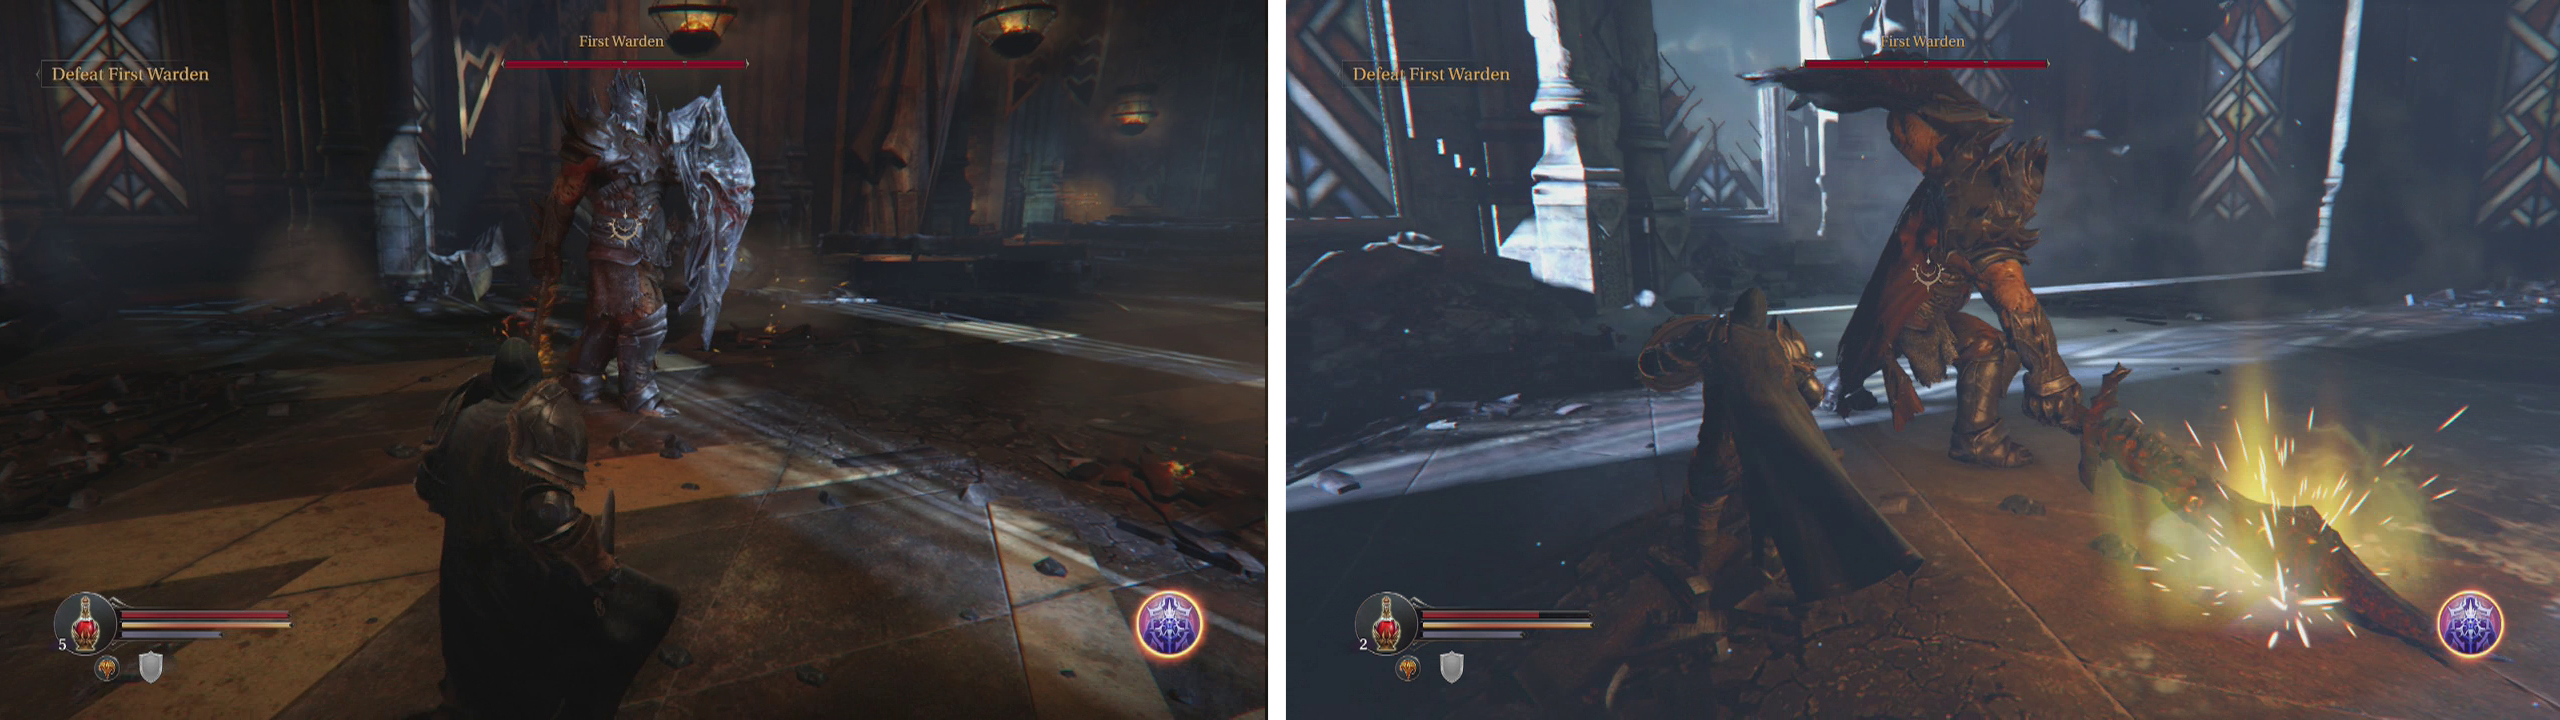
The boss starts out with armour and a shield (left) but will shed them as the fight goes on. The biggest opening for an attack is right after his overhead smash (right).
For the first 3/4 of the fight, lock on to the boss and stay just outside of his melee range whilst dodging or blocking when he gets too close. Unfortunately, just about all of his attacks leave only a very small window of opportunity to actually land a blow on him. The one exception is his overhead smash attack - when he does this, he will be immobilised for a second or two, so be sure to avoid it (and the shockwave) before running in and hitting the boss once or twice before retreating.
When the boss is reduced to 25% health, he will ditch the shield and pretty much exclusively use his whirlwind attack for the rest of the fight. At this point, you will need to keep back-pedaling away from him until he stops (he usually does nine rotations, so be sure to keep count!), then quickly run in, tap him once or twice with your weapon and then run away again. Keep doing this until the scene plays to end the fight.


Once the Warden is dead, loot the item he dropped for a Sealed Rune (Big) and a new Weapon (Greatsword – Persistance) . We can also go and investigate the red Checkpoint Crystal that has appeared in the middle of the room. The game will give you a brief primer on its various uses and how to go about using it.
At this point we can save the game and upgrade Harkyn by banking experience. You should be able to purchase 3 attribute points, so invest them in whatever you feel necessary (Although Faith is always a good bet). When you are done with the Checkpoint Crystal , head out the other door.

No Comments