
Crimson Desert Preview

Pros
- Satisfying combat mechanics
- Every boss feels like an event
- Requires different tactics for every encounter
- The game is a real looker
Cons
- Controls can take a lot to get used to
- Can be very challenging
- Would like a hard lock-on
Crimson Desert has been in development for a long time and it was first shown off to the world in December 2020 at The Game Awards. What initially started life as a sequel to Pearl Abyss’s highly successful Black Desert Online was soon shifted to a single-player open-world adventure game, and the few trailers that have followed since have done nothing but fuel our excitement about it.
If you’ve played Black Desert Online, you’ll know that the expertly crafted combat system plays a large role in it, so when Gamer Guides were invited to take part in an exclusive hands-on session with the combat system against some of the game’s bosses, I couldn’t have been more excited.
We took up our sword and shield with Kliff, readied our bow, and set off to defeat some challenging bosses.
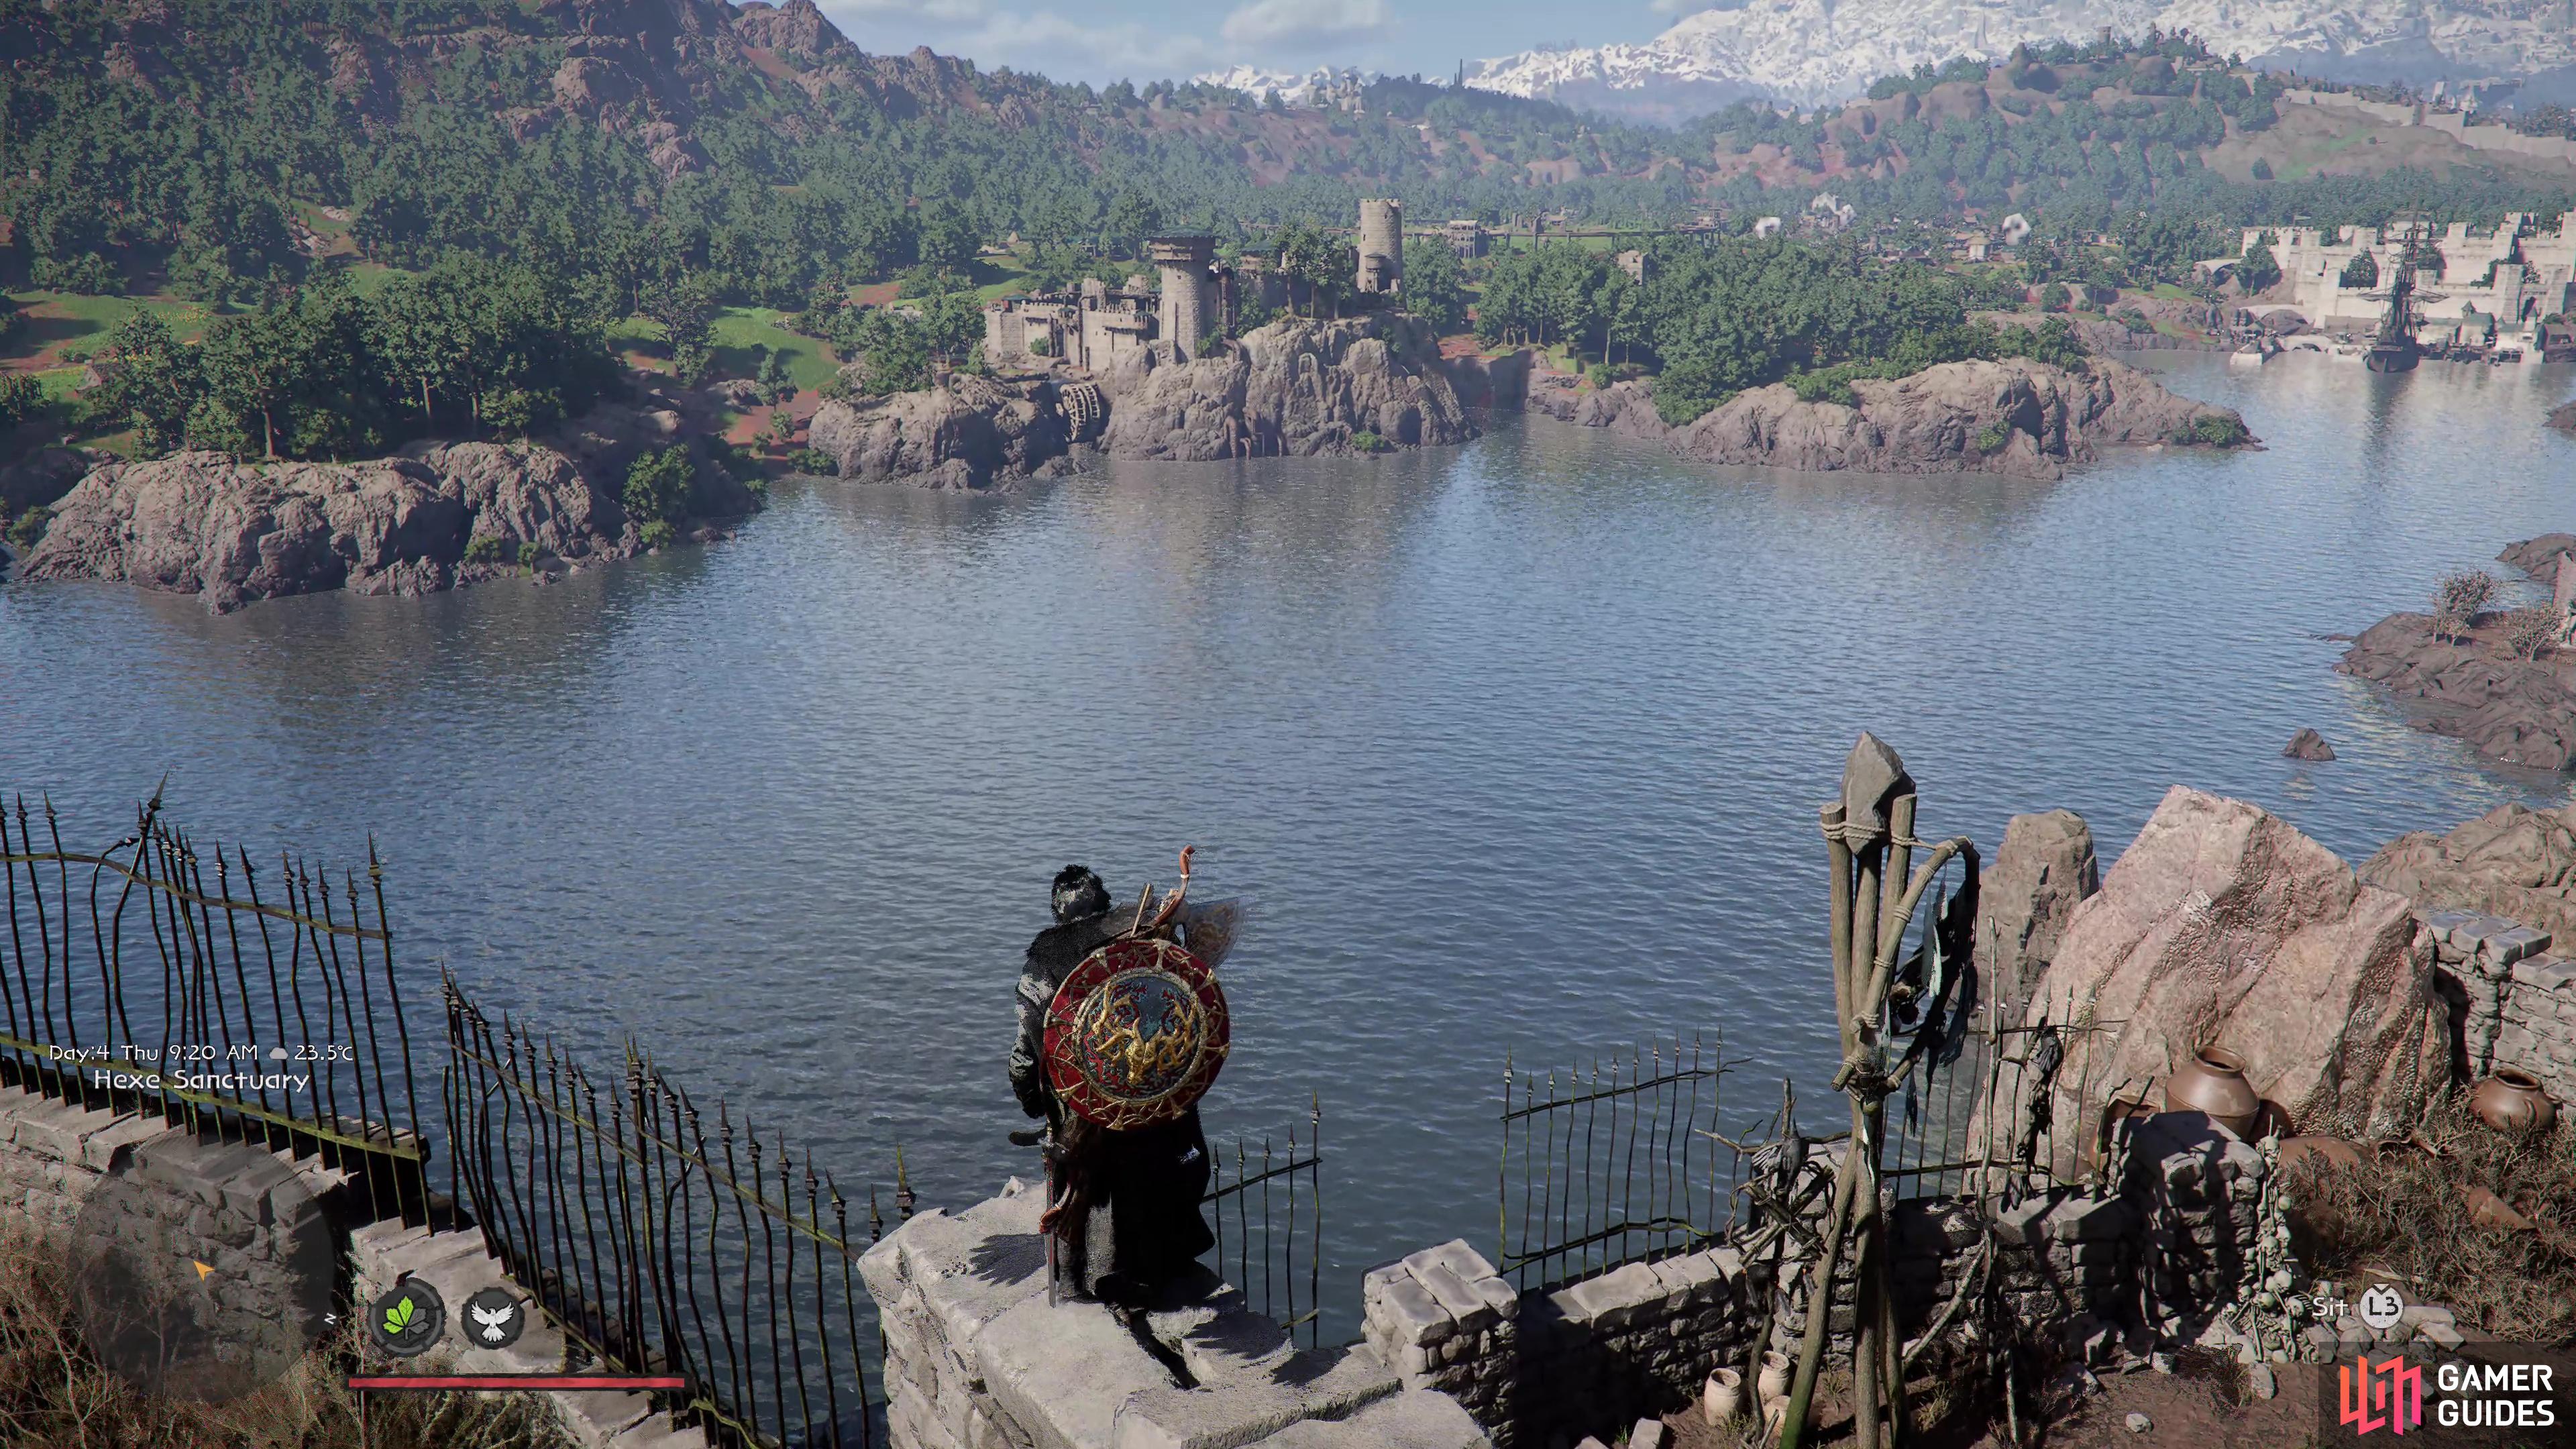
Crimson Desert’s world promises to be a beautiful one.
Arming Kliff
The focus of our hands-on was purely on Crimson Desert’s exhilarating combat system against four tricky bosses, all of which had unique mechanics and varying degrees of difficulty, while controlling the main protagonist Kliff, a Greymane warrior armed with a sword, shield, and a bow. After a short intro sequence where I learned some of the basics, I was whisked off to four Abyss Gates that would take me to the sections of Crimson Desert that featured these encounters.
Crimson Desert is a true action RPG, there are no skills to assign to a shortcut that you then use in battle, instead, you’ll have to use a combination of buttons to perform specific skills, such as one combination of face buttons pressed together allowing us to perform a grapple, another unleashing a flurry of slashes, and so forth. This means you’ll need to be precise with how you attack your foe and look for openings, rather than trying to blindly slash away at them, as the bosses don’t give you a lot of time to breathe.
…there are no skills to assign to a shortcut that you then use in battle, instead, you’ll have to use a combination of buttons to perform specific skills.
Kliff’s bow plays a large role in combat too, you can access it at any time by using the left trigger button, and there’s a variety of arrows you can switch to using a quick swap wheel. I was a big fan of the explosive arrows especially, and using a combination of perfect dodges and leaps into the air allowed me to slow down time while getting shots off in the heat of combat.
Likewise, you’ll really need to think about your defense in combat, that shield is not just for show. You can perform a simple block, a parry, and even use your blade to temporarily blind a nearby foe, allowing you to follow up with a deadly attack of your own. Outside of this, you can dodge roll, which is the technique I used the most during my hands-on, creating distance and allowing me to get some strikes in from behind. Just be aware that your stamina will suffer if you rely on it too much!
An Imposing Challenge
Let’s get to the meat of our time with the hands-on, and that’s the four bosses we had access to. Each was a varying degree of difficulty, and of course, being thrown into the deep end meant things were always going to be more challenging than they may be when you reach them naturally.
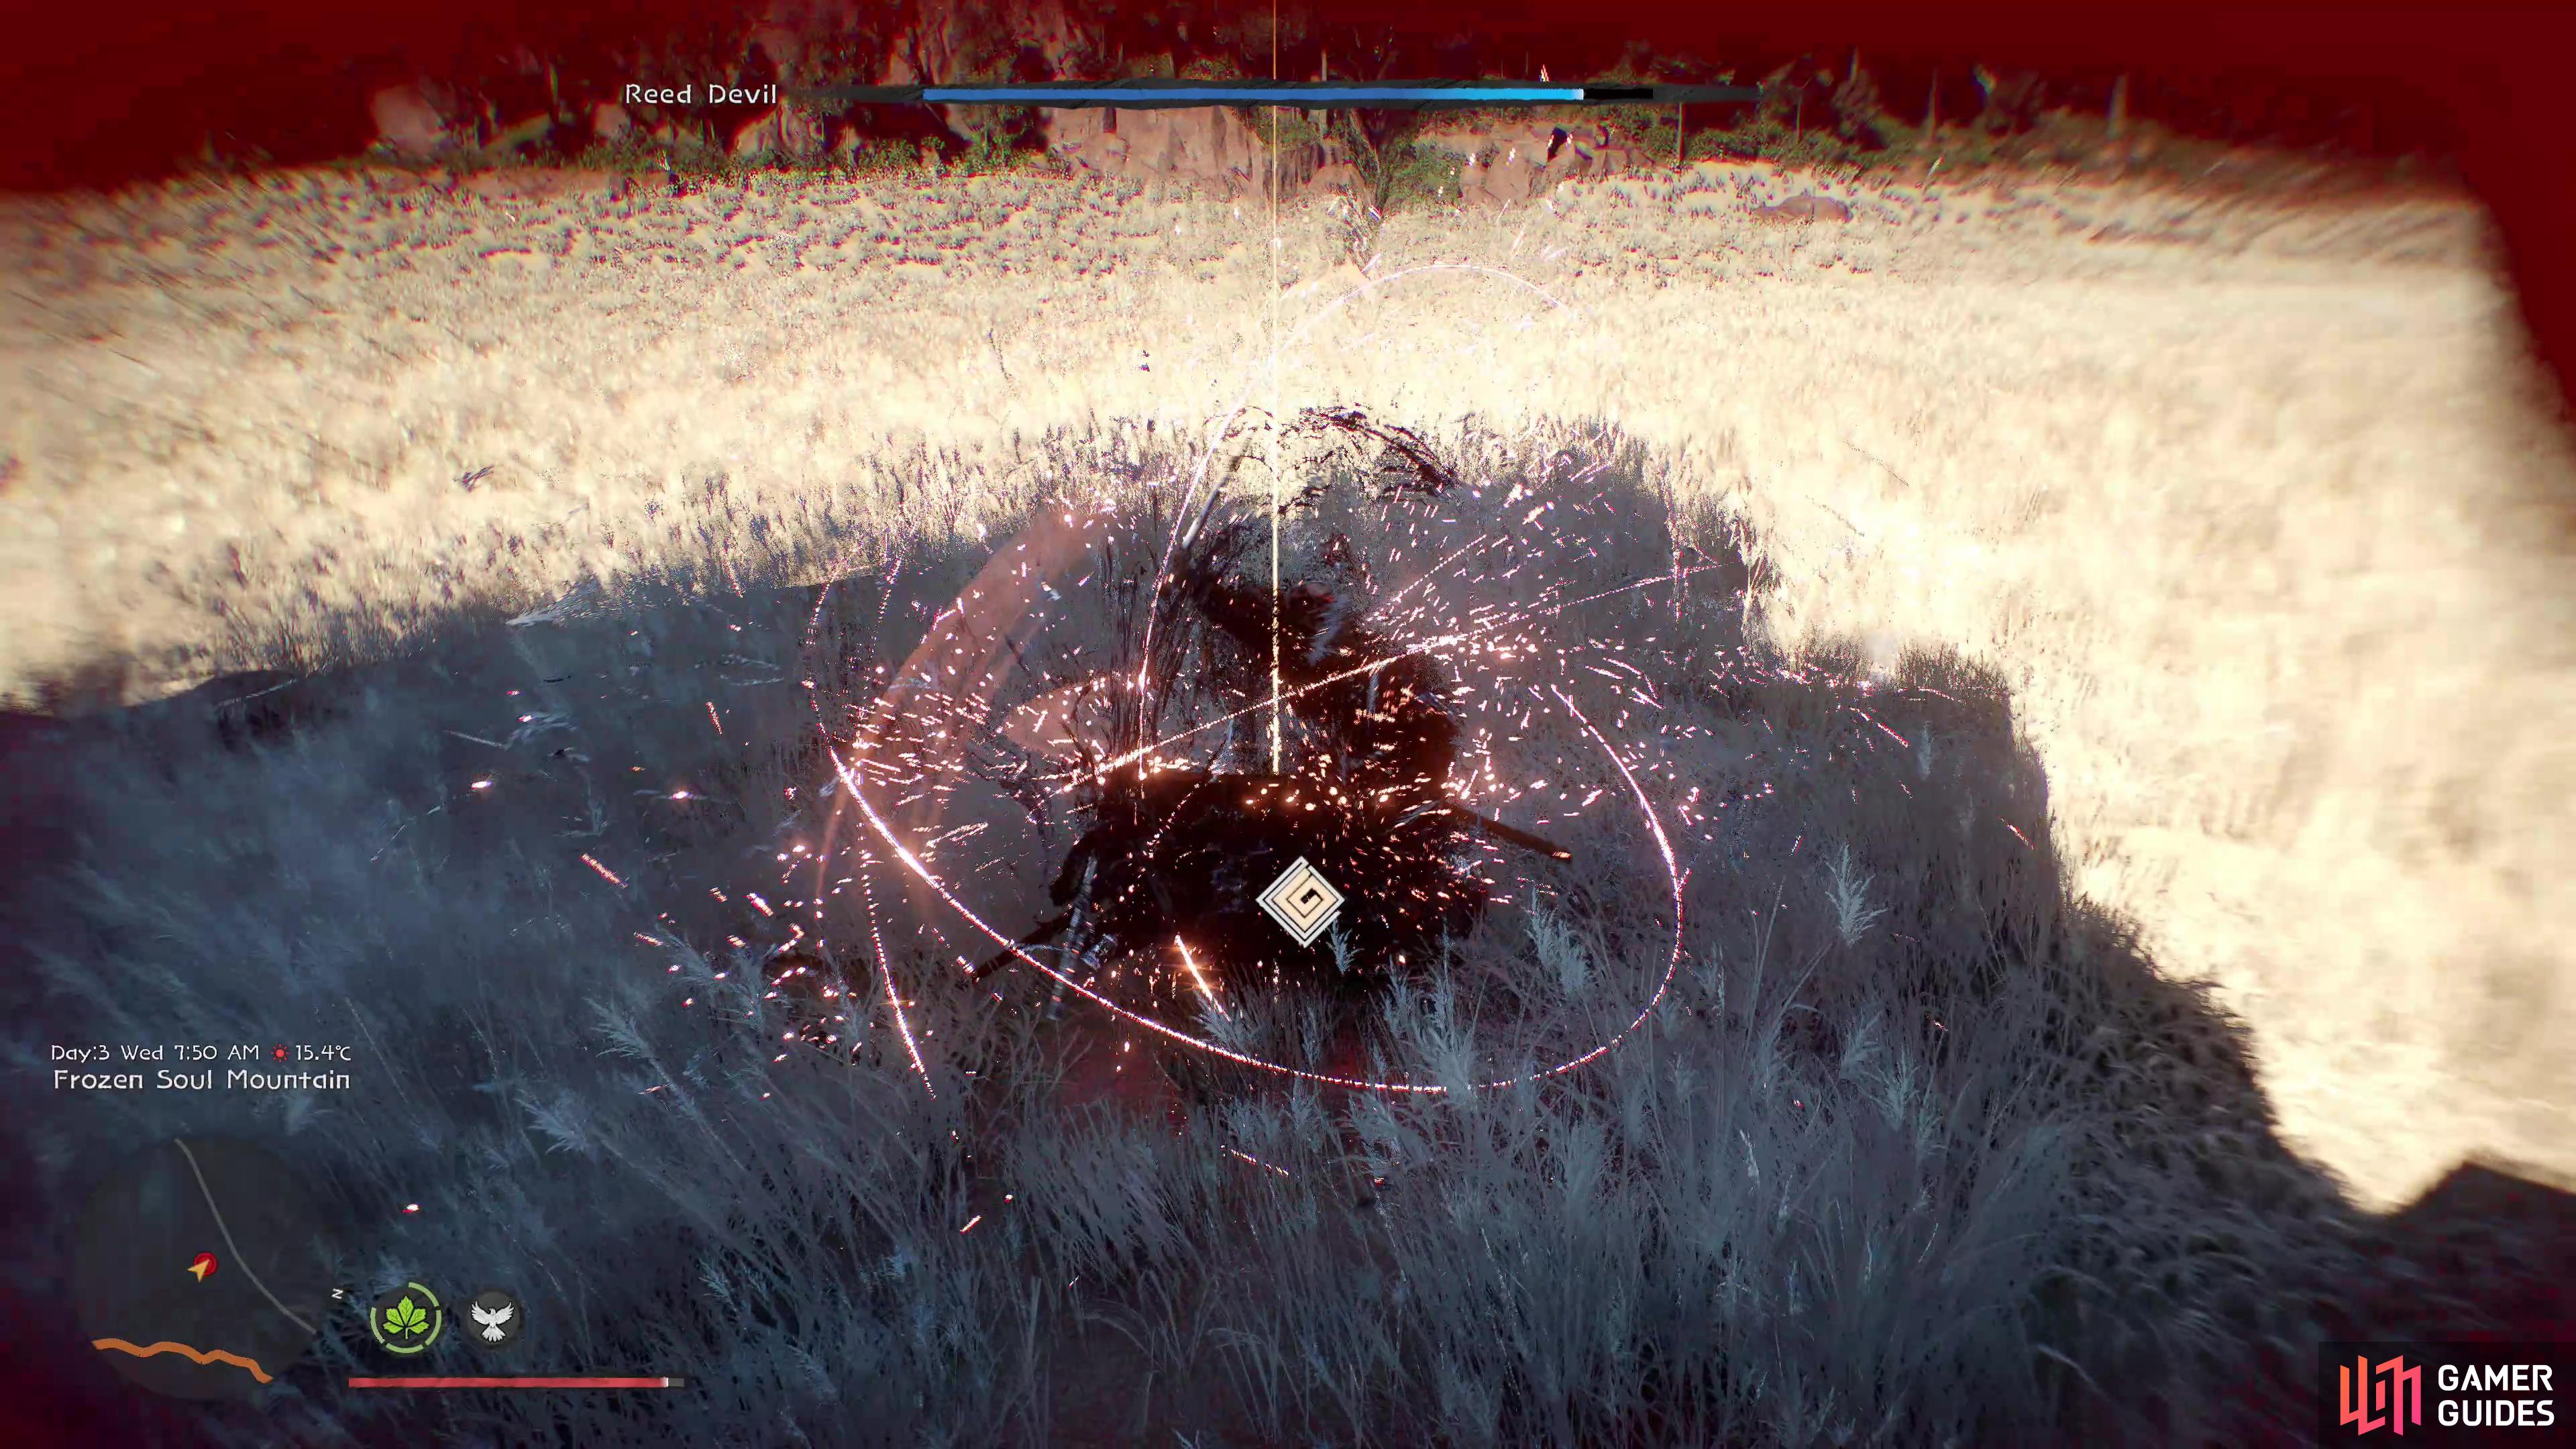
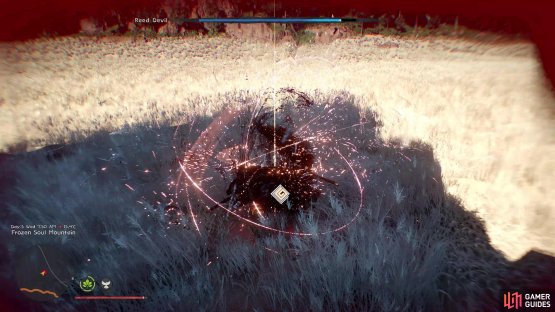

(1 of 2) The Reed Devil was agile and used quick strikes to attack Kliff.
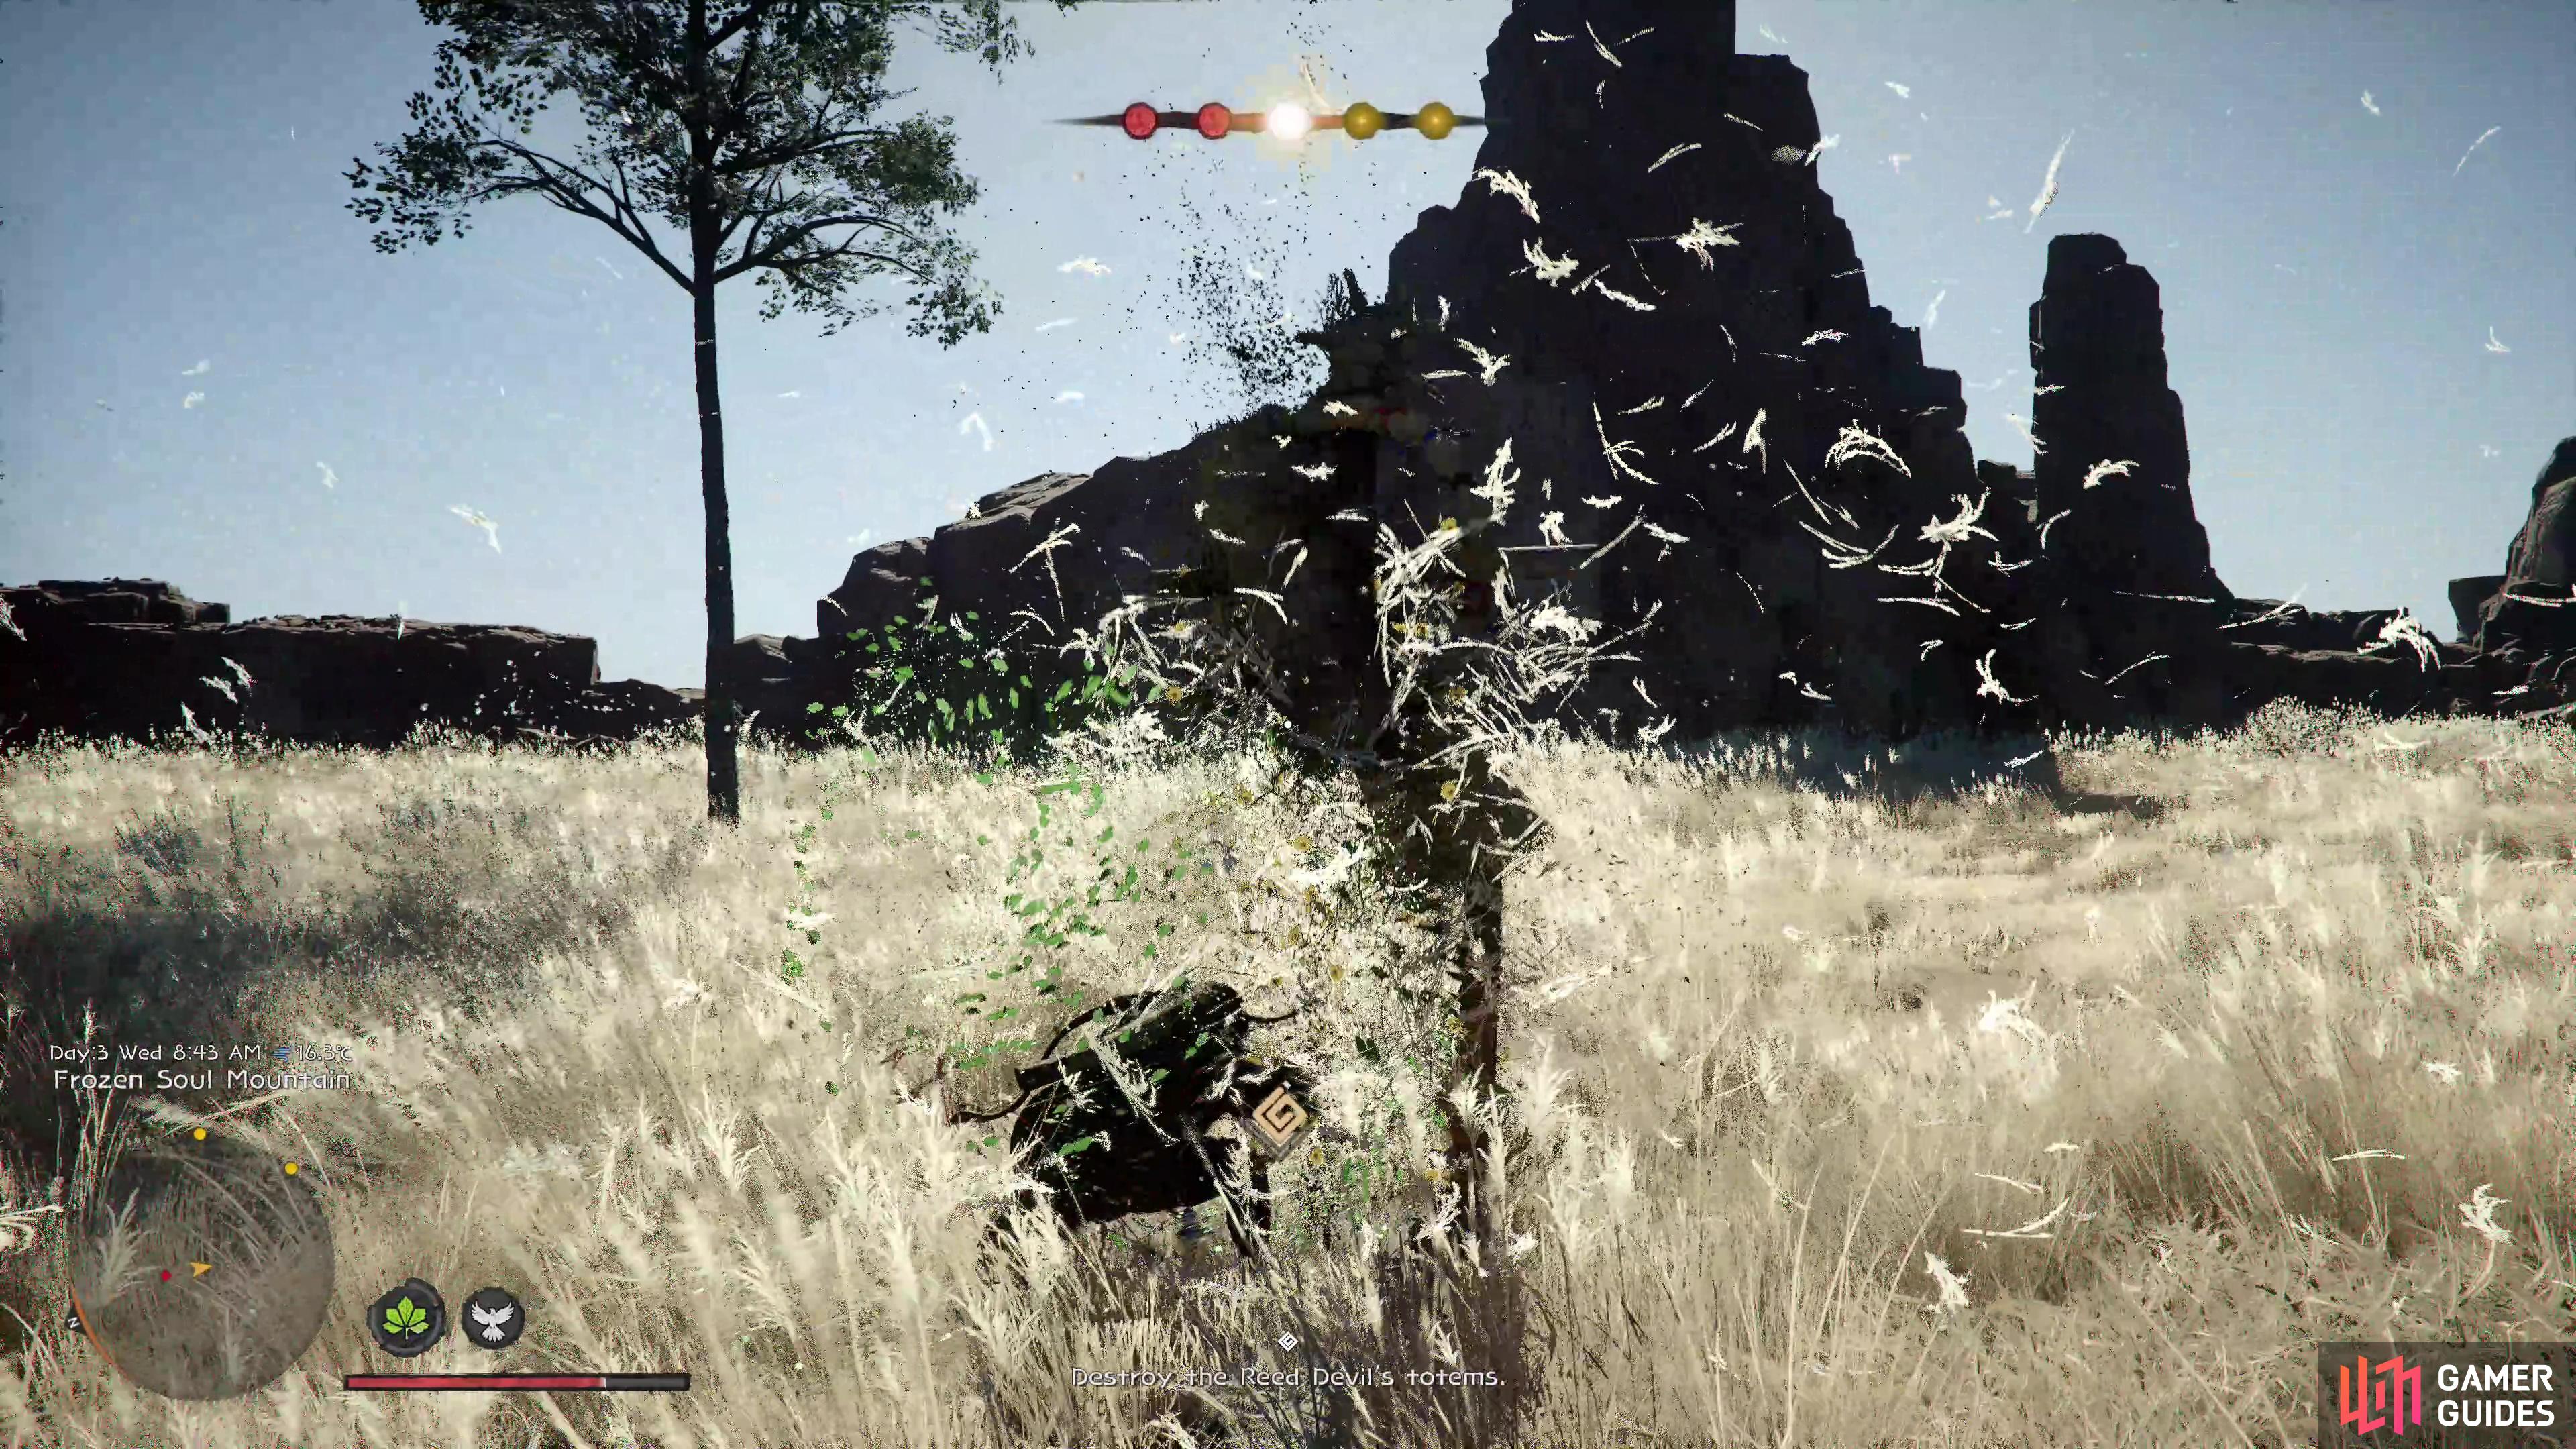
The Reed Devil was agile and used quick strikes to attack Kliff. (left), The second phase against the Reed Devil forced me to destroy totems that he summoned. (right)
The first one we took on was the Reed Devil, a swordsman who we fought, unsurprisingly, in a reed field. After still getting to grips with the combat system and the controls, this was certainly a challenging encounter, as he attacks with quick flurries and moves through the reeds at an almost lightning pace. I quickly learned that going in close without timing my dodges or blocks was suicide. Still, even at range, the Reed Devil had attacks such as being able to toss daggers at me, meaning there’s hardly a moment to get your bearings.
Like with all of the bosses in Crimson Desert, depleting the first HP gauge is just beginning, in all of the encounters we had during our session, there were multiple phases. The Reed Devil, for example, spawned multiple totems that made him invulnerable during the second phase. The goal, then, was to destroy these (explosive arrows worked a charm here) and then force him into a third and final phase, where his attacks became deadlier. It was a battle that had me on the edge of my seat the entire way through and as my first impression of the bosses in Crimson Desert, it’s safe to say I was impressed.
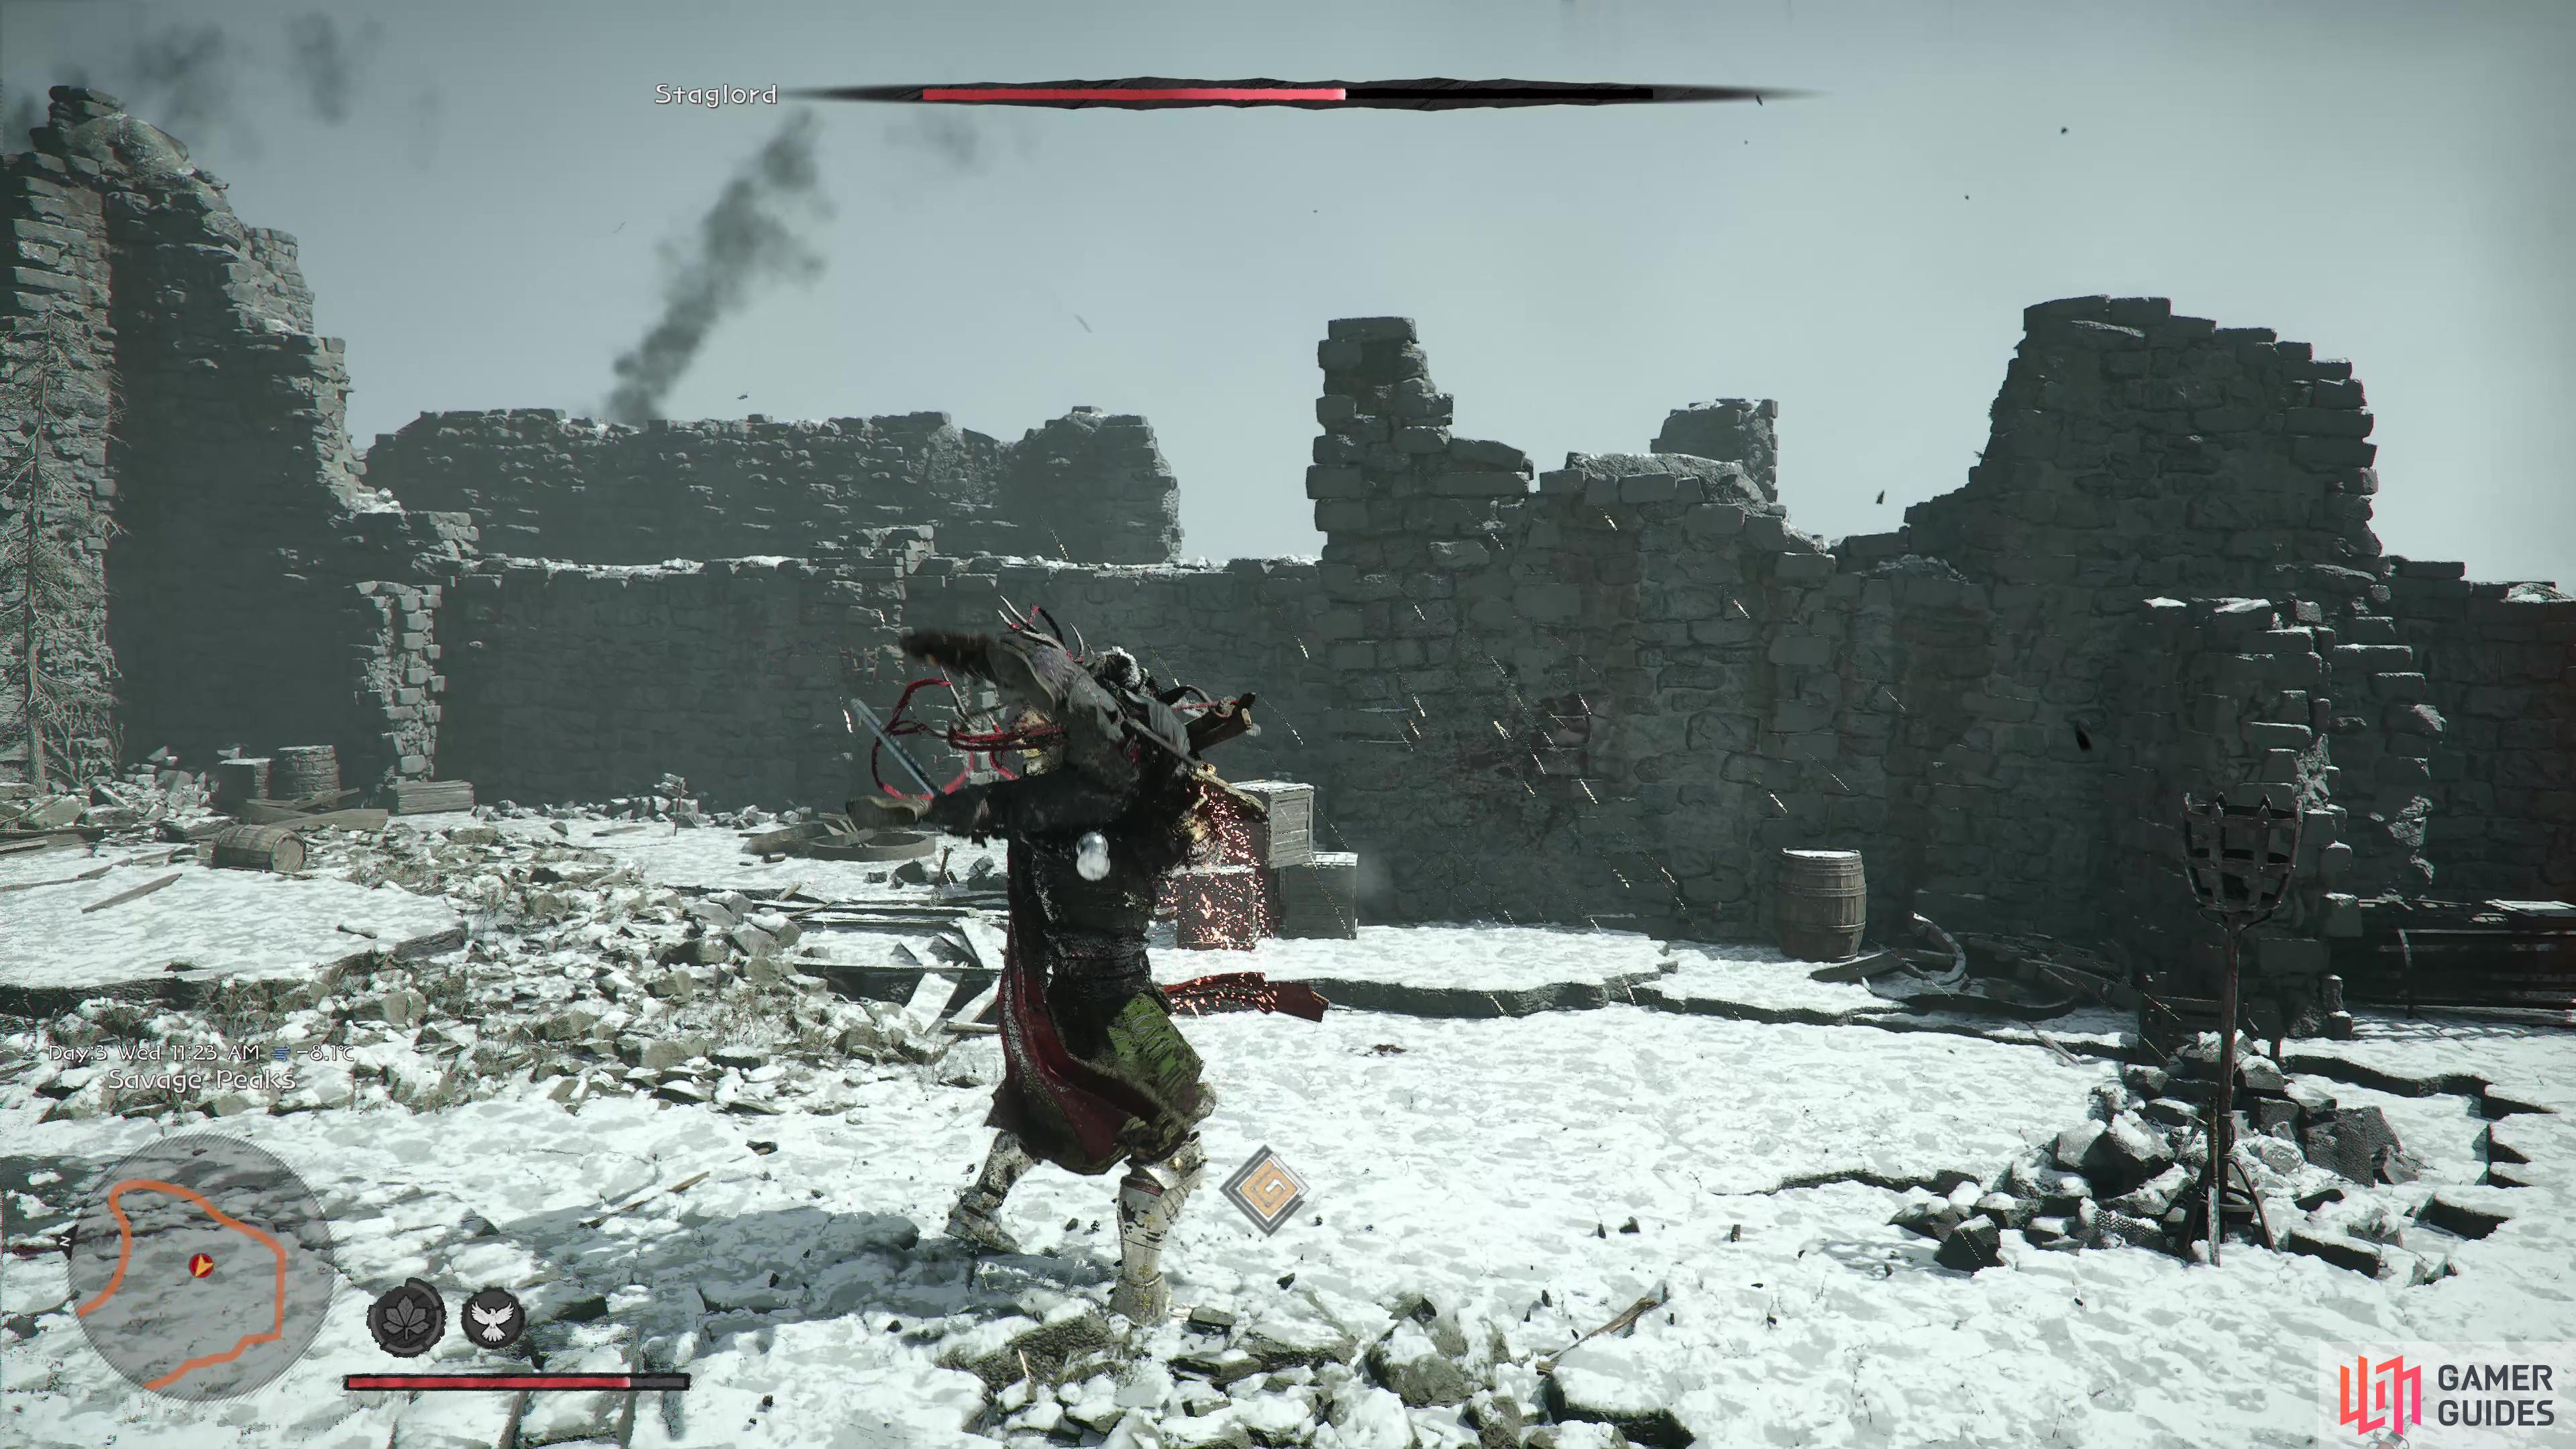
The next boss we faced off against was the Staglord, staged against a beautiful backdrop of wintry ruins. After an impressive opening exchange, the battle began, and it was immediately clear that this was a different beast compared to the first boss. While the Reed Devil focused on speed and quick strikes, the Staglord was almost the complete opposite, wielding a sword and shield himself and using sweeping strikes and heavy thrusts. The Staglord also felt far tankier than our battle against the Reed Devil, so I had to change up my tactics a little.

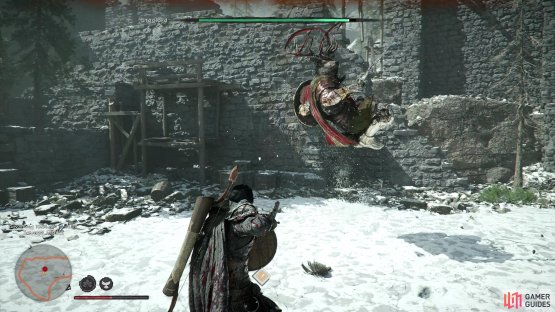
(1 of 2) The Staglord used heavier, slower attacks than the Reed Devil, but was just as aggressive.
The Staglord used heavier, slower attacks than the Reed Devil, but was just as aggressive. (left), Get too close to The Staglord, and he can easily grapple you and throw you to the ground. (right)
I found the block and parry to be a much more useful tool, as was the incredibly satisfying kick ability that I made more use of here, this would allow me to create some distance and then close in for a few strikes myself. I was also pleased to see my favorite combo of the bow and explosive arrows were useful here, directing shots whenever the Staglord would drop his guard. Still, get too complacent, and the Staglord would frequently use a grapple of his own against me, dealing major damage.
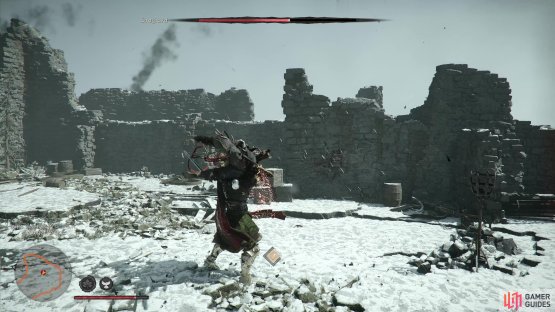
The phase change for The Staglord saw him become far more aggressive, causing him to run and leap through the air with a leaping slash, this was far more difficult to block forcing me to rely instead on making use of dodge rolls. He also added a shielded dash to his arsenal of attacks, something I could use against him if I timed my dodges right by creating an opening from behind. Still, two bosses down, and I was already massively impressed with how different each of them felt, and how much I had to change up my playstyle to combat it.
The third boss I tackled was Hexe Marie, a tricky witch that relied on phasing in and out, along with conjuring additional enemies to attack me. This was probably the battlefield I had the least amount of space to maneuver in too, so I had to make sure I dealt with the additional enemies as quickly as I could to prevent myself from becoming overwhelmed. This was also the first battle where I noticed status effects come into play as Hexe Marie would often coat her weapon with a poison that would leave pools on the ground when she disappeared. Fortunately, we were provided with plenty of healing items for our hands-on, but I could see this adding a lot to the challenge in the final release.
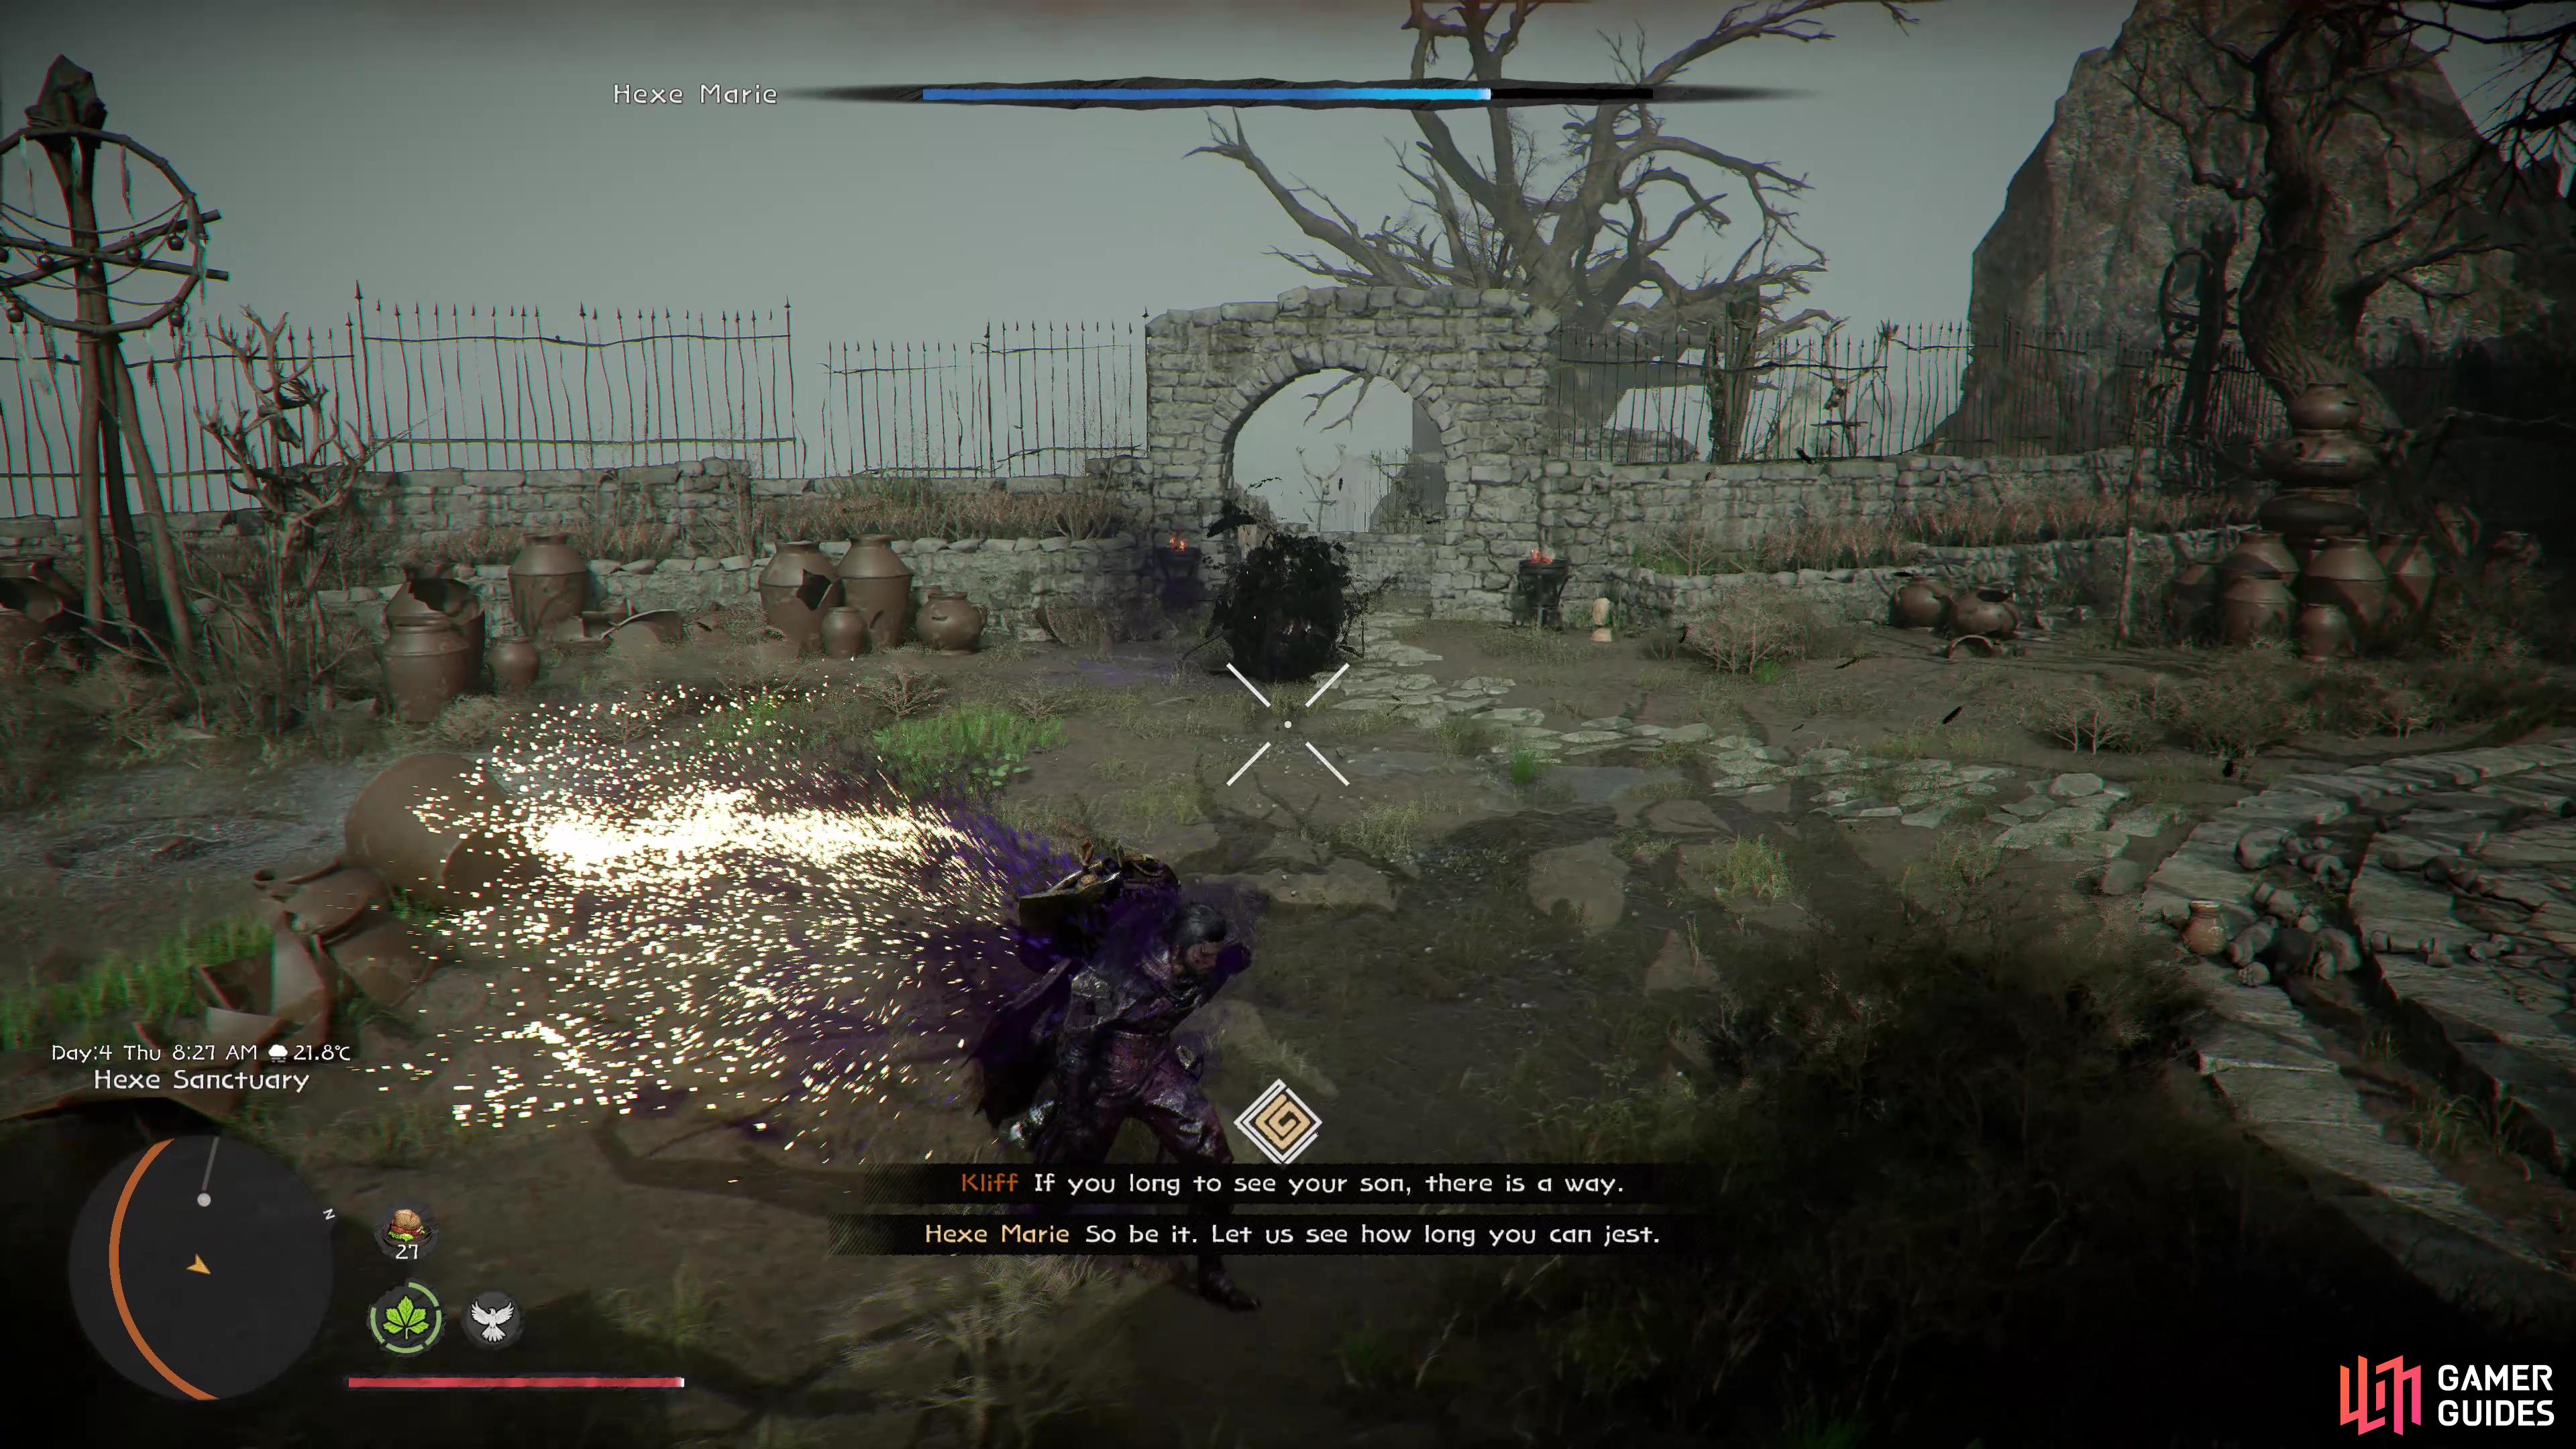
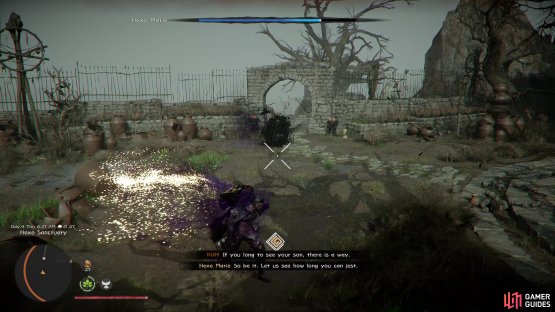
(1 of 2) Hexe Marie coated her weapon with a poison.

Hexe Marie coated her weapon with a poison. (left), She also summoned reinforcements that Kliff needs to deal with or become overwhelmed. (right)
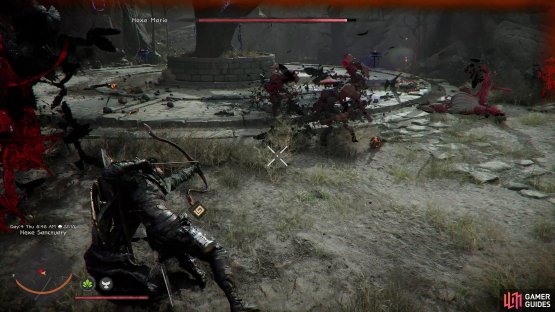
The phase change this time around caused Hexe Marie to make more use of her summons, while also moving around the battlefield herself a lot quicker, this meant I didn’t have as much time as before to deal with her reinforcements. Fortunately, I found the Flurry Slash to be especially powerful against Hexe Marie, often hitting her summons at the same time while dealing heavy damage to her. Once the battle was over, I was treated to an engaging scene and free to head into the final battle, although I did take the time to admire the scenery and ponder what wonders the open world may hold.
The final boss was the one that required a different approach altogether, playing completely different to the other three. The Queen Stoneback Crab was a gargantuan creature that is cursed by a jar that sat atop it, it was clear to see that the usual approach of hacking and slashing would not suffice here and a different method was needed to tackle it, here is where Crimson Desert showed its ability to switch things up.
I’m not a fan of lock-on being only available when you’re holding down the block button
The back of this creature was lower to the ground, this allows Kliff to leap onto the back of it and cling to it while it attempts to toss you off. Look carefully, and I could see formations of crystal where a use of my Focus attack (a special attack that requires Spirit to be built up first) to blow it away and create a weak point. While still clinging to the back, I then needed to plunge my sword into it, a task that is needed to be performed three times while avoiding the Queen Stoneback Crab’s desperate attempts to wrestle free from me.
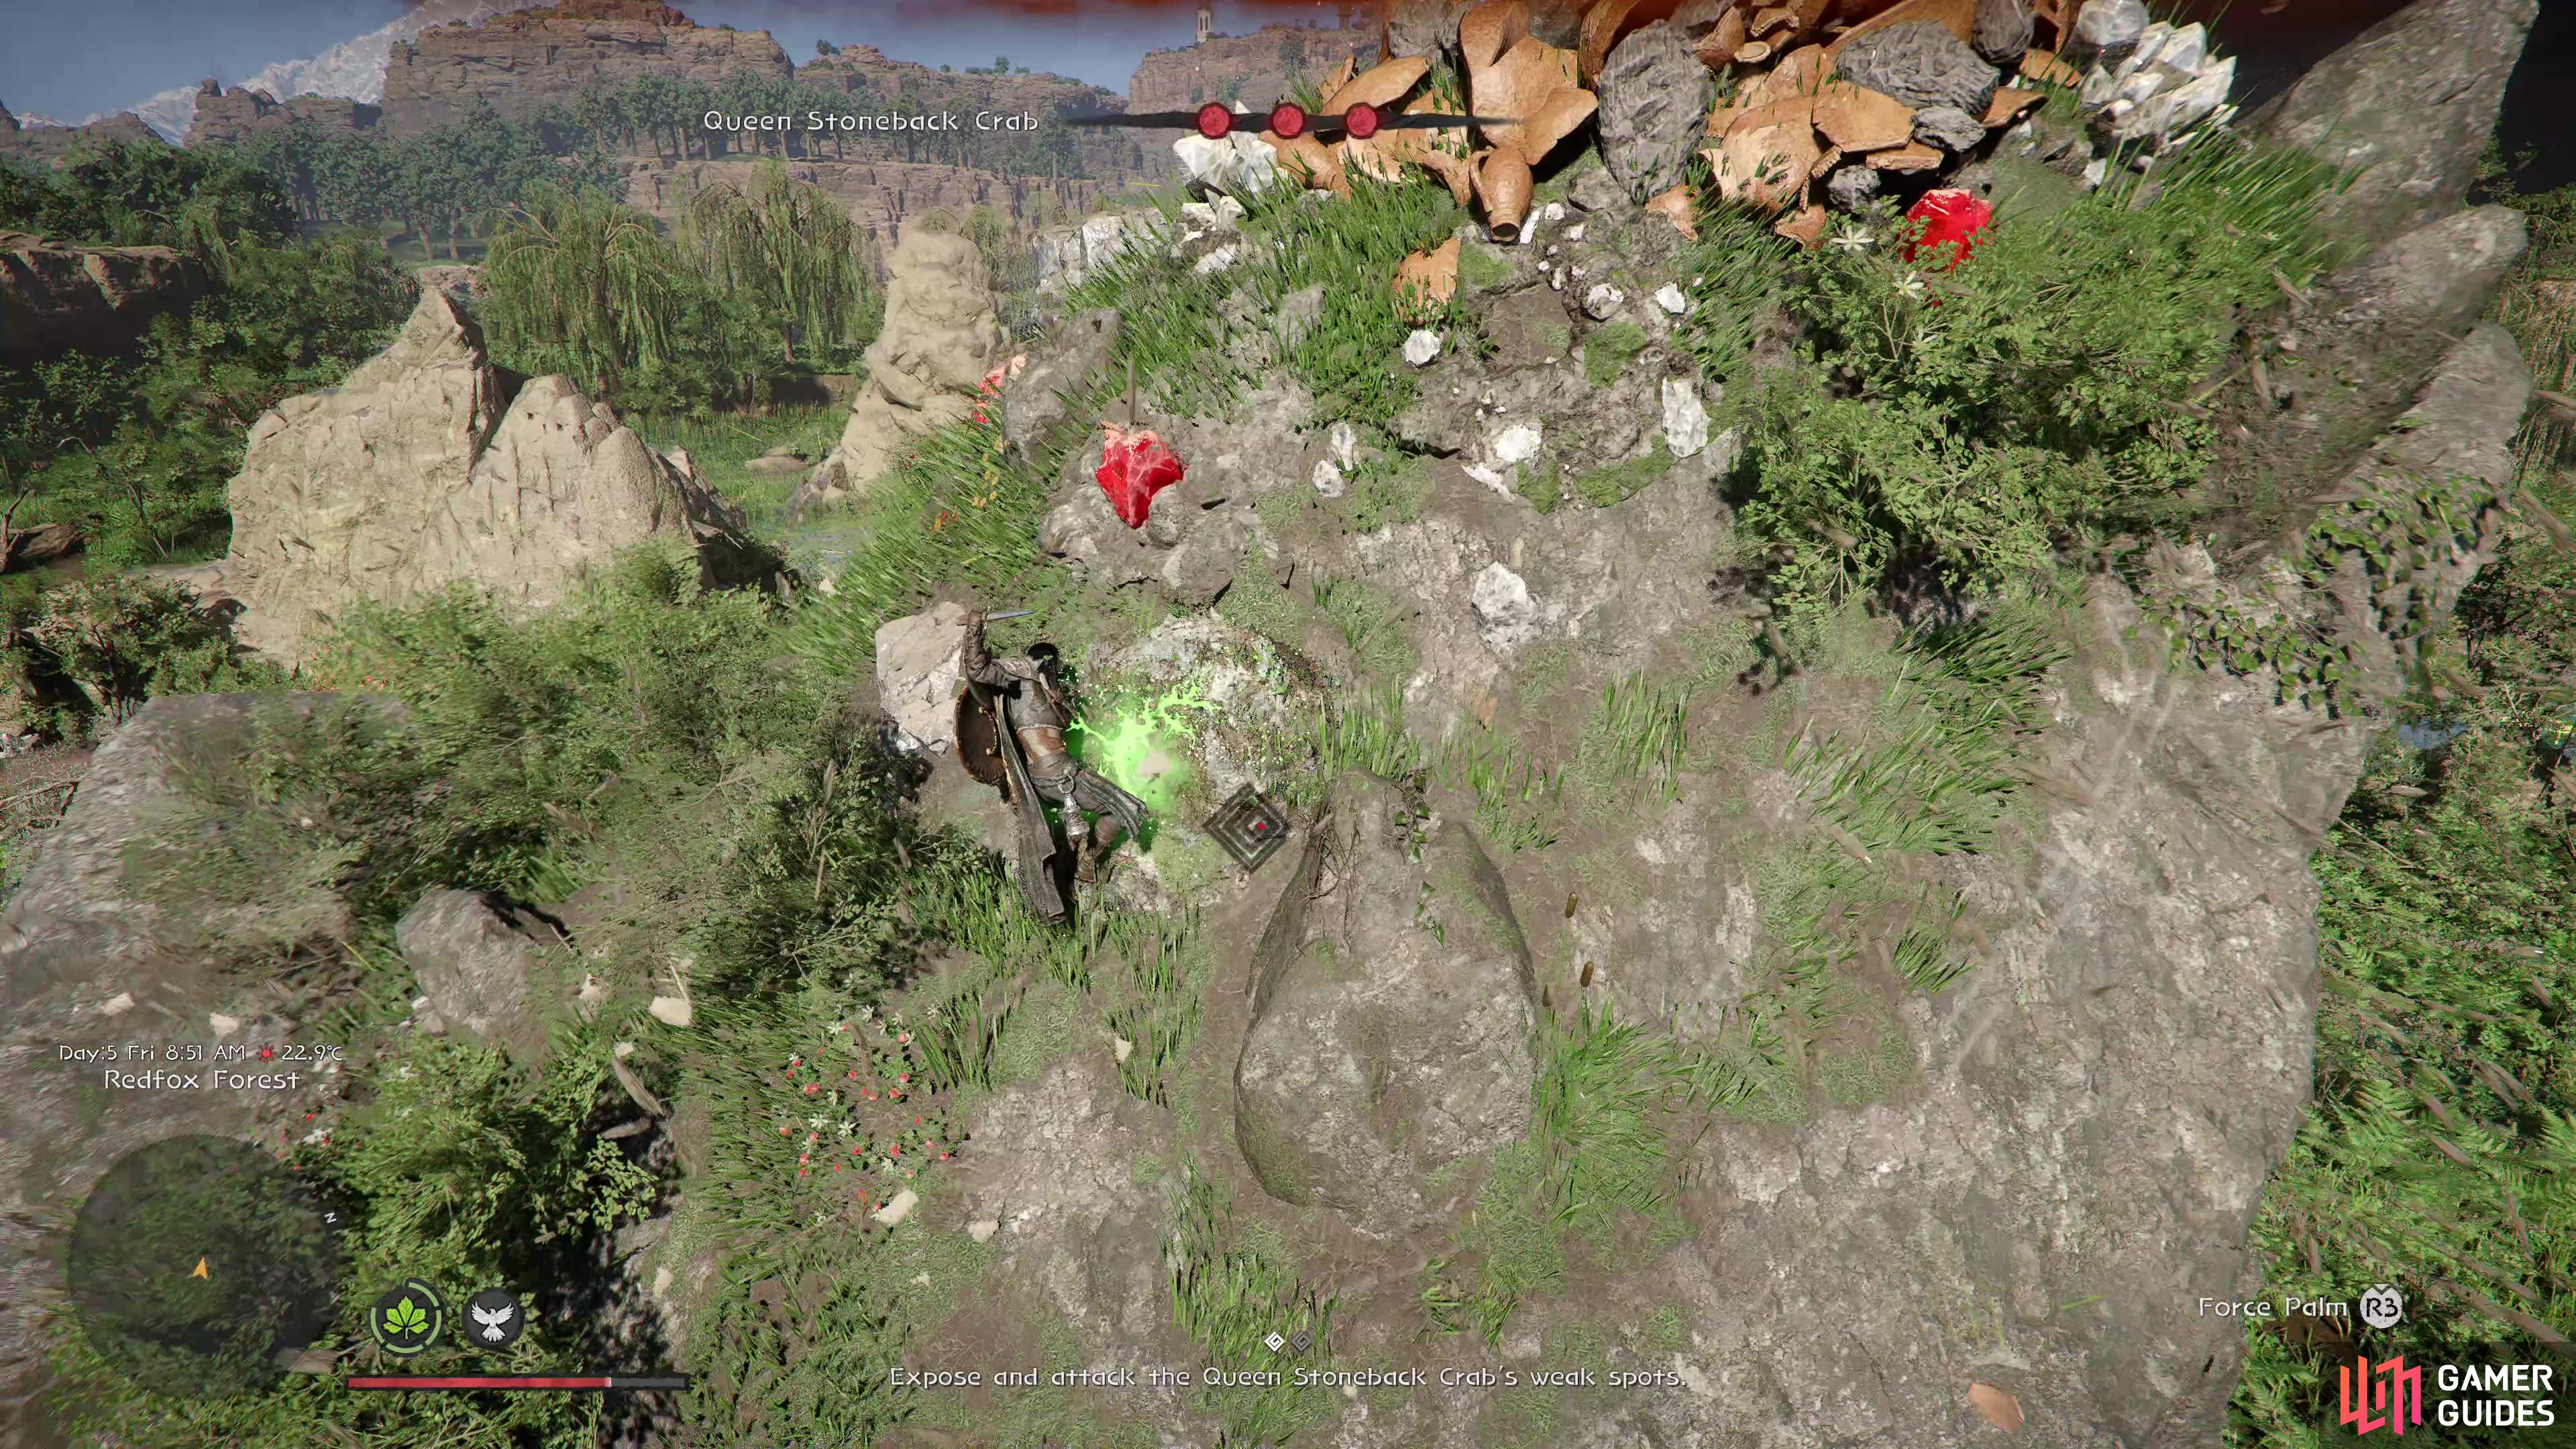


(1 of 2) You need to cling to the back of the Queen Stoneback Crab and stab her weakpoints.

You need to cling to the back of the Queen Stoneback Crab and stab her weakpoints. (left), Then make use of the Spider Web grapple to swing around to the top and destroy the cursed jar! (right)
Once I’d dealt with those weak points, I was able to deliver the final blow, but this was far trickier than anything I did in my time with Crimson Desert. The target was the cursed jar on the head of the poor Queen, but the only way to get up there was by using the Spider Web, a tool that functions much like a grappling hook, and whipping around it. This was perhaps the most trouble I had during my entire hands-on, mainly down to not understanding the controls fully (holding down a shoulder button and the right stick down at the same time). Still, once I managed to pull it off, plunging down from the air to destroy the jar was incredibly satisfying.
With that, my time with Crimson Desert was over for now, but having tasted combat against four very different bosses, I was definitely left wanting more. The controls admittedly take some getting used to, and I’m not a fan of lock-on being only available when you’re holding down the block button, this often caused me to use different skills I wasn’t trying to. However, with combat being just one slice of the massive open-world adventure that Crimson Desert promises to be, I think it’s safe to say this is a game that people should be very excited about.
A Bountiful Desert
With every boss feeling like an event down to the intricacies of the combat system and the mechanics of your foes, Crimson Desert is looking to be a game that you can lose countless hours to, and we’ve not even checked out the open-world yet!
Gameplay:
Sound:
Graphics:
No Comments