
Overall description
The only map set in the wilderness. And with that its more than obvious that the will be tons of open areas. There are a couple of narrow “corridors” like the ones on the eastern side of the map or the little cave to the north, but besides these the whole map is only open areas. Your best bet are Assault Rifles and Snipers because you want to be quick and move as fast as you can so you can get some cover if someone’s shooting at you.
Action areas
The areas where all the action mostly take place are (non-objective game types like Free-for-All and Team Deathmatch/Kill Confirmed):
- The central ruin is the spot that dominates this whole map. From the top you can see all the northern side and all the southern side, only leaving the “corridors” on both the upper left and lower right. This area has an upper (roof) and a lower area, both being equally powerful. You can see more from the top and its easier to locate your enemies but you’re also vulnerable. You can’t see much from the bottom but you have a lot of cover, mainly the pillars surrounding the area.
- The cavern to the north is another good hiding spot for campers. It has three entrances but never use the middle one as you never know where the enemy is hiding or on which side. There are pillars in here that support the cave so this is a good cover to take out enemies or replenish your health.
Hardpoint
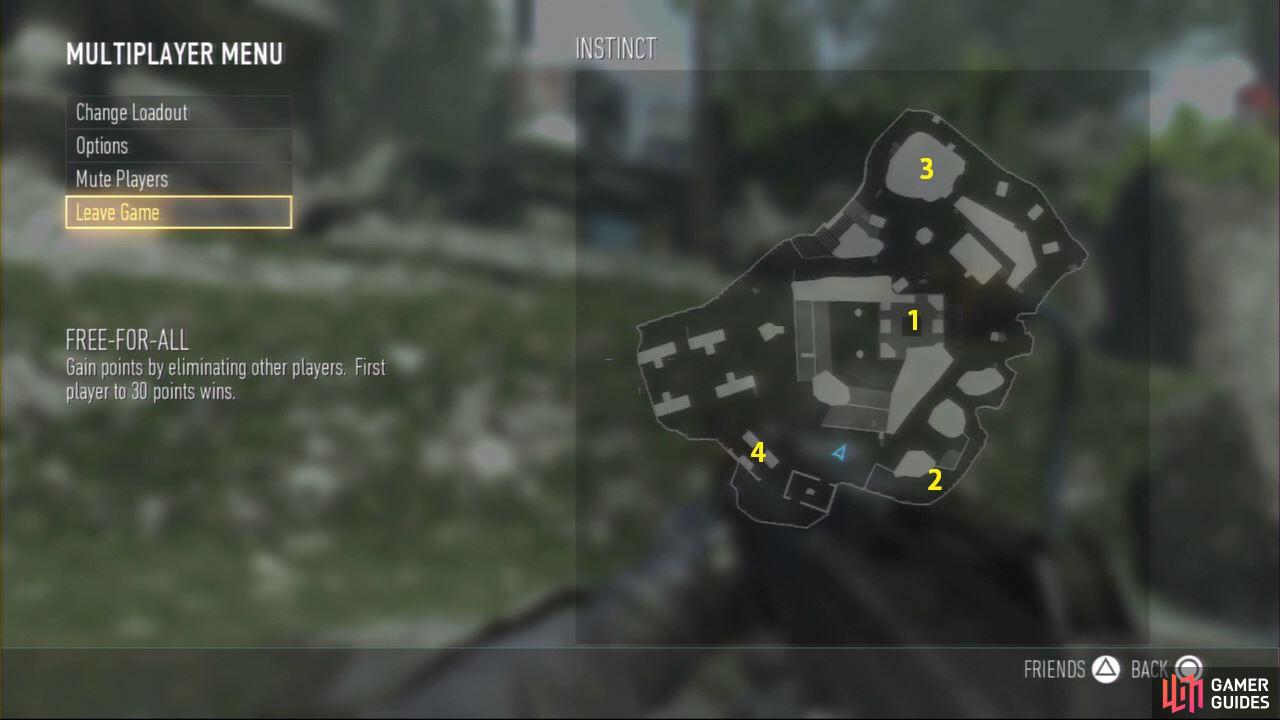
The following is a list of the hardpoints in the map and how to approach each one:
- This hardpoint will be a killzone. Once again no easy way to approach this hardpoint since its such an open space that you can see most of the map from the top. You can however approach via the little corridor to the northwest of it and quickly turn and kill any enemies in your line of sight.
- A hardpoint that is in a point where you can shoot anyone from pretty much anywhere. There are some stepping stones underneath the hardpoint. Use these to climb up to the hardpoint. The enemies won’t expect you coming up from here.
- This other corner is a hell to get. Spam this little corner with rockets, grenades – anything you’ve got. There’s really not much to say about this one. Approach from any of the two points being extremely careful.
- This cubicle has a lot of cover, except of the sides and the window in front. This window is used to take out the enemies in the center of the area so that’s a no go. Using the lower side is preferred thanks to the small area next to it to replenish your health.
No Comments