Dragonbarrow Bosses - Elden Ring Database
| Icon | Title | Category | Subcategory |
|---|
Dragonbarrow Bosses
| Icon | Title | Details | Type | Runes | HP | Strong Vs | Weak to |
|---|---|---|---|---|---|---|---|

|
Bell Bearing Hunter (Dragonbarrow) |
Bell Bearing Hunter is a slow-paced creature with a menacing prescence. Bell Bearing Hunter is found in:
Lore
Menacing and slow-paced, it wields a large, red-glowing sword and a shield combined with a full body armor and a chilling cape.
Location
Can also be found just outside the Isolated Merchant in Dragonbarrow. The quickest way to respawn the boss is to rest at the Isolated Merchant, advance time to night, then rest again. Walk outside the shack and he should spawn. This iteration of the boss is significantly stronger. He drops Gravity Stone Peddler’s Bell Bearing.
Info
The name of the game against the Bell Bearing Hunter is patience, never get greedy and go for more than one attack, and only when there’s an opening as he can quickly overwhelm you. Take the time to learn his attack patterns, the Three-hit Combo is the best time to get a strike on him once you learn how to roll through the attacks. Likewise, when he does his Shield Rush, once you know how the timing, you can roll at the last minute to land next to him and leave him wide-open. Whenever you see him charging his Corkscrew, forgo everything else and dash backwards as fast as possible, if you think you’re too close to him as he’s winding up, resort to constant rolling to avoid the incoming blast. The other main attack to watch for is when he walks towards you with his hand glowing, he’ll soon lunge forward and attempt to grab you. This cannot be blocked and should he catch you, he’ll deal a massive amount of damage to you. If you’re playing as a magic user, then the Bell Bearing Hunter becomes a lot easier to manage, you can keep yourself at range on horseback, taking care to avoid the Sword Throw Combo and Corkscrew attacks, and pelt him with magic, avoiding some of the deadlier attacks he will use against you. All encounters with the Bell Bearing Hunter will use the same attacks, check out our guide on the Limgrave encounter for more details.
Location
1× Dragonbarrow
Dragonbarrow
Item Drops
1×
|
Field Boss |
50,000 |
|||
|
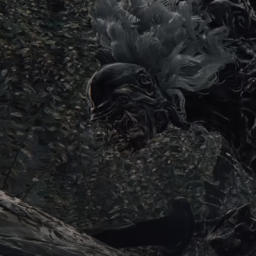
Black Blade Kindred (Bestial Sanctum) |
Black Blade Kindred is a giant gargoyle Boss that wields a huge halberd that can be found in Dragonbarrow and the Forbidden Lands.
Lore
The gargoyles are servants of Maliketh, the Black Blade, and carry out his will as guardians.
Location
Info
You can make use of this Gargoyle to help calm the rampaging Gurranq, Beast Clergyman if you’ve been progressing his Quest. Once Gurranq attacks, head outside the doors and lure the Gargoyle to attack you while standing near the door. This will prompt it to use its laser attack which will deal massive damage to Gurranq at the same time.
Location
1×
Item Drops
1×
Item Drops
1×
|
Field Boss |
88,000 |
|||
|
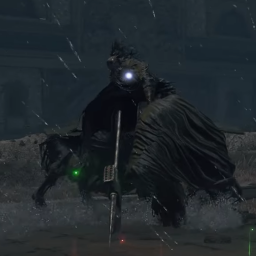
Night's Cavalry (Dragonbarrow) |
The Night’s Cavalry are a group of Bosses that are large knights that ride atop dark steeds, wielding large flails and halberds. There are several Night’s Cavalry bosses in various areas of the game and they only appear at night.
Location
Location
1× Dragonbarrow
Dragonbarrow
Item Drops
1×
|
Field Boss |
42,000 |
|||
|
|
Beastman of Farum Azula (Dragonbarrow) |
Beastman of Farum Azula is a Boss that is encountered in various locations.
Lore
The Beastman was said to have come from a doomed city in the sky, and now resides in a cave in Limgrave. Attacks with its signature cleaver, with the ferocity of a wild beast on the hunt.
Location
Other locations:
Location
1×
Item Drops
1×
|
Field Boss |
65,000 |
1,960 |
Lightning |
Physical (Slash), Fire |
|
|
Putrid Avatar (Dragonbarrow) |
Location
1×
Item Drops
1×
Item Drops
1×
|
Field Boss |
91,000 |