0 of 22 collected
Checklist complete: 22 of 22 locations collected.
Sign in to save your progress across every device.
Tantegel (Dragon Quest I)
1 location on this map

-
1

Snoop Scroll
Tantegel (Dragon Quest I)
View on mapInside a chest in the locked room on the west side of Tantagel Castle - 1F. Requires the Ultimate Key to enter.

Erdrick's Hollow (Dragon Quest I)
1 location on this map
-
2

Sandstorm Scroll
Erdrick's Hollow (Dragon Quest I)
View on mapFound in the nearby Treasure Chest.
Teaches the Hero the
 Sandstorm ability when used from your inventory.
Ability: Conjures a sandstorm which reduces an enemy group’s accuracy. (3 MP)

Craggy Cave (Dragon Quest I)
2 locations on this map
-
3

Nose for Treasure Scroll
Craggy Cave (Dragon Quest I)
View on mapInside a chest in the small room in the northeast corner of Craggy Cave B1.
-
4

Muster Strength
Craggy Cave (Dragon Quest I)
View on mapIn a chest in the northwest corner room of Craggy Cave B2 (B).


Damdara (Dragon Quest I)
2 locations on this map
-
5

Demon Demeaner
Damdara (Dragon Quest I)
View on mapInside the only building in Damdara, in a barrel in the northwest corner.
-
6

Padfoot Scroll
Damdara (Dragon Quest I)
View on mapExamine the ground by the table half-submerged in the sand, north of the northeasternmost poison swamp.


Grave of Galen (Dragon Quest I)
2 locations on this map
-
7

Whistle Scroll
Grave of Galen (Dragon Quest I)
View on mapFound inside a chest at the end of the northeast path in Grave of Galen, B1.
-
8

Kacrackle Slash Scroll
Grave of Galen (Dragon Quest I)
View on mapInside a red chest the northwest corner of Grave of Galen - B3.


Galenholm (Dragon Quest I)
1 location on this map
-
9

Safe Passage Scroll
Galenholm (Dragon Quest I)
View on mapFound on a bookshelf inside the house in southwest Galenholm.

Cave of the Dwarves (Dragon Quest I)
2 locations on this map
-
10

Miracle Slash Scroll
Cave of the Dwarves (Dragon Quest I)
View on mapInside the chest in the small room in the northeast corner of Cave of the Dwarves - B1. From B1, Go down the easternmost stairs to B2, then go up the stairs to the north.
-
11

Undead Undoer Scroll
Cave of the Dwarves (Dragon Quest I)
View on mapInside a chest to the right of the south exit of the small area in the northern tip of Cave of the Dwarves - B2.


Weirdwood (Dragon Quest I)
1 location on this map
-
12


Cantlin (Dragon Quest I)
2 locations on this map
-
13

Attack Attacker Scroll
Cantlin (Dragon Quest I)
View on mapOpen the leftmost wardrobe in the room to the right upstairs.
-
14

Moreheal Scroll
Cantlin (Dragon Quest I)
View on mapSearch the second bookshelf from the right in the room to the left upstairs.


Weeping Isle (Dragon Quest I)
1 location on this map
-
15
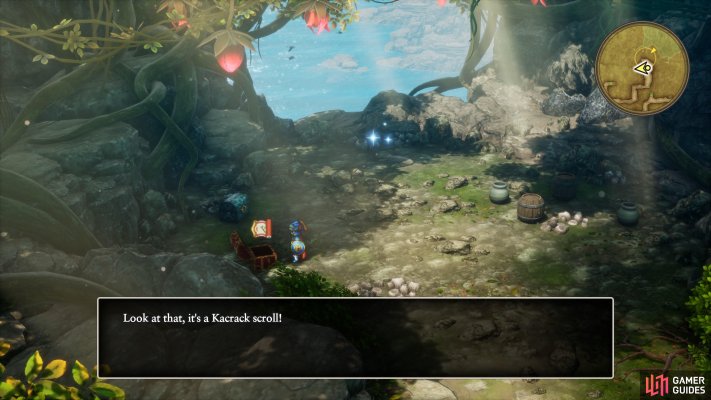
Kacrack Scroll
Weeping Isle (Dragon Quest I)
View on mapInside a red chest in the western area of Weeping Isle - Exterior.

Rimuldar (Dragon Quest I)
1 location on this map
-
16

Magic Barrier Scroll
Rimuldar (Dragon Quest I)
View on mapInside the chest in the Warlock of Doorlocks’ home in Rimuldar.

Shrine of Rain (Dragon Quest I)
1 location on this map
-
17

Crack Scroll
Shrine of Rain (Dragon Quest I)
View on mapFound in the nearby Treasure Chest.
Teaches the Hero the Crack spell when used from your inventory.
Spell: Pierces a single enemy with razor-sharp icicles. (3 MP)

Faerie Village (Dragon Quest I)
2 locations on this map
-
18

Crackle Scroll
Faerie Village (Dragon Quest I)
View on mapFound in the Treasure Chest in the west side of the house.
-
19

Snub Scroll
Faerie Village (Dragon Quest I)
View on mapIn a bookshelf in the northeastern corner of the western house.


Citadel of the Monarch of Medals (Dragon Quest I)
3 locations on this map
-
20

Reheal Scroll (Dragon Quest I)
Citadel of the Monarch of Medals (Dragon Quest I)
View on mapIn the first chest on the right in the northwest room of the Citadel.
-
21

Wild SIde Scroll
Citadel of the Monarch of Medals (Dragon Quest I)
View on mapDeliver 10 Mini Medals to the Monarch of Medals in the Citadel of the Monarch of Medals.
-
22

Meditation Scroll
Citadel of the Monarch of Medals (Dragon Quest I)
View on mapDeliver 35 Mini Medals to the Monarch of Medals in the Citadel of the Monarch of Medals.


No locations match this filter.