
The Start of the New Vegas Run
Before you start out this run, keep a few things in mind; you want to gain as little XP as possible while doing it, as the more you level up now, the more Skill Points will be wasted in the long run. That said, try not to discover any locations (10 XP) or kill any enemies. This walkthrough will take you through the Mojave with a good bit of detail, but random critters can show up, so it can’t be guaranteed that your trip will conform exactly to the one presented here… but more or less, it should.
Sneak by pressing down the [Left Analog Stick] (PS3)/(Xbox 360). Even if your Sneak skill score is low (which… how could it not be at this point?) enemies at a distance might not pick up on you, and at the very least, you’ll know when they’re coming. [Caution] means you’ve been spotted, and the enemy is most likely going to come investigate, [Danger] means the enemy is currently moving to attack you, [Hidden] means you’re safe. If you sneak throughout this run you’ll at least know whether you’ve been spotted or not, and may avoid trouble more.
With that out of the way… let’s get started! From Doc Mitchell’s house head east to find two roads, one running south, and another running east. Follow the eastern road past the Goodsprings General Store and the Prospector Saloon and follow it as it winds south-east. As you leave Goodsprings behind, you’ll get one last chance to change anything about your character before you venture deeper into the wasteland. If you followed the advice above, you should be good to go.

As you’re about to leave Goodsprings, you’ll get one final chance to modify your character (left). Once done, follow the road out of Goodsprings to reach the highway (right).
Following the Train Tracks South
Continue following the road until it bisects another road running north-east/south. If you read the road sign before the intersection you’ll see that the road running north-east apparently leads to Las Vegas. Follow the road north-east and keep your eye to the south-east where you should spot some train tracks. These train tracks will eventually start running north-east along-side the road you’re on (Interstate 15), starting just after passing a trailer along the road. This trailer is guarded by a Powder Ganger; avoid conflict, as you don’t want the XP nor do you want to influence your reputation with the Powder Gangers just yet.
Make your way onto the train tracks and follow them south - if you follow the tracks (and the road) north-east, you’ll eventually find Quarry Junction, which is a more direct route to New Vegas, but it’s also been taken over by some of the meanest critters in the Mojave, which you’re just not ready to tangle with yet. Following the tracks south will take us down and around some mountains, and while it’s the long route, it’s also the path of least resistance.
Keep following the train tracks south. In the distance to the west of the train tracks you should spot a roller coaster which marks the town of Primm, which you’re also avoiding by taking this route. After train tracks will turn south-east you’ll see a red train car along the side of the tracks, which you should give a wide berth to avoid discovering the Powder Ganger Camp South map marker. Further along the tracks you’ll find the Emergency Service Railyard, which you can avoid by heading into the hills to the west.
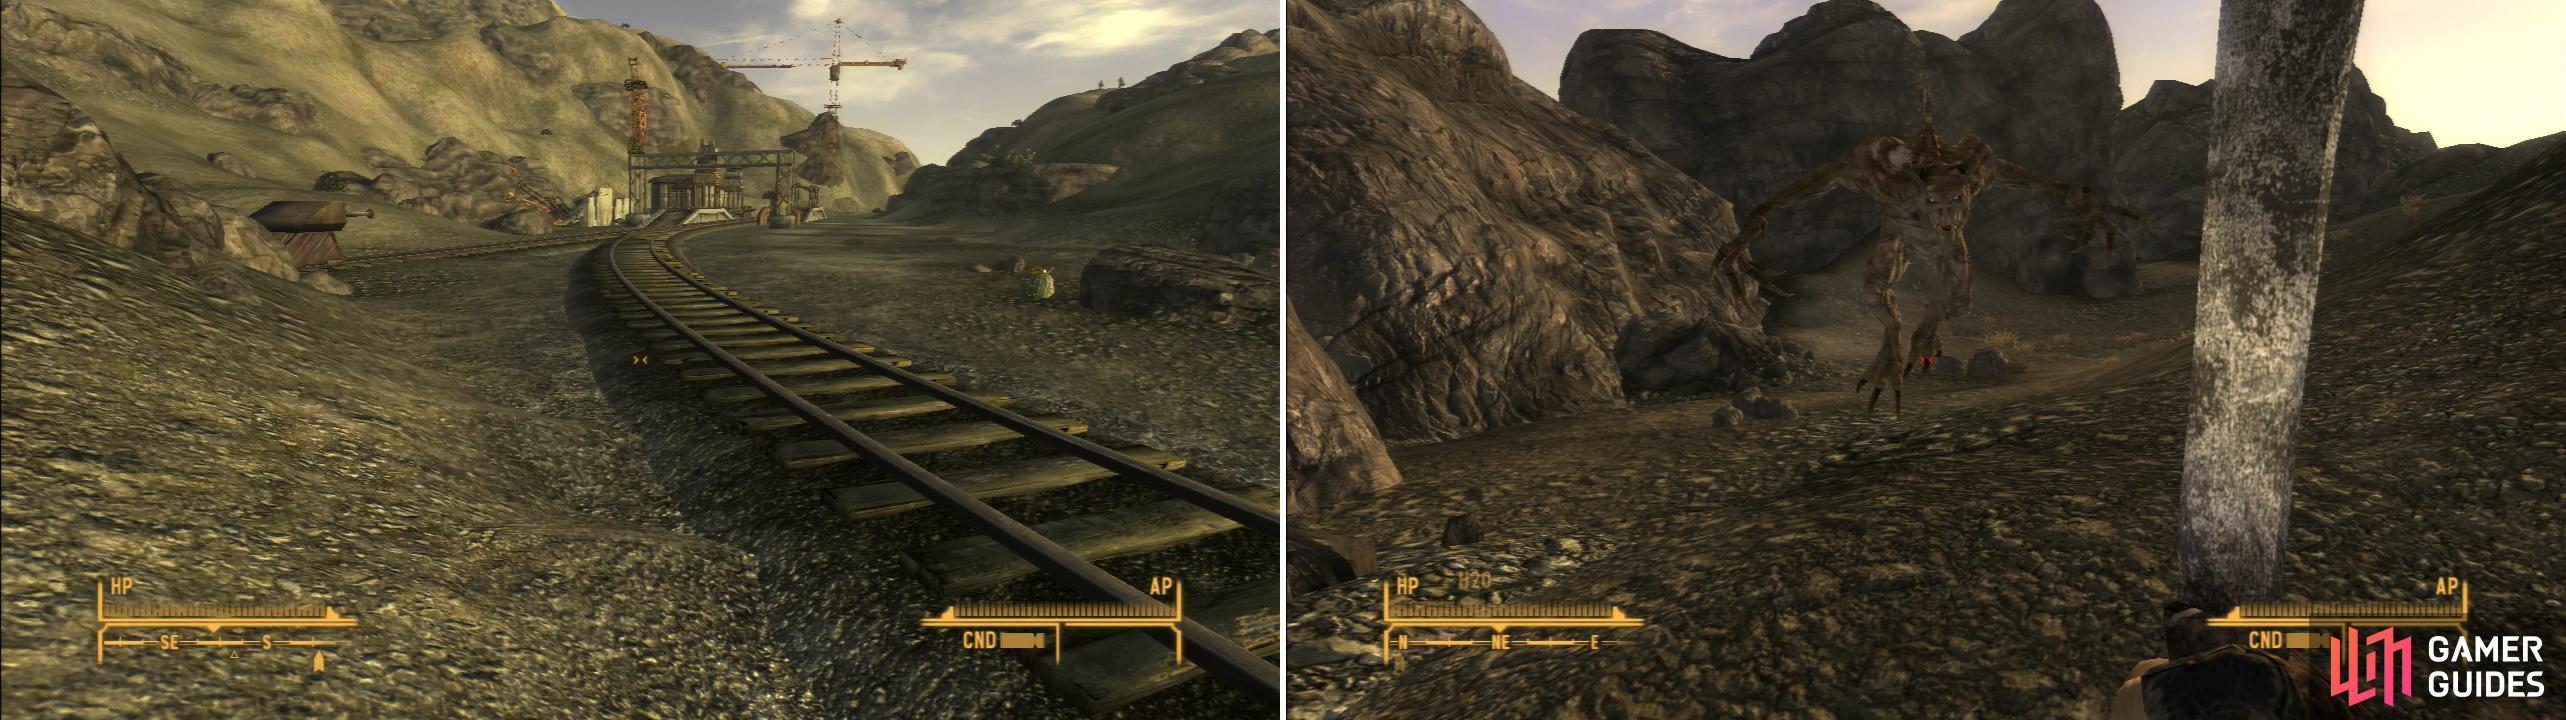
Follow the train tracks to - and past - the Emergency Service Railyard (left). Avoid Primm Pass, however, as it’s guarded by a vicious Blind Deathclaw (right).
Route 164 to Novac
Link up with the train tracks south of the Emergency Service Railyard and keep heading south. Along the tracks you may encounter Bark Scorpions and Coyotes, but briefly taking to the hills to give you some distance as you continue south past them should avoid trouble; they’ll attack if you get too close, but otherwise aren’t too aggressive. Eventually to the west you’ll spot the town of Nipton. They must be having some kind of barbecue, given the ominous plumes of smoke rising from town.
A short ways south you’ll find route 164, which bisects the train tracks you’ve been following. You’ll want to follow the road east, but if you do you’ll face an ambush by a group of Viper Gunslingers near an over-turned truck, complete with Frag Mines hidden under traffic cones. It can be a tough fight, but it’s winnable. Still, nobody wants that XP yet, so bypass the encounter by heading east through the hills north of the road starting opposite of Nipton. Turns out you don’t want to follow route 164 after all… at least, not yet. You’ll have to navigate some rough terrain and avoid a Bark Scorpion lair, but it’s still by far the easier of the two options.
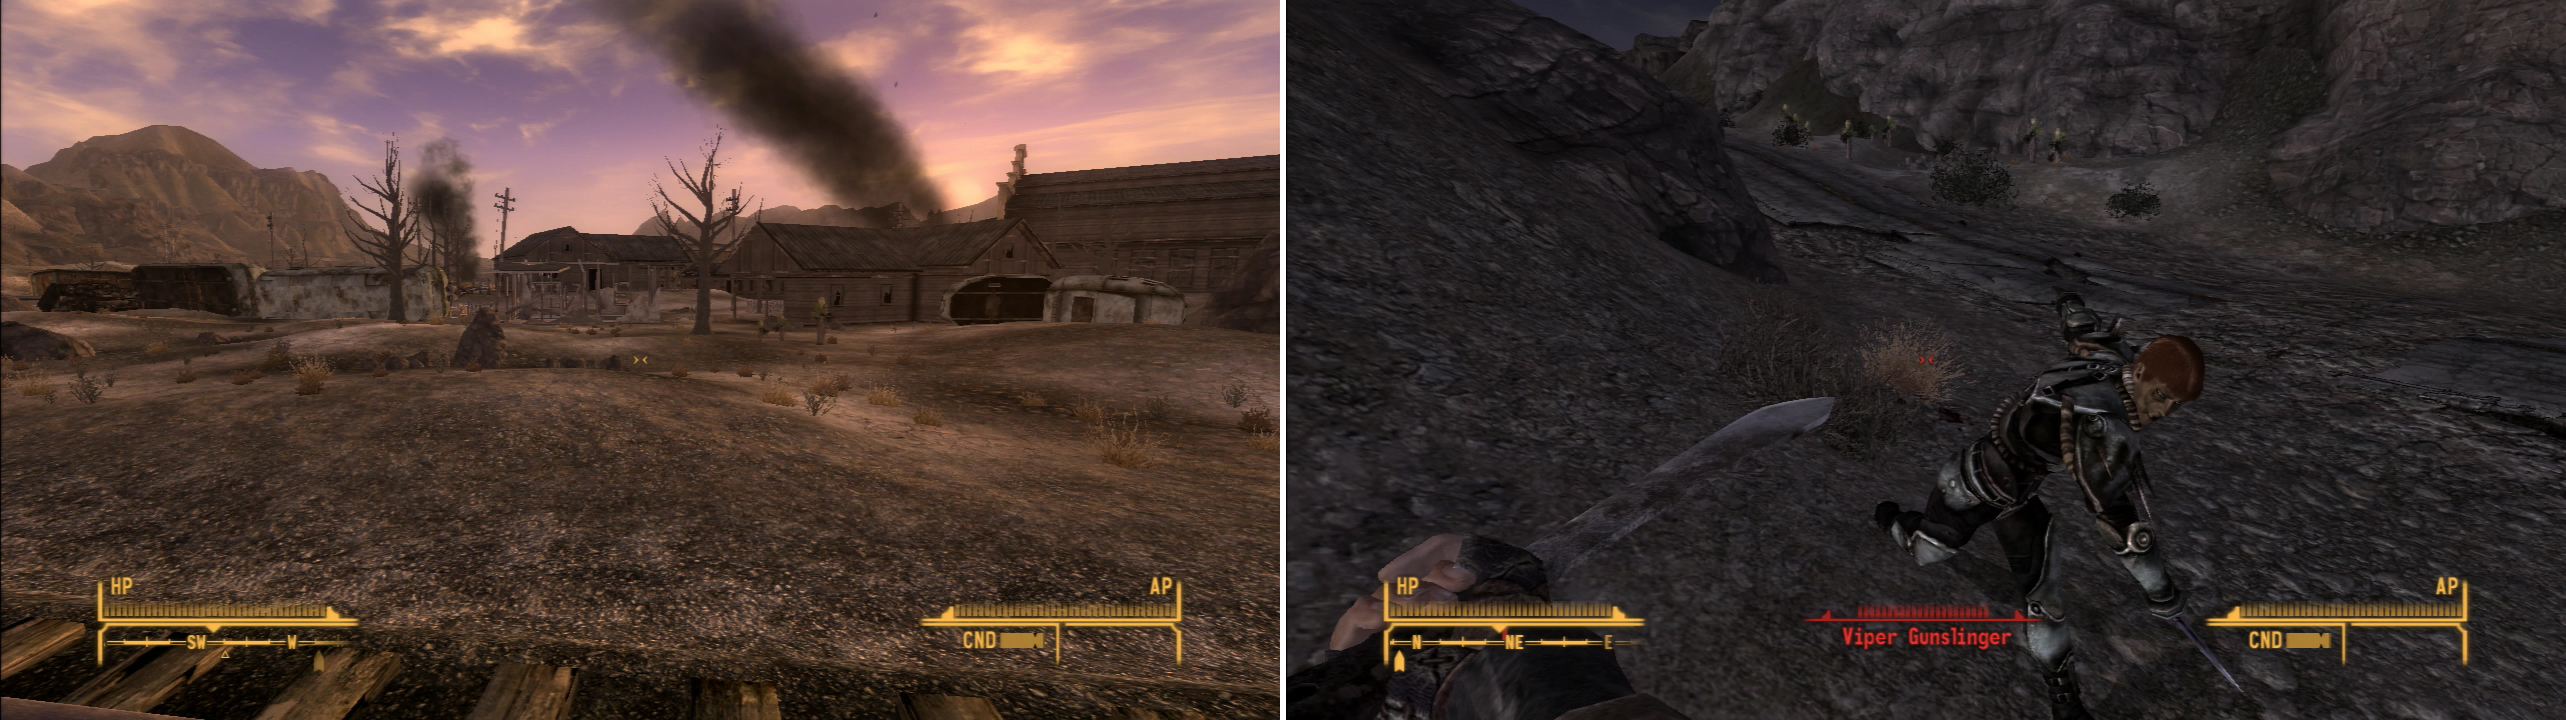
You can spot the town of Nipton west of the track tracks. Note the distinctive… ah… ominous plumes of smoke rising from the settlement (left). Avoid the road east, as it’s guarded by a group of Viper Gangers (right).
Link up with route 164 north of the ambush and follow it north, then east past a metal wind mill on the hills to the east. You should pass under an elevated road sign pointing to two locations; Novac and Searchlight. Novac is your next destination, and to get there, continue east along the road, and make your way onto two roads running north, one east of an over-pass, and one running under and over-pass. It doesn’t matter which you initially follow, they both link up shortly.
On this road you may have a few encounters; a caravan may be heading north, which you can follow. They will be shortly ambushed by some Caesar’s Legion soldiers, although the caravaners tend to win the fight. Stay out of it either way, getting involved only by looting the corpses of the dead. It’s not terribly useful loot, but selling it will get us some basic starting Caps for our ultimate goal in New Vegas. Further on, behind a “Rita’s Cafe” billboard, you may encounter another Viper Gunslinger ambush, which you can avoid by staying west of the road or just running past them; they shouldn’t chase you too far.
To the north is Ranger Station Charlie, which you can avoid by keeping to the east. Past this are a tangle of roads and rail road track; keep moving north until you find a giant green dinosaur, which marks the town of Novac. Discover this location or not (a few XP won’t hurt, and it’s a nice enough waypoint).
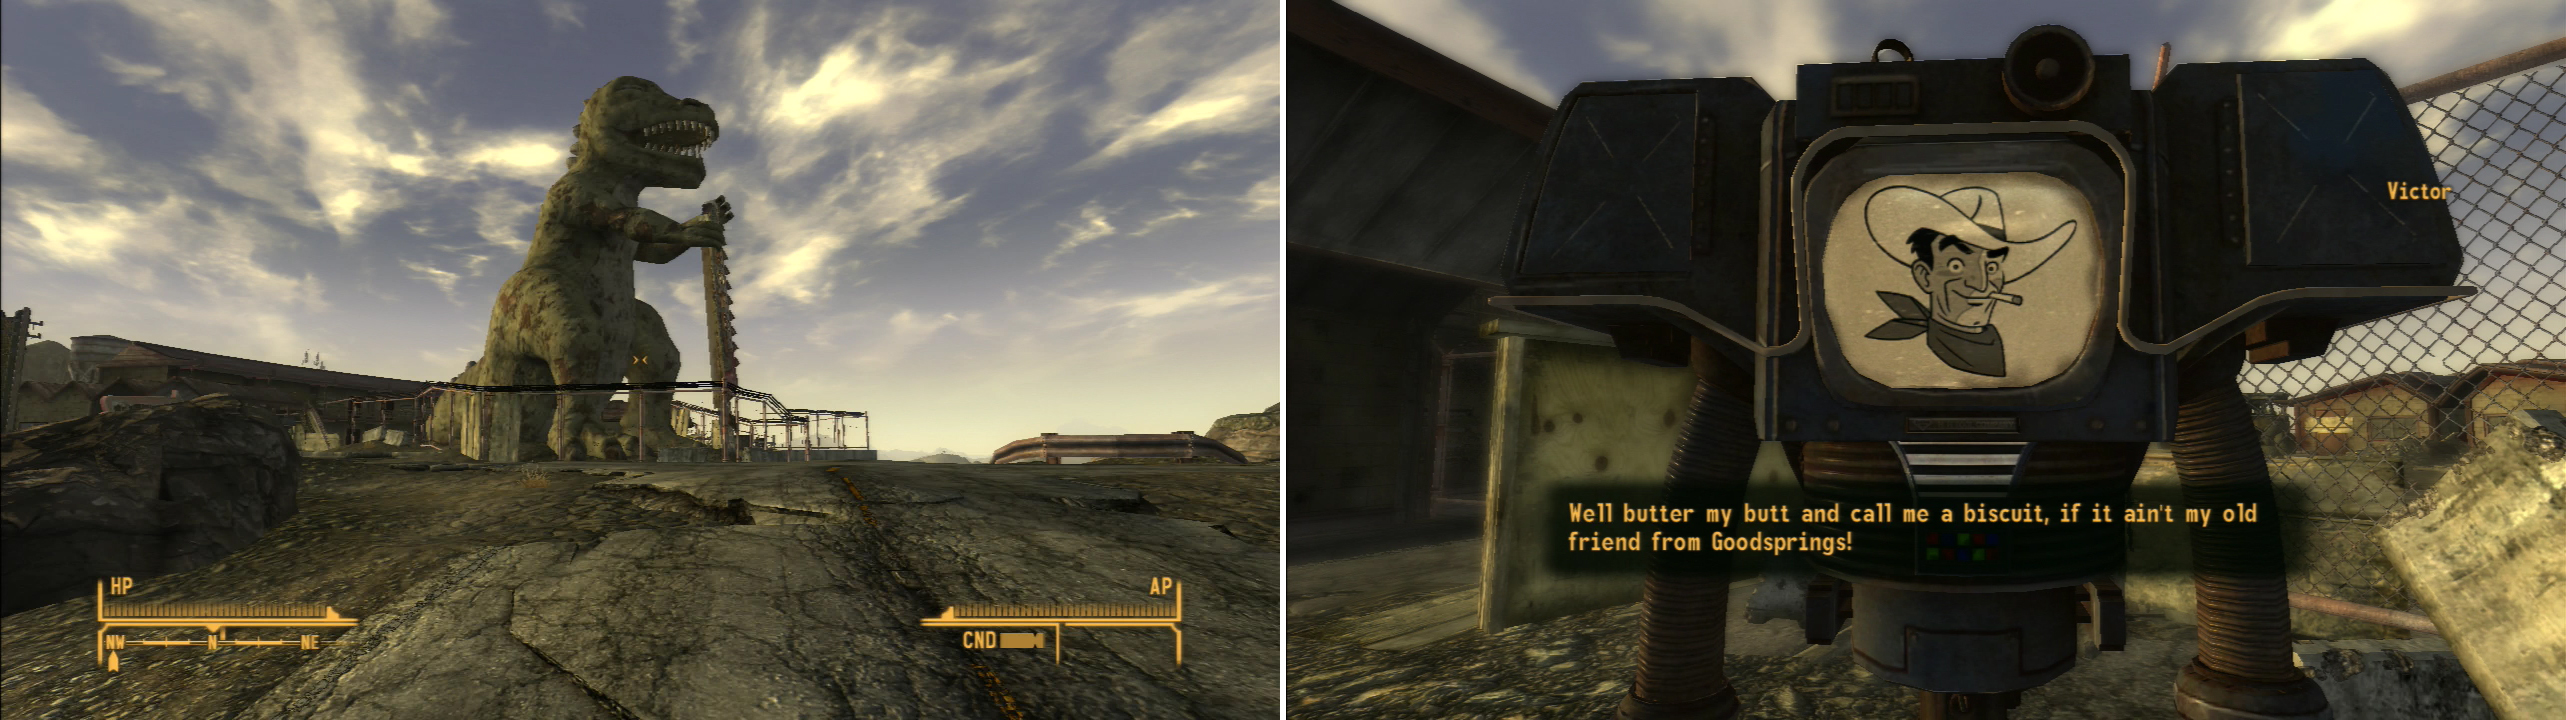
The big green dinosaur marks the location of Novac (left). If you visit Novac and talked to Victor back in Goodsprings, he’ll be here waiting for you (right). What a… coincidence…
Route 95 to the New Vegas Medical Clinic
Leave Novac and head north along a highway. Route 95 will take you most of the way to New Vegas, and it’s pretty much a straight shot from here, but there are a few things to point out along the way. Past Novac, to the west of the road you’ll spot the HELIOS One solar power plant, which isn’t much more than an interesting landmark at this point. Past HELIOS One, stay east of the road to avoid an encounter with more Viper Gunslingers and give the gas station along the highway a wide berth to avoid discovering the El Dorado Gas & Service map marker. Keep east as you follow the road to stay away from the desert and its vicious inhabitants (especially Fire Ants).
Past the El Dorado Gas & Service station you’ll find The Lonesome Drifter camping in the shadow of a Sunset Sarsaparilla billboard. You can talk to him to learn about his daddy issues and he-haw over his fancy guitar. You can also catch forty winks by resting on his Makeshift Bedding, should you need to recover lost HP or just keep your SLP meter down. Follow the road past a “Boulder City” sign, then continue north-west under an over-pass to find the 188 Trading Post, which is worth discovering. There are all kinds of interesting characters here that’ll be worth visiting later.

Spot the HELIOS One power plant in the desert to the west of the road as you travel north (left). Eventually your path will take you to The 188 Trading Post, built where route 93 and route 95 meet (right).
This place is called the 188 Trading Post because it’s where route 95 and route 93 meet. Clever enough. Make your way onto the bridges running over the lower roads and find an Arms Dealer standing near her truck. It’s not necessary to talk to her yet; she’s just a landmark for now. From her head west along the road and follow it as it turns north-west.
Follow route 95 north-west and pass under two over-passes. By now you should see the lights of New Vegas in the distance, so your safe arrival in the jewel of the post-apocalyptic desert should be all but assured… but there’s one more lucrative stop you can make along the way which will provide us all the seed money you need for the strip. After the second over-pass avoid the Grub n’ Gulp Rest Stop east of the road and keep following the road north. Shortly you’ll end up running along an elevated road to the east and an elevated rail way to the west. Keep going and pass a four-way intersection where two NCR Troopers standing near a burning barrel and further north the road will end at a rickety wooden bridge.
Cross the bridge to discover Durable Dunn’s Sacked Caravan. The XP gain is worth the trouble to find this place, as, between the two wooden bridges you can find several corpses worth looting. A Crimson Caravan Guard will forfeit some Leather Armor and a Lever-Action Shotgun and two Van Graff Thugs can be looted for Combat Armor, Plasma Rifles, and other goodies. The weapons are decent enough, but the Combat Armor they have has a value of nearly 2000 Caps. Granted, you won’t get nearly that amount when you sell it, but you’ll still get a hefty sum of Caps, which you’ll need shortly. You can also loot some Ash Piles (the remains of the caravaners, victims of Energy Weapon attacks) and a dead Pack Brahmin under the northern bridge. To convert this Combat Armor into Caps fast travel back to the 188 Trading Post and sell your Combat Armor to the Arms Dealer for whatever price you can get; one suit should sell for around 1000 Caps, which is probably around all the Caps she has to barter with.
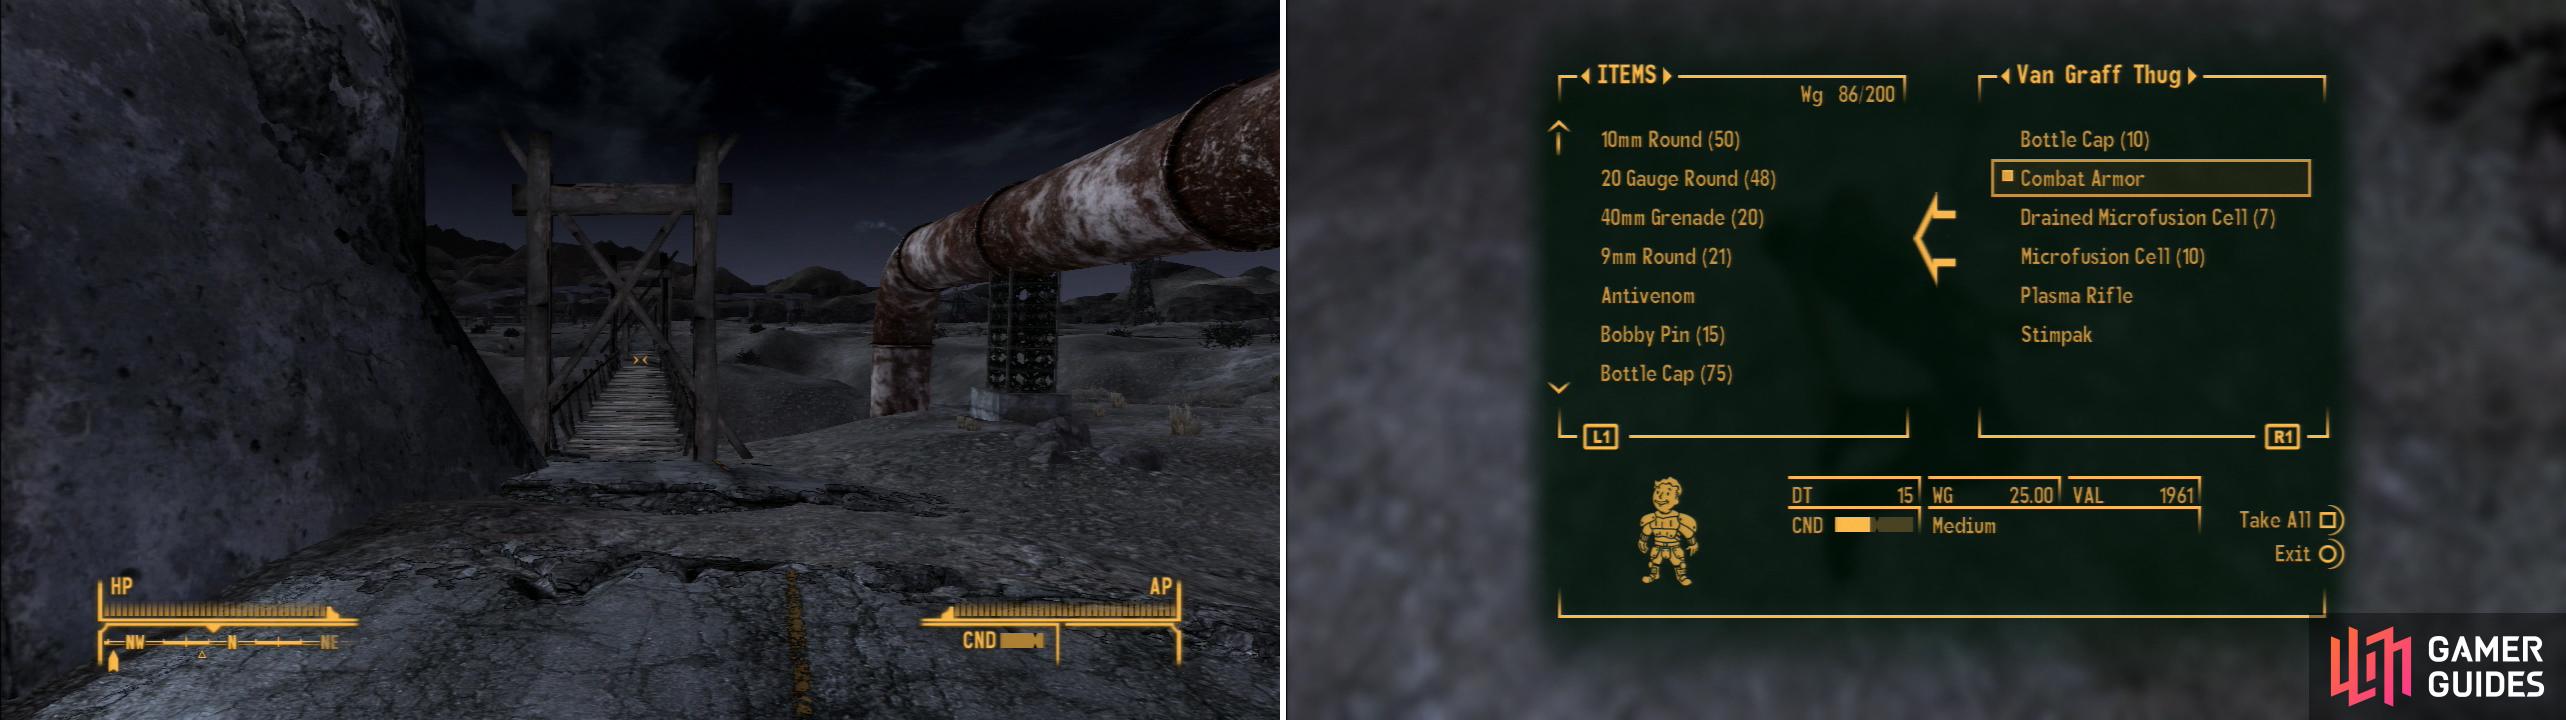
Follow the road north from The 188 Trading Post and cross a bridge to find Durable Dunn’s Sacked Caravan (left). Here you can scavange some valuable suits of Combat Armor from some corpses (right).
Continue north across the northern bridge and follow a road beyond to the west until you find another bridge. From this bridge follow another road north past some houses and turn west when you run out of north, then take the next road north and follow it until you reach a large, walled complex which houses the Crimson Caravan Company. When you find the gate (and the bright red “Crimson Caravan” sign over said gate) turn east to find, finally, the New Vegas Medical Clinic. This is your ultimate goal, but you currently don’t have the funds to purchase anything yet. Next stop? New Vegas.
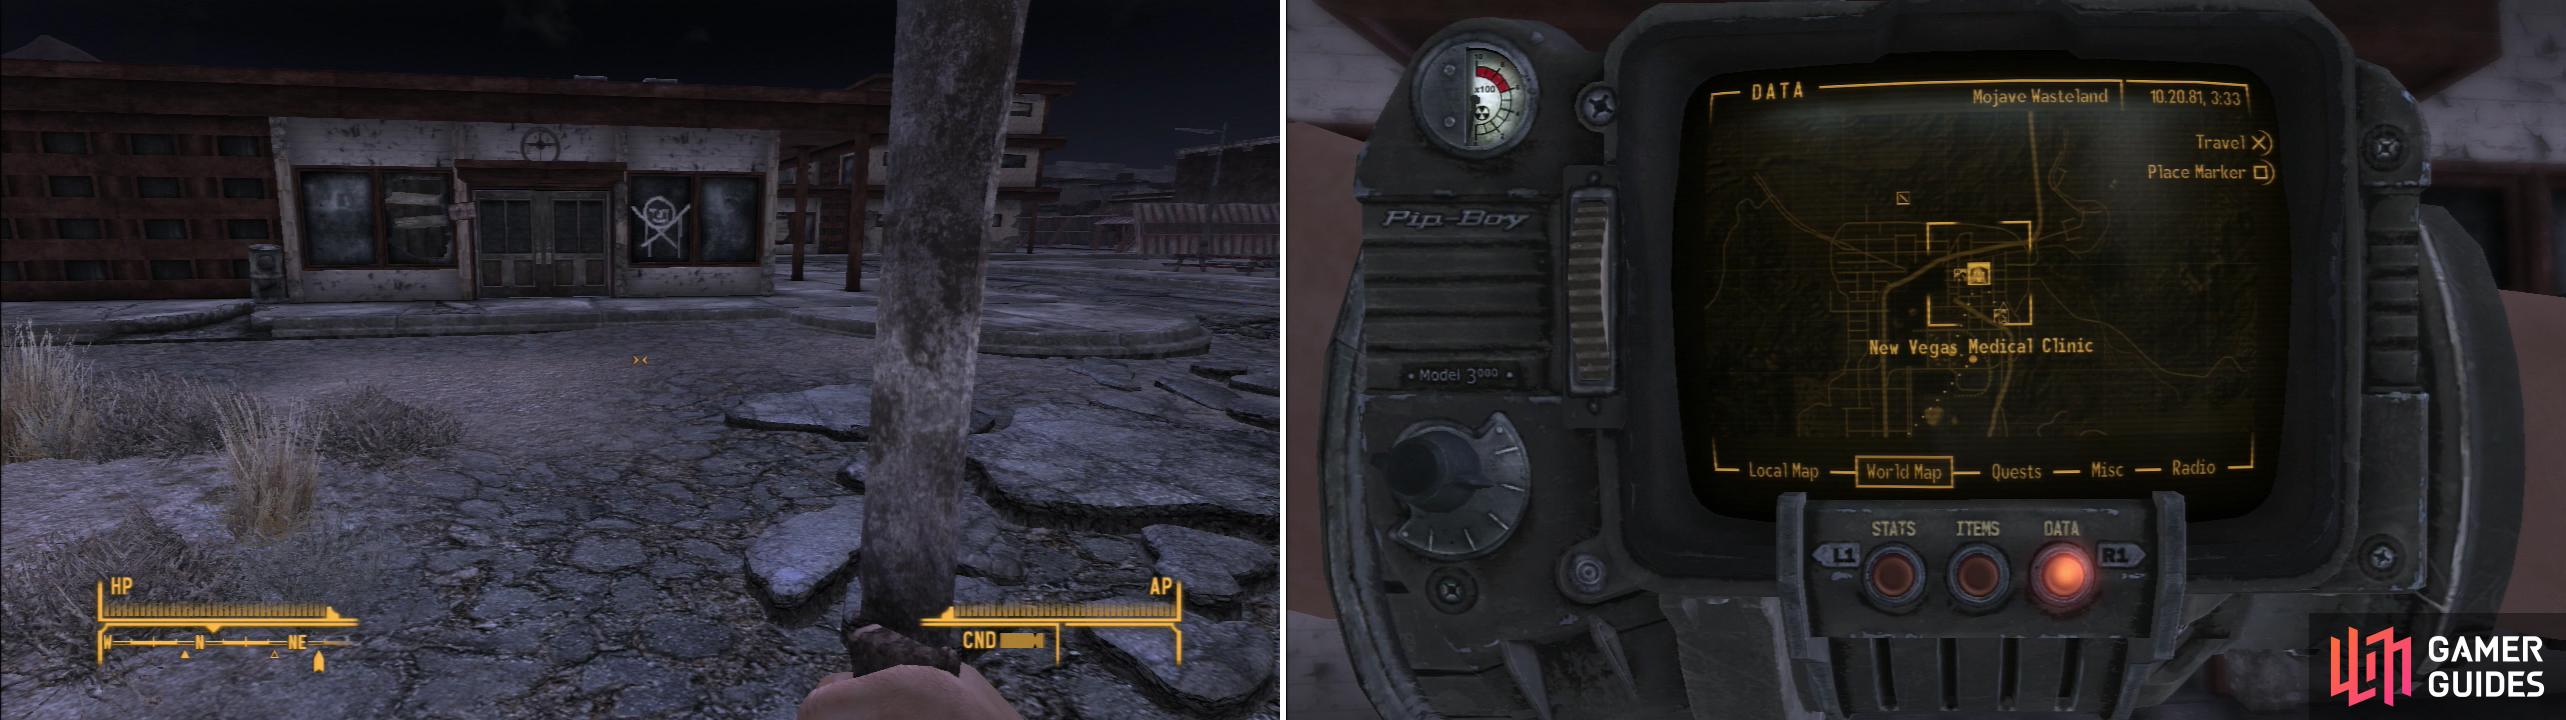
Pass through the New Vegas outskirts to finally reach your destination; the New Vegas Medical Clinic (left). Note its location on the Pip-Boy World Map (right).
Making a Fortune in Freeside
Make your way north around the Crimson Caravan Company complex and follow some train tracks west to find Freeside’s North Gate; Freeside being the slums lying immediately outside of New Vegas. Enter Freeside and make your way south past some bodyguard-for-hire to reach a blue gate leading deeper into Freeside. Through this second gate head south-west until you reach a four-way intersection, at which point turn north-west and head under a “Freeside” sign and listen to some Atomic Wrangler Criers try to sell you on their workplace… fitting, because this is your next destination. Keep going north-west to find the Atomic Wrangler, where you’ll earn the Caps required to gain access to the New Vegas strip.

Sell a suit of Combat Armor at The 188 Trading Post (left) which will provide you with the initial Caps you’ll need to fund your gambling (right).
If you sold one of those suits of Combat Armor you found at Durable Dunn’s Sacked Caravan, you should have plenty of money to gamble. Head north-east into the back room and talk to the cashier and convert 1000 Caps (or as many as you have) into chips. Once done… it’s time for some gambling!
Save your game then head to the Blackjack table, the rules to which everybody should know; get as close to 21 as you can and, if your hand is higher than the dealer’s without surpassing 21, you’ll win your wager (up to 200 Caps). If you’re feeling extra lucky and your cards are low enough to risk doubling down, you’ll win twice your bet. If your Luck score is high, you should win far more often than you lose, and doubling down when your first two cards are between nine and thirteen is a pretty safe bet. If you win on a natural, two-card 21 - a Blackjack - you will gain bonus Caps. When your Luck score directly influences the outcome of the game, you’ll get a notification (following a win) saying “Your feel lucky”. Be sure to save/load at first when you have relatively few Caps, but after you’ve won a few rounds (betting max every time) and secured a health collection of chips, you can afford to be more bold and lose a few hands. After you play ten games of Blackjack you’ll complete the challenge “Double Down”, which will earn you 100 XP and a trophy/achievement of the same name. If you avoided conflict and didn’t discover too many areas, this shouldn’t level you up, but if it does… no huge loss.
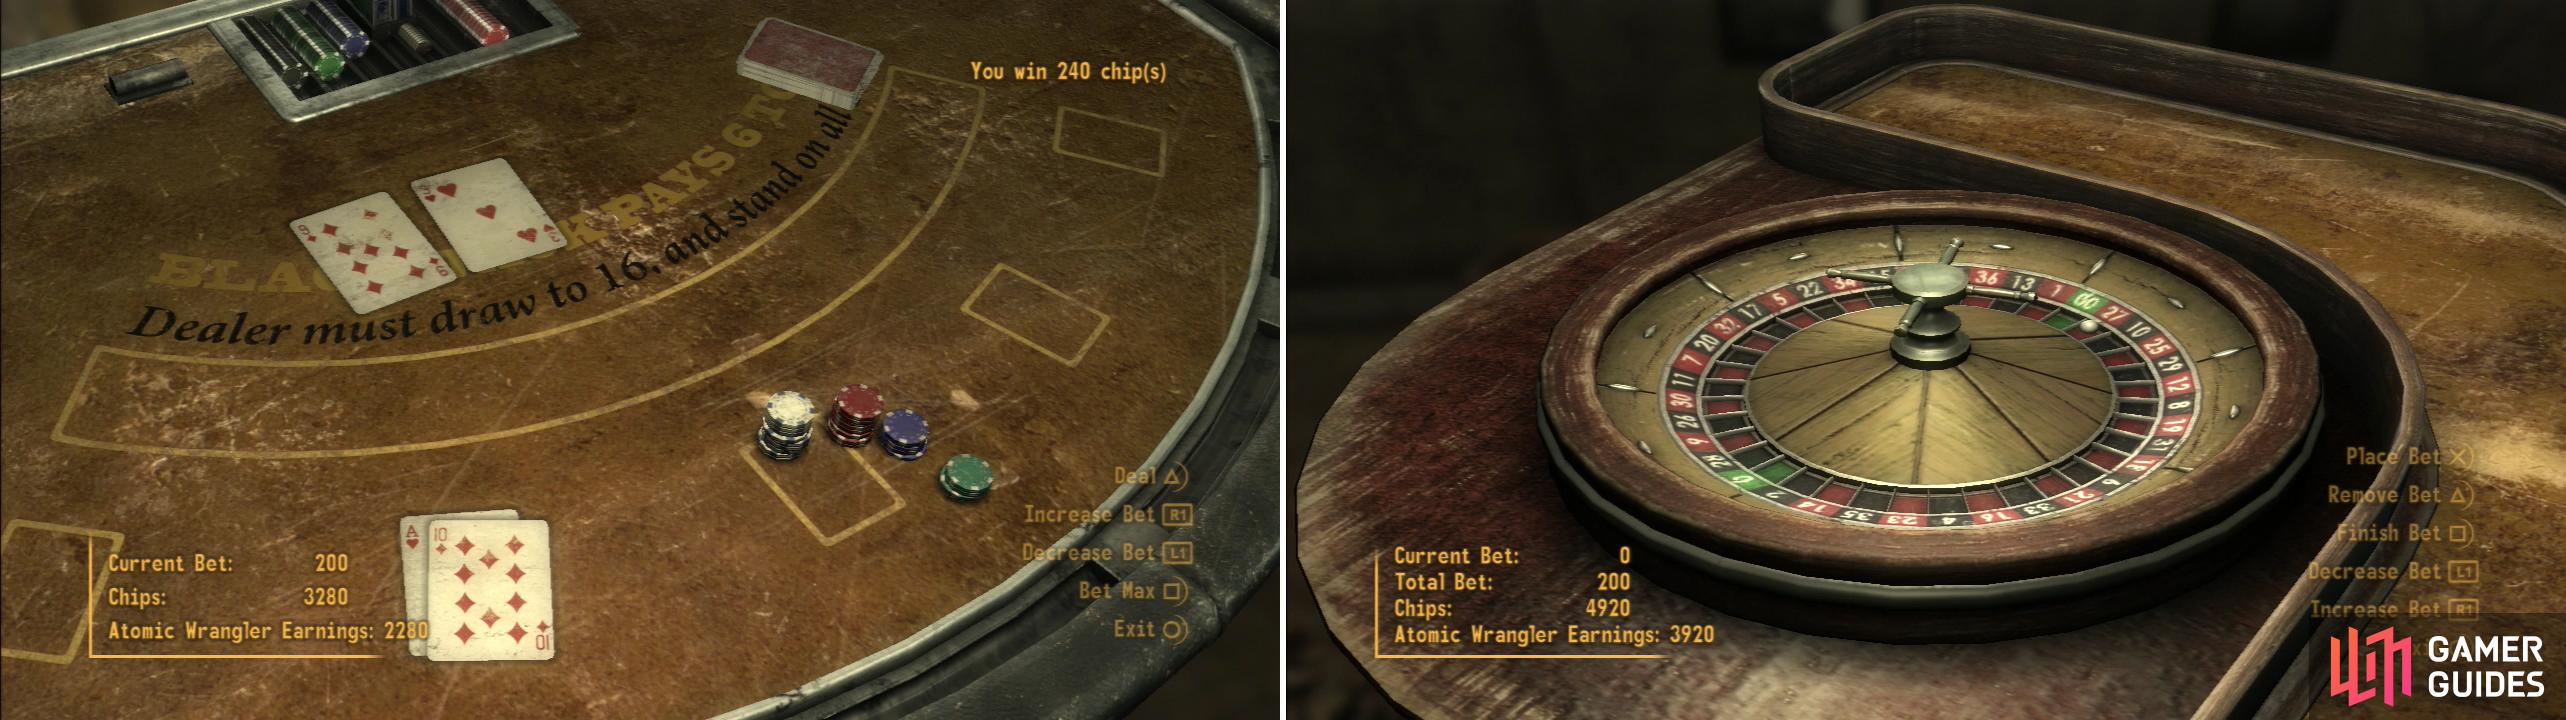
Start out by playing Blackjack to grow your funds (left) and when you near the casino’s winnings cap, break the bank spectacularly by winning at Roulette (right).


With eight Luck, your earning potential at Blackjack should be all but a foregone conclusion, but like most casinos, the Atomic Wrangler are a bunch of sore losers. Once you reach 5000 Caps of profit, they’ll cut you off, so play Blackjack only until you’re near the 5000 Cap limit. If you’re going to reach - and pass - the 5000 Cap limit, why not surpass it by as much as possible? For that, turn to Roulette and bet the maximum value on one - and only one - number and play until you win that juicy 35:1 jackpot… or until you lose too many times. No point in winning the jackpot if you waste a lot of money doing it. With any luck you’ll walk out with around 10,000 extra Caps. Along the way you’ll earn various complimentary gifts, including Beer, Whiskey, a Dapper Gambler Hat, Absinthe and a Dappler Gambler Suit.
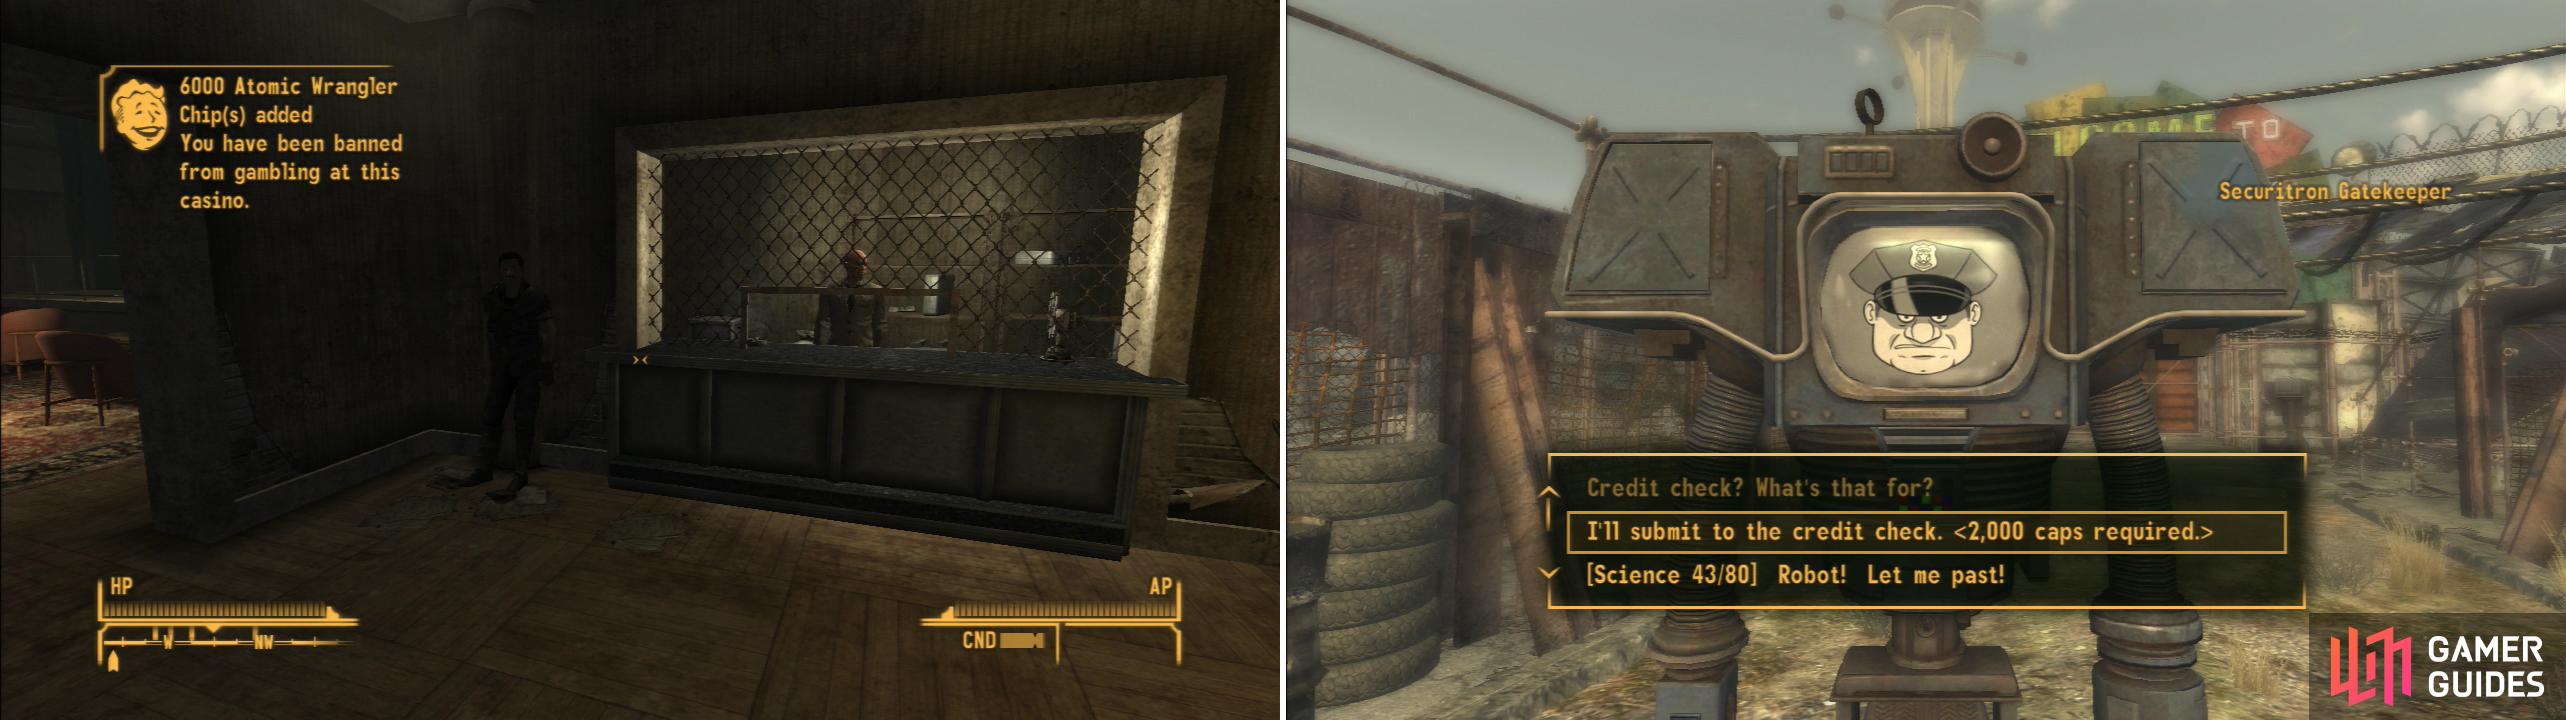
Rob the Atomic Wrangler for all it’s worth (left) then take your mound of Caps to the New Vegas Strip. Your money should be enough to pass the credit check and get you into The Strip (right).
Hittin the Strip
Now that you’re filthy, stinkin’ rich, leave the Atomic Wrangler and head south-east to return to the four-way intersection and turn south-west to reach The Strip North Gate. If you are harassed by any Freeside Thugs, keep running until you near the gate and a man named Old Ben should help you out. When the fighting is done, Old Ben will talk to you and give you some advice about the strip, and tell you about his past. Follow his advice and talk to the Securitron Gatekeeper and either pass a difficult Science check (a Science score of 80+ is required) or just flash your Caps (2,000+ Caps required) to gain access to the strip. On the plus side, you only need to pass this credit check once.
As soon as you pass the credit check, you can return to the New Vegas Medical Clinic and start spending some of your Caps on implants… or at least the Intelligence Implant. You can do this by talking to Doctor Usanagi, who is not shy about peddling her implants. The Intelligence implant will cost 4,000 Caps, which you should be easily able to spare by now, and it’s the only implant you really need to get at this moment. Once you have it, you no longer need to fear leveling up, as you’ll have all the Intelligence you’ll ever naturally have. Don’t spend too much upgrading, however, as there’s still more gambling to be done! If you’ve got the Caps, also consider boosting your Luck; it’ll make winning more likely and speed up the gambling process, even if slightly. As long as you leave the clinic with 1000 Caps, you’ll have more than enough seed money to gamble with.
Return to Freeside and enter the strip where you’ll be pestered by Victor; the robot who saved you in Goodsprings, who will pass on an invitation from Mr. House, the ruler of the New Vegas who resides in the Lucky 38. This will start the quests Ring-a-Ding-Ding! and The House Always Wins, I, neither of which you’ll be messing with any time soon. Across the street from the Lucky 38 is Gomorrah (9,000 Cap limit) and in the next area you’ll find The Tops Casino and the Ultra-Luxe Casino (15,000 Cap limit). Repeat the same strategy for this place as you used in the Atomic Wrangler; play Blackjack until you’re near the winning Cap then break the bank by winning one mighty 35:1 round of Roulette. Just… stay out of The Tops for now, however, as it continues the story, and there’s no need to bother with that just yet.
In addition to Caps, you can earn some trophies/achievements for playing ten games of Roulette and slots, as well as enough XP to level up. Of course, the casinos will also compliment you as you win, as follows: Gommorah will give you two Brahmin Steaks, a box of Mentats and finally some Combat Armor, Reinforced, which itself is very valuable… and probably too expensive to bother wearing. The Ultra-Luxe will reward you with a Brahmin Wellington and the Bon Vivant Suite Key, which grants you your own permanent suite in the Ultra-Luxe where you can rest and take advantage of their unlimited clean water. A very nice win for people playing in Hardcore Mode. FOD might still be an issue, but that issue will be addressed shortly…


Repeat the process you used to win money at the Atomic Wrangler in Gomorrah and the Ultra-Luxe (left), then spend your winnings buying valuable implant at the New Vegas Medical Clinic (right).
When you’re done robbing Gomorrah and the Ultra-Luxe, return to the New Vegas Medical Clinic and get whatever upgrades you want, you have the Endurance for, and can afford. You should already have the Intelligence Implant, the next best ones to get, in order of importance, are the Luck Implant, Strength Implant, Sub-Dermal Armor, Agility Implant and the Perception Implant. The Regeneration Implant may come in handy in Hardcore Mode, while the Charisma Implant is… pretty much useless. Once you’re done going under the knife, it’s time to return to Goodsprings and get started on the tutorial you probably no longer need. Alternatively, if you want to a bit of extra grinding, you can go hunt Bighorners, which will be covered in the next paragraph. Otherwise, skip to “Rise From Your Grave!” .
Bighorner Beatdown
Now for a bit of helpful grinding! Bighorners are large ram-like critters that live in mountainous areas of the Mojave which give good XP (10 for Calves, 25 for adults, and 50 for Bulls). They’re not entirely push-overs, but their range is limited and their damage is nothing special. Individuals can be killed with melee weapons by just backing up and attacking. Why kill them? Aside from the obvious benefits of putting a few levels under your belt, if you’re playing in Hardcore Mode their meat is incredibly valuable as a food source. Just be sure to get your Survival skill up to 50 and you’ll be able to turn that Bighorner Meat into Bighorner Steaks. Since they can drop several pieces of meat each, a few Bighorners can keep you full for a long time.
They appear in many areas, including (but not limited to) near the Ruby Hill Mine (west of New Vegas), around Spring Mt. Ranch State Park (south-west of New Vegas), west of Camp Golf, south of Nipton and of course along the train tracks running south of Goodsprings, the ones you took back Primm and Nipton during the New Vegas Medical Clinic Run. Kill however many of these dangerous beasts you care to; they’re numerous near Spring Mt. Ranch State Park, but that also makes them more dangerous, as they’ll team up against you, and at this point in the game, getting knocked down by a Bighorner’s headbutt can prove fatal. Using a Caravan Shotgun or Cowboy Repeater (common weapons carried by Fiends, Gangers, and other low-level human foes which are also sold by pretty much every merchant who carries arms) to deal with groups is ideal, and although they’re hostile, they won’t move to attack unless you get too close or attack first. Use this to your advantage and try to get sneak attack criticals.
If you need guns and ammo to carry out this grinding spree, you have some options. South of New Vegas you’ll find Fiends in the surrounding ruins, particularly west and south of Camp McCarran around the New Vegas Steel factory and the Allied Technologies Offices, respectively. If you avoid going too deep into the ruins and picking fights with unique Fiends (which are part of a quest later), you can safely harvest the Fiends for their weapons and ammo, which can include Laser Rifles, Plasma Rifles, Laser RCWs, Spiked Knuckles, Cowboy Repeaters, Caravan Shotguns and the relevant ammo for them. These weapons are, in general, more than a match for Bighorners, and when fully repaired sell for a decent number of Caps. The Gun Runners stall (south of Freeside’s East Gate) sells a healthy selection of ammo, as does Chet at the Goodsprings General Store and the Arms Dealer at the 188 Trading Post.
Simply put, beat up Fiends around Camp McCarran, use their weapons to kill Bighorners and earn some Caps, rest for 72 hours (using Bighorner Meat/Steaks to feed yourself and taking advantage of the free water in the casinos, if necessary) and repeat. If you broke the bank at the Ultra-Luxe, you can also rest in their beds for free. Doctor Usanagi at the New Vegas Medical Clinic and Doc Mitchell at Goodsprings will be happy to heal broken bones and radiation sickness for 50 and 100 Caps, respectively. Do this as much as you want to build up supplies of food, Caps, ammo… and of course XP. You can also wait until you’re done with the next section, “The Goodsprings Tutorial”, after which you’ll have access to the free water at Goodsprings Source, campfires with which to cook your Bighorner Meat and a decent place to stash loot.

Early Leveling Tips
Since you may or may not be grinding, some early level tips should be discussed; namely how to allocate your first precious perks and skill points. First, if you’re playing in Hardcore Mode be sure to get your Survival skill up to 50, as this will allow you to make Bighorner Steaks and make food a non-issue for the rest of the game. After that, there are a few skills you should improve to make early questing easier, and to improve your survival. Getting your Melee Weapons skill up to 45 for Super Slam will allow you to rely on Melee Weapons and Unarmed to kill most everything you might come across at the beginning of the game, saving you precious ammo and wear and tear on your guns.
After that, get Speech up to 40, then spend the next few levels boosting Lockpick, Guns and Unarmed to 75, 75 and 70, respectively. If you get Piercing Strike at level twelve (70 Unarmed required) you’ll be able to handle all but the toughest foes in melee. Still, sometimes putting your range in between you and your enemies is the safest thing to do, and even a Cowboy Repeater can handle most things with a 75 Guns skill score, Finesse and Better Criticals. Lockpick is mostly just necessary to boost to get various loot, and it can be put off a bit after you get 50 points in it in favor of the two more combat-focused skills. Still, to get one of the best, most powerful guns in the game relatively early, you’re going to need a Lockpick score of 100. 75 will suffice if you have Comprehension, read a magazine, wear a Perception-boosting item (most hats will do) and pop some Mentats.
Once all that is done, presumably when your level is in the mid-to-late teens, start boosting other useful skills like Repair, Science and Sneak, and after those are in good shape, try to hit the skill thresholds you need for some of the better perks in the game, like Silent Running (50 Sneak), Them’s Good Eatin’ (55 Survival), Living Anatomy (70 Medicine), Slayer (90 Unarmed) and Jury Rigging (Repair 90). In general, boosting your skills up to 70 and letting skill books do the rest is a good idea.
No Comments