
| Important Items in This Area |
|---|
| Big Book of Science |
| Nikola Tesla and You x2 |
| Q-35 Matter Modulator |
Train Station
South-west of the Grub n’ Gulp Rest Stop and north-west of the 188 Trading Post you’ll find REPCONN Headquarters. North of the large, elevated HQ building you’ll find a Train Station, which you can rob for some Pre-War Money, Cartons of Cigarettes and other mundane valuables. After you’re done with that optional bit of looting, head over to the REPCONN Headquarters building, which is patrolled by a few neutral Maintenance Robots. These robots don’t realize that the world in which they were programmed is no longer relevant, but that doesn’t stop them from doing their job. Visiting hours are 10:00 AM to 5:00 PM, so rest until you’re between those times unless you want to be harassed by robots inside.
REPCONN Office Main Floor
Once you’re in the building you’ll see some dead Fiends on the ground in the lobby. Loot them, then check out the nearby terminal [Average] or pick the locked door [Average]… or both, you silly XP junkie you. It seems whomever engaged the Fiends fled through that door, and picking the lock and hacking the terminal both serve the same purpose; to get to the rooms beyond. There is a small complication, however; the security bots are still active, and if you don’t follow their protocols, they’ll attack. Sure, you can probably just fend them off, but let’s treat that as the fallback plan, not the goal. Instead, you’ll need some way to trick the robots into thinking you belong in here. One way is by succeeding at a [Speech 60] check. Another is to get some identification. A third way is to scan your facial data into the database. All three approaches will be covered.
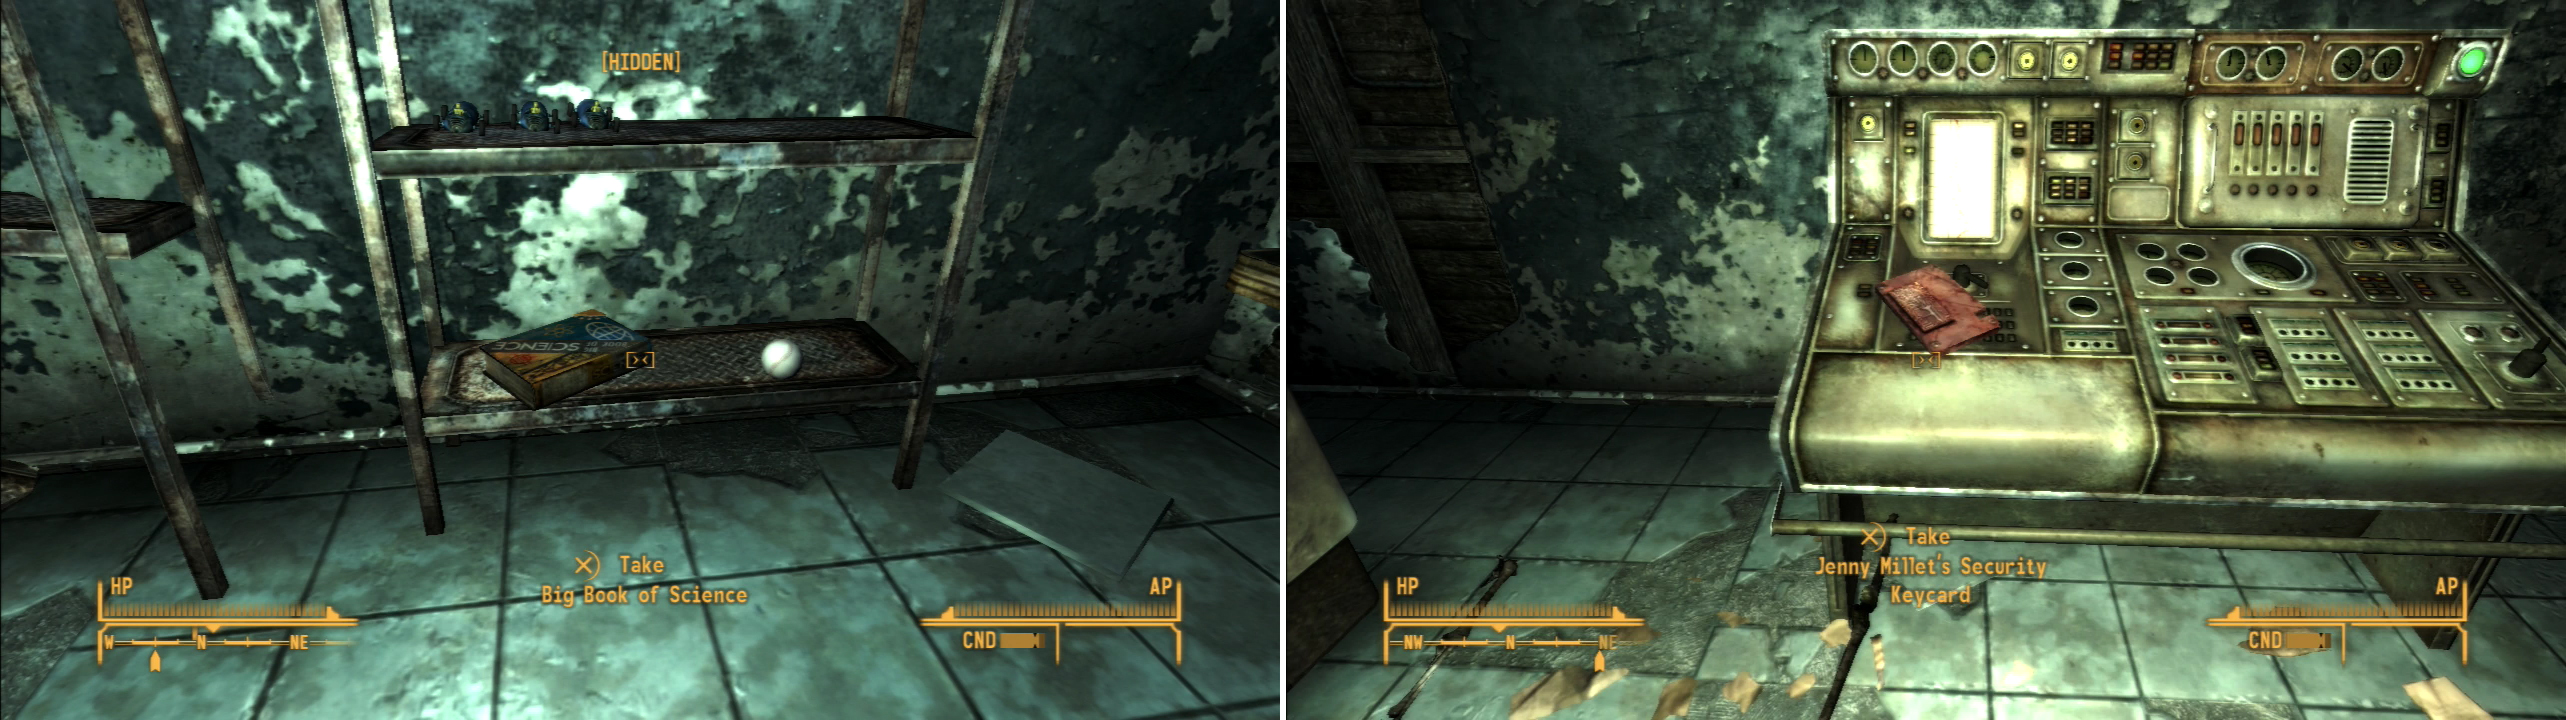
Find a Big Book of Science in the gift shop (left) then complete the tour to obtain Jenny Millet’s Security Keycard (right).
Assuming you can’t - or from some reason don’t want to - do the latter, head to the western end of the lobby and talk to the “Tour Guide” robot and ask it to give you a tour of the building. The tour itself is mostly flavor, but it is a nice excuse to explore the rest of the building, and it will cause the Tour Guide robot to open a locked door [Average] at the end, if that is in fact a good thing.
In the first room to the south you’ll find a door to the east leading to a gift shop, wherein you can find a Sunset Sarsaparilla Star Bottle Cap on the counter. If you can get through another locked door [Hard] to the north you’ll find a small - but lucrative - profitable storage room. Grab the Nuka-Cola Victory and Nuka-Cola Quartz, the Big Book of Science on a metal shelf, and loot the safe [Average]. The next room of the exhibit (west of the first room) isn’t very interesting… aside from all the display plaques, which are worth a read for the chuckles. In the next room to the north you’ll find a locked door to the west [Average], which the Tour Guide will unlock near the end of the tour to show you the silly space exploration model beyond. In this room you’ll find a door to the south of the solar system display. Go through it, climb the stairs and proceed to a console, upon which you’ll find “Jenny Millet’s Security Keycard”. It should be enough to fool the security robots on this level.
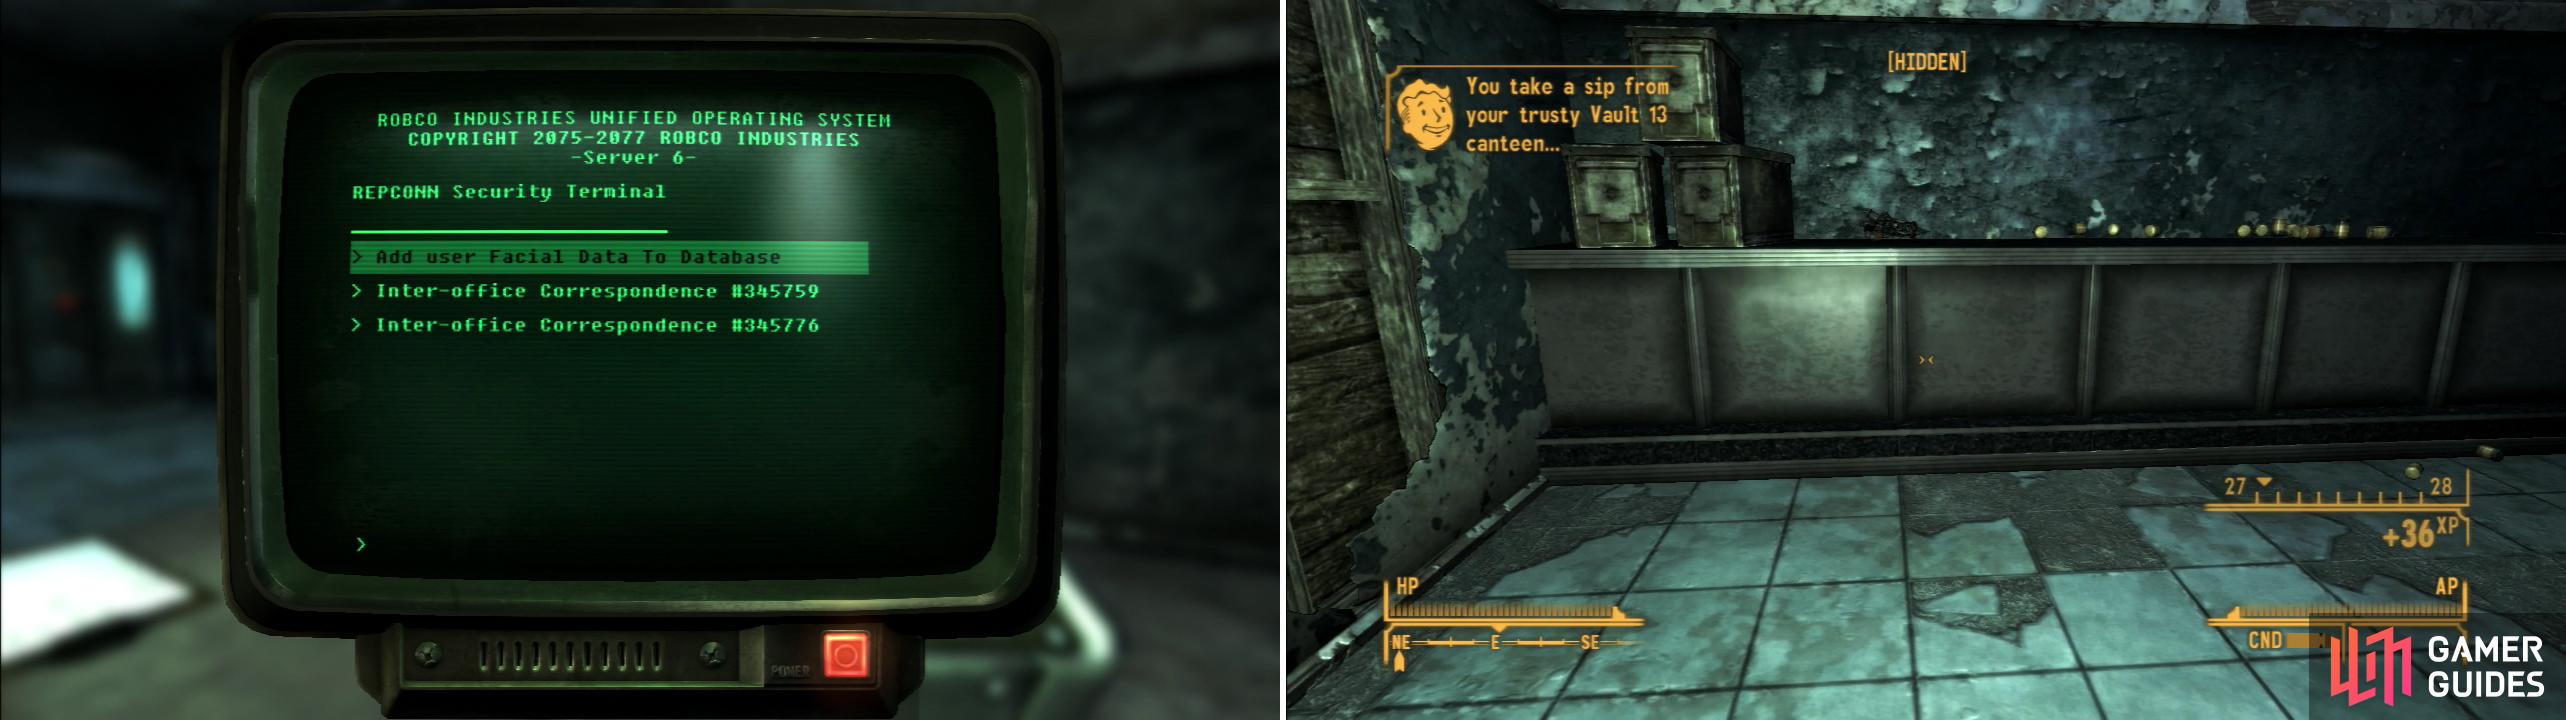
Add your own facial data to the database to fool the automated security (left) and be sure to loot a supply closet for a fine collection of loot (right).
Return to the lobby and go through the locked door [Average] (which “Jenny Millet’s Security Keycard” opens) to reach a small office room. Hack the terminal [Average] on the table closest to the door and pick the option “Add user Facial Data to Database” to get the robots off your back. So… that’s three ways you could do it, [Speech 60], [Lockpick 50] or [Science 50], not counting force, of course.
Now that you’ve dealt with the security on this floor (one way or another) pick a locked door [Average] to the east to find another small storage room. Grab the abundant Microfusion Cells off the counter, loot a First Aid Box and three Ammo Boxes, then pick up the Plasma Pistol and the Plasma Rifle. In the previous room you can score a Sunset Sarsaparilla Star Bottle Cap on the middle desk . Once that loot is all yours head through a doorway to the west. Further west you’ll find a locked door [Very Hard] and a terminal [Very Hard]. Pick your poison, eh? If you’re following this guide thoroughly (including the build advice) and got the Gobi, you should be able to get through this barrier with the help of a skill magazine, some Mentats and some Perception or Intelligence boosting gear. If you can get through the door, great. If not, there’s another way through, and the guide will assume the latter.
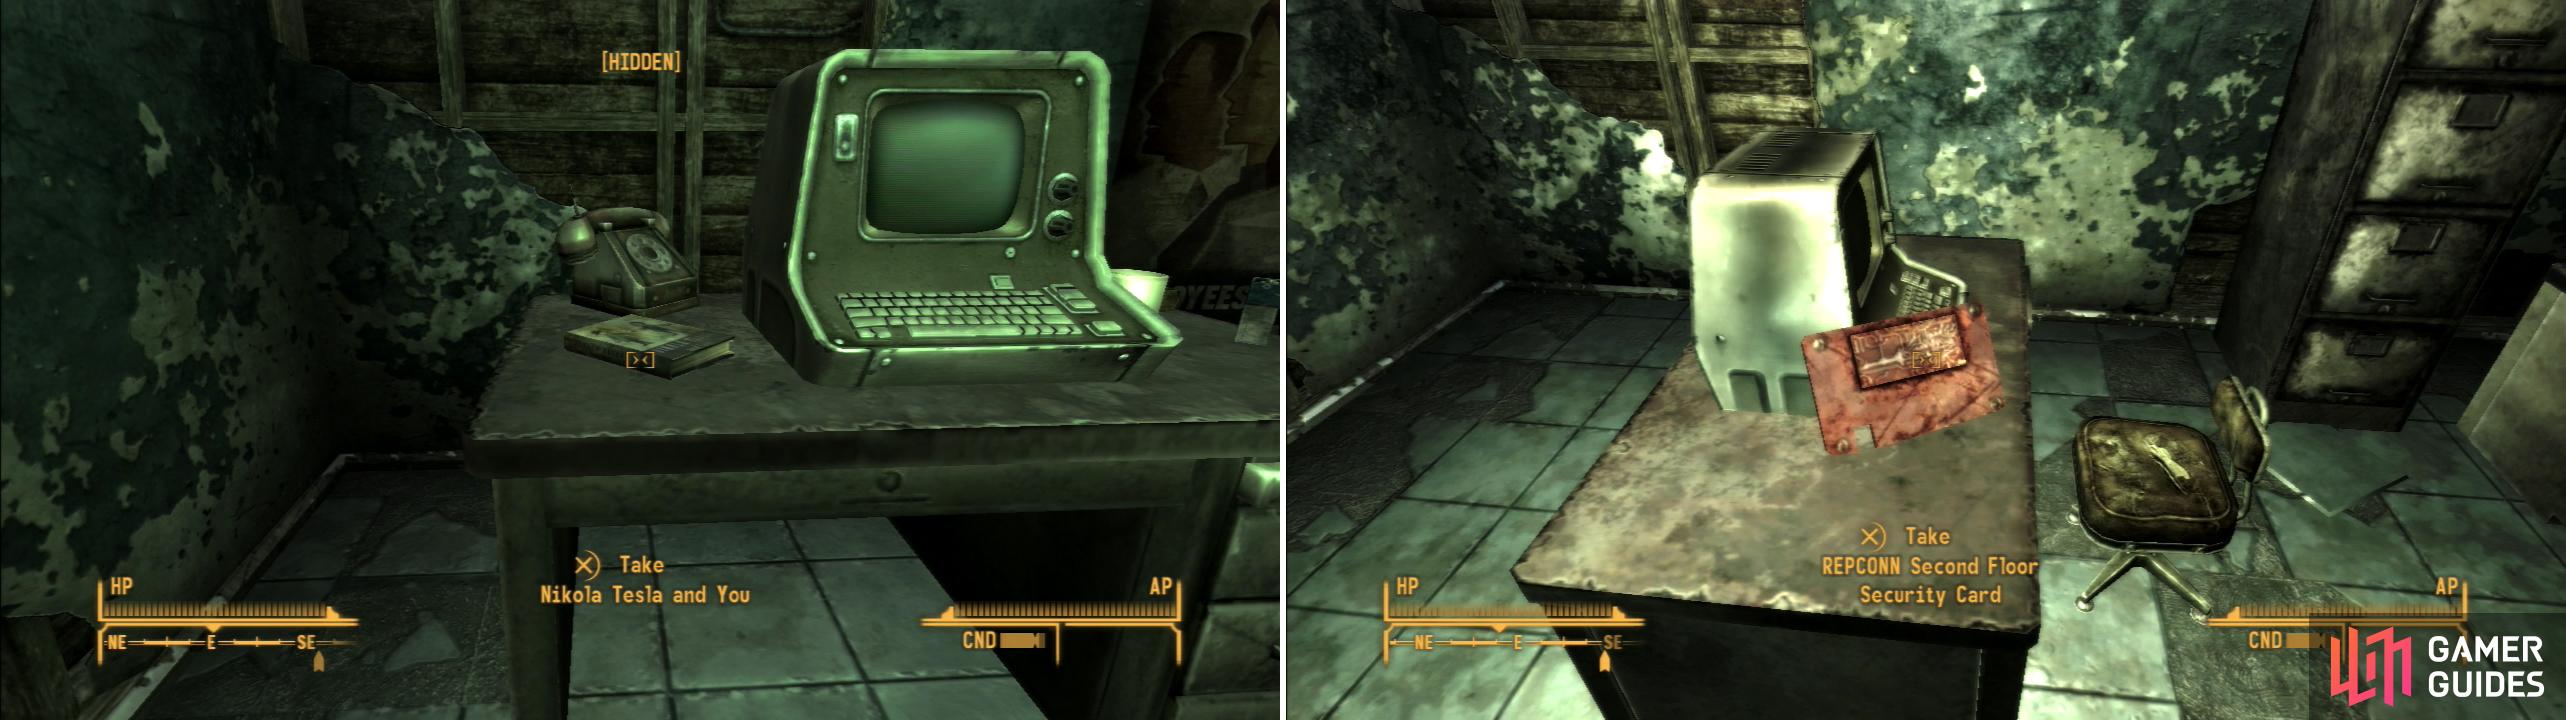
Grab a copy of Nikola Tesla and You from a desk on the second floor (left). You can find a security keycard to bypass the security on the second floor (right).
REPCONN Office 2nd Floor
Assuming you can’t get through the locked [Very Hard] door, go north up some stairs to reach the second floor. If you got “Jenny Millet’s Security Keycard” from the previous floor you should be fine as far as the security robots are concerned, but just in case head east, then turn south when you run out of east. Go through the first door to the left (east) and search the north-eastern corner of the room to find a desk with a Terminal [Very Easy] which you can hack to “Add user Facial Data to Database” and clear you on the second floor. Once that’s done, grab a copy of Nikola Tesla and You from the desk and head through a door to the west.
Proceed west until you reach a fork in the path. Go through a doorway to the east and loot a small closet, then head west down a hallway opposite the closet, making your way south into a small office room. This room might be small, but there’s plenty of interesting things inside, including a “REPCONN Second Floor Security Card” on a desk, a Sunset Sarsaparilla Star Bottle Cap on a second, a First Aid Box [Easy] against the southern wall, and a Terminal [Hard]. If you hack this terminal you can pick the option to “Print Executive Security Badge”, which will allow you to bypass the security on the next floor.
Leave the office room and head west to reach another hallway. Continue south a short distance down the hallway and turn west down another hallway to reach… yet another hallway. Head to the northern end of the hallway and turn east to find two locked doors [Average]. Beyond the northern-most of these two doors you’ll find a storage closet containing three Ammo Boxes, a First Aid Box and a Doctor’s Bag and some mechanical components on a metal shelf. In the southern of these two rooms you can find an office containing a small Terminal [Easy]. If you hack it you can learn about some weapon REPCONN was working on. Access the
“Encrypted Message” and “Q-35 Release Notes” entries to get a blank note and the note “Matter Modulator Project”.
Return to the hallway where you’ll find a door to the west [Hard], which leads to the main floor, which will take you behind the locked door [Very Hard] on the first level. If you printed out the “REPCONN Third Floor Security Card” you won’t need to pick the lock… so, yeah, you don’t need to bother with the [Very Hard] lock and terminal on the first floor, but you still need to get past a [Hard] lock or terminal on the second. If that’s too much for you, there’s one more way to get beyond the [Very Hard] door on the main floor…
Go through the door [Hard] and loot everything beyond if you can, but assuming you can’t (or after doing so and returning to this area) continue to the southern end of the hallway to find two more rooms. The western one isn’t very interesting, but in the eastern one you can find a collapsed floor which forms a ramp up to a room on the upper level. Up here in the north-eastern corner of the room you can find a locked door [Easy] which provides an alternate route to the top floor.
The only reason to go this route, however, is to reach the master Terminal [Very Hard] in the building from which you can disable all the robots… but if you are able to hack a [Very Hard] terminal to do this, you should have been able to hack a [Hard] one and get the “REPCONN Third Floor Security Card”. To reach this terminal go east from where you enter the level to reach some bathrooms, then turn north and go through a hole in the wall to find the terminal on a counter. From here if you go west through some doors you’ll reach a hallway. Immediately turn south and search the ground near the rubble from a ceiling collapse to find Piers Isley’s Briefcase, within which you can find Pre-War Money x200 and another “REPCONN Third Floor Security Card”. This will give you access to the [Very Hard] door on the first floor.
Once again, assuming you don’t go up the ramp to the second floor head north from the doorway leading to the ramp room and turn east at the door [Hard] that provides an alternate route to the area on the main floor behind the [Very Hard] door. Continue east down the hallway to reach another hallway. Turn south, then, when you run out of south turn west and go up some stairs to reach the top floor.
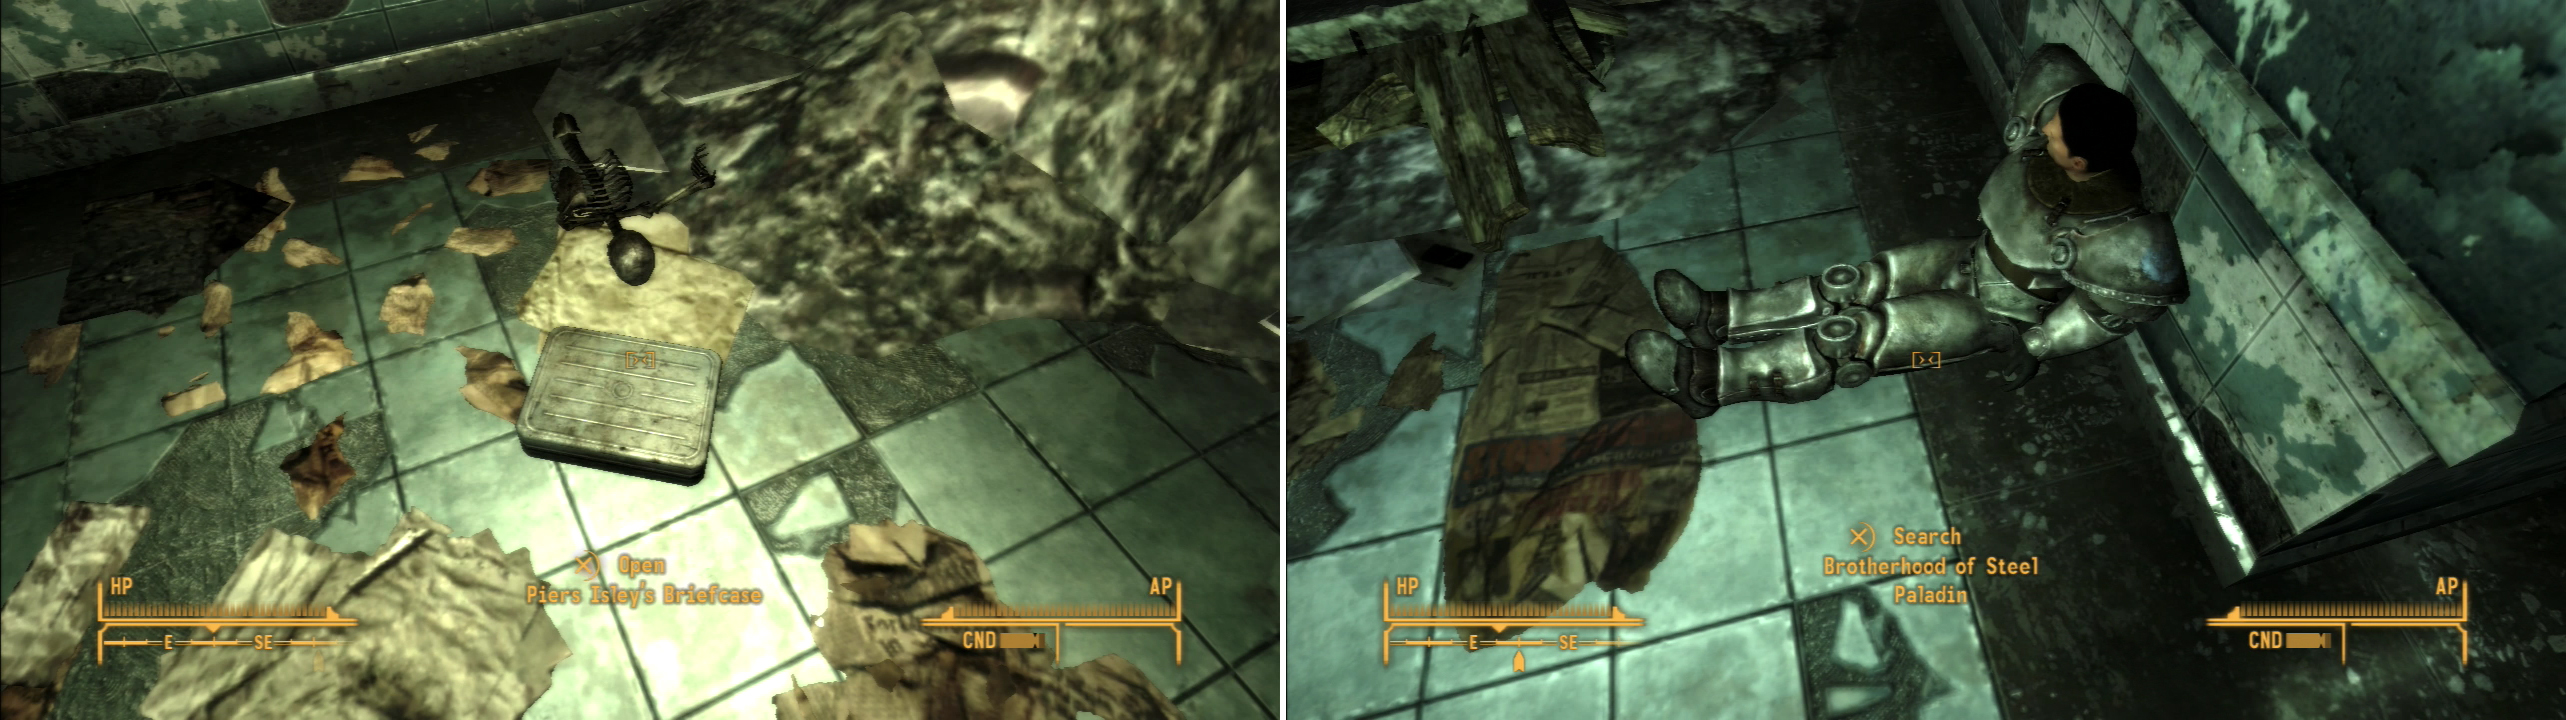
Piers Isley’s Briefcase contains some obsolete Pre-War Money and a REPCONN Third Floor Security Card (left). On the third floor you can also find the remains of a Brotherhood of Steel squad (right).
REPCONN Office Top Floor
From the (non-ramp) entrance to the top floor head north, then east, go through a doorway and turn north to find the bodies of two Brotherhood of Steel Paladins, long since killed… presumably by a combination of the building’s security forces and decline of structural integrity. Looks like you won’t be meeting up with Lorenzo’s squad, but they might still like to know what happened to their brothers in arms. Loot the bodies for some tasty Brotherhood T-51b Power Armor and a “Brotherhood of Steel Mission Holotape”, which will provide you with a password to the Brotherhood of Steel stronghold. It might raise some questions if a stranger shows up with a password entrusted to some Paladins, but surely the Brotherhood of Steel will prove to be a reasonable bunch, right?
Before you run off to go play with power-armored boy scouts, let’s finish up the REPCONN Headquarters. Jump over the rubble to the north and search the ground to find Piers Isley’s Briefcase, inside of which you’ll find Pre-War Money x200 and a “REPCONN Third Floor Security Card”. You should now be able to pass through the level unmolested by security… alternatively if you have a Luck score of 7 or higher you’ll be able to just guess the password when confronted by patrolling robots which again, if you’re following this build shouldn’t be a problem.
Go through some double doors to the east to find a room with a Terminal [Very Hard] on a desk. If you manage to hack this monster of a terminal you can shut down all the robots in the building, for what that’s worth. You can also score a Sunset Sarsaparilla Star Bottle Cap on the desk. to the south are some bathrooms with no noteworthy loot inside them, and west of these bathrooms is a door [Easy] which leads to the ramp-room on the second floor.
Continue down the hallway to the north, go through a doorway and turn west. Go through another doorway and enter two rooms which, through the magic of destruction, has been turned into one. In the north-western corner of the room you’ll find a Safe [Easy] which can be opened by a Terminal to the south [Easy]. Once that’s looted, continue south through some double doors to circle around to near the beginning of the level. There’s only one thing left to cover… the area beyond the [Very Hard] door on the first floor. By now you should be able to get around it, one way or another.
![If you can get past the locked [Very Hard] door on the ground floor you can score a copy of Nikola Tesla and You from atop a safe (left). You can also obtain the Q-35 Matter Modulator (right).](/assets/guides/79/118904-1447027200.jpg)
If you can get past the locked [Very Hard] door on the ground floor you can score a copy of Nikola Tesla and You from atop a safe (left). You can also obtain the Q-35 Matter Modulator (right).
Looting the Shipping Room
If you enter from the locked door [Hard] on the second floor, start out by looting the Cabinets on the floor you find yourself on, then head north and descend through a broken floor to reach the secured storage room behind the [Very Hard] door on the first floor. By picking the locked door [Very Hard] or by using the “REPCONN Third Floor Security Card” you’ll end up on the ground floor by default. However you get here, grab the Q-35 Matter Modulator in the corner of the room to the south-east then head to the north-west to find a Safe with a copy of Nikola Tesla and You on top. There’s also minor loot on a metal shelf and a First Aid Box on the wall.
You’re now done with REPCONN Headquarters. Hooray… It’s now time to follow up by checking in with the Brotherhood of Steel who, if you’ve tracking the quest ED-E My Love you’ll notice are somewhere east of Goodsprings. If you messed around with the terminals at HELIOS One, you’ll have the Hidden Valley map marker near the quest marker. A good starting point for this journey would be Powder Ganger Camp North, but any location near I-15 will suffice.
No Comments