
Mortardom
Hijacked a Wraith and used it to kill at least four enemy Wraiths in mission 5 on Heroic or harder

20
Part 1: Size Matters
From the start of the level, go through the tunnel in front of you. Upon exiting from the other side, you’ll see a giant armored vehicle to the right. We’re going to be escorting this bad boy. Enter the vehicle and climb to the top to talk to the guy who’s highlighted with an objective marker, there is a sniper rifle on the wall close to this guy if you are interested. After the conversation, walk to the next objective marker and pick up a jetpack.
The mammoth will start moving. Wait for it to go around the corner and once the particle cannon has fired, keep an eye on the left hand side of the road, there will be some covenant forces dug in here. You will have to neutralize all of the enemies in this vicinity to continue.
Once the vehicle stops, you will have to run over to the pelican crash site (to the right of the mammoth). Pick off the sniper in the tower and any visible enemies on the ground below before returning to ground level and leaving the mammoth. Head past the now vacant sniper tower towards the objective marker, you will see the enemies the phantom just dropped off attacking the downed pelican. There are a few elites and a pair of ghosts. Once you have dealt with them pick up the target designator.
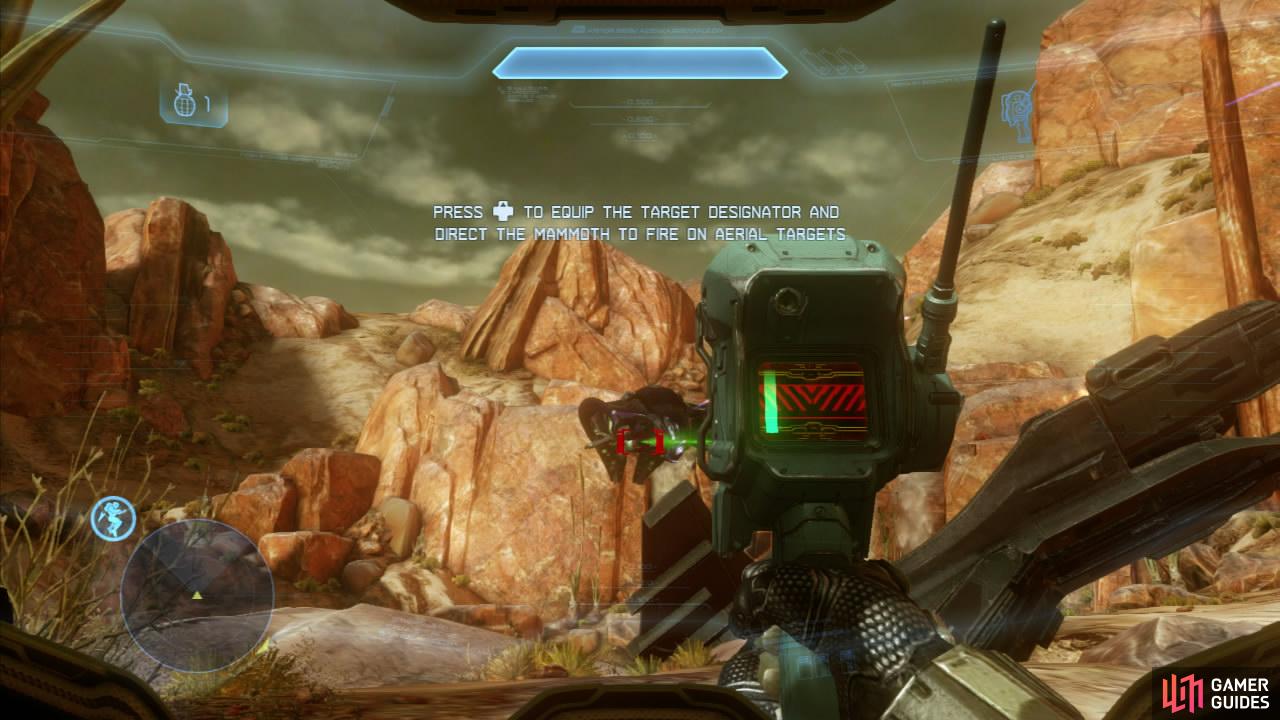
Use it to shoot down any phantoms in the immediate area and then head back to the mammoth killing the wraith that is now here and any additional enemies that get in your way (there may be a couple of extra ghosts if you were slow to shoot the phantoms). Once at the mammoth, use the target designator on the particle cannon to take it out.
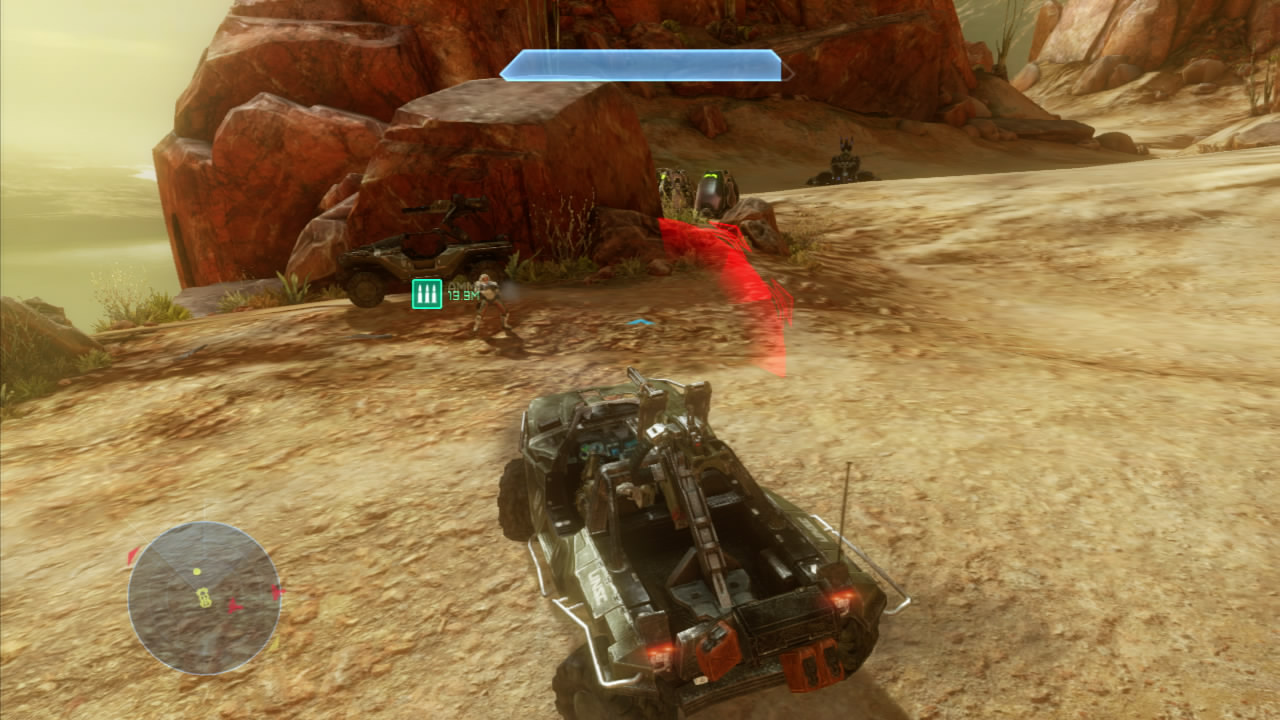
Grab a ghost or a warthog and follow the mammoth. When it stops at the stream, drive through it to the other side. As you round the corner, you’ll encounter a pair of phantoms, feel free to use the target designator on them. When they bail, continue up the path and follow it around to the left. Kill the pair of ghosts here and any other enemies in the covenant fortification on the either side of the road.
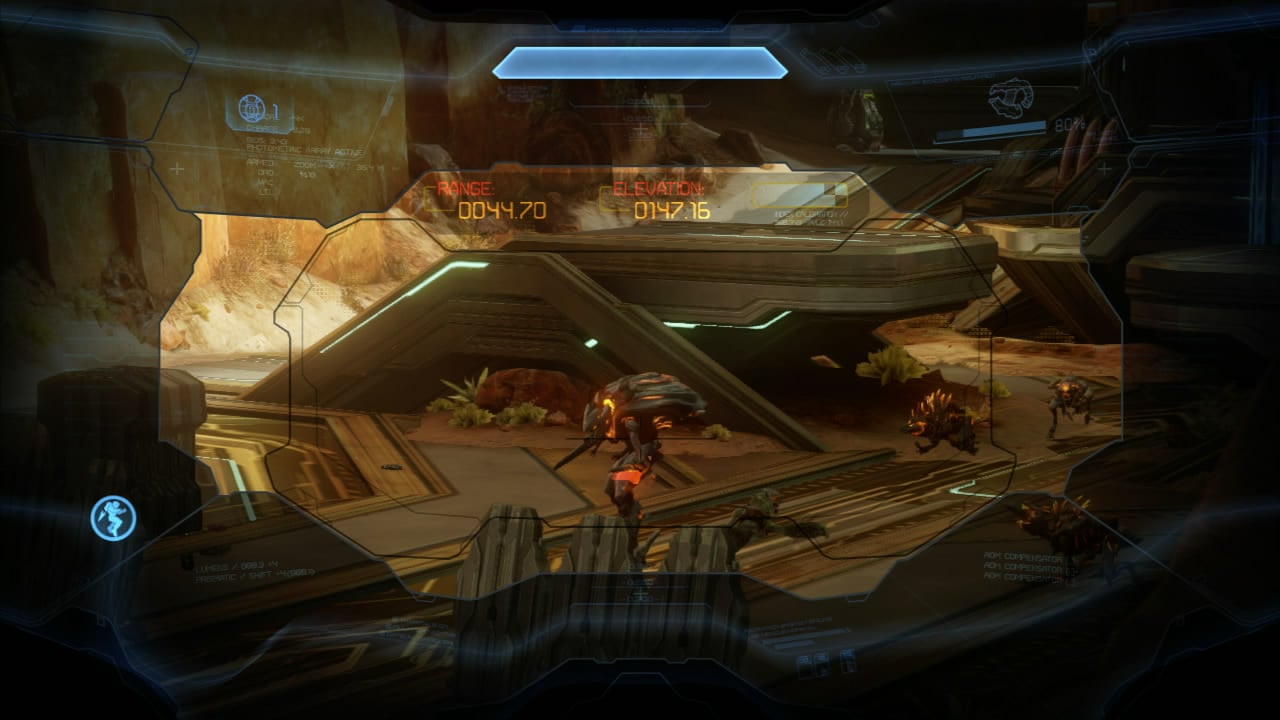
Continue until you reach the next open area. Ahead you will see a giant blue wall in the distance, in the foreground you will be able to spot a pair of blue force field domes (there is actually three of these, but one is out of sight to the far left), a sniper tower behind them and a turret to the right of them. I would suggest attempting to take out the turret first, before focusing on any enemies in the immediate area, watch out for the wraith on the same raised area as the sniper tower and a couple of ghosts. Once the area around each dome is relatively clear, you will need to run inside and destroy the power source.
After destroying all three power sources, the large blue shield will drop, allowing the mammoth to continue. In the next area, follow the cliff to the left and when you reach the end, you should be able to make out the next particle cannon floating off to the left in the distance. Hit it with your target designator to take it down. The mammoth will now sit stationary just behind you.
This will cause a few phantoms to spawn around the corner to the right which will come and drop off a wraith and four ghosts. Destroy these enemy vehicles and then proceed up the slope just to the right of the mammoth (you will see a covenant ship with a green beam at the top of the hill). On the way up you will have to take down a couple of elites and a small group of grunts and jackals.
When you reach the top, enter the green beam to fly up to the ship above. Kill the elite, his posse of grunts and a couple of jackals before destroying the power node at the back of the ship. Cortana will let you know when you’ve done enough damage and at that point you are going to want to jump off of the ship and use your jetpack to drop to the ground safely. Return to the mammoth and eliminate any remaining enemies in the area.
Return to the mammoth and climb inside and it will start rolling again. Wait until the vehicle reaches a dead end before hopping out and making your way between the rocks to its left.
As you work your way up the path, you will have to deal with a number of grunts and jackals at ground level and a knight up on a higher ledge to the right. Additionally, there are quite a few jackal snipers scattered around the area which we will need to address first as they can kill us very quickly. The first sniper is up on some rocks to the left. The next is on top of the rocks to the right above the knight’s position. The third sniper is on a rocky ledge at the far end of the area on the same level we are.
This path switches back twice on its way up the hill here. After the first switchback follow the path up the ramp, killing any additional jackals or grunts here. Note the presence of a pair of snipers on the rocks at the top of the first ramp. When we reach the top switch back again.
From here we can see a three tiered structure in the distance. In front there is a knight, a jackal sniper and a few grunts. Behind them, on the various tiers of the structure in the distance are four jackal snipers. Take them out before focusing on the nearby enemies and proceeding towards the structure.
Climb the ramp to the right and turn left, take out the jackals hanging out at the end of the bridge. As you start to make your way across 4-6 suicide grunts will run down the stairs on either side of the area in front and run at you. Kill them all before continuing across to the other side. Climb up either set of stairs here and at the top kill the knight, 4-5 crawlers and any remaining grunts in the area.
Continue up the various ramps to the very top tier of the structure. Kill the three knights here and a jackal sniper on a rocky ledge to the right before mopping up any remaining grunts and crawlers. Head over to the objective marker and enter the door.
When you reach the bottom, follow the sentinel through the door to the left. It’s a lift! Ride it down. Follow the path around the corner and enter the next room, continue through the door straight ahead and in the next room take a right. Exit into a large indoor area. Follow the passage all the way to the end to activate the console.
Afterwards, do a 180 degree turn and take the first right across the now activated light bridge here. Enter the door and follow the hallways until you drop down into a large open area. Climb down the ramp in the center of the room and through the door at the bottom. Approach the blue light source for a story scene.
After the cut-scene, grab Cortana from the pedestal up the ramp to the left and then cruise down the ramp. Kill the pair of knights and the crawlers here. Enter the door at the far end of the room opposite the ramp we descended.
$$$item 2132
Continue through the open door to the next room into an elevator. Ride it down. At the bottom, turn right and enter the portal at the end of the path.
Part 2: The Gravity of the Situation
As soon as you regain control of the chief, hop on the nearby scorpion tank and commandeer it. Destroy the four ghosts in the immediate area and continue onwards. Take out the covenant forces at the defense on the left and the group of four nearby wraiths. Continue under the stone arch at the back right of the area and you will find another giant blue wall.
From here, continue via the path over to the left and you’ll find a pair of those small blue domes containing the shield generators. Kill any enemies in the immediate area and when it is clear, enter each of these domes and destroy the generators before returning to where we saw the blue wall before. It will be gone now so let’s go on through. Run to the end of the path here and pick up the target designator, use it to target the glowing orange structure ahead to complete the mission.

No Comments