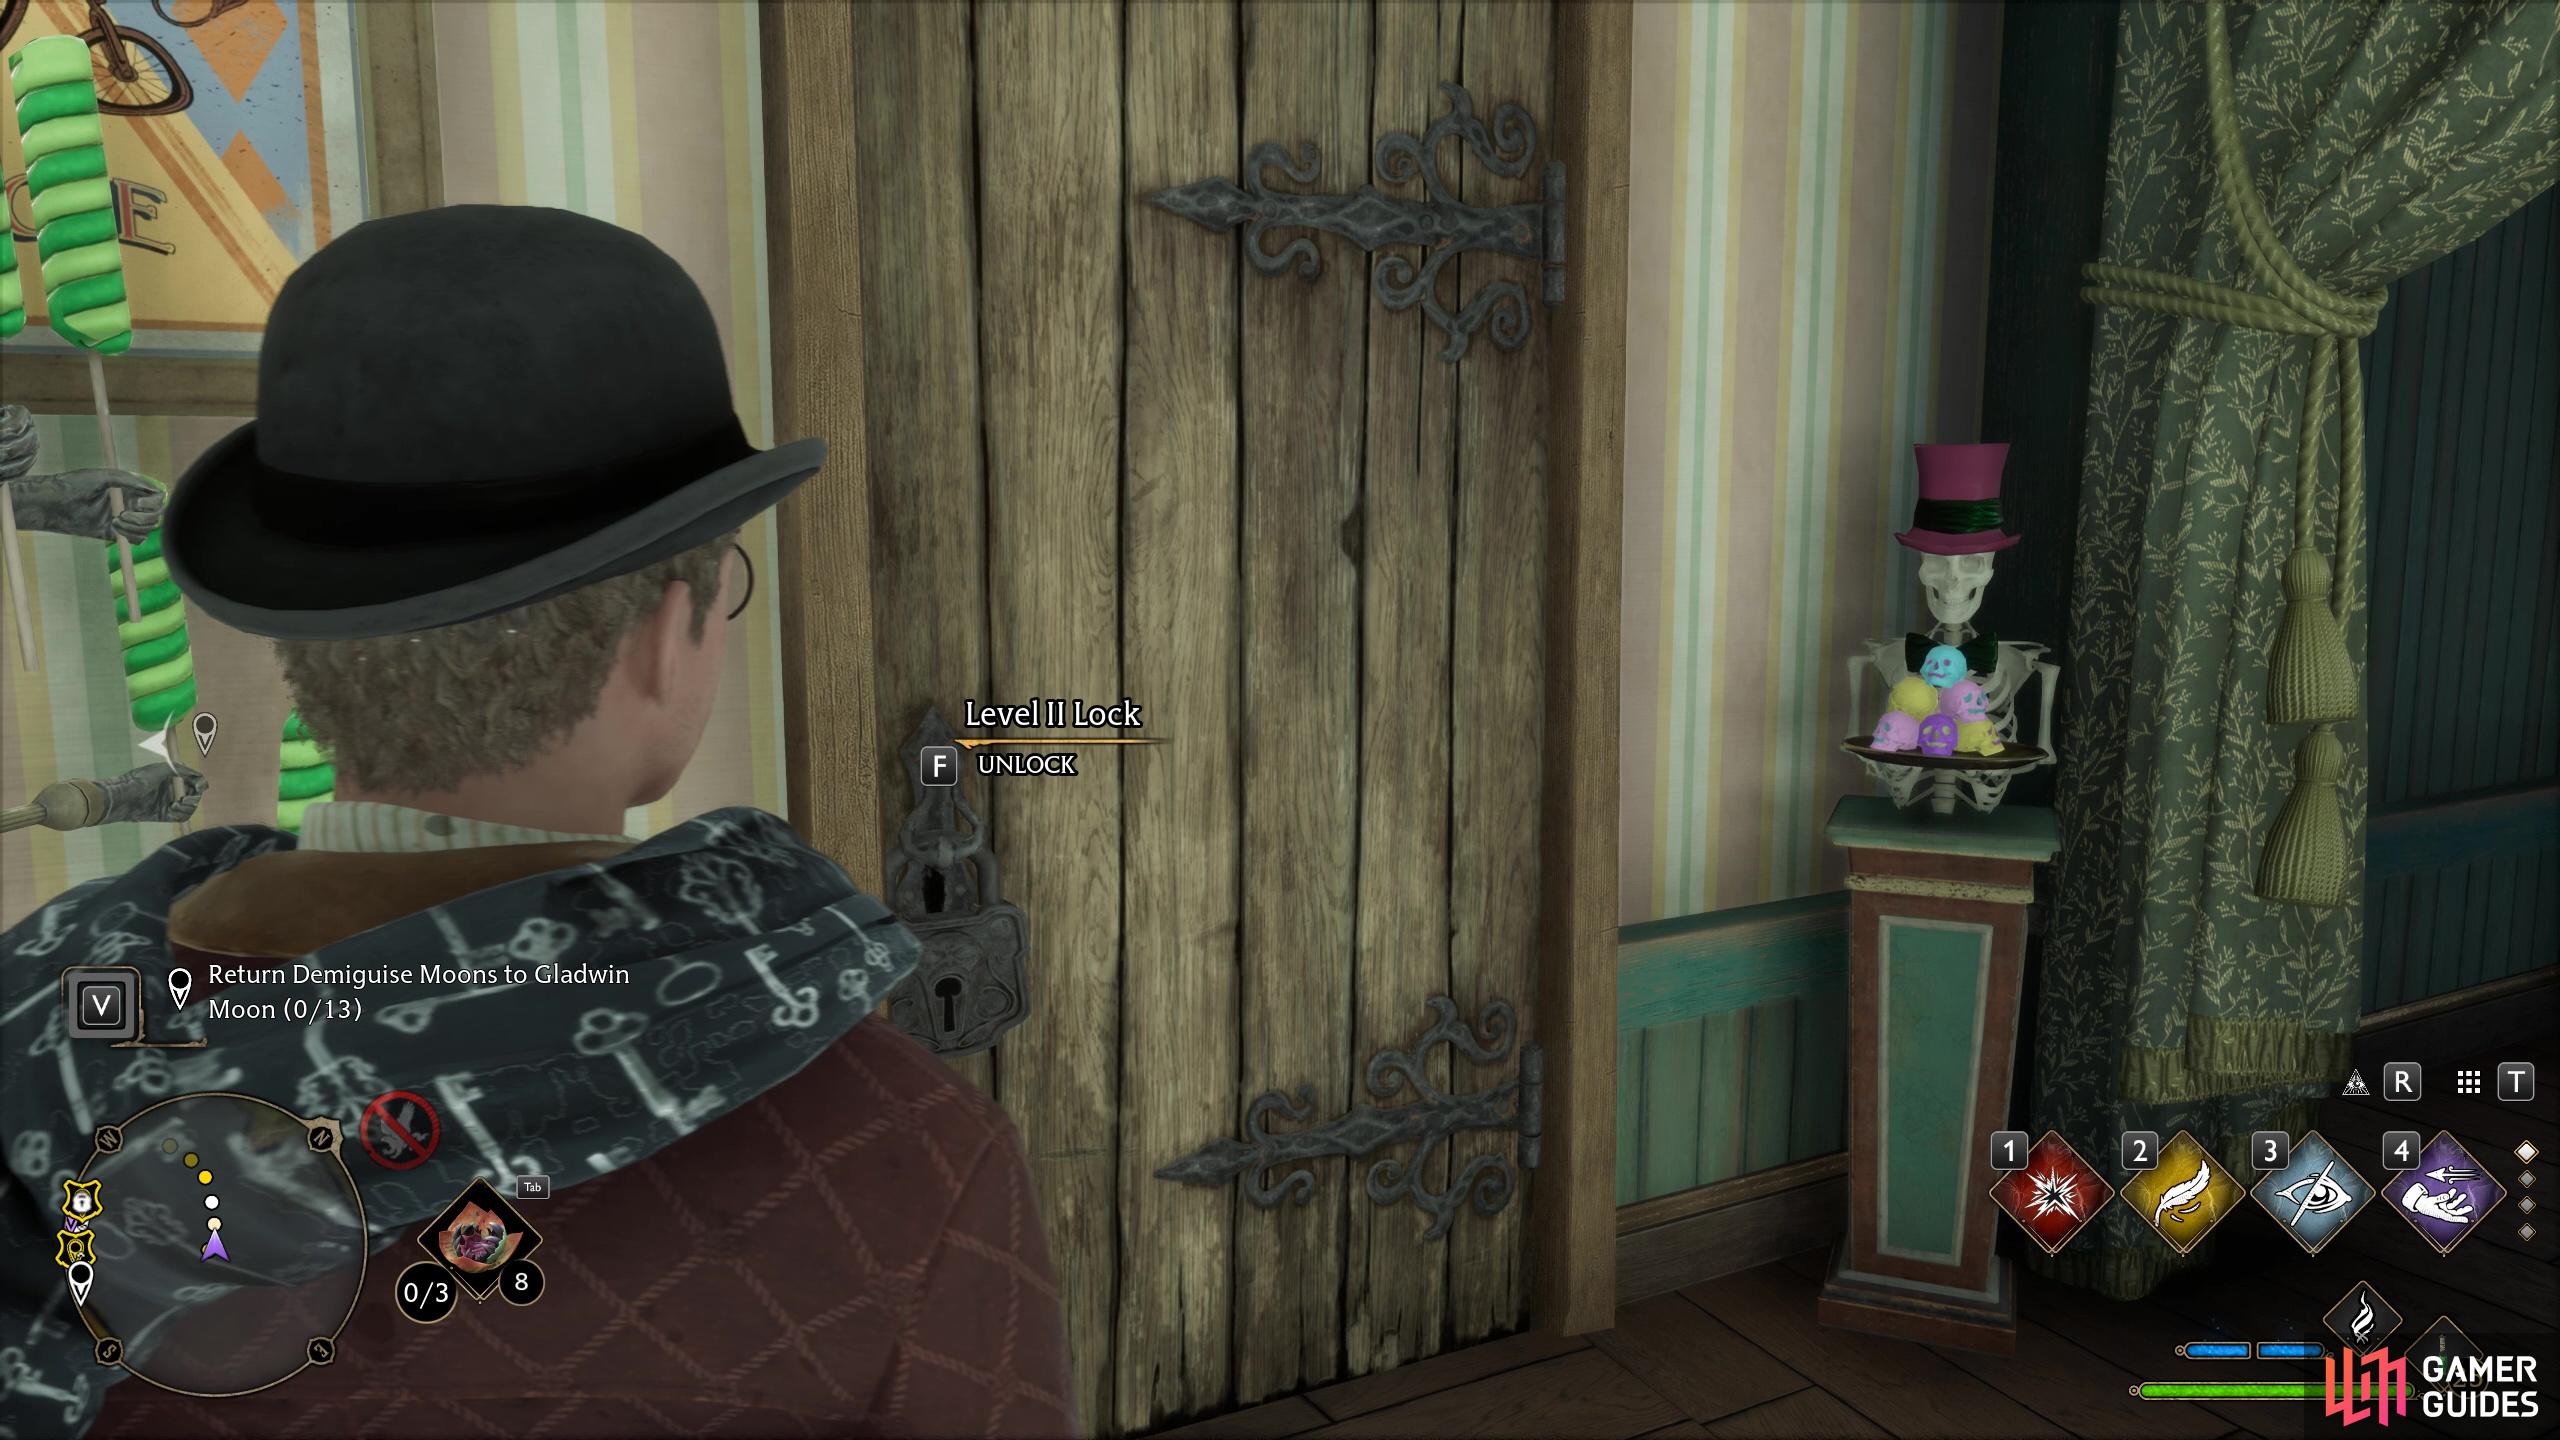
Level II Locks
Description
Level II Locks can be picked after you learn the ![]() Alohomora spell as part of the main quest Gladwin Moon is the character who will teach it to you. Initially you will only be able to open
Alohomora spell as part of the main quest Gladwin Moon is the character who will teach it to you. Initially you will only be able to open ![]() Level I Locks but after returning nine
Level I Locks but after returning nine ![]() Demiguise Statues to Moon he will upgrade your spell to Alohomura II which will allow you to then open
Demiguise Statues to Moon he will upgrade your spell to Alohomura II which will allow you to then open ![]() Level II Locks.
Level II Locks.
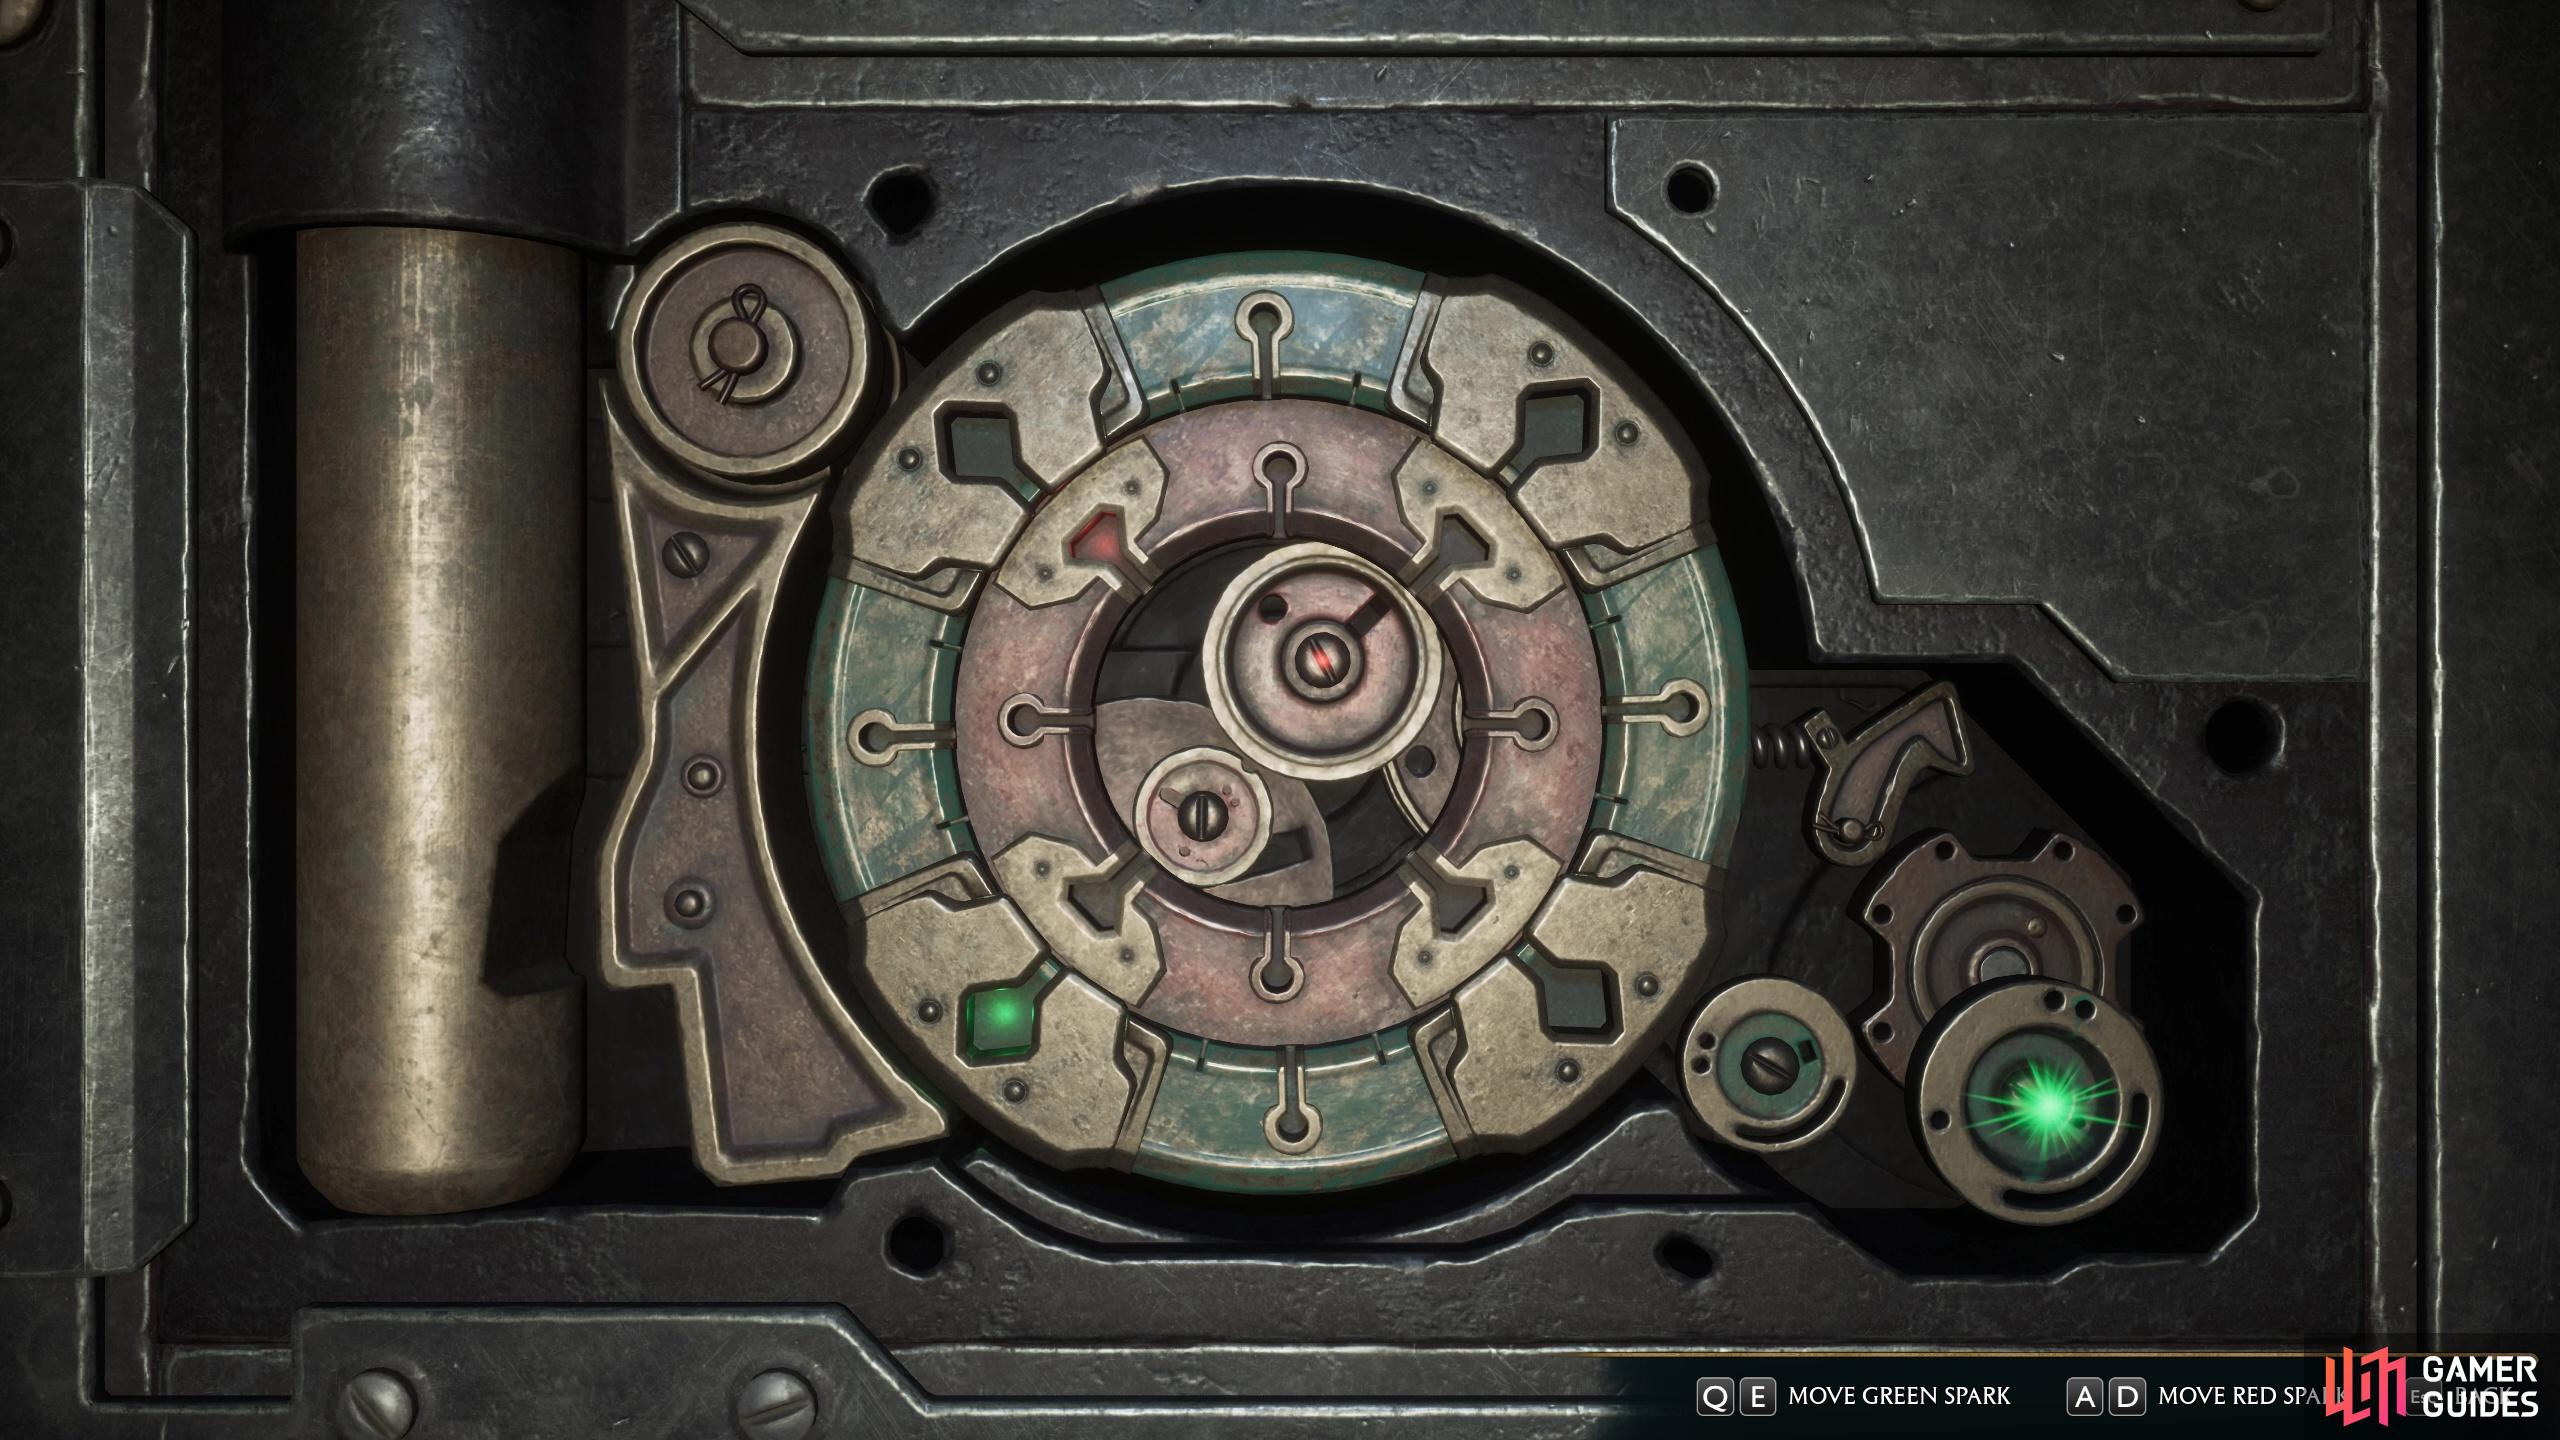
How to Unlock
Once you have the spell you can approach a Level II Lock and interact with it to bring up the lock picking screen where you must move the tumblers around until they click into place and release the bolt. The procedure to open ![]() Level II Locks is identical to Level I locks.
Level II Locks is identical to Level I locks.
Media Gallery
Interactive Map Locations

32622. Hogsmeade Map
As you follow the shop around you will encounter a Level II locked door. Behind it you will find a couple of chests and not much more.

32623. Hogwarts Legacy World Map
As you follow the shop around you will encounter a Level II locked door.


32630. Hogsmeade Map
Adjacent to the cottage attached to ![]() Honeydukes is a further Level II Locked door.
Honeydukes is a further Level II Locked door.


32632. Hogwarts Legacy World Map
Adjacent to the cottage attached to ![]() Honeydukes is a further Level II Locked door.
Honeydukes is a further Level II Locked door.

32633. Hogwarts Legacy World Map
Next to ![]() Honeydukes. A cottage door with a Level II Lock.
Honeydukes. A cottage door with a Level II Lock.

32636. Hogsmeade Map
Next door to the hairdresser’s shop you can find a door with a Level II Lock.


32639. Hogwarts Legacy World Map
Head to the very top of ![]() The Three Broomsticks and you will find a Level I Lock on the door.
The Three Broomsticks and you will find a Level I Lock on the door.

32645. Hogsmeade Map
This Level II Lock protects another a Demiguise Statue that needs returning to Gladwin Moon.


32652. Hogsmeade Map
You will find a Demiguise Statue upstairs in this cottage after you have removed the Level II lock.

32653. Hogwarts Legacy World Map
You will find a Demiguise Statue upstairs in this cottage.


32696. Hogwarts Legacy World Map
The cottage with the Level II Lock contains a chest and one of the collectible ![]() Notes,
Notes,

32699. Hogwarts Legacy World Map
There are a couple of chests behind this locked door.

32701. Hogwarts Legacy World Map
You will need to pick this Level II Lock in order to get to the Demiguise Statue and chests behind it.

32765. Hogwarts Legacy World Map
A worthwhile cottage to break into as behind its Level II lock are two collection chests and three ![]() Notes.
Notes.

32833. Hogwarts Legacy World Map
The first house you see after arriving at the Floo Flame will have a Level II Lock on it and contain two chests behind it.

32840. Hogwarts Legacy World Map
The cottage with a Level II lock contains a Demiguise Statue within.

32844. Hogwarts Legacy World Map
Two chests inside the cottage protected by a Level II Lock.
No Comments