
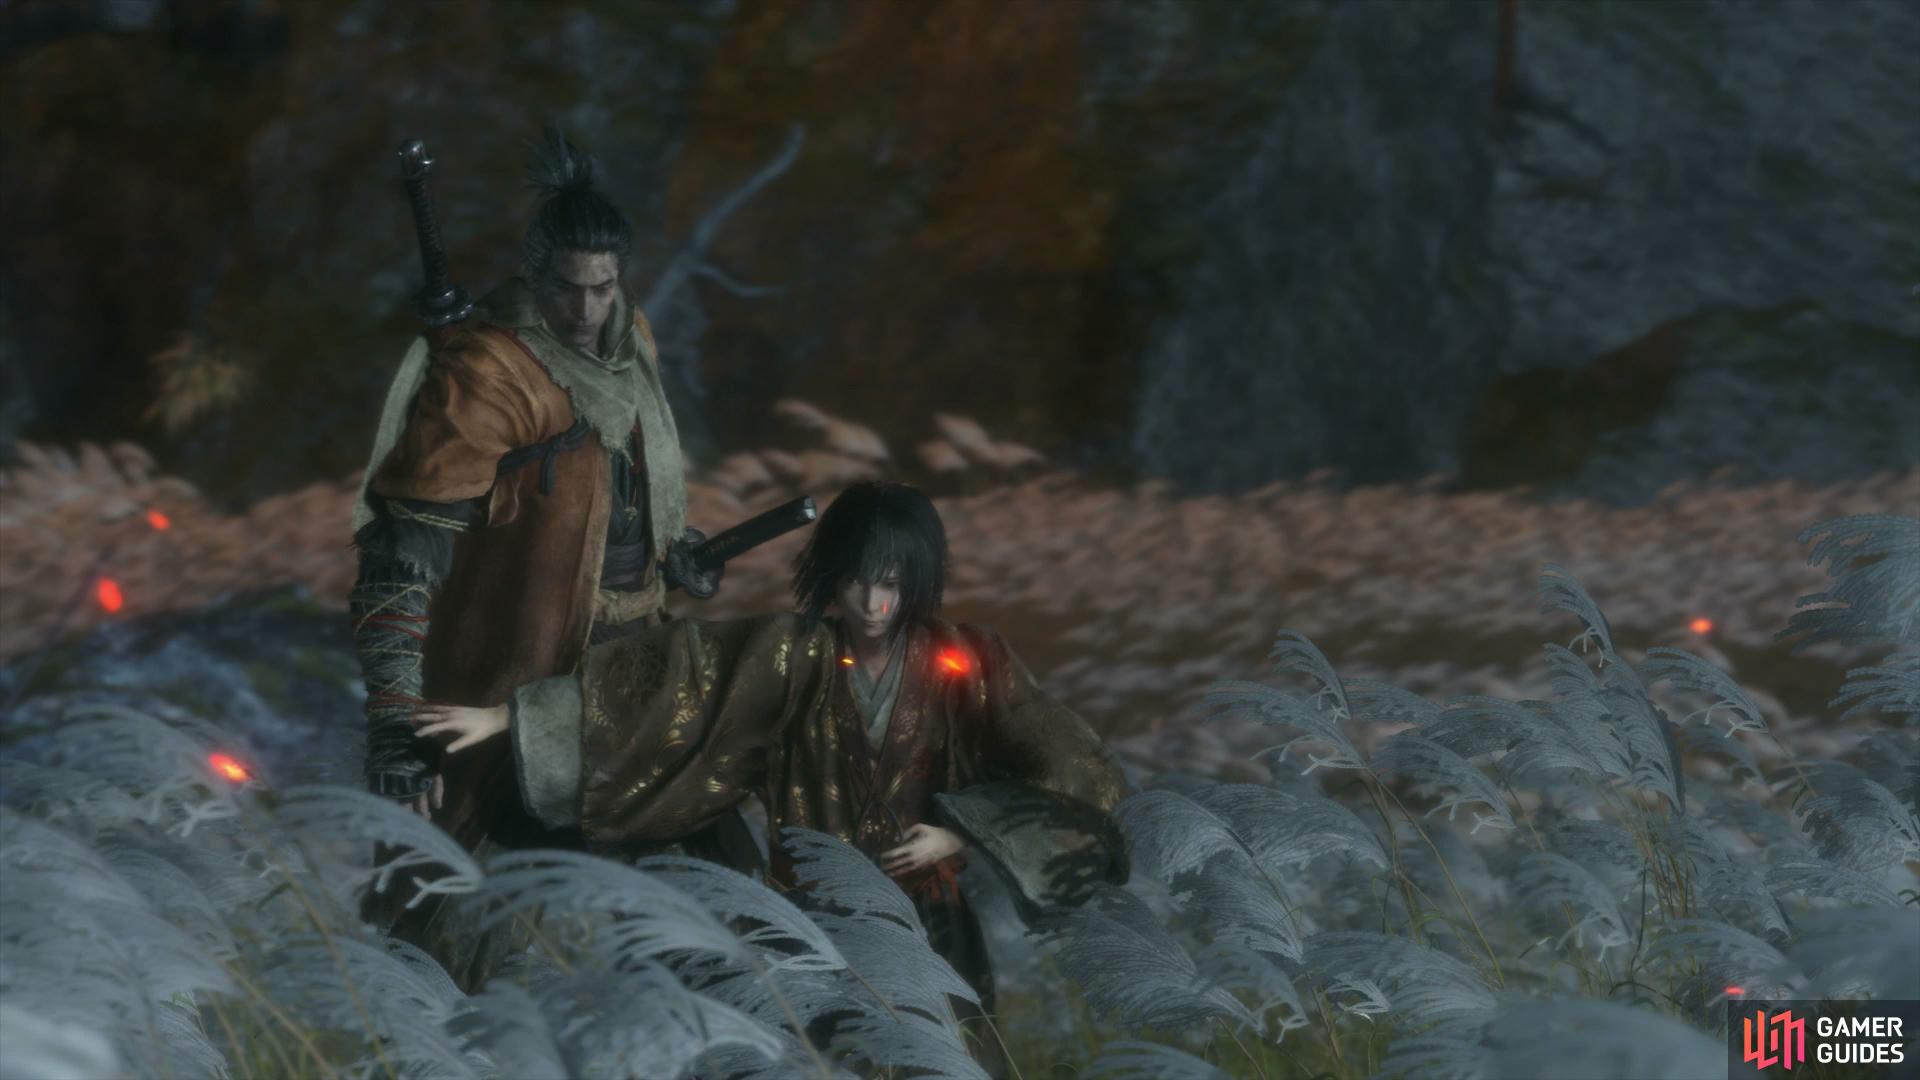
You return to find Lord Kuro gone and a grieving Emma over the body of Lord Isshin. In the panic, the Central Forces have attacked Ashina head on and Emma pleads with you to follow Lord Kuro through the secret passage, handing over the Secret Passage Key in the process. This is the door in Ashina Reservoir that you passed through where you met Genichirio for the first time and lost your arm. Be warned however, this leads to the game’s very challenging final boss and there are many items and tasks to do in Ashina Castle and the Outskirts once more.
Exploring Ashina Castle
To begin with, use the nearby Idol and Enhance your Attack Power using the Divine Dragon Memory and rest up. Head out the only exit and make your way back over to Lord Isshin’s room (you should know the way by now) and then be prepared for a Mini-boss at the bottom.
Mini-boss: Ashina Elite - Ujinari Mizuo
To make this battle a lot easier, you can actually get a Deathblow prior to the battle. In order to do this, sprint past him and up the stairs at the other side before standing in the corner near the sliding doors. This will cause him to lose his alert status allowing you to get behind him for an easy Deathblow.
As for the rest of the battle, Ujinari isn’t too different from Jinsuke that you defeated before Genichiro. Wait for him to come to you and then use either careful timing of deflections or the Loaded Umbrella to drive up his posture gauge. Beware not to get caught in his simple attacks however, they’re a lot more stronger than your regular Mini-boss and he can easily cut you down quickly if you’re not careful.
Run past him and lose alert to get behind for a Deathblow
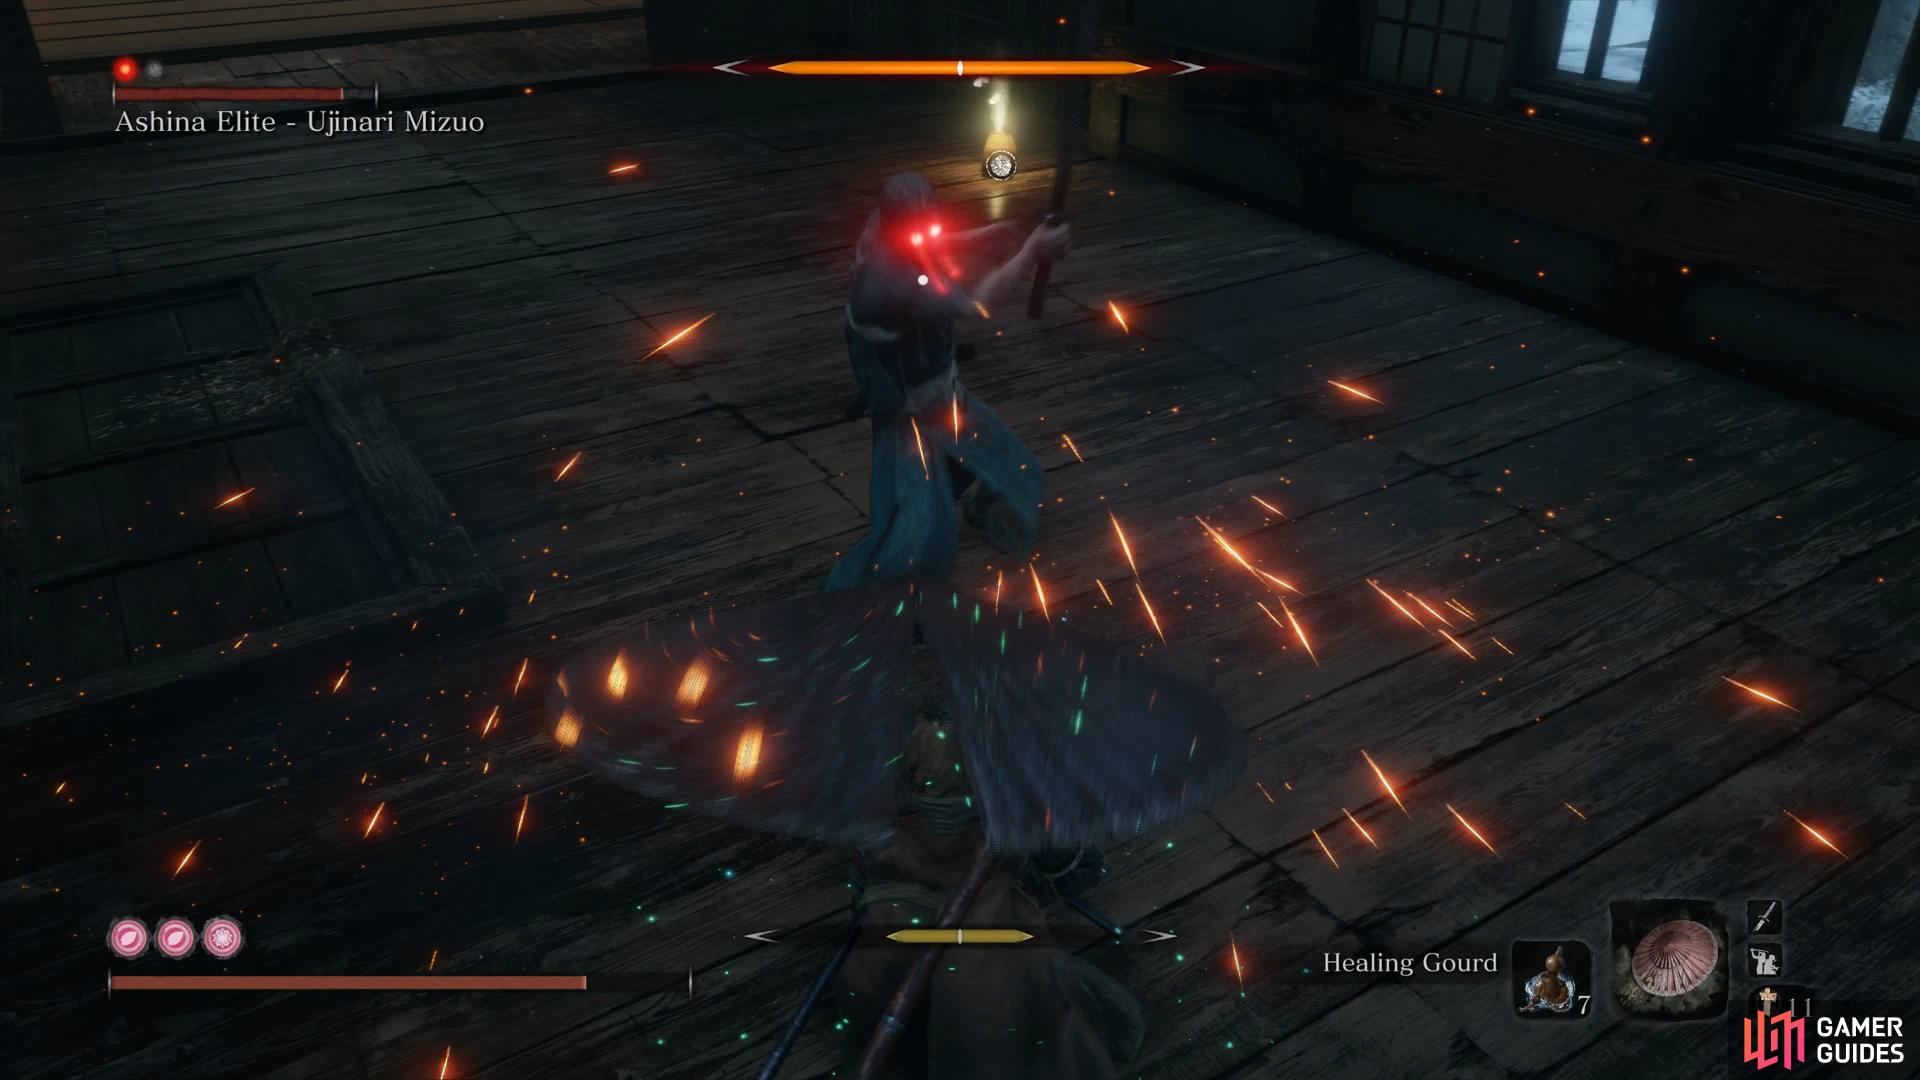
the Loaded Shield will raise his posture quickly.
You’ll obtain another Prayer Bead for your victory and then can loot the room of the Yashariku’s Sugar and then head up the stairs at the back and make your way back to the Dojo Sculptor’s Idol. There’s not too much difference with Ashina Castle in terms of items although all across the area you’ll run into the fearsome Red Guard soldiers and you’ll need to be at your best to deflect their attacks or look to use the war to your advantage to score Deathblows.
For now, make your way back through the castle, defeating the enemies on your way to reclaiming the Upper Tower - Antechamber Idol. Rest up and then take out the nearby Interior Ministry Ninja before grappling down to the beam in the center of the room. Down below, by the open doors, are two difficult Red Guards so pick your target and Deathblow one before taking out the other.
Take a detour out the back door first and head along the path back towards the Great Serpent Shrine Idol (along the bridge to the left). Along the path, you’ll encounter a group of Monkeys that you can take out with Shurikens and then prepare the Finger Whistle for when you reach the shrine itself, doing so will allow you to turn the tougher Dual Wield Monkeys against each other before finishing them off to obtain a Bundled Jizo Statue.
Reclaim the Idol here and rest if needed before making your way back to where you took out the other two Red Guards via the Old Grave Idol. Once you step outside the main doors, you’ll witness a great battle between the Ashina and Central forces so quickly grab the Adamantite Scrap to your left and then grapple to the roof in order to get behind the Red Guards to take them out.
Once the steps are clear, loot the Ministry Dowsing Powder and Fulminated Mercury before reclaiming the Ashina Castle Idol. From the Idol, speak to the Ashina Samurai near death and heed his words, grapple over the wall to the right and take out the nearby Giant Mauler. Head around the corner to the tree and grapple up to the rooftops on the right and then use the kite to reach the Old Grave area once again.
You’ll see the bridge in the distance that leads to the Ashina Outskirts but first you’ll need to deal with the encounter on the bridge. Run along the bridge and past the menacing Red Guards before waiting for them to resume the battle with their Ashina foes, this allows you to get behind and use a Backstab followed by the Bestowal Ninjutsu. Once defeated, head down the right side of the bridge and reclaim the Idol to make your time here easier.
Underbridge Valley
Up ahead is another Mini-boss however before you even consider taking him on, you’ll want to clear the area of all threats. Begin by grappling back up the nearby ledge and wait for the battle between the forces on the bridge again. Once begun, grapple up again and dispatch the two Red Guard Marksmans at the back before finishing off the others on the bridge again.
Grab the Ministry Dousing Powder against the wall and then grapple up to take out the last Red Guard Marksman if he is still alive. With this initial group defeated, enter stealth and use the long grass to the right to get behind another enemy above the Mini-boss leaving the area clear.
Mini-boss: Shigekichi of the Red Guard
This is the fourth time you fought this enemy type by now and like Juzou the Drunkard, is almost a carbon copy in terms of how you should take him down. The main difference however is that instead of Poison based attacks, Shigekichi will use Fire based attacks instead. Additionally, he’s wearing armor as well so you may want to consider using the Loaded Spear twice to strip him off it and increase the damage you do against him.
Take the surrounding enemies out to begin with a Deathblow
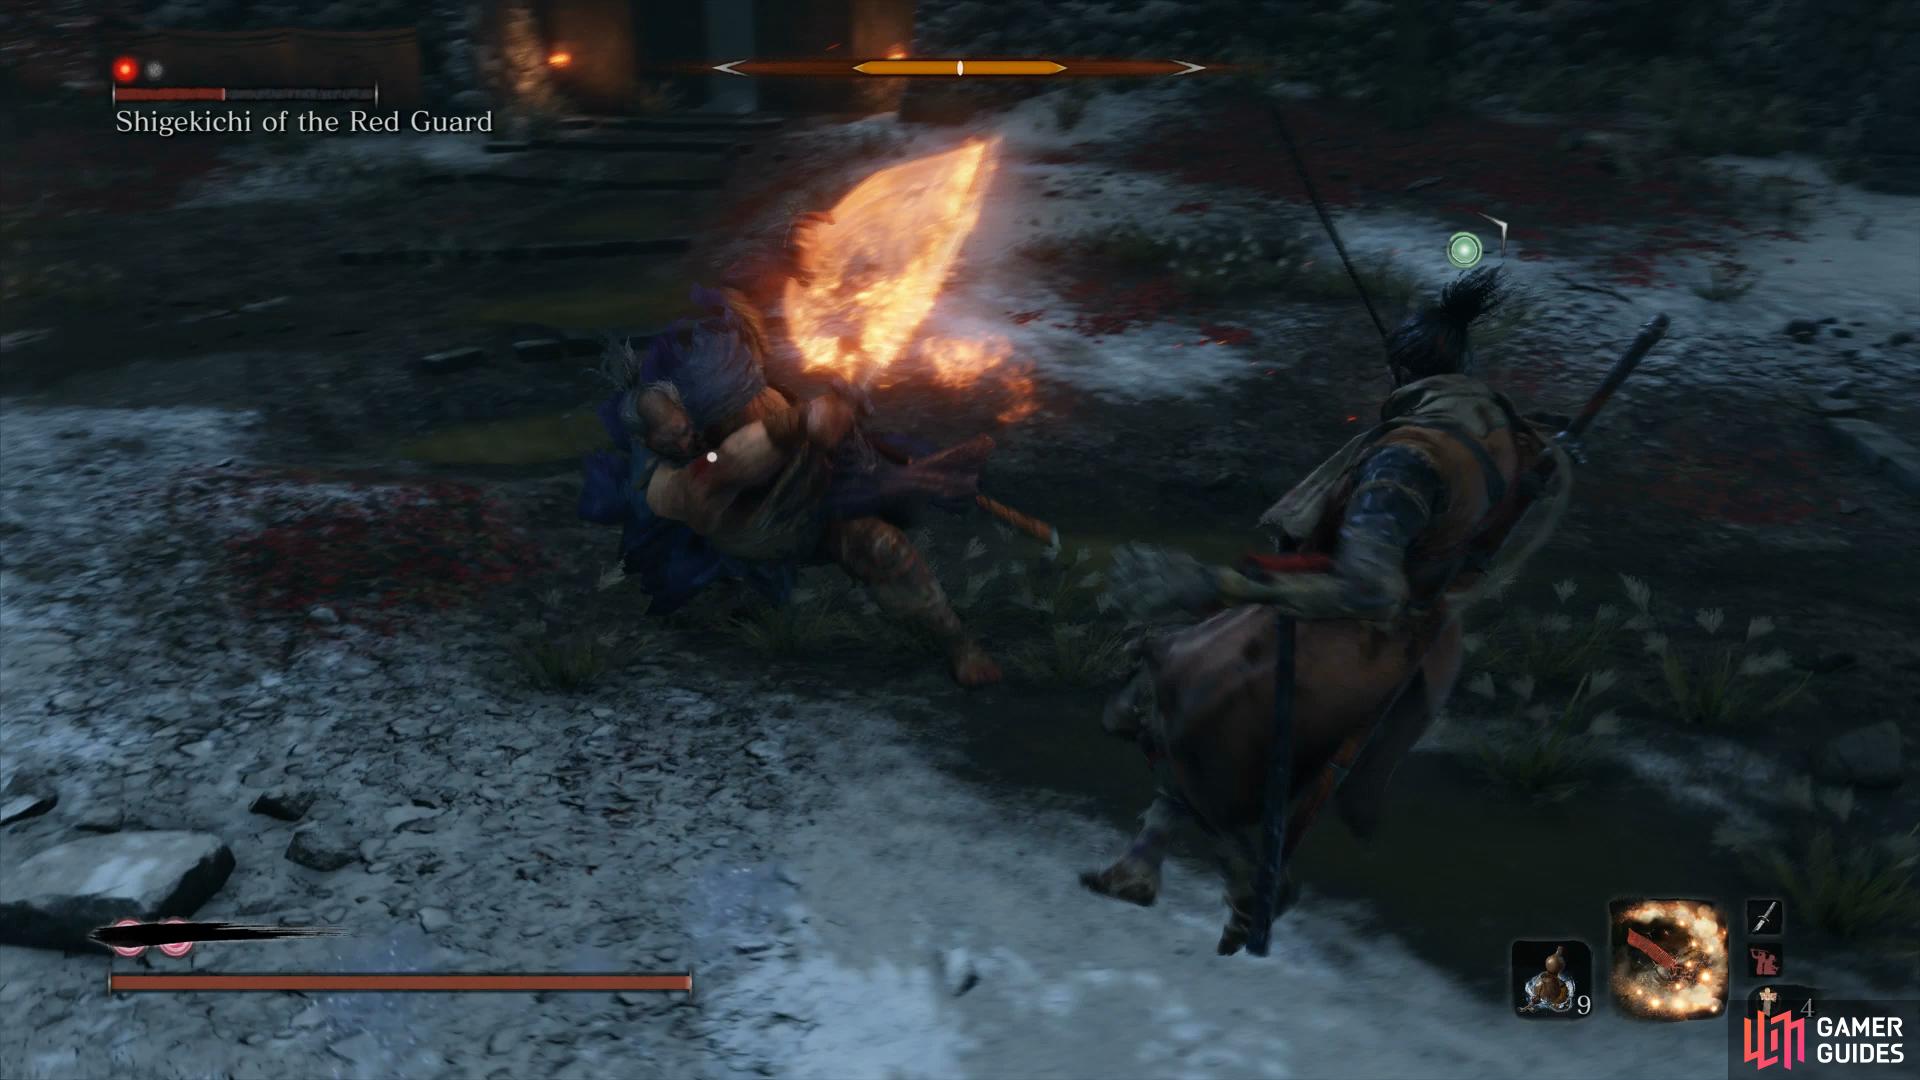
Shigekichi adds Fire attacks to his arsenal.
Regardless of how you handle him, you’ll be able to start the battle with a Deathblow thanks to removing all the enemies here and then can finish him off by baiting his attacks. Your reward for this battle is another Prayer Bead leaving you with just one final one to find.
Grapple up to the branch to the left of the large doors and defeat the Red Guard before dropping down and killing another and looting the Adamantite Scrap. Return to where you defeated the Mini-boss and grapple up to the corridor to find some Gachiin’s Sugar along with two Rats in the room to the left, dispatch them and then claim the Heavy Coin Purse.
Return to the large double doors and, while remaining in stealth, loot the nearby Fulminated Mercury and then stay to the right while waiting for the two Red Guards to patrol up the stairs, getting behind them for a Backstab when the opportunity arises. Back away and lose the alert status if you wish to Backstab the other and then make your way down the stairs to finish off the last Red Guard.
With the enemies dead, return up the stairs once more and head to the right and follow the ledge down to the far right, this will allow you to get around the back of the watchtower by going around the grapple points in the circle and dispatch the Red Guard along with looting the Adamantite Scrap. From here, you can drop down and search under the watchtower (watch out for another Red Guard if you didn’t defeat him earlier) and loot the Fistful of Ash and Pellets before heading left to claim the next Sculptor’s Idol.
Before continuing on, this is a good time to take a short detour back to the main path to take out the last Mini-boss, doing so will allow you to max out your Vitality and Posture ensuring that an upcoming boss will be a little bit more manageable. Travel back to the Ashina Castle Idol and head left to loot some Gokan’s Sugar and then through the gateway to the left and drop down to find the Ashina Reservoir Idol.
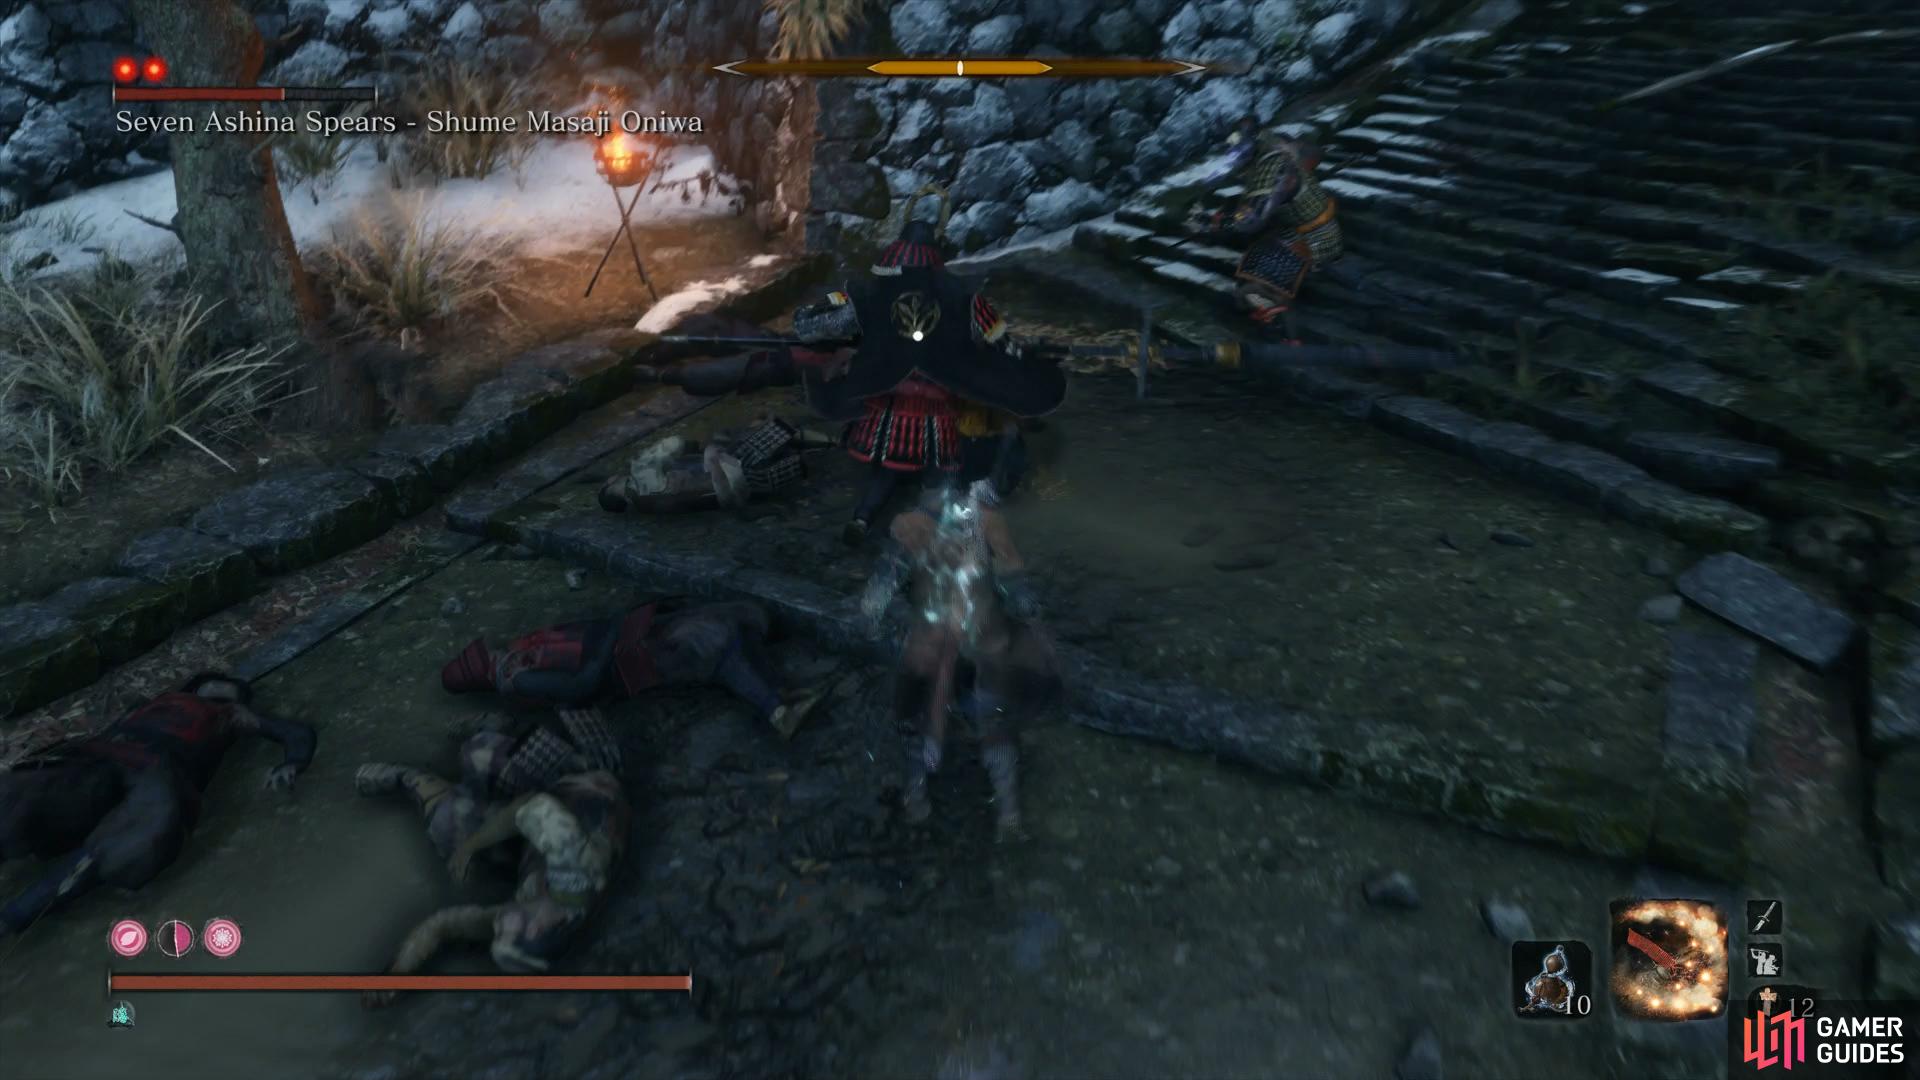
Mini-boss: Seven Ashina Spears - Shume Masaji Oniwa
Up ahead is another deadly Seven Ashina Spears General along with a regular unamed General and the last thing you want to do is take both of them on head on. Begin by using a Gachiin’s Sugar and stealth around to the left to Backstab the unnamed General and follow up with Puppeteer to turn the odds in your favor.
Beware while the two battle it out however as you can and will be hit by their weapons during the battle so stand back and let them wear each other down before closing in yourself. Like previous battles against the Seven Ashina Spears, focus on the Mikiri Counter opening, this will allow you to deal large posture damage. Likewise, the Firecrackers are as useful as ever here to give you some time to either heal or score some free hits.
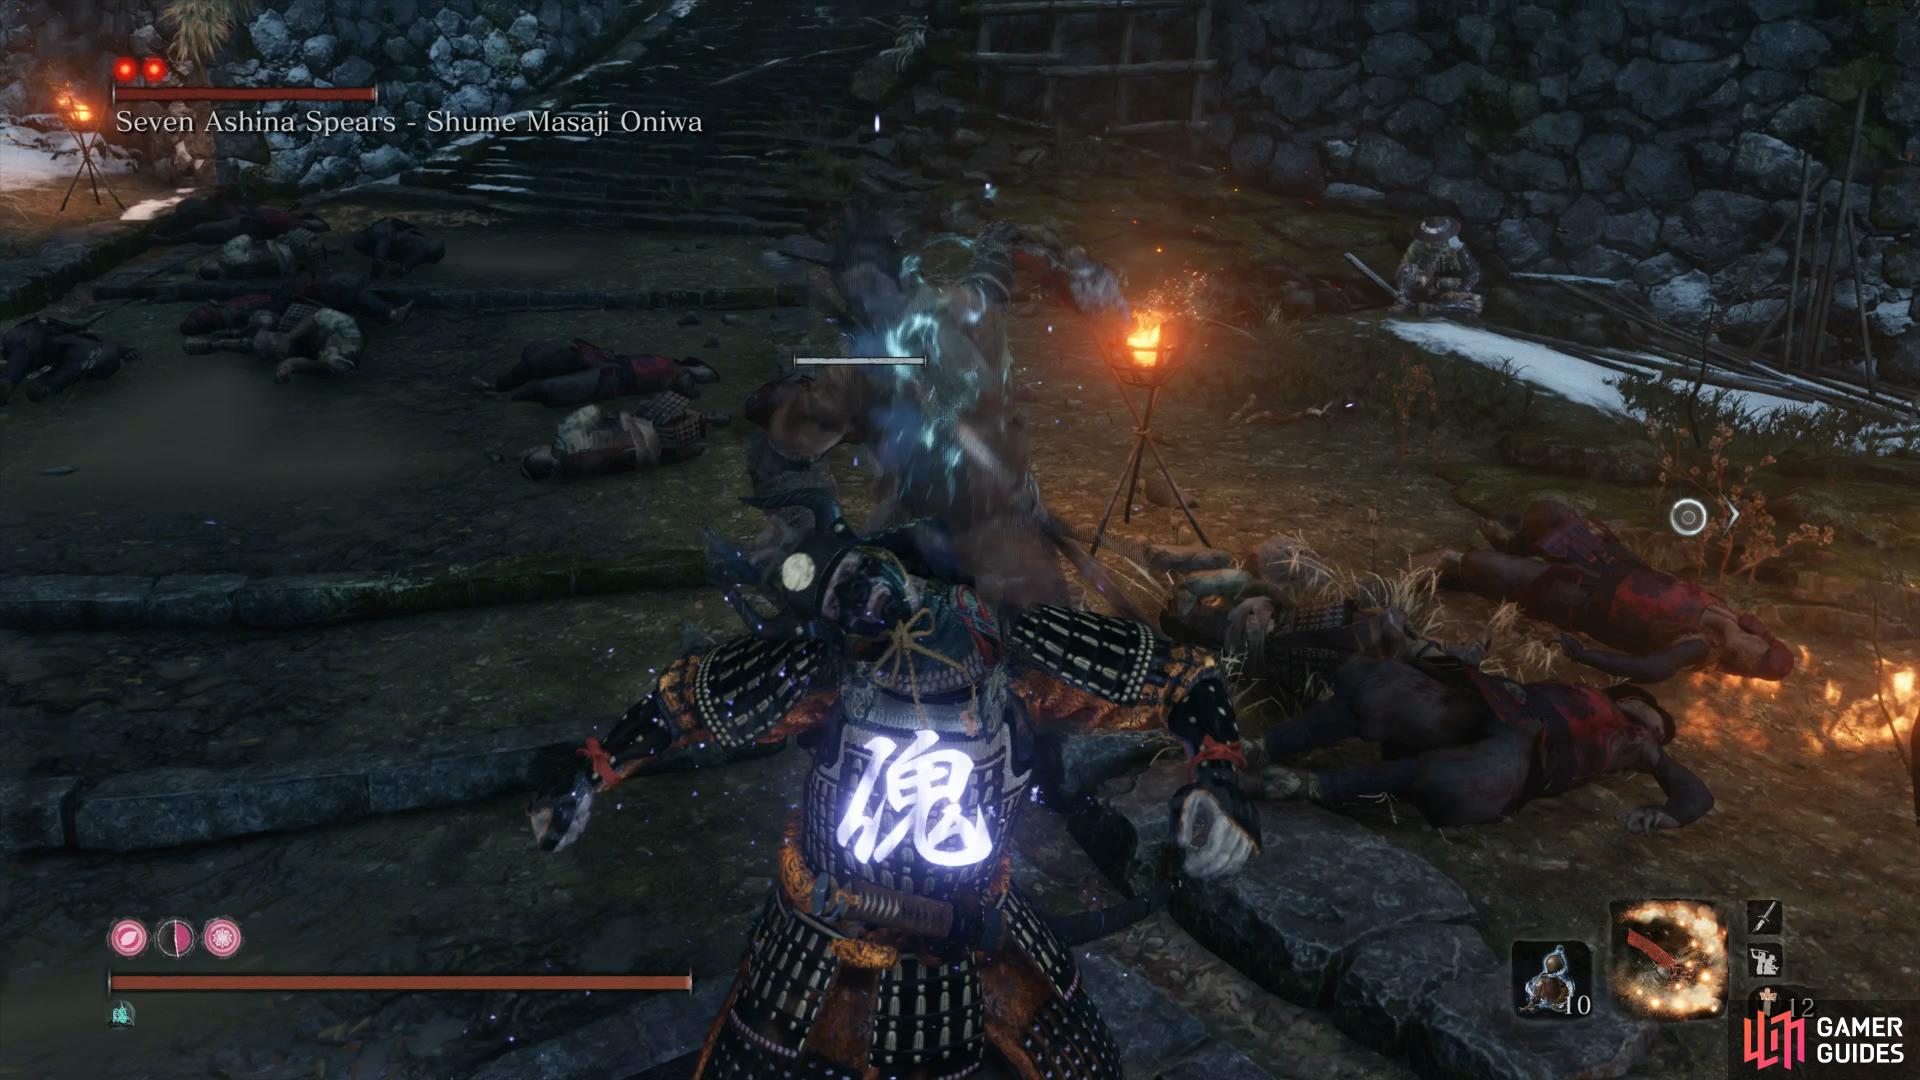
Using Puppeteer on the other Samurai
allows you to attack Shume from behind.
Your reward for this tough battle is the final Prayer Bead so be sure to use the nearby Sculptor’s Idol to Enhance your Vitality for the final time before looting the nearby Fulminated Mercury and Ministry Dousing Powder.


While you’re here, it’s worth unlocking the final Suclptor’s Idol before the final boss, but not beginning the encounter. Head along the branch and grapple over towards the bridge, then go right and loot the Pellets on the branch. From here it’s a few grapples over to the Near Secret Passage Idol so rest up and then travel back to the Outskirts Wall Idol.
Outskirts Wall - Stairway
Take care of the Red Guard in the watchtower again and then make your way along the ledge to the left and around the gatehouse. Provided you finished the Kotaro and Anayama questlines (which this walkthrough aimed for), you’ll find Kotaro’s body on the ground with Anayama near death next to him. Speaking to him, you’ll gain your only chance to buy the Promissory Note for a single Sen, be sure to buy this as this will decrease the cost of all merchant’s goods and will come in use especially on New Game+.
Be sure to buy the Promissory Note from Anayama.
Loot the nearby Gachiin’s Sugar and then head down the path to the left to grapple on to a branch below you. Grapple to the next one in front and to the right and then you’ll notice a Red Guard patrolling the path here. You should also spot a sneaky Rat hanging from the ledge so take aim with a charged Shuriken and knock him off.
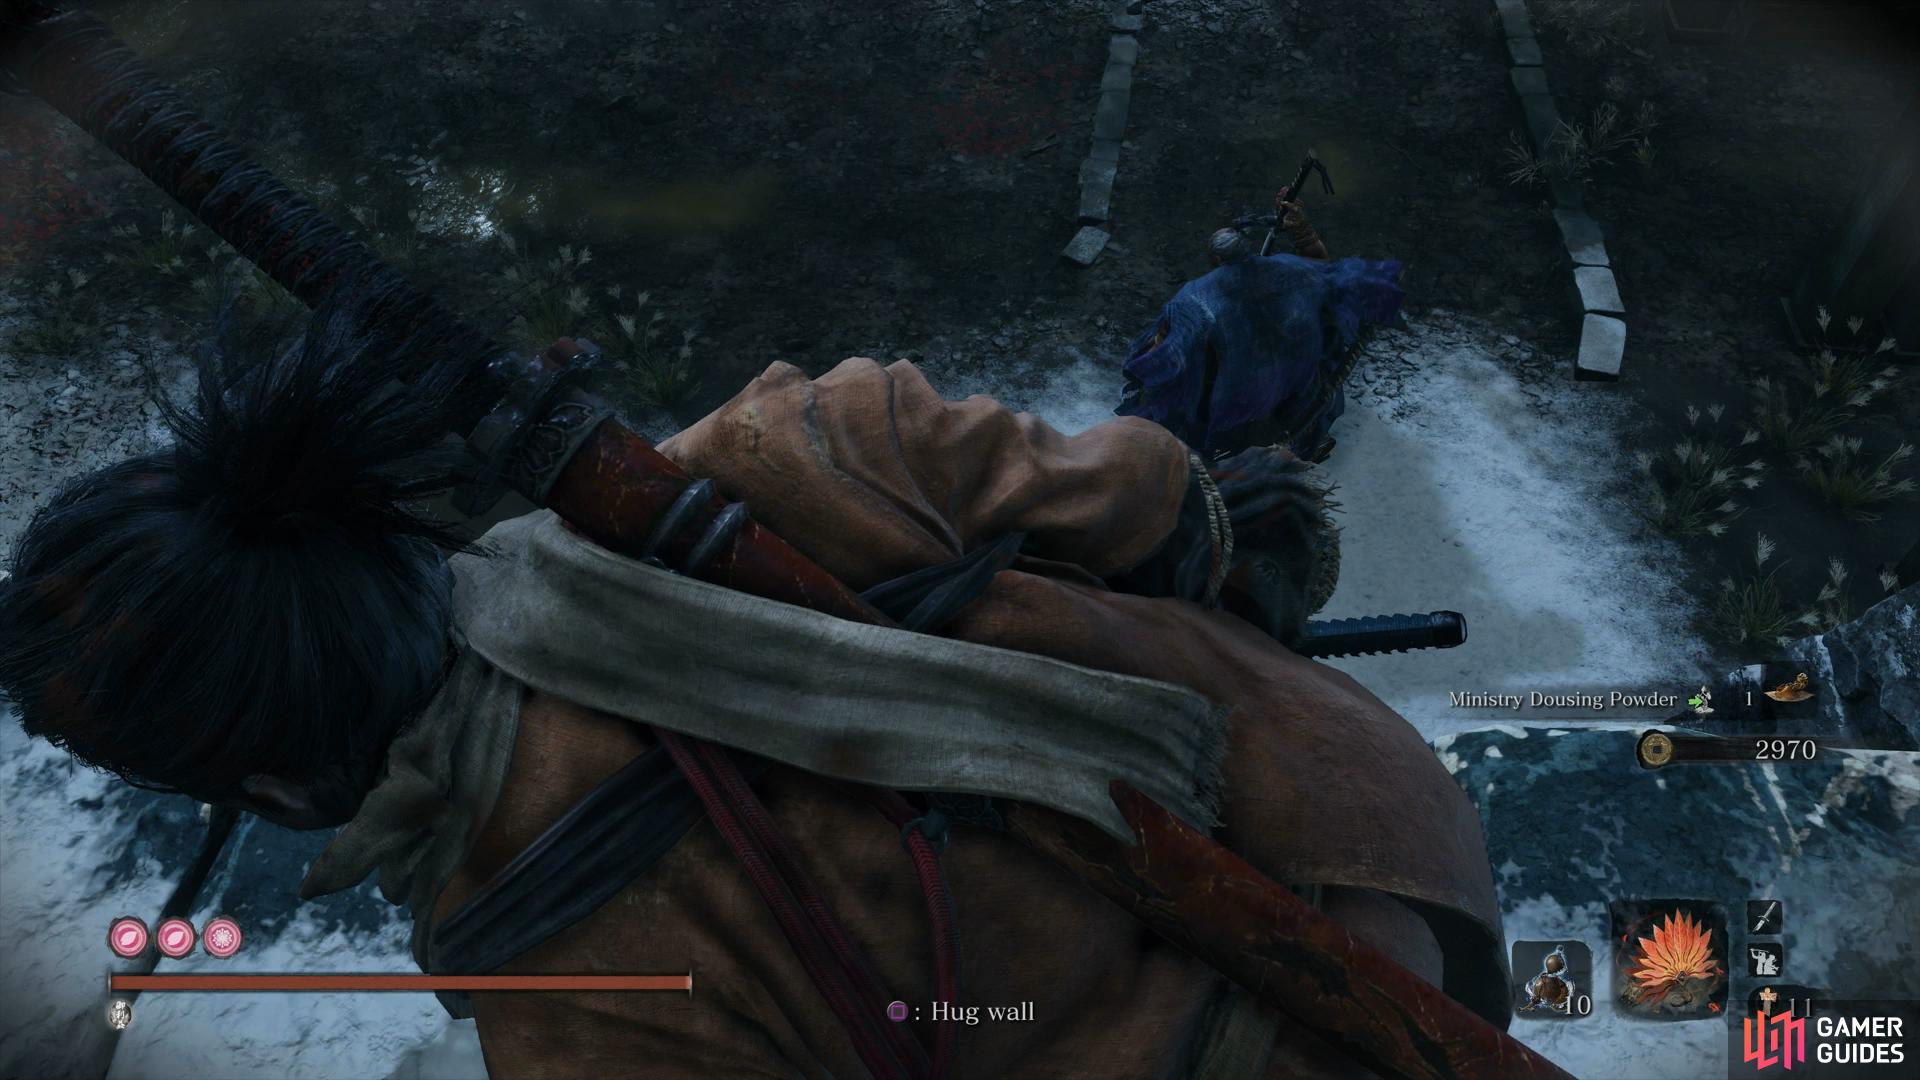
Return to where Anayama was and grapple to the gatehouse in front before heading right and using another Gachiin’s Sugar. From here, grapple across to the long grass to Backstab two Rats up ahead before waiting for the Red Guard to pass by and Backstab him too. Wait for one more Red Guard to patrol down and backstab him before carefully looting the Adamantite Scrap in the corner. Go around the left side of the door to take care of another Red Guard waiting to ambush you.
The next courtyard is full of many Red Guards, a watchtower and a Chained Ogre (who’s not a Mini-boss and only has a single Deathblow Circle) so it’s best to tackle this area as quietly as possible. Begin by grappling to the ledge to your right and then leap up the next few ledges and over to the right, following the path up and against the large wall. There’s a Red Guard here that you can hang on the ledge and perform a Deathblow on.
While still hanging, wait for the Chained Ogre to pass by and then climb up and into the long grass to your right. Once the Ogre makes it’s way back down the path, sneak around to the nearby Red Guard to take him out before Backstabbing the Chained Ogre on it’s way back down once more. If you’re fortunate enough here, another Red Guard will come to investigate the commotion, wait for him to make his way back and then score another easy Backstab.
Grapple up to the rooftops around the back here and you’ll spot two Watchtowers in front of you so grapple over to the one on the far right to begin with and dispatch him with ease. From here, you can easily grapple over to the left to take care of the other Watchtower and then head behind the previous watchtower to drop down to the side of the wall. One final Red Guard remains here, so drop down from this Watchtower and take him head on before grappling to the ruined house to the right to finish off the last two Rats.
With the area clear of enemies, head up the path from this house to loot some Ministry Dousing Powder and then grapple up to the branch in front of you to find some Fulminated Mercury behind the cannon. Grapple up to the Watchtower now to find a Lump of Grave Wax before searching the house above the previous cannon for some Pellets. In the area beyond here, you’ll see fire everywhere with scratch marks in the ground, continue through here to find a new Sculptor’s Idol however this one acts as a transportation device to the Flames of Hatred Idol.
Before you begin one of the game’s toughest bosses, note that you’ll want to be fully prepared so read on ahead before beginning.
Boss: Demon of Hatred
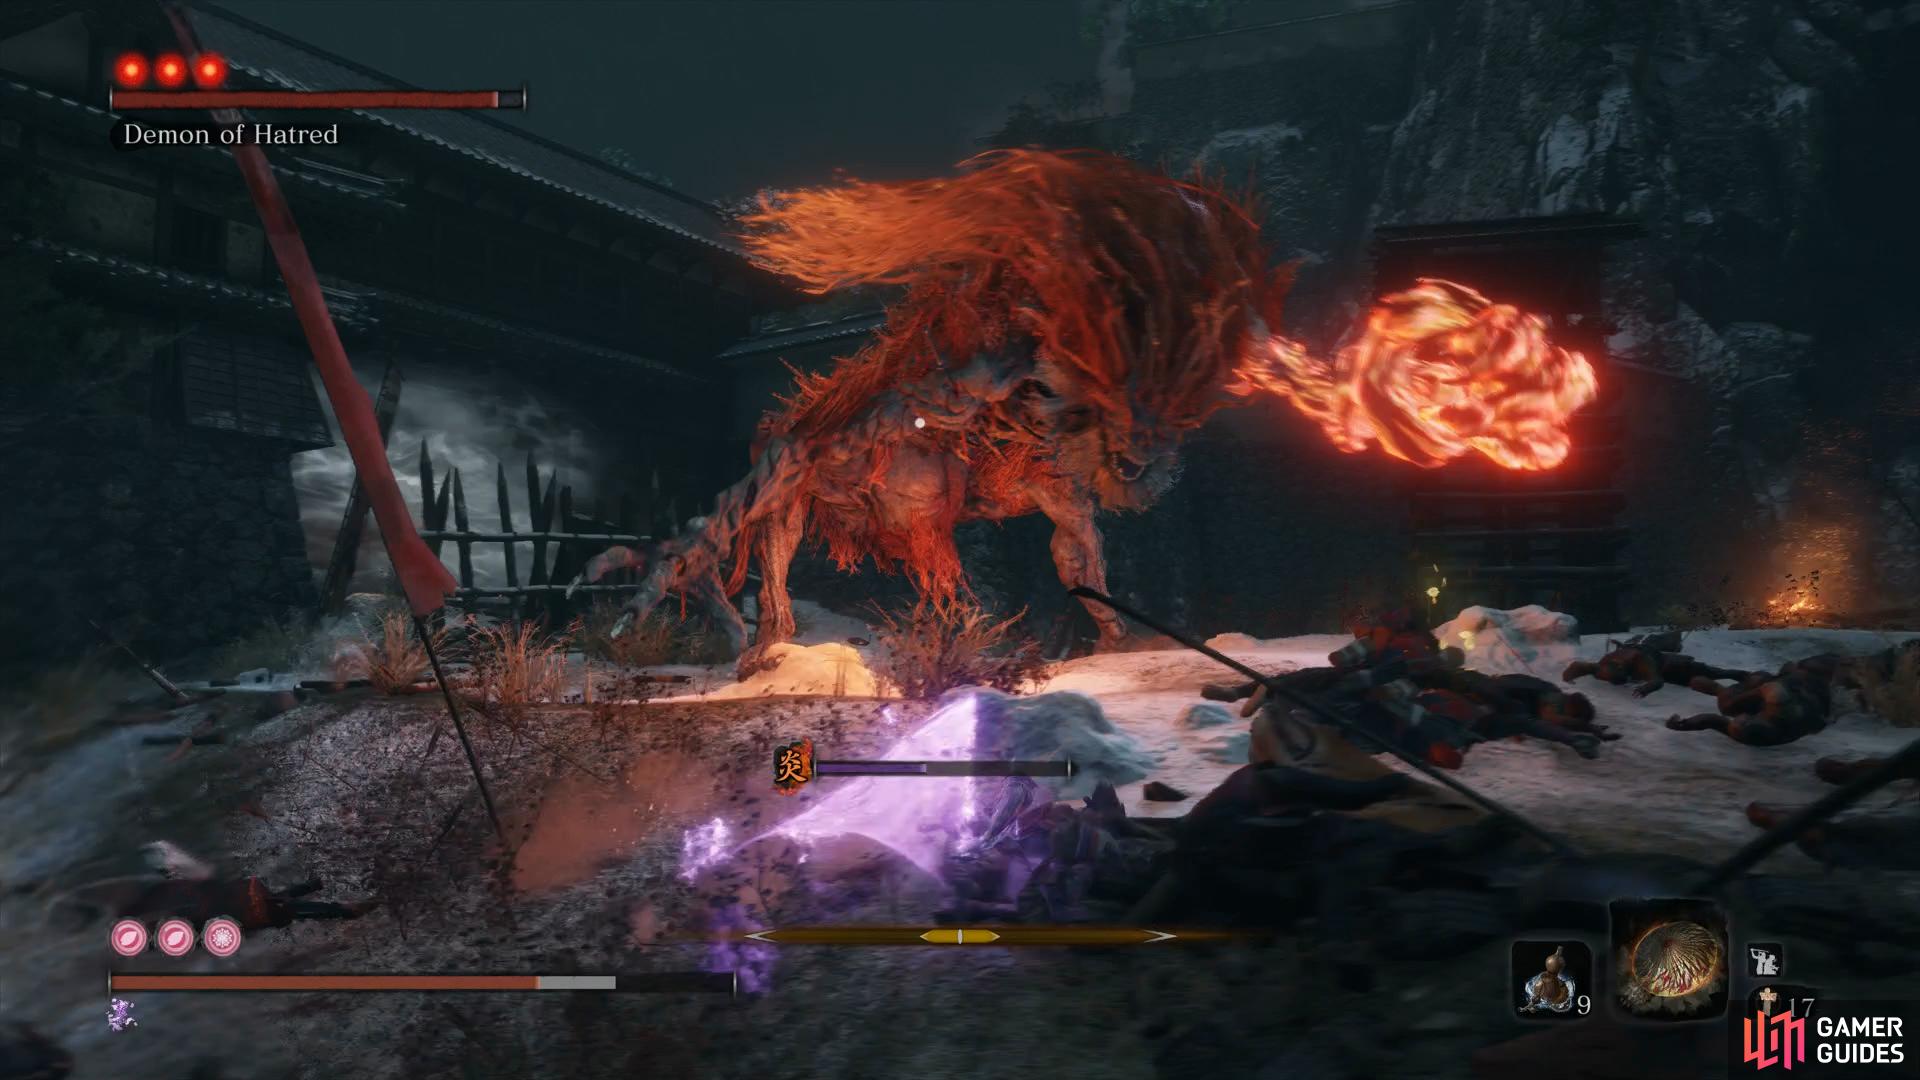
Before you even begin this battle, you should know that this is an optional boss but it does affect three diffrent Trophies/Achievements so if you’re chasing them, you’ll have to take it down regardless. On top of that, ensure that you’ve maxed out your Vitality with all of the Prayer Beads, if you’ve been following this walkthrough then you should already have them, if not, kill of the remaining Mini-bosses before you do. You’ll also want to make sure you have equipped the Suzaku’s Lotus Umbrella and the Malcontent as both are needed for the battle. Finally, make sure you have Ministry Dousing Powders equipped along with other useful items such as Rice and Pellets.
The first thing to note about the Demon of Hatred is that nearly everything you’ve learnt about Sekiro will need to go out of the window. The last thing you want to do against the Demon of Hatred is deflect and it becomes more a battle of evading and using the Tools at the right time. Nearly all of the Demon’s attacks will inflict Burn buildup so you’ll want to have Ministry Dousing Powders on hand to remove it should you need to. Finally, you’ll want to conserve at least 12 Spirit Emblems for phase three when you’ll want to use the Malcontent three times. If you find yourself short on them, consider using the Ceremonial Tanto if you have enough healing items to recover the lost health.
As you will see, the Demon of Hatred has three phases and learning the attacks that will come your way will go a long way to beating it as you’ll want to reach the later stages with as much Healing Gourds as possible. Also note that he has a large Vitality pool so be ready for a long and tiring battle.
For phase one, the Demon of Hatred will use many attacks such as Stomp combo where he will stomp with one leg, followed by a swipe and then a second stomp. If you dodge the first stomp you can then dodge back to your starting position to avoid the second. Beware not to confuse this with the more damaging Strong Stomp, if you see him wind up a bit then he’ll do one single Stomp that will deal heavy damage should you get hit by it.
He also has the ability to launch himself into the air once he glows orange, before crashing back down to detonate the area in a 360° so as soon as you see him glow, dash backwards as far as possible. Once he lands, you’ll be able to grapple on to him to close the distance and resume your assault. On top of this, he has a Perilous Charge which has all the properties of a sweep, until you learn this you may wonder how to avoid the attack. Once you see the Perilous Symbol, immediately jump because the attack will follow straight away.
At a distance, he will toss Fireballs your way which can be avoided by running to the side or making use of Suzaku’s Lotus Umbrella to negate the damage, for this reason you’ll want to remain up close the entire battle. This does mean however, that he will use his various Swipe Combos and Overhead Smash on you constantly so be ready to dodge at a moments notice.
As for attacking the Demon of Hatred, you’ll want to stay around his left leg or under him, this is the best place to be when attempting to dodge his attacks and will allow you to score many strikes at a time so long as you don’t get too greedy and forget to dodge. Strike him enough and he may fall to the ground stunned for a short time, take this time to lay on more hurt before getting ready to dodge again.
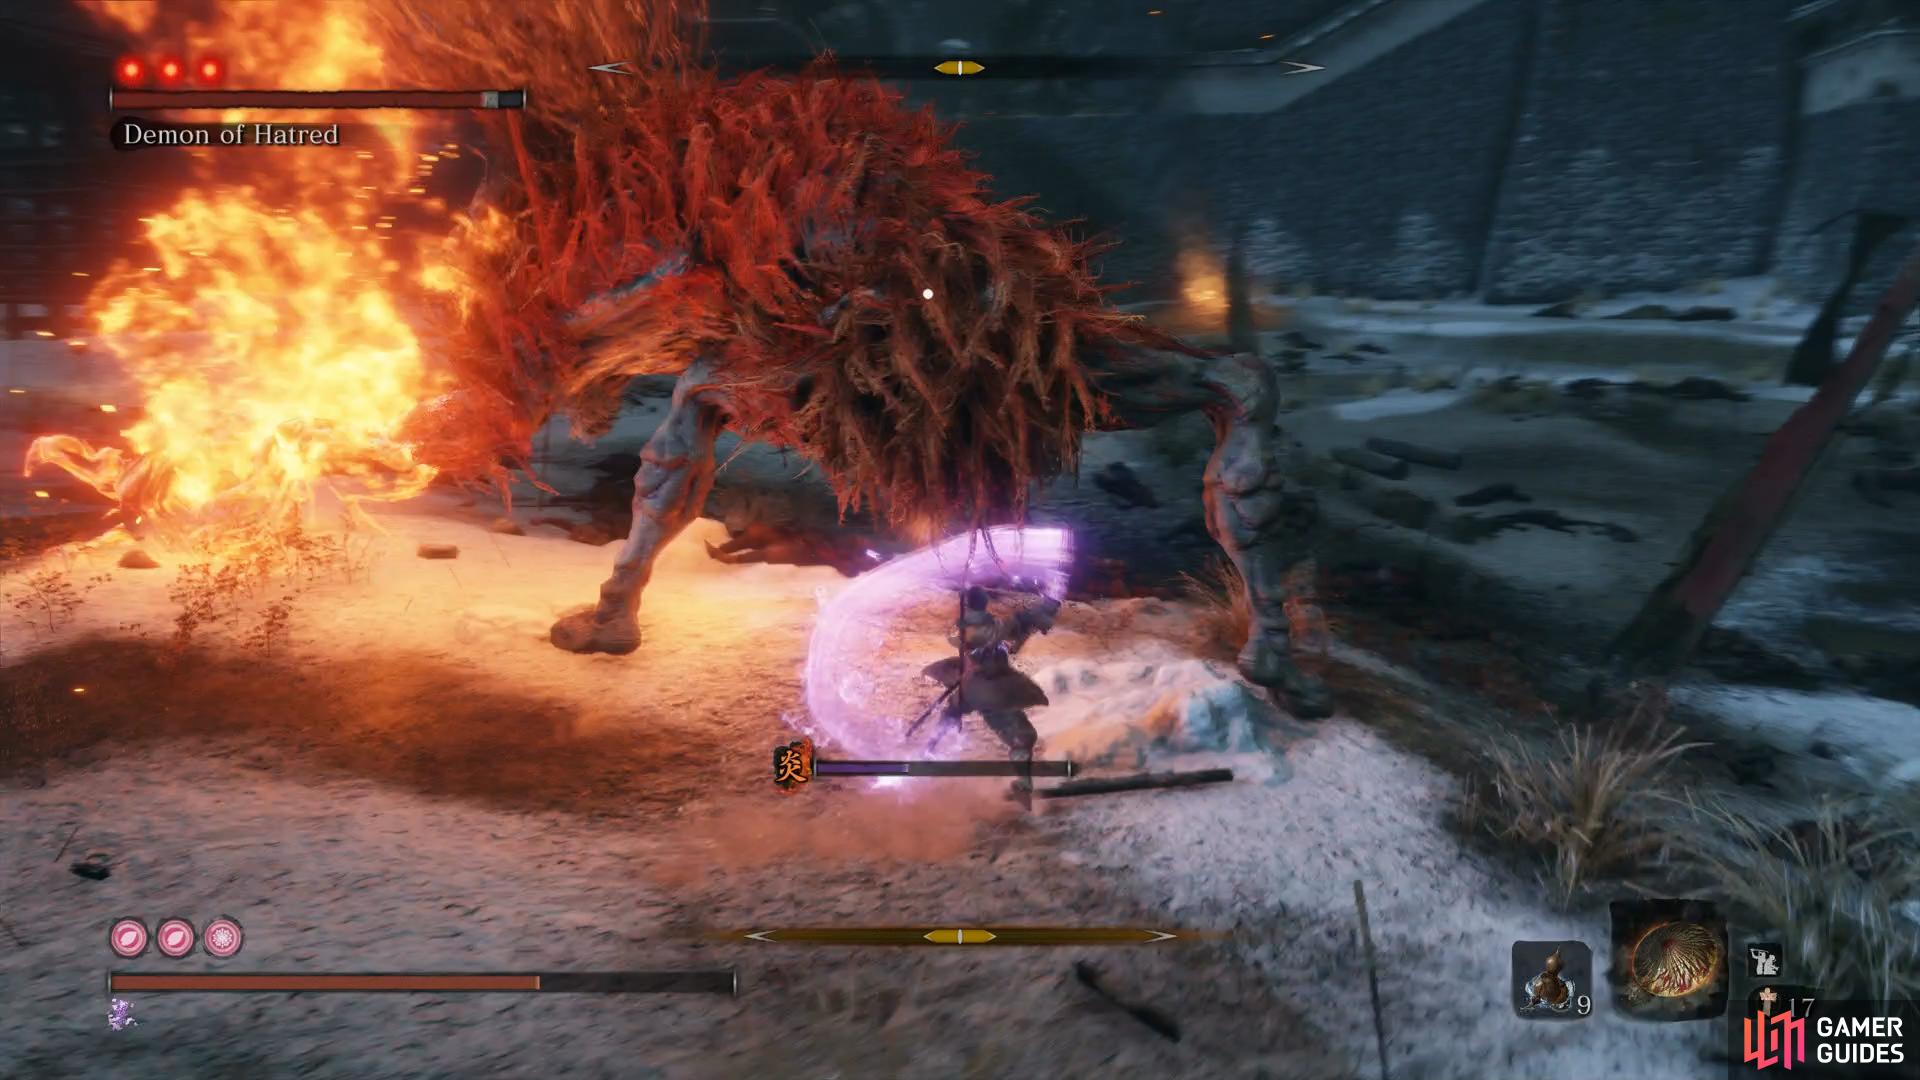
Once you perform the first Deathblow, get away as the Demon of Hatred will let out an explosion before beggining phase two. Not only does he retain all his previous attacks but he also adds devastating new ones to the mix as well. The most deadly being his new Fire Blast attack that he will use after his Perilous Charge (but also on its own sometimes too), causing him to stomp the ground and shoot a wide range fire attack across the ground. Once you see this attack coming or after avoiding the Perilous Charge, sprint to the side and jump before the fire reaches to avoid it, otherwise consider using the Suzaku’s Lotus Umbrella as a last resort. You’ll be able to grapple back over to him following this attack and it’s a good idea to do so as he’s a lot deadlier at range.
His second new attack here is his Homing Fireballs where he’ll swing his head around in circles and eight Fireballs will shoot out and home at you. Keep on the move here while running forward and to the side, attempting to close the distance in the process as he’s vulnerable at the end of the attack. Finally, he can close the distance with a Leaping Punch if you’re at range so again, stick close to his left leg while dodging his lethal Swipe Combos.
The third phase get’s tricker still and as soon as you begin the phase, sprint away as far as possible as he’ll use his new attack, the Flame Circle at the start of it. This will cause an outer ring of Fire that if caught in, will limit your fighting space and make it a lot tougher to dodge his attacks. The fire will disappear after around 15-20 seconds so if you’re low on health, focus on dodging until they’re gone. On top of this, he’ll add a second charge to his Perilous Sweep so be ready to jump again after avoiding the first. Finally, he will increase the radius of his Explosive Crash attack that he’s used throughout the battle so be sure there’s sufficient distance when retreating.
This third phase is when you want to use the Malcontent, you can use it up to three times before it stops working and each time you’ll stun the Demon of Hatred for a period of time allowing you a long time to score a series of strikes on him. You can even use this at the start of the phase to skip the first Flame Circle attack and deal a lot of damage to him before the phase even truly gets going. Keep an eye on your health here, if you feel your chances of victory are high, then don’t be afraid to use a Divine Grass or Bundled Jizo Statue to see you through. This is one of the game’s toughest challenges and it will take a while to learn how to fight him but persist and you’ll get there in the end.


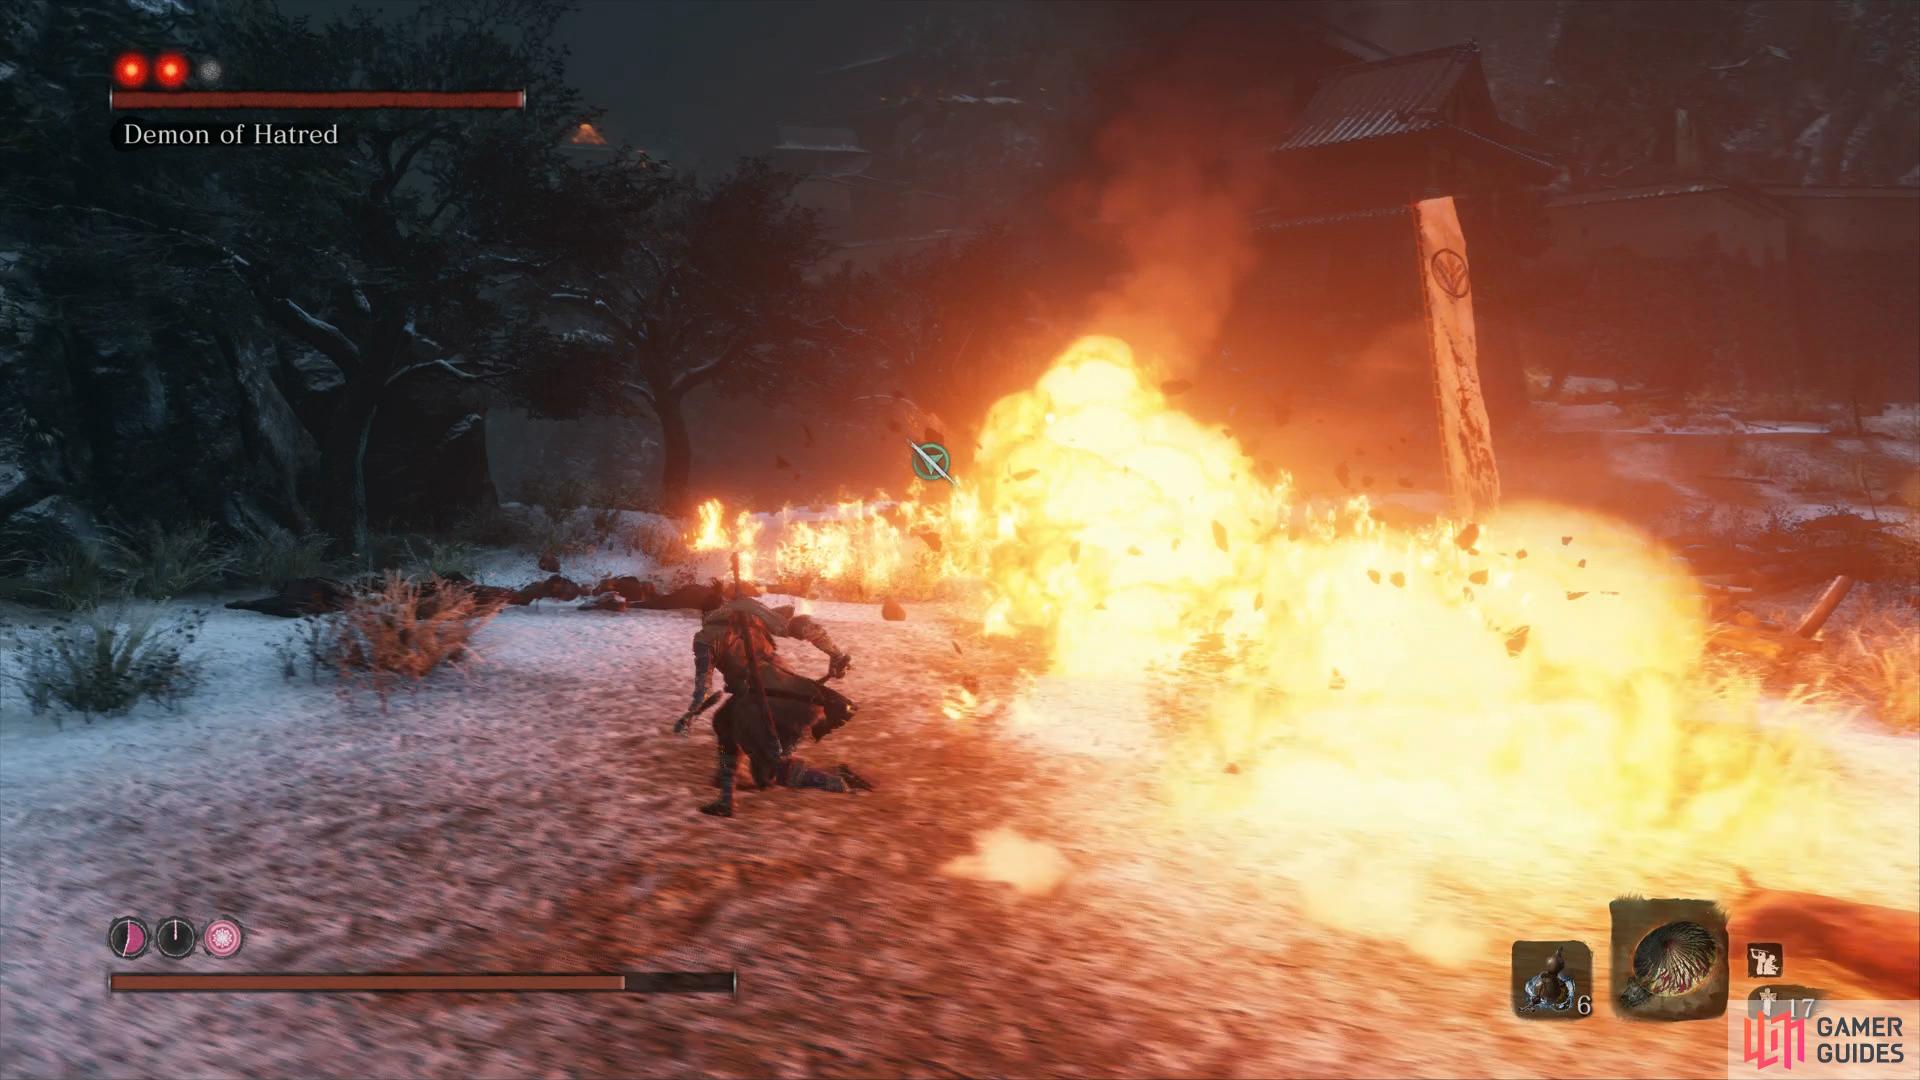
Your reward for one of the game’s toughest battles is the Memory: Hatred Demon along with the final two Lapis Lazulis you can obtain in a single playthrough. Take the time to reclaim the nearby Idol and enhance your Attack Power once more and then head up the stairs at the back to pocket the Lump of Grave Wax. Head inside the building and speak to the Old Woman to learn a bit more about the Demon you just fought and grab another Dragon’s Blood Droplet behind her.
There’s nothing left to accomplish now before the final showdown so take the time to stock up on items, upgrade your Prosthetic Tools and earn any more Skills you wish to learn by fighting the Red Guard enemies near the Outskirts - Wall Idol. Once you’re ready, return to the Near Secret Passage Idol and head through to begin the final battle.
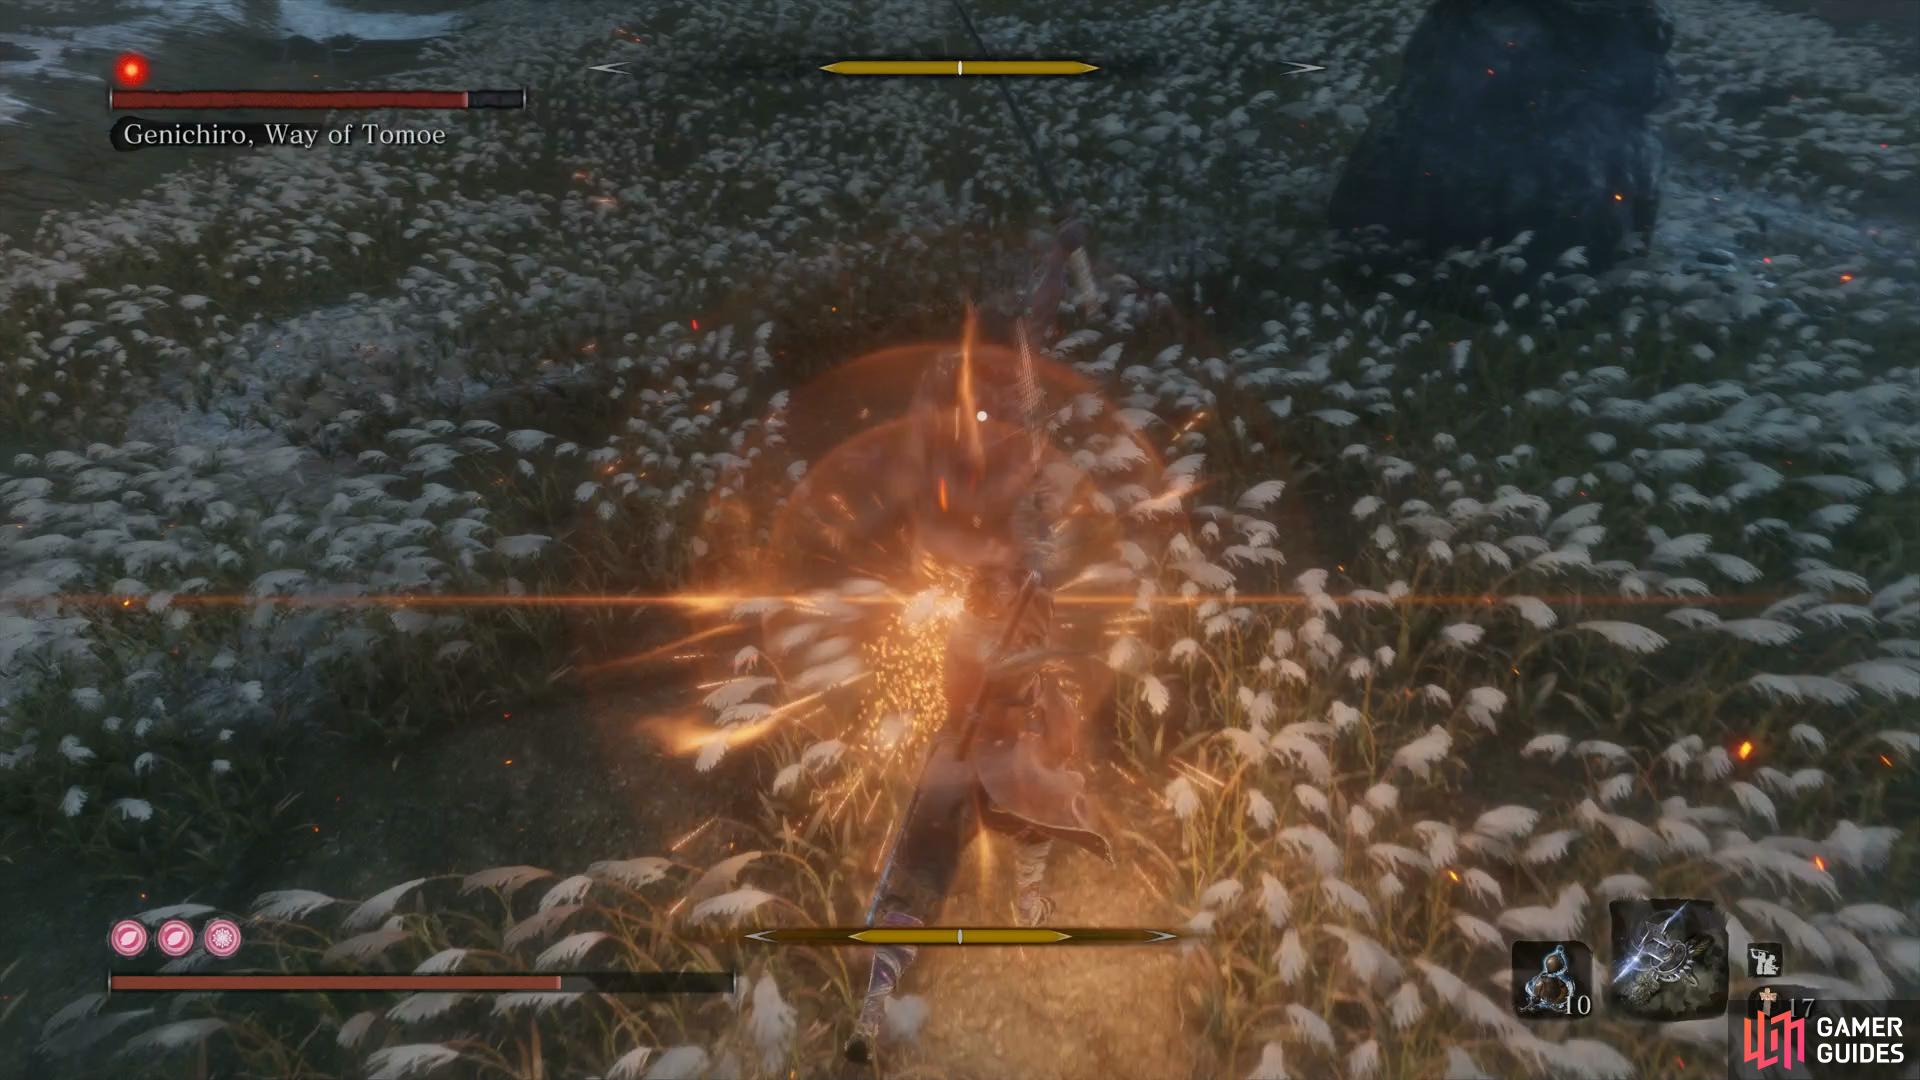
Boss: Genichiro, Way of Tomoe

Genichiro is the first phase of a multibattle final boss and due to this, you’ll want to get in the habbit of taking him down quickly and efficiently to conserve resources for the real battle. Conserve all of your Spirit Emblems and focus on beating the battle with little use of your Healing Gourd, if it goes badly then consider dying outright and trying again, you’ll need all the help you can get for what follows.
Genichiro will always begin the battle with the Mortal Draw skill so quickly run behind him to avoid the attack and begin striking him. He can however, sometimes follow up with another Mortal Draw so dodge behind him while he’s charging up to get even more free strikes on him. This is the attack you’ll want to look out for as it’s by far the easiest way to damage him. Note however that you cannot block or deflect the Mortal Draw skill so if you think you’re truly about to be hit by it, use the Phoenix’s Lilac Umbrella to block it.
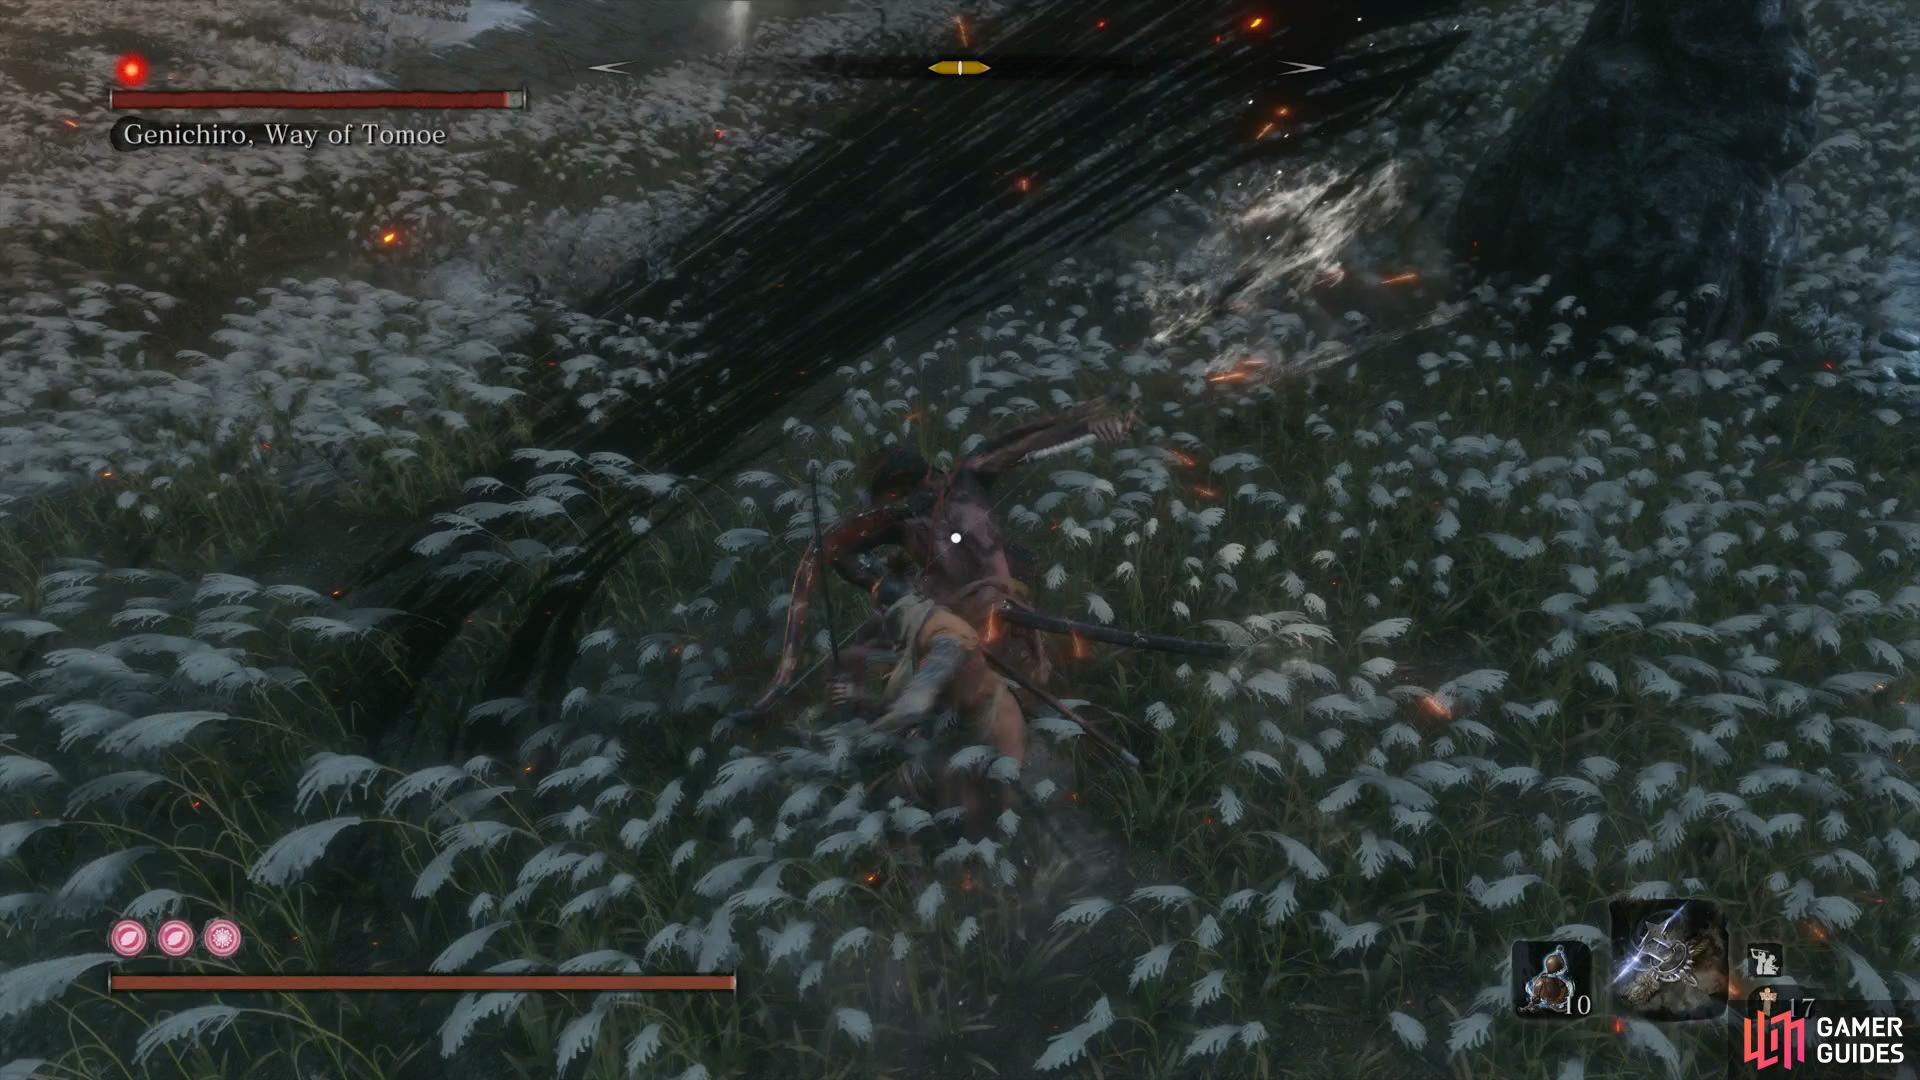
Run behind him to avoid his Mortal Draw
then focus on deflecting his attacks.
Other than this, Genichiro plays out the same way as his third phase back at Ashina Castle but without the lightning based attacks. Deflect his multi hit Combo and use Mikiri Counter on all of his thrusts, it shouldn’t take too much to take down Genichiro and proceed to the true battle.
Boss: Isshin, the Sword Saint
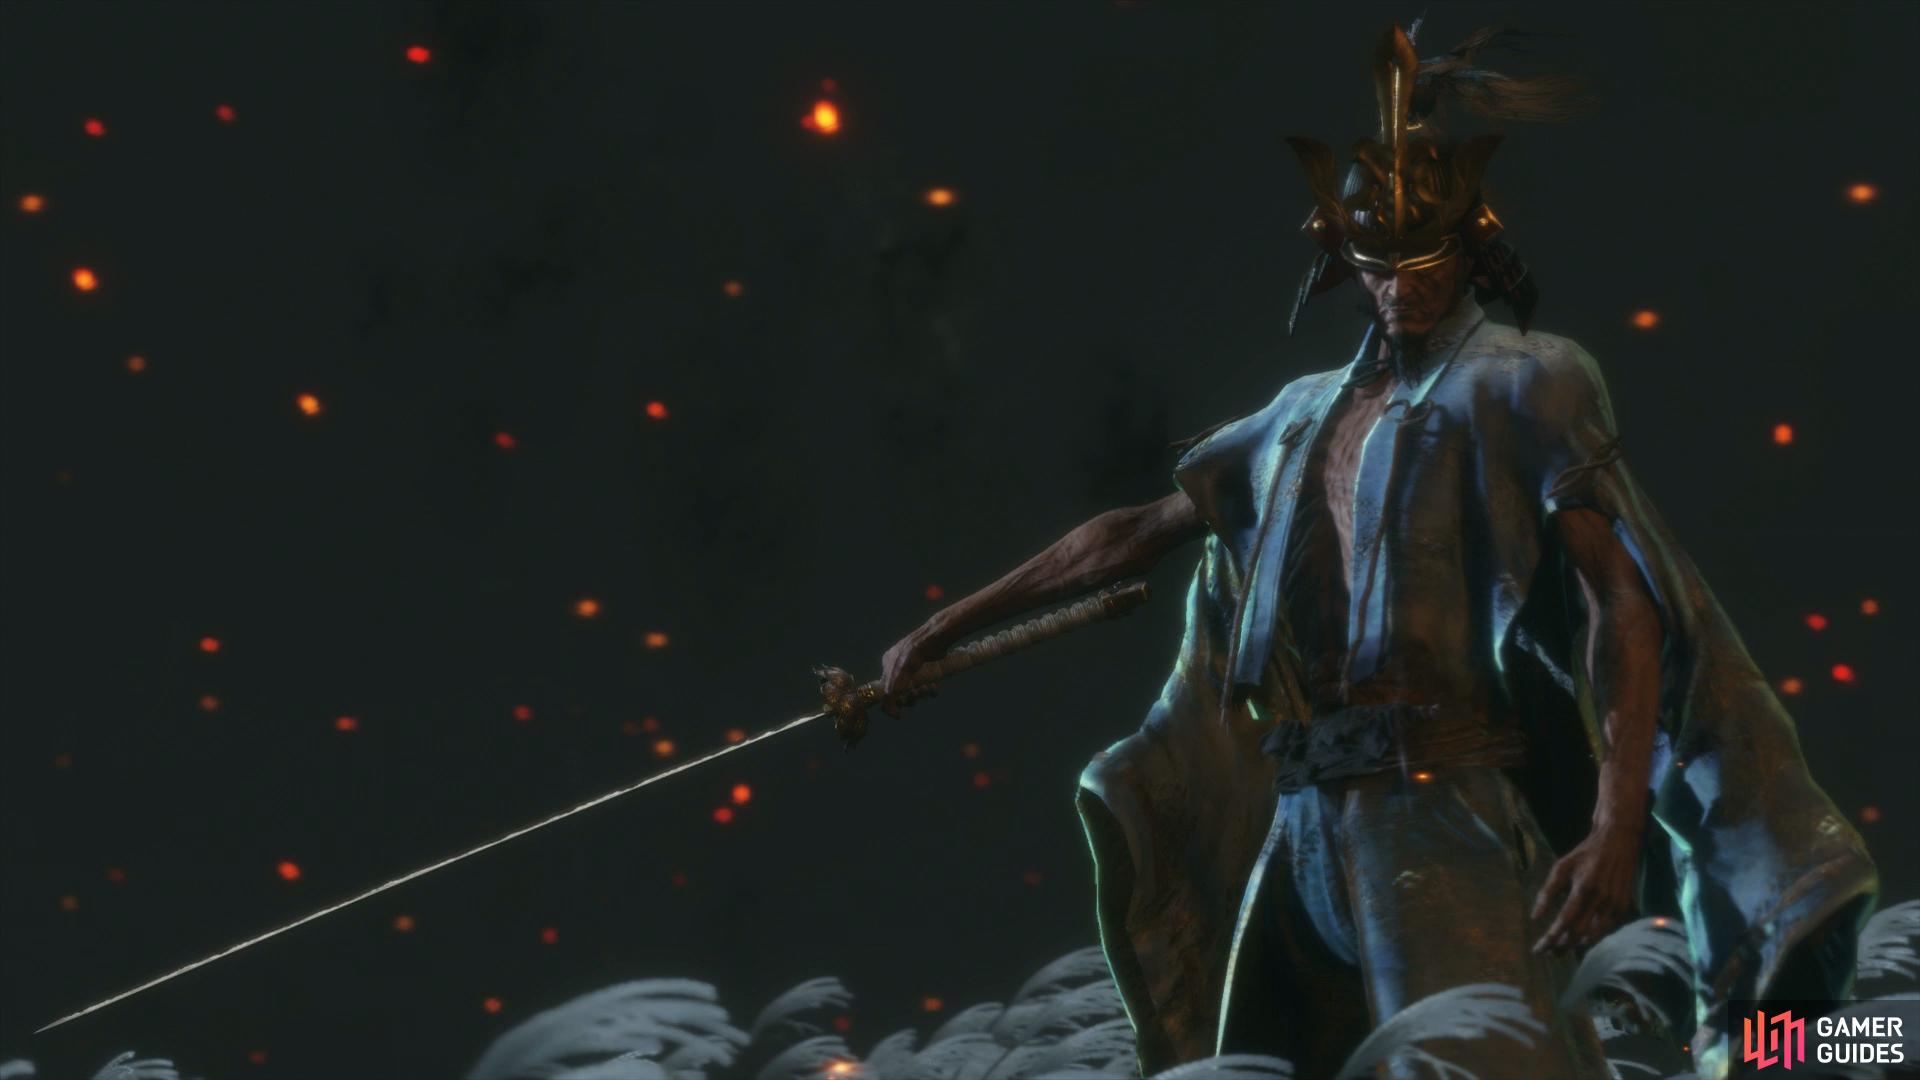
This is the final battle in Sekiro and it will require you to put into practice every skill you’ve learnt throughout the game if you wish to beat it. He’s by far the hardest challenge in the game and it will most likely take you many attempts just to reach the later phases to learn his attacks. You’ll notice from the start that he has three phases to him (and along with Genichiro, making this a four phase battle) with each one changing up massively.
Phase one will be a straight up sword fight and you’ll need to be adept at deflecting to bring his posture gauge up. To begin with, he has many multi hit combos that can all be deflected, be careful though as he may follow these up with Perilous Thrust attacks that can and should be dealt with using a Mikiri Counter. He can however also use a Perilous Sweep at times, take this time to jump over and kick him for some more easy posture damage.
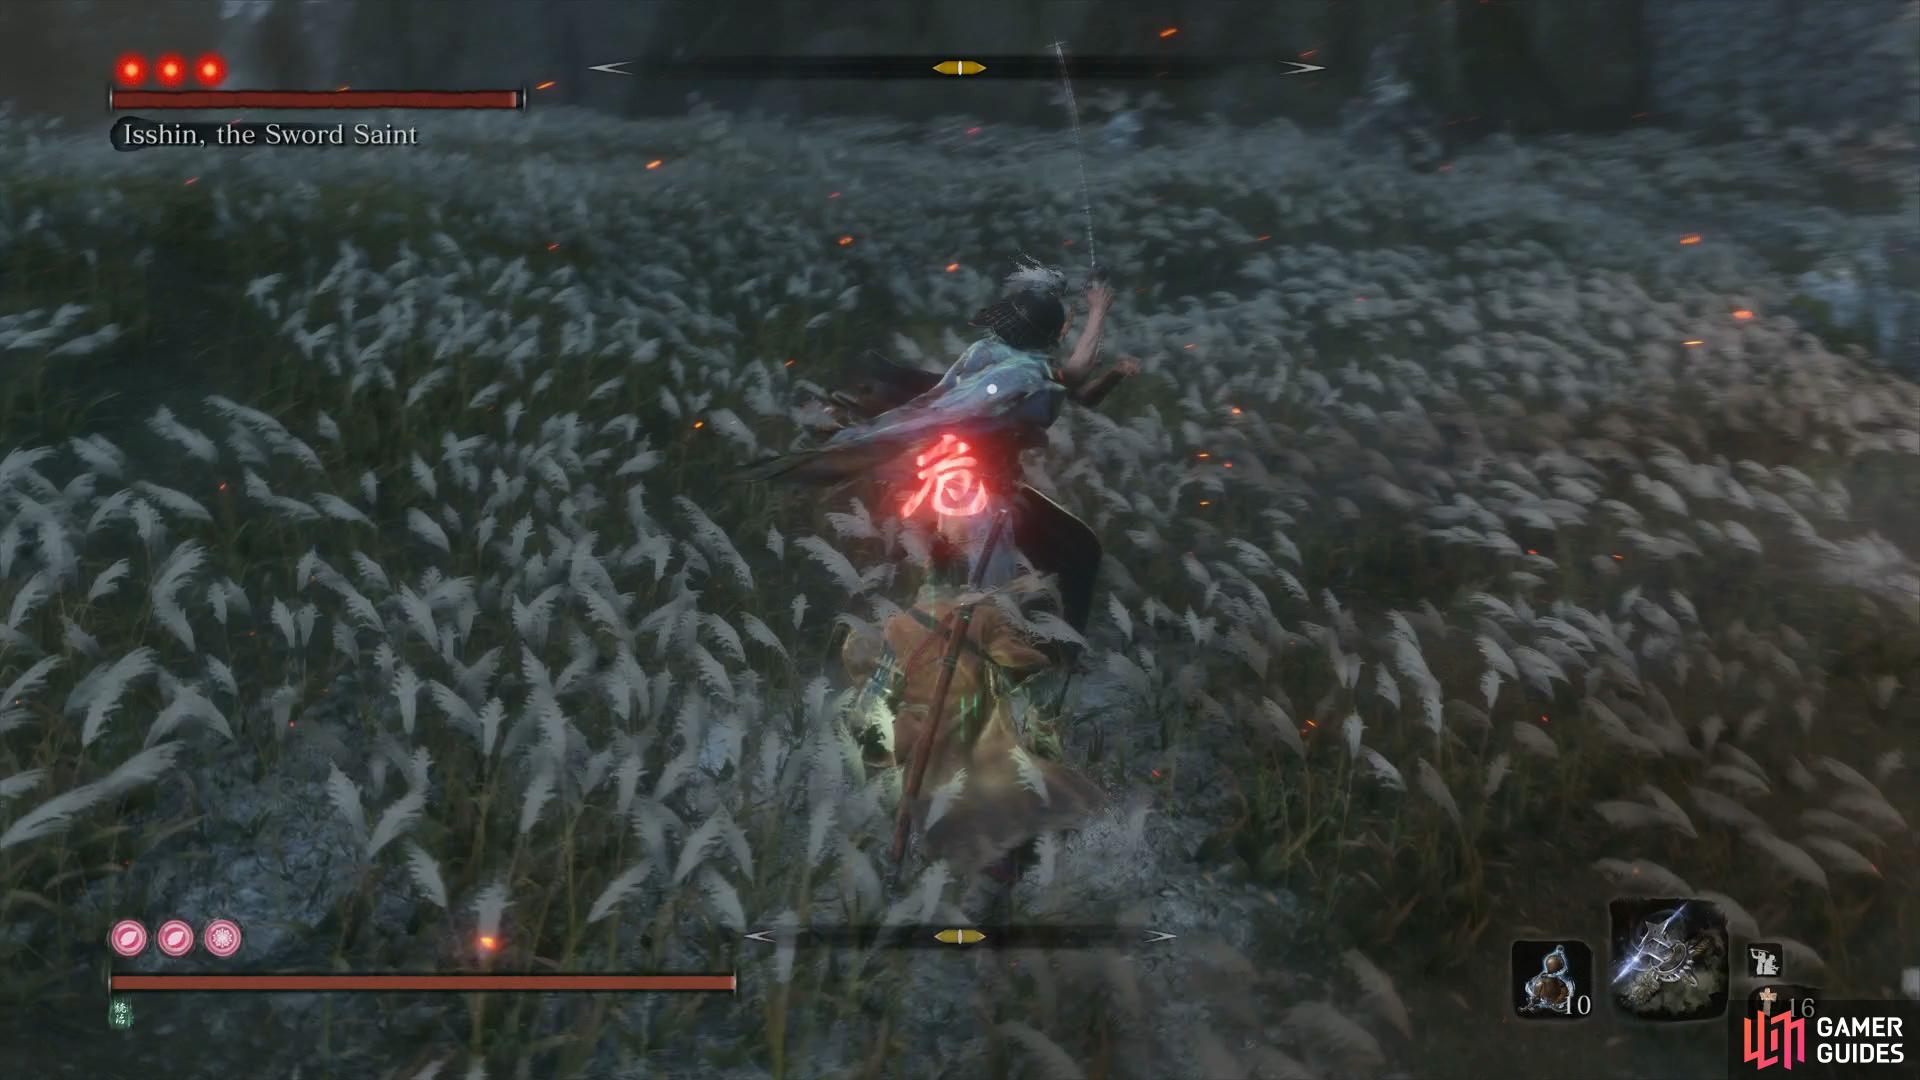
Isshin also retains the Mortal Blade from Genichiro and can use it for one of his more powerful attacks. He’ll charge up the weapon and let loose a 360° strike with a large radius, as soon as you see him charge up, sprint back as far as possible or if you feel you won’t make it out, attempt to deflect it at the cost of heavy posture damage to yourself.
His other deadly attack during this phase is his Ashina Cross skill, he’ll hold his sword in a Quickdraw stance and then step forward to unleash Ashina Cross. Getting caught in this will deal heavy damage to you but it’s also a good opportunity to get behind him following the attack to get a few more strikes in. Isshin will try to close you down at range if you try to heal so make use of the many rocks and hide behind them to recover if needed. Finally, Isshin will use Ichimonji: Double at close range and if you’ve already fought Owl (father), you’ll know that the best way to counter this is to dodge at the last moment.
You’ll also find that Isshin is weak to the Burn status if doused with Oil first so the Flame Vent can be put to good use here. He’s also weak to Poison so if you have the Lazulite Sabimaru by now, you can put this to use to Poison him and create another opening. Focus on trying to make it through this phase with as little healing as possible, using your Pellets for healing first before relying on the Healing Gourds.
Isshin’s second phase is arguably his toughest as he now pulls out a massive Spear to combat you. On top of this, he has a gun that he can use to shoot a barrage of bullets before following up with a combo although all of this can and should be deflected.
You’ll find him far more aggressive in this phase and he’ll actively pursue you even when retreating to heal, often with a Barrage from his gun. On top of this, he can easily transition from sword strikes to spear strikes in a single combo, often ending them with either a Perilous Thrust or Perilous Sweep. You’ll need to nail all of the opportunities to score a Mikiri Thrust in order to drive up his posture gauge during this phase.
He’ll add Shockwaves to his attacks from distance but you’ll be able to recognize these by him charging and can use the time to run sideways or diagonal to get behind him for a few easy strikes. He also extends the range on his 360° so you’ll have to make use of the Loaded Shield or a well timed deflect if you’re not able to dash away far enough. Finally, at range, Isshin will run and then perform a Spear Slam by leaping high in the air, this is a good opportunity to dodge behind him and get some strikes on him when he lands, taking care to possibly deflect a Gunshot following it.
That’s what makes this phase so challenging, Isshin is very unpredictable and can cancel most of his attacks and combos into other attacks at will and learning how to recognize and deal with these will go a long way to taking him down during this phase. You should focus on using your Spirit Emblems here in this phase as it’s by far the most difficult one to deal with and the Lazulite Shuriken can provide a safe way to inflict a little damage if you’re close to finishing him off.

The final phase isn’t too much different from the last phase with one huge difference, he adds Lightning to his Spear Slam and Spear Combo however this is actually a boon for you. You’ll want to make sure you leap in the air when you see the Perilous symbol so that you can perform a Lightning Reversal and Shock him for a period of time allowing many strikes on him.
Due to the fact of this, you can keep away and bait him into this attack, allowing you to drain his vitality with relative ease and end the battle with less hassle. This is also the phase to consider using Bundled Jizo Statues or Dragon’s Blood Droplets and Divine Grass if you feel the battle is winnable. The battle as a whole is an extreme test of everything you’ve learnt in Sekiro and victory will only come after you’ve mastered everything as Isshin will punish every mistake.

Your reward for the game’s toughest challenge is Memory: Saint Isshin and the Dragon Flash skill, a very powerful skill from Isshin’s moveset.
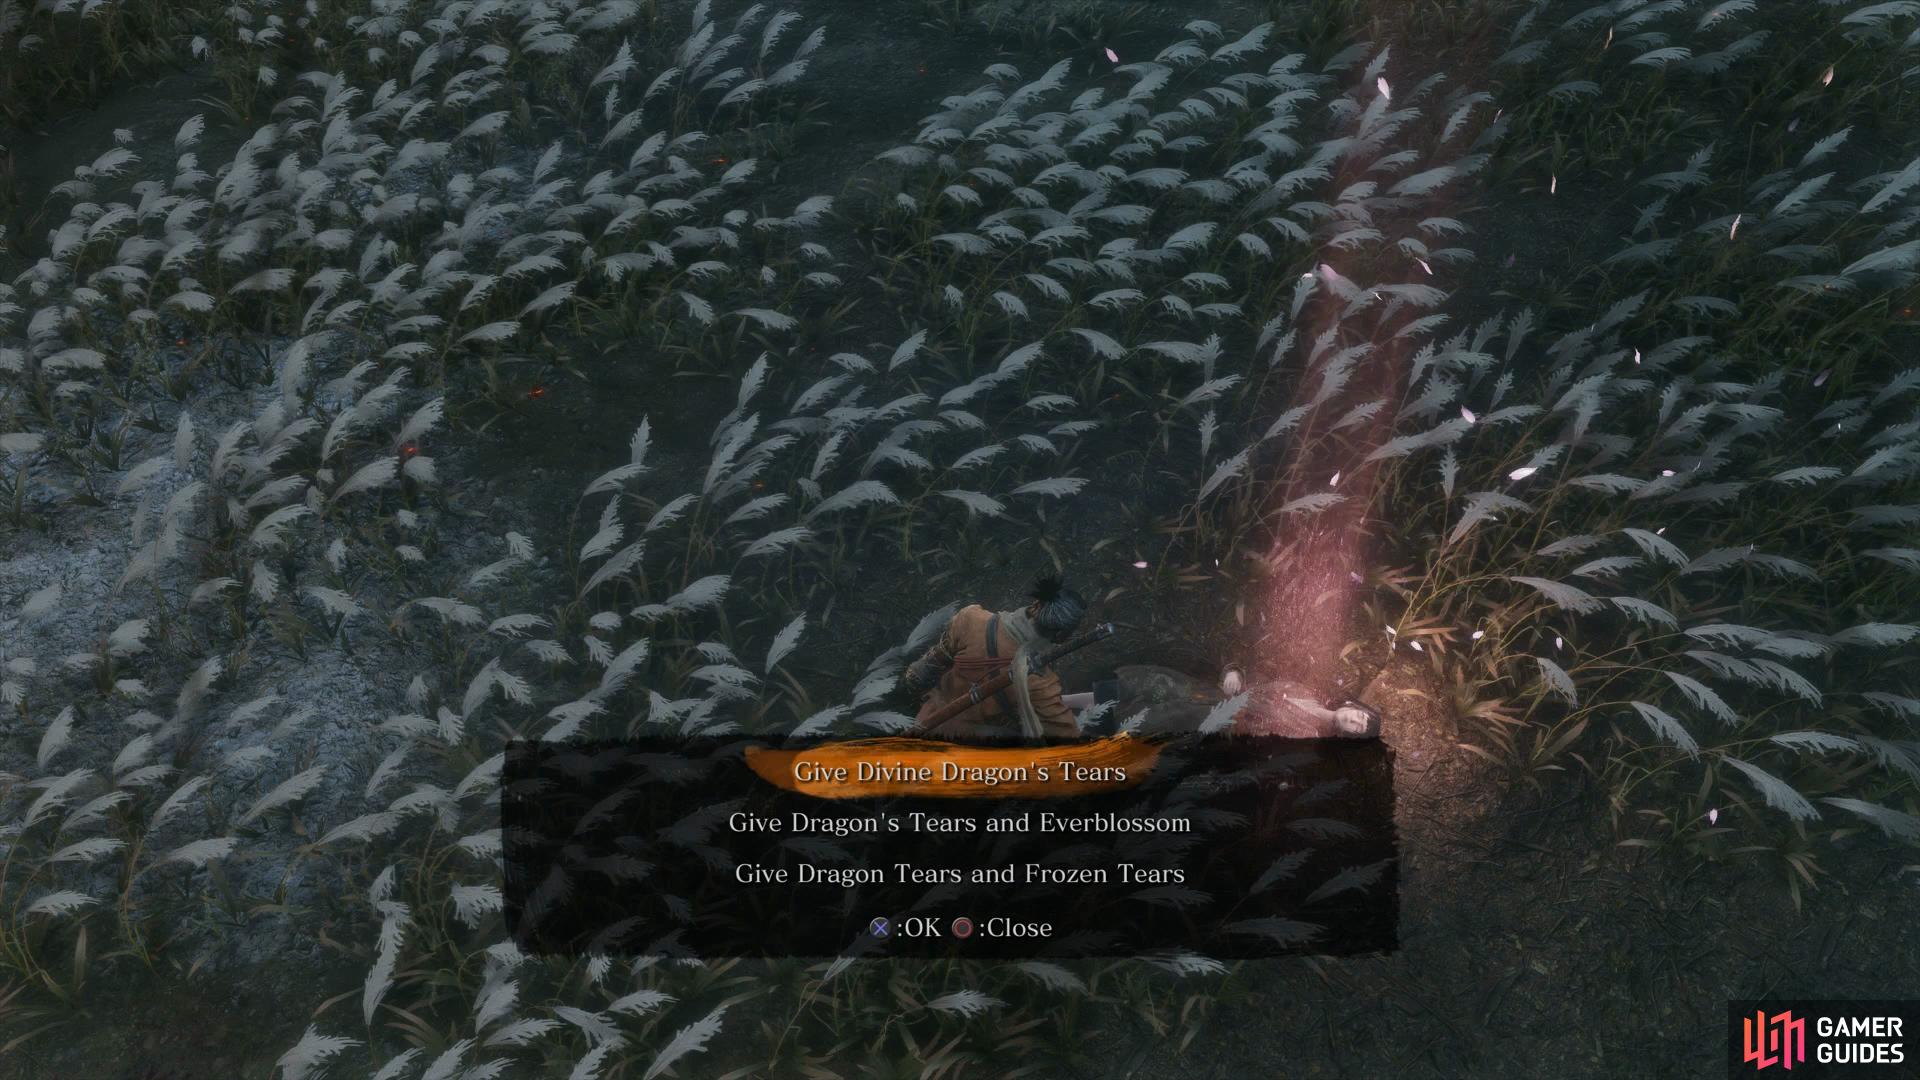
Your choice here will affect what ending you receive.
When you head over to Lord Kuro, you’ll be given three choices if you’ve been following this walkthrough. The Dragon Tears choice will get you the regular ending while the Frozen Tears is for the Return ending and the Everblossom for the Purification ending. You’ll be given a choice here to proceed into the next game cycle however turn this down until you’re ready, you can head to the Dilapidated Temple to advance on your own terms.


New Game+ and Beyond
Before you head over to your next game cycle, ensure that you’ve acquired all five available Lapis Lazuli per playthrough and everything is completed. In New Game+ and beyond, you’ll have Kuro’s Charm and giving this back to him will activate the Hard difficulty (yes, really). On top of the already increased stats of enemies in New Game+, you’ll also have to focus on deflects only as a regular guard will steal deal damage to your vitality. As an offset, you’ll gain increased Exp and Sen on top of the already increased rates of New Game+.
For your New Game+ run, focus on the alternative ending (most likely the Shura one by staying loyal to Owl) to gain two more Trophies/Achievements for defeating all bosses in the game and the Shura ending. Finally, you should also do your Skill Point grinding on a New Game+ (or beyond) due to the increased rates of Exp.
No Comments