
While exploring the open world of Ginormosia, in Fantasy Life i: The Girl Who Steals Time, you will run into some Shrines. These Shrines will task you with completing a task, usually a puzzle, combat challenge, or just doing a gathering challenge, with your reward being a Strangeling. This page will focus on guiding you to the Sednas Shrine, located in the East Dryridge Desert.
Where to Find Sed’nas Shrine
Sednas Shrine is found in the East Dryridge Desert, the second region that you will encounter in Girnomosia. It is towards the southeastern side of the region, not too far from the little pond that exits out into the ocean. If you head east from there, you will have to cross a little bridge to reach the shrine. Enter it to find a puzzle waiting for you.
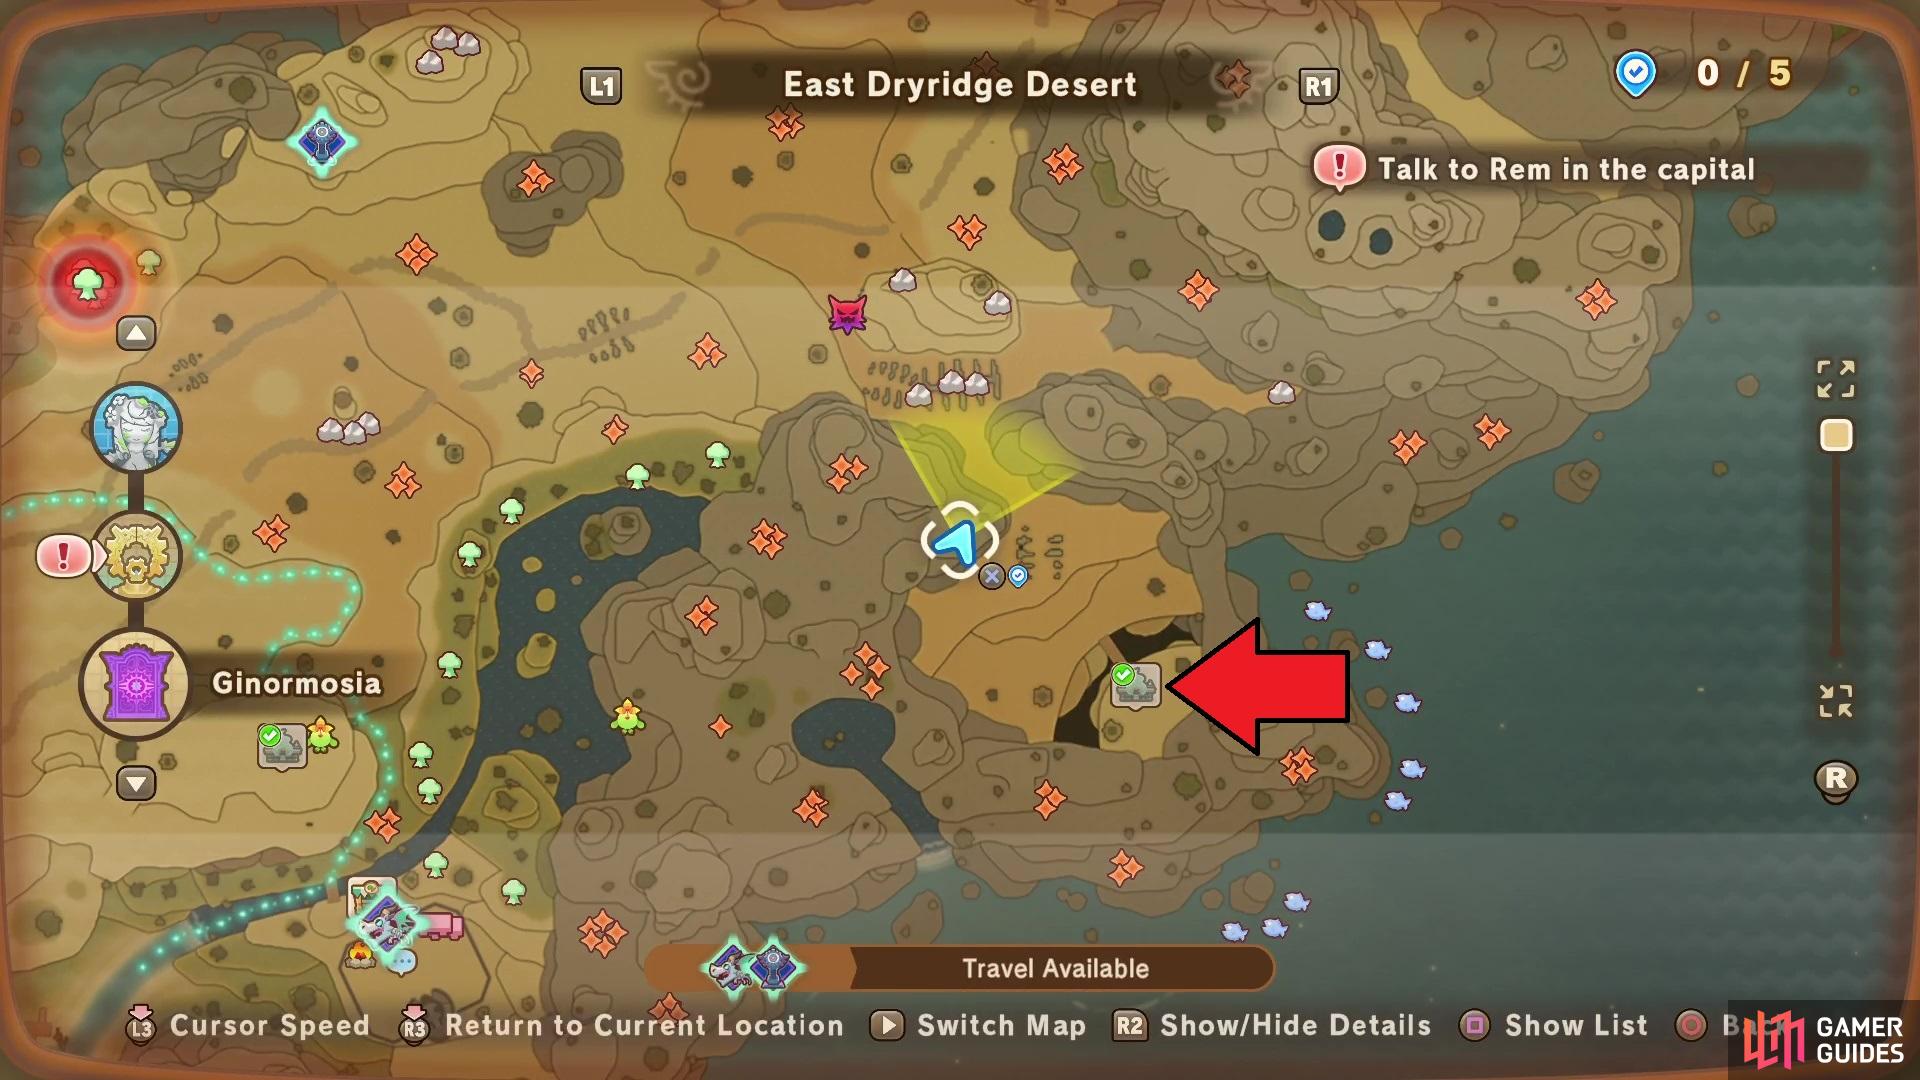
Sednas Shrine is found in the East Dryridge Desert region.

It will be right across the bridge, so it’s not hard to really find.
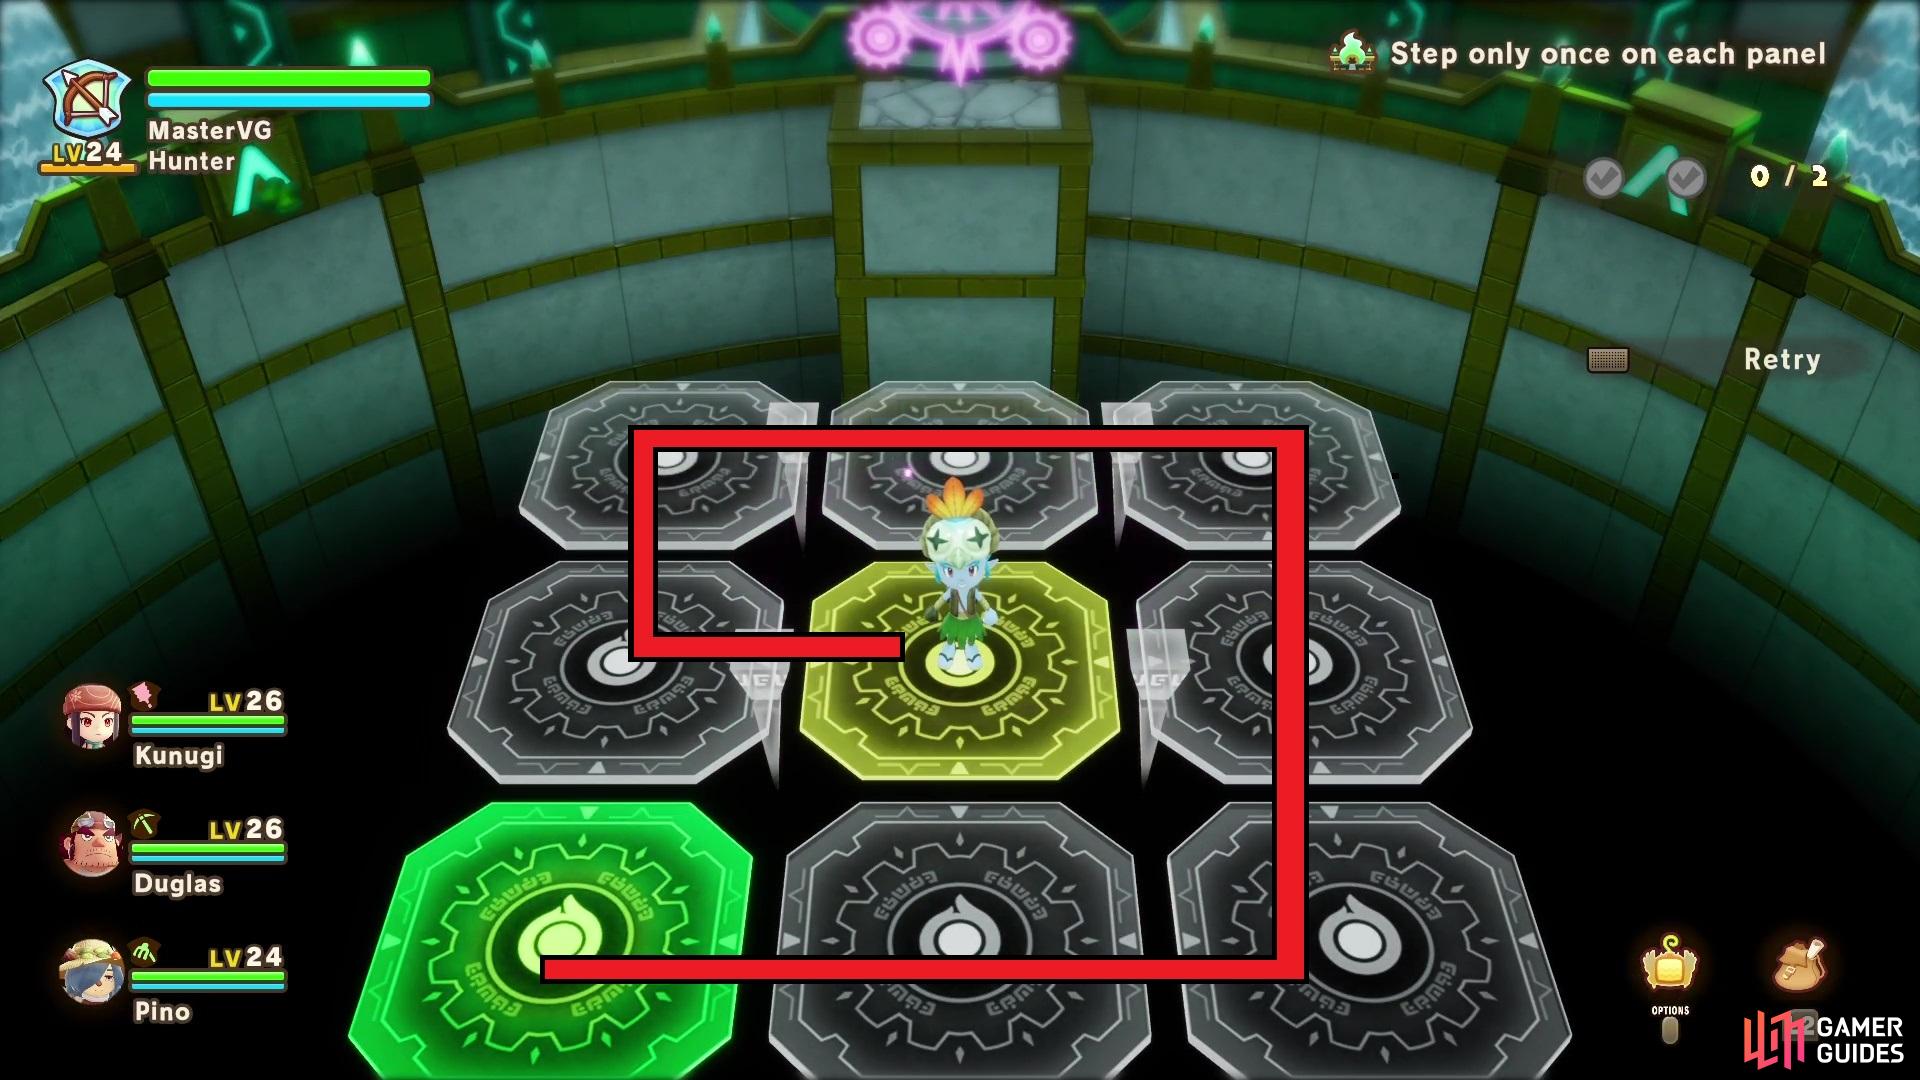
This puzzle isn’t all too challenging, but it can be a little tricky. The rule is that you have to make it to the green-colored tile, while stepping on every other panel first. The catch is that you can only step on each panel once, and if you step on one a second time, then you fail and have to start over from the beginning. For this shrine, there are two different stages and both will be fairly simple in their designs.
Sed’nas Shrine - Stage 1
The first stage will have the panels laid out in the shape of a square, and the end panel is in the lower left corner. You start out in the middle of the square, so you need to figure out the correct path to take. There are actually two solutions for this one, since there are no other obstacles in your way here. One solution will have you going left at first, then up and around to the green panel. Alternatively, you can go straight down at first, then go around to the upper path to reach the end.
Sed’nas Shrine - Stage 2
The second stage is split into two sections, with the pink panel acting as a teleport between the two. You’ll start in the lower left corner of the bottom section, so go up, right, down one panel each, then head all the way right and then circle back to the teleport. When you reach the second section, head to the right first, then return to the left and at the end, go down, left, and up, onto the green panel.
For successfully completing both of the above stages, you will dispel the barrier in front of the Strangeling. This will allow you to collect the ![]() Free-Spirited Cap, who is a Paladin named
Free-Spirited Cap, who is a Paladin named ![]() Laura, once you revert her back to normal.
Laura, once you revert her back to normal.
No Comments