Now that you’re in Beregost a helpful peasant named Golin Vend will talk to you, basically to tell you about various places in town. Beregost is the second most substantial settlement in this game, and it’s not until you reach Baldur’s Gate that you’ll find a larger bastion of civilization. We’ll pick up some quests, put down assassins, recruit some new party members, and ogle items we can’t afford yet… you know, typical RPG stuff.

(1 of 4) Walking around the northern end of Beregost you’ll be hailed by Neera, who asks for your help.
Recruiting Neera
From where you arrived head south-east until you find a manor… or at least its fence. Follow this fence south until you find a Mage named Neera (x=3150, y=2120), just standing around waiting to make a nuisance of herself. She’ll initiate dialogue with you and ask you to help her deal with some bandits that are after her. Agree to help and ‘lo and behold, the bandit show up in a timely manner. Her “bandit” pursuers are none other than Red Wizards of Thay, and oddly enough you’ll be encountering quite a few of them around these parts despite the fact that we’re quite far from their homeland.
Anywho, their leader - Ekandor - tries to get you to do the wise thing and mind your own business. Naturally if you side with Neera violence will ensue. Neera uses some of that wild magic of hers (which will be nowhere near as helpful in the rest of the game as it is here) and Ekandor finds himself unexpectedly teleported. Once gone, his understudy - a Thayan Mage takes up the attack, joined by two Thayan Bodyguards. The latter two are mere distractions. focus on the Mage lest he complicate your life with spells like Color Spray, which can allow the Bodyguards to cause trouble. Once your opposition is dead, Neera will ask to join your party - for mutual protection, you see. Might as well take her along, at least long enough to snatch that Gem Pouch in her inventory, which you should take for your own. It’s a nice inventory management item of the sort that the original Baldur’s Gate game was sadly lacking in. Sadly you can’t make off with Neera’s Staff +1, as it can only be used by her. Oh well.
Character Info: Neera
| STR | DEX | CON | INT | WIS | CHA |
|---|---|---|---|---|---|
| 11 | 17 | 14 | 17 | 10 | 11 |
At a glance, Neera seems to provide something that the good party had been somewhat lacking in: top-tier Mage prospects. Edwin is hands-down the best Mage in the entire game (both games, in fact), and other possibilities - especially good or neutral-aligned ones - left much to be desired. Imoen was easily the best compromise candidate before Neera came along… and after.
Neera is a perfectly fine Mage, all things considered. Her Intelligence isn’t quite as high as it could be, and her Hit Points aren’t helped any by her Constitution score (just two more points - c’mon!), but at least her Dexterity bonus will help her somewhat. Compared to Imoen, it’s clear who has the better stats. While being out-classed by Imoen in pure stats (seriously, Imoen will have twice as many HP as Neera by 6th-level), Neera does have one advantage: she’s a Wild Mage.
The Wild Mage functionally acts like a specialist Mage, save it lacks a prohibited spell school and instead suffers from “Wild Magic”. Essentially there’s a 5% chance that some random effect will occur every time Neera casts a spell, and spells tend to be rather make-or-break affairs in this game. The odds of having Wild Magic do something beneficial actually isn’t that low. Having it do the right beneficial thing to the right target, however, is rather uncommon. If you really need that Dispel Magic spell, having it replaced by a Slow spell isn’t going to cut it. Suffice to say, Neera will increase the number of times you reload the game, although in a game where RNG is so fickle and reloads are relatively common, it may not be as severe of a problem as it seems.
All in all, the good party is fine with Imoen, thank you very much, but if you have another way of getting the Thieving skills that Imoen provides, Neera will do her job just fine. 95% of the time.
As for how to develop her… well, Mages are simple. Get her ranks in slings, then daggers. You don’t have many options, anyways, and Neera should only be using a weapon when the foes on hand aren’t worth wasting spells on, which is dreadfully common.
Party Management
Now that we’ve encountered more than a full party’s worth of characters, we should discuss party management. If you disband any characters, they will wait where you left them, unless your Reputation is too high or low for their alignment (usually within a few points of their “break” score). Be cautious when you disband characters that are unhappy, as they might just walk away forever - a neutral Reputation makes everybody happy, in this case.
Also keep in mind that many characters (Kivan, Safana, Coran, Kagain, Edwin, Minsc are all examples) have time-based quests, which, if left unfulfilled, will cause the unsatisfied character to defect. This timer starts as soon as you recruit said character, but it doesn’t end when you disband them. Yeah, that’s right, you could end up disbanding a perfectly happy character, only to have them immediately (and permanently) defect after you recruit them again because their personal business went unresolved.
Some characters come in pairs, when you disband one, the other disbands automatically, these include Khalid/Jaheira, Montaron/Xzar, Eldoth/Skie, Minsc/Dynaheir. Of course, as you can see, a few great characters are tied to dead-weight because of this, but never fear-there’s a number of solutions. First, you can kill the less useful character (or just allow them to die) and disband their corpse. Second, disband the suck character in a house you never plan to enter again, and walk out before they talk to you.
The characters who are new to the Enhanced Edition-Neera, Dorn, Baeloth, and Rasaad, will return to specific areas after they’re disbanded. The first three head back to the Friendly Arm Inn, while Rasaad returns to Nashkel.
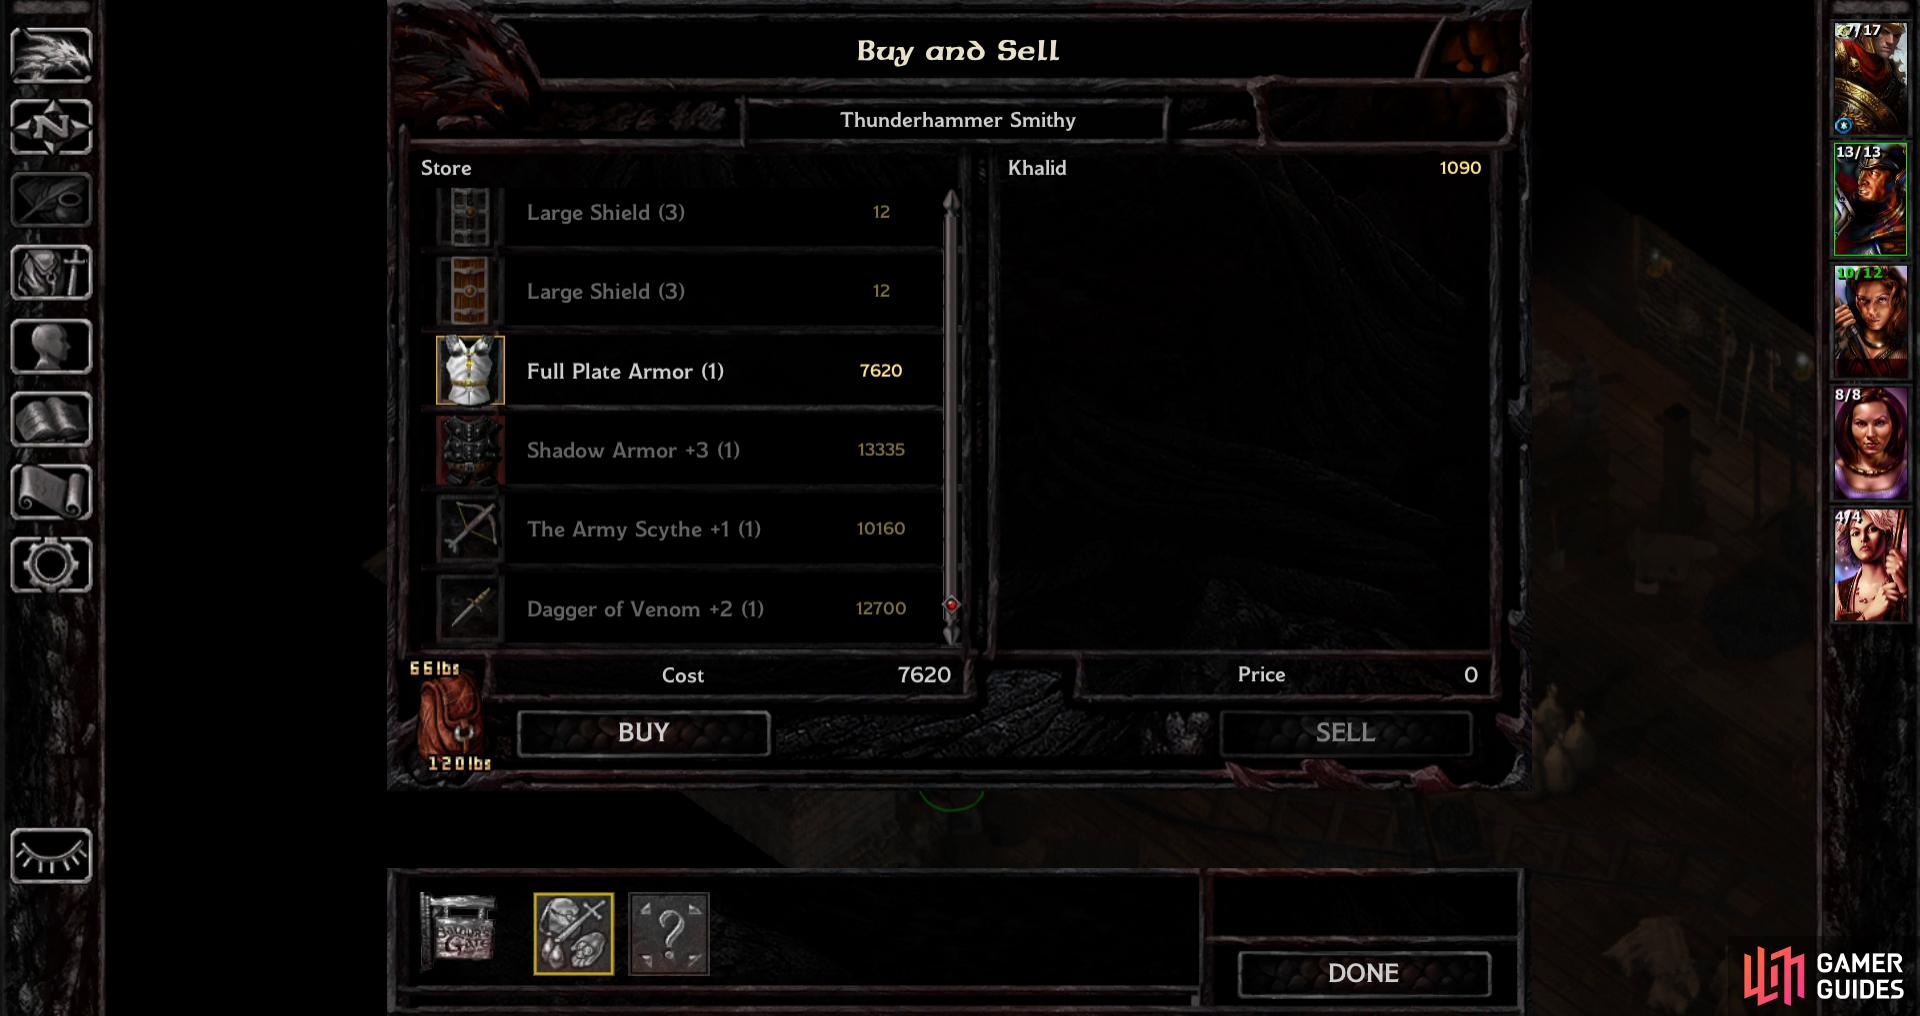
You can buy - or rather, at this point in the game, salivate over - high-quality gear at the Thunderhammer Smithy.
For more immediate gratification, however, you can loot a Bastard Sword +1 - an endeavor best attempted at night, when the smithy is empty.
Thunderhammer Smithy (AR3301)
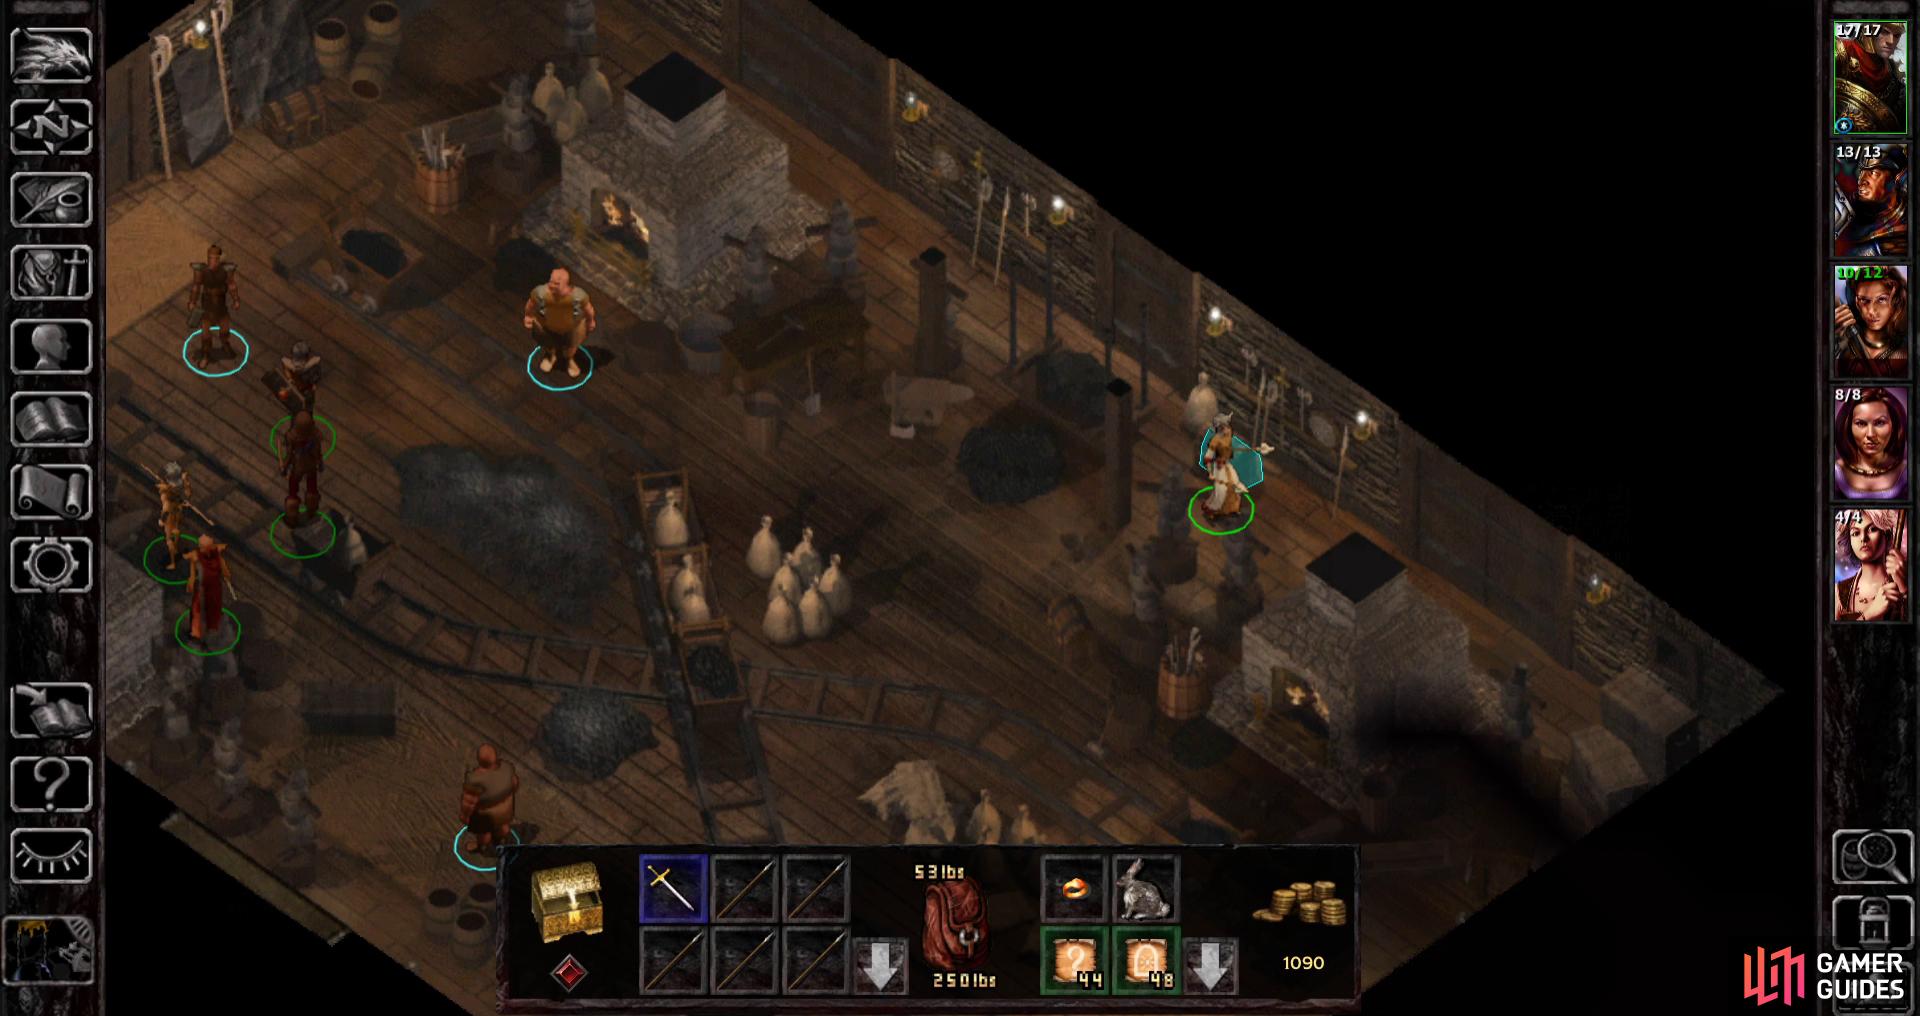
From where you found Neera continue east, then south between two rows of buildings. When you run out of south, head east again to find the Thunderhammer Smithy (x=4600, y=2850) (AR3301). This is the main shop to hit in Beregost as it sells all kinds of good loot we can’t afford yet. There’s no reason to go there yet, but for the sake of continuity, we’ll discuss it now… and more importantly, what goodies it sells. Or at least the most interesting ones.
Inside talk to (x=330, y=290) Taerom Fuiruim and check out his wares, which will be discussed below:
Dagger of Venom +2: The best - and most expensive - weapon sold in this game, it’s one of the few weapons that will allow Jaheira to become an effective melee combatant. She just doesn’t have the Dexterity to make do without a shield, even if you can get a pretty good quarterstaff later in the game, and one of the few other options, a Scimitar +2, can’t be obtained until we gain access to the Cloakwood Forest. Even at its price, it’ll be the first +2 weapon Jaheira can get her hands on, and in all honesty, the last she’ll care to. Sure, 1d4+2 damage sucks, but the chance to deal an extra 15 damage via poison makes up for it.
Full Plate Mail: Boasting a base Armor Class of 1, this non-magical armor can be combined with magical items that further boost Armor Class, making it some of the best armor in the game. Regardless of what party you assemble you’re likely to have several characters who are in need of quality heavy armor, and being able to get them all in superb armor before the Nashkel Mines is certainly worth a few thousand gold. Of course you can always just make do with normal Plate Mail until you can just find other suits of this armor later on, but you’ll end up with more gold than you can reasonably spend anyways. Being a bit profligate is probably better than going most of the game with inferior armor, right?
The Army Scythe +1: A fast, potent Light Crossbow that… honestly it’s difficult to find a use for. Anybody who can use a crossbow can also use a bow, which will give as many attacks per round (two) as this crossbow will (or two-and-a-half attacks per round if the user is Specialized with bows). At 10,000~ gold, it’s just an expensive way to engage in ranged combat less effectively. Compare this to the Composite Long Bow +1 sold at Feldpost’s and the Short Bow +1 sold here, which are a quarter of the cost and perform just as well in combat (if not better).
Shadow Armor: While this armor might be tempting, it’s only really useful if you for some reason have a Thief in your party who is not also a Mage. The guide’s suggested evil protagonist is a Fighter/Mage/Thief, and Imoen in the good party is also a Mage (or will be, after she dual-classes). That being the case, it’s just difficult to find a use for this armor. If, however, you are playing a Fighter/Thief, there’s only one better suit of armor in the game… and you need to take down a very dangerous character to get it.
Short Bow +1: Although this weapon doesn’t seem exceptional (and it’s not), it’s worth mentioning for one reason: you won’t find a superior short bow until Baldur’s Gate. If you’re fine waiting over half the game for a decent ranged weapon for a Thief (we have Imoen in mind here, of course), then don’t worry about it. On the other hand, with a decent Reputation you can get it for less than 2,000 gold, which makes it a worthy consideration.
Sling +1: Again, not a great weapon, but it’s dirt cheap, and with every Cleric in your party needing a ranged weapon, it’s worth a buy.
Keep the Thunderhammer Smithy in mind for later when we have some money to spend. Also note that if you return at night, the pesky blacksmiths will be gone and you’ll be free to loot the place. In one of the chests (x=840, y=340) you’ll find a Bastard Sword +1, which is a nice catch at this point in the game. Aside from that, it’s not a bad idea to stock up on some mundane weapons stashed about, so long as you like spears and swords. Once you’re done in here, leave the smithy, head west and enter the building at (x=1500, y=2000).
| Items (AR3301) |
|---|
| x=370, y=170 - Spear |
| x=770, y=440 - Bastard Sword x2, Long Sword x3, Two-Handed Sword x2, Short Sword |
| x=840, y=340 - Bastard Sword +1, Spear x6 |
Kagain’s Shop (AR3353)
Behind the counter you’ll find Kagain, the premier Fighter for evil parties. Whether you care to recruit him or not, his store is a fine place to store excess baggage, be it weapons, scrolls, potions, wands… anything you don’t want to get rid of, but that you also don’t want to carry around. There’s plenty of containers here to sort such items up, no NPCs lurking about, and as long as you stash items in some container or another they’ll be there when you come back.
This is also a good place to disband party members, in case you need them later or just want to remember where you stashed them. Might as well stash your loot and your goons in the same place, right? Just remember to take whatever useful loot they have before disbanding them, as you’ll need their gear more out in the wilderness than they will in Beregost.
Anyways, good, evil, or otherwise, talk to Kagain and accept his job to look for the caravan his mercenaries were responsible for, which starts the creatively named quest Kagain’s Quest. Since he won’t pick fights with other party members, we bring Kagain into our party for now. The good party will get rid of him when another warrior with superior morals comes along, but the evil party welcomes him for the rest of the game. Either way, when it comes to Montaron and Xzar, it’s time to bid them farewell and stash them somewhere in this shop.
Once all that is done loot the place, then leave.
| Items (AR3353) |
|---|
| x=250, y=300 - Fire Agate Gem x2, 58 gold |
| x=580, y=150 - 76 gold |
| x=510, y=150 - Fire Agate Gem x3, 73 gold |

(1 of 3) Outside of Kagain’s shop, during the day, you’ll find a black-clad Town Crier who will give you news about the rogue Cleric Bassilus - and the hefty bounty on his head.
The Town Crier
Leave Kagain’s Shop and head a short distance to the east to find a Town Crier, who is distinctive for his black garb. Talk to him and he should mention some “mad cleric” named Bassilus for “crimes against nature”. Dangerous. But the reward on offer for his demise is a whopping 5,000 gold which, to be fair, makes his head about twenty-five times more valuable than yours. Such a bounty is well worth going after, so keep it in mind. This starts the quest Bassilus the Murderer.
Kagain’s Quest
Speaking of quests, we might as well get Kagain’s job out of the way real quick. It’s neither very difficult nor very rewarding, but seeing to it will keep Kagain happy (as happy as a gold-obsessed dwarf can be, anyways) and prevent him from defecting. Exit Beregost via any map edge and travel back to the area to the north (AR2800), where you’ll need to search for some “Raided Caravans”.
There are two such caravans - testament to the bandit infestation in the area - but you’re after the northeastern of the two. Head on over to around (x=3840, y=2580) to find the caravan, along with the body of Kagain’s client’s son. He’ll complain about the true victim here - himself - and offer to help you kill the bandits who tarnished his reputation. Accept and you’ll be able to retain Kagain’s services indefinitely… provided your Reputation doesn’t get too high. He’ll also pay you whatever he promised, which of course is based on a Reaction check. Worse case scenario he’ll give you a share of the “spoils”, which means you get whatever you loot off the nearby corpses. With a better Reaction check you’ll get 15 gold per party member (sans Kagain) or 30 gold per party member. Either way, the baubles on the corpses nor the gold Kagain gives are all that impressive, but at least you get to keep your dwarf.
| Objective | Reward |
|---|---|
| For finding Entar Silvershield’s son | “spoils” / 15-150 gold |
| Items (AR2800) |
|---|
| x=3830, y=2670 - Silver Ring, Fire Agate Gem x2 |
| x=4040, y=2540 - Small Shield |
| x=4065, y=2500 - Bastard Sword |
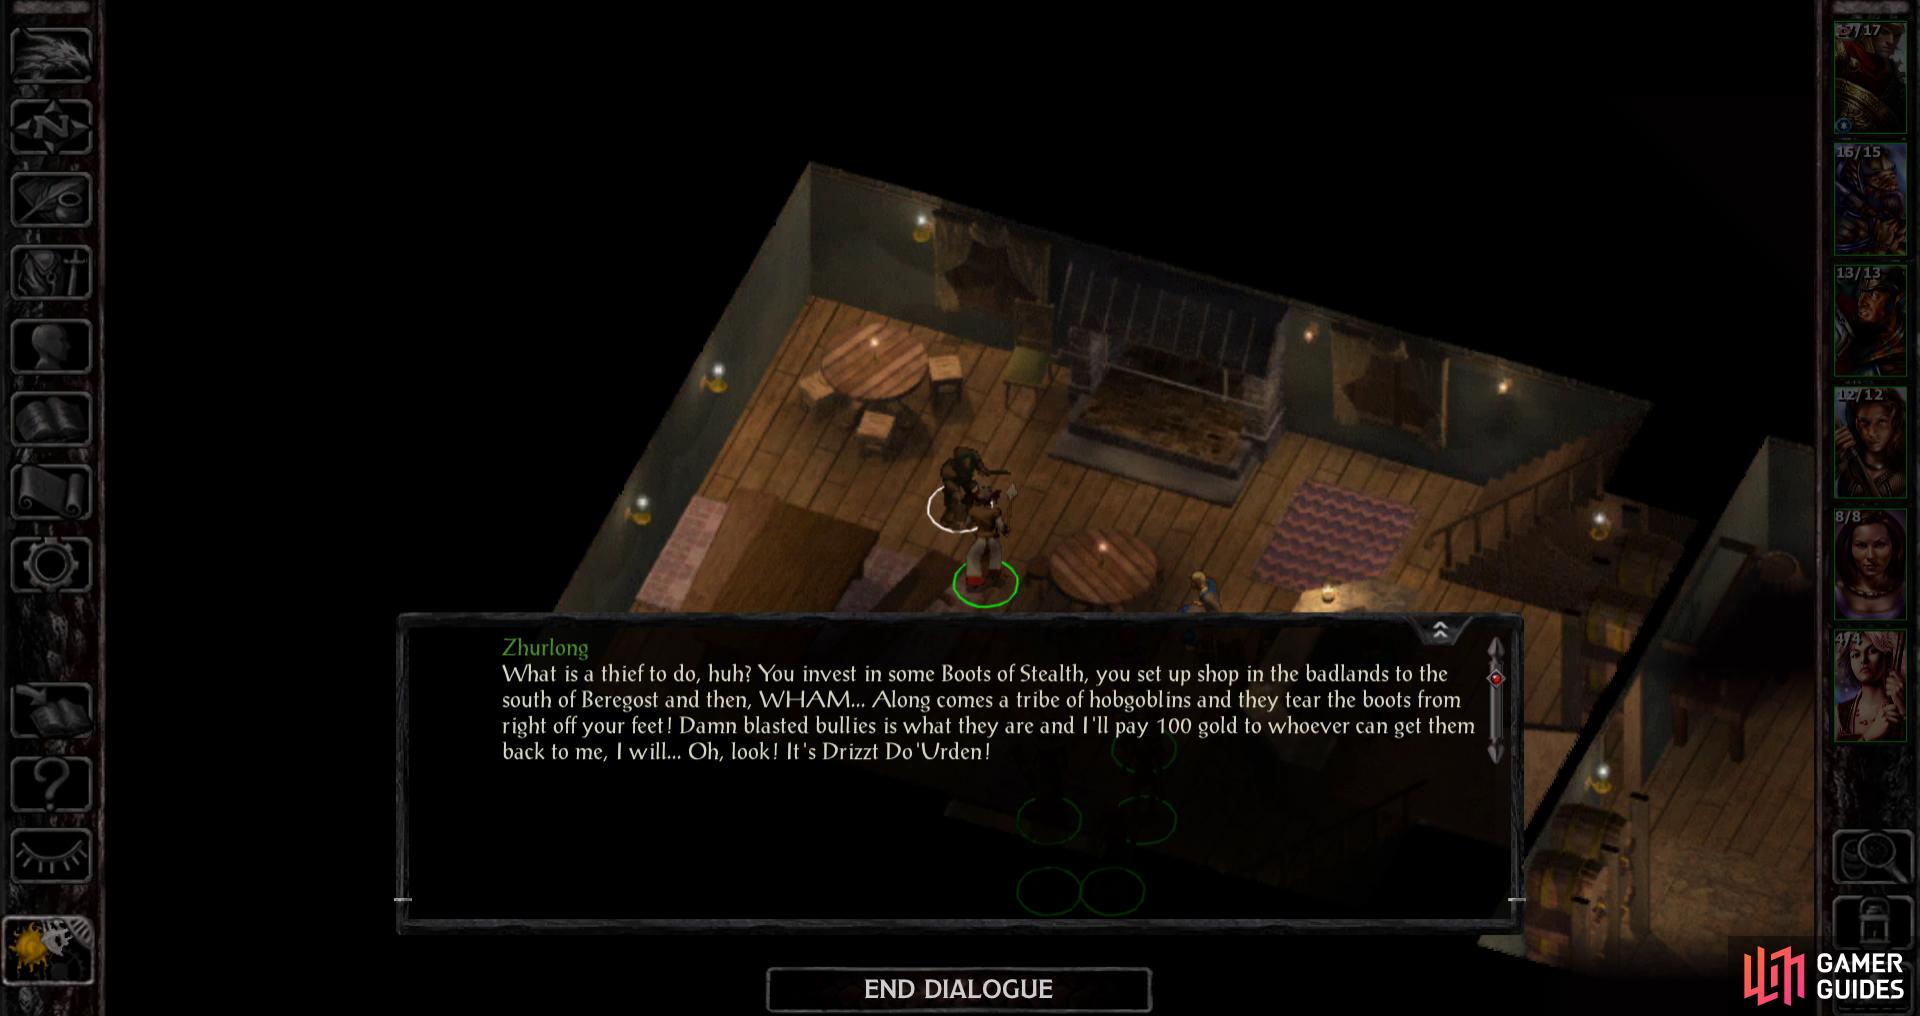
Talk to Zhurlong and he’ll complain about some Hobgoblins who stole his boots… he’ll also swipe some of your gold.

Upstairs you can loot an unassuming dresser for The Stupefier +1.
The Burning Wizard (AR3307)/(AR3308)
Return to Kagain’s Shop in Beregost, from which you’ll continue exploring the town. From Kagain’s Shop head east to find “The Burning Wizard” (2650, y=2050) inn and tavern. Head inside and talk to a halfling named Zhurlong, who will tell you about some Boots of Stealth he lost to some hobgoblins, promising 100 gold for their recovery. He’ll also lighten your coin purse, a bit. Grr… In any event, this starts the quest Zhurlong’s Missing Boots, another quest you’ll get to later.
Don’t retaliate against Zhurlong and head upstairs (x=520, y=200) where you’ll find a villager named Spen Gil’meh, who despite being named has nothing of interest to say. Instead set your sights on looting the rooms here to score some loot (Imoen’s default Open Locks score should be sufficient to break into these chests), by far the most noteworthy of which is The Stupefier +1 (x=400, y=150). Free magical weapons are always nice, but this particular specimen is especially interesting as it has a 10% chance to stun targets for one round pending a Save vs. Spell. Nobody in your current party (perhaps excepting your protagonist) are proficient in maces, so hold onto this weapon until you find someone worthy of it.
Finish looting, then leave The Burning Wizard.
| Items (AR3308) |
|---|
| x=550, y=190 - Iol Gem |
| x=160, y=260 - Sunstone Gem |
| x=250, y=100 - Dagger |
| x=400, y=150 - The Stupefier +1 |
Did You Know?: The Stupefier +1 wasn’t in the original game, and naturally since it was added in the Enhanced Edition, it was horribly unbalanced. Not only is it a free magical weapon, but when it was added it had a flat 25% chance to stun targets on hit. It has since been toned down to the current version, which has a 10% chance to stun a target for one round, and even then only if they fail a Save vs. Spell.
:::

(1 of 3) Talk to Garrick outside The Burning Wizard and he’ll ask you to protect his mistress.
Silke and Garrick
Once you’re back outside talk to Garrick (x=2500, y=2270), who stands just outside the entrance to The Burning Wizard. He’ll offer you 300 gold to protect his mistress Silke from some of Feldpost’s thugs. Who are Silke and Feldpost? Who cares! Easy money, right?
Accept and you’ll automatically follow him around to the side of the Red Sheaf, a nearby tavern. Talk to Silke to hear her story (and if you have a good Reaction score, she’ll bump your wages to 400 gold) and when she’s done, a group of three men will come to deliver Silke her gems. You can either choose to kill them, or to turn on Silke.
If you kill the men Silke will pay you, you’ll lose 2 points of Reputation, and you’ll get to loot them, gaining three Potions of Defense and a Lnyx Eye Gem, a Turquoise Gem, a Sunstone Gem and a Fire Agate Gem… presumably the gems Silke wanted to kill them for. A rather small sum to murder three people over, eh? And she doesn’t even take them! Oh, whatever.
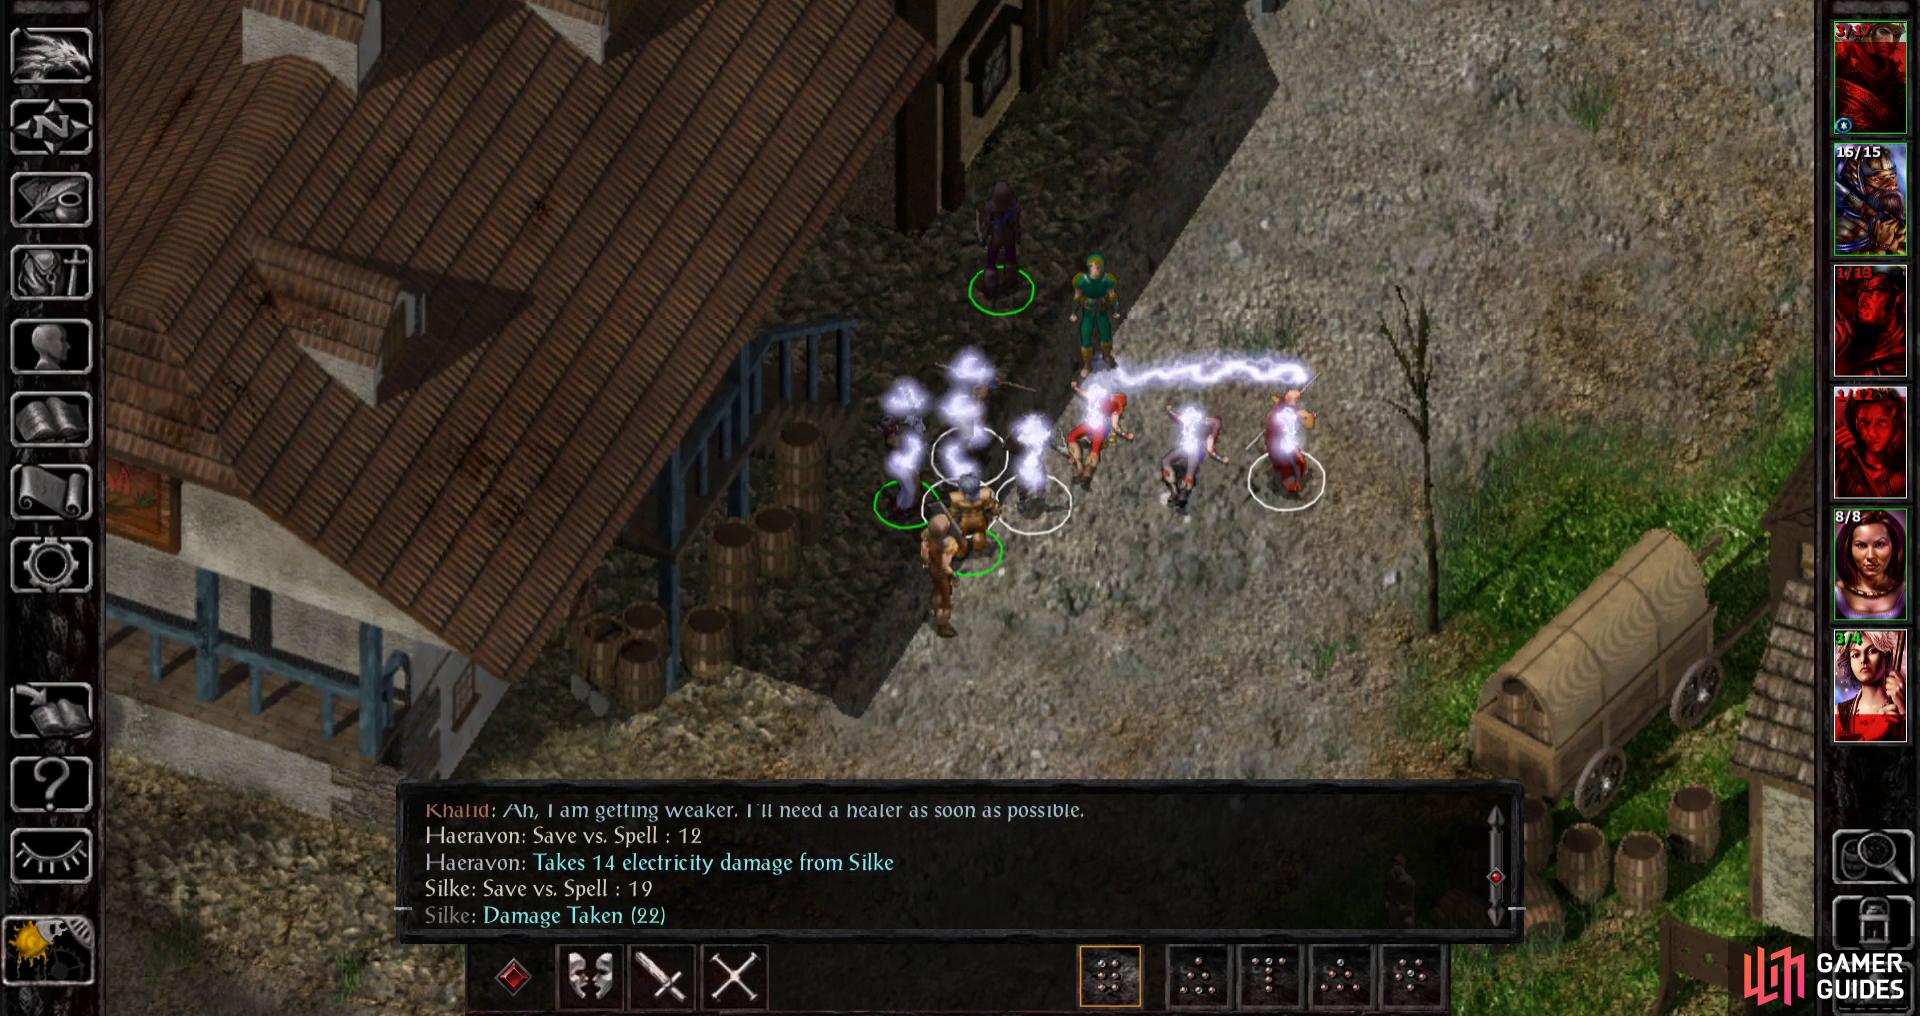
(1 of 3) If you do the righteous thing and refuse Silke’s bloodthirsty demands, you’ll find out she’s capable of casting nasty magics - like Lightning Bolt.
If you turn on Silke you’ll discover that, like Tarnesh, she’s a troublesome Mage. Surround her before you talk to her and make sure to disrupt her spells and she’ll go down quickly… If she gets a Lightning Bolt off, however, you’re going to regret it. Once she’s dead, consider stealing from the three “thugs” you just spared, as each of them carries a Potion of Defense, and their leader, Faltis, also has a number of gems (see above).
Whether you steal or not, talk to Faltis after putting Silke down and he’ll give you one of the Potions of Defense for a reward (yes, you can somehow get four of them if you stole three, previously). Better yet, you get to loot Silke and take her 400 gold, a Quarter Staff +1 and a Potion of Invulnerability. That Quarterstaff +1 will serve Jaheira well, at least until we find her a magical one-handed weapon.
After that’s done, talk to Garrick and if you did Silke’s bidding he’ll complain about your lack of morality and storm off, never to be seen again. If you struck down Silke, however, he’ll ask to join up with you… you know, seeing as he lost his employer and all. Might as well bring him along, even if it’s just long enough to drop him off back at Kagain’s Shop.
The next destination is the Red Sheaf (x=3300, y=2100), as it’s… well, nearby.
| Objective | Reward |
|---|---|
| For killing Feldpost’s “thugs” for Silke | 300-400 gold / Reputation -2 |
| For sparing Feldpost’s “thugs” | Potion of Defense, can recruit Garrick |
Character Info: Garrick
| STR | DEX | CON | INT | WIS | CHA |
|---|---|---|---|---|---|
| 14 | 16 | 9 | 13 | 14 | 15 |
Garrick is a wholly unimpressive character that, aside from his future Bard spells and abilities, offers little. Of his stats, only his Dexterity score gives any combat bonus, with his Strength being one point away from providing any bonus. He’s passable, but not exceptional, in ranged combat - just give him a crossbow and… well, don’t expect too much.
As for spells, Bards make fine support casters, although Garrick’s is somewhat suspect. Be wary of the limited number of spells per level he can learn (9) and his rather high scribe failure rate, the former of which may require some planning with what spells to give him and the latter will just require save/loading.
On the other hand, given the level cap in this game, a Bard’s spell progression isn’t much of an issue, so Garrick can serve as something of a poor man’s Imoen… Okay, not really. Imoen will end up with comparable Hit Points, will be roughly as competent in ranged combat, will actually be able to serve as your party’s Thief and will have more spells.
Garrick’s Chaotic Neutral alignment technically makes him a candidate for the evil party as well as the good party, but as previously discussed, it’s hard to see who he’d replace in either party. There are better ranged combatants, better arcane spellcasters, and he doesn’t even fulfill the need for a Thief.
If you do need a warm body to take up space, have Garrick become proficient in Short Bows so he can contribute more competently from a distance.

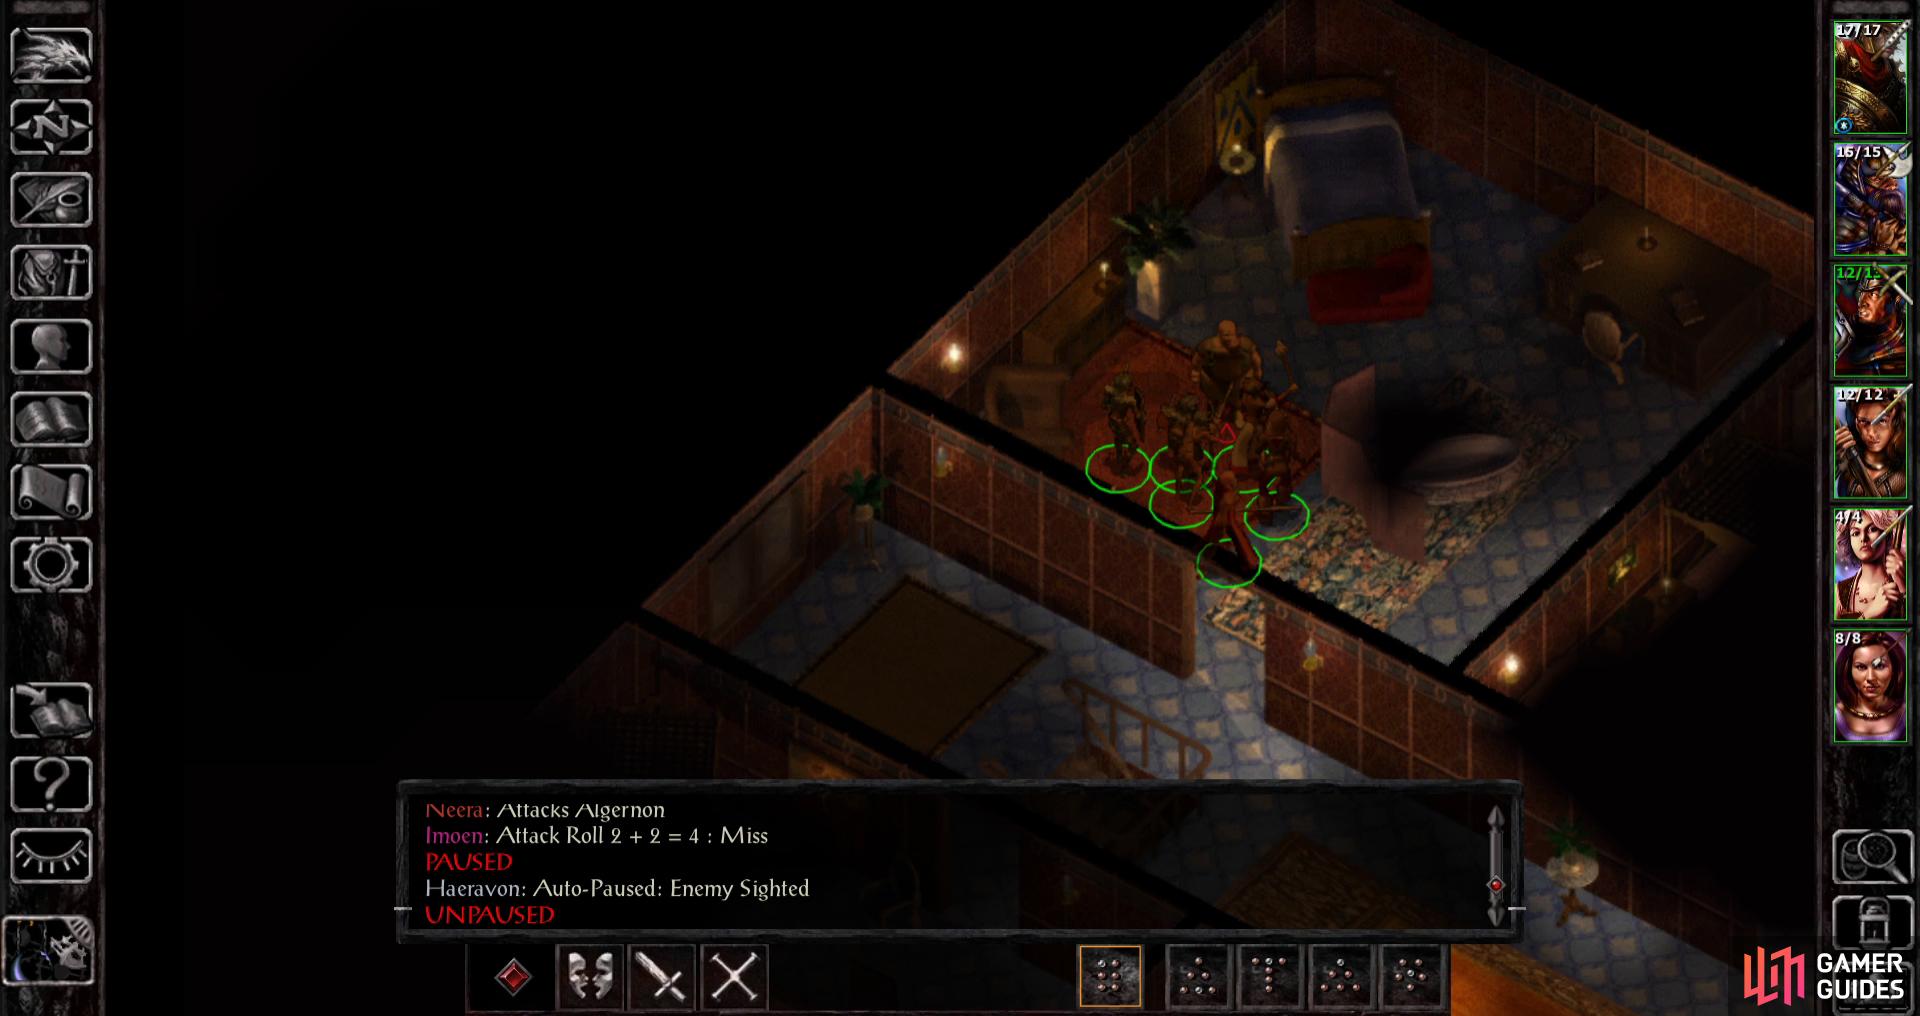
(1 of 3) When you enter The Red Sheaf you’ll be attacked by another would-be assassin.
Attacked by Assassin - Karlat - The Red Sheaf (AR3357)
Enter the Read Sheaf and you’ll be accosted by a dwarf named Karlat, another one of your friendly neighborhood assassins. This can be a fairly tough fight at this level, as Karlat has a hefty number of Hit Points (35) and just good enough gear to make whittling down those Hit Points tricky. Suffice to say he can probably out-fight any warriors you have at your disposal, and the narrow confines means you’ll have trouble surrounding him. Faced with 2-to-1 odds with Khalid and Kagain making up your front line and other characters contributing from a distance, there’s a very good chance Karlat will kill somebody before he goes down, at the very least.
Fortunately, you have spellcasters who can turn the tide. Karlat might be strong enough to cause trouble to your warriors, but he’s susceptible enough to Spook, or if you have a Cleric, Command. Karlat is, however, too strong to be affected by Sleep or Color Spray. Hit him with the aforementioned debilitating spells to give your warriors some time to deal damage and/or have your casters contribute to the task with direct damaging spells like Magic Missile or Chromatic Orb.
You can also attempt to improve your odds by luring him to more open ground. If you enter with just one character, provoke him (wait for him to turn hostile after talking to you), and leave the building you can lure him out near where you defeated Silke, where he’ll be easier to surround.
Anyways, when he’s dead loot him for a suit of Chainmail, a Medium Shield, a Battle Axe, 38 gold, and a Letter (another bounty notice). This place is crawling with would-be assassins, it seems, but at least your value has gone up to 350 gold!
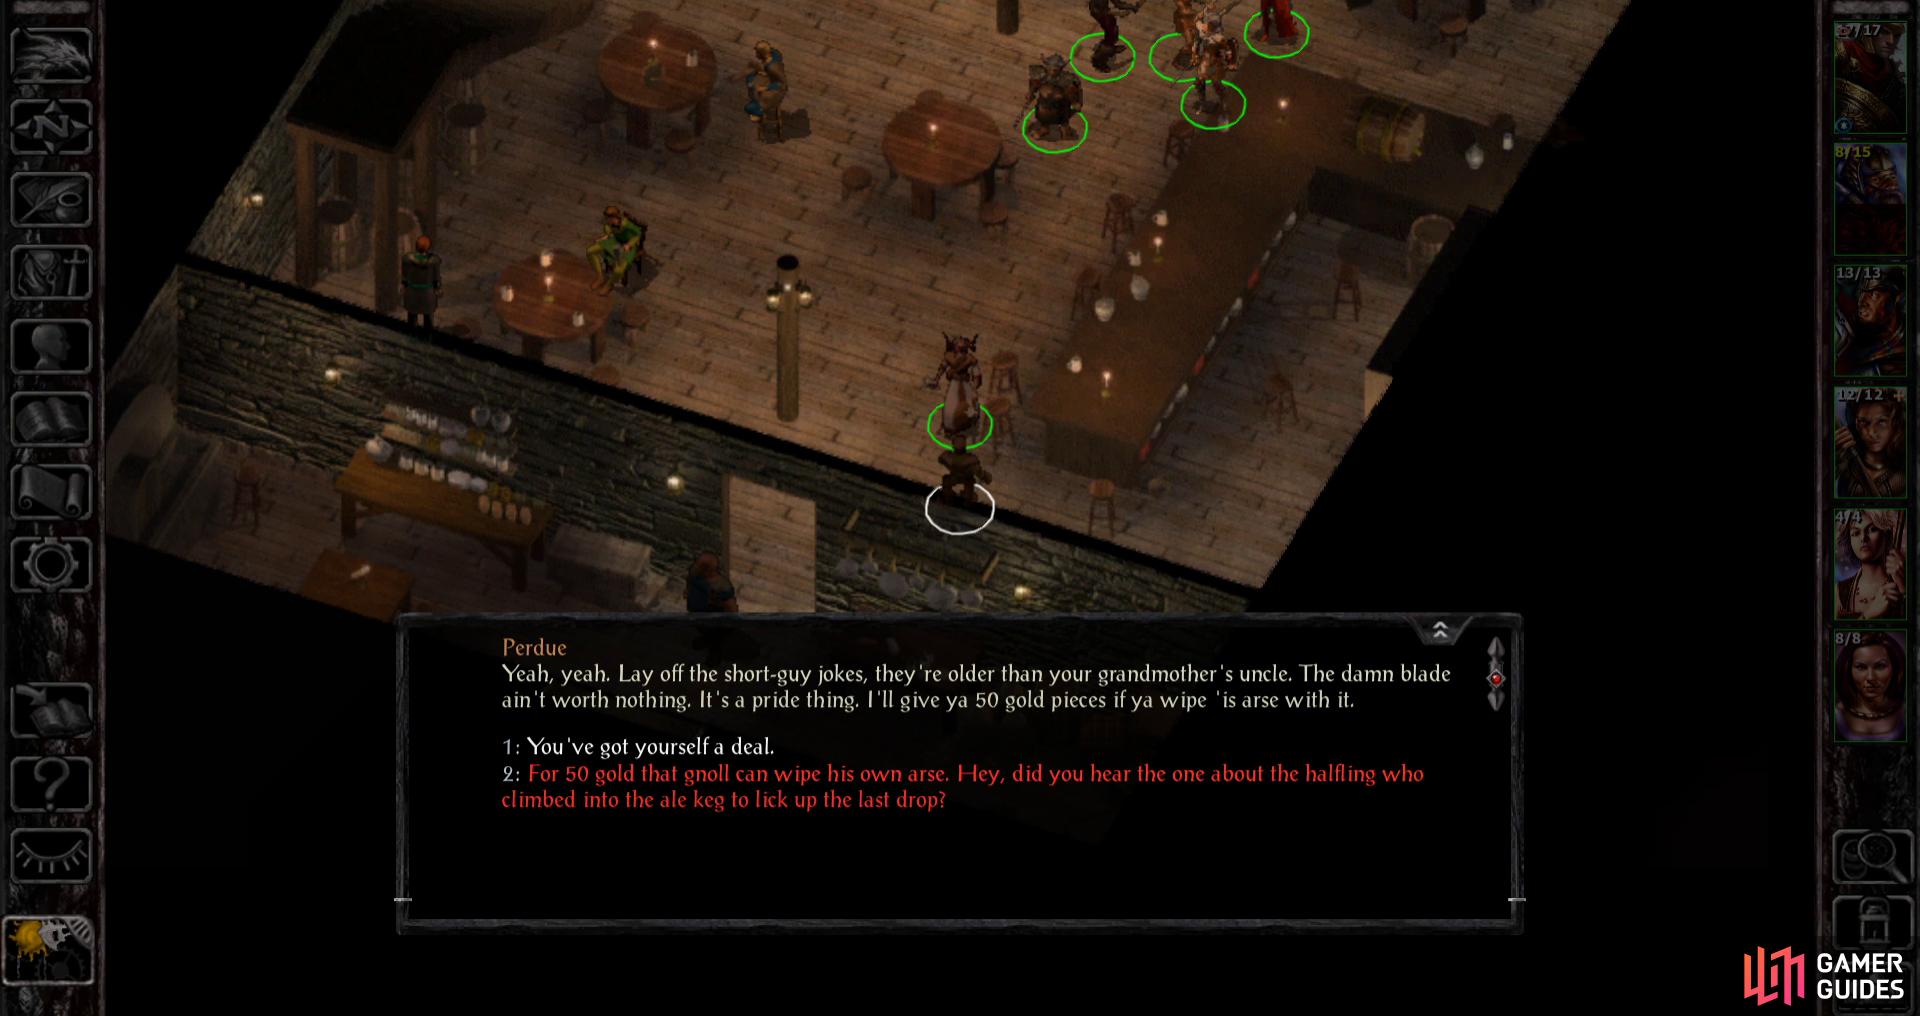
Talk to Perdue and navigate his dialogue to get him to ask you to reclaim his stolen sword from some Gnolls - in somewhat more colorful language.
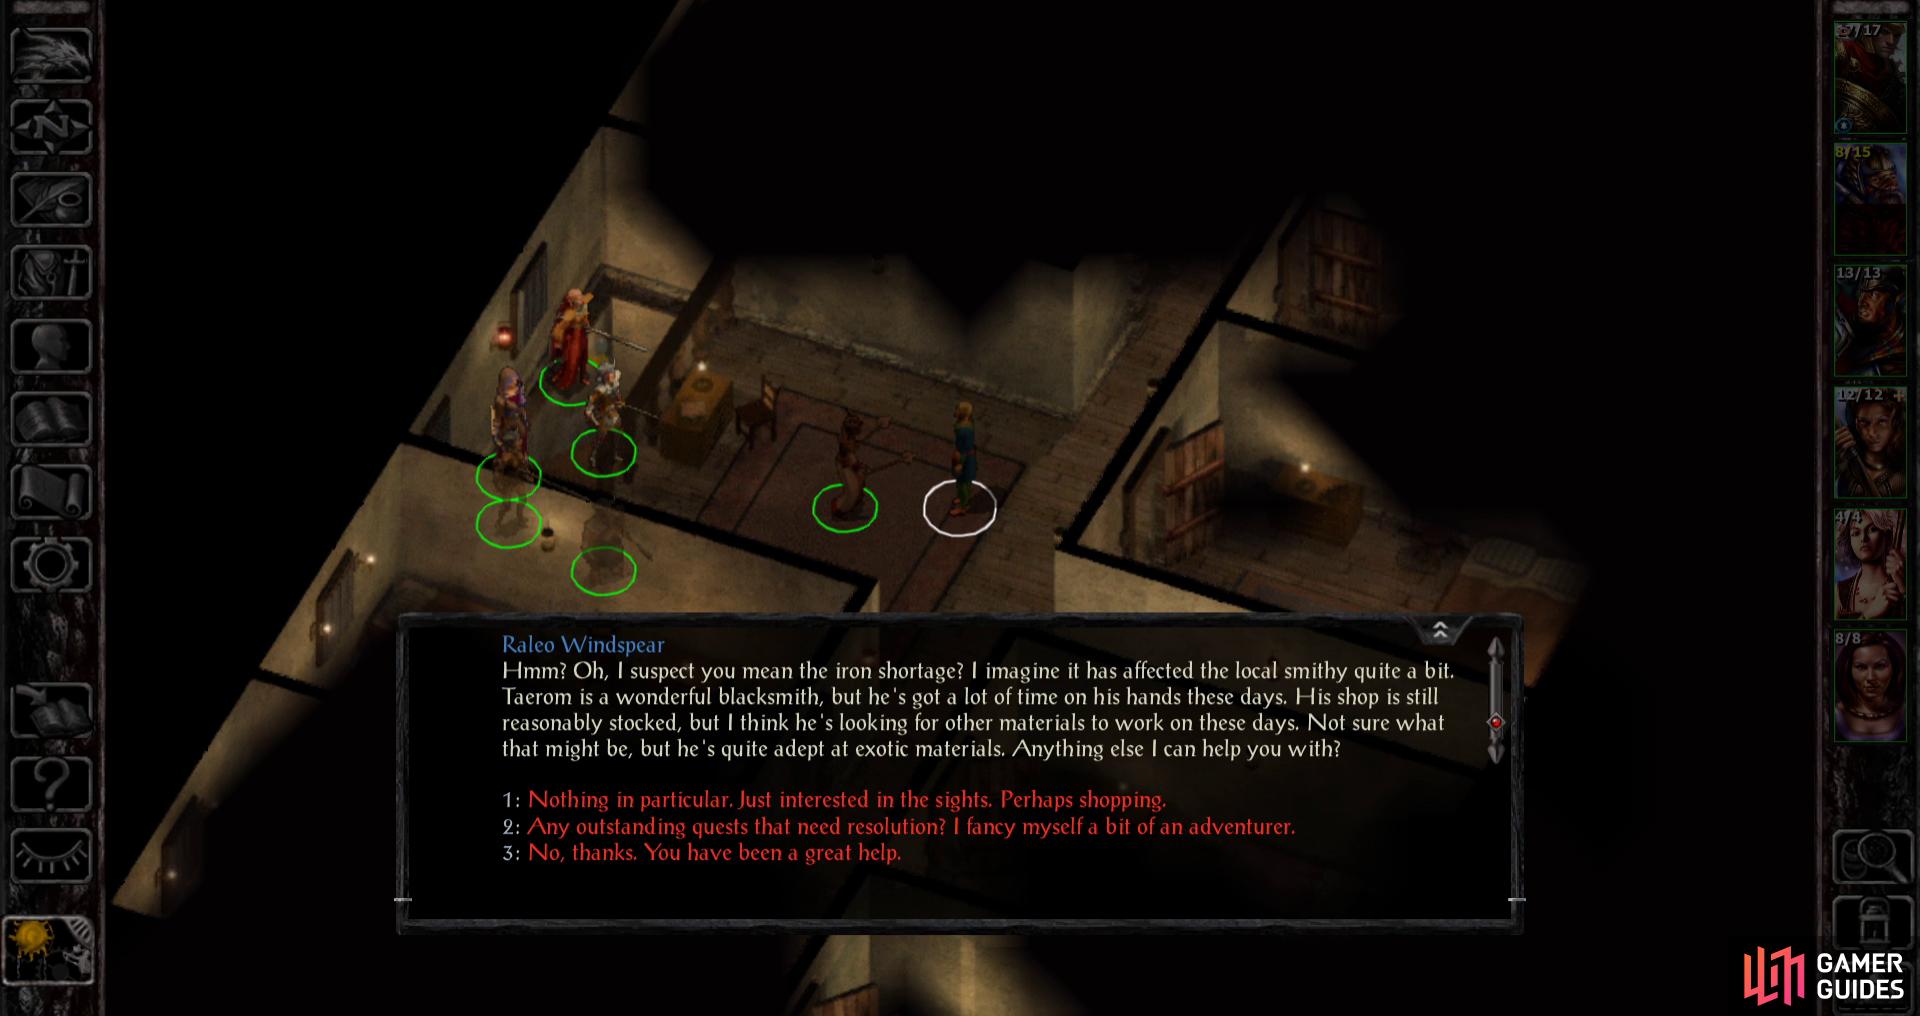
Upstairs you can talk to Raleo Windspear, who gives you much useful information.
Perdue - The Red Sheaf (AR3357)
Once the business with Karlat is over, find a halfling named Perdue and talk to him. Respond with the following dialogue options:
- “A dog’s head?”
- “Oh, a gnoll!”
- “Never liked them myself. How much would that blade be worth to a runty guy like you?”
- “You’ve got yourself a deal.”
To find out he was robbed by some Gnolls nearby and to ultimately pick up the quest Perdue’s Short Sword, which tasks you with retrieving said sword… and wiping the thieving Gnoll’s arse with it. More of a point of pride than a matter of Gnoll hygiene, really. You’ll get around to this shortly after you’re done exploring Beregost.
| Items (AR3357) |
|---|
| x=560, y=650 - 9 gold |
The Red Sheaf, 2nd Floor (AR3303)
Compared to the lower floor of The Red Sheaf, the upper floor is relatively tame. Talk to Raleo Windspear and exhaust his dialogue options to unlock a wealth of information. If you ask about “outstanding quests” he’ll tell you about the Ulcaster School to the southeast, which is indeed a place not suited for fledgling adventurers like yourself. The other task he mentions, involving lady Mirianne, is not quite so harrowing, and fairly lucrative. Asking about “concerns of the day” will get him to mention the iron crisis and Taerom’s subsequent desire to work with new materials - a very lucrative endeavor for future consideration - and finally if you ask about “shopping” he’ll tell you about Feldpost’s Inn and the wizard Thalantyr who dwells west of the city. His advice about talking to Thalantyr immediately upon entering his shop is quite apt, and something you should keep in mind. All in all, he’s a font of useful information even if talking to him does not, in fact, effect any quests directly.
Other than Raleo there’s little to do here but loot various rooms for pissant gear, then leave.
| Items (AR3303) |
|---|
| x=190, y=520 - 21 gold |
| x=440, y=600 - Leather Armor |
| x=300, y=400 - Dagger, 8 gold |
| x=630, y=330 - Club, 36 gold |
| x=400, y=100 - Bloodstone Gem, 12 gold |
| x=700, y=200 - Jasper Gem |

Mirianne’s House (AR3313)/(AR3314)
Leave The Red Sheaf and enter a secluded house north of the Thunder Hammer Smithy (x=4770, y=2100). Inside is a woman named Mirianne. Talk to her and she’ll tell you about her husband, and ask you to keep your eyes open for any word from him, starting the quest Mirianne’s Husband. You don’t really need to come here before you travel on, but when you complete the quest later, you’ll know where to head back to… or you could just pick-pocket poor Mirianne for your intended reward - a Ring of the Princes +1 if you’re not a fan of delayed gratification.
| Items (AR3314) |
|---|
| x=200, y=240 - Silver Necklace |
| x=70, y=270 - History of the Chosen of Mystra |
Bjornin’s Ogre Problem - The Jovial Juggler (AR3304)
Now head south until you reach the Jovial Juggler, the south-eastern most building in town. Head in and talk to the armored figure named Bjornin, who will tell you about some half-ogres in the south-west who whupped up on him. Needless to say, these beasties need a “taste of justice”, starting the quest Half-ogres Near Beregost. Again, if you want to get the reward without doing the quest you can just steal his Medium Shield +1.
Gurke’s Conveniently Lost Cloak - The Jovial Juggler (AR3304)
There are more residents of Beregost suffering from their misadventures with monsters, as you’ll see if you head to the back of the Jovial Juggler. As you do, an aggrieved dwarf named Gurke will yell at you, mentioning that he lost his cloak in the Cloakwood forest. Heh. Nice. This starts the quest Gurke’s Cloak, but given its location… It’ll be a bit before you get to that.

(1 of 4) You can disable many of the Giant Spiders with the application of the Sleep spell.
Landrin’s House (AR3315)
Leave the Jovial Juggler, head west, and enter the house at (x=3070, y=3400) (you can score some meager gold in a barrel outside of this house at (x=2970, y=3380), if you wish). This is Landrin’s house, and just like you were told, there’s a bit of a spider problem…
Four Huge Spiders dwell in this house, and while they’re not terribly potent combatants, their poison can be fatal at lower levels, especially if you weren’t charismatic enough to get Landrin to hand over any Antidotes. You can make you life much easier if you hit them with Sleep, which should let you pick them off at your leisure.
While Sleep should be more than enough to trivialize this fight, if you’re lacking such a spell, this might be another instance where luring your foes outside can be helpful, instead of having to split up and fight them.
In any event, when the spiders are squashed, grab the body of the largest spider, as well as the boots and wine Landrin is looking for. Return these to Landrin at your leisure… perhaps en route to recruiting Ajantis or Viconia? (More on this in the Party-Building Guide section of the guide.)
| Items (AR3300) |
|---|
| x=2970, y=3380 - 6 gold |
| Items (AR3315) |
|---|
| x=300, y=200 - Andar Gem, Worn out Boots, Bottle of wine, 7 gold |
| Objective | Reward |
|---|---|
| For recovering Landrin’s boots | 300 XP / 120 gold |
| Objective | Reward |
|---|---|
| For recovering the body of the largest spider | 200 XP / 100 gold |
| Objective | Reward |
|---|---|
| For recovering Landrin’s wine | 300 XP / 75 gold |

Firebead Elvenhair’s House (AR3333)/(AR3334)
- Now head west some more and enter the house at (x=2050, y=2950), wherein you’ll find an old friend… well, acquaintance, rather. In any case, this is the house of Firebead Elvenhair, and when he spots you he’ll recognize his favorite purveyor or reading materials and again burden you with a fetch quest. This time he asks you to acquire a copy of “The History of the Fateful Coin”, starting the quest A Book for Firebead.
Fortunately you can obtain a copy of this book rather easily. Either go across the street from Firebead Elvenhair’s house to find Feldpost’s Inn (x=1400, y=2650) and buy a copy from the Bartender (x=750, y=420) or head to the house just south of Firebead’s (x=2000, y=3200) (AR3335) and loot the bookshelf at (x=700, y=250). No reason to pay money for it if you don’t have to, right? Plus you’ll have to deal with some encounters in Feldpost’s Inn, which makes it less than ideal as far as continuity goes.
Anyways, procure the book Firebead wants to get the rewards listed below. The Scroll Case is another inventory management item that can hold a variety of scrolls and letters - a handy device, indeed. It’s also worth noting you can loot Firebead’s house without worry.
| Items (AR3333) |
|---|
| x=400, y=150 - 39 gold |
| Items (AR3334) |
|---|
| x=200, y=290 - Jade Ring |
| x=100, y=300 - 38 gold |
| Objective | Reward |
|---|---|
| (For finding Firebead a copy of “The History of the Fateful Coin” | 300 XP / History of the Dead Three / Scroll Case / Reputation +1 |
Colquetle’s House (AR3331)
Leave Firebead’s House and head north into another house at (x=2200, y=2650). This estate belongs to one Mr. Colquetle, who is simply too busy worrying about his son and his son’s family to bother with anything else. Although this might seem like an inconsequential encounter to the untrained eye, it starts up a quest we’ll resolve in a bit.
Once you’ve talked to the inhabitants, be sure to loot the house, then leave.
| Items (AR3331) |
|---|
| x=140, y=250 - 13 gold |
| Items (AR3332) |
|---|
| x=250, y=300) - 4 gold |
| x=200, y=250) - 8 gold |
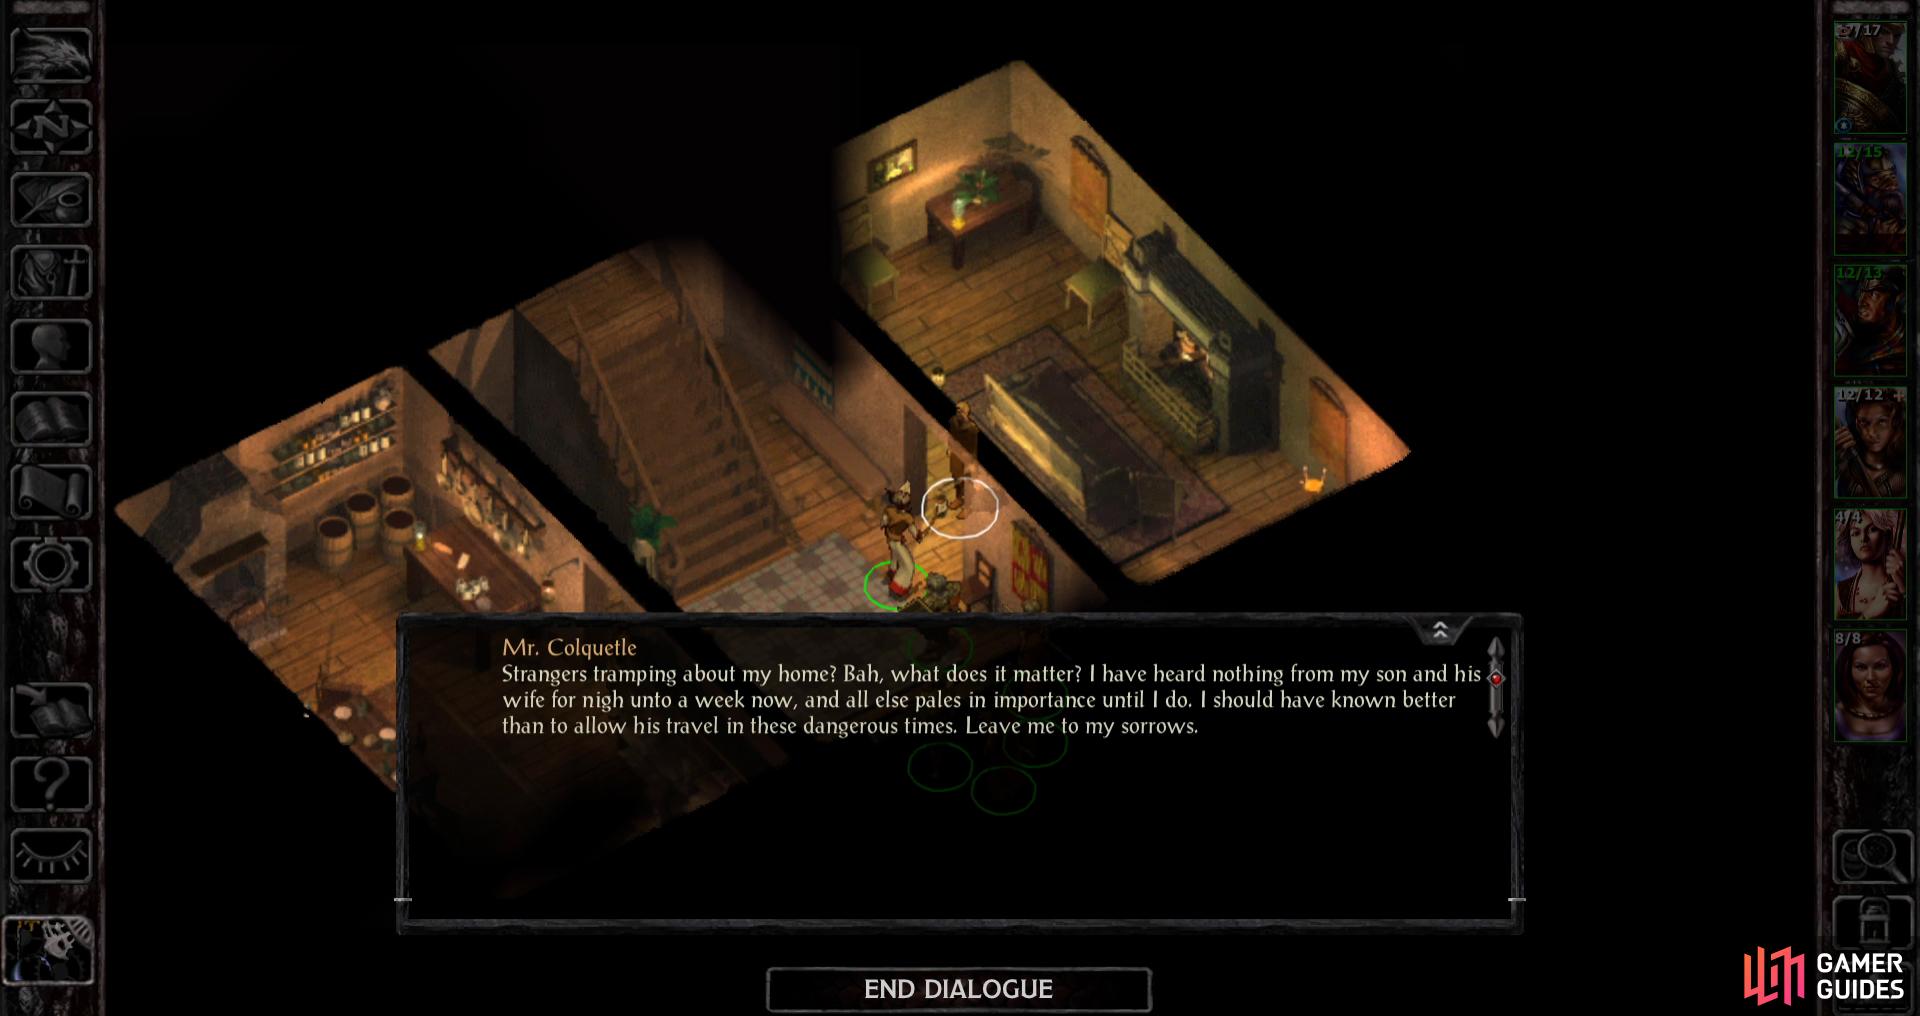
Talk to Mr. Colquetle to start his quest.
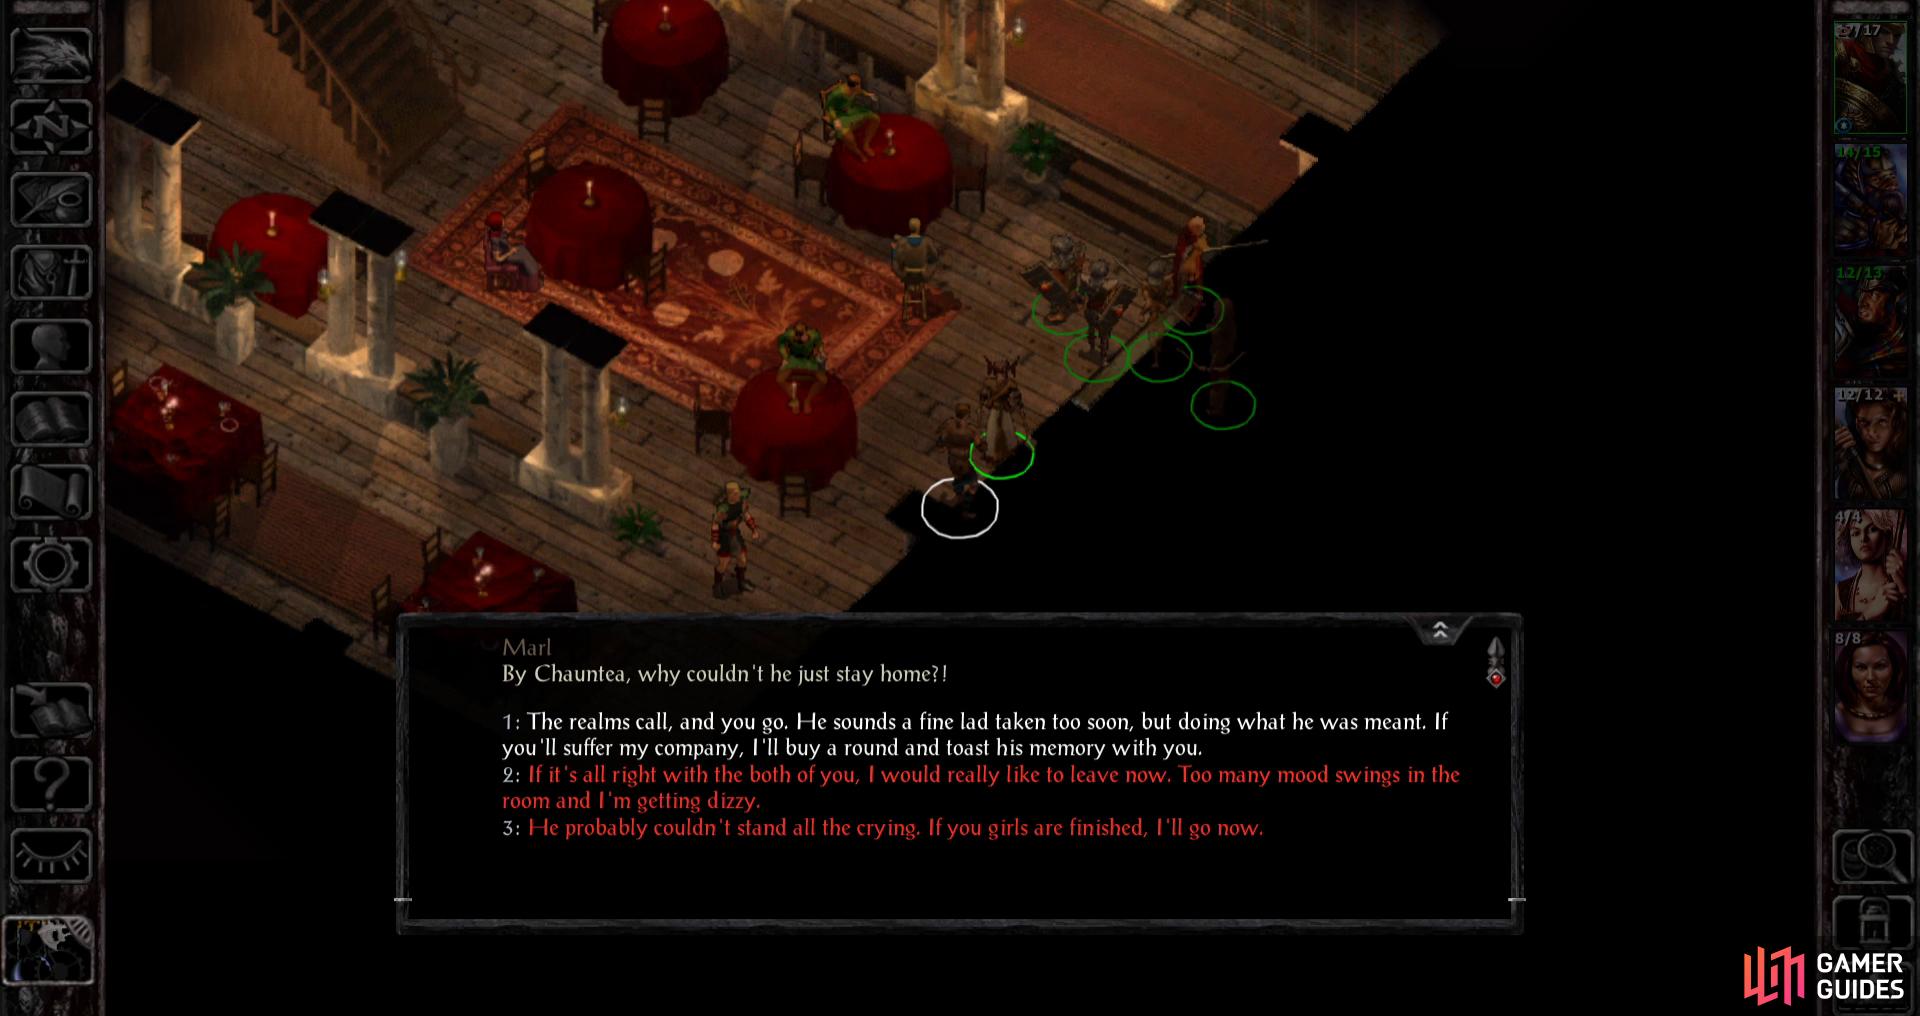
In Feldpost’s Inn you can talk down Marl for some experience.
Marl’s Misplaced Anger - Feldpost’s Inn, Downstairs (AR3351)
Go across the street to Feldpost’s Inn (x=1400, y=2650), wherein you’ll immediately be confronted by a drunkard named Marl and his goon Dunkin. It’s very easy to end up picking a fight with him, but the best course is to talk him down. Pick the following dialogue options:
- “No need to get all bent out of shape. There’s plenty of bar for us all.”
- “I just do what I think is right. We solve a lot more trouble than we cause. Well, very nearly anyways. Heh heh.”
- “Hold on! Everyone goes their own path, and I’ll not be held accountable for what the Fates deal.”
- “If you knew him like you think, then ask yourself if he wouldn’t have gone anyway. It’s a calling you’re born with. Nobody gives it to you.”
- “The realms call, and you go. He sounds like a fine lad taken too soon, but doing what he was meant. If you’ll suffer my company, I’ll buy a round and toast his memory with you.”
…to defuse the situation. See? We don’t always have to kill people. For showing restraint you’ll earn a hefty 900 XP, which is well worth the bother, even if you’re the evil type.
| Objective | Reward |
|---|---|
| For talking Marl out of a fight | 900 XP |
Shopping at Feldpost’s Inn - Feldpost’s Inn, Downstairs (AR3351)
Now talk to the Bartender (x=750, y=420) and buy a copy of the “History of the Fateful Coin” for Firebead if you didn’t already nab one earlier.
This Bartender has more to offer than just a cheap book, however. Not only will he purchase gems, jewels, and other clutter, but he sells a few trinkets worth considering. One is the Battle Axe +1, which will be a great get for Kagain, especially considering it’ll be a bit before we find a magical axe. If you plan to keep Kagain around for a length of time, it might be a worthwhile investment. Feldpost also sells a Composite Long Bow +1, which is a nice item for the dedicated archer in your group, and is also worth a purchase.
For the good party the Composite Longbow +1 is a solid choice, since you’ll likely be recruiting a character who could use a good bow. For the evil party, however, you should content to just wait to find a bow, but the axe is a must-buy item. Either way, expect to pay somewhere in the area of 2000-3000 gold to get what you want. Which means we won’t be buying anything just yet.
The Bartender also sells a few arcane spell scrolls, although nothing so great you need to feel compelled to spend money on them.
| Mage Spells - Feldpost’s Inn |
|---|
| 1st - Reflected Image |
| 2nd - Deafness |
| 2nd - Glitterdust |
You can steal from - or kill - Algernon.
The prize for either action is Algernon’s Cloak.
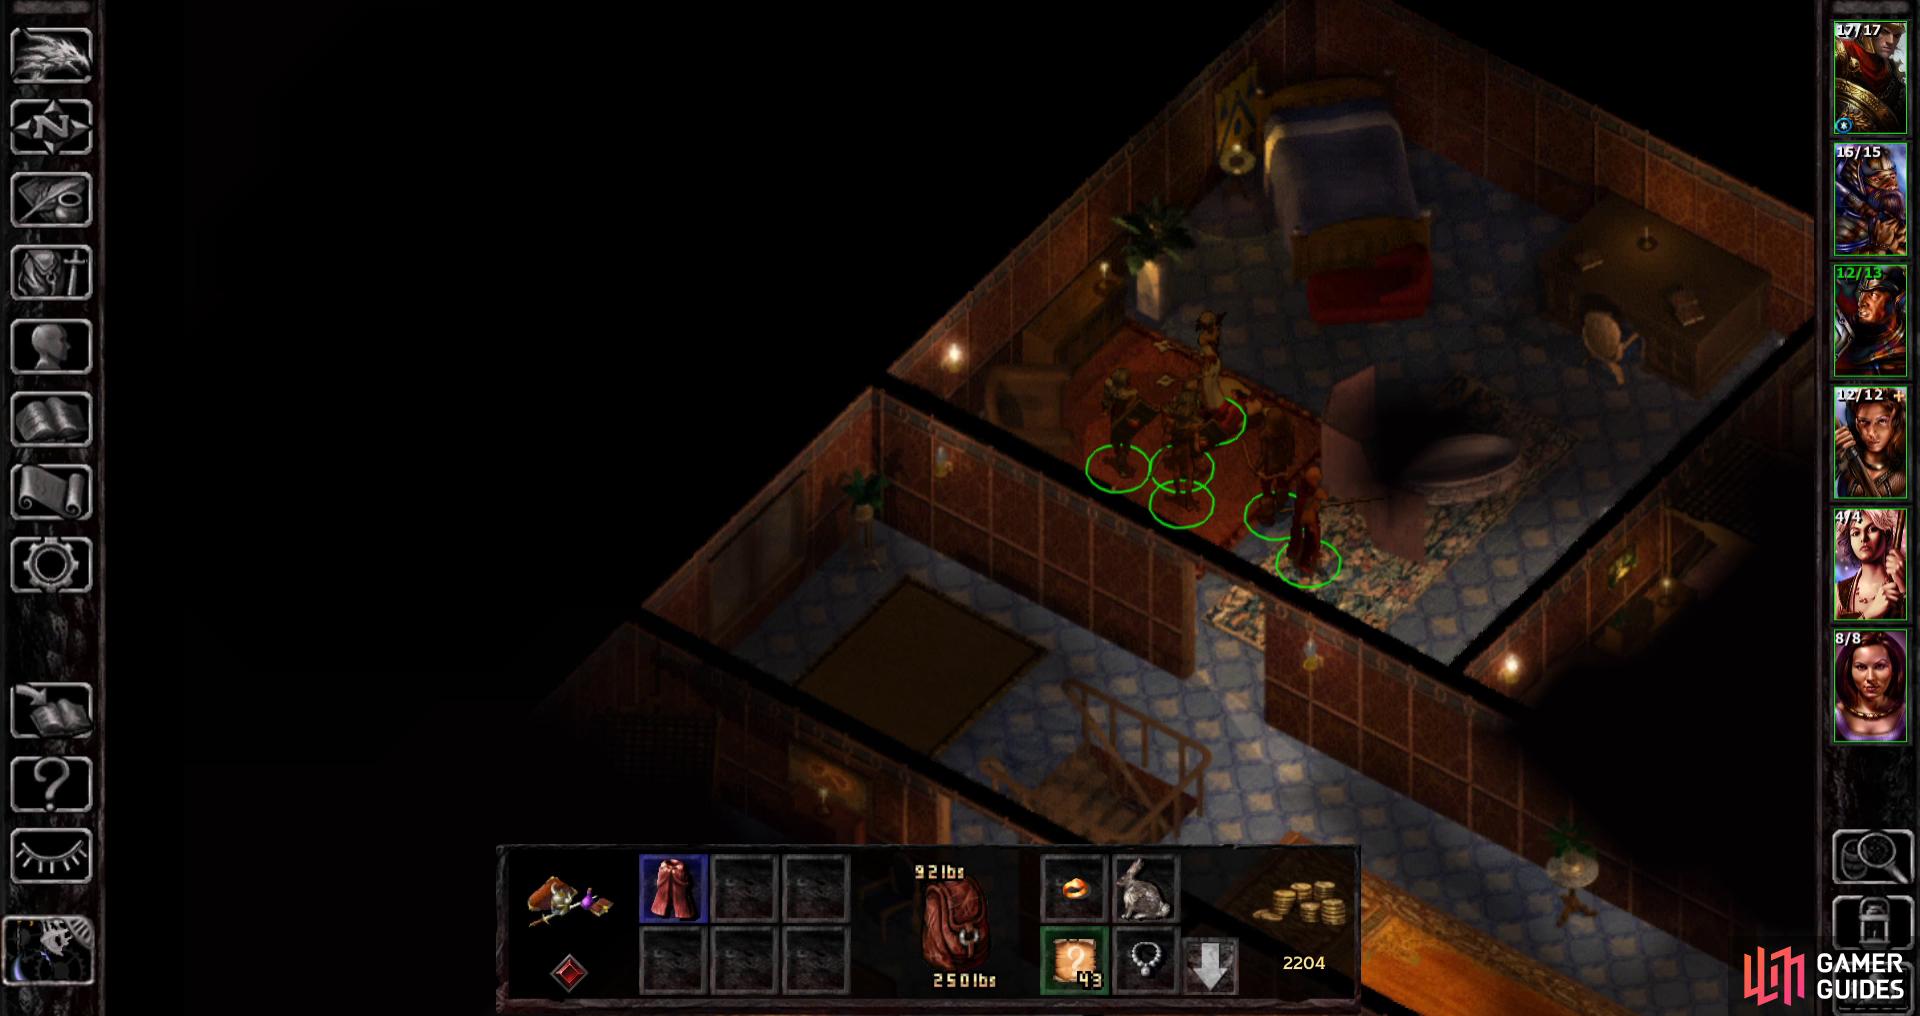
Algernon’s Cloak - Feldpost’s Inn, Upstairs (AR3352)
When you’re done drooling over gear you can’t afford, take a Thief and head upstairs (x=450, y=450), where you can find a portly merchant named Algernon (x=530, y=250).
While not much for chatter, Algernon does have a rather wonderful item in his possession, Algernon’s Cloak, which boosts the wearer’s Charisma by two points. Put this on your party leader to boost Reaction scores, which should help conversations go your way, get you better quest rewards, and better prices at shops.
Unfortunately the only way to get this item is via theft or murder. In the former case, you’ll need a Thief with a Pick Pockets score of 50 or better, which seems to be the minimum threshold for many acts of skulduggery throughout the game. If you don’t meet this minimum score you’ll be rewarded with the text “The target has no items that can be stolen by a cut-purse of your skill.” - and that’s likely after much save/loading.
There are some workarounds to this, the most obvious being… well, raising your Pick Pockets score, but you’re better off investing points in Find/Remove Traps. You could also save up Potions of Master Thievery as you find them and use them just before going on stealing sprees, but it could be a while before you find any of these, and buying them will also take quite a long time, not to mention it’ll set you back several hundred gold. You can recruit a secondary Thief (Safana, Alora, or any Bard works) and dump points into Pick Pockets, and just use them for your thieving. Absolutely nothing wrong with having a Thief you bring with you when you want to adventure (the suggested evil protagonist, or Imoen) and one you temporarily bring along to use other skills, as needed. Obviously, however, this is a rather long-term solution, and of little help in the present.
As mentioned earlier there’s another option: murder. Killing Algernon will set your Reputation back several points, and if your Reputation score is currently middling (10-13 or so) it’s a minor nuisance, at worst, one you can offset by just donating a few hundred gold at a temple to bring your Reputation back up to snuff. Not ideal, but Algernon plays no further role in the narrative, his cloak is well worth the cost, there’s nobody around to see the deed, so it won’t have a chain effect of turning other NPCs hostile, and it’s far more expedient than other options. It’s something the evil party doesn’t hesitate to do, at the very least.
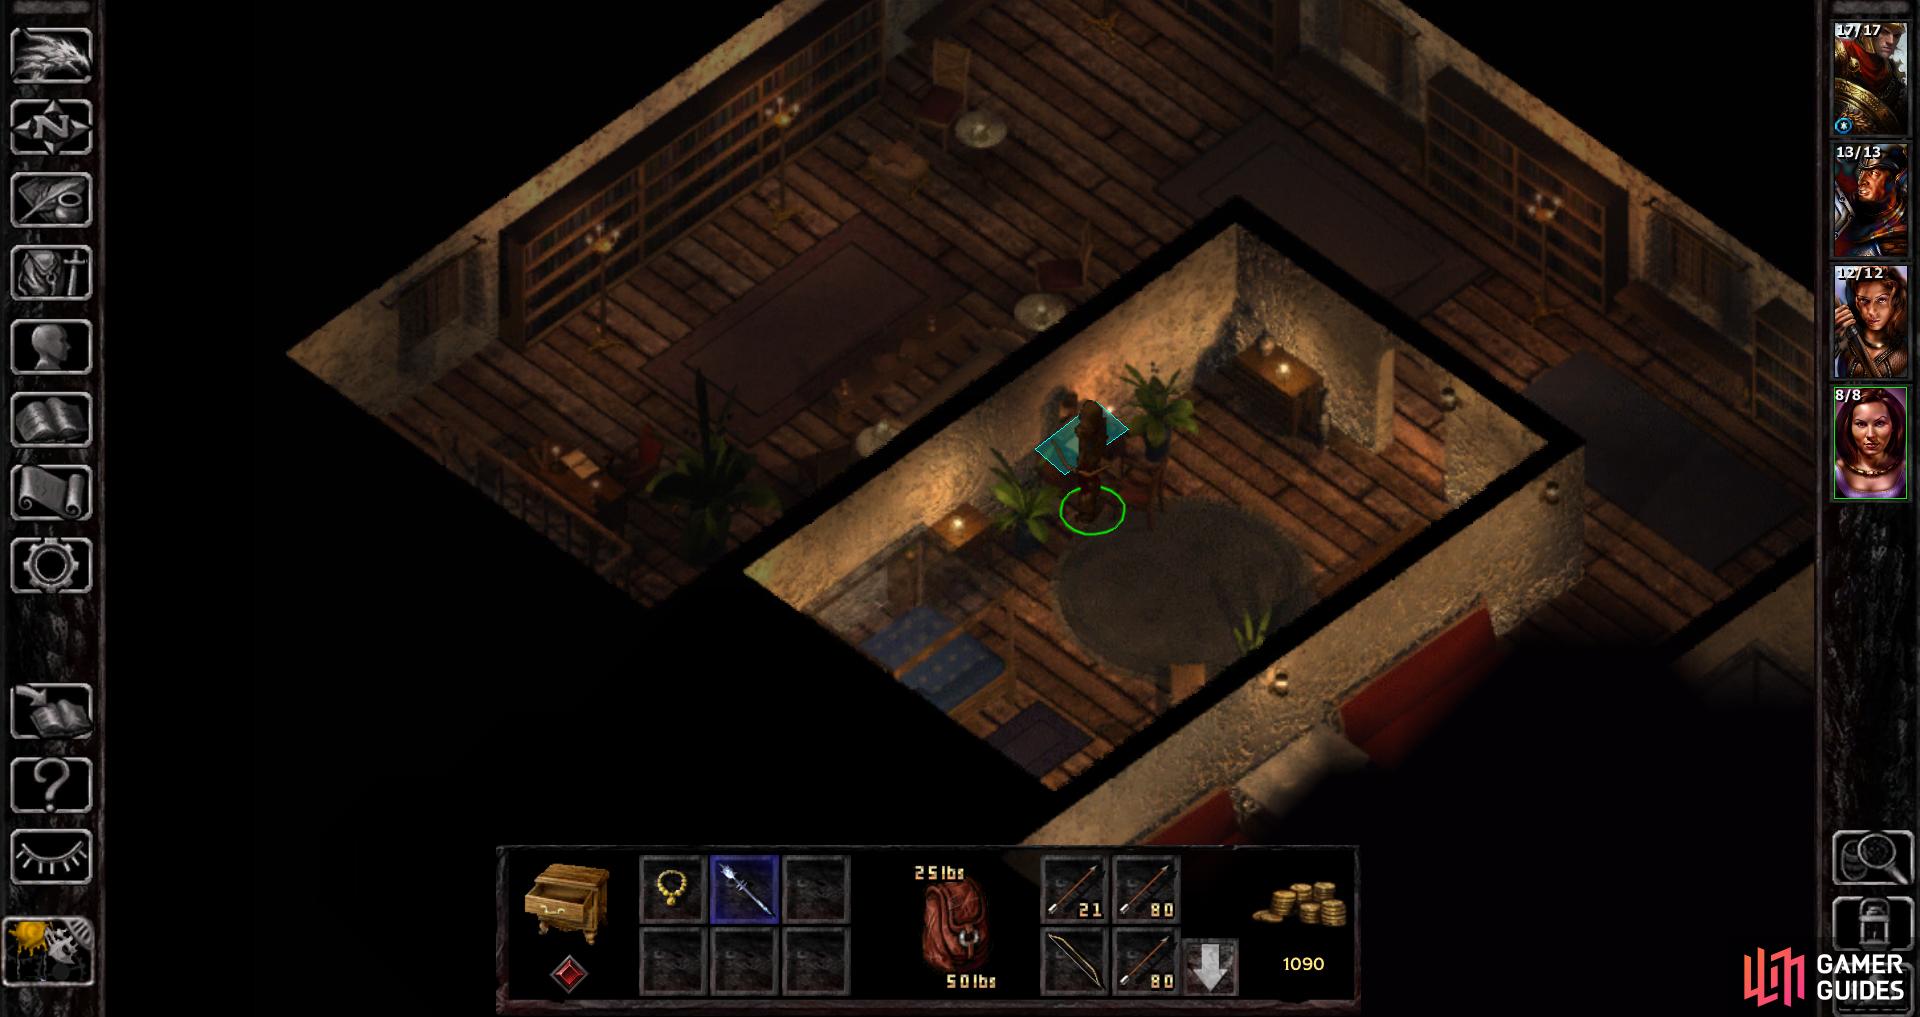
Gerard Travenhurst’s Manor (AR3320)/(AR3321)
The next destination - if you care for some optional looting, anyways - is the large mansion along the
northern edge of Beregost we bypassed en route to encountering Neera. First, loot around outside of it to score a few goodies, then head inside (x=3650, y=900) - the lock can fortunately be easily picked.
| Items (AR3300) |
|---|
| x=4150, y=600 - Arrows x5 |
| x=4330, y=670 - 25 gold |
| x=3880, y=460 - Dagger, Girdle |
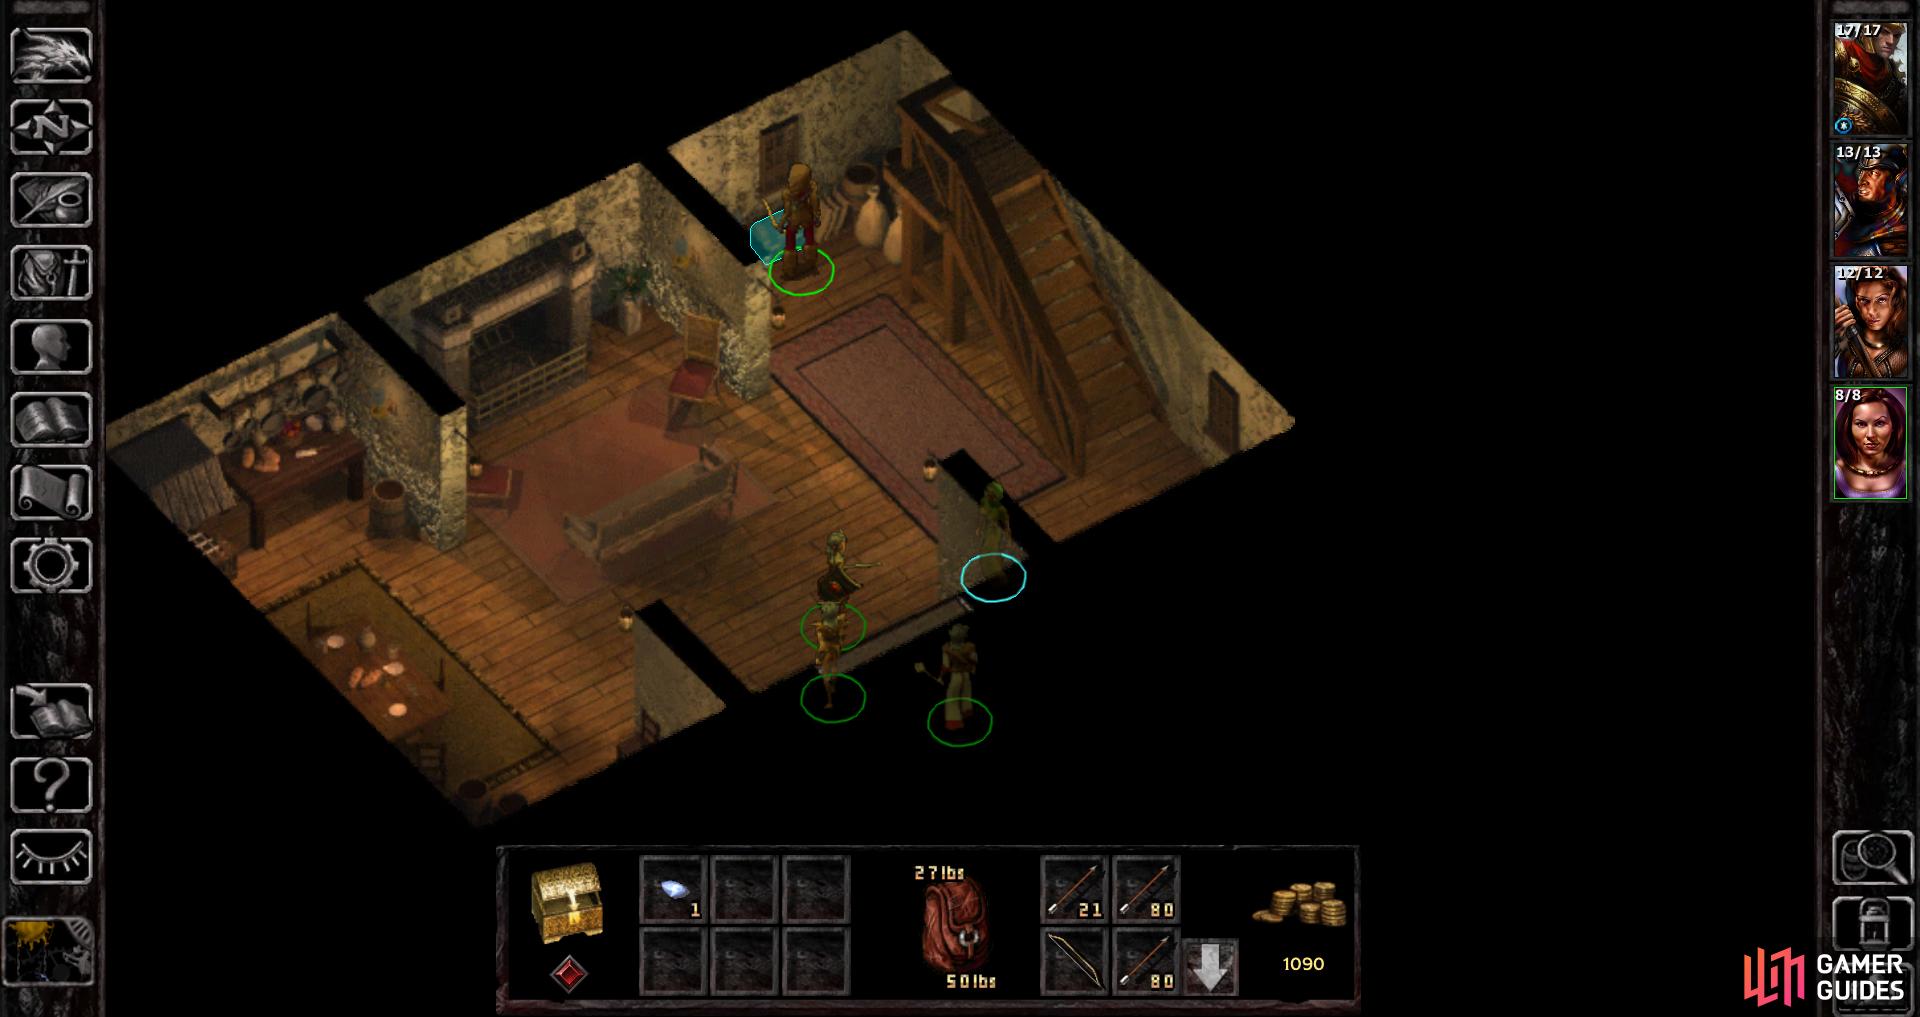
On the first floor you’ll find two hired goons, as well as the manor’s owner, Gerard Travenhurst. He really doesn’t have anything interesting to say, nor is there anything worth stealing on the first level. Upstairs, (x=150, y=400) however, you’ll find some goodies that are downright decent… or at least, the Wand of Lightning is pretty nifty, and the potions and gold won’t hurt, either.
If you can’t pick the locks to get the options and gems, don’t fret about it too much, the Wand of Lightning is the real prize here. Give it to a Mage (or other character who can use arcane magic, and hence this wand) and equip it in their quick item slot so it can be readily used in battle. Deploy thus it’ll summon a Lightning Bolt similar to the spell, which deals 6d6 damage to all targets in a line (3d6 if they pass their Saving Throw), which can be a hefty bit of damage at this point in the game. Be careful, however, as the Lightning Bolt spell will bounce off walls, and is indiscriminate about what it harms. Probably best to avoid using it in enclosed spaces. Each use of the wand will deplete one charge, and this particular wand should start out with six charges - save it for targets of value.
| Items (AR3321) |
|---|
| x=150, y=350 - Dagger |
| x=500, y=300 - Iol Gem, Horn Coral Gem |
| x=420, y=340 - Gold Necklace, Wand of Lightning |
| x=350, y=400 - Potion of Healing, Potion of Invisibility, 86 gold |
Loot the Travenhurst manor to score a Wand of Lightning.
Other valuables can be found scattered throughout the buildings of Beregost.
Looting around Beregost
Now to finish up Beregost by looting the city’s various buildings. Much of this will be left up to your own enterprise, as… well, frankly most of the loot you can find here just isn’t worth the bother. Your most common gains will be low-value gems and jewelry, gold, and the odd mundane weapon. Worse yet, if you don’t have a Thief with a good Open Locks score and/or a character with exceptional Strength there’s a good bit of loot you probably won’t be able to get. Frankly you’re not really expected to have either at this point in time, and you can always come back later when you do - the loot’s not going anywhere.
As far as exceptional loot goes, the most noteworthy loot can be found in the following locations:
Enter the house along the northwestern edge of Beregost at (x=2050, y=1050) (AR3341) head upstairs and loot the container at (x=150, y=350) to score a Healing Potion and 31 gold. There’s also a chest on the first floor (x=400, y=250) with 39 gold, but all things considered the Healing Potion is… well, the least meager of the junk in this house.
| Items (AR3342) |
|---|
| x=150, y=350 - Dagger, Potion of Healing, 31 gold |
Right next door (north of) the previous house you’ll find another lucrative dwelling (x=2100, y=850) (AR3339). The two locked containers have goods worth pilfering, if you can get at them.
| Items (AR3339) |
|---|
| x=350, y=100 - Spear, Fire Agate Gem, 13 gold |
| x=550, y=200 - Potion of Insight, 10 gold |
Your next target is the building adjacent to (northeast of) the Red Sheaf (x=3520, y=1850) (AR3323), inside of which you’ll find a chest housing a Diamond. Easily the most value bit of loot left in Beregost.
| Items (AR3323) |
|---|
| x=400, y=150 - Diamond |
Next up, head across the street (east) to find a house at (x=4150, y=1900), in which you’ll find a room with two chests and a desk. In one of the chests you can score a Potion of Agility.
| Items (AR3319) |
|---|
| x=120, y=220 - Potion of Agility |
Exit the last house and follow the street south to find the last target (x=3400, y=2800) (AR3327). There’s not much of interest downstairs, but upstairs (AR3328) waits a container with a Potion of Heroism inside.
| Items (AR3328) |
|---|
| x=150, y=350 - Mace, Potion of Heroism, Jasper Gem |
In any event, you’re finally done with Beregost, now it’s time for the most important early-game task: assembling your party. This will be covered in detail in the next section, the aptly named Party Building Guide.
No Comments