| Items of Interest | Area | Location |
|---|---|---|
| Dagger +1 | AR2618 | x=490, y=410 |
You start your adventure just outside of the Candlekeep Inn (x=1060, y=520), and while you’re tasked with picking up some supplies for the journey ahead (of indeterminate duration and direction, one might add), there are people to talk to, quests to complete, loot to be collected, and vicious foes to vanquish, first. Besides, it would be silly to go shopping prematurely when you might get your hands on more loot shortly - no need to settle for subpar gear, right?

Phlydia’s Book
Start by heading northeast and as you travel note the Tutors (the guys in green robes) standing around. You can talk to them to learn about basic aspects of the game. Chat with them when you need to, and when you’re an unquestioned expert in all things Baldur’s Gate, continue northeast to find Phlydia (x=3600, y=310), who will ask you to find her copy of The History of Halruaa, which she foolishly misplaced somewhere. This starts the quest Phlydia’s Book. Huzzah, your first quest! Once you slay the dragon roosting upon this tome, you’ll certainly have enough money to purchase whatever you wish!
Let’s focus on this quest for now and head east past some cows and Tutors, as well as past the “Priest’s Quarters” building (x=2950, y=400), which you’ll get to later. At (x=3270, y=420) you’ll find Dreppin, who will tell you that Phlydia left her book in the hay (x=3250, y=290). Not quite the dragon we were looking for, but… well, who can fault it for hiding the book in some hay and fleeing at our approach?
| Items |
|---|
| x=3250, y=290 : History of Halruaa |
Grab the book, backtrack to Phlydia and return it to her for your first, magnificent reward… 50 EXP and, if she likes you enough, a Lynx Eye Gem. All joking aside, that’s actually not a bad reward for such a paltry task.
| Objective | Reward |
|---|---|
| For returning Phlydia’s book | 50 EXP / Lynx Eye Gem |

When you enter the Priest’s Quarters you’ll be attacked by a would-be assassin named Shank.
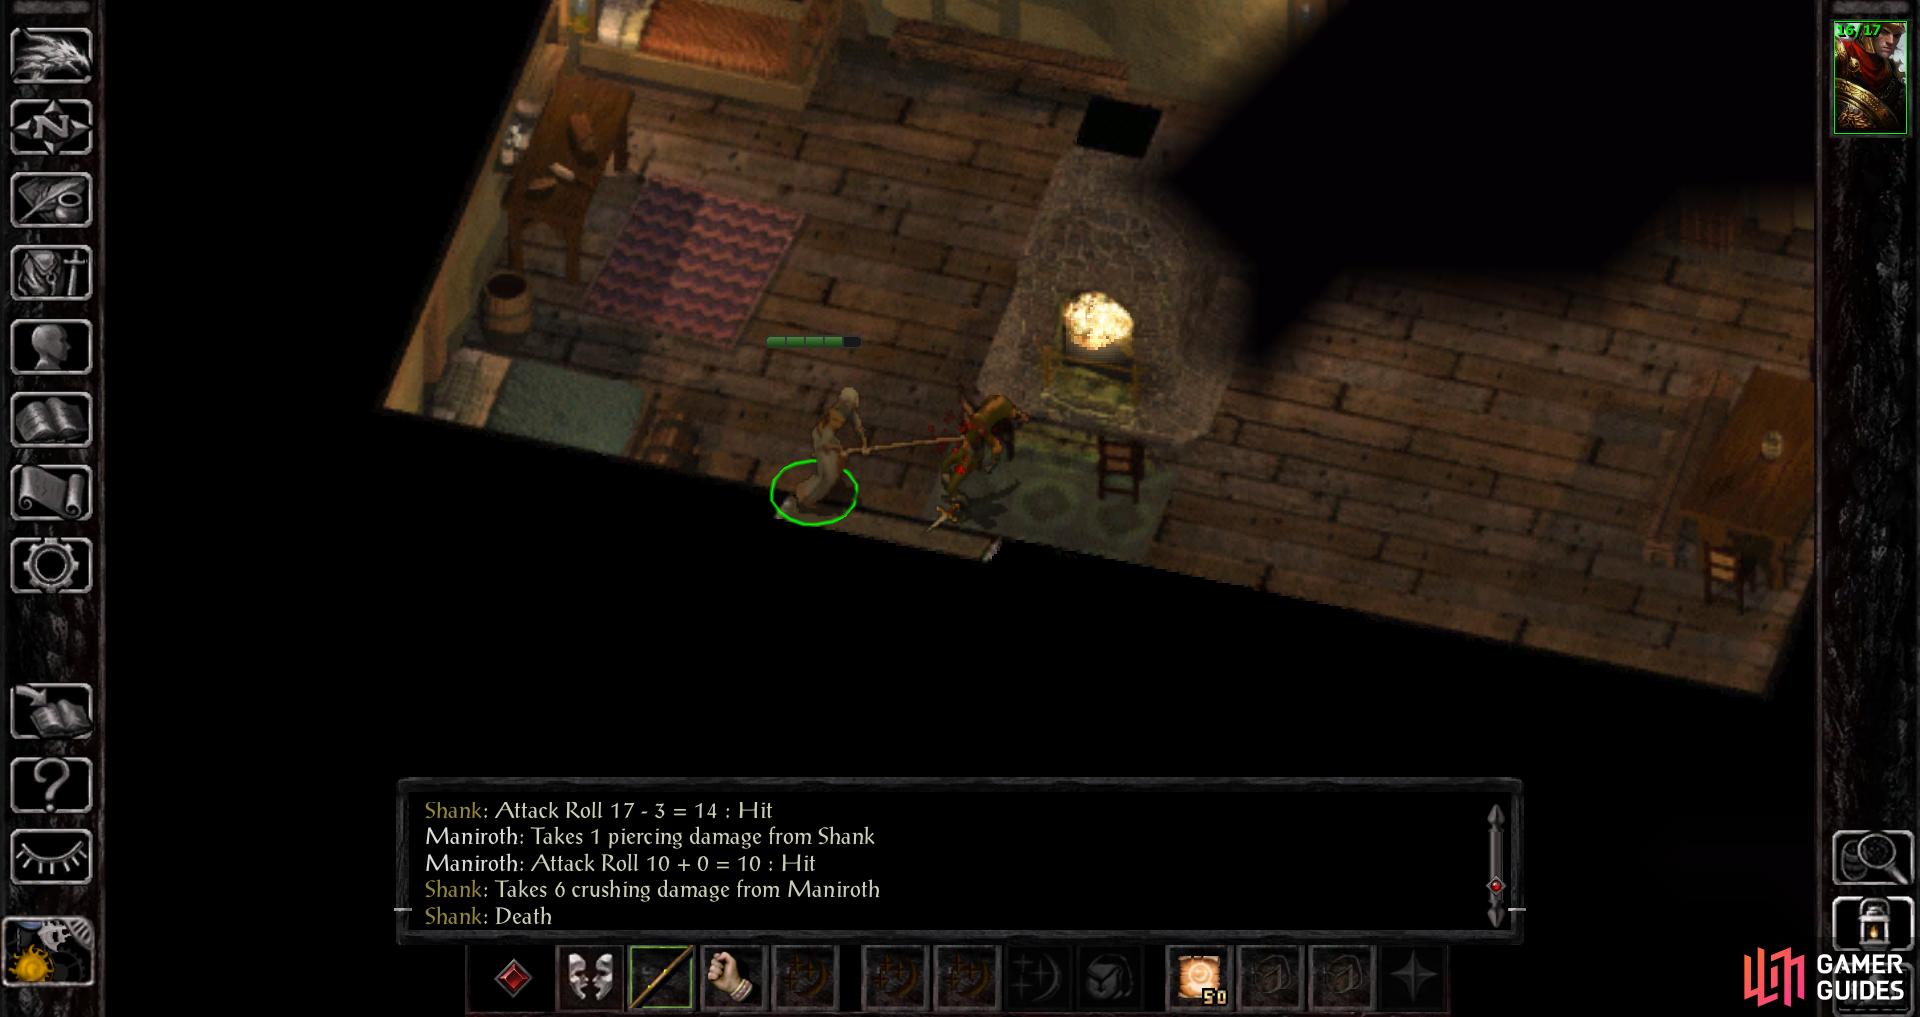
Gank Shank to log your first of many, many kills, then loot the building and leave.
Attacked by Assassin - Shank
Now return back east to the Priest’s Quarters (x=2950, y=400) (AR2627), which you may as well explore en route to Dreppin. Before you go inside, save your game - you know, in case a book falls of a shelf onto your head or something (you didn’t read the header yet, right? Good) - and enter the building.
Once you enter the building a man named Shank will attack you. As the first battle of the game, it shouldn’t be too tough, despite the fact that you’re armed with an over-glorified stick… and if something should go horribly awry (RNG is ever a fickle mistress in Baldur’s Gate) you saved just outside… right? If you’re a caster, keep in mind that you’ve got some spells you can throw at Shank, and if that’s not enough, you can always flee the building and run to one of the Watchers - you know, the big guys in plate mail whose job it is to handle this sort of thing? It’s worth noting that you can pause the game at any time by pressing the Space Bar button - expect to do this a lot.
Either way, once Shank is dead loot him and the building around you. Pick locks if you can - in the Enhanced Edition, picking locks and disarming traps nets you some experience (like in Baldur’s Gate 2) so it’s worth trying if you have a Thief… which in this case, your only option is to have a Thief protagonist. If you’re not a Thief, you can attempt to employ brute force to open locked objects, just click on whatever weapon you have equipped at the bottom of the screen and the cursor will change into a sword, indicating that you’ll now attack whatever you select next… including obstinate chests! Your success at this particular brand of thuggery will depend on your Strength score, and honestly, unless you have over 18 Strength you’re probably just wasting your time. Later on, Wizards can learn a Knock spell which will suffice to open almost all locked containers throughout the rest of the game (and the entirety of the sequel!), but that’s still likely a ways off.
Anyways, loot and leave.
| Items |
|---|
| x=130, y=320 : Dagger |
| x=100, y=200 : 8 gold |
| (x=480, y=220 : War Hammer |

Dreppin’s Cow
When you exit the Priest’s Quarters, a man named Parda will question you. Answer him however you will, either way he’ll suggest you finish your preparations and depart with Gorion. They clearly know much more than they’re letting on.
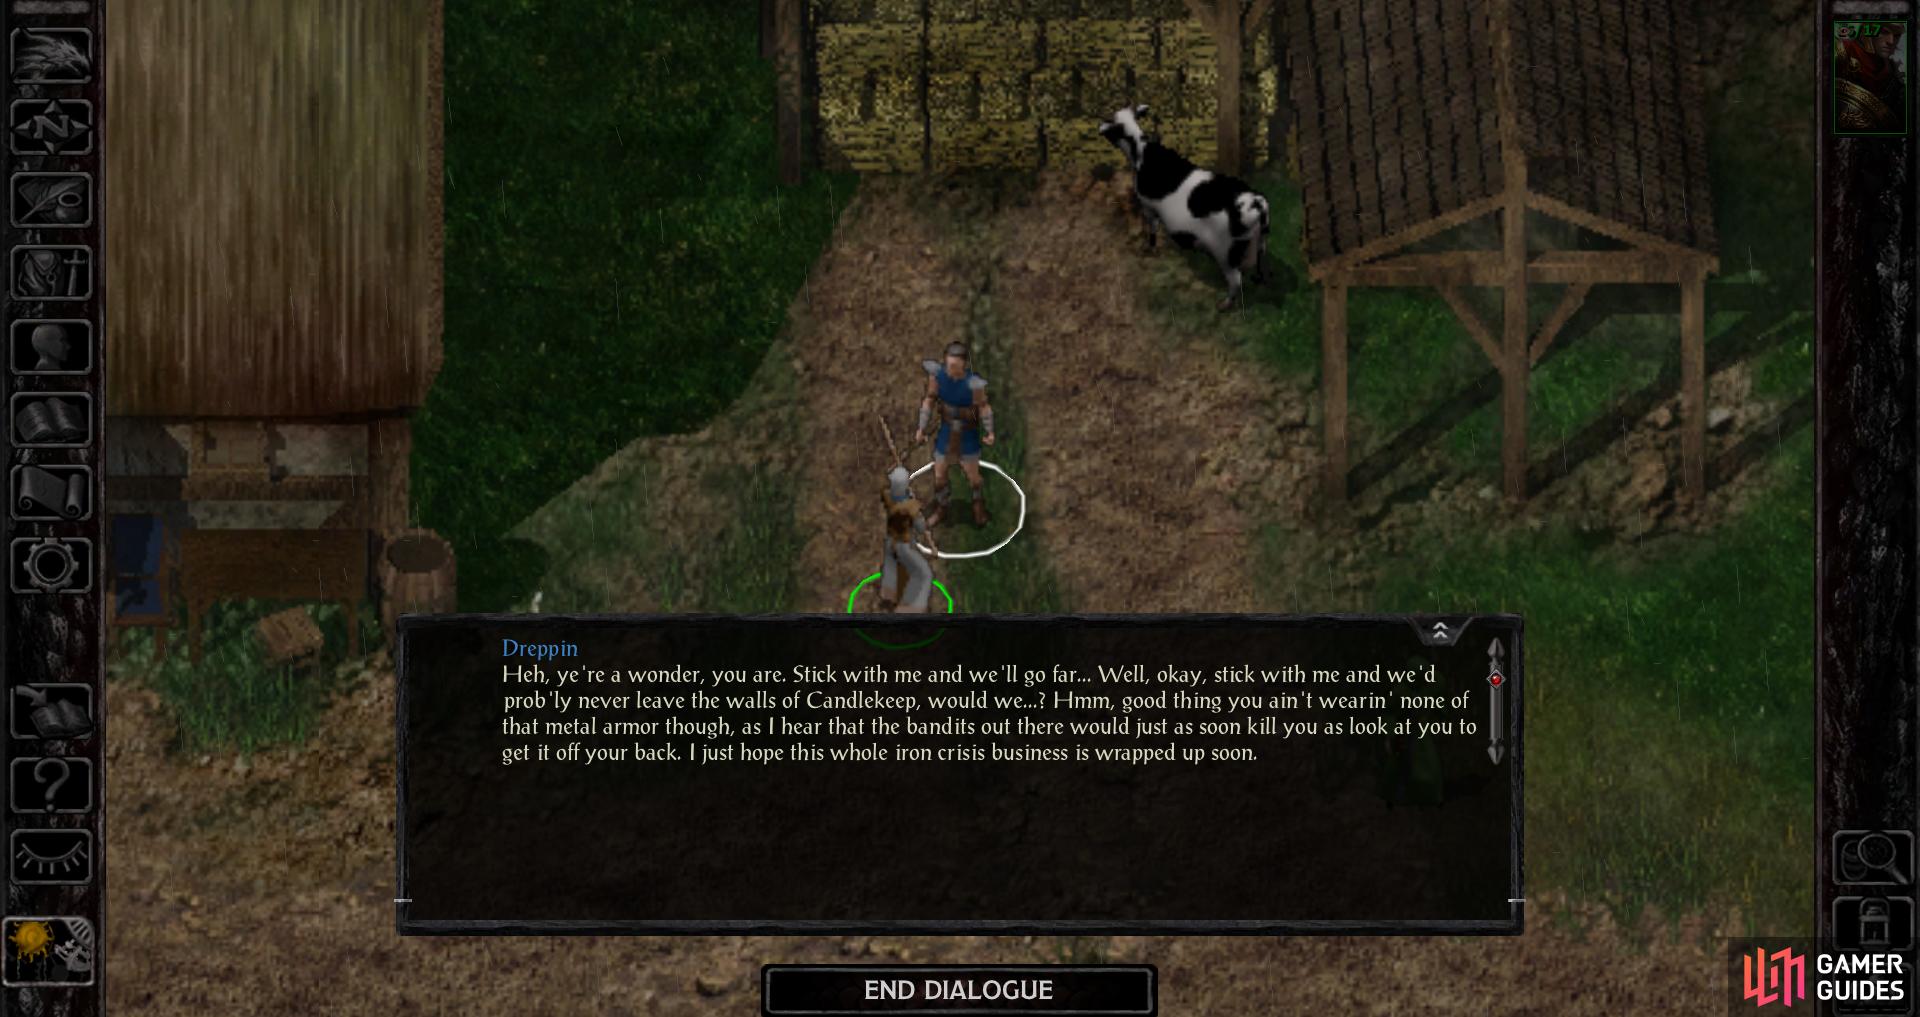
Oh well, no sense in letting a little murder get in the way of our busy day of questing. Return to Dreppin and he’ll ask you to get an antidote from Hull for his poor cow, Nessa. Quests galore! This starts the quest Dreppin’s Cow, which is simple enough to complete, and for the sake of continuity (you’ll be hearing this a lot) we’ll get it out of the way now… even if it means dodging some other attention-starved NPCs in the meantime.
From Dreppin, keep following the trail east and south, past an open-air shrine to Oghma. Bet they have to repaint this thing every year, but I guess it’s a welcome break from supervising books… Anyways, you can talk to the Priest of Oghma and gain access to various priestly services, none of which you should either need nor be able to afford at this time. That being the case, continue south past Jondalar (x=4100, y=1330) and Reevor (x=4330, y=1450), who will be worth talking to later, then turn southwest to finally find Hull at (x=3650, y=2430).
Talk to Hull, who will ask you to retrieve his sword for him, which he left in the Barracks. Also, he’ll tell you that the potion Dreppin wants is where his sword is. Convenient. This starts the quest Hull’s Sword - you’ve got so many quests, even your quests are having quests! If you continue southwest, then west you’ll reach the Barracks, but some pushy old Gatewarden (x=3210, y=2880) will try to pressure you into some group training. No need to bother with that yet, so backtrack north and west to the Candlekeep Inn (x=1060, y=520), then venture south and east.
Eventually you’ll spot the Barracks at (x=1570, y=2450) (AR2618). Loot the barrel outside of the Barracks (x=1410, y=2680) then enter the Barracks, where you’ll find Fuller (x=490, y=410). Hull’s chest is at (x=650, y=260), and while it’s hardly the only bit of loot in this area, we wouldn’t suggest stealing from the Barracks, as you’re likely to get caught doing so. Instead, be a good ward, talk to Fuller and pick the dialogue option “I was just wondering if you had any errands I could run.” to find out that, of course, he does. Apparently he needs a quarrel of crossbow bolts, and can’t get them himself because Candlekeep Inn is aaaaall the way over there. This starts the quest An Errand for Fuller. We’re in questception territory now.
| Items (AR2600) |
|---|
| x=1410, y=2680 : 8 gold |
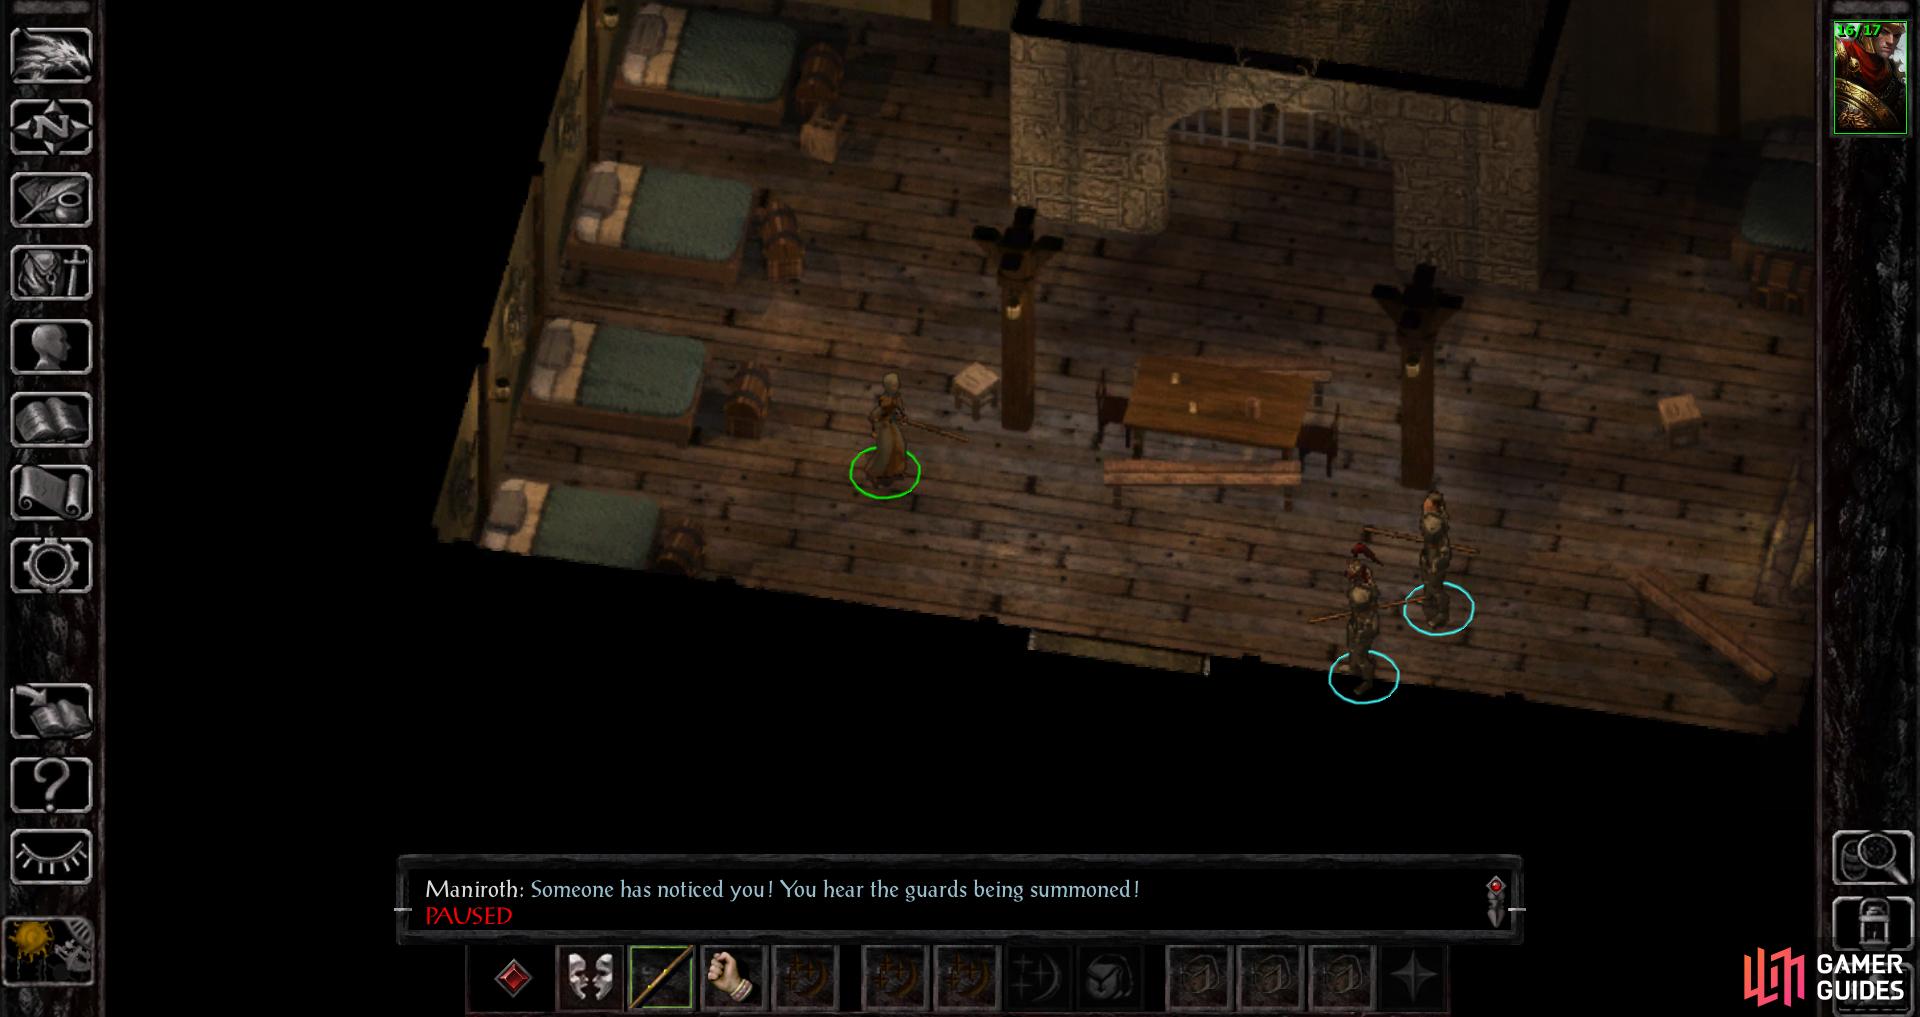
If you get caught going through things that don’t belong to you, the guards will be summoned.
If the guards manage to confront you, negative consequences will likely ensue.
Anywho, loot the aforementioned chest at (x=650, y=260) and grab both Hull’s Long Sword and the Antidote, then exit the Barracks. Now all you need to do to finish this quest is to backtrack to old Dreppin and his poor cow, and if you make your way clockwise you can avoid the Gatewarden for now. Return to Dreppin unmolested and he’ll mention some iron crisis, which has made the local bandits somewhat keen on certain parcels of the adventuring profession - namely armor. Certainly such business will never have any impact on us, personally. Your reward for this epic bovine rescue is… 50 XP. What? Guy raises cows for a living, you didn’t expect him to have money to give you, right?
| Items (AR2618) |
|---|
| x=650, y=260 : Hull’s Long Sword, Antidote |
| x=200, y=170 : Dagger, Long Sword |
| x=180, y=250 : War Hammer, Dagger |
| x=170, y=320 : Battle Axe |
| x=140, y=400 : Long Sword, Mace |
| Objective | Reward |
|---|---|
| For giving Dreppin an antidote | 50 XP |
Return to Dreppin with the Antidote he seeks
and give Hull back his Longsword.
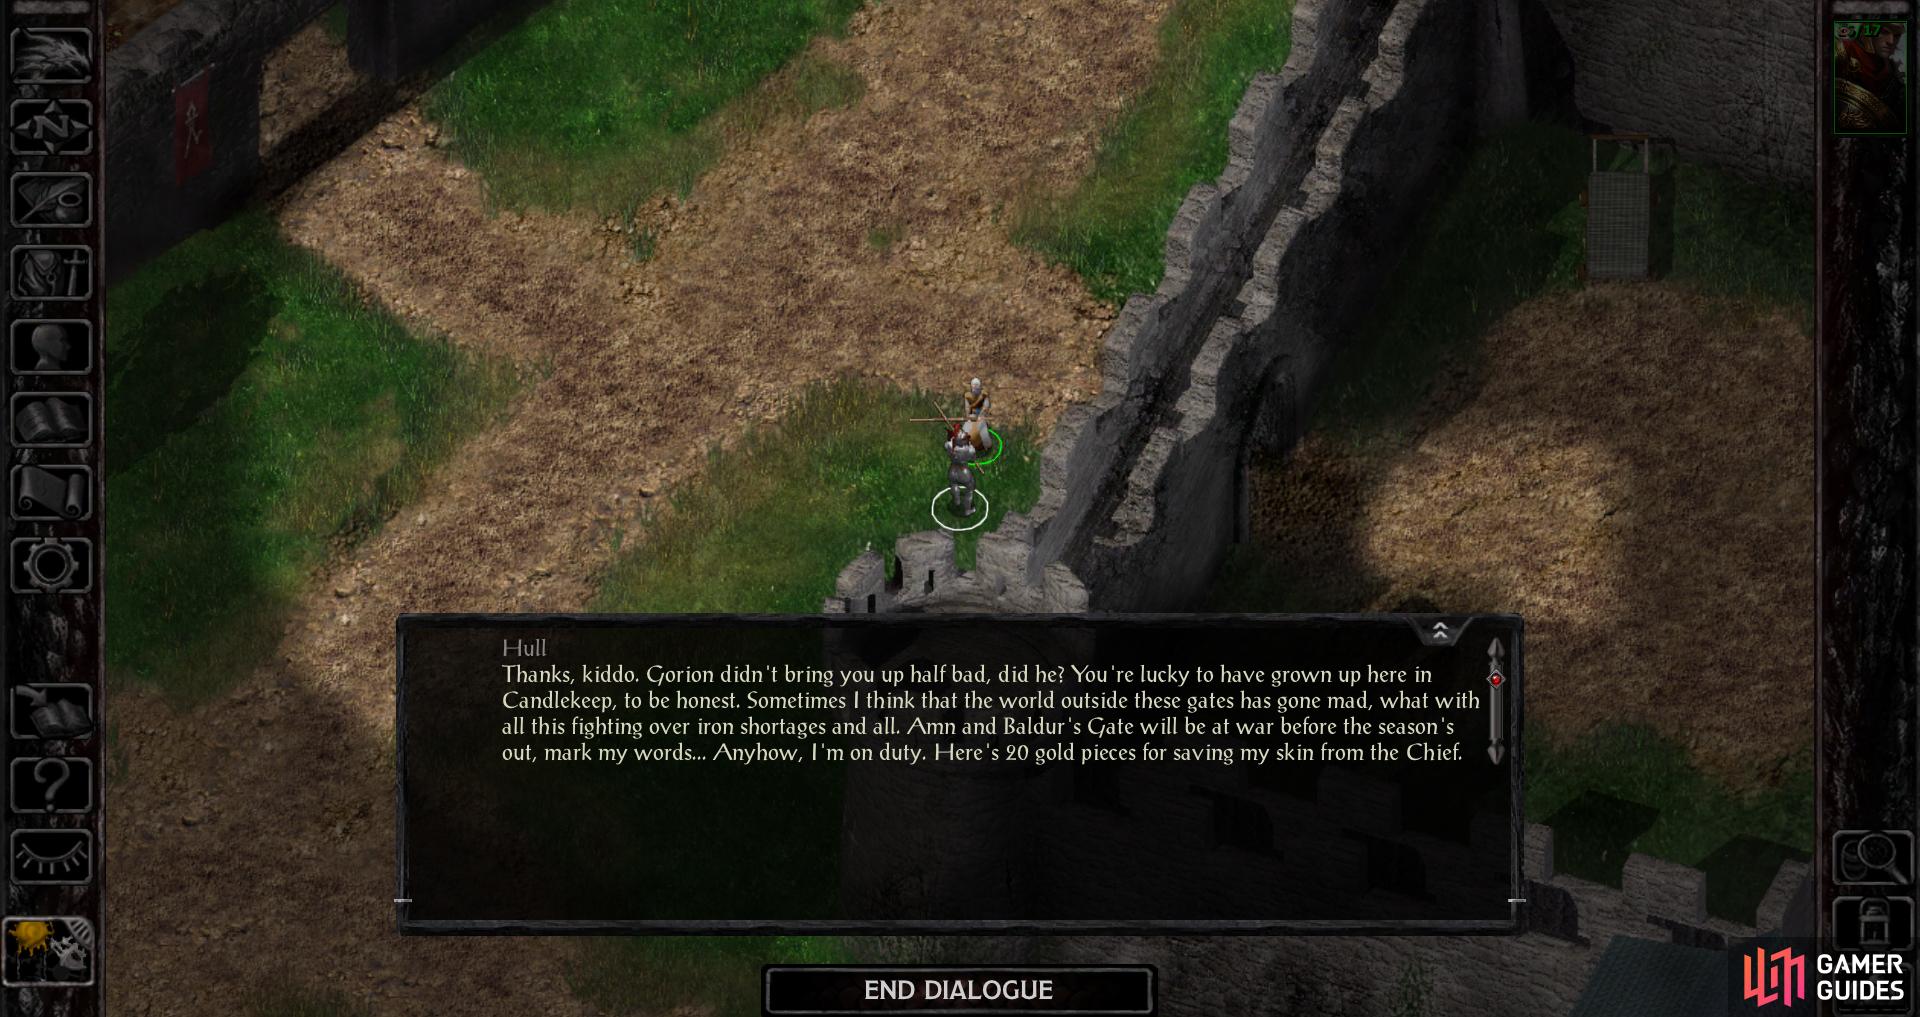
Hull’s Sword
You’ve mostly completed this quest, all you really have to do is turn it in. Still, for the sake of continuity (told you that you’d be seeing this a lot), let’s wrap this quest up. In case you for some reason didn’t manage it earlier, you’ll need to enter the Barracks (x=1570, y=2450) (AR2618), inside of which you’ll find Hull’s chest (x=650, y=260) which naturally contains Hull’s Long Sword. Grab it and take it back to Hull near the gate to Candlekeep (x=3650, y=2430).
Hull’s generosity is another example of that under-the-hood Reaction check in action. If Hull likes you, you’ll get 50 XP and 20 gold - a hefty reward considering his sword is only worth 7 gold. If he’s not that keen on you he’ll give you 50 XP and 10 gold, which is still a fine reward. His dialogue may also vary if you get his sword before talking to him and starting this quest, for what that’s worth.
| Objective | Reward |
|---|---|
| For giving Hull his sword (low Reaction) | 50 XP / 10 gold |
| For giving Hull his sword (high Reaction) | 50 XP / 20 gold |

Combat Practice with Jondalar
From Hull backtrack north to find Jondalar (x=4100, y=1330) again, who will give you some combat training if you talk to him. If you’re new to the game, you might as well indulge. After the chat ends, Jondalar will attack, but he’ll immediately be joined by a man named Erik (x=4170, y=1100) who will pepper you from afar with arrows. Through the magic of tutorials, this won’t hurt, and the tutorial will end when you run up and smack Erik with your standard-issue Quarterstaff. This tutorial is there to teach you to… watch out for random archers popping up? Actually, that’s not a bad thing to learn, and in the Enhanced Edition, it’s easier to keep an eye on things since you can zoom out.
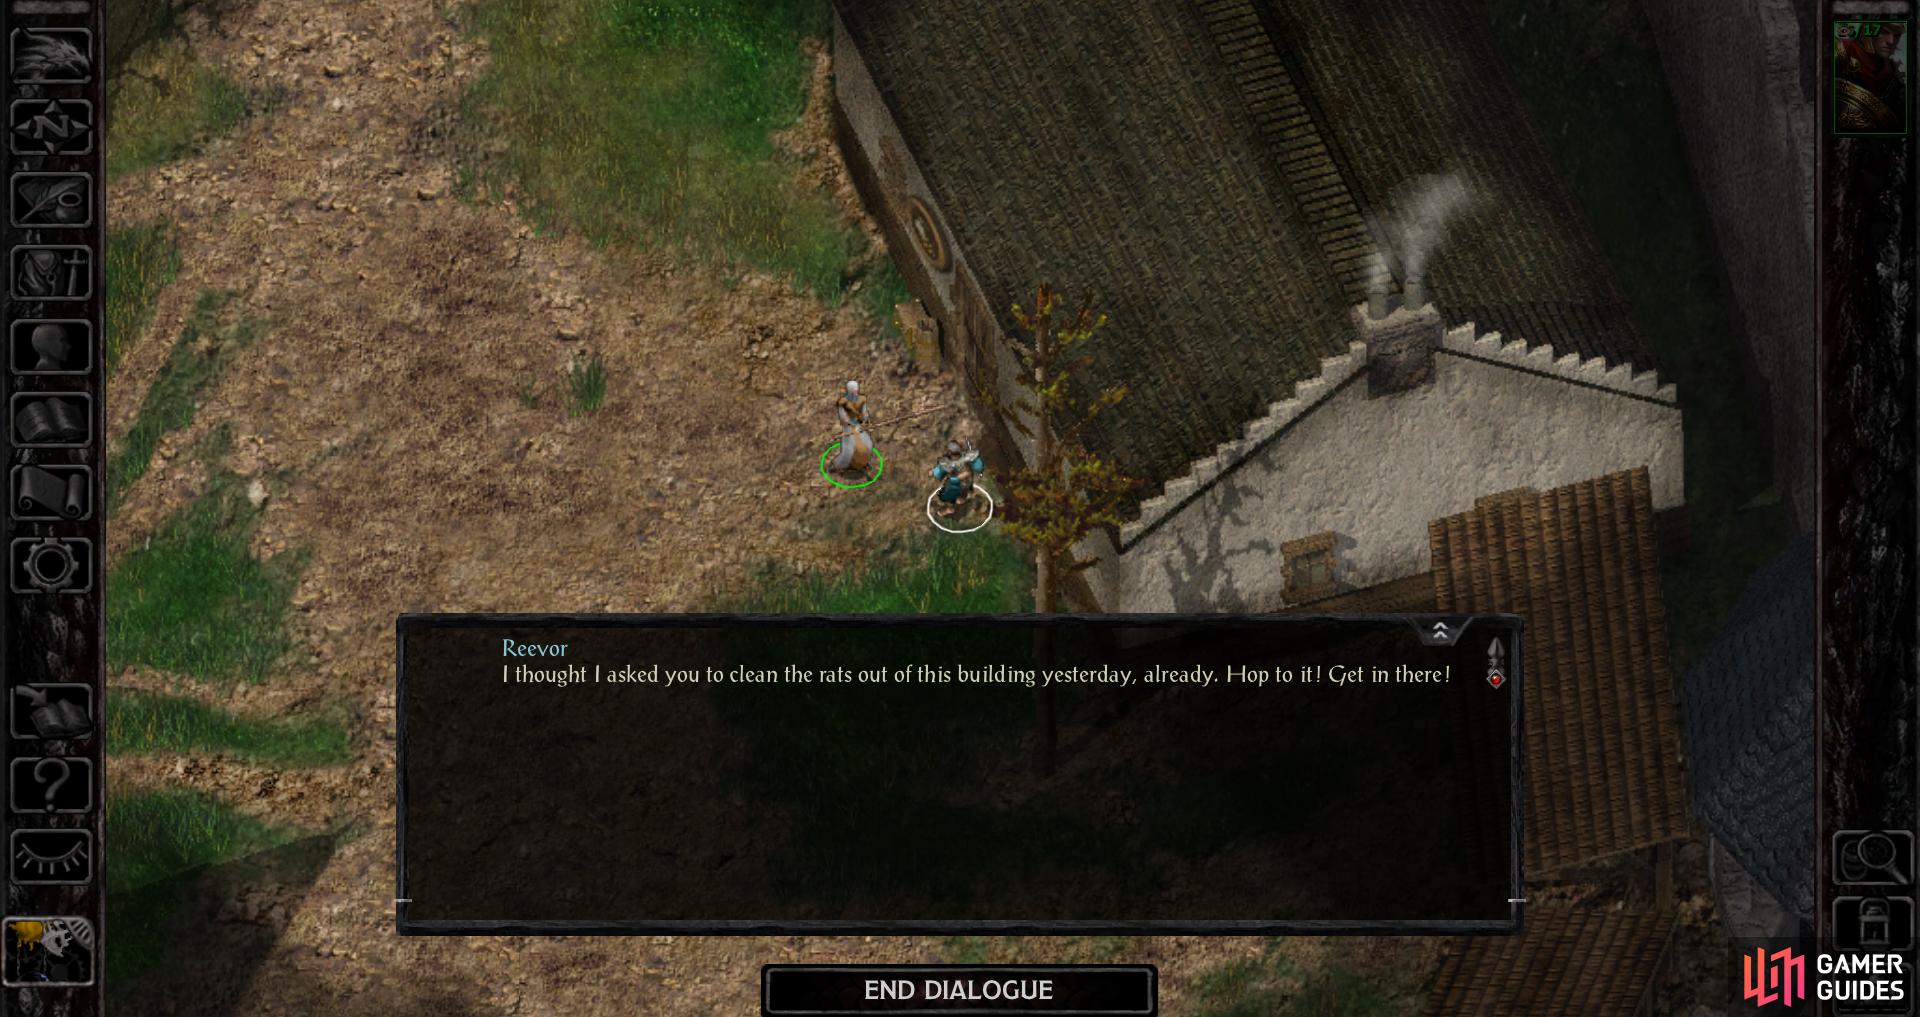
Talk to Reevor outside the storehouse and you’ll be tasked with exterminating rats.

Head inside the storehouse and mercilessly maul the mice.
Reaving Rats for Reevor
No fancy reward for Jondalar’s interaction, save the unquantifiable value of the training itself. A short ways to the southeast you’ll find a dwarf named Reevor (x=4330, y=1450), who will offer you a more tangible reward for a bit of combat. Talk to him and he’ll tell you to clear the rats out of the storehouse. Head inside the Storehouse (x=4350, y=1400) (AR2606) to do just that.
Inside the Storehouse you’ll be accosted by several rats, who walk up to you and wait to be smote. Oblige them, loot the building, chastise the lazy cats for not doing their ONE JOB, and return to Reevor for your reward.
| Items (AR2606) |
|---|
| x=100, y=200 : Silver Ring |
| Objective | Reward |
|---|---|
| For killing Reevor’s rats | 50 XP / 5 gold |
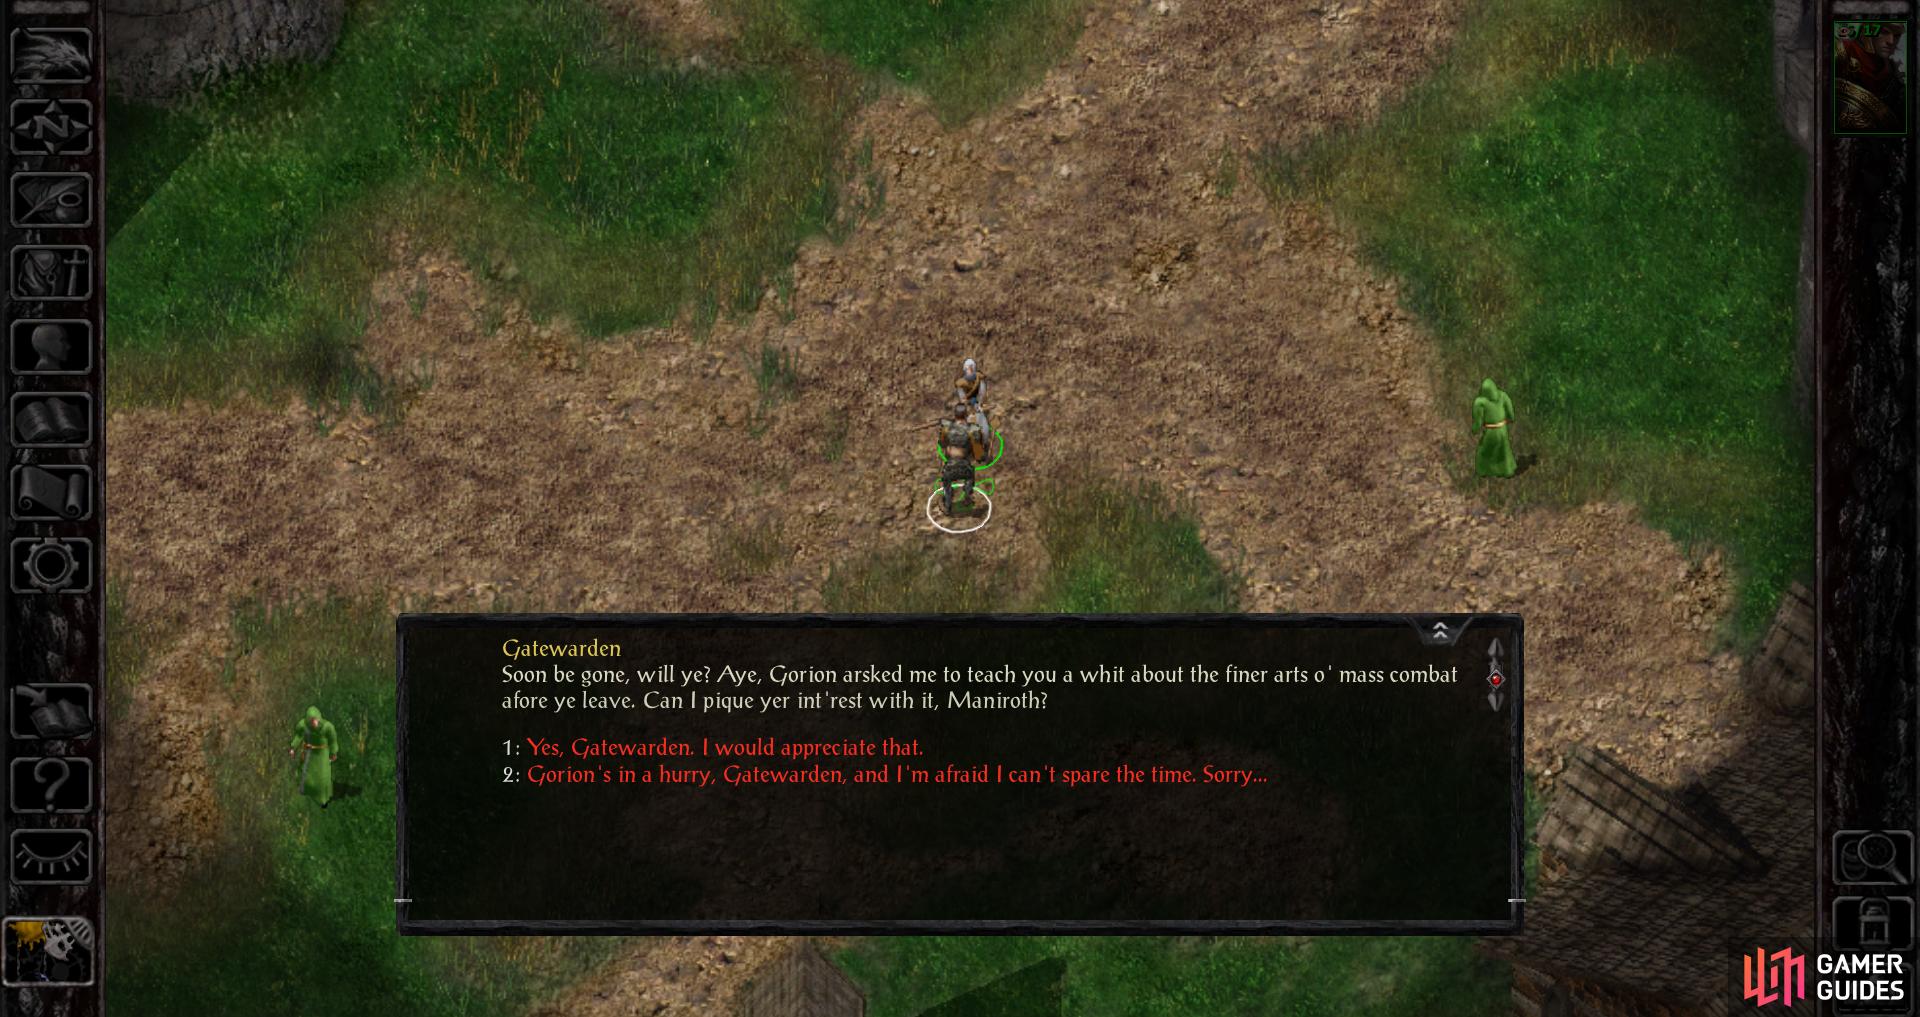
Gatewarden’s Group Combat Tutorial
Venture south, then southwest past Hull to find the Gatewarden (x=3120, y=2880), who you need not bother avoiding anymore. When you have him on screen he’ll approach you and initiate conversation, offering to train you in group tactics. If you decide to go, follow him to the building he mentions (x=3020, y=3050), where you’ll get a party with which to fight a number of illusory foes, courtesy of Obe the illusionist.
When your companions join and the illusory monsters attack you’ll be able to engage in combat the likes of which you’ll aspire to when your adventure properly begins. On the right side of the screen you’ll find the portraits of all you companions. You can select a specific companion by clicking on their portrait or their in-game sprite. If you hold the Shift or Ctrl keys while you click you’ll add or remove more characters to the current selection. The number buttons (1-0) will also select a specific character based on their order in the party lineup - the 1 key will select the first character, 2 the second, and so on, while 7 will select the first two characters, 8 the next two and 9 the last two, while the 0 key will select the entire party… or you can just press and hold the left mouse button and drag a selection box over the characters you want to select.
After Obe summons some monsters for you to fight, pause the game, select the party at your disposal and click on the critters you want to die. The first foes you’ll face off against are a host of Gibberlings, who shouldn’t be any trouble for your team… mostly because they can’t do any damage. If you want to get a hang on some spellcasting practice, select Osprey, click the spell icon (crescent moon and stars), select the spell you want to cast (say, Magic Missile) then select a target.
Also note the magic of Party AI, which you can toggle off and on by pressing the A button or by clicking the lantern icon at the bottom right of the screen. You can customize AI scripts in the character record menu (press the R button to summon this menu), click the “Customize” button, then select “Script”. When we bother using the AI (see note below) we’ve always had a simple enough time just selecting the “STANDARD ATTACK” script - you’ll attack enemies in sight with whatever weapon you have equipped Not elegant, nor suitable for difficult encounters, but ideally you’ll intervene (direct commands take precedence over AI scripts) when necessary, leaving AI scripts only for those battles with foes you can afford to contemn, or for general mop-up when victory is inevitable.
Once every couple of rounds Obe will ask if you’ve had enough, and when you have, pick the dialogue option “I think I’ve had enough, just take me outside.”.

(1 of 3) When you enter the hospital, talk to a Priest of Oghma for a free Potion of Healing.
Candlekeep Hospital
When you’re back outside, make your way east to the building at (x=3550, y=2950), which just so happens to be the Candlekeep Hospital (AR2605). Talk to the Priest of Oghma that wanders around and he’ll offer to
give you a Healing Potion. Why refuse? There’s another potion you can filch from the desk at (x=660, y=410) but the guards will be called on you.
This may be your first theft of the game, so keep in mind what was mentioned earlier and put it into practice. Namely the fact that if you’re caught stealing (your theft will almost certainly be discovered at some point in this small building) the guards will be summoned, and if said guards manage to initiate dialogue with you, it’ll likely end in a fight and/or a reputation drop. If the guards cannot find you, however, you will not suffer any consequences. The solution, then, is clear - steal what you want, then bolt for the door.
As long as you avoid contact with the guards, you will get away with your thieving consequence-free, and the guards will vanish if you wait a few days (game time). That’s the model of stealing for the Enhanced Edition. Steal, sneak, flee. Get used to it, you may be doing it a lot.
| Items (AR2605) |
|---|
| x=660, y=410 : Potion of Healing |
Enter the Bunkhouse and you’ll be accosted by another would-be assassin.
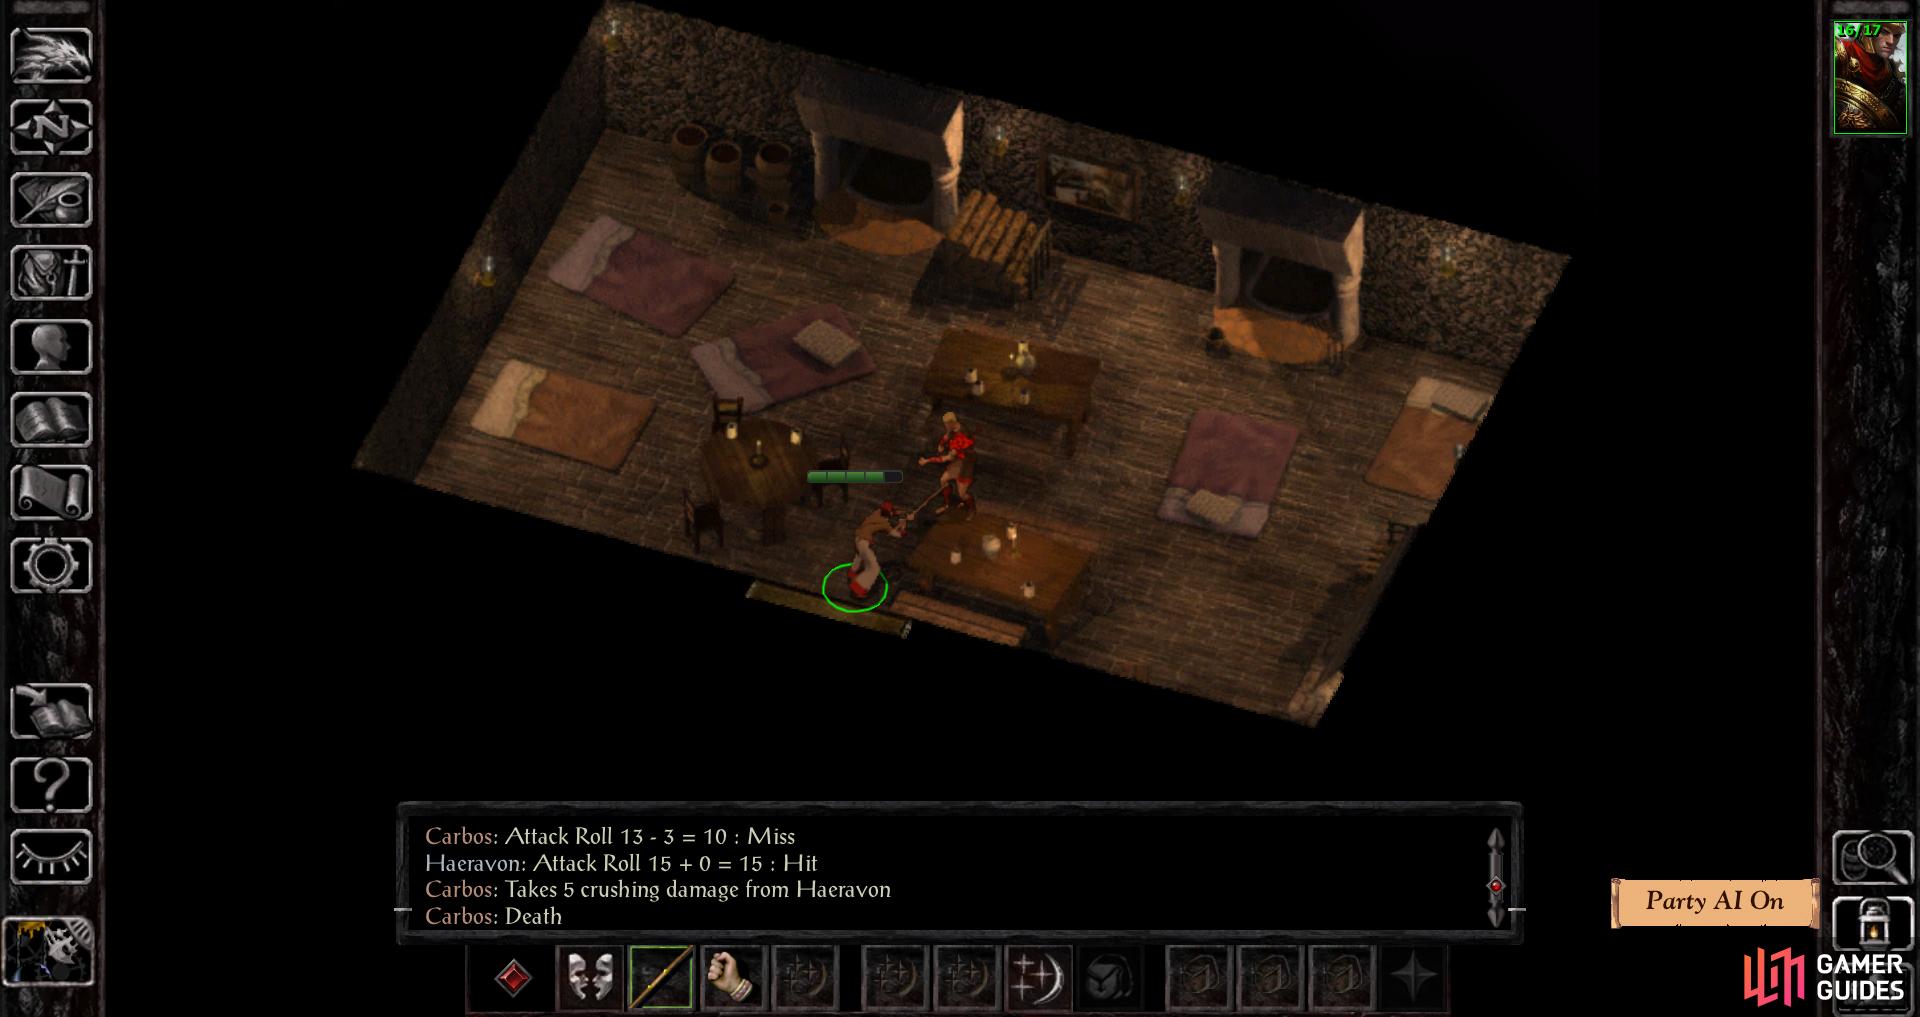
Put down Carbos, and make up whatever excuse you wish to the monk that confronts you afterwards.
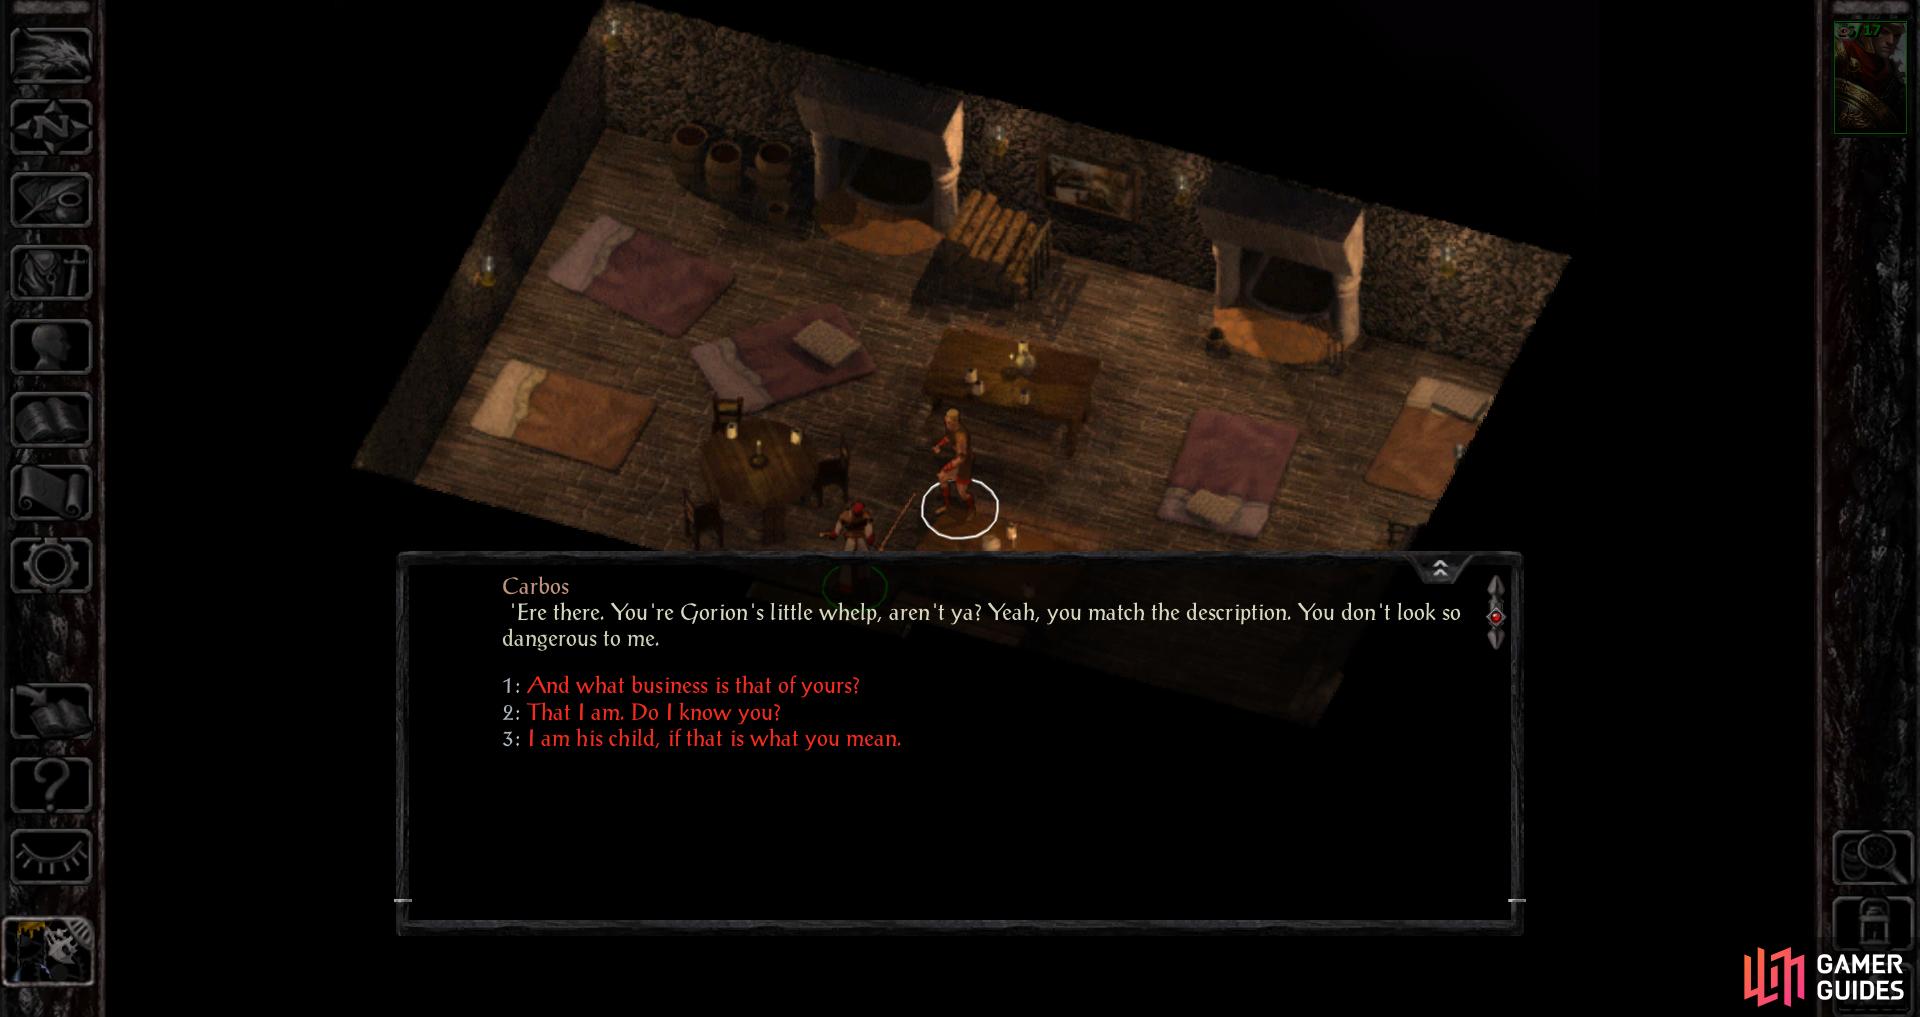
Attacked by Assassins - Carbos
Head west until you come across the Bunkhouse, which is your last stop before you finally venture into Candlekeep Inn. Loot the chest outside, then head into the Bunkhouse (x=2070, y=2670) (AR2607), inside of which you’ll be accosted by another would-be assassin named Carbos. He’s not very different from Shank, stat-wise, to cut him down and leave the building. Just like the last time you fought of a would-be assassin you’ll be pestered by a tardy monk outside, this time named Karan. Like Parda, he’ll ask you a question, and your response is irrelevant. Curious these monks seem to understand why assassins would be after you, always ready to respond after the violence is over, and entirely unwilling to share any useful information.
| Items (AR2600) |
|---|
| x=2150, y=2750 : 15 gold |

Buy some Bolts from Winthrop
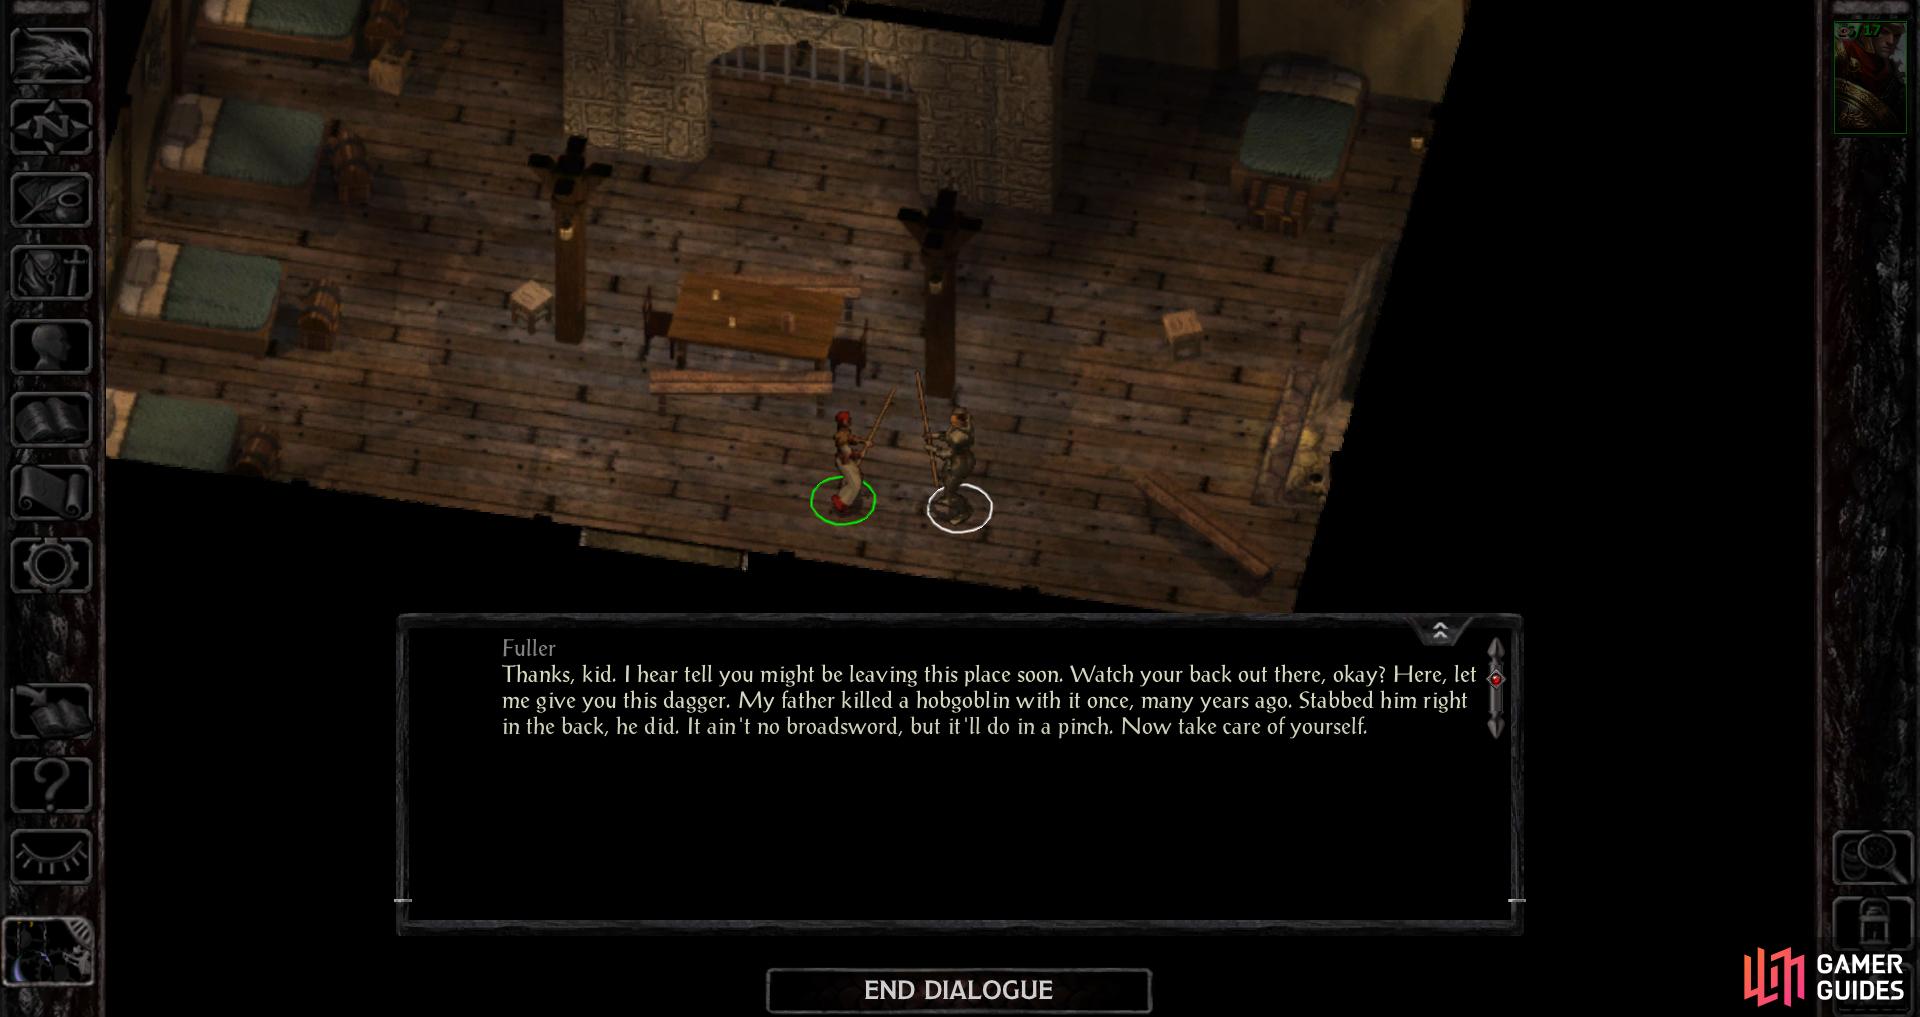
then give them to Fuller to complete his quest.
An Errand for Fuller
Oh well, nothing that can be done about it now. Time to head to Candlekeep Inn (x=1060, y=520), inside of which you’ll find Winthrop (x=670, y=410). From him you can buy all the goodies you’ll need to get started… he sells just about every weapon out there, but before we get into that let’s finish up Fuller’s quest real quick. Navigate Winthrop’s tired joke however you wish, then you’ll find yourself on the shopping screen.
There are three icons on the bottom of the screen in this case, and while the variety of services may vary based upon merchant, Winthrop offers “Rooms”, “Buy and Sell” and “Drinks”, as indicated by the three icons, from left to right. Don’t be profligate with your gold and just pick the “Buy and Sell” option for now, and once you’re staring at the massive array of arms and armor available to you, scroll down until you find some Bolts. One gold coin will get you twenty of them, so buy some Bolts, leave the Candlekeep Inn and return to the Barracks (x=1570, y=2450) (AR2618) where you’ll find Fuller (x=490, y=410).
If you started the quest earlier, great - talk to Fuller and give him the Bolts for a reward. If not, talk to Fuller, ask “I was just wondering if you had any errands I could run.” to pick up the quest, then talk to him again to give him the Bolts. Either way, you’re done with this quest.
As with Hull and Phlydia, your reward varies based on your Reaction modifier (if you forgot, it’s a mix of Reputation and Charisma, for the most part). If Fuller doesn’t like you much, your reward will be 50 XP and 10 gold, while if he does he’ll give you 50 XP and a Dagger +1 instead. There are many reasons to prefer the latter reward to the former, but one of the more obvious is the fact that a Dagger +1 will sell for a cool 150 gold.
| Objective | Reward |
|---|---|
| For giving Fuller a score of bolts (low Reaction) | 50 XP / 10 gold |
| For giving Fuller a score of bolts (high Reaction) | 50 XP / Dagger +1 |
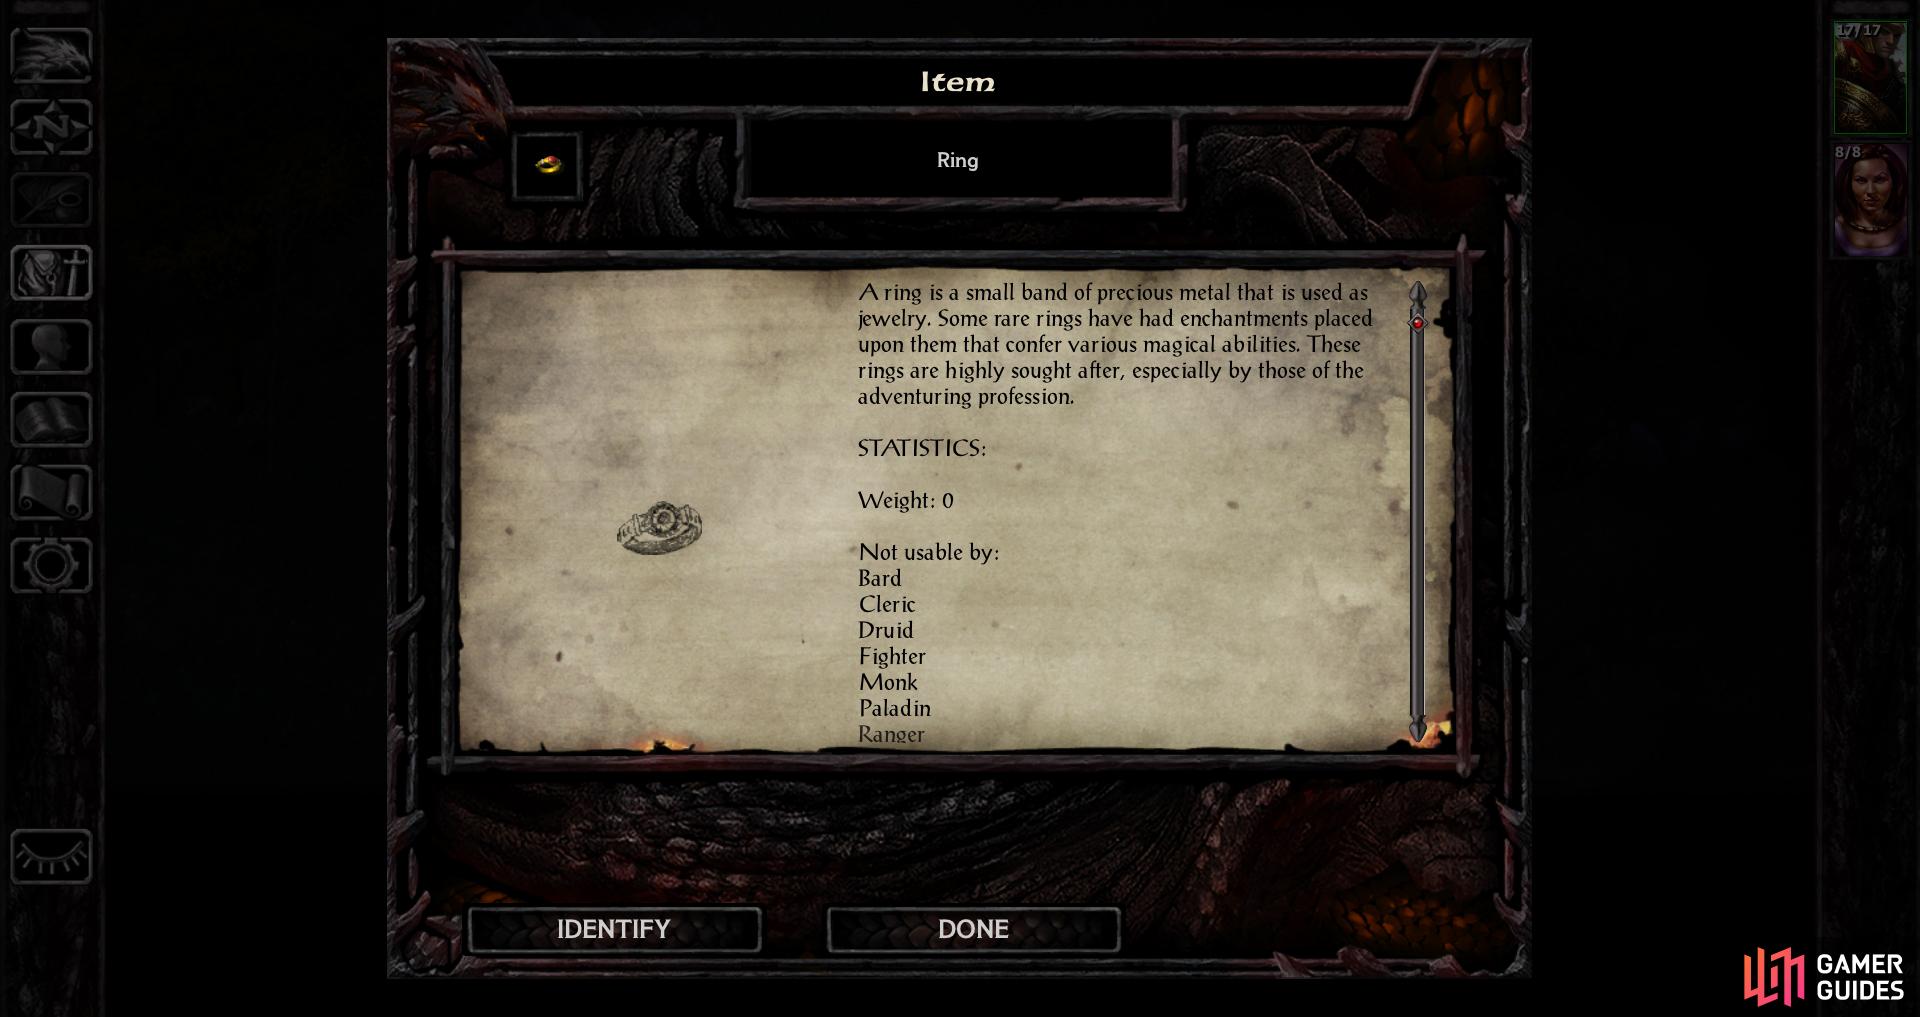
Magical items by default are unidentified - you’ll have to identify them to reveal their properties.
Anyways, magical dagger or no, return to Candlekeep Inn to give it the proper exploring it has long since avoided.
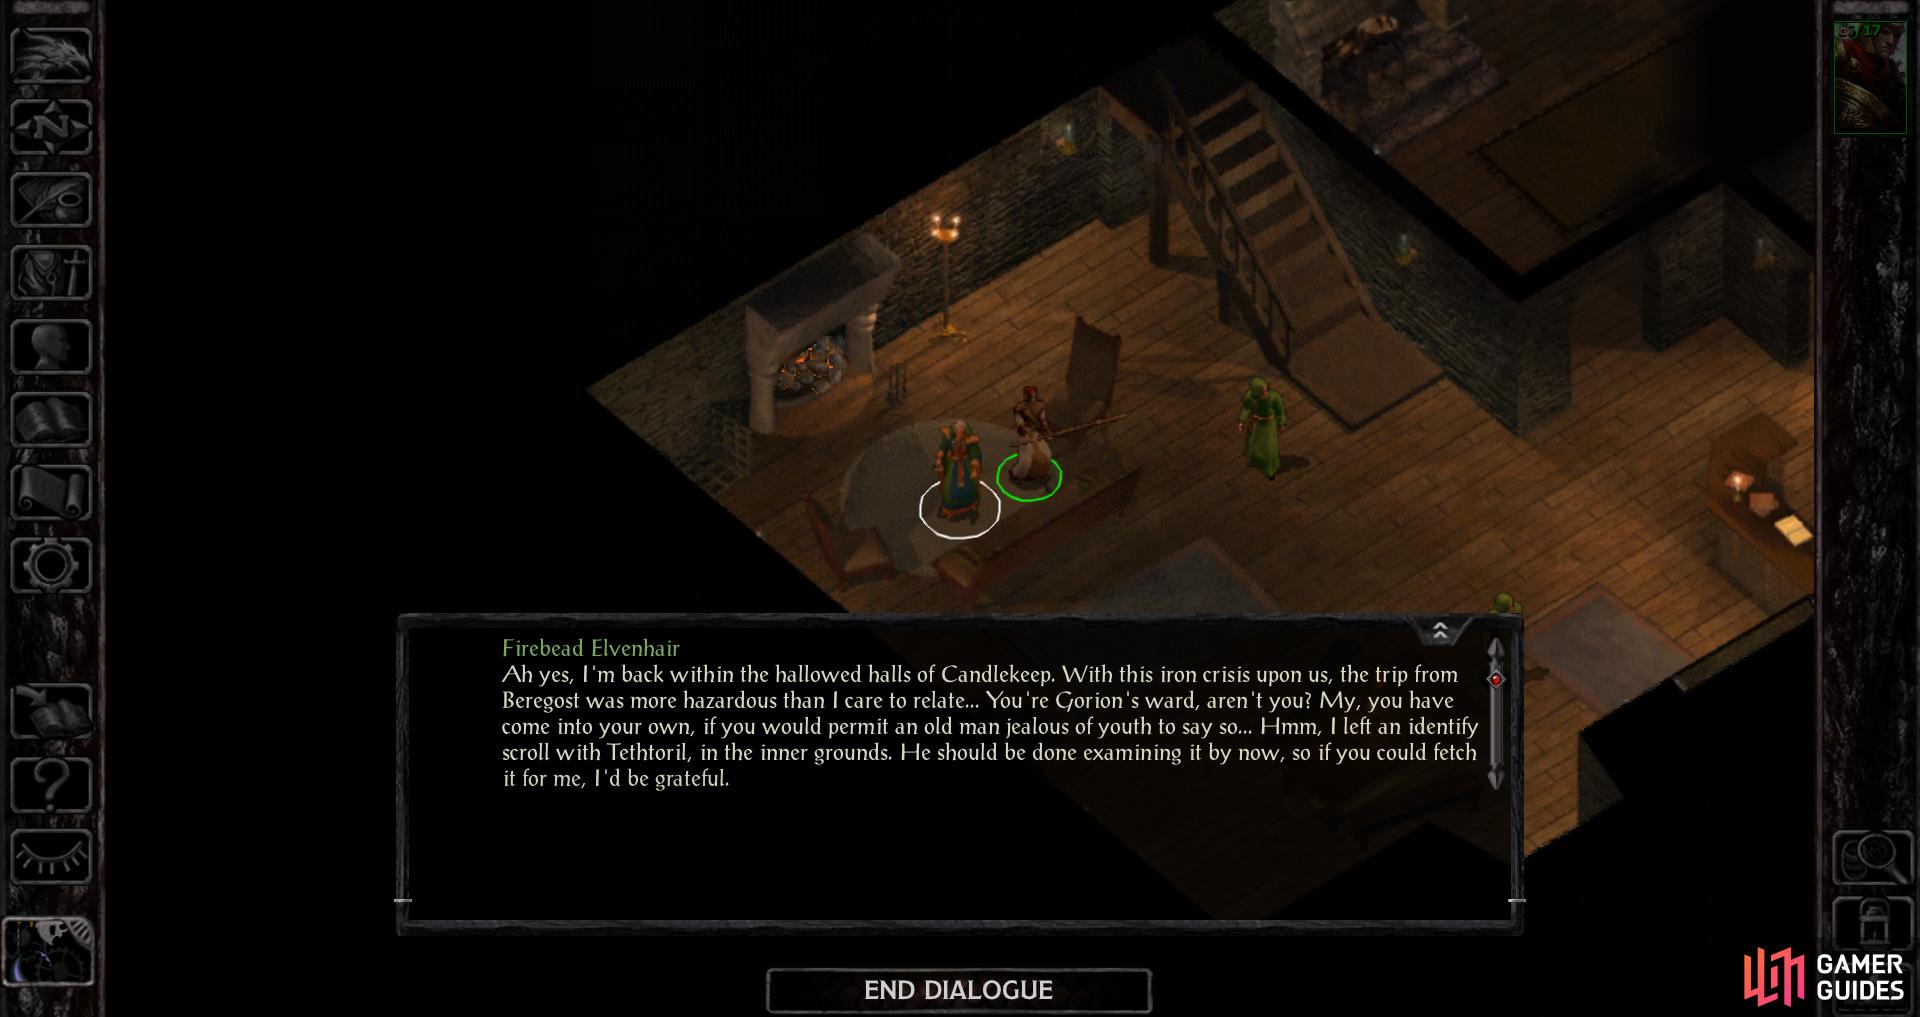
Talk to Firebead Elvenhair and he’ll ask you to retrieve a scroll he lent to Tethtoril.
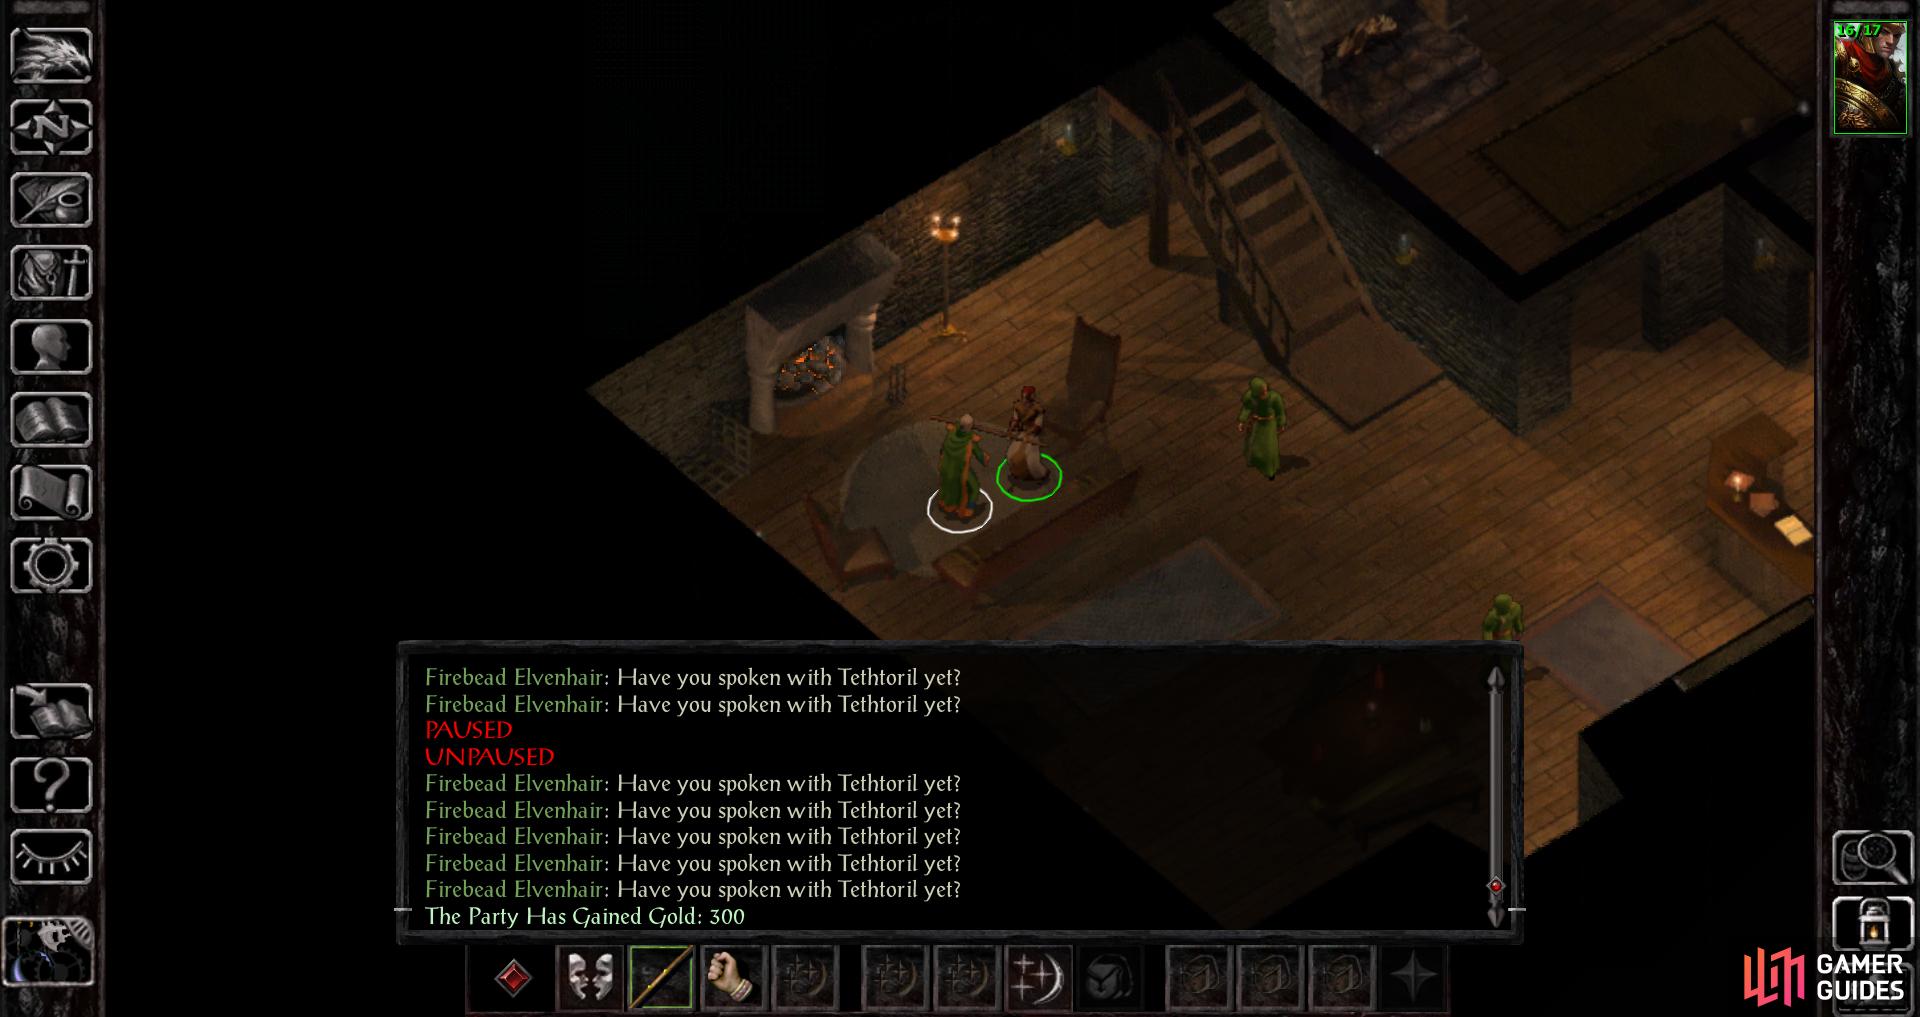
Talk to Firebead exactly 30 times to gain a surprise reward of 300 gold.
Candlekeep Inn, Downstairs
Return to Candlekeep Inn (x=1060, y=520) again and this time ignore Winthrop - there’s still a bit more loot to collect before you bother buying and selling anything else, so let’s turn our attention elsewhere.
At (x=200, y=400) you’ll find Firebead Elvenhair. Talk to him and he’ll ask you to retrieve a Scroll of Identify from Tethtoril, starting the quest Firebead’s Scroll. We’ll get on this shortly.
Speaking of spell scrolls, grab the Scroll of Armor and the Scroll of Infravision from the dresser at (x=800, y=250). You may have to bash or pick the dresser to get it open, but with luck it should yield, and nobody seems to mind your theft this time around. Thank you, fog of war!
Only one more thing to do here now before you head upstairs. In a room to the north you’ll find a pair of nobles standing around. Talk to the male (x=550, y=200) and when you get a chance to reply pick dialogue option #3 (“Oh, I would not let it concern you, milady. Perhaps they are not used to wealth such as yours. You are quite wealthy, are you not? Bring a lot of expensive jewelry with you?”) to lavish an unseemly amount of attention on their status symbols. Most characters will be reprimanded with threats of incarceration, but if you manage to get a good Reaction check from the noble his wife will mistake your larcenous intent and decide to put her jewelry back in their room, to avoid offending the monks with any
further ostentatious displays. Anyways, when you’re done with this level head upstairs (x=350, y=250).
| Items (AR2616) |
|---|
| x=800, y=250 : 18 gold, Scroll of Armor, Scroll of Infravision |
| x=650, y=100 : Dagger |
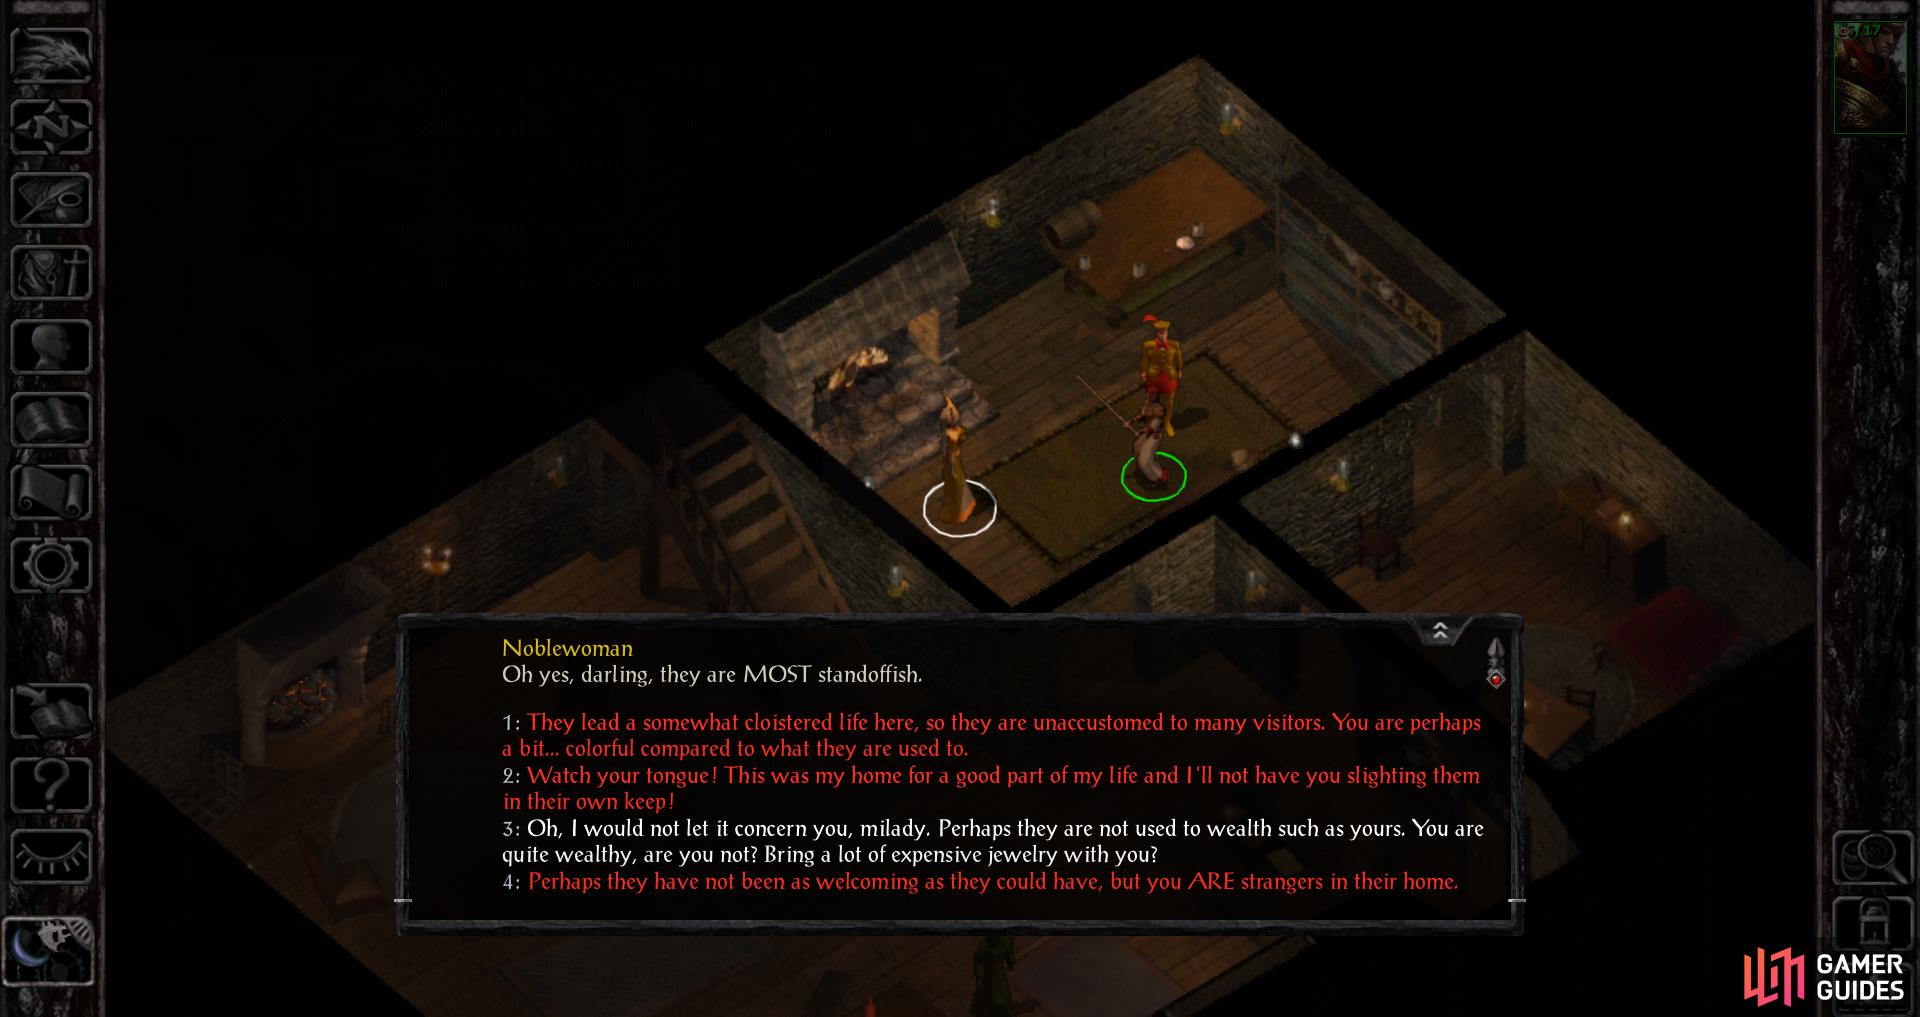
(1 of 3) With enough Charisma, you can trick some nobles into locking up their treasures.
Candlekeep Inn, Upstairs
Go around looting, there’s not really much else to do on this floor besides antagonize nobles. If you have a great amount of Strength (and by “a great amount”, we mean more than is legitimately possible to get with a new character), or a terribly high lock pick score (60 or more), or a Knock spell memorized, you can get at the Star Sapphire in the dresser at (x=420, y=170). However, to get this you need one of three things: either a character from a previous playthrough, a character who has been modified by console commands or a save editor, or a Thief with the appropriate skills. For the rest of us, the gem is just there to mock us. Even if you have a Thief, investing in the Open Locks skill is, in the long-term, a waste of points, so we suggest just ignoring it.
On the other hand, if you managed to convince the nobles downstairs into putting their jewelry away, the Star Sapphire in the dresser at (x=420, y=170) will be joined by a Pearl Necklace and a Fire Opal Ring. The Star Sapphire alone sells for 1,000 gold, while the Fire Opal Ring is worth 250 gold, and the Pearl Necklace will burden your purse with 500 gold. It’s not a bad bit of starting money… ignoring the fact it’s probably out of reach for most characters. It’s also worth noting that the nobles will still plant their goodies in the dresser if you rob the Star Sapphire from it before talking to them and convincing them to stash the rest of their loot. Not very smart, eh?
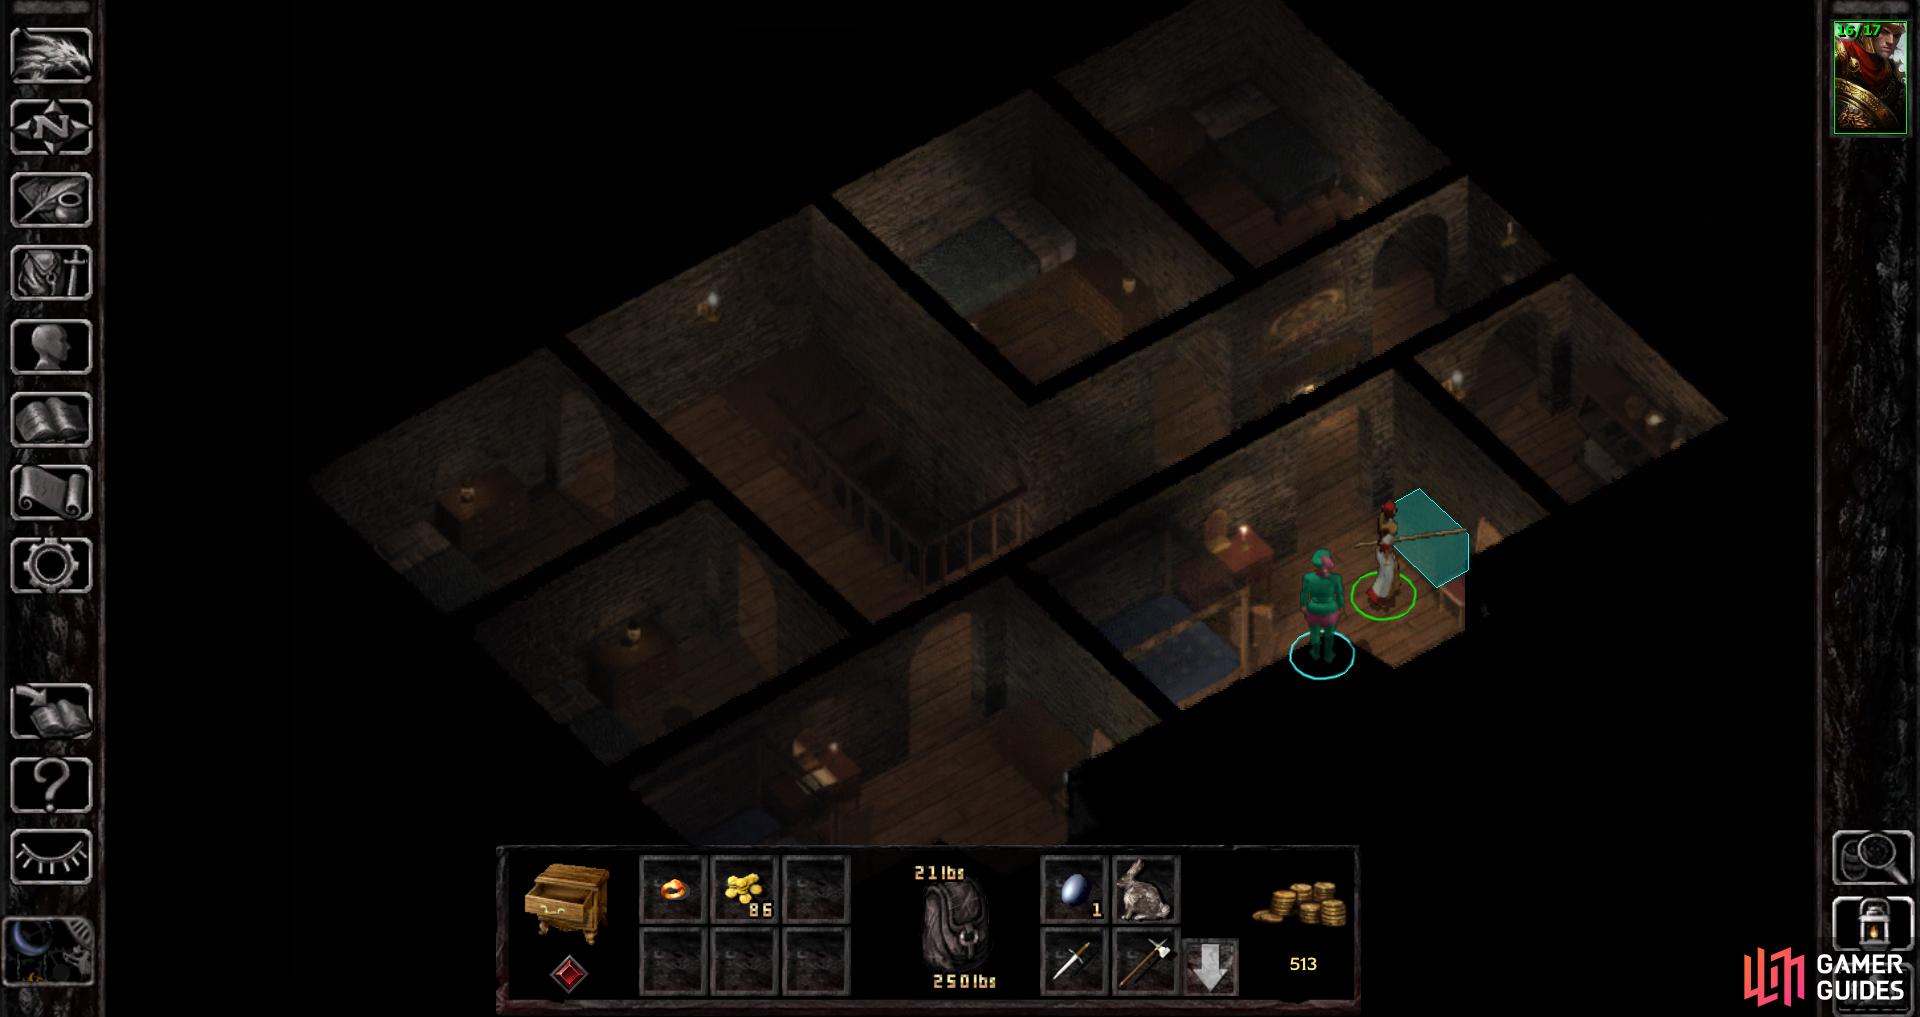
Finally, in the room across the hall you’ll find another dresser (x=570, y=300) which contains quite a few gold coins worth pocketing, as well as a watchful Nobleman (x=520, y=350). While the Star Sapphire in the previous room likely will teach you a lesson about learning to let go of what you cannot obtain (and rewarding the odd thief - bless them, they need the help), this room is also instructional. It’ll teach you about the limitations of the grab-and-dash and reinforce the Star Sapphire’s lesson about when it’s best to just let sparkly things lie.
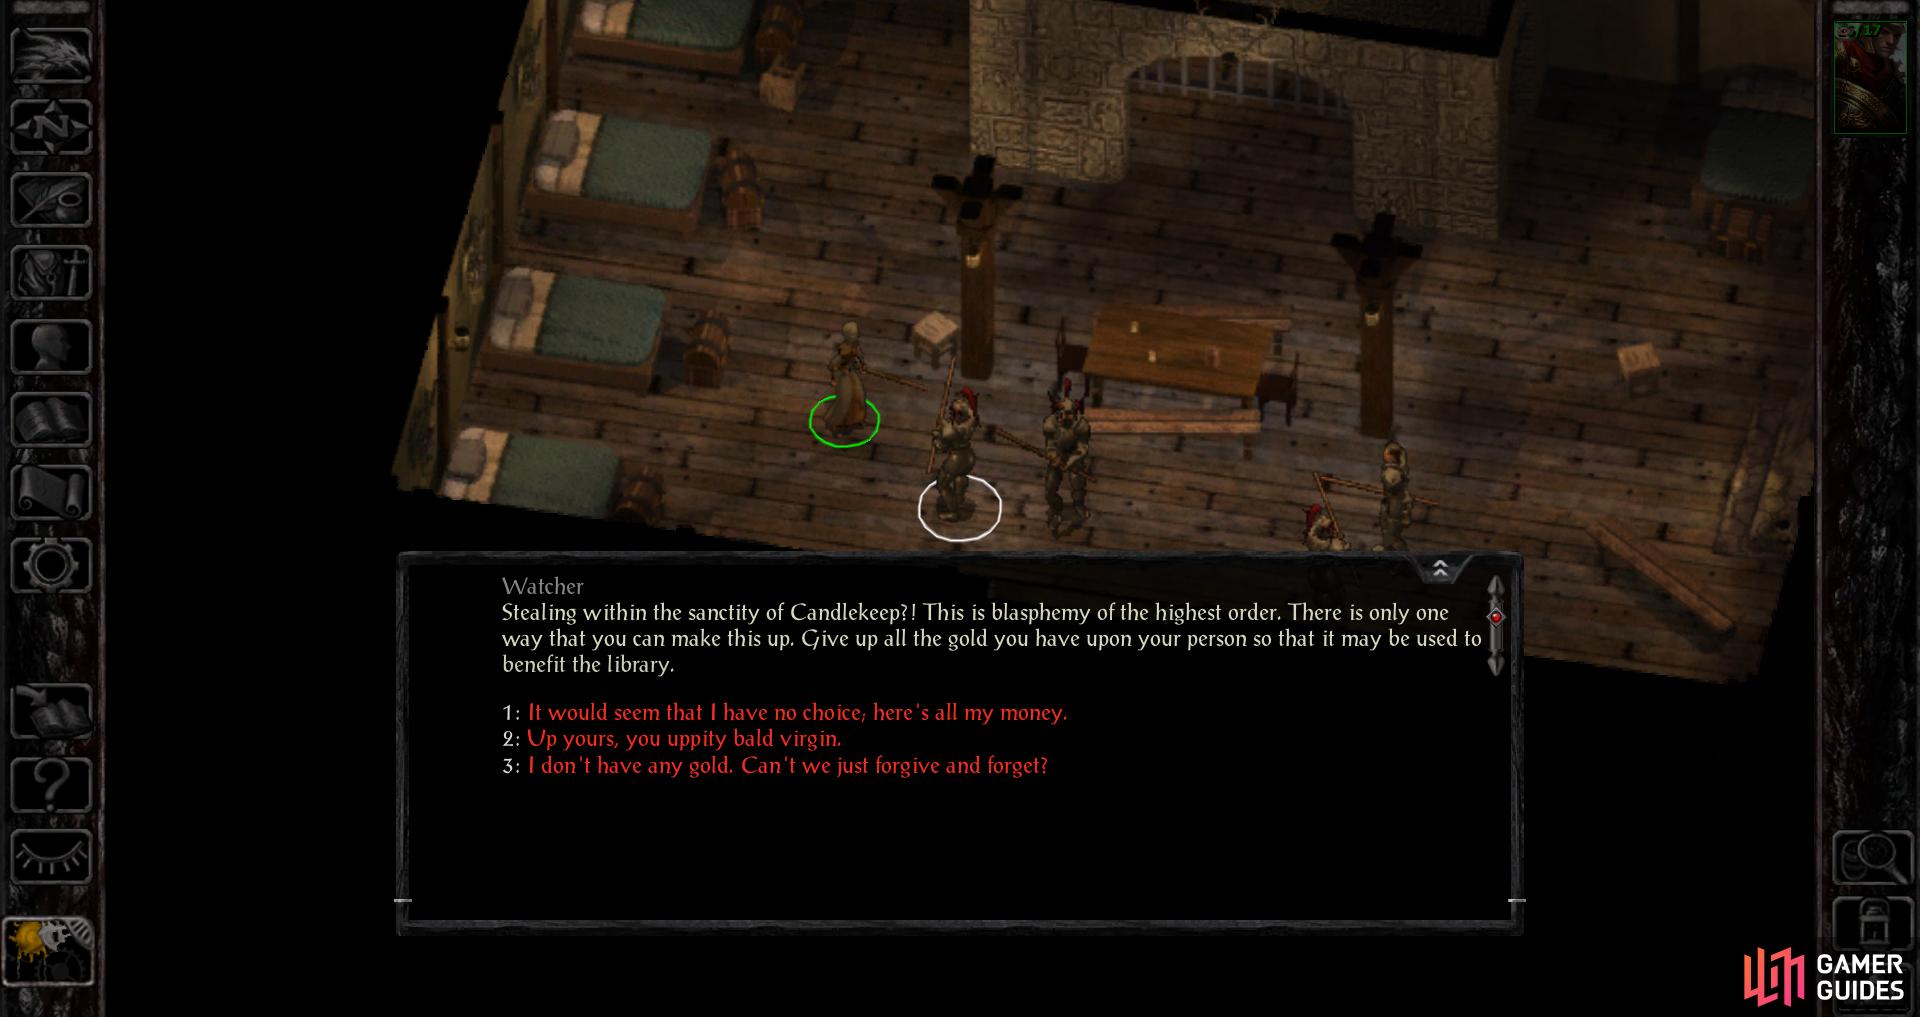
You can most likely bash or pick your way into the dresser, but if you dare touch the goods within, the Nobleman will call the guard. The distance to the stairs and narrow confines of the area make it very hard to escape without trouble. A Thief with the Stealth skill might be able to steal the loot, hide, wait for the guard to get out of the way, and escape, but other characters are playing a riskier game.
That said, we were able to escape without consequence by running to the stairs, and when caught by the guard picking the dialogue option “I don’t have any gold. Can’t we just forgive and forget?”. Naturally the guard wasn’t happy and attacked us, but clicking on the stairs again got out out of the area without any loss to reputation, and the guard won’t follow you downstairs if he hasn’t actually initiated combat (if you see the text Watcher: Attacks [Charname], you probably just want to reload).
Even better, if you snatch the goods, run to the stairs, and when the guard appears click on the stairs again the game might generously allow you to head downstairs without having to walk near the guard, avoiding any confrontation at all. This should take a few tries to get right, as the pathfinding is notoriously fickle at the best of times. You’ll have to wait a while for the guard to leave, but if you save this bit of robbery for last there’s also no reason you have to head upstairs again at all.
You can also just kill the Nobleman so you can rob him in peace, but the Reputation loss isn’t worth the reward in this case, and almost never is.
In any event, you can view this as a nice little bit of practice in an advanced bit of grab-and-run if you wish, and the reward for pulling this last heist off isn’t terrible. 86 gold in raw coinage, and the Flamedance Ring sells for another 62 gold, for a total of 148 gold. Speaking of which, it’s probably time to talk about what to buy.
| Items (AR2617) |
|---|
| x=100, y=270 : 4 gold |
| x=170, y=350 : Silver Necklace |
| x=380, y=400 : Potion of Clarity, 36 gold |
| x=420, y=170 : Star Sapphire, (Pearl Necklace, Fire Opal Ring) |
| x=570, y=300 : Flamedance Ring, 86 gold |
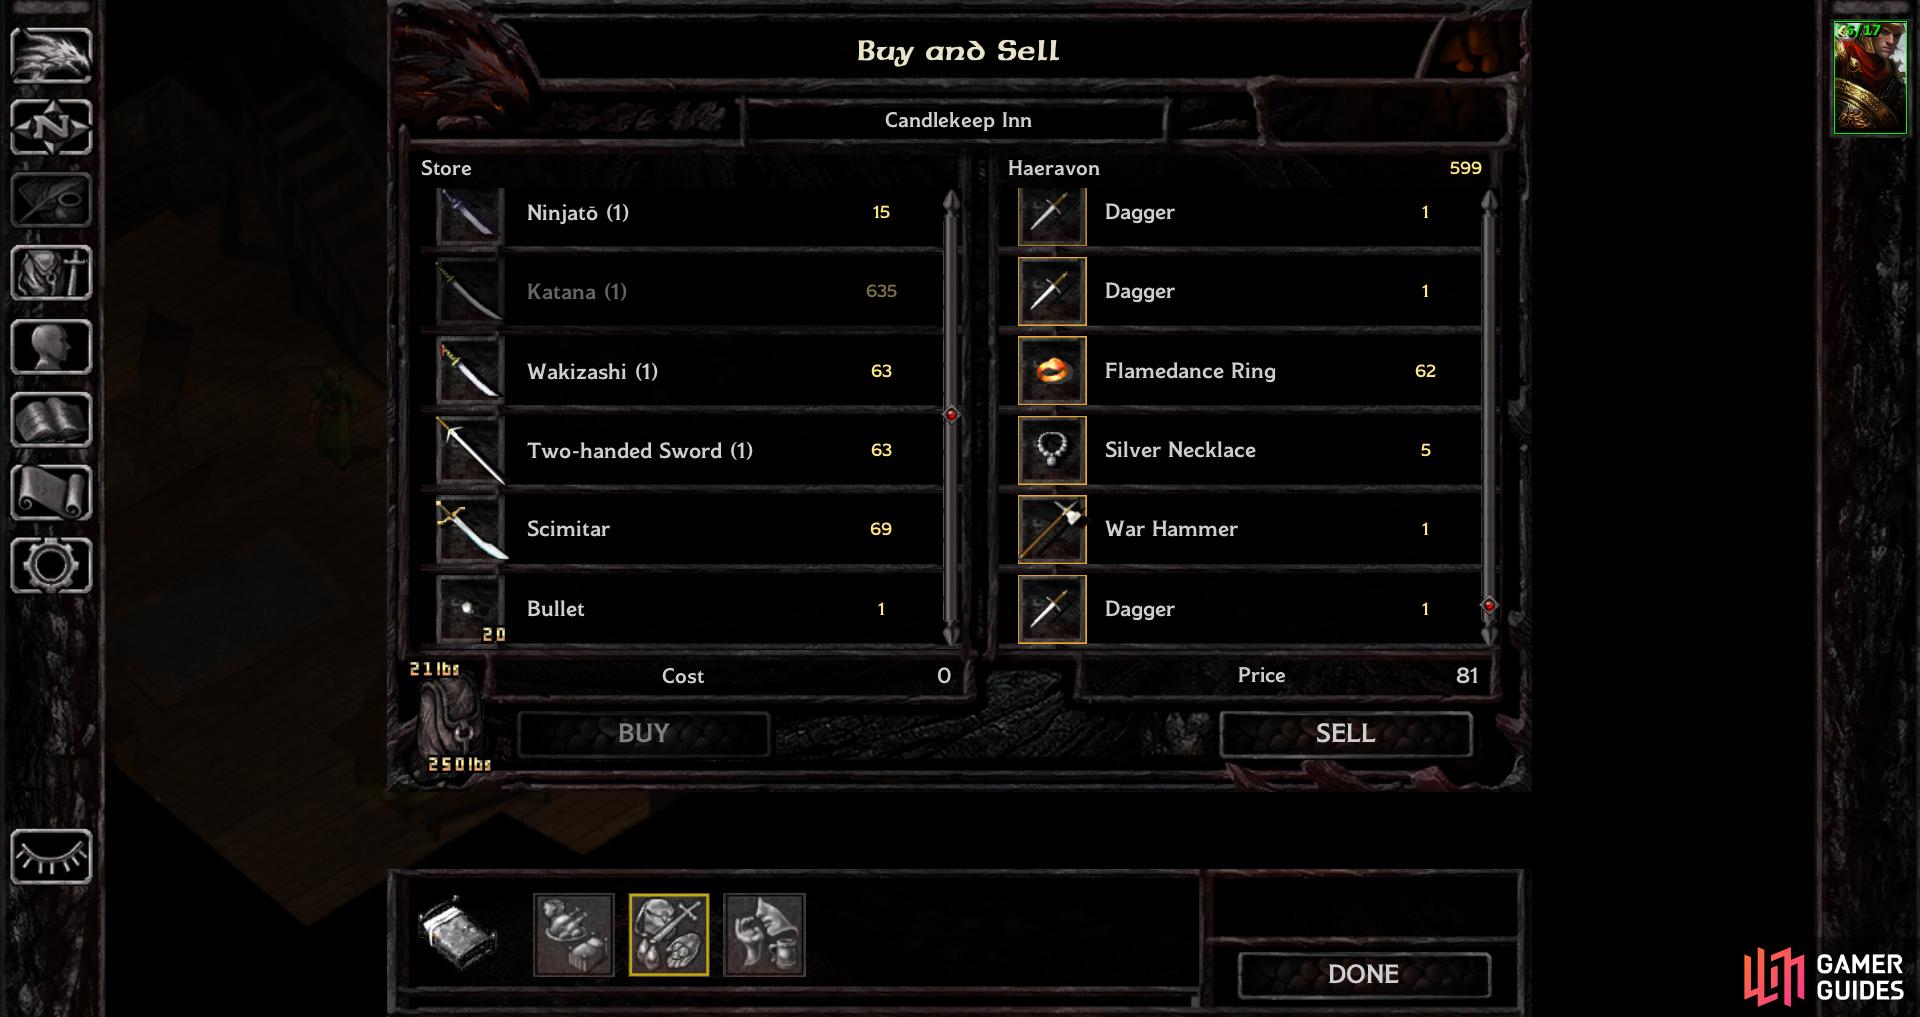
Sell off the loot you’ve accumulated
and buy yourself gear suited to your character class and playstyle.
Winthrop’s Shop
When you’re back downstairs, talk to Winthrop again and sell off any gems, jewelry and weapons you may have picked up around Candlekeep, for what can generously be called pocket change. Every little bit helps, but honestly your starting gold and the money you made from the silly Firebead trick probably account for the lionshare of your resources, provided you didn’t manage to obtain the Star Sapphire, Pearl Necklace and Fire Opal Ring earlier. In any event, we’ll assume everybody has roughly 400 gold to spend, which should be more than enough to purchase your initial gear.
First, if you’re a single-class Mage, you’re already done. You might want to buy a Sling and some Bullets - you don’t want to be in melee combat due to your low Hit Points and Armor Class, and you don’t have a whole lot of spells, so this will give you some way to contribute. Anybody who can use any sort of conventional bow (Shortbow, Longbow or Composite Longbow) should consider buying one and some arrows - they’re by and far the superior ranged weapons in the game, provided you’re proficient with them. Heavier melee types might want to consider buying Splint Mail and a Large Shield (provided you’re not using a two-handed weapon), although your weapon type should match your proficiencies. Last and not least, if you can wear a Helmet, buy one. It’ll prevent critical hits, and at this point in the game almost any critical hit can force you to reload. One gold coin isn’t a lot to pay for critical hit insurance.
When you’re done up here, you’re done with the Candlekeep Inn.
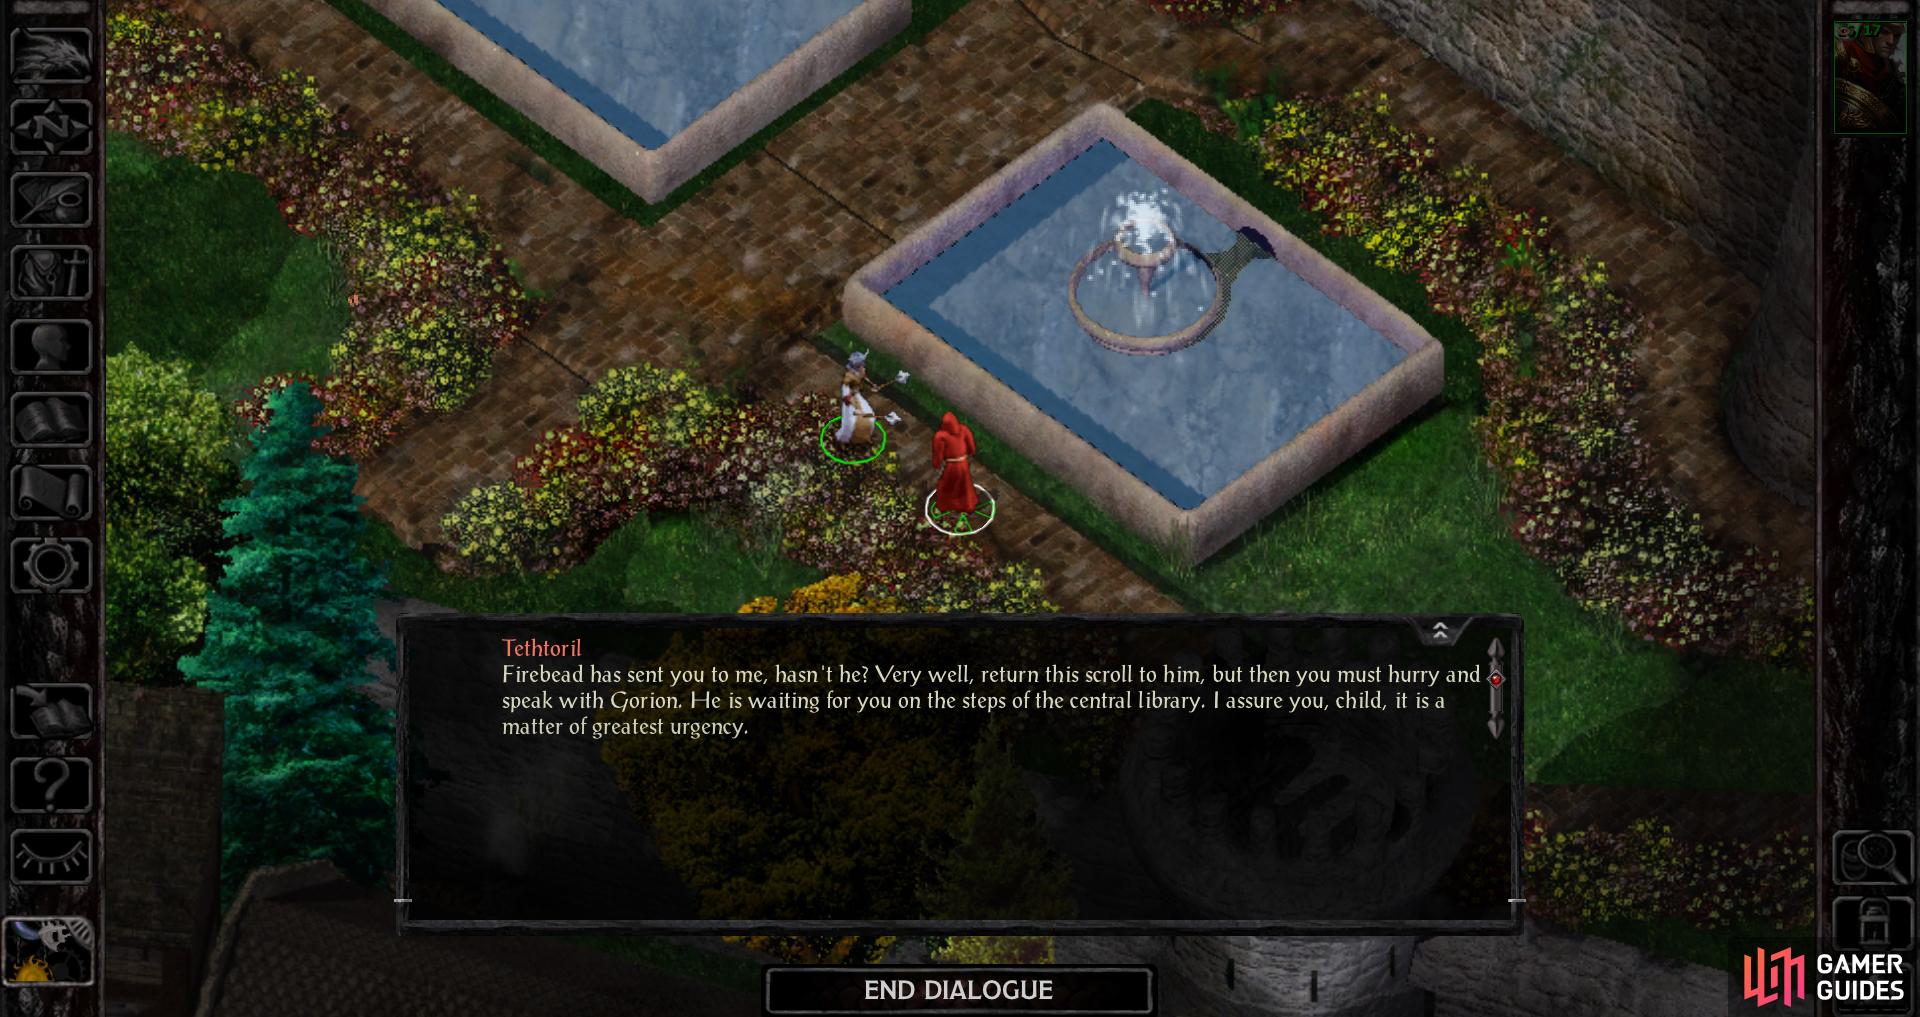
Wander around the keep until Tethtoril spots you, at which point he’ll hand over Firebead’s scroll.
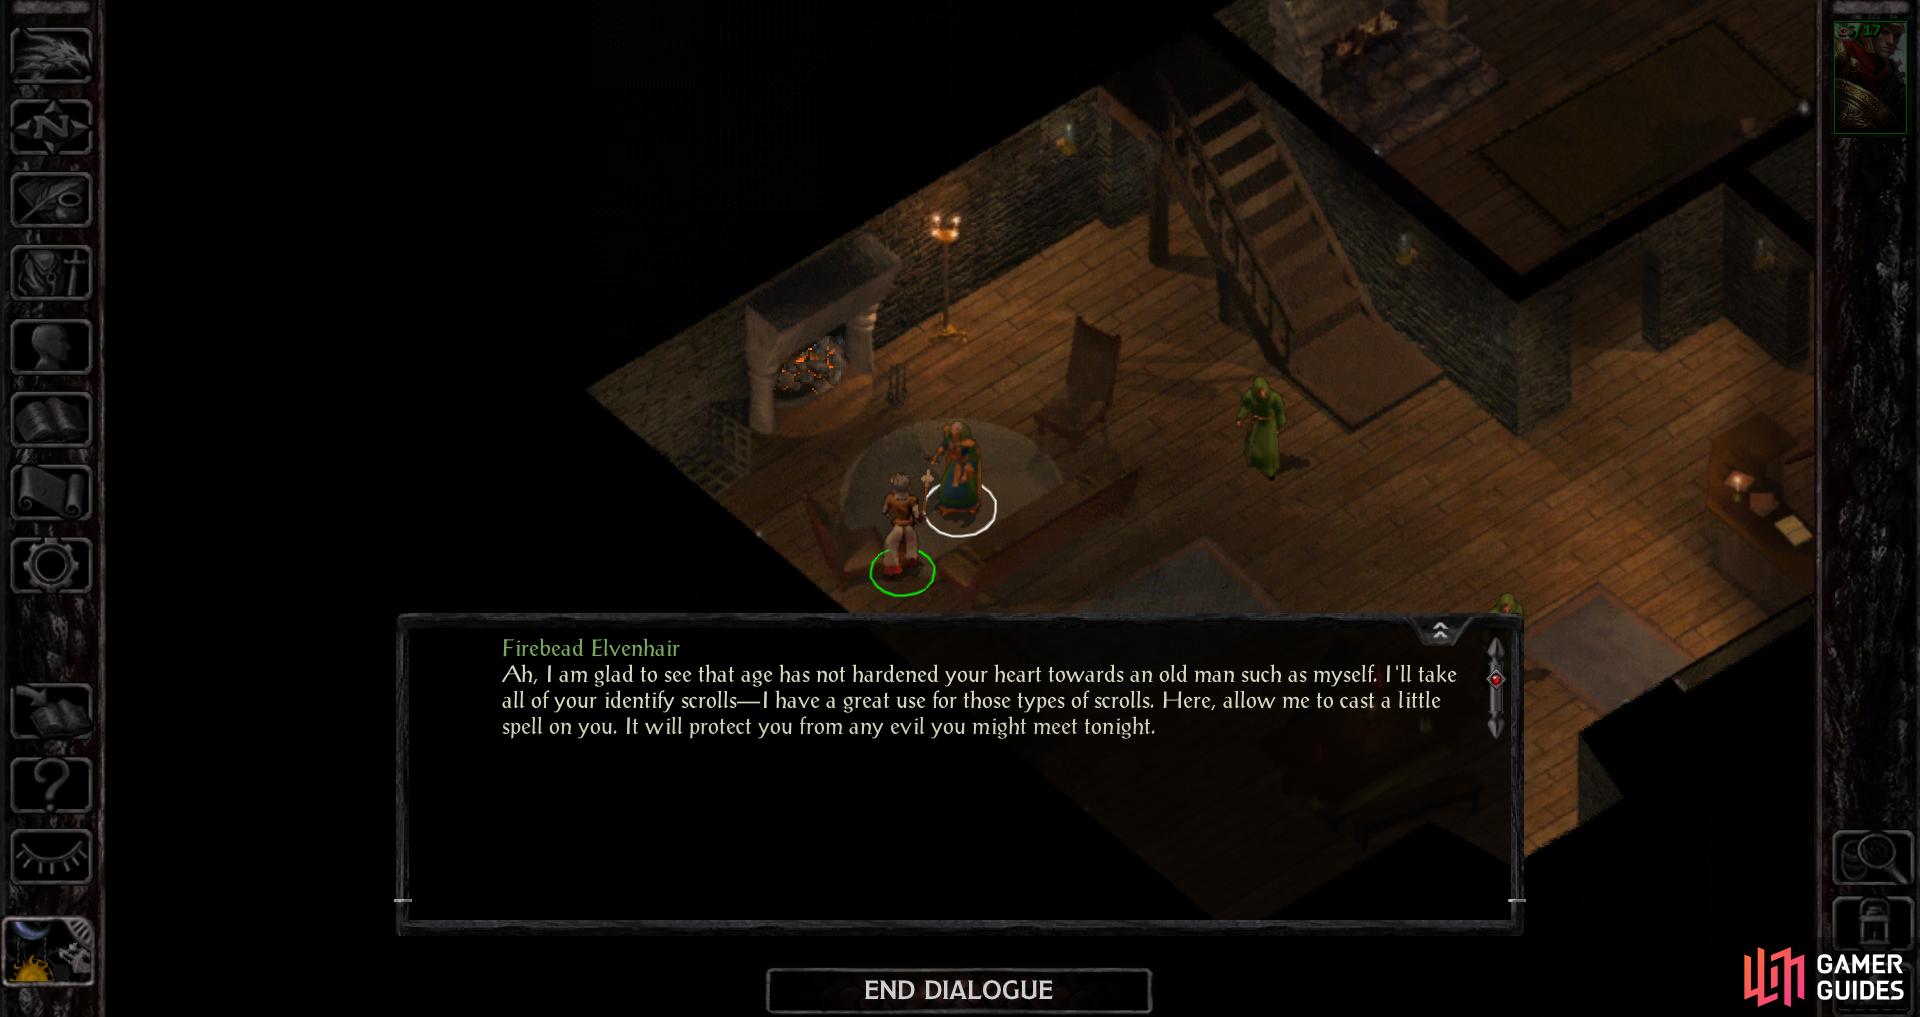
Return the scroll to Firebead for an honestly underwhelming reward.
Firebead’s Scroll
Only one thing left to do before you leave - find Tethtoril and retrieve Firebead’s scroll. He can be found wandering around the central area of Candlekeep, near the… actual keep after which this place is named. While his location varies, he’ll initiate dialogue with you if he sees you, giving you the scroll you’re after. Once this Scroll of Identify is in hand you’ll need to return to Firebead Elvenhair at the Candlekeep Inn. He’ll give you a meager reward and cast Protection From Evil on you. Oh boy. Or you could just scribe the scroll for yourself, but such scrolls are common enough you shouldn’t feel compelled to do so.
| Objective | Reward |
|---|---|
| For giving Firebead Elvenhair his scroll | 50 XP / Potion of Healing |
With that, you’re ready to seek out Gorion and skadoodle. Along the southwestern end of the keep you’ll find a Chanter and some directional “Voices” chanting about some prophecy, which certainly has nothing to do with you…
“The Lord of Murder shall perish, but in his doom he shall spawn a score of mortal progeny. Chaos will be sewn from their passage. So sayeth the wise Alaundo.”

At the southern end of the keep you’ll be pestered by Imoen, whose snooping clearly revealed more than she’s willing to share.
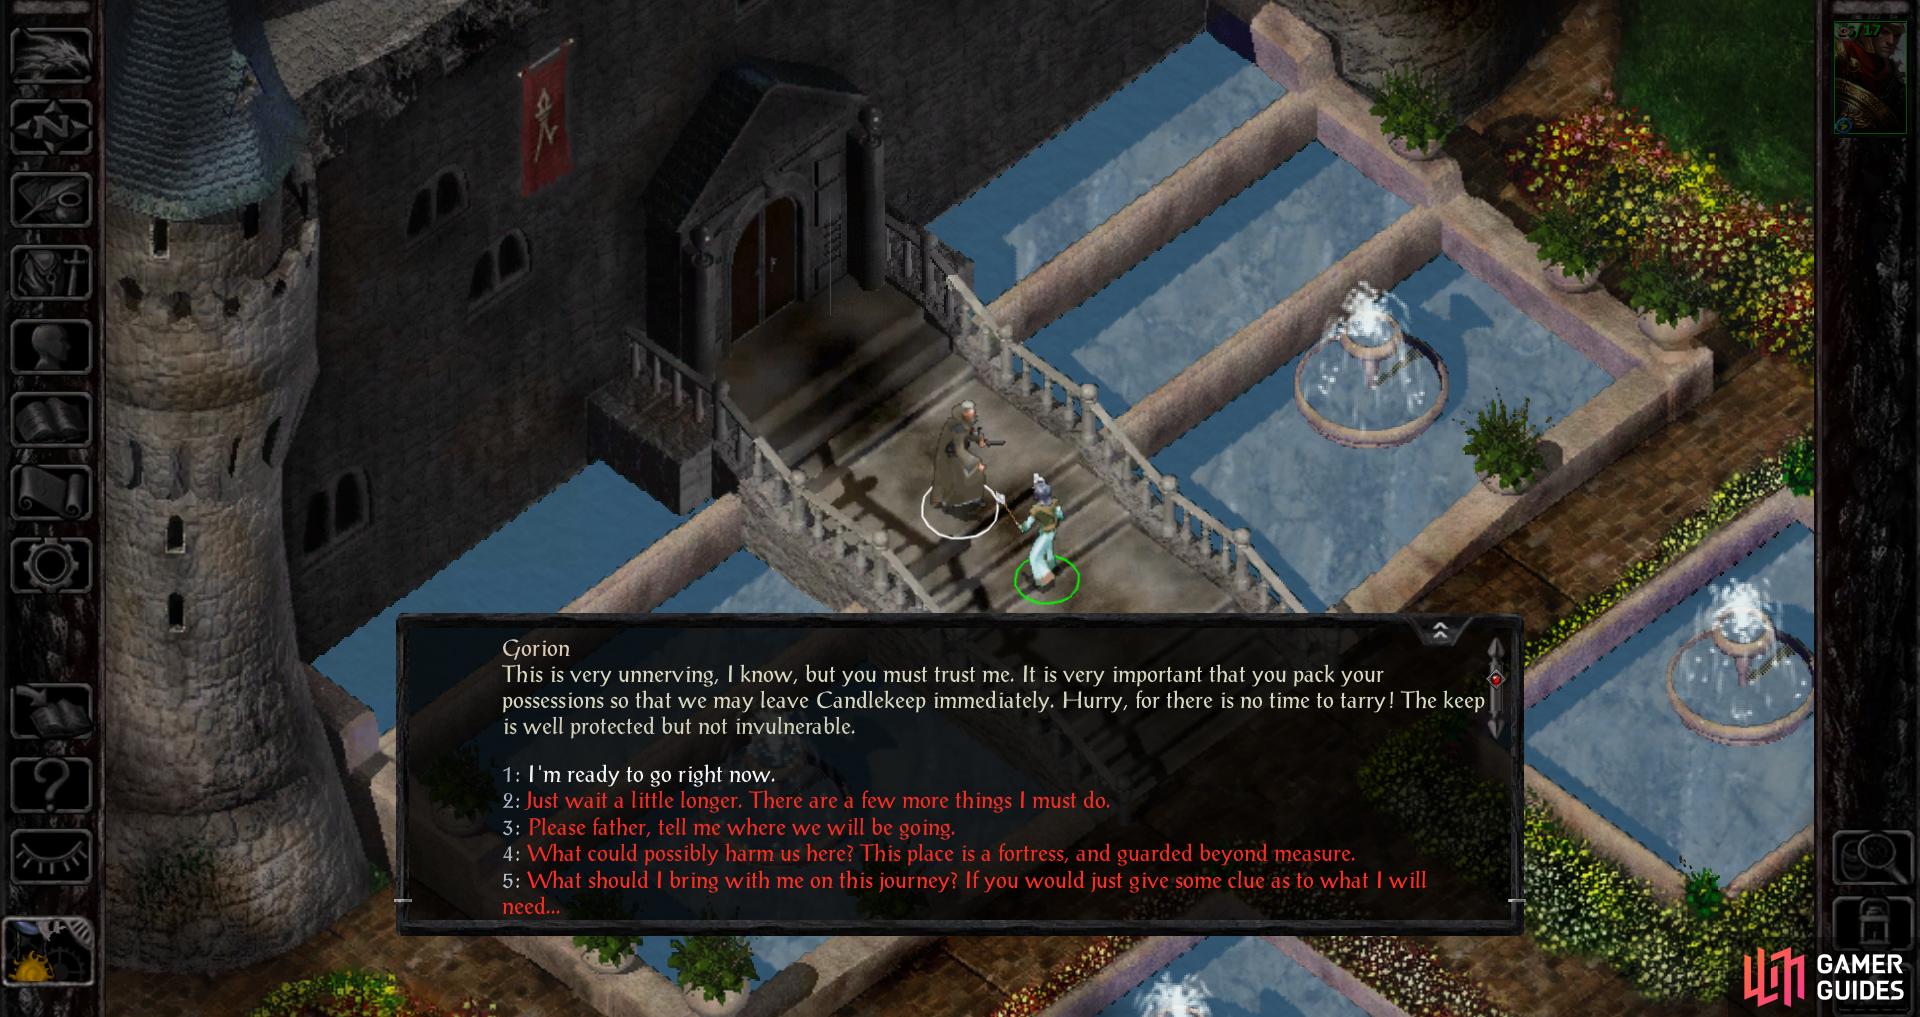
When you’re done in Candlekeep, talk to Gorion and abandon your home for the unpredictable road.
Just beyond the southern gate to the keep - in front of Gorion, in fact - you’ll find Imoen. If you plan to follow the guide’s suggestion for a good-aligned party, you might as well get used to her. There’s a good chance she’s going to be your Thief through the game… and she’ll play a decidedly more important role in the sequel. Respond to her as you wish, it doesn’t make a difference here.
Once everything is done in Candlekeep, talk to Gorion (x=2700, y=1760). If you’re ready to go, tell him so, and with that you’ll be off to Chapter 1. As you leave your father will tell that if something happens and you find yourself separated from him (what are the odds of that happening?), you should head to the Friendly Arm Inn and meet with two of his friends: Khalid and Jaheira.
No Comments