| Items of Interest | Area | Location |
|---|---|---|
| Ring of Princes +1 | AR2800 | x=1005, y=1115 |
An Especially Cruel Dawn
Watch the scenes that follow, and the Chapter 1 text, after which you’ll be pestered by Imoen, who joins your party. You might as well take her along for now, even if you don’t plan to keep her, especially since she comes to you with three Potions of Healing, an Oil of Speed, and a Wand of Magic Missiles with ten charges.
Gorion’s advice was sound - and an obvious death flag. Heading to Friendly Arm Inn should be a priority. There’s strength in numbers, and right now you’re terribly vulnerable.
To go to new areas, you simply have to reach the edge of the map and click when the icon turns into a wheel… assuming you’re at an edge that actually goes somewhere. Naturally that means in every area you’re in, you’ll want to explore at least to the four edges and click to leave from each applicable edge, as this is how you ‘discover’ new areas, which appear on your map after attempting to leave from a side in an adjacent territory.
Don’t just take our word for it, though, if you attempt to exit this wilderness area (AR2700) via the southern edge of the map you’ll discover High Hedge (AR3200) to the south, while if you exit to the east you’ll discover another wilderness area (AR2800). Since the Friendly Arm Inn is to the northeast, you’ll naturally want to head east for now.
For more information, see below, after which it’ll be time to explore this area.
Character Info: Imoen
| STR | DEX | CON | INT | WIS | CHA |
|---|---|---|---|---|---|
| 9 | 18 | 16 | 17 | 11 | 16 |
At a glance, Imoen is a pretty damn good Thief, with Dexterity (18) and Constitution (16) scores well-suited for the profession. Her Strength (9) means she won’t be much use in melee combat, but she can contribute well enough in combat with her Shortbow.
That said, using Imoen as a mere Thief is an atrocious waste of a character, and it’s no accident she’s a Human with an Intelligence score of 17. These two factors allow her to dual-class into a Mage at a later date, and while there are some growing pains, once her Mage level eclipses her old Thief level, she’ll have all the abilities of a Thief - the ability to use a bow and Thief skills - and those of a Mage. You should ultimately seek to dual-class her when she hits 6th level as a Thief, and if so she’ll end the game as a Lv.6 Thief/Lv.9 Mage, with not a single level wasted.
She’s far from the most powerful Mage in the game, but she’s no slouch, and the fact that she can pull double-duty as a Thief means you need not worry about finding one elsewhere. These two things combined - and how important she’ll be to the story in the sequel - make her an easy pick for the good party, who will keep her around for the rest of the game… and the majority of the next game, too.
Her Intelligence is sufficient for dual-classing, but low enough that she can’t learn every spell natively (she can’t learn 8th-level spells - definitely not a problem until the sequel), and she may be limited in the number of spells she learns (14 spells per spell level), but if you keep some Potions of Genius around for when you need them, it shouldn’t be a problem. These problems are less severe than they seem, as it’ll be quite a while before she dual-classes.
Dump all her Thief skill points into Find Traps until it’s 100, then put the rest into… well, either Move Silently/Hide in Shadows or Open Locks. She won’t ever be a great sneaker, but it could help getting the drop on bad guys from time to time. When she needs to use Pick Pockets, you’ll have potions to help with that, although raising her Pick Pockets will reduce the number of said potions she needs to chug. It’s honestly more of a matter for the sequel, and her stats are reset for that anyways. In this game, you can count the number of times it’s worth using Pick Pocket on one hand, and you can usually just save scum that.
She comes Proficient in Shortbows and Short Swords, but you may want to add another good weapon before she dual-classes… Long Swords or Scimitars, for example. Not like it matters, she’ll probably never backstab after she dual-classes. As for after she dual-classes, well… her proficiencies really don’t matter much. The whole goal is to get back her Thief levels so she can return to shooting things with her bow. In the meantime, start out with Slings so she can have some ranged presence in those awkward first Mage levels.
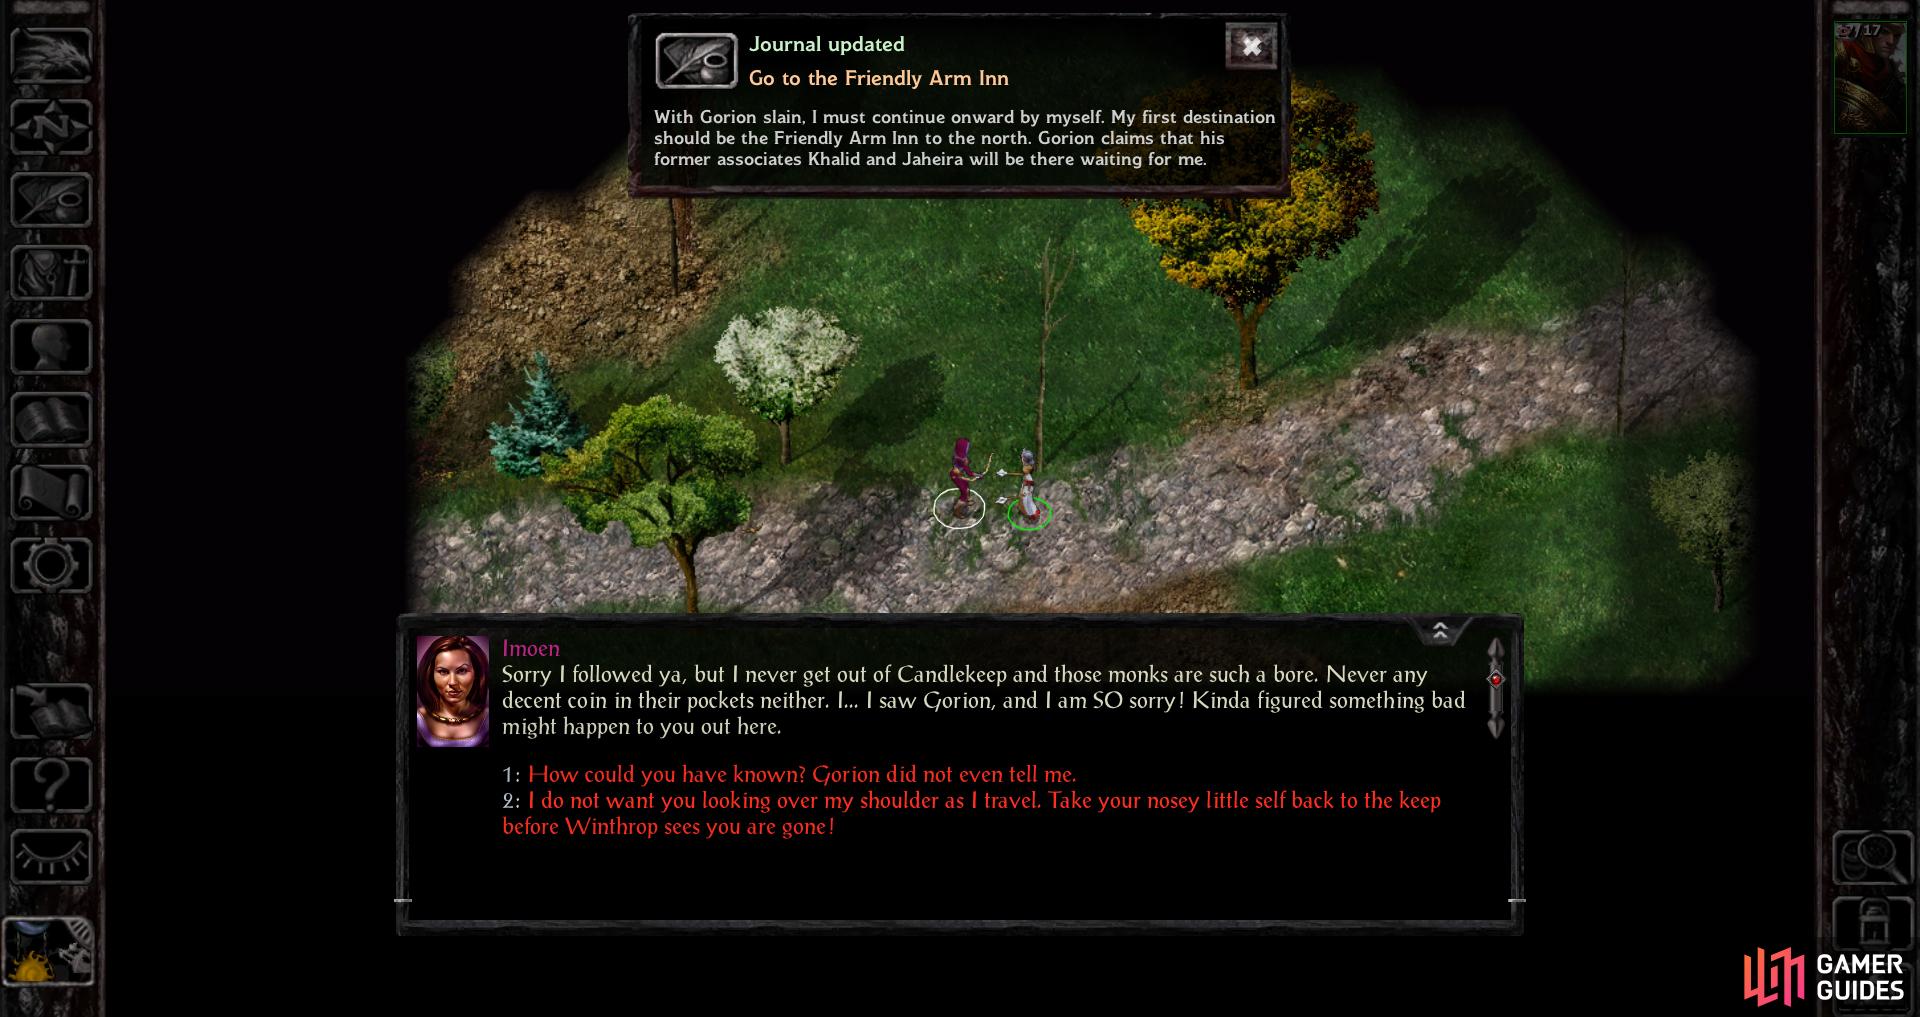
After the dawn breaks, Imoen will join your party.
Return to the site of the fight and loot Gorion’s corpse and the bodies of the foes he vanquished.
Looting the Dead
First up, you might as well return to the scene of Gorion’s last stand and pick over the corpses. You can show respect for the dead by letting their equipment rot, or by avenging Gorion’s death - we like to believe he’d prefer the latter. Head north and you’ll find the bodies at roughly (x=3150, y=1370).
On Gorion you’ll find Gorion’s Scroll, a note warning Gorion of unspecified dangers signed by one old “E” (who could that be?). He’ll also drop the Belt of Antipode, a bit of a mixed bag, as you’ll take twice as much fire damage, but in return you’ll gain you 100% cold resistance. There are areas where cold damage will appear, but fire is a much, much more common element.
The loot Gorion’s enemies dropped is somewhat random, but you should certainly be able to pick a suit of armor off a Thug for Imoen, and we nab a spare Morning Star for our good protagonist. Good thing a weapon used by an Ogre can also be used by a humanoid half the size.
Xzar and Montaron
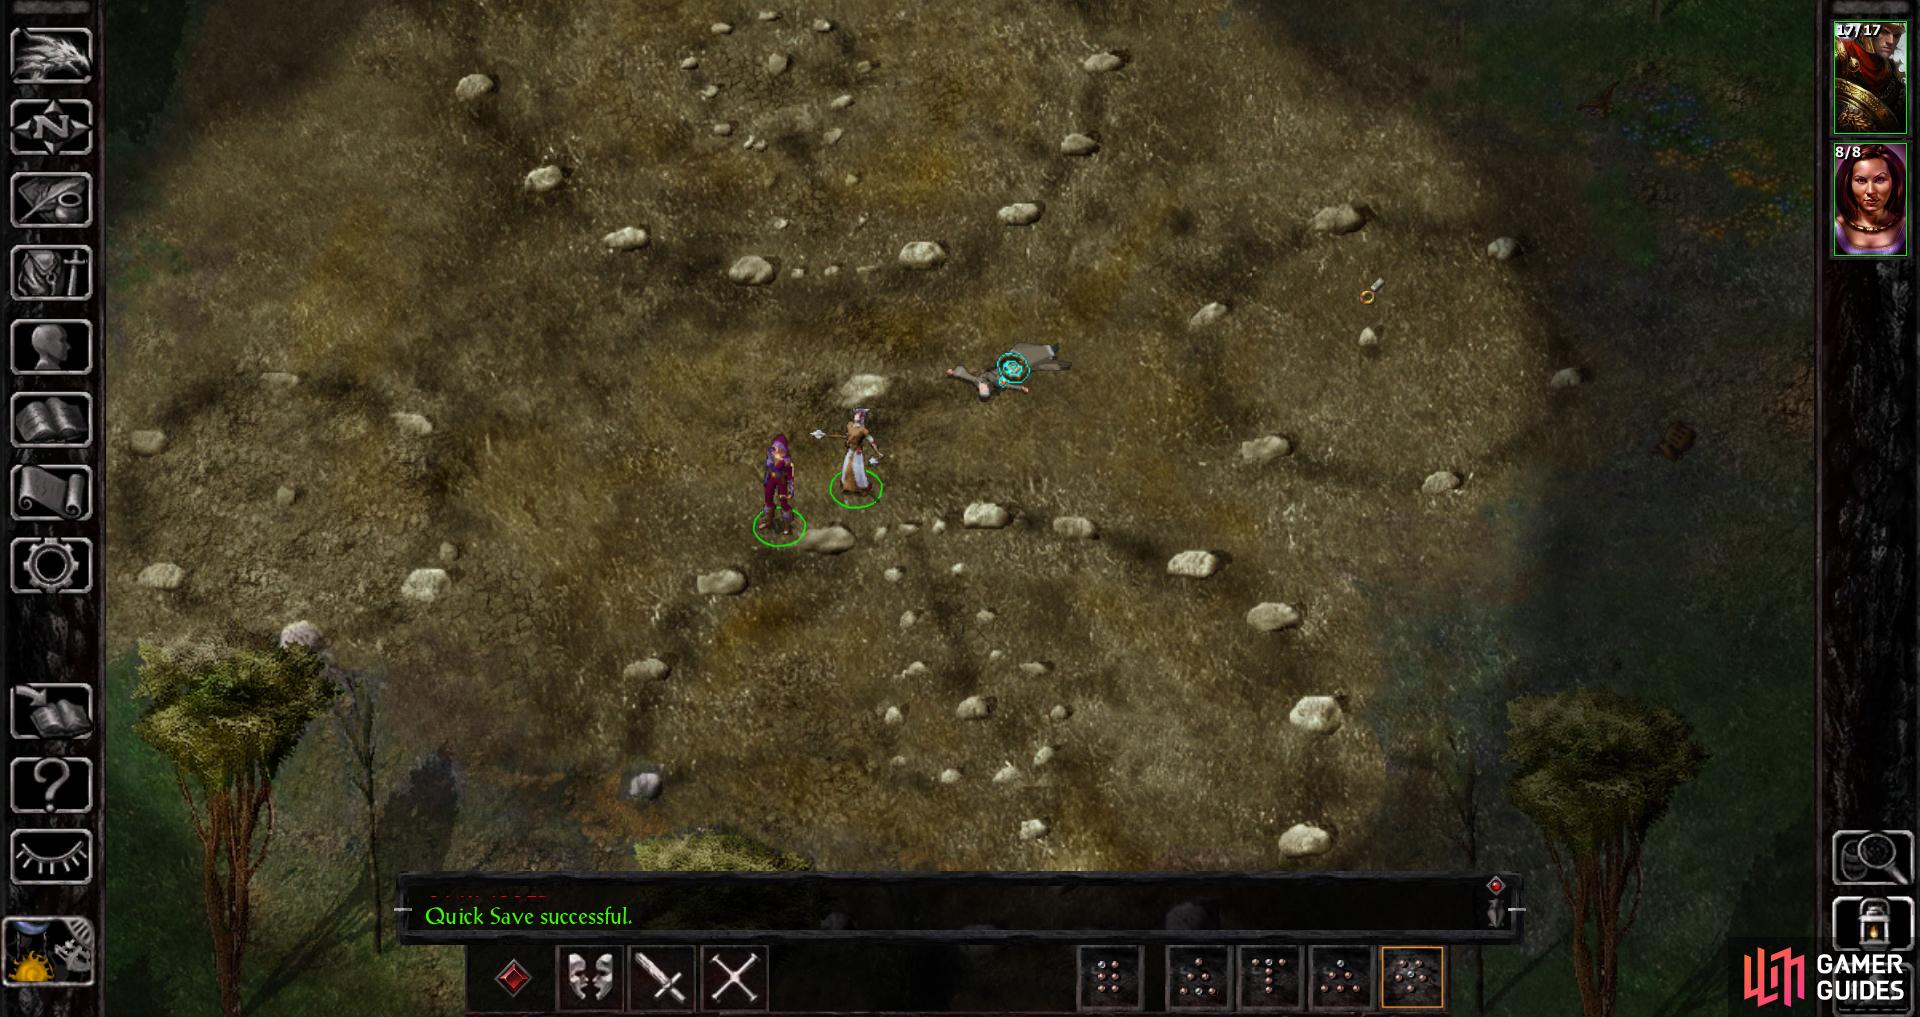
Besides that there’s honestly not much to this map. If you wander around you may run afoul of Wolves and Gibberlings. Gibberlings are cheese, but Wolves can be surprisingly brutal to an unprepared party of two, especially if neither of those characters are heavily-armored Fighter-types. If you’re in trouble, just use Sleep spell to settle things, which is a wonderfully over-powered spell for… well, for the weakest of foes, anyways. If you explore along the cliffs to the west you may run afoul of the odd Black Bear, which will remain docile so long as you keep your distance. This is another fight you probably don’t want right now.
That being the case, head back south to the road where Imoen joined you and follow it east and north. Along the way you’ll bump into an inexperienced hermit named Kolssed (he hasn’t gotten the whole “isolation” part down just yet, poor thing), and while this interaction isn’t particularly meaningful he will tell you of two unfriendly-looking folks further along the road. If you’re civil he’ll also advise you to gather some companions (…and venture forth?), as adventuring is a lot easier with a party.
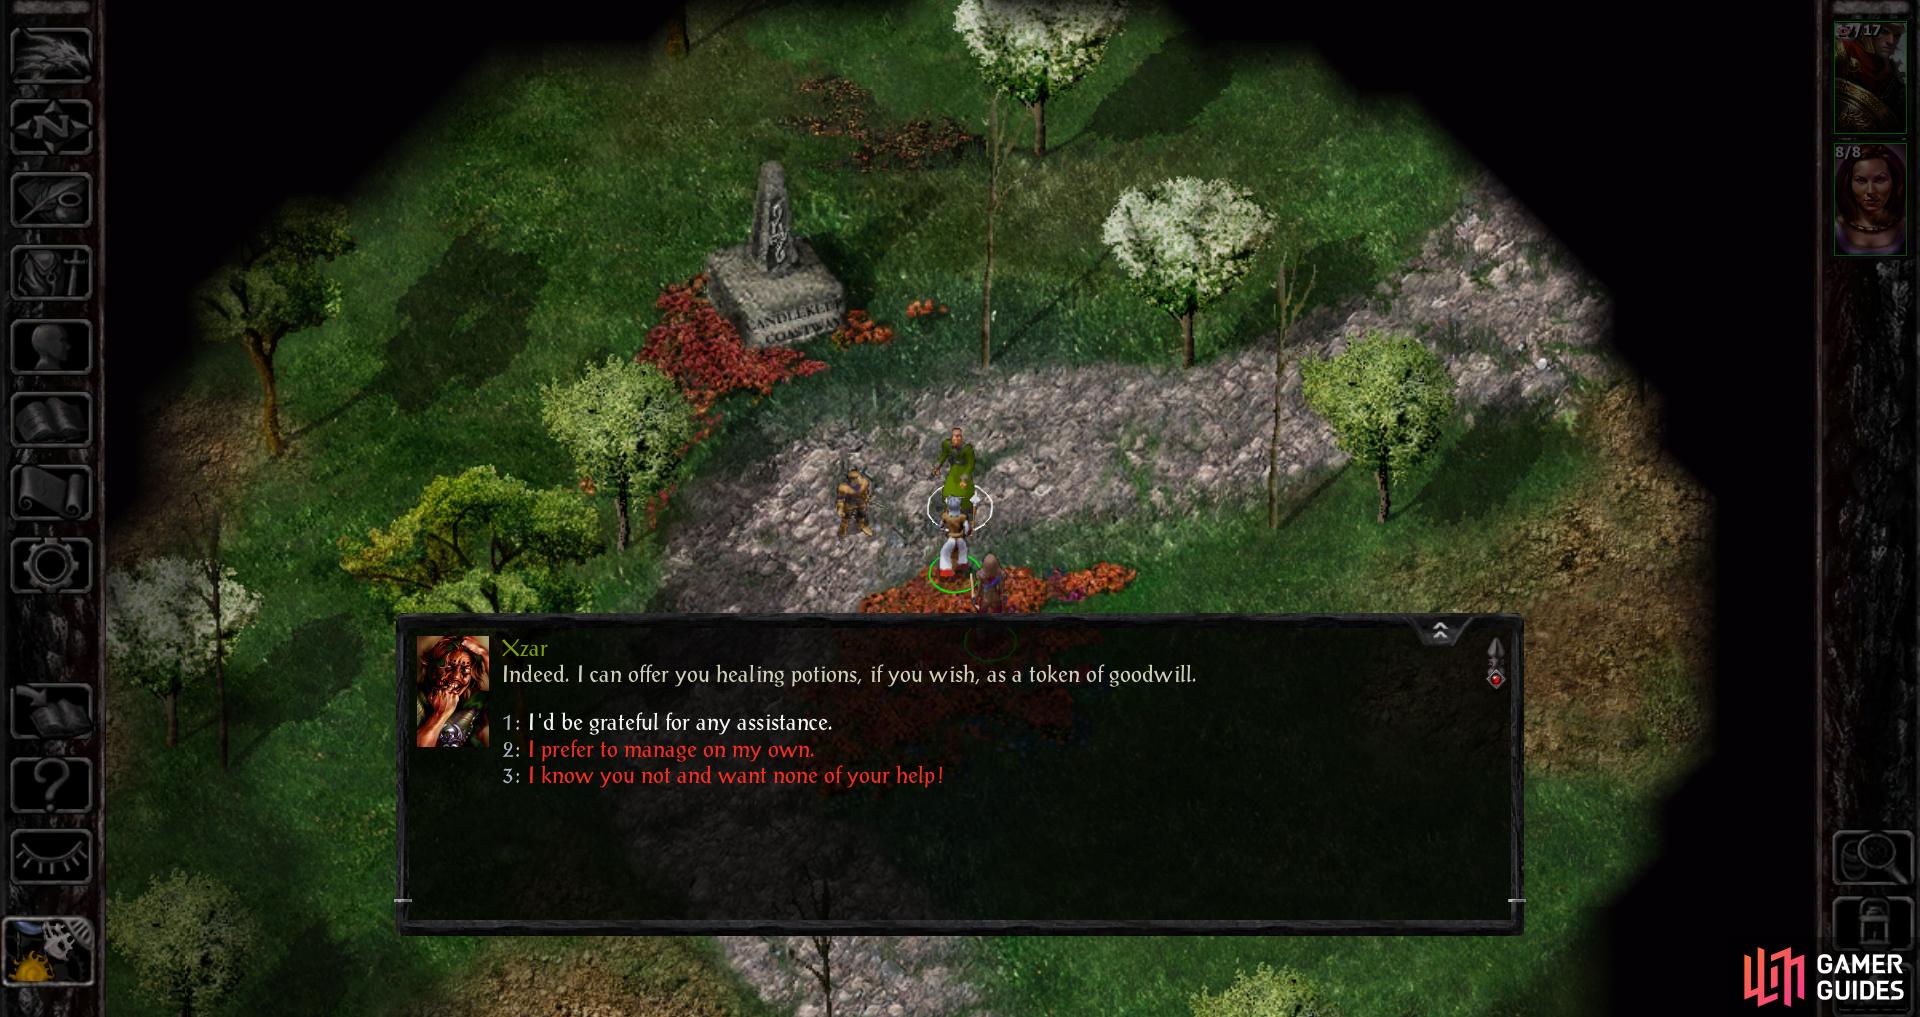
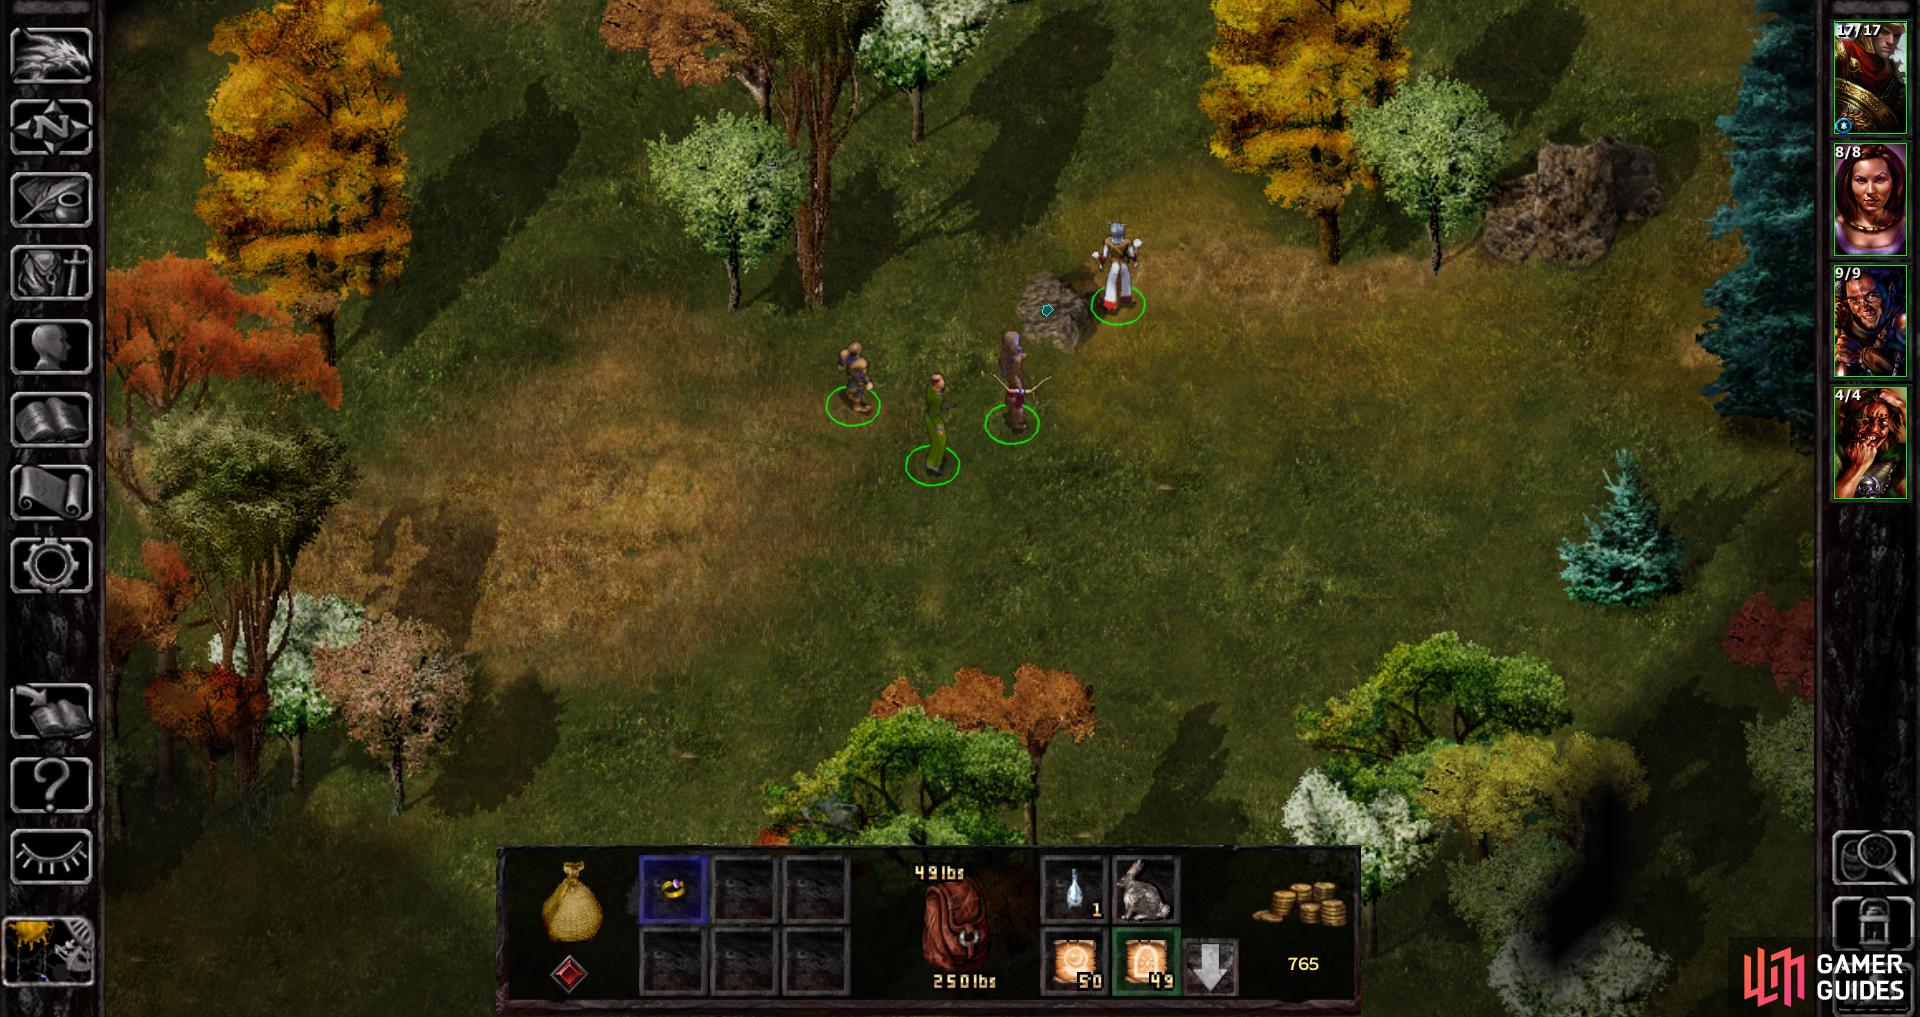
Keep following the road and you’ll run across Xzar and Montaron await at (x=4500, y=2700). At a glance, they’re friendly enough, even handing over a Potion of Healing if you accept their aid (“I’d be grateful for the assistance.”). They’ll then try to get you to head to Nashkel with them, which is a destination you’ll be heading to eventually anyways.
Regardless of your alignment pick them up for now. Make sure to relieve Montaron of his Oil of Speed and Potion of Healing, and Xzar of his Scroll of Larloch’s Minor Drain and Scroll of Chill Touch. You’ll put them to better use.
Now that you have a party - such as it is - you can consider exploring the area a bit more. Montaron isn’t quite a viable front-liner, but he’ll serve well enough, and Xzar’s Larloch Minor Drain spells are… well, something. Save frequently and don’t pick fights if you don’t need to.
Character Info: Xzar
| STR | DEX | CON | INT | WIS | CHA |
|---|---|---|---|---|---|
| 14 | 16 | 10 | 17 | 16 | 10 |
Xzar is a perfectly fine Necromancer. Really, he is. He’s got some downsides, sure, like his low Hit Points (due to an anemic Constitution score) which is further exacerbated by his inability to cast Illusion spells (a limitation of his Necromancer specialization). Together they combine to make him a rather squishy Mage - even by Mage standards! - as many low-level protective staples like Blur and Mirror Image are unavailable to him, and at higher levels he’s excluded from Improved Invisibility. Anything with a ranged weapon is a dire threat to him at basically all levels of play.
That alone makes him a worrisome proposition, but the real nail in Xzar’s coffin is Edwin. Edwin exists, and not only will Edwin have 50% more Hit Points on average (at the acceptable loss of a trivial bit of Armor Class), but Edwin gets two bonus spells per spell level and is a Conjurer - a far less compromised specialist Mage. The best spell Edwin is excluded from is Identify, which is unfortunate, but doesn’t compromise in him combat.
If you do bring Xzar along, he’s a pretty simple build. Get him proficiencies in Slings so he can stand back and pelt foes from afar and you’re fine.
Character Info: Montaron
| STR | DEX | CON | INT | WIS | CHA |
|---|---|---|---|---|---|
| 16 | 17 | 15 | 12 | 13 | 9 |
He’s got fairly decent stats at a glance… for a Halfling. His Strength is, to be generous, okay, but his Dexterity and Constitution are high enough to give him some bonuses to Armor Class and Hit Points, respectively. That said, none of his stats are really high enough to make him recommendable as a front-liner, especially since he’d need to go around lightly armored to keep his Thief abilities, which will result in him getting chewed up by any remotely competent enemy in melee combat.
While the good party has no use for him in the long term (Imoen ftw), he’s a perfectly fine archer for the evil party, especially if you need somebody to fill that Thief role. His Fighter levels makes him superior to Safana and Skie in combat, in spite of his slower growth as a mutli-class character. A dual-classed Shar-Teel will make a superior Fighter/Thief in the long run, but she’s more difficult to obtain and has that unfortunate dual-class down-time, which isn’t quite as annoying with a Fighter-to-Thief transition as it is with a Thief-to-Mage.
If Montaron is your primary (read: only) Thief, get his Find Traps score to 100, which is really why you need a Thief in the first place. After that, freely invest as you please. Hide in Shadows and Move Silently will enable him to perform the odd sneak attack (with some luck), but for such a tactic to be truly effective you should probably restrict yourself to a protagonist of your own design, as its high-risk nature makes it better suited for a specialist with high stats.
As for weapon proficiencies, get Longbow as soon as possible and Specialize (two ranks) in it. Afterwards you can consider boosting his proficiency in any two-handed weapon, as this will allow him to participate in melee combat without necessarily exposing himself to enemy counterattack.
(1 of 3) Follow the road and you’ll find Xzar and Montaron. While morally dubious, there’s strength in numbers.
Chase and the Diamond
From where you found Xzar and Montaron, follow the road north and use the Tab key to scout out for loot. At (x=4420, y=1960) you’ll find a Diamond hidden in the tree - an early lesson in why it pays to be vigilant. This Diamond will sell for 500 gold, so it’s well worth the trivial effort to grab.
The most interesting bits of this map are behind you, but if you continue north you’ll find Binkos, a messenger who bears news of a caravan attack near Beregost. It doesn’t seem to be an isolated incident.
Over at (x=1460, y=2410) you’ll find a Noble named Chase, who threatens to effect his demise by leaping off the nearby cliffs. Whatever your response, Chase will find a newfound will to live, although it’s doubtful whether he learned any meaningful lessons.
| Items (AR2617) |
|---|
| x=4420, y=1960 : Diamond |
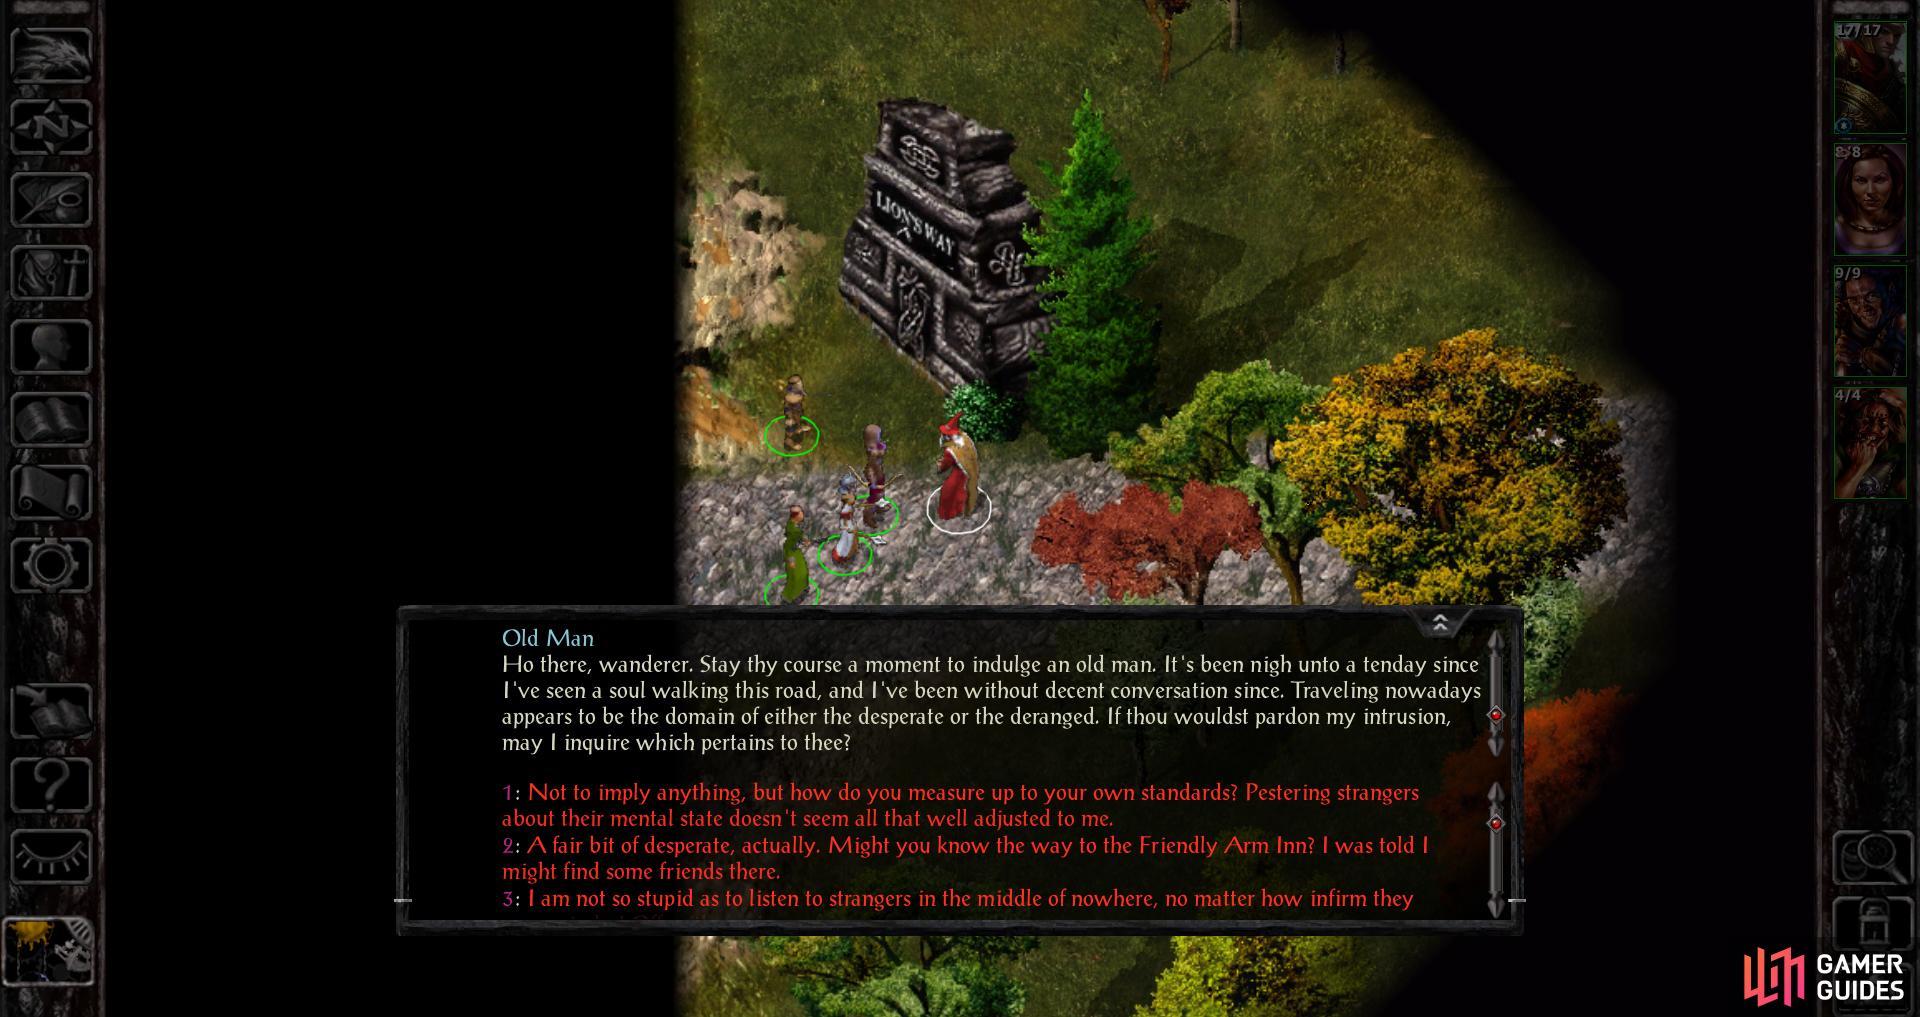
When you enter AR2800 you’ll be pestered by an inquisitive old man.
Answer how you wish, then head northeast to find a Ring of Princes +1 hidden in a rock.
To the Friendly Arm Inn
When you’re done searching around this area, it’s time to head to the Friendly Arm Inn. Exit anywhere along the eastern end of the map and you’ll reveal another wilderness area (AR2800), through which you must pass to reach the Friendly Arm Inn. That said, you’ll want to keep your stay here short, as it’ll be much easier to clear when you’ve got a full party.
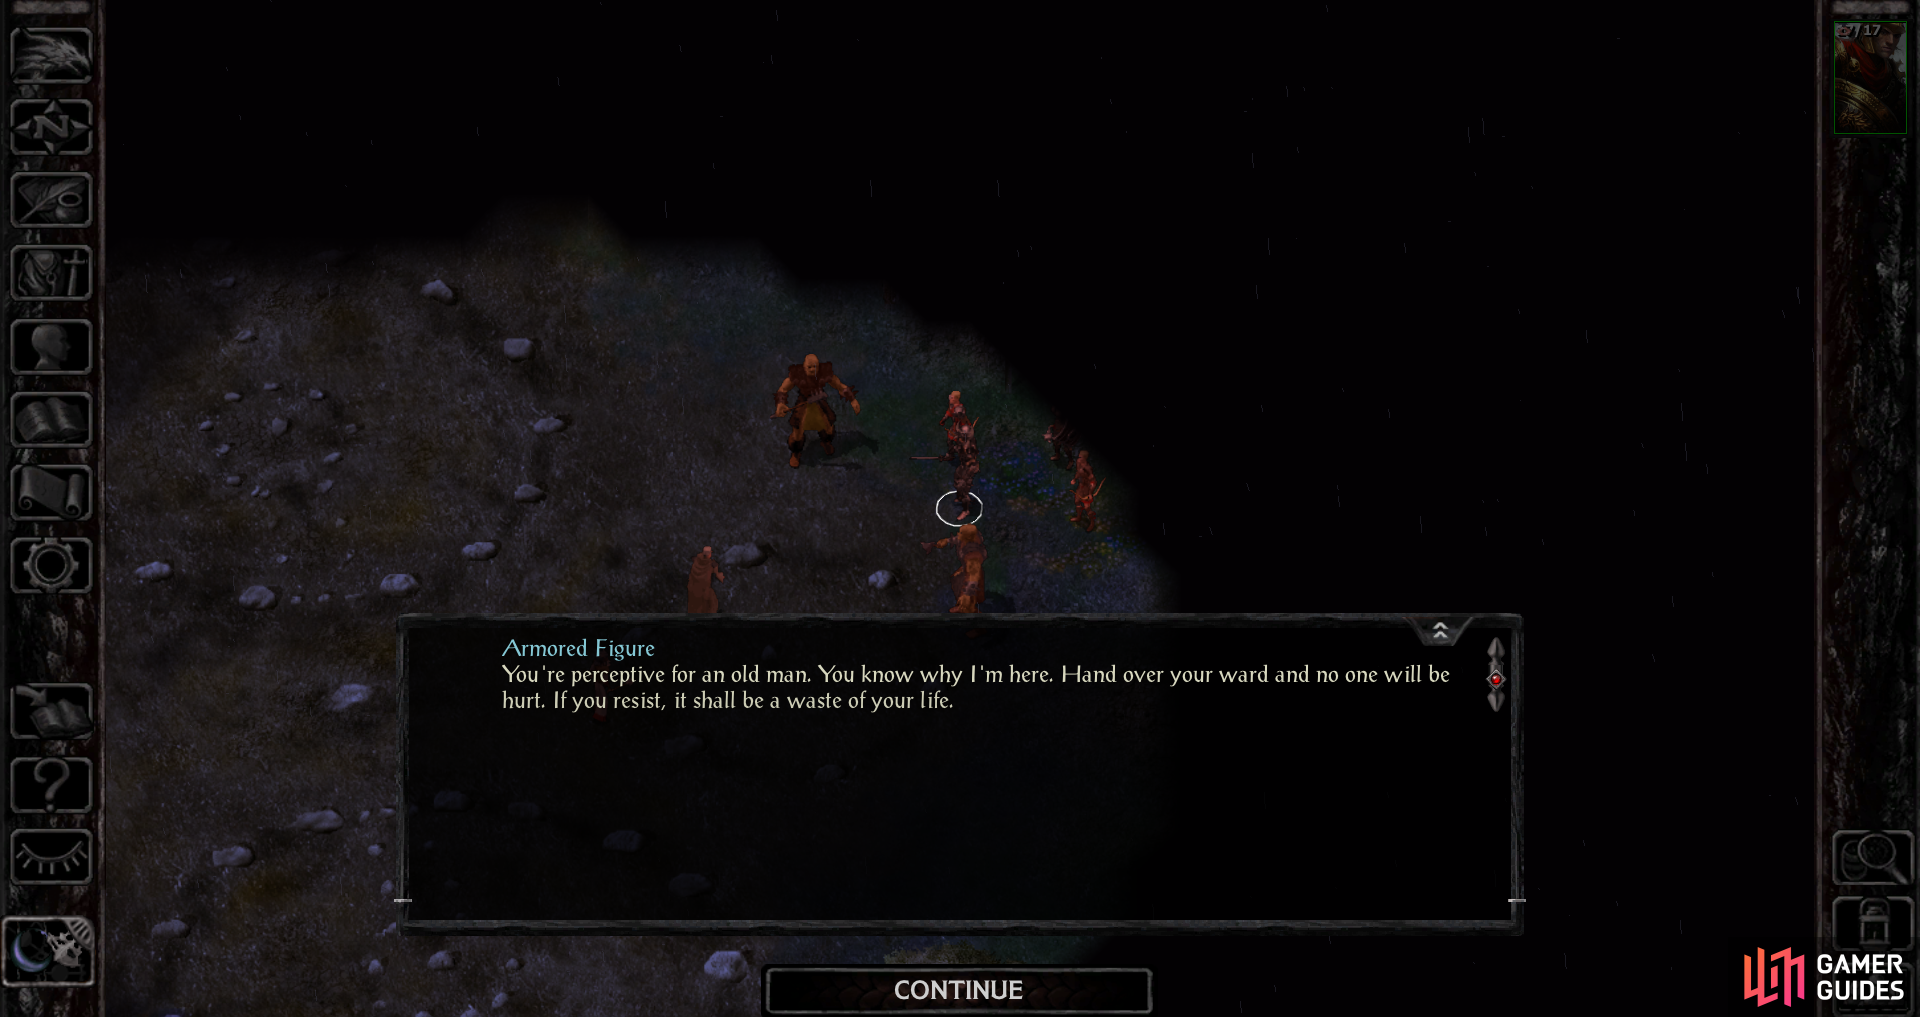
Upon entering this area you’ll be bothered by an “Old Man”, whose appearance should be iconic enough for anybody familiar with the Forgotten Realms. Answer him as you please and when he leaves you’ll need to make your way through this area to the north. You can just follow the road east, then north to get to the northern edge of the map, but there’s profit to be had by heading northeast from where you start, as you can find a rock which has a hollow containing a Ring of the Princes +1 at (x=1005, y=1115).
While you may not be able to identify it just yet, it’s a decent little accessory that will give you a one-point bonus to Armor Class (that is, it’ll reduce your Armor Class by one). It’ll become obsolete eventually when you start finding enchanted armor, but in the meantime there’s no good reason not to wear it. We personally stick this on our protagonist, who isn’t going to be wearing any armor for quite a long time.
Once you’re done searching through stones head east until you rediscover the road, then follow it north. Along the northern stretch of the road you’ll run across Aoln, a solitary hunter from whom you can learn about local beasties, for what little good that’s worth. Answer him however you please, as this counter is entirely inconsequential, and continue north. There’s more to do here in this area, but again, you’ll be better off continuing to the Friendly Arm Inn and returning when you have a full party.
Speaking of which, exit to the north and you’ll discover the Friendly Arm Inn.
| Items (AR2800) |
|---|
| x=1005, y=1115 : Ring of Princes +1 |
No Comments