
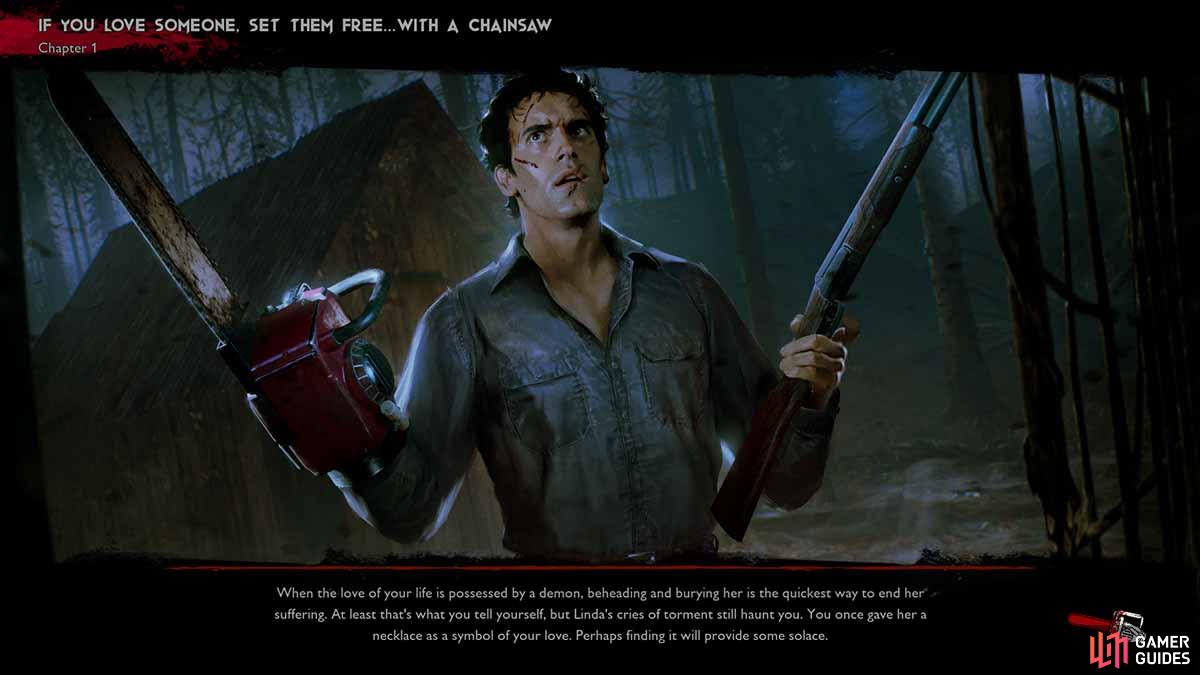
Evil Dead: The Game has an entire solo campaign to play through. This page will guide you through the first mission “If You Love Someone”.
Mission: If you love someone, set them free… with a chainsaw
Background:
- When the love of your life is possessed by a demon, beheading and burying her is the quickest way to end her suffering.
- At least, that’s what you tell yourself, but Linda’s cries of torment still haunt you. You once gave her a necklace as a symbol of your love. Perhaps finding it will provide some solace.
Mission unlocks:
- The Knowby Tapes: Part 1
- Ash Skin (Ash vs The Evil Dead)
Walkthrough
Come get some.
The first single-player side-mission sets you off aas Ash on a quest to locate Linda’s necklace in a reenactment of some classic Evil Dead 2 action. If you are a fan you will know that in the movie Ash buried Linda’s head and ultimately here you are going to have to find said head and get it back to the cabin.
You start up in the house in the woods and are armed with a long gun and chainsaw, which, while suitably gore-inducing, can be a bit of a pain to wield accurately in a tight spot.
The room you begin in is interesting enough, there is a rattling trap door in one corner that is chained shut and seems to be keeping some grim entity in which turns out to be the level’s boss Henrietta. Anyway, ignore it and it’s constant jabbering about being able to smell your fear and pick up the two matchbooks and box off ammo in the room. Search the other rooms before leaving and collect the cola and the other gun ammo - you are going to need it. You should be able to find 12 shells before you leave if you check all the rooms.
Upon leaving the house don’t head straight out but rather skirt around the back of the premises and you will see a creepy looking shack that you can’t enter. There are some more bullets outside though and if you hunt around the back in the undergrowth you will also find a further couple of boxes meaning you should be leaving the area with over 20 shells, two matchbooks and a can of cola.
You are going to need all this stuff so don’t shirk your responsibilities here.
Bronson Cave
Your first marker says you need to get to Bronson Cave in the north-western corner of the area so bring up your map and check out your position. There are a couple of ways to get there, you can either just make a bee-line as the crow flies or skirt around using the tracks. The former will be a darker route so your fear may be a factor - you only have two books of matches at this point remember, but you may also be able to avoid some of the Deadites with a clever use of stealth, thus conserving health and ammo for later.
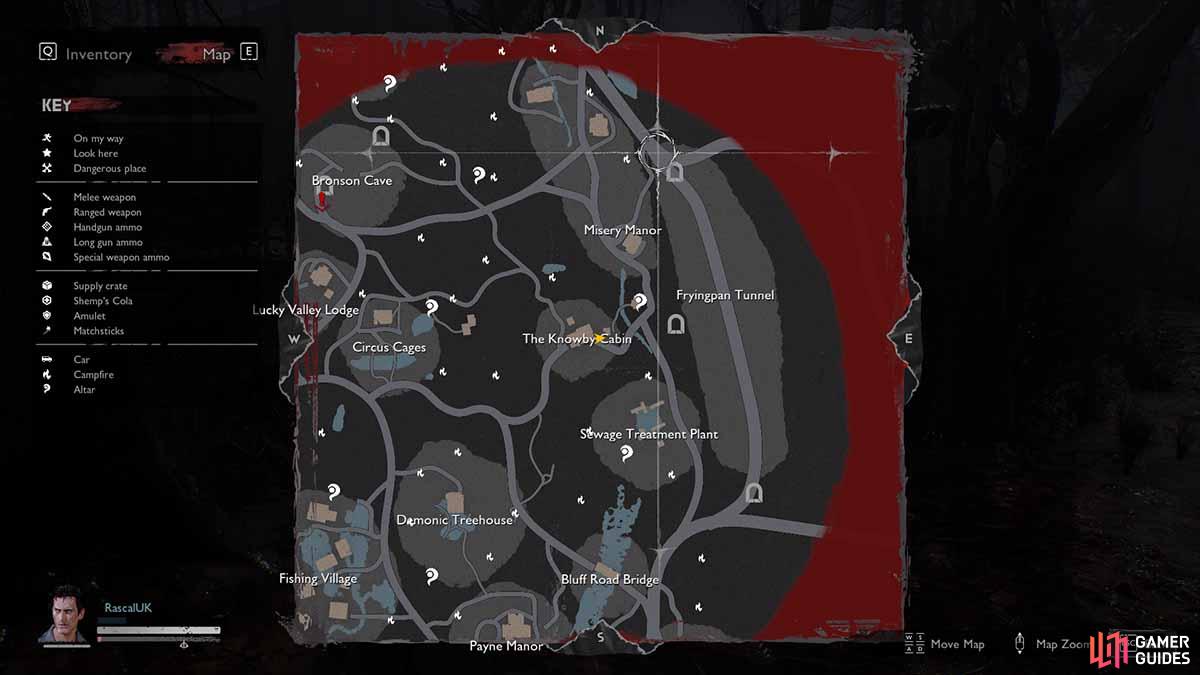
The mission map highlights where you need to get to.
There is nothing too tricky along the way, the most you be attacked by at any one time is two Deadites and while it is possible to be caught off guard they can all be generally despatched pretty quickly.
As you approach the cave watch out for the two Deadite there, get your headshots right and they won;t even get close and one of them will drop some ammo as a bonus. Watch yourself if you are heading towards the cave to the left of the path as that massive tree will flex out and hit you, scaring you half to death - speaking for a friend there. Stick to the right and it doesn’t seem to do it.
Once outside the cave you can collect a further matchbook and some ammo. for the trusty old gun.

Outside Bronson Cave.
Head inside and take out the low-level bad guy and collect anything you find. There are several paths to choose but all are short and all lead you to your first tricky enemy - a Deadite Elite. Back off and hit him with headshots but when he inevitably gets close hack away with the chainsaw and make sure you work hard to dodge his attacks.
The worst thing about your gun here is that it only takes two shells and reloading takes an age so hit him, get away from him, reload and repeat and you shouldn’t ultimately have too much of an issue. Once he’s gone you collect the necklace and you are onto the second item quest - now you need a shovel.
Your on-screen marker will change to a shovel and off you go. There is a head to be dug up so let’s crack on.
Finding the shovel
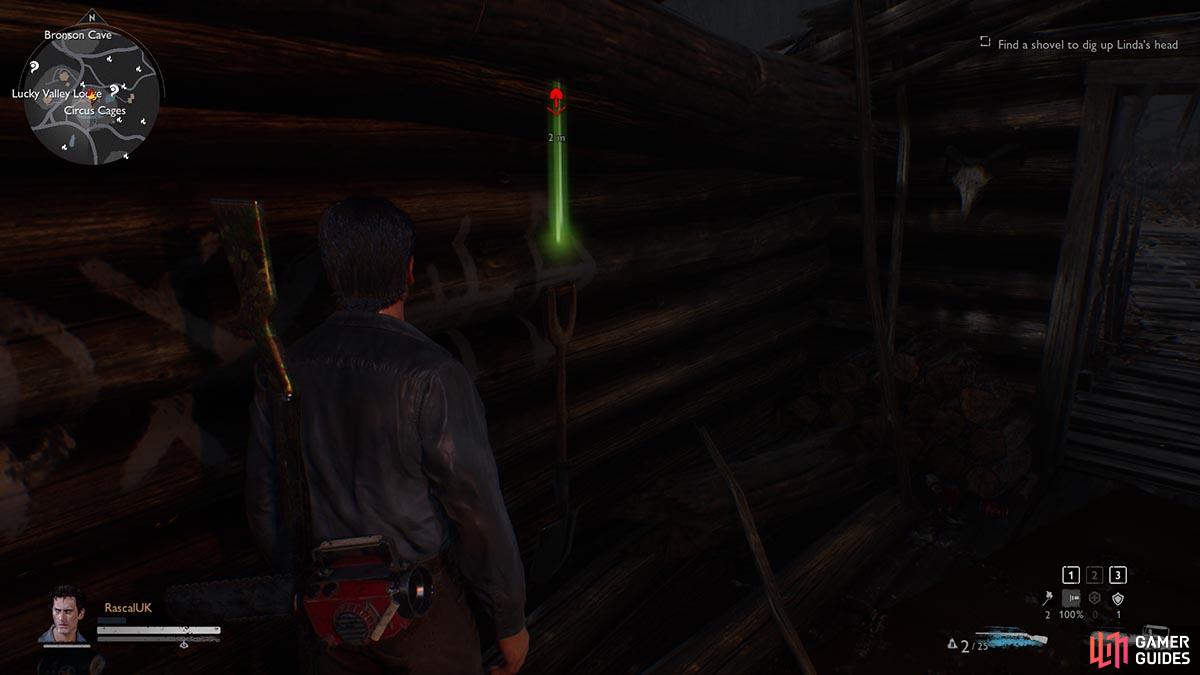
The shovel will only appear when you are ready for it.
The shovel is located in the Lucky Valley Lodge. It is possible to visit it before going to the dave but there will be no sign of the shovel at that point so you can’t circumvent the system. Unlucky.
With luck and a fair wind you will be able to track to the lodge without encountering any more Deadites, so get in there, collect the spade and now it’s time for a little graverobbing of your beloved.
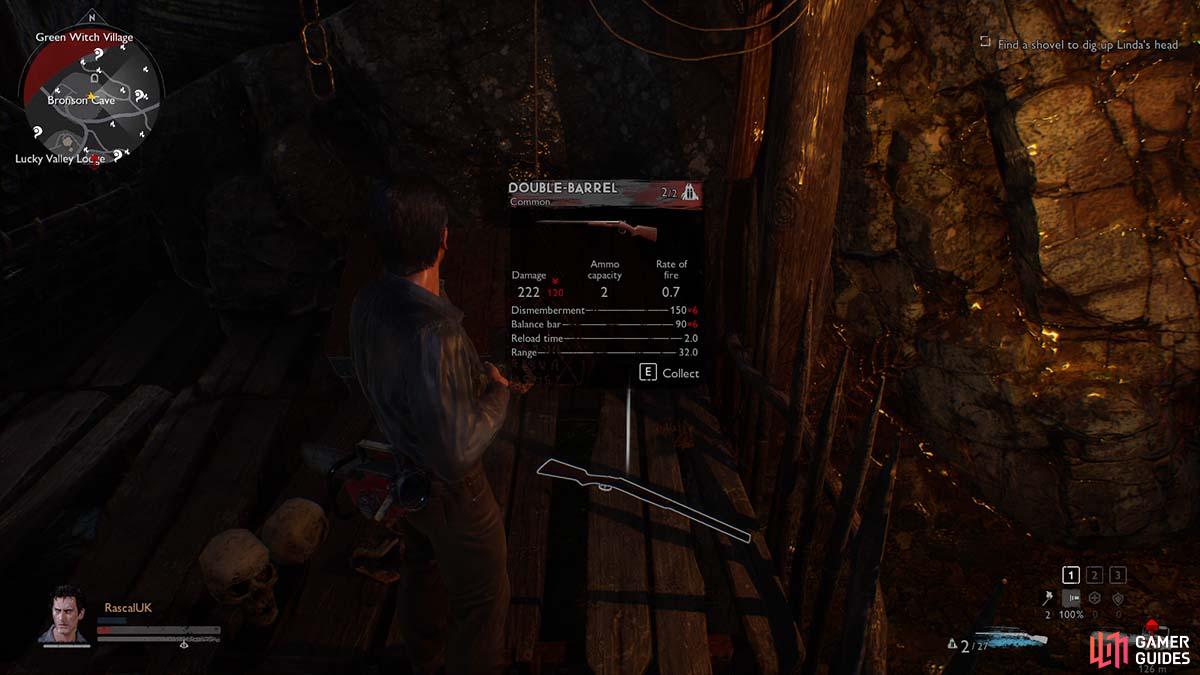
You can find an upgraded shotgun in Bronson Cave,
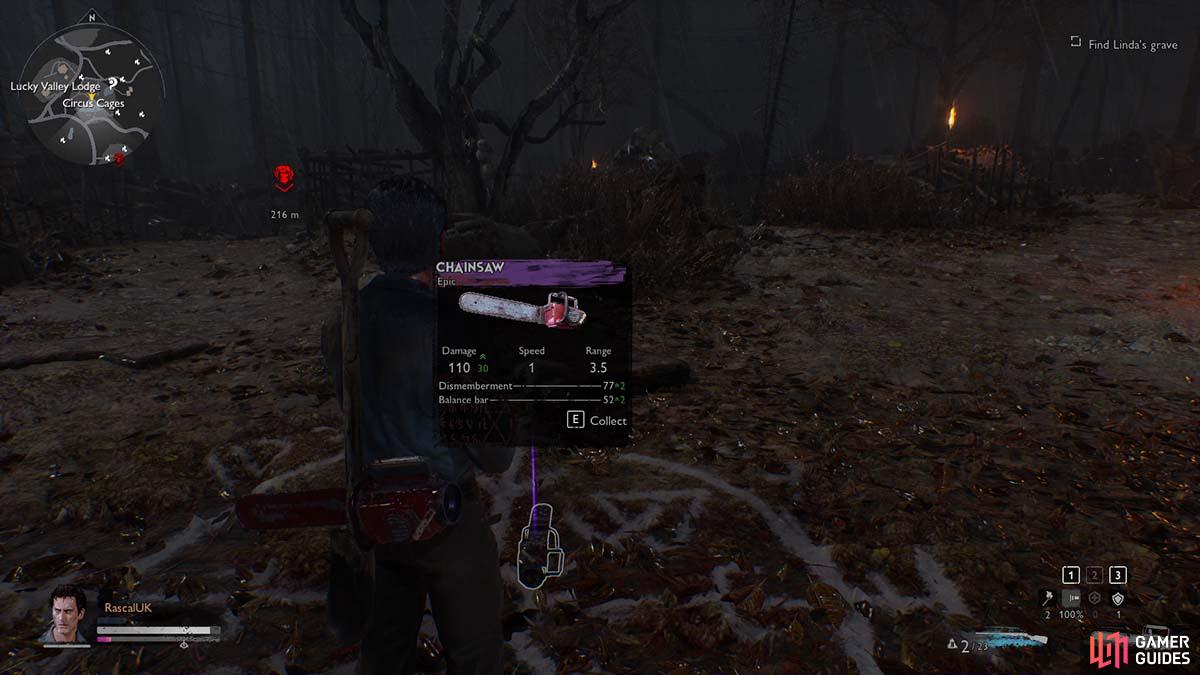
and this star-spangled chainsaw is guarded by a demonic portal.
Head for the head
They don’t call it Lucky Valley Lodge for nothing. Luckily there is a massive demonic portal outside that will spawn demons at you. Just what you wanted eh?
Finish them off and one will drop an upgraded chainsaw for you.
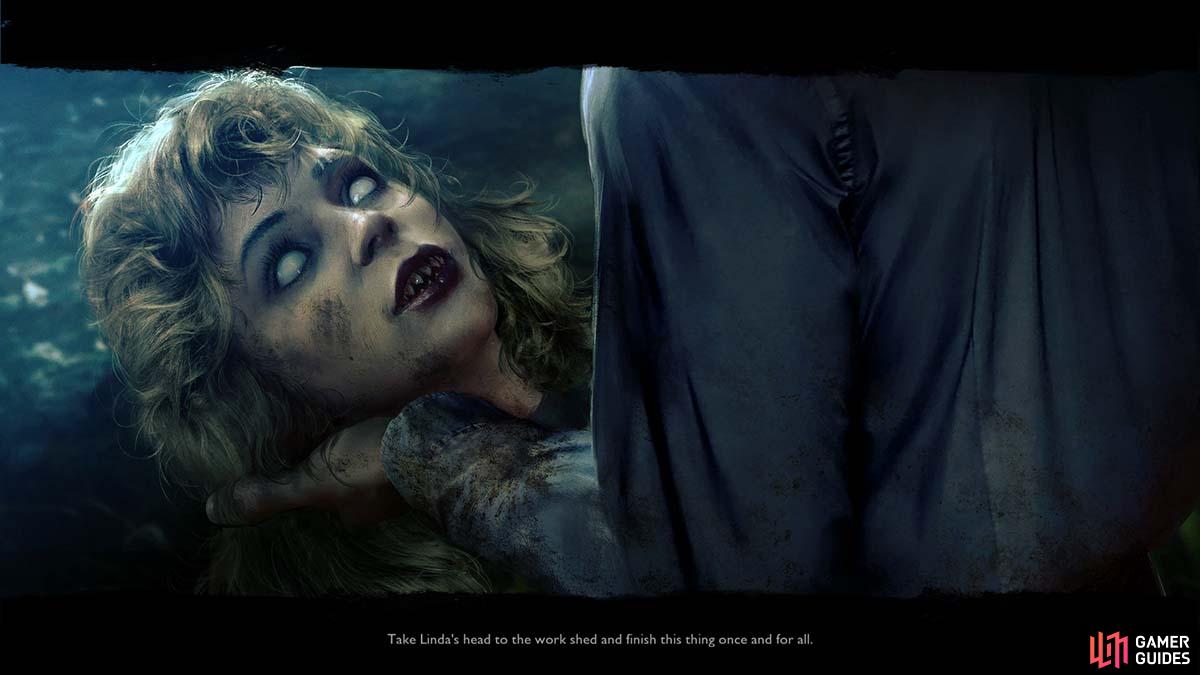
Now follow the map marker and head towards the Demonic Treehouse (okay, so that doesn’t sound like a great holiday destination but needs must). Find the cross that marks Linda’s grave and you will get the head. So far, this is all going to plan. Now you need to head to the work shed to “finish this thing once and for all.”
Sounds simple enough.
Heady days
What’s a nice girl like you doing in a place like this?
From the off a change of music lets you know things are about to ramp up and you will be attacked by spawning demons almost immediately, including another big guy and a demonic chanting of unsettling nursery rhymes for added effect.
Finish off these guys and drink your cola if necessary to boost your energy levels. You then get a screen advising you to head to Payne Manor to stock up on supplies before heading to the woodshed, so that is what we probably should do next.
All agreed? Let’s go.
Payne Manor - no payne no gain
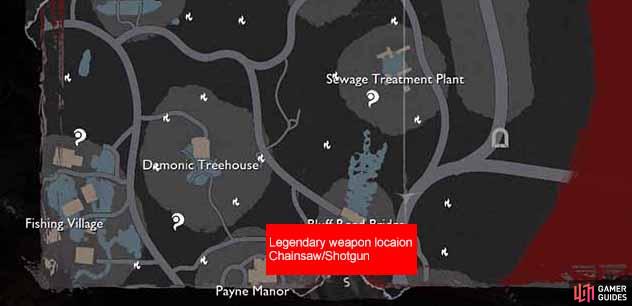
The legendary weapons are located at Payne Manor.
Even though this place is full of good stuff you will need it is also packed full of Deadites that need despatching.
Make your way upstairs, chainsaw in hand and collect everything you can get your hands on - matchsticks, ammo and cola.
All the time Linda’s head will be complaining, but once you think you have everything get out of dodge and follow the marker to the wood shed. Watch out for trees leaping out to damage you, especially if you have coffee nearby. That will end up on that expensive GPU you waited so long to get.
Wood shed
When you get to the marker you may well recognise it as the creepy shack from right at the beginning that you couldn’t enter. You still can’t, because first you are going to have to fight off a swarm of Deadites intent on ruining your day.
Besides them is also Henrietta - the voice from the trapped cellar and this is the most dangerous boss you faced in the mission Keep backing up and going for the headshot where you can and you should be able to complete with minimum fuss.
On killing all the demons you will now get access to the shed where you can now place Linda’s head in the vice on the bench and you will complete the mission and get the rewards unlocked as well as unlocking access to Party Down, the next mini-mission.
#Tips if you are struggling
Legendary weapons
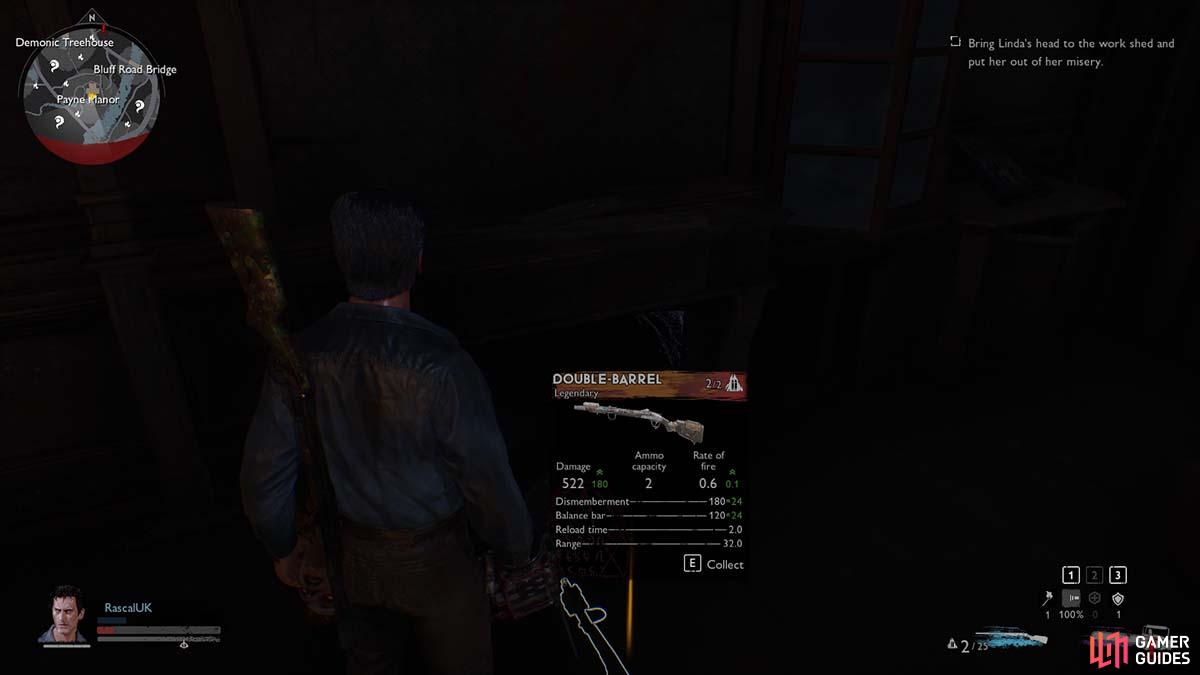
The legendary shotgun found in Payne Manor can be retrieved at any time.
While it may be tempting to just charge away and go the way the game is telling you there are huge advantages if you are prepared to do a little exploring beforehand.
For examples, should you head to Payne Mansion before Bronson Cave and clear it out, upstairs you will find a Legendary shotgun and chainsaw that will make despatchign the Deadite’s in the rest of the mission much easier. Yu will still be lead to get these before the final boss battle, but as they spawn at the start you may as well have them.
Also, if you are struggling for health you will find a stash of cola in the hut on the bridge so you can stick up.
Bad guys
As a rule there will generally be two Deadites that attack you at any one time. They rarely fly solo. If you hear a Deadite in the vicinity it means they are attackjing you and they can generally be upon you before you even have turn to turn completely round to see which direction they are coming from. It’s best to hit the sprint button and charge away a few metres to put some distance between you, allowing you to turn round and usually get a shot or two off to remove the problem.
No Comments