Local Enemy Bestiary
| Monster Name | HP | MP | ATK | DEF | Gil | EXP |
|---|---|---|---|---|---|---|
| Borghese | 1584 | 250 | 45 | 105 | 716 | 510 |
| Cloudwraith | 2058 | 360 | 13 | 145 | 385 | 485 |
| Exoray | 1200 | 112 | 13 | 105 | 370 | 449 |
| Malboro | 2900 | 980 | 20 | 95 | 2292 | 780 |
| Skeletal Horror | 1584 | 143 | 45 | 115 | 542 | 770 |
Now’s probably a good time to mention that you’ll pretty much NEED about 15 Holy Waters (or Zombie-immunizing Relics) to get through here. You collect plenty from defeating the enemies though so don’t worry too much.
Also note how every enemy here is weak to Fire, and all but one is weak to Holy. Have Celes abuse Fira, whereas Sabin should stick to Rising Phoenix. Once you reach the tomb entrance, Setzer will open it up. Head on in.
Once you enter the inside of the tomb, go south to the next area. There, go south to the fork in the path, which effectively has five branches. Use the southeastern exit and open the chest for a Genji Helm . Back at the B2F fork, use the northeastern exit. In this next room, examine the tombstone to open up another path. Go along it to find a switch. Use it, then backtrack to the fork.
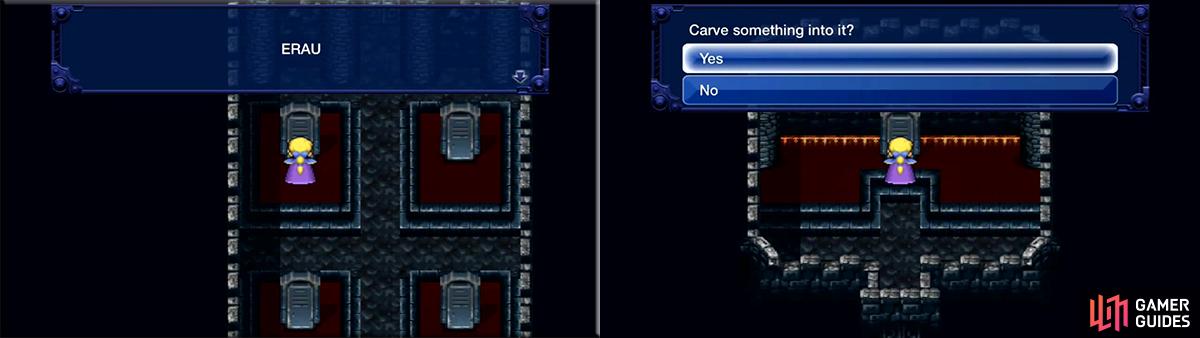
Examine the tombstones to get the bits of the message. Carve them into the other one to read “THE WORLD IS SQUARE” backwards.
Back at the B2F fork, use the southwestern exit to find a chest with some Crystal Mail . Use the stairs nearby and open the chest on B3F to find a Regal Gown . Go north to the next area and you’ll notice the switch. Trigger it and return to the B2F fork.
Back at the B2F fork, use the south-central exit. Hop on the turtle in this room to continue to the next room. There, go to the far south and into the next room. There, you’ll find four gravestones. When read backwards, they say “THEW ORLD ISSQ UARE” or, more conveniently, “THE WORLD IS SQUARE”.
Return to the B2F fork and use the northwestern exit. Examine the gravestone and carve in the letters as shown before: “WEHT”, “DLRO”, “QSSI”, and “ERAU”. You’ll learn of a new relic.
Head south and downstairs to B3F. On B3F, go to the far east and straight into the eastern wall. If you have some trouble, stand south of the chest, go south one step, then east into the wall. Once you bump into another wall, go north to find a Growth Egg (SWEET!).
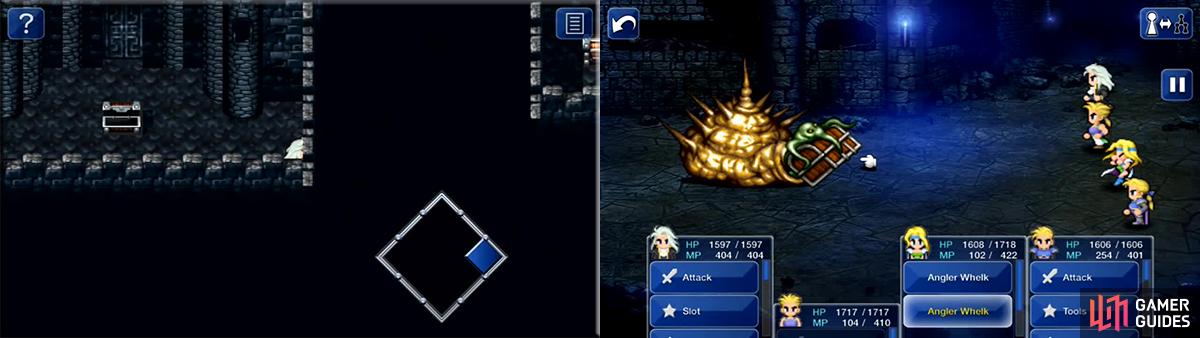
Walk into the wall as shown to reach the Growth Egg, a very useful relic. Later, the Angler Whelk offers a slight challenge but relinquishes the Dragon’s Claws for Sabin!
Return once more to the B2F fork and use the south-central exit again. Use the turtle ride again and, in the next area, examine the switch to raise the water level. Use the nearby turtle to head to the next area.
There, you’ll find a Save Point to the north. Go to it, use a Tent, and save. Then open the chest to the north to find an Angler Whelk . You can easily kill it; it’s like the Ymir from the start of the game, but also vulnerable to Break, Death, Catoblepas, Banish, and the like. Enjoy your Dragon Claws for Sabin!
Open the other chest in the room to find the Man-Eater, then continue to the next area after saving and healing once more. In the next area, walk north to find a purple tombstone. Examine it (for you should have already saved and healed) to fight a battle.
Dullahan
Dullahan can use a basic attack, Morning Star (which is twice as strong), Blizzara, Blizzaga, Absolute Zero (ice damage to all), Northern Cross (which can induce Freeze), Lv. ? Holy (the ? equals the one’s digit of your Gil; those with levels divisible by it get hit hard), and Cura. Cura only starts at around 10,000 HP.
It’s a good idea to start this battle by using Kirin, Fenrir, Ifrit, and someone else you want – probably Zona Seeker.
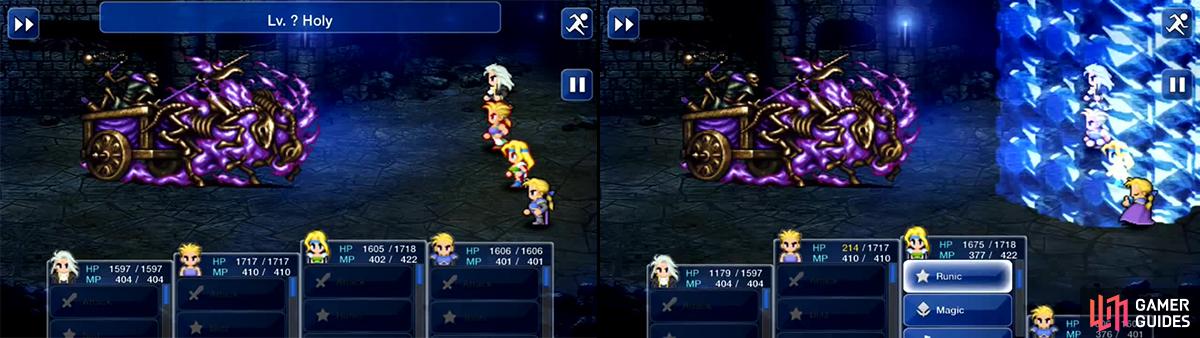
He will open the battle with Lvl ? Holy, which may damage some of your party depending on your Gil amount. Using Runic (after curing) will eliminate the strongest spells.
It’s easy beyond that, very much so. Have Celes on constant Cura/Esuna duty, using Fira when nothing needs to be done. Let Sabin use Rising Phoenix; Edgar, the Drill; and Setzer … well, I had already gotten Fira on him, and his attack sucked for some reason. So I let him use Fira, resorting to reviving characters with Phoenix Downs and using Potions where necessary to help out.
After the battle, a room opens up in the back. Go along it and downstairs, watching some interesting scenes between Setzer and Darill in the background. At the bottom of the stairs, you’ll find a new airship. Thus ends the sub-section.
No Comments