
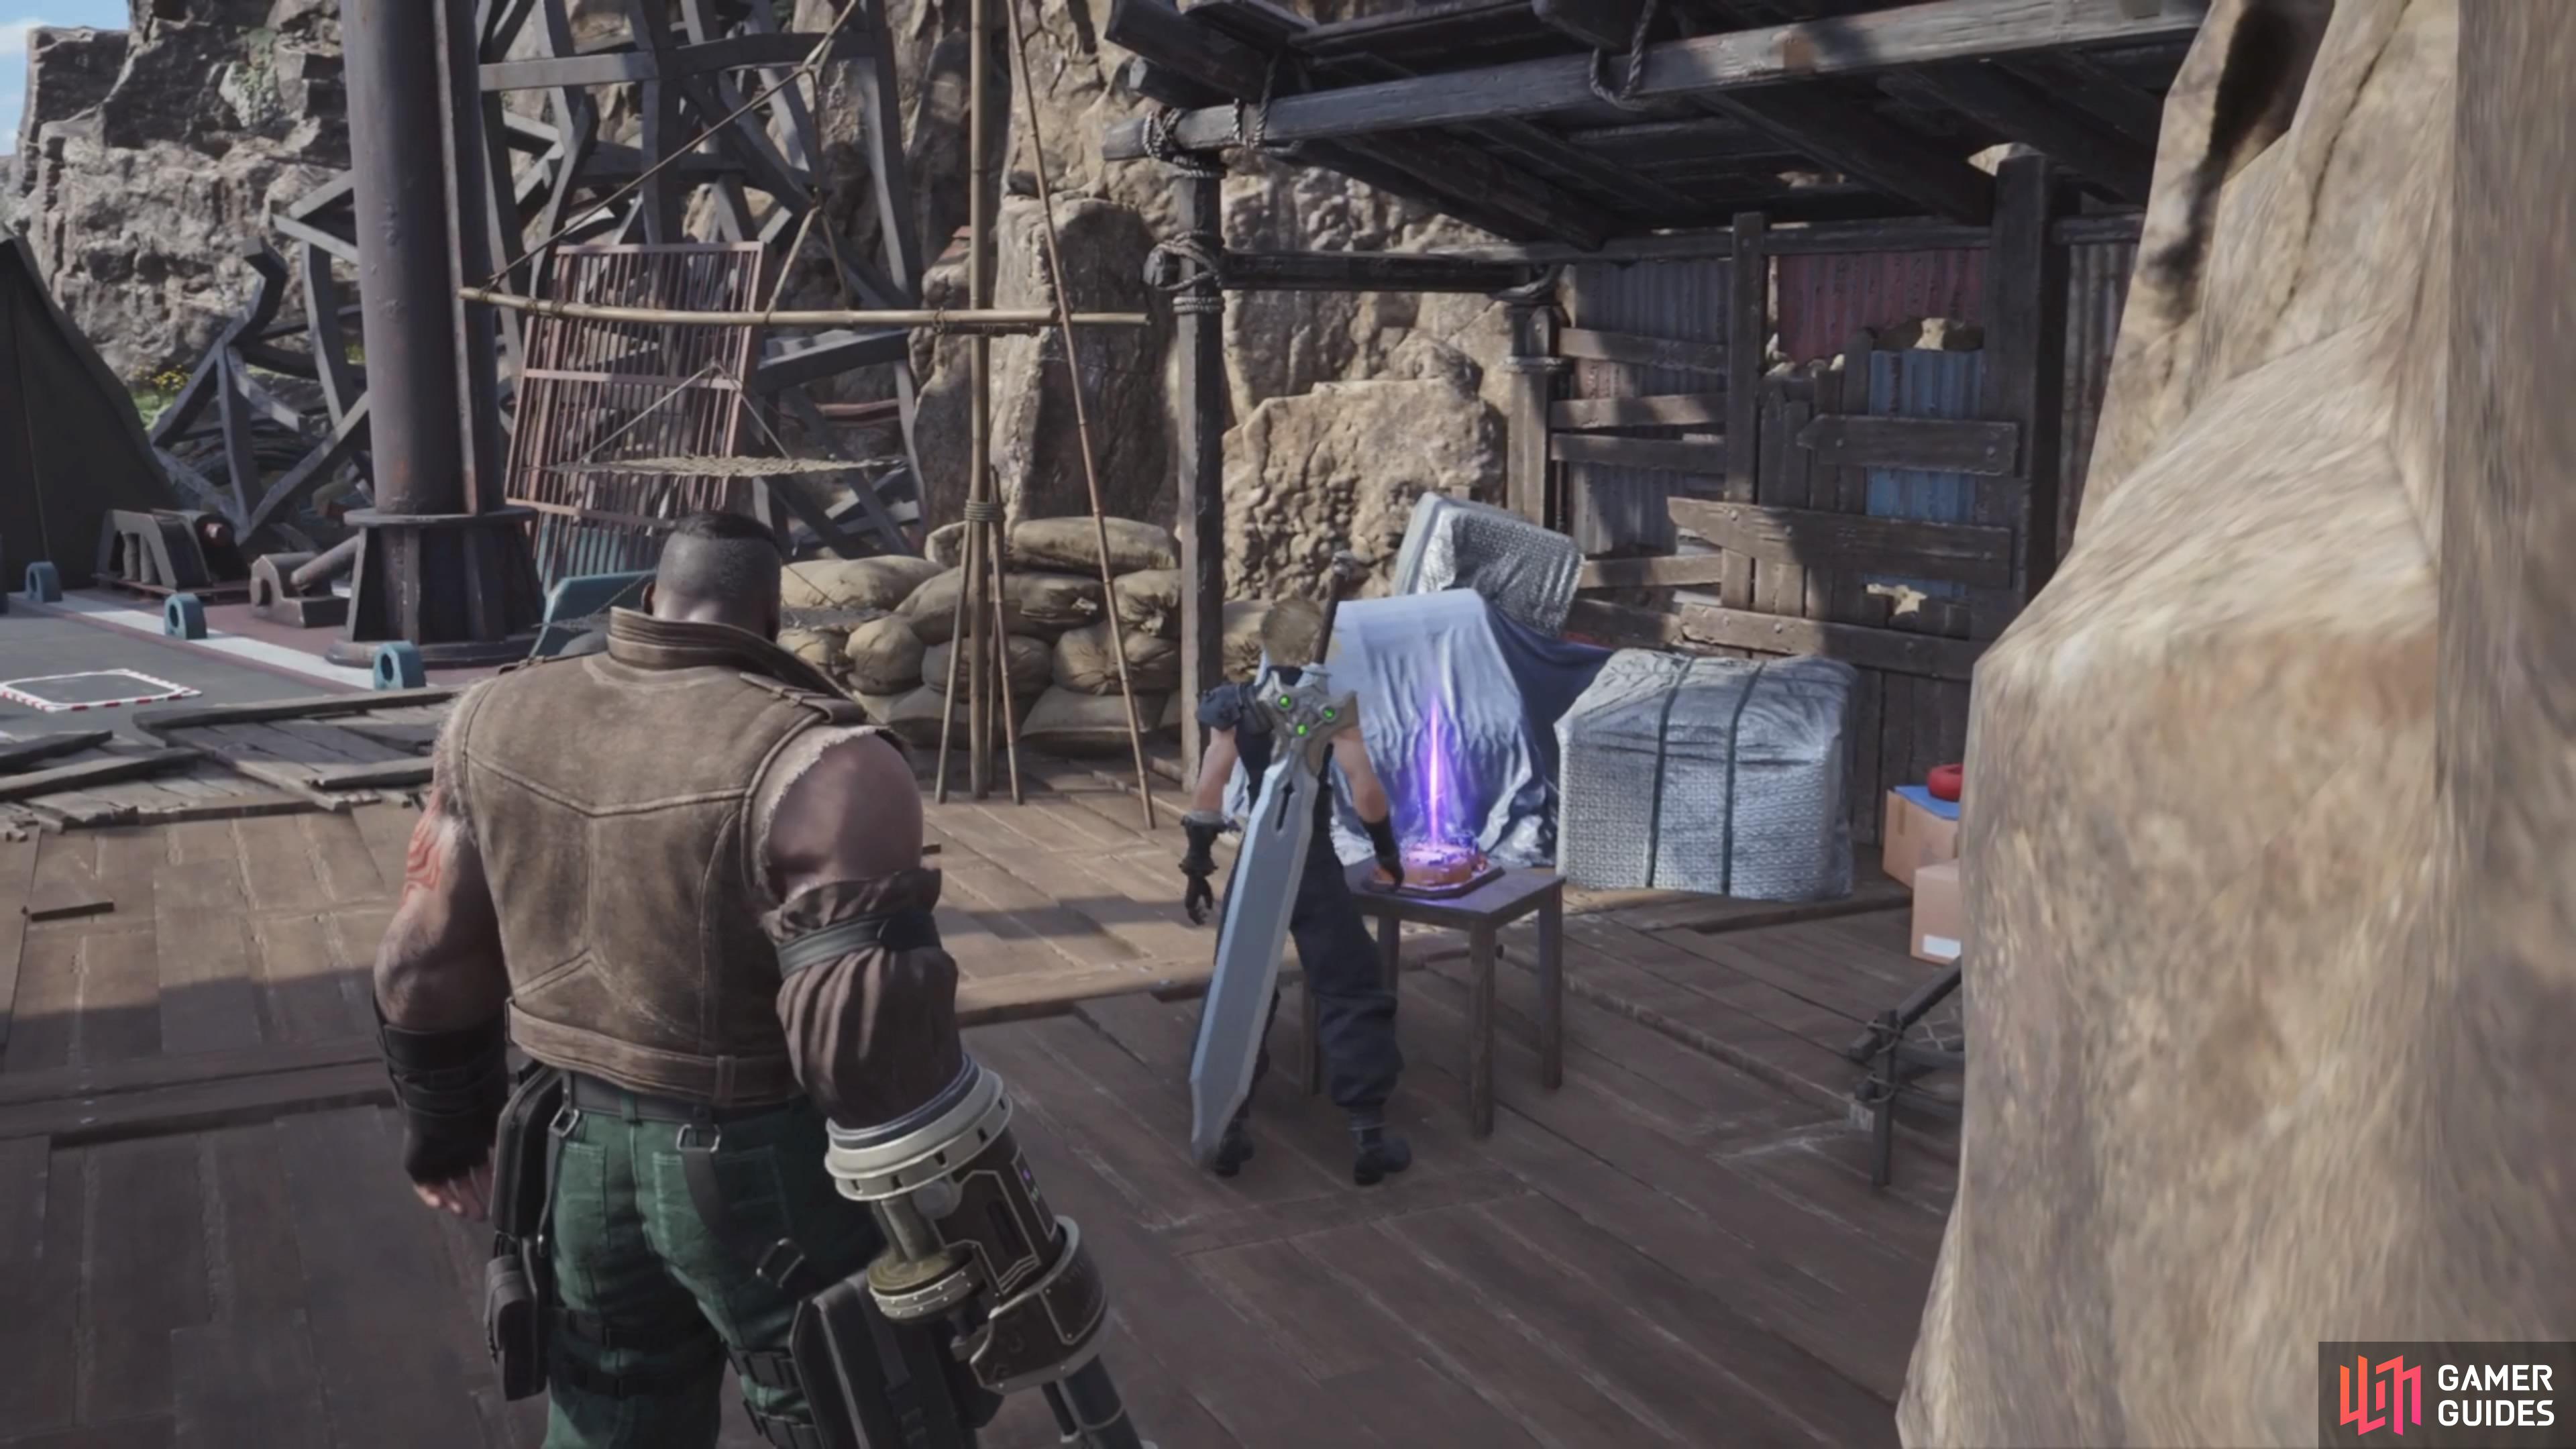
![]() Fort Condor was a minigame that debuted in the Intermission DLC of Final Fantasy VII Remake, but it makes a return for Final Fantasy VII Rebirth. Instead of just being a normal minigame you can do throughout your journey, it is tied to World Intel. Specifically, all of the Fort Condor matches involve the Protorelic in the Junon region. After completing the four normal matches, Chadley will unlock Hard Mode for the minigame. This page will go over strategies for each stage of Fort Condor Hard Mode, making it so you can beat them with as little resistance as possible.
Fort Condor was a minigame that debuted in the Intermission DLC of Final Fantasy VII Remake, but it makes a return for Final Fantasy VII Rebirth. Instead of just being a normal minigame you can do throughout your journey, it is tied to World Intel. Specifically, all of the Fort Condor matches involve the Protorelic in the Junon region. After completing the four normal matches, Chadley will unlock Hard Mode for the minigame. This page will go over strategies for each stage of Fort Condor Hard Mode, making it so you can beat them with as little resistance as possible.
Finishing Fort Condor Hard Mode can be a difficult endeavor.
How to Unlock Fort Condor Hard Mode
Once you make it to the Junon region, you will be able to go around the area and do the World Intel. Of course, you will need to unlock the region’s Chocobo first before you’re able to fully explore the Junon region. When you have done this, then you can start doing the Protorelic, which is basically just four matches of Fort Condor. The first two battles are easy enough, but you’ll likely have trouble with the third and fourth stages. After finishing all of them, you will unlock Hard Mode versions.
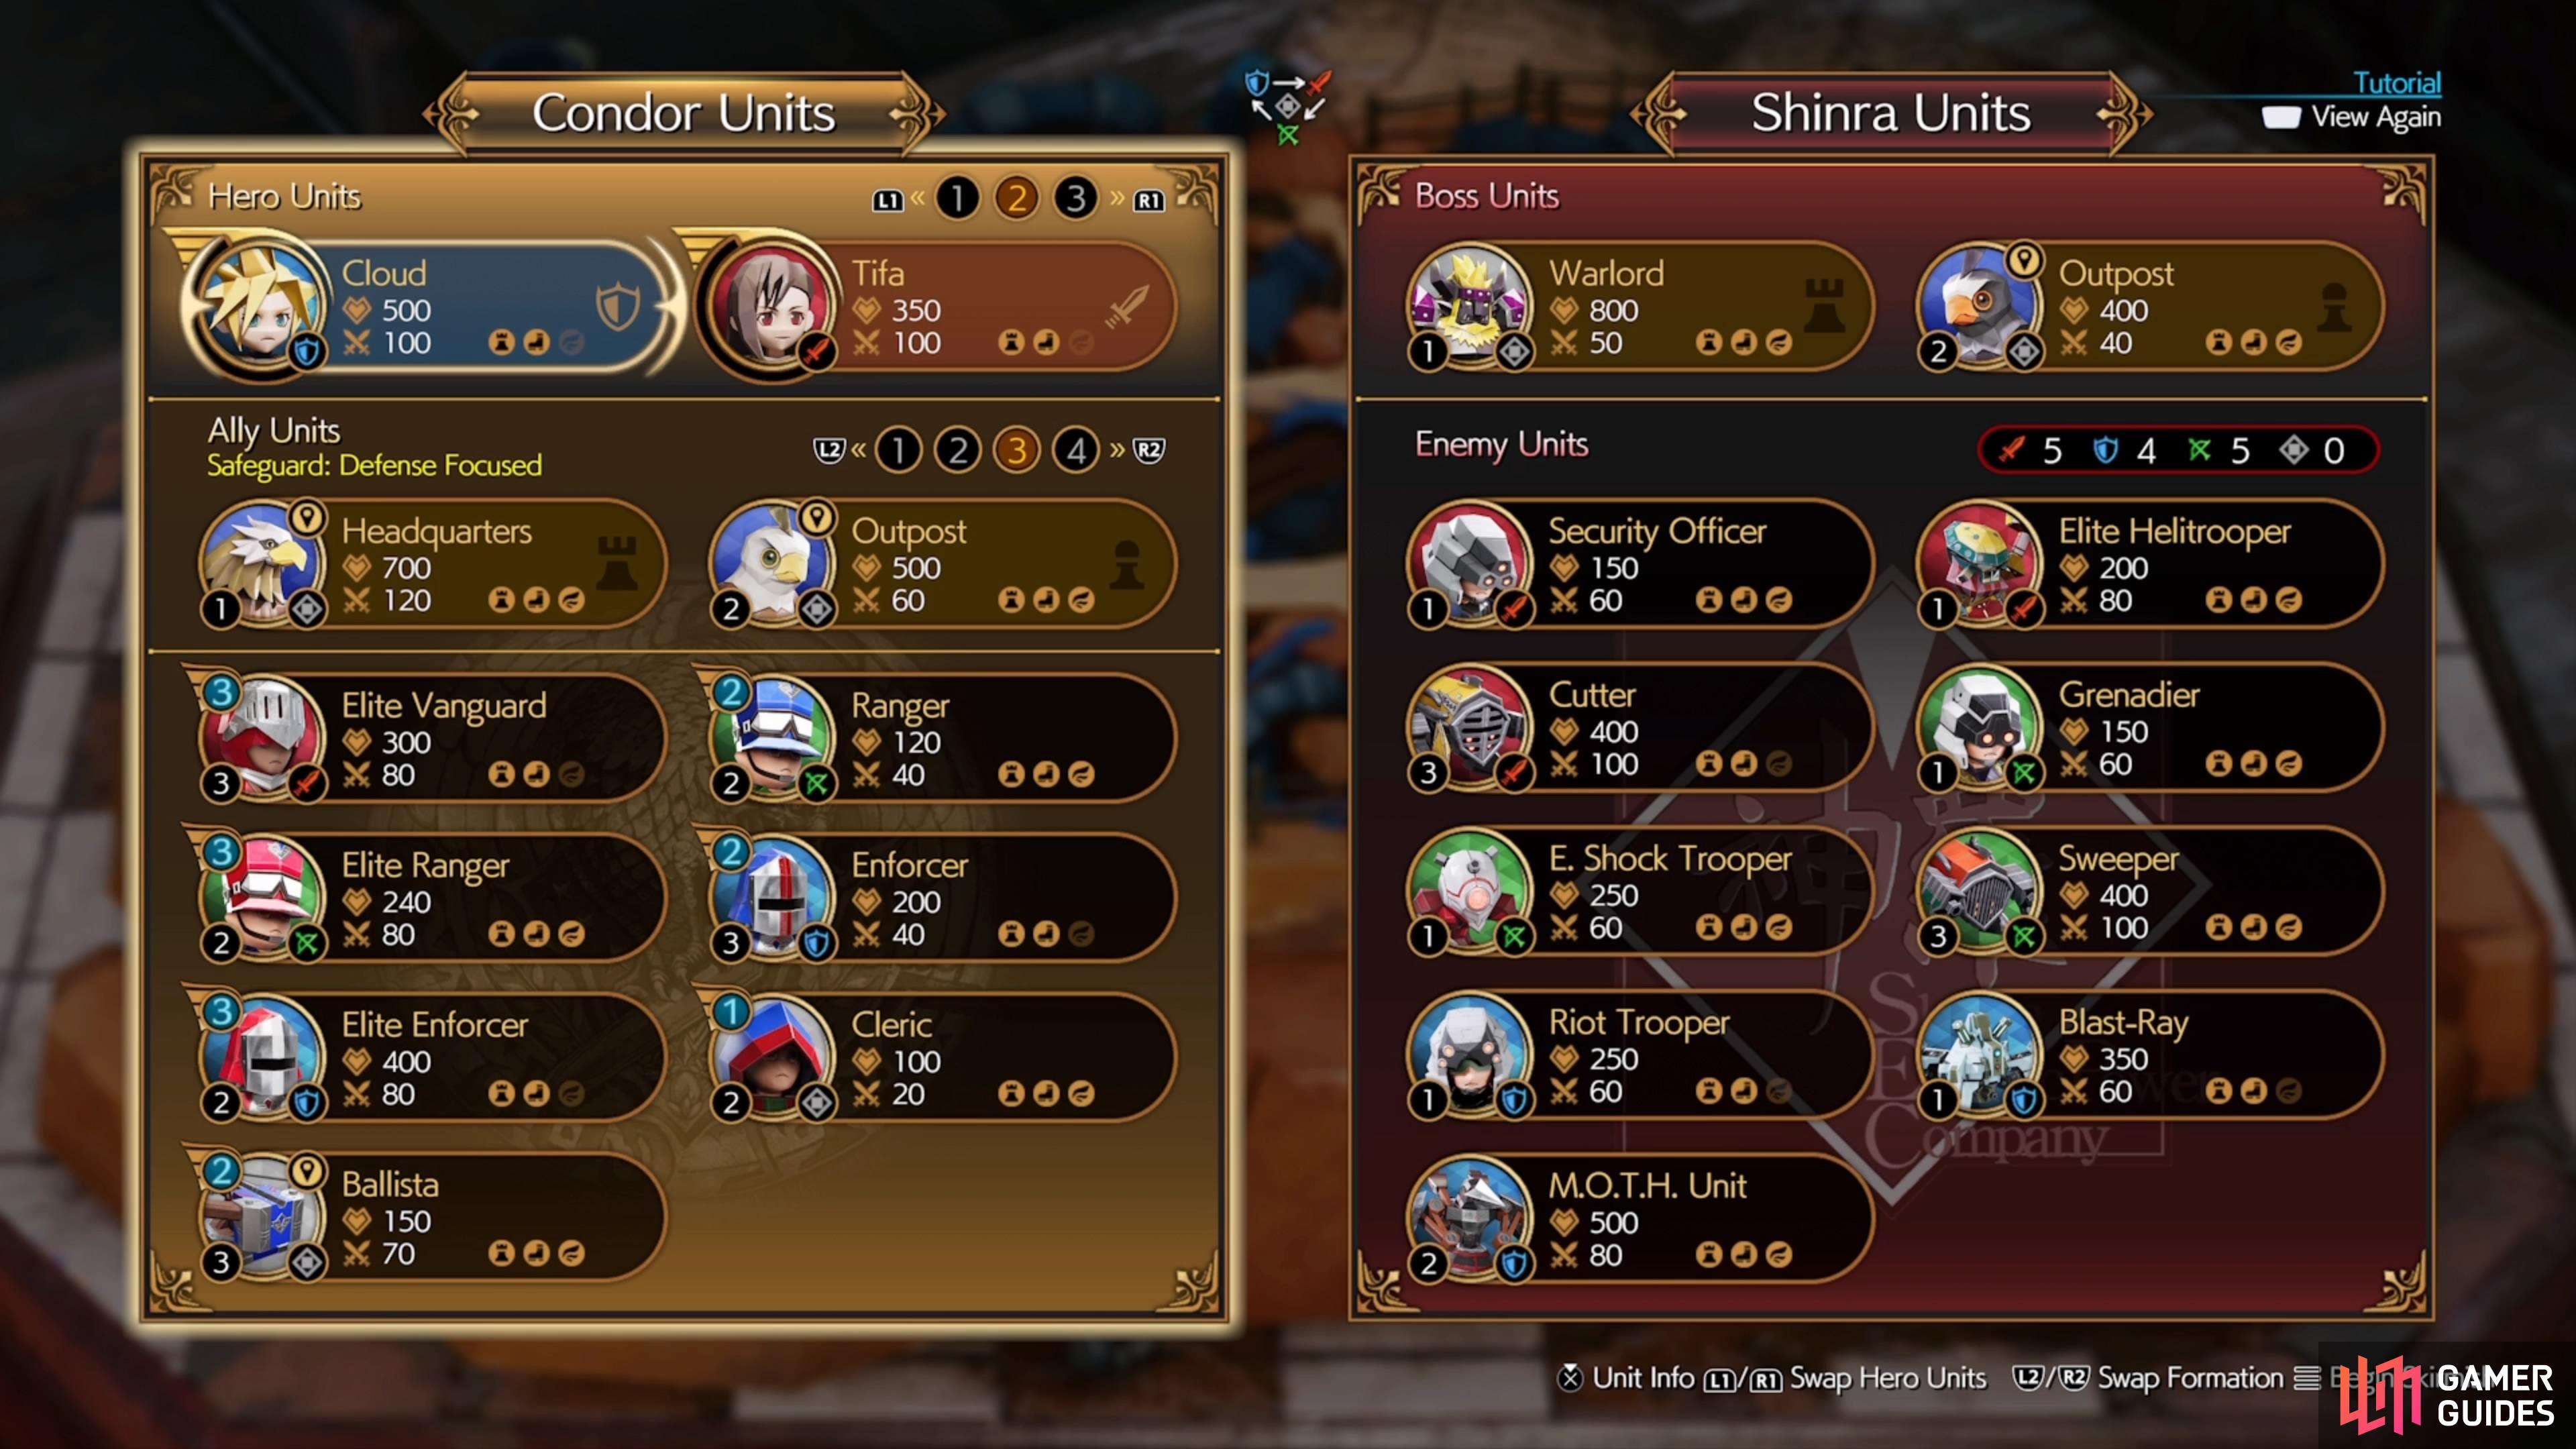
Just visit the tables where you did the first four battles to do the Hard Mode versions. So, what’s the difference between the normal and hard mode versions? Well, your opponents seem to send tougher units out, as well as more of them. One of the biggest differences, though, is that you have limited quantities for all of your units, even the basic ones. In normal mode, you had unlimited supplies of the basic troops, so you could keep spamming them if needed.
Fort Condor Hard Mode - Stage 1
- Heroes: Cloud and Tifa
- Ally Units: Safeguard - Defense Focused
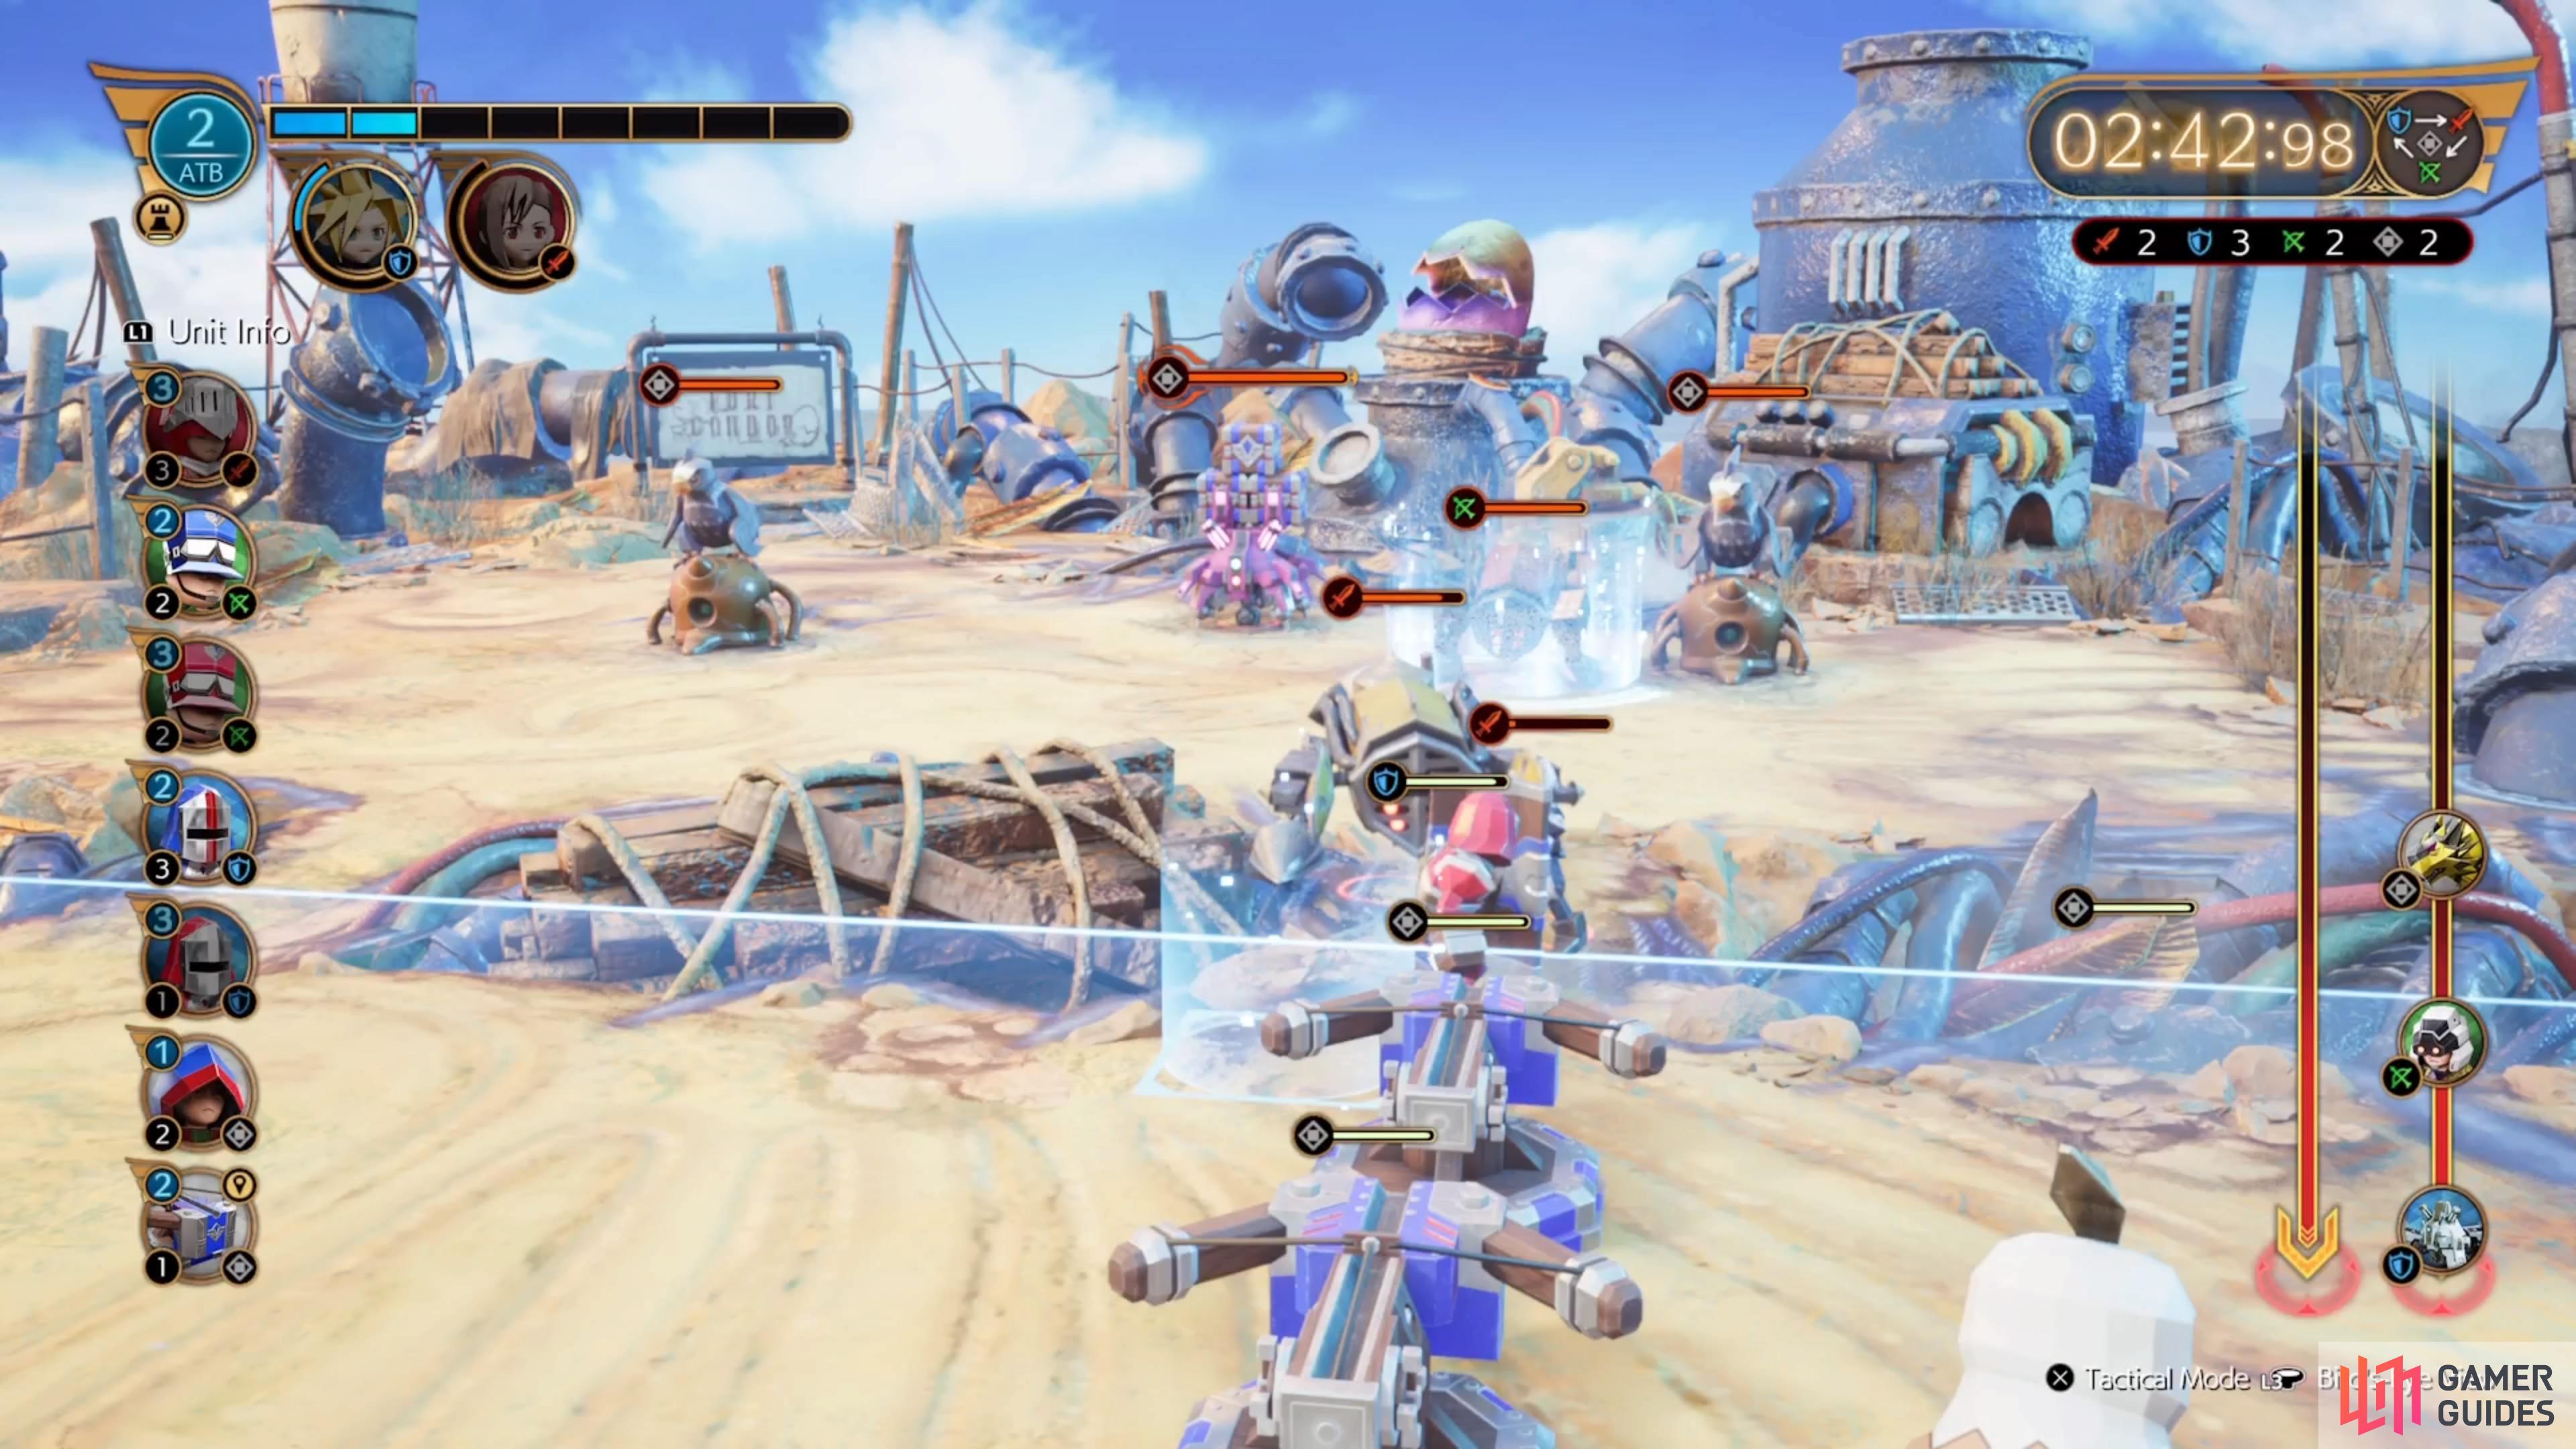
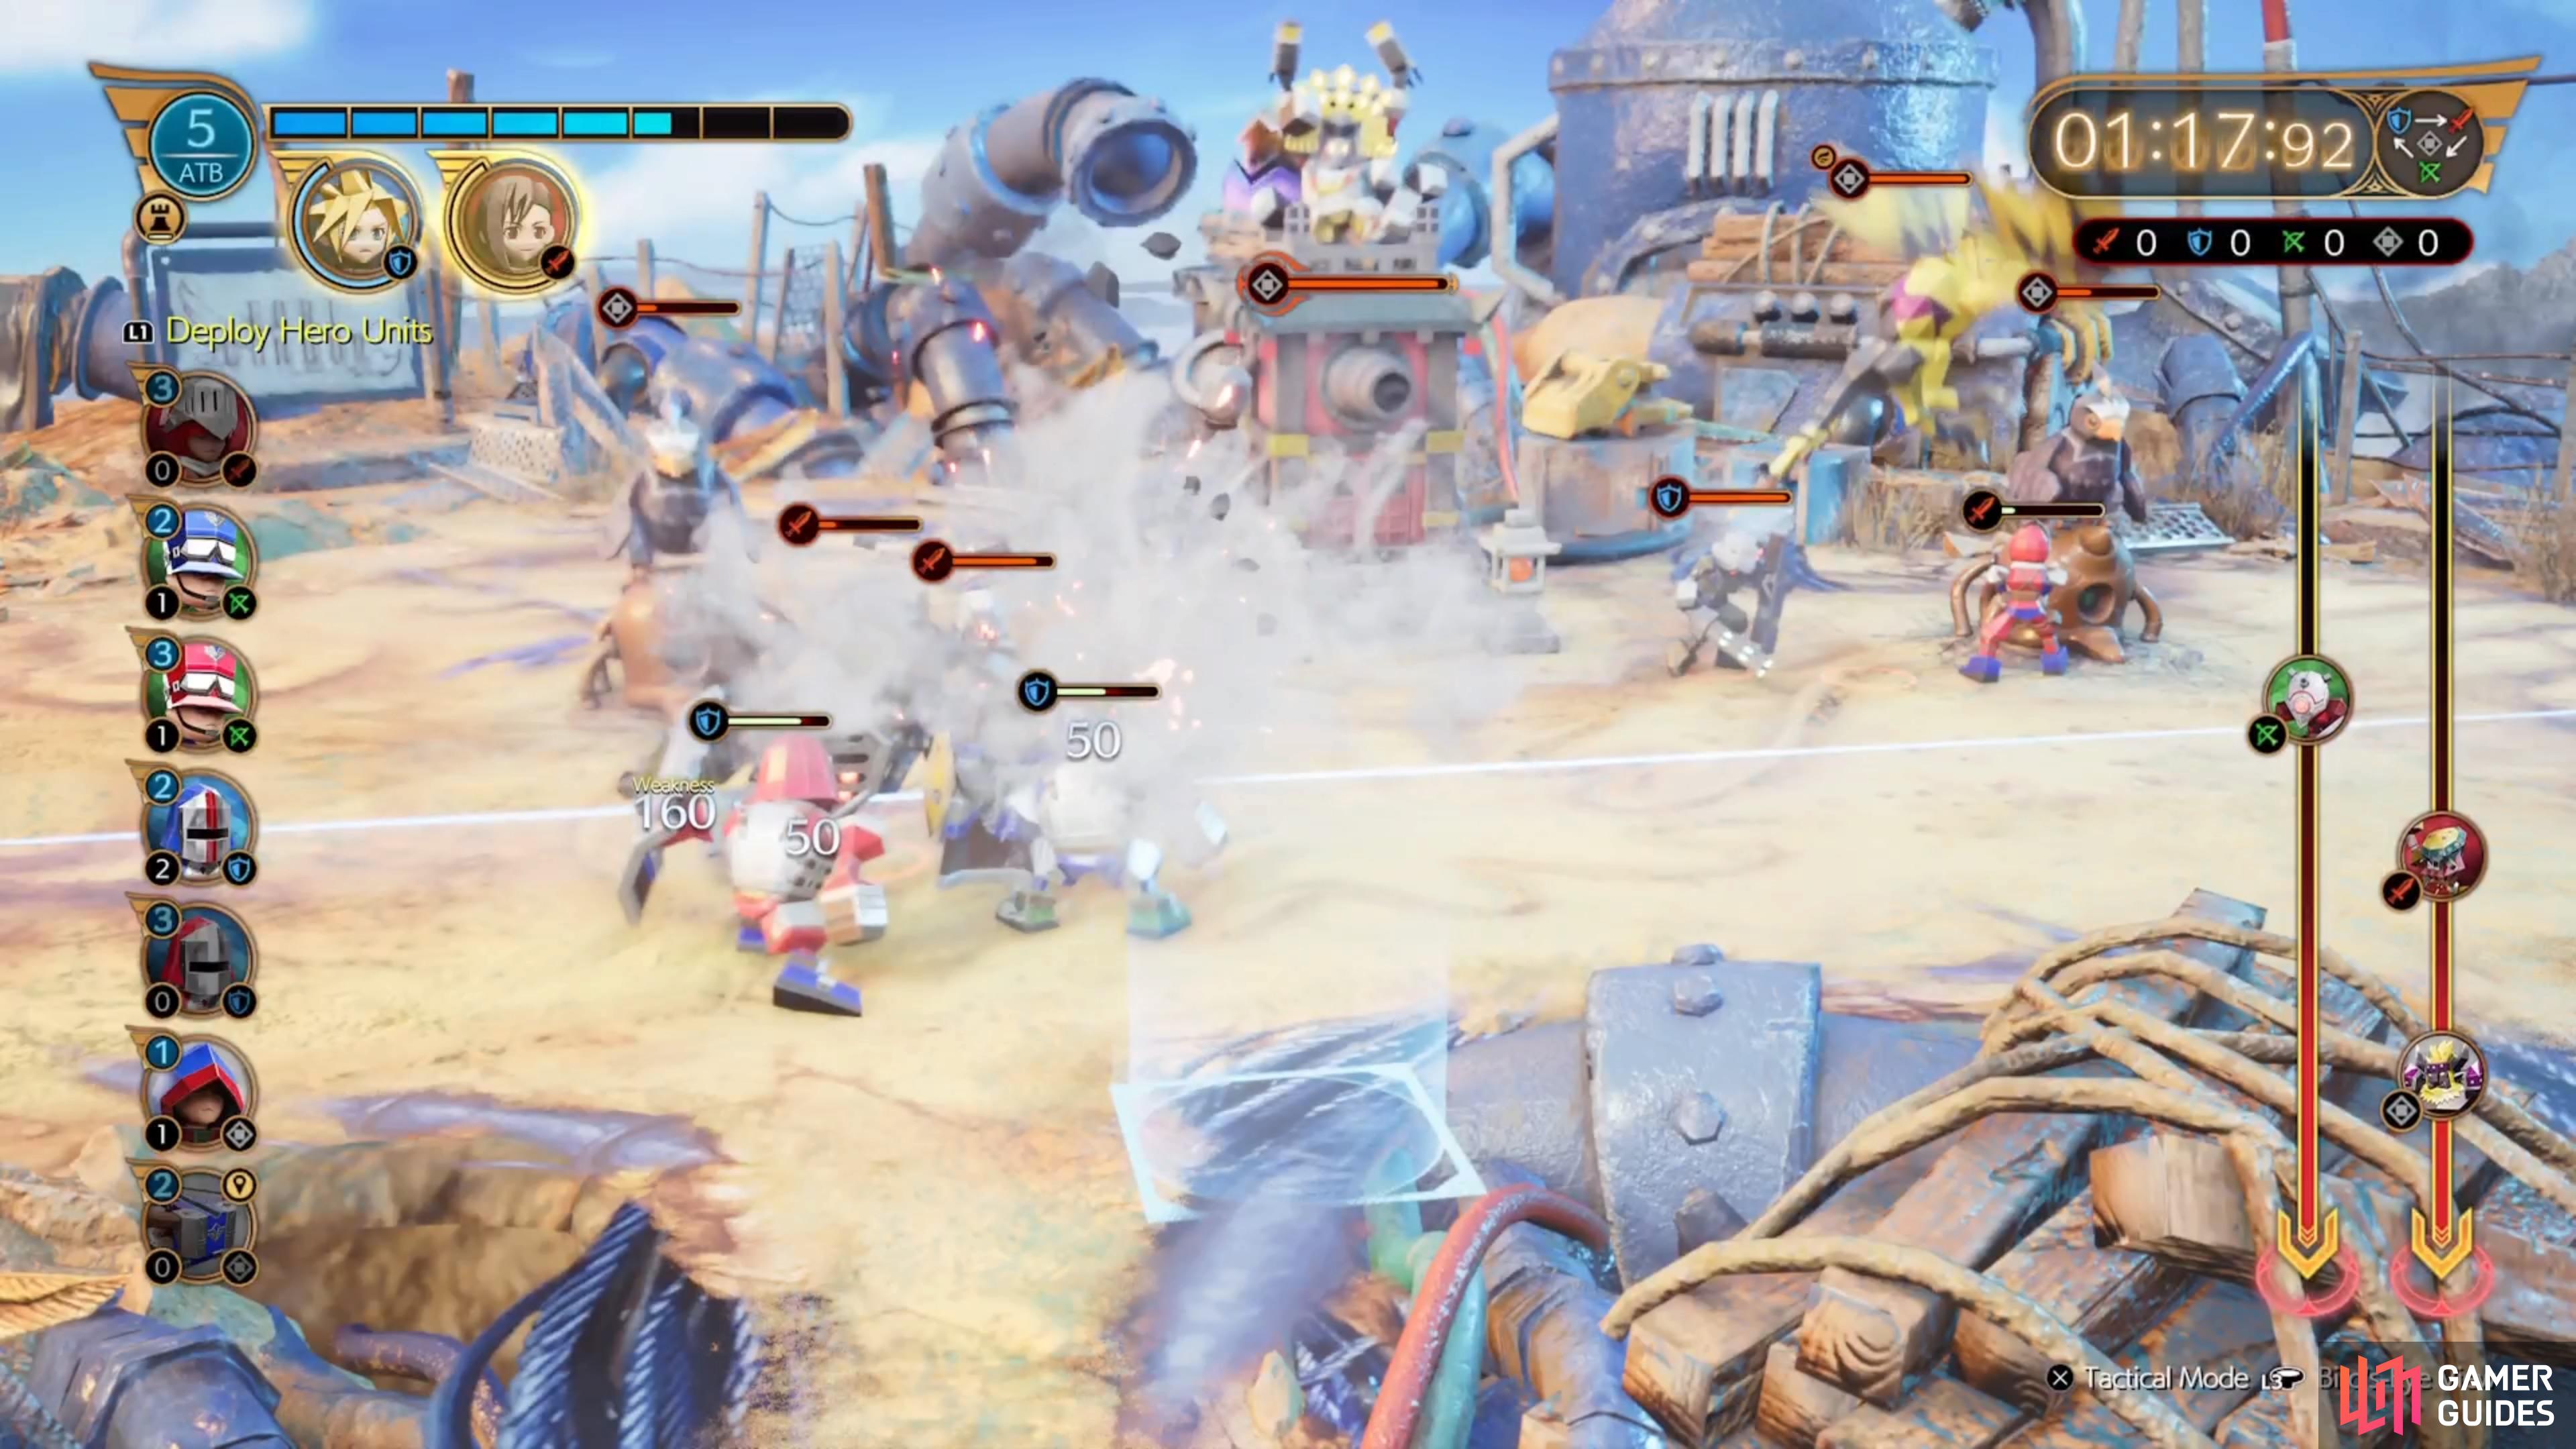
The first stage isn’t exactly going to be a pushover, as your opponent has a lot of elite units. One of the biggest problems will be the Sweepers, as their attack range is rather big. The general strategy for the beginning will be to place Ballistas down by your Outposts, so they can shoot down the lanes. This allows them to weaken enemy units before they get to your side, while not getting destroyed. With the loadout above, you will have three Ballistas, so you can place two on one side and one on the other. The enemy will generally start by pushing their units down the right side first, so put one or two there, depending on how many are coming.
For this stage, the battle will start with two ![]() Attack-types being sent to the right lane, so start with one Ballista, then summon an Elite Enforcer in front of it. You can do a regular Enforcer after that to bolster up that side, then place a Ballista in the left lane when you have ATB. From there, it’s just a matter of countering the enemy types with those that have an advantage over them. One thing you should absolutely not do is put your Hero Units in too early. They are either an emergency situation or should be saved for when the boss is the only thing left.
Attack-types being sent to the right lane, so start with one Ballista, then summon an Elite Enforcer in front of it. You can do a regular Enforcer after that to bolster up that side, then place a Ballista in the left lane when you have ATB. From there, it’s just a matter of countering the enemy types with those that have an advantage over them. One thing you should absolutely not do is put your Hero Units in too early. They are either an emergency situation or should be saved for when the boss is the only thing left.
If you are running out of time, then feel free to deploy them. The biggest pains for the first stage center around when the enemy deploys multiple types in a row, like with two minutes remaining on the left side. It will also be done at around the halfway mark on the right side. These will probably be the biggest hurdles, so if you overcome those, with a good amount of time/units remaining, then you should be close to victory. You will want to try and save your Clerics until the end, when you rush the boss.
Fort Condor Hard Mode - Stage 2
You will be using the same unit layout for Stage 1 here, as well as for the rest of the battles. Unlike the previous battle, the opponent will have a few units in the Other category, which are not tied to the weapon triangle. That means they are neither strong nor weak to your units since they are all tied to the weapon triangle. At the start of this battle, your opponent will bombard the right side with a bunch of units. You will see two Attack-types first, then two Ranged, with a Defender in between.
Right after the second Ranged unit, there will be a wolf-type enemy, who will make a beeline right for your Outpost. You don’t really need to worry about the wolf enemies, though, as they won’t be able to take out the Outpost. So, you should start by placing two Ballistas on that side, one behind the other, although you could start with the Elite Enforcer. The only problem with the Elite Enforcer is that it will need backup once the other units start pouring in.
Once the right side has subsided, the battle will switch to the left for a few units, but the battle will become a lot easier at this point. You can use your Elite Vanguards over on the left here, then summon Tifa as well, once all of the units have been summoned there. If you want to add more pressure, you can summon more Defenders to get Cloud ready to summon. Save him, though, for when you need him, as it’s possible Tifa and the Vanguards can take out the boss on their own.
Fort Condor Hard Mode - Stage 3
If you remember the third normal battle, then you realize this could spell potential for trouble, just because of the boss. The battle will start with a Warlord and Grenadier on the right lane, with an E. Shock Trooper on the left side. You could probably start by summoning a Vanguard on the right, then a Ballista on the left. When you get enough ATB, you can go ahead and put a Ballista on the right. If you’re playing on Easy, then you can do all of the above right away, since your ATB fills much faster.
You’ll have to contend with the boss’ cannon once you’re on his side.
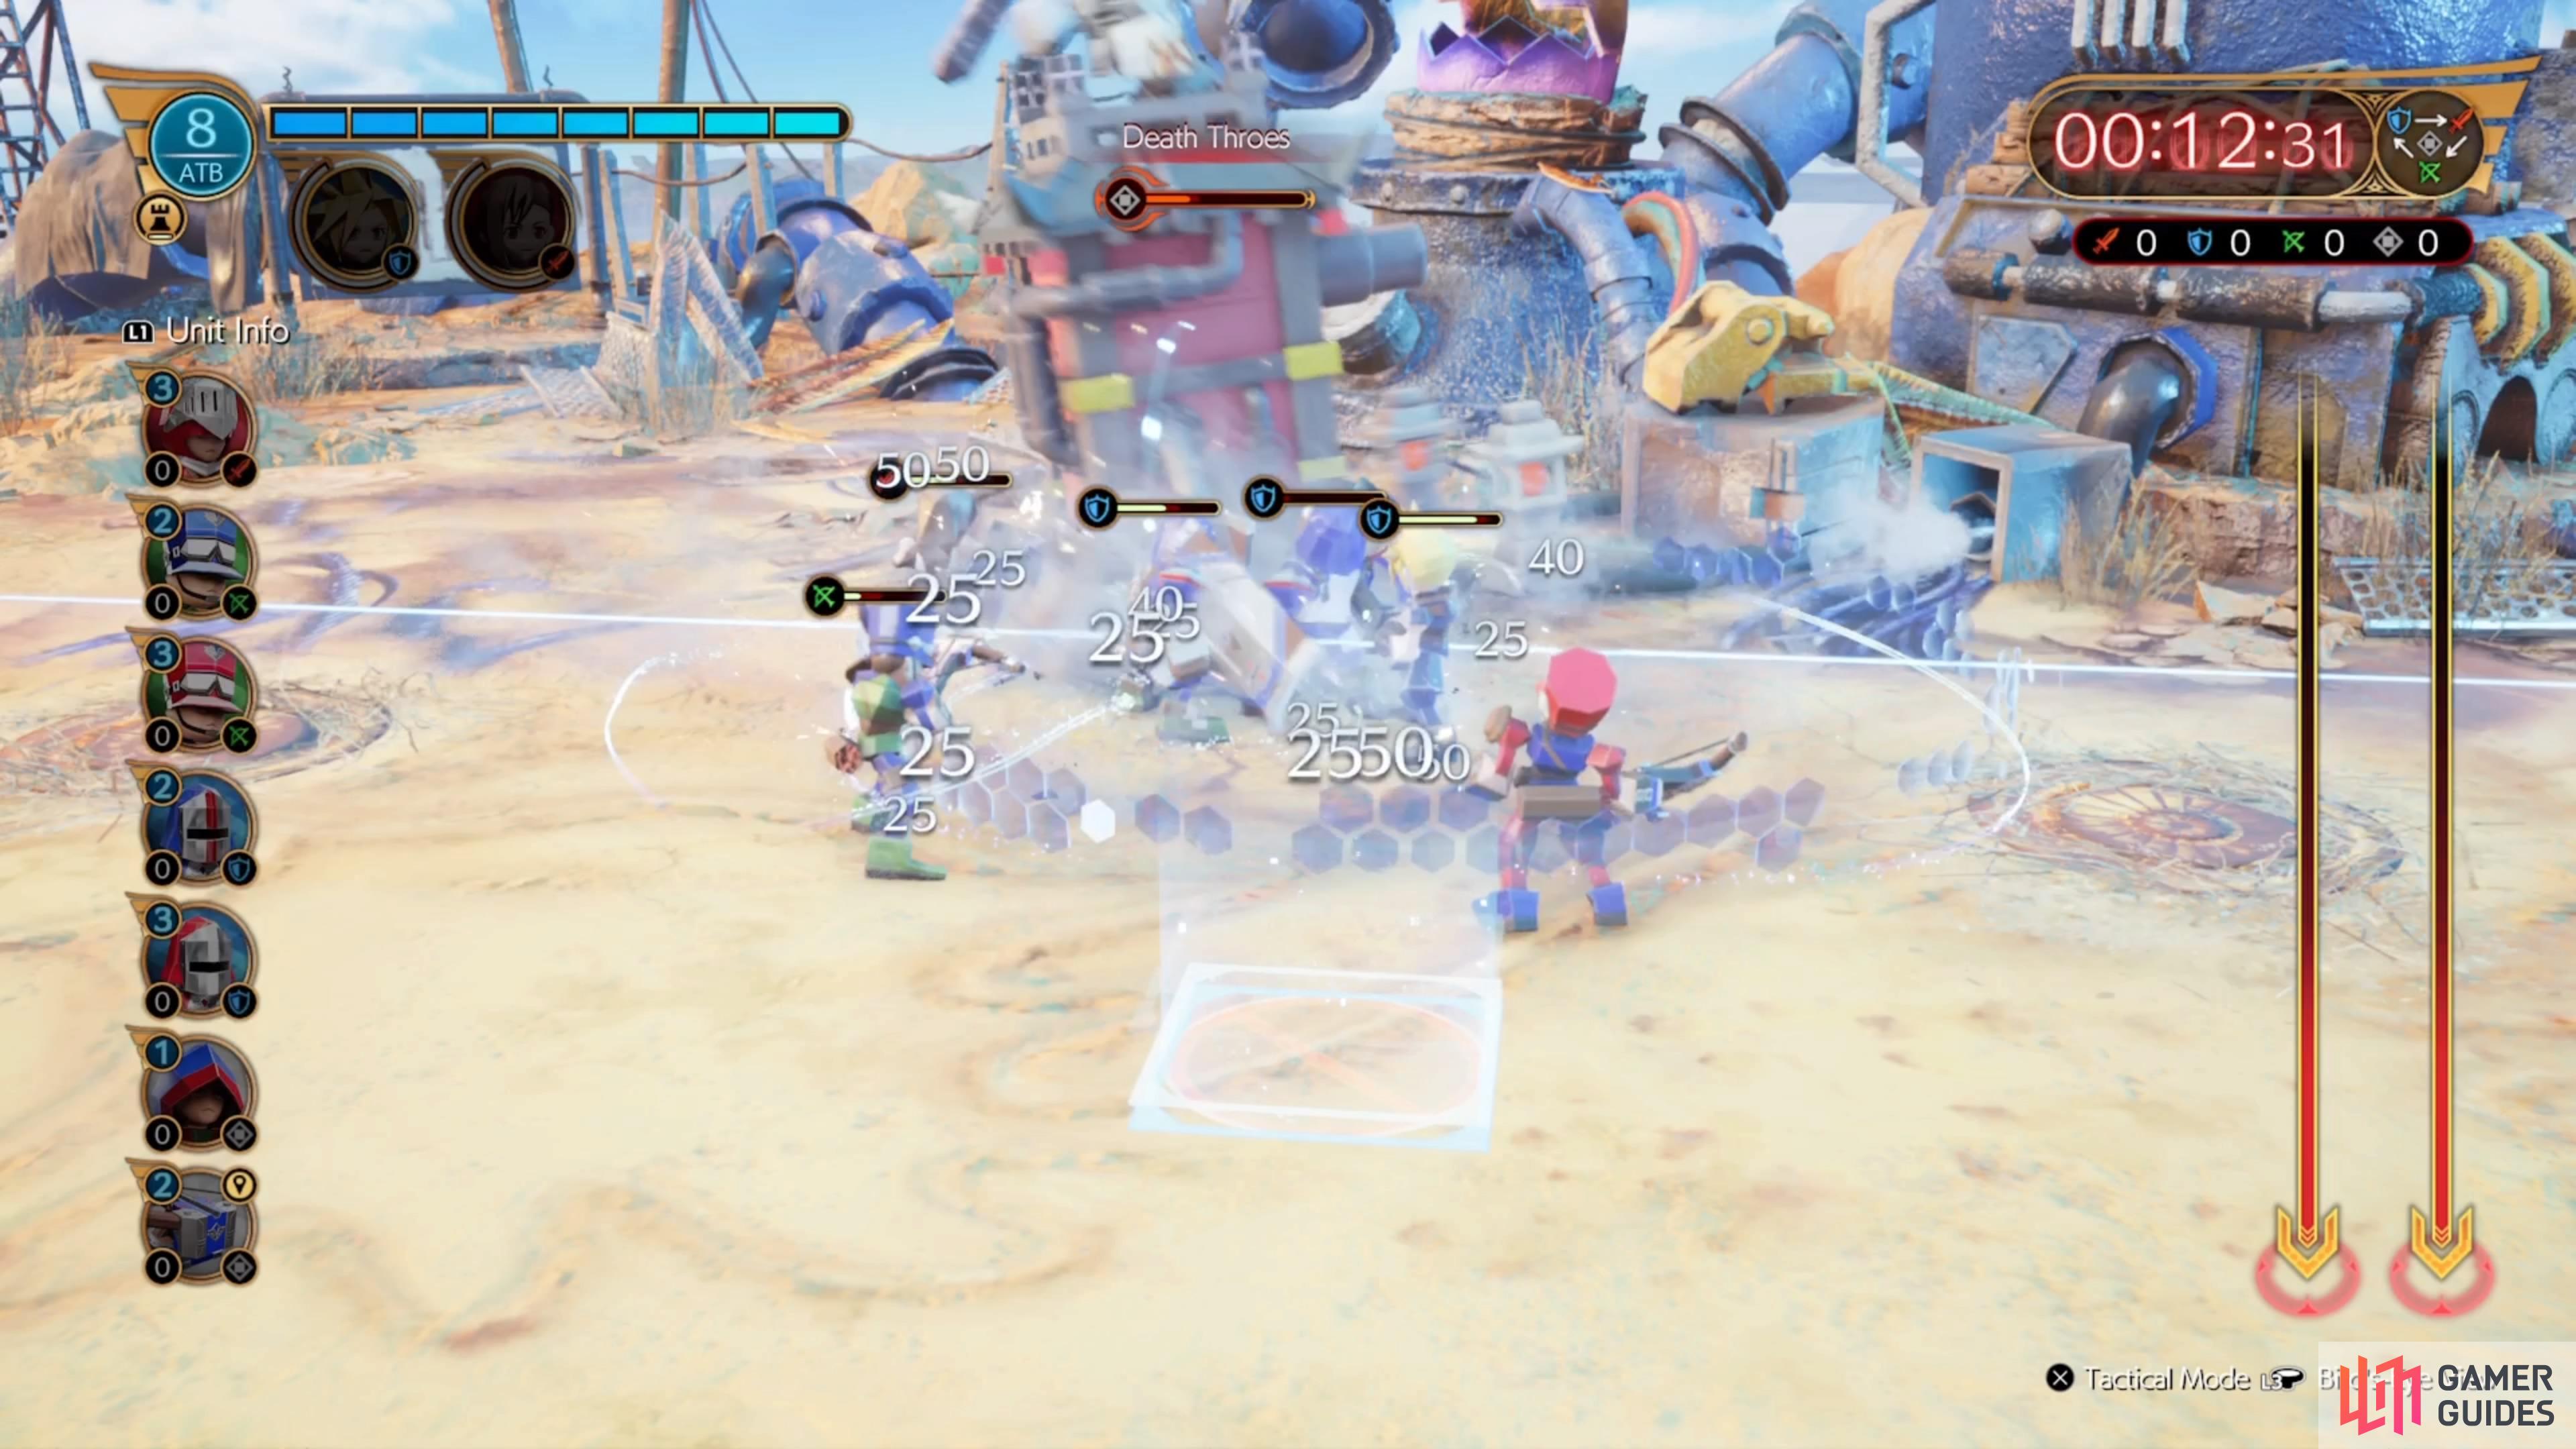
Death Throes is a move that can make or break the battle.
Once again, don’t worry about the wolves, since the Ballistas and Outposts will take them down quickly. The biggest problem, as mentioned above, comes from the boss. He will summon more units as part of his ability, so you never really know what’s going to appear. Also, the boss uses a cannon when you pretty much get in his half of the board, so you have to deal with taking damage from that. Lastly, when he’s low on health, he’ll start using Death Throes, which does A LOT of damage to all enemy units near it.
If you feel like you’re overwhelmed by the normal units, use a Hero to inflict damage and possibly KO the enemies. You should try to keep your Clerics until the end, so you can just rush the boss, especially if you have units left at that point. This is probably the hardest of the four matches, in terms of time, so you might be cutting it close.
Fort Condor Hard Mode - Stage 4
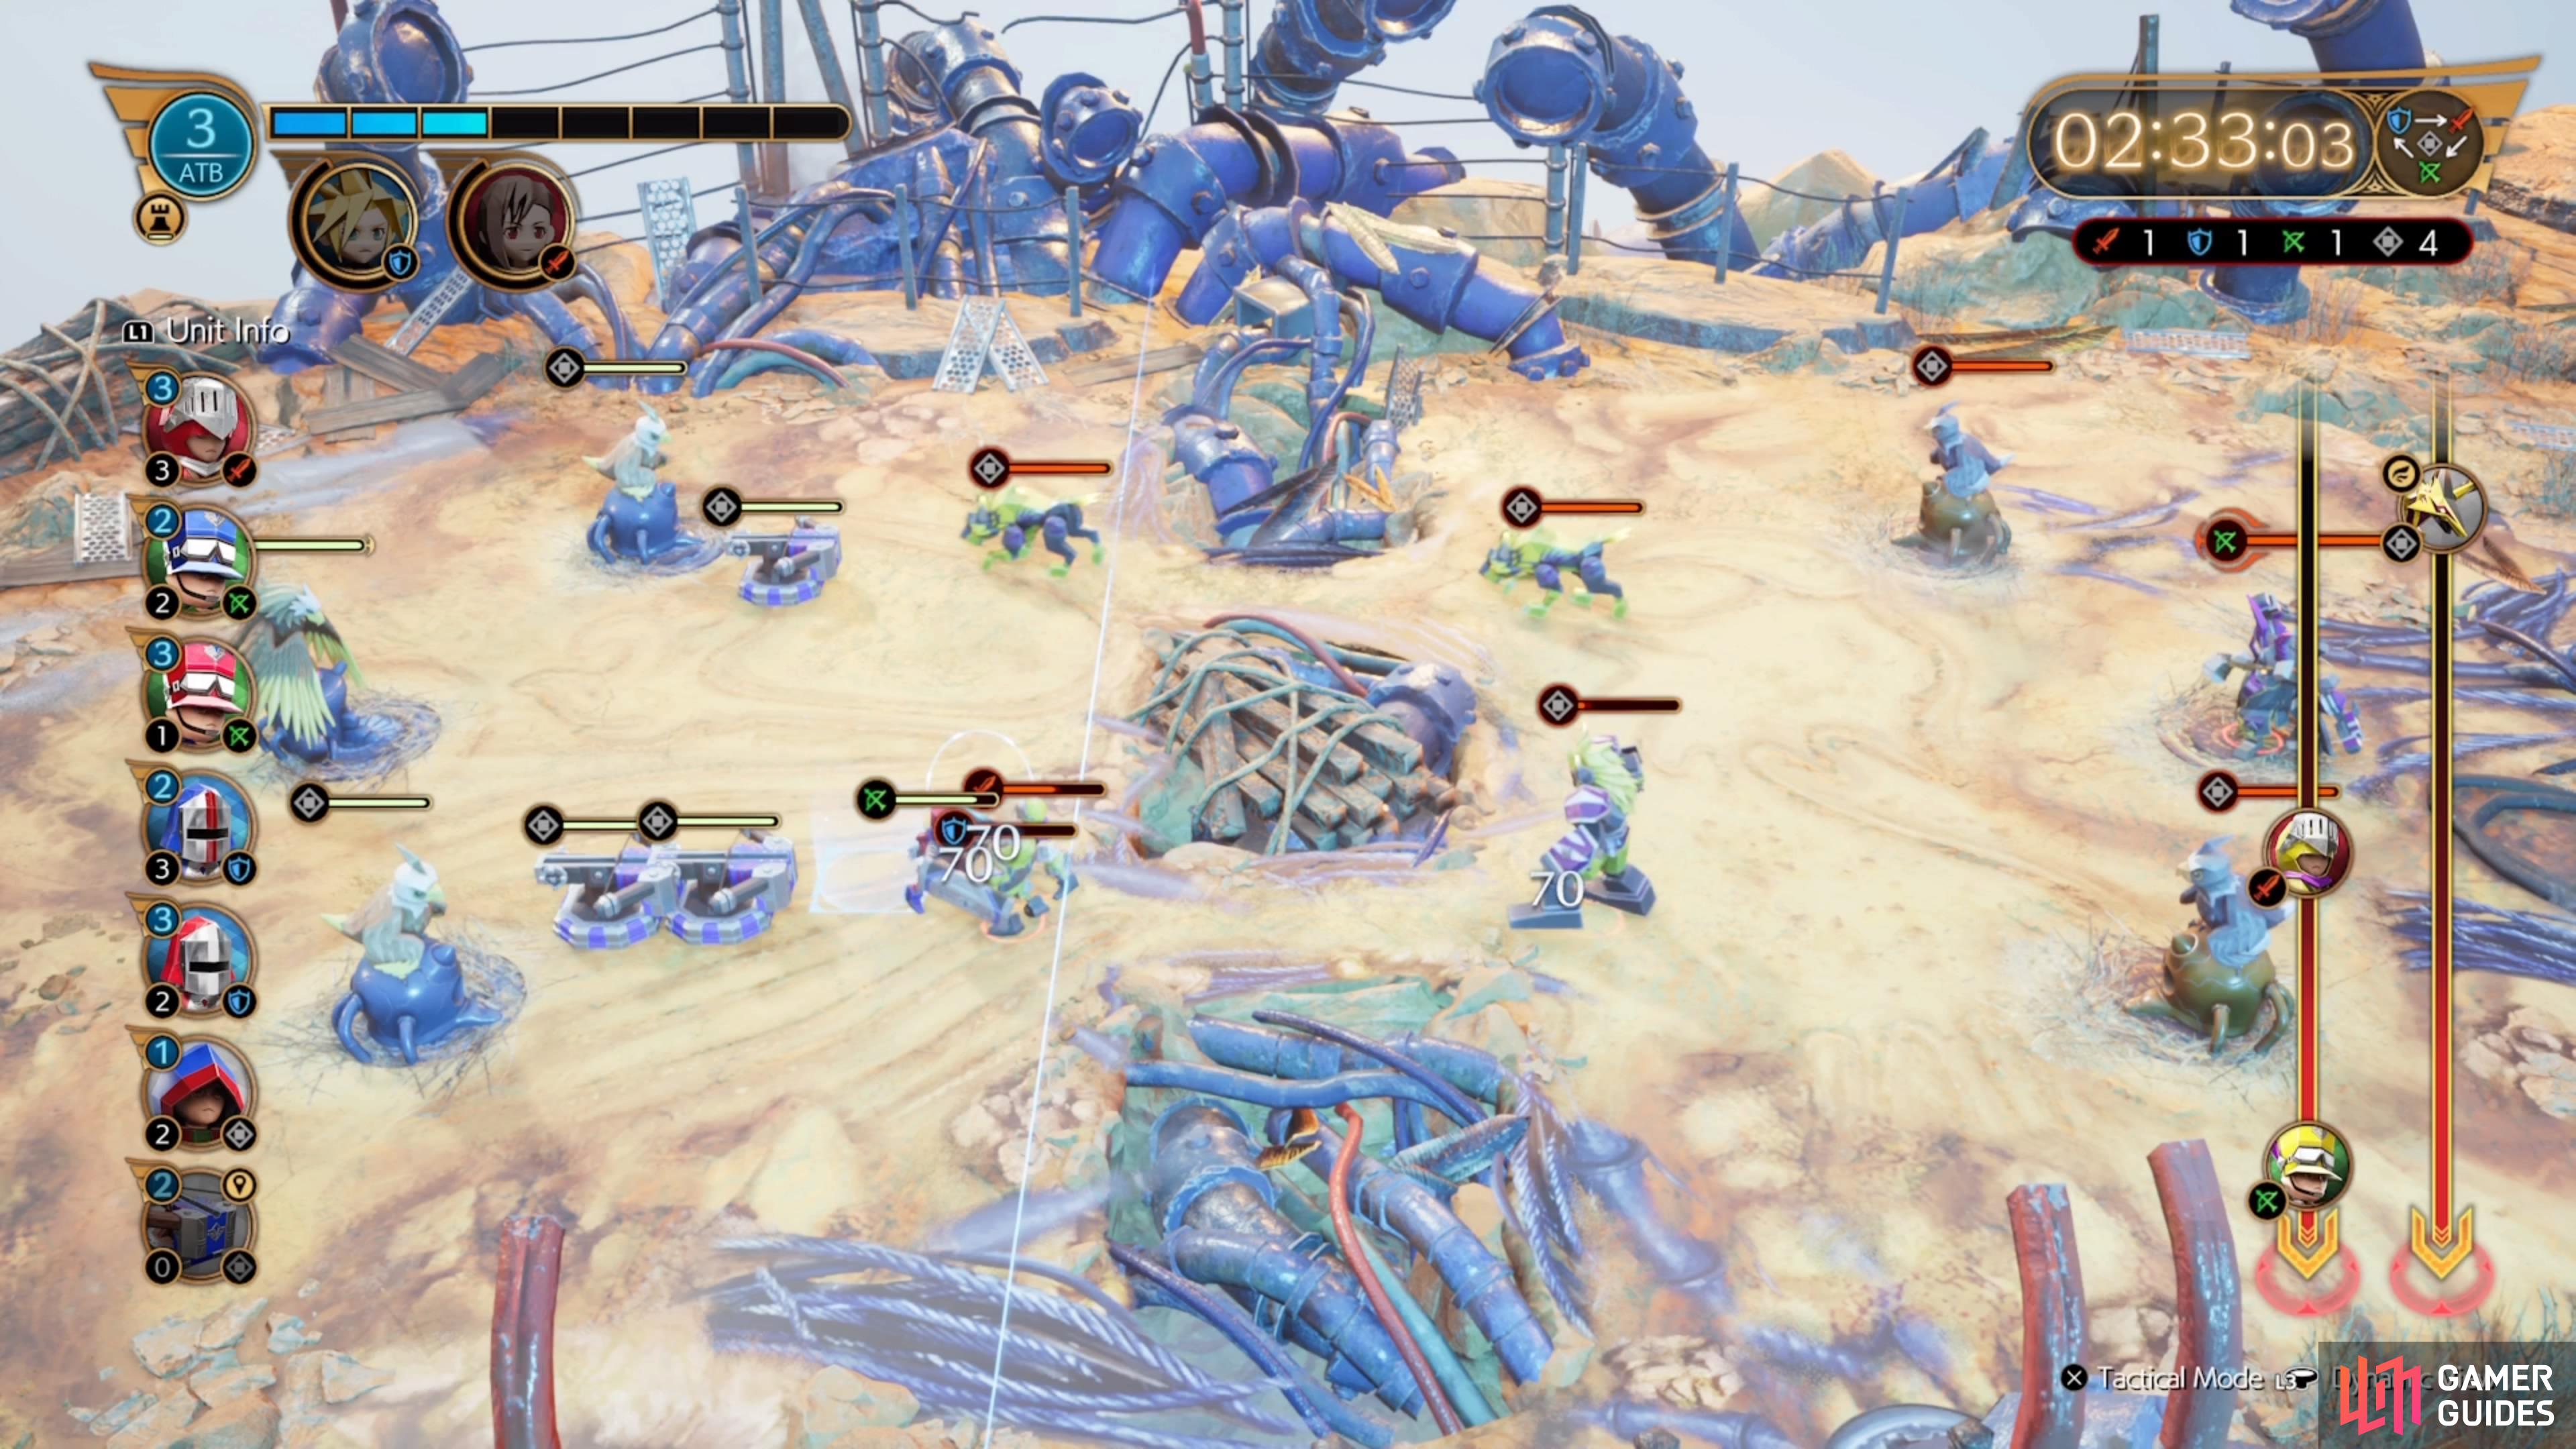
The final stage is definitely going to be a difficult one because the boss has stepped it up here. For the most part, the strategy will remain the same, so you won’t need to do too much to readjust it. If you look at the enemy units, you will see he has three Clerics, but he won’t bring these out until the very end, so they aren’t going to factor into you losing, since they won’t be healing any important units.
Two wolves at once could be a little dangerous, so quickly take them out.
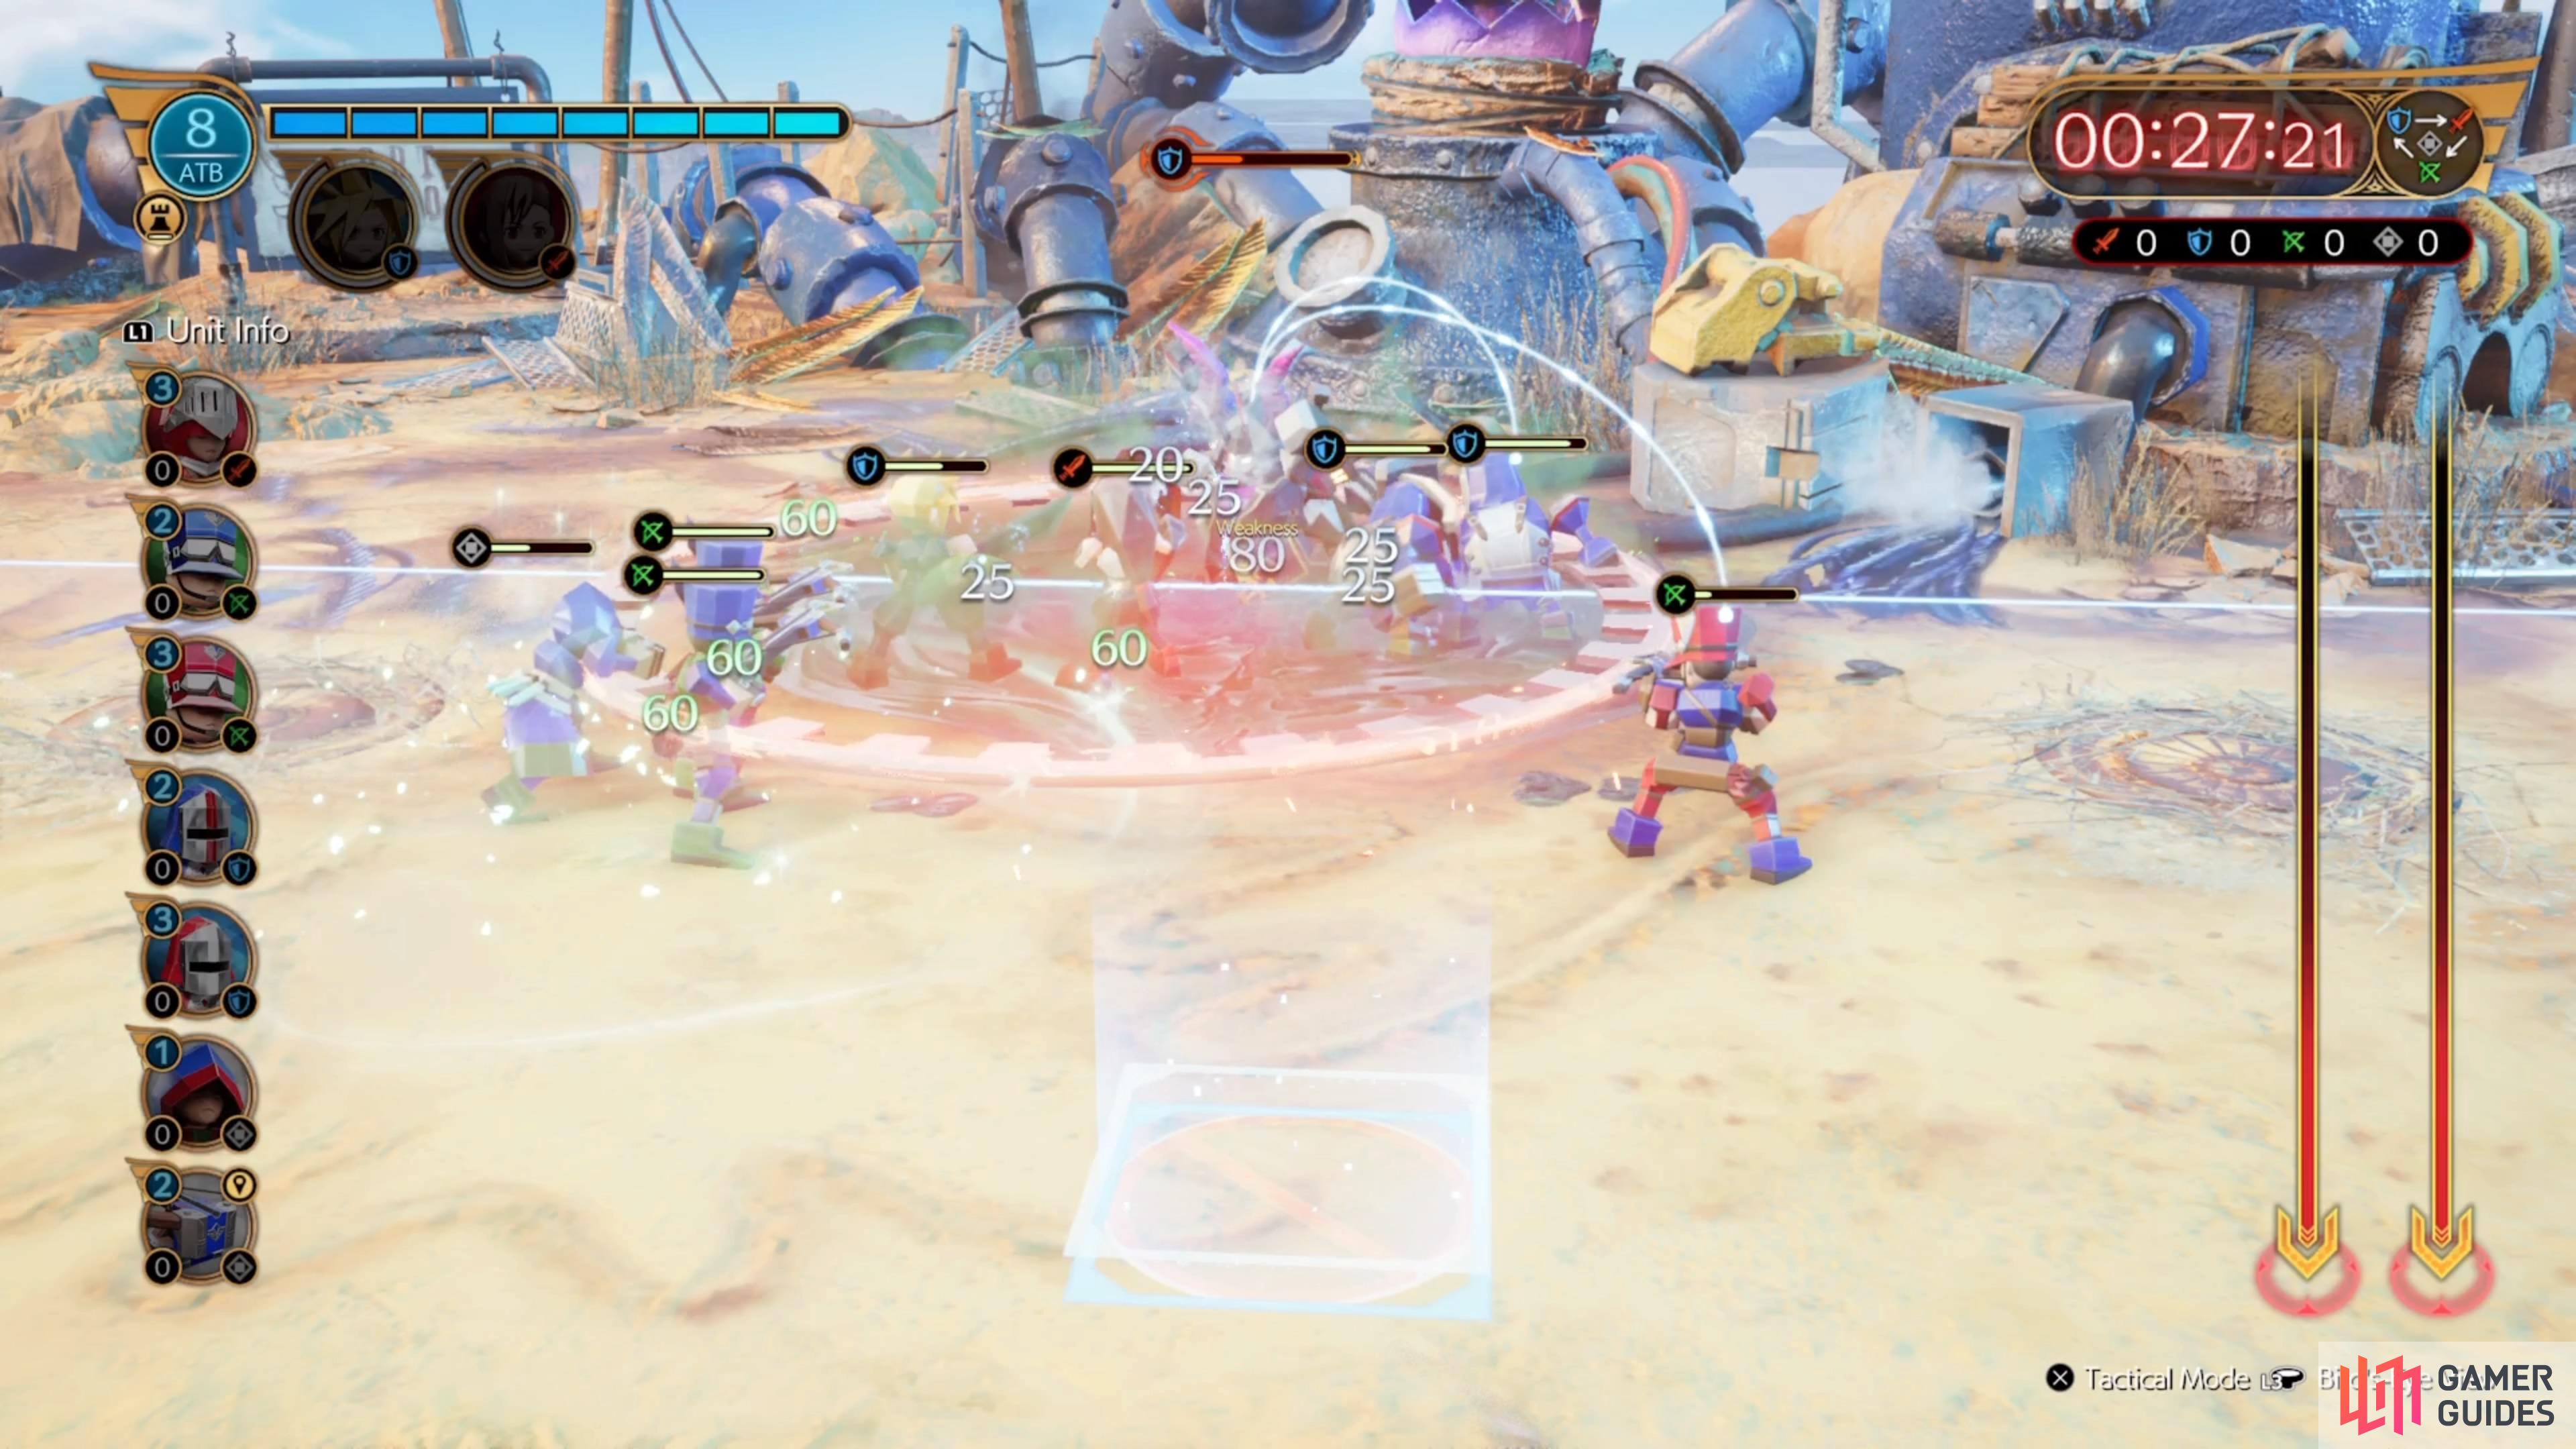
Dogpile on the boss so you can try to defeat him before he does Stop.
The pressure will be on right from the beginning, with four enemy units coming down the right lane, while some enemies won’t be lagging behind in the left lane. While one wolf enemy is nothing, two wolves at the same time might prove to be a little much, so you might want to put something close to your left Outpost to avoid having it taken. Once you get past the beginning, though, things should be smooth sailing until you get to the boss. Unlike other bosses, the one in Stage 4 actually has weapon weaknesses/strengths.
He starts as a Ranged unit but will switch to a Defender after losing some health, then an Attacker towards the end. Of course, with each type switch there will be something accompanying it. First will be some poison surrounding him for the Defender switch, then something else for the Attacker switch. The final piece, though, is him casting ![]() Stop on nearby units at low health. This can be very bad if you’re pressed for time, but if you overwhelm the boss, then you should be fine.
Stop on nearby units at low health. This can be very bad if you’re pressed for time, but if you overwhelm the boss, then you should be fine.
Fort Condor Hard Mode Rewards
So, what do you get for finishing all stages on Hard Mode? Well, each stage will grant you 5 Party EXP, granting a total of 20 Party EXP for the whole lot. Outside of that, there’s no visible reward, like armor, weapons, or materia. However, if you plan on getting 100% in the game, as well as that coveted platinum trophy, you will need to do this for a side activity in Chapter 7 of the main story.
No Comments