
In the Flesh
Location: Nurn, Cab-Gwanath Bluff
Reward: 400 XP, 400 Mirian (+50 Mirian)
Objective: Rescue 5 Slaves
Bonus Objecive: Use Caragors to kill Uruks
“These men served rotten meat to their master, and as punishment htey were forced to eat the putrid flesh themselves. Save them before they succumb to disease.”
A little more challenging than most other Slave rescue missions, you have to rescue three Slaves, and will get bonus Mirian for getting Caragors to kill five Uruks. You’re also timed, so you really shouldn’t bother with much subtlety. The first Slave is on the bridge that comprises half of Tol Crossing. Shoot the Caragor cage to free the beast, then, while the Uruks are distracted, free the Slave. Your timer will reset, giving you another two minutes to reach the next Slave, which can be found in some ruins in the south-eastern part of Watcher’s Landing. Same thing goes here-free the Caragor and then the Slave. Your clock resets again, and you’ll be tasked with reaching the third Slave-along the eastern end of Harad Basin-in the same two-minute time limit. Again, free the Caragor and hope you get your 5th Uruk kill (if you haven’t already), then free the Slave. Get the gist? The fourth Slave can be found in the south-eastern part of Harad Basin, and the fifth is held in all the way in the south-western corner of the Fern Outskirts. No matter how incompetent your Caragor is, you should have no trouble getting five Uruk kills with them if you bother to free them.
Last Hope
Location: Nurn, Last Hope
Reward: 400 XP, 400 Mirian (+50 Mirian)
Objective: Rescue 3 Slaves
Bonus Objecive: Throw 5 Uruks over ledges
“Prisoners are whispering of how the Gravewalker will rescue them. When the Uruks overhear this kind of talk, they string up a few men as examples. It’s time to prove the rumors are true.”
Another easy mission, the Slaves aren’t kept in a Stronghold, it’s not timed, and the bonus objective merely requires you to toss a few Uruks over ledges. The Slaves are, however, all in a small area, as are their Uruk guards. Try to complete the bonus objective at the start of the mission, before all the Uruks converge on you in numbers, which will complicate things. Worse comes to worse, Wraith Flash will stun nearby Uruks at least long enough for you to toss one off a ledge.
Light in the Darkness
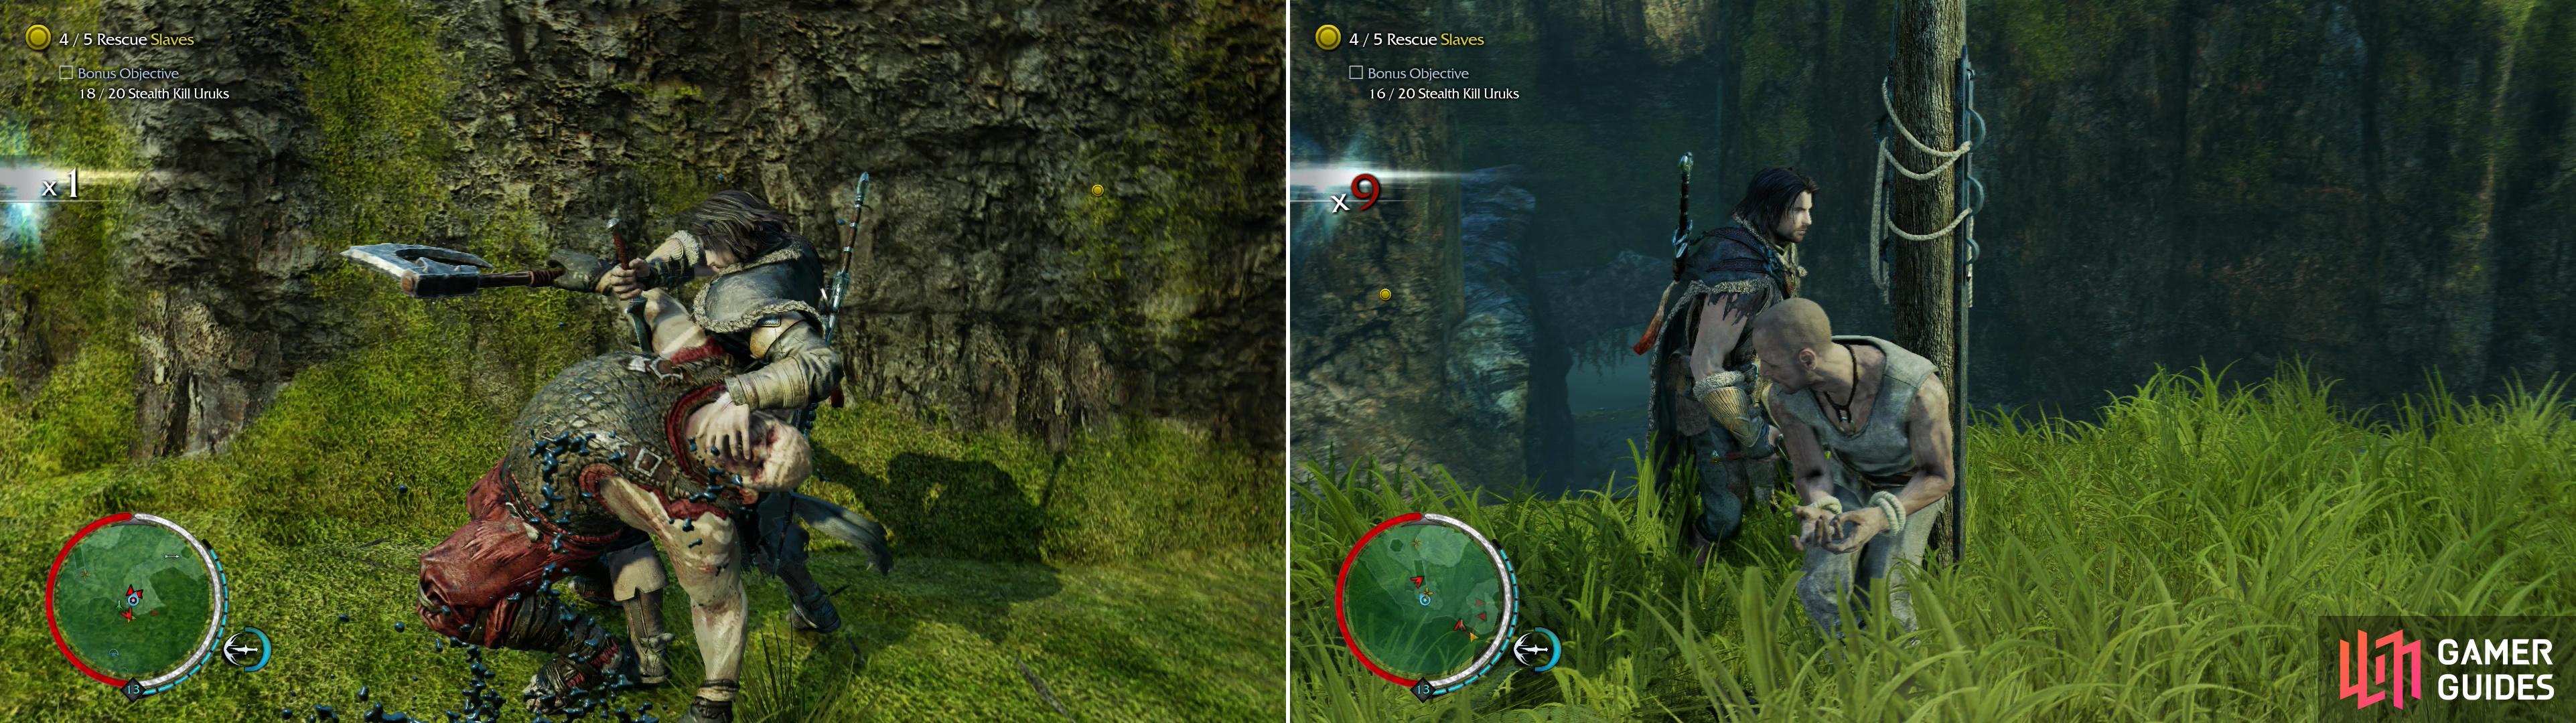
You’ll have to go through some effort to Stealth Kill twenty of the Uruks guarding the slaves to complete this bonus objective (left), but afterwards, there shouldn’t be many Uruks left to prevent you from freeing said slaves (right).
Location: Nurn, Ethir Poros
Reward: 400 XP, 450 Mirian (+50 Mirian)
Objective: Rescue 5 Slaves
Bonus Objecive: Stealth Kill 20 Uruks
“Even in the darkest shadow, some men never give up hope, never lose their strength. Even though these men lost their battle, you can ensure the war continues. Rescue them and get them back in the light.”
Another easy rescue mission, just Stealth Kill twenty Uruks on your way to rescuing five Slaves.
Nowhere to Hide
Location: Nurn, Cab-Gwanath Bluff
Reward: 400 XP, 450 Mirian (+50 Mirian)
Objective: Rescue 5 Slaves
Bonus Objecive: Don’t get hit
“In a futile attempt to escape, these men tried to disguise themselves in Uruk armor. They were easily caught. Rescue them and show them that they don’t need to hide.”
A somewhat difficult rescue mission, for a change… at least if you care about the bonus objective. You have to rescue five Slaves without getting hit. Unfortunately, the Slaves are located in the Stronghold areas north of Cab-Gwanath Bluff. Use ranged attacks and stealth to mitigate your risk of injury, and climb around the exterior of fortifications.
The Evil Eye
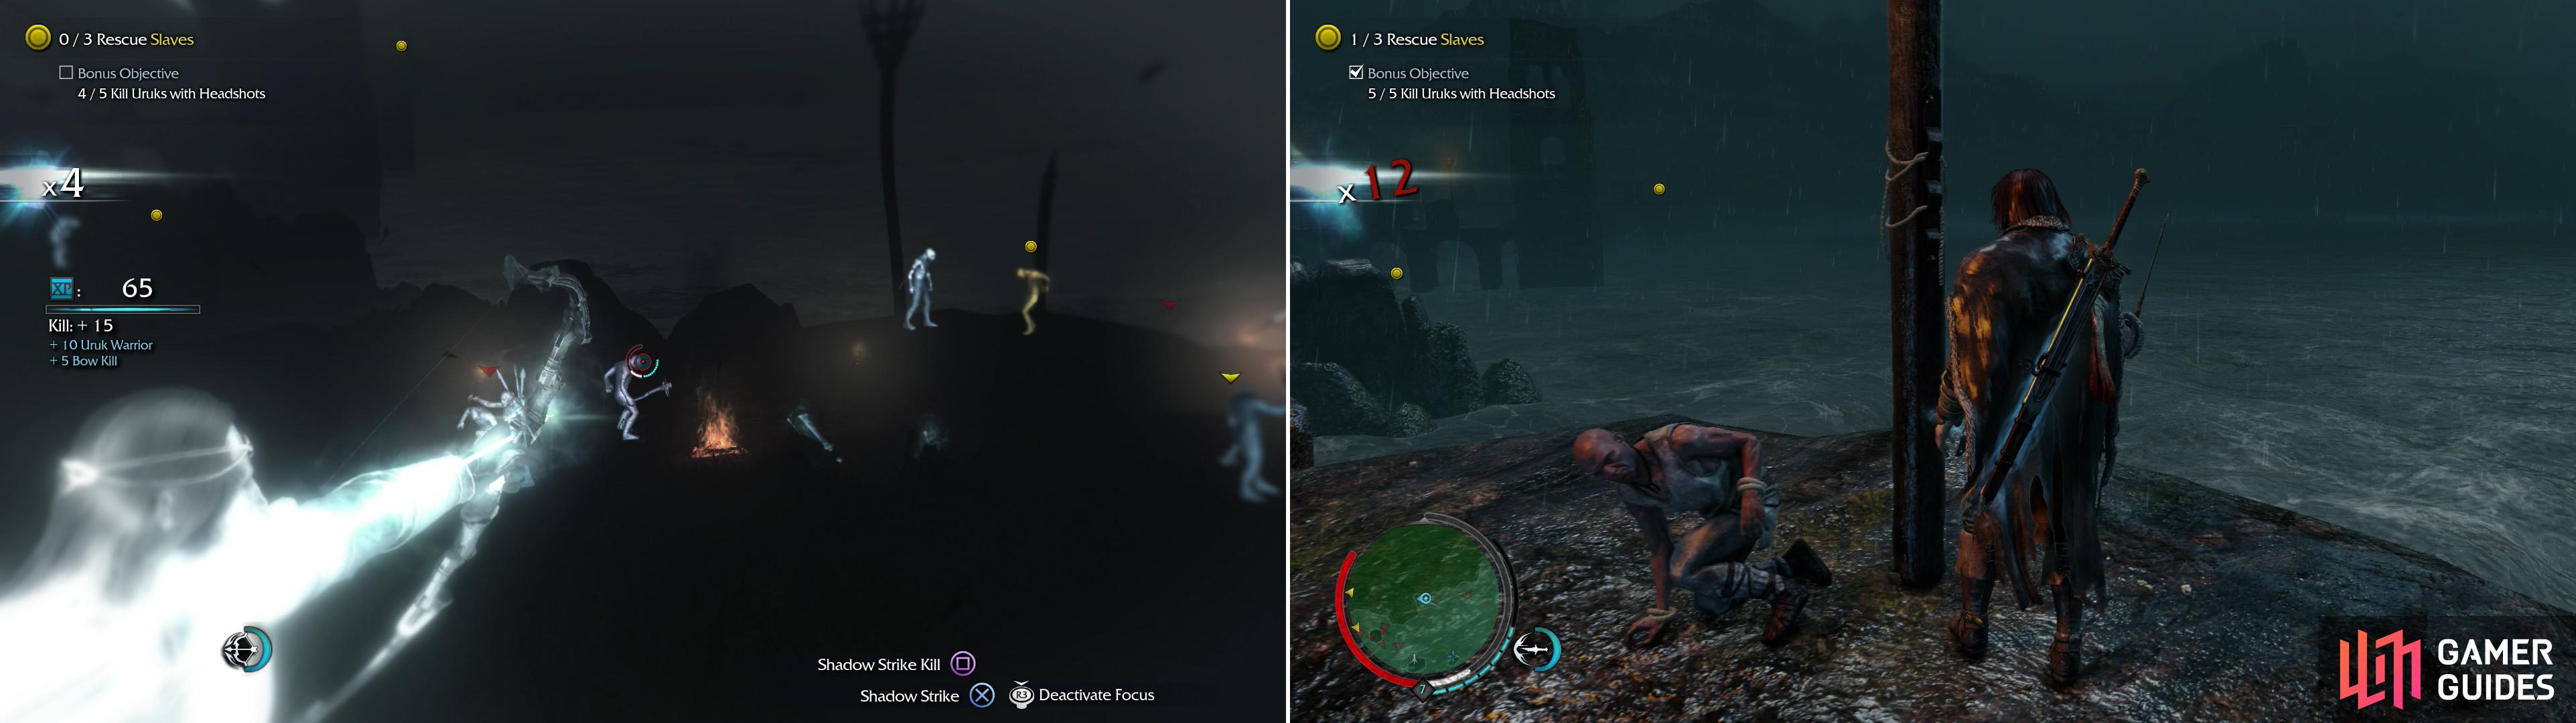
Find five arrows a home in the heads of a similar number of Uruks (left) then free the slaves (right).
Location: Nurn, Cab-Gwanath Bluff
Reward: 400 XP, 350 Mirian (+50 Mirian)
Objective: Rescue 3 Slaves
Bonus Objecive: Kill 5 Uruks with Headshots
“Some captured Tribesmen have been strung up for looking directly in the eye of their master. Find them and cut them free.”
This mission takes place in the Cab-Gwanath Bluff and Watcher’s Landing, not the northern Stronghold, which makes this rather easy. Just free the Slaves and headshot five Uruks for bonus Mirian.
The Hunger
Location: Nurn, Cab-Gwanath Bluff
Reward: 400 XP, 350 Mirian (+50 Mirian)
Objective: Rescue 3 Slaves
Bonus Objecive: Ledge Kill 3 Uruks
“These hungry men dared steal some food. Free them so they can rejoin Lithariel’s company.”
Another Tribesman rescue mission in the Cab-Gwanath Bluff, this one focuses on the north-eastern part of the area, and like “The Evil Eye” , it’s pretty easy. Ledge Kill Uruks for bonus Mirian. The Uruks here, even though they’re not in a Stronghold, are mobile and densely packed, and you can get into a pretty big fight if you’re not careful. Since the Uruks are finite here, try to score the Ledge Kills before going after the Slaves and drawing too much attention.
The Name of Power
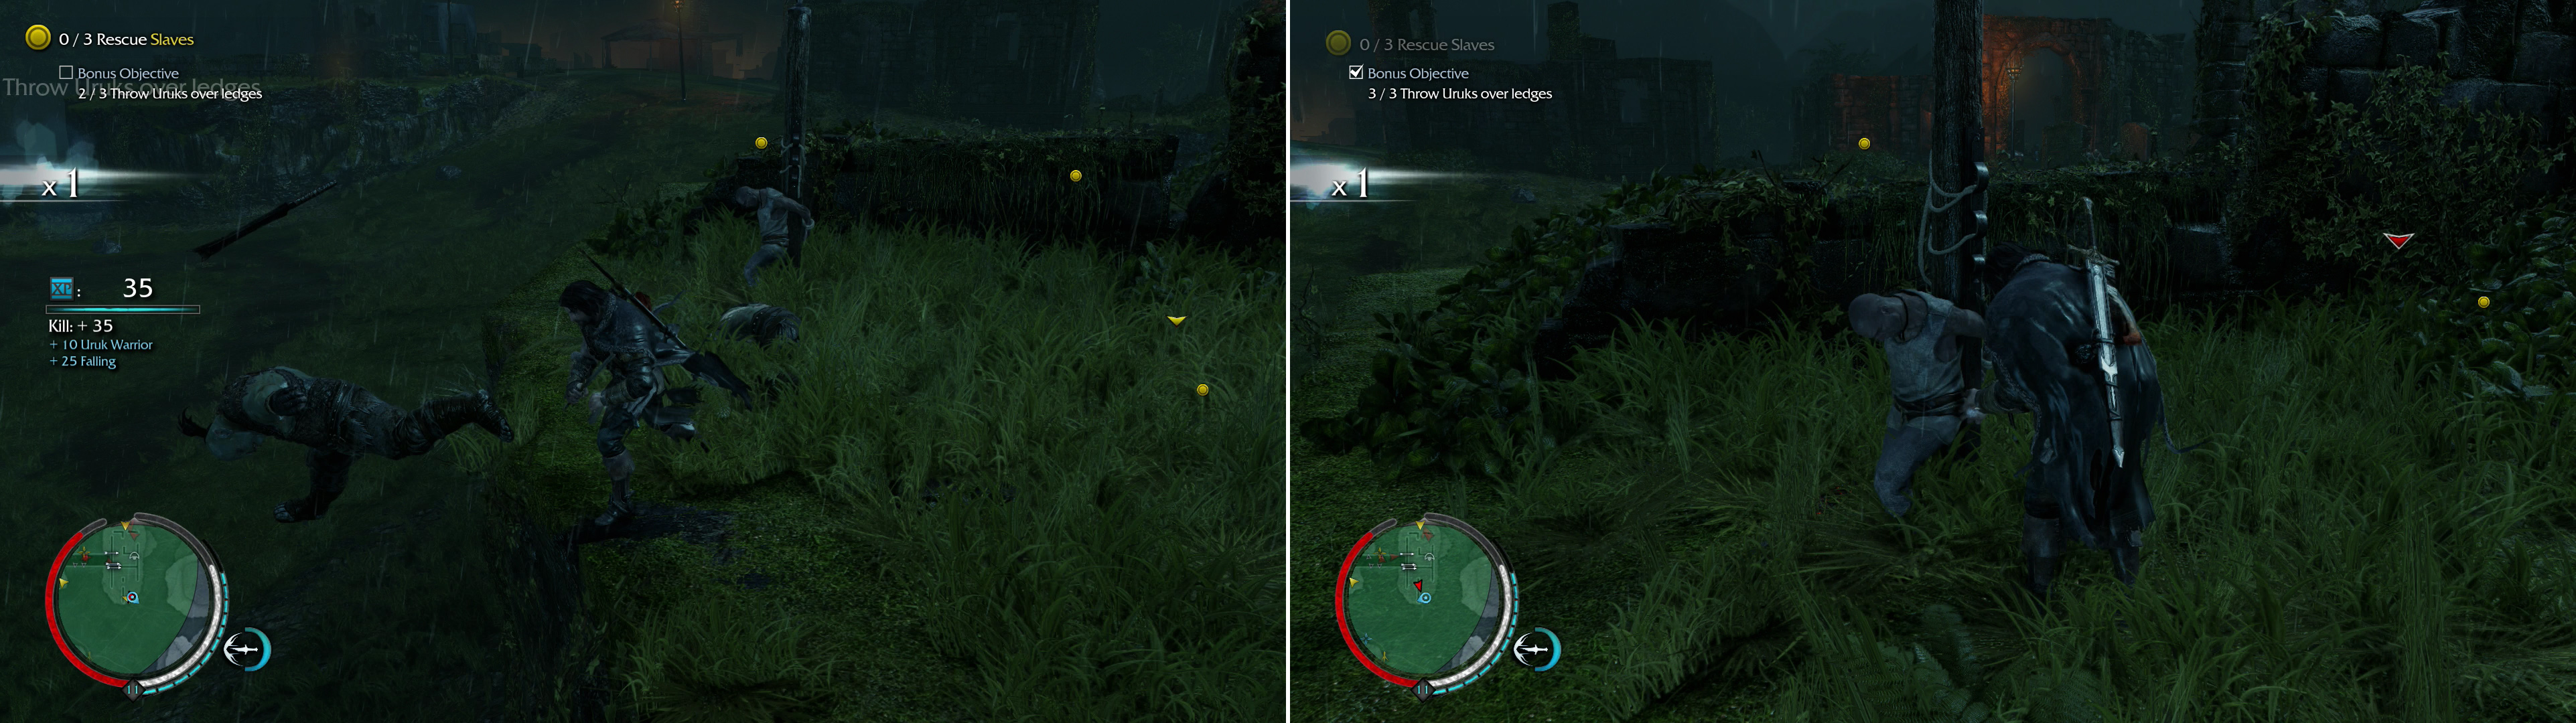
Toss three Uruks off ledges (left) then free three slaves (right).
Location: Nurn, Harad Basin
Reward: 400 XP, 350 Mirian (+50 Mirian)
Objective: Rescue 3 Slaves
Bonus Objecive: Throw 3 Uruks over ledges
“These Tribesmen are being punished for blaspheming against the Dark Lord. Show their oppressors a true challenge to his power.”
Rescue three slaves around the western end of Harad Basin and, for bonus Mirian, throw three Uruks off ledges. There are plenty of elevated areas here to do this, but if all else fails, you can always pick on archers.
The Stand
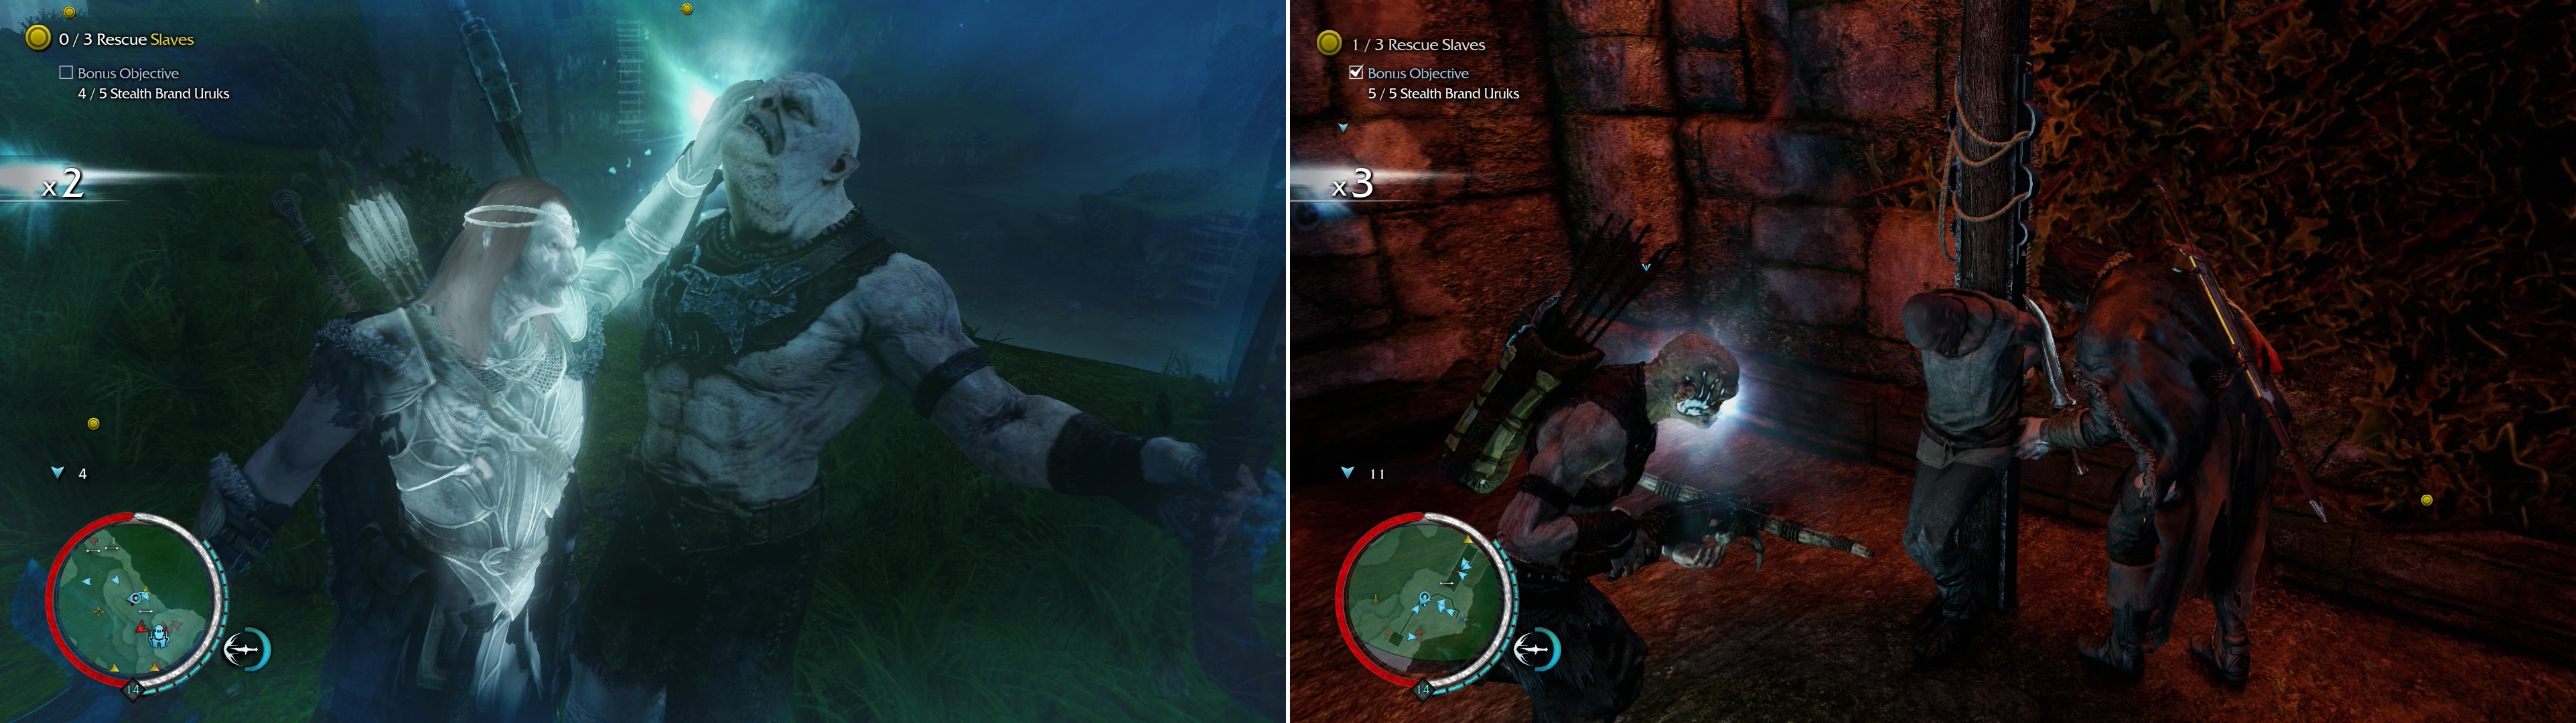
Abuse your newfound Brand ability to satisfy a bonus objective (left) then rescue three slaves (right)
Location: Nurn, Harad Basin
Reward: 400 XP, 400 Mirian (+50 Mirian)
Objective: Rescue 3 Slaves
Bonus Objecive: Stealth Brand 5 Uruks
“You are not the only one striking a blow against the Uruks. These men attempted to distract the guards while others ran. You must reinforce their courage.”
Easy Mirian. Free the three Slaves and Stealth Brand 5 Uruks. Just an excuse to press a different button while you sneak around, reallly.
To Freedom
Combat Brand some Uruks to give you some allies (left) then free enough slaves to inspire an uprising (right).
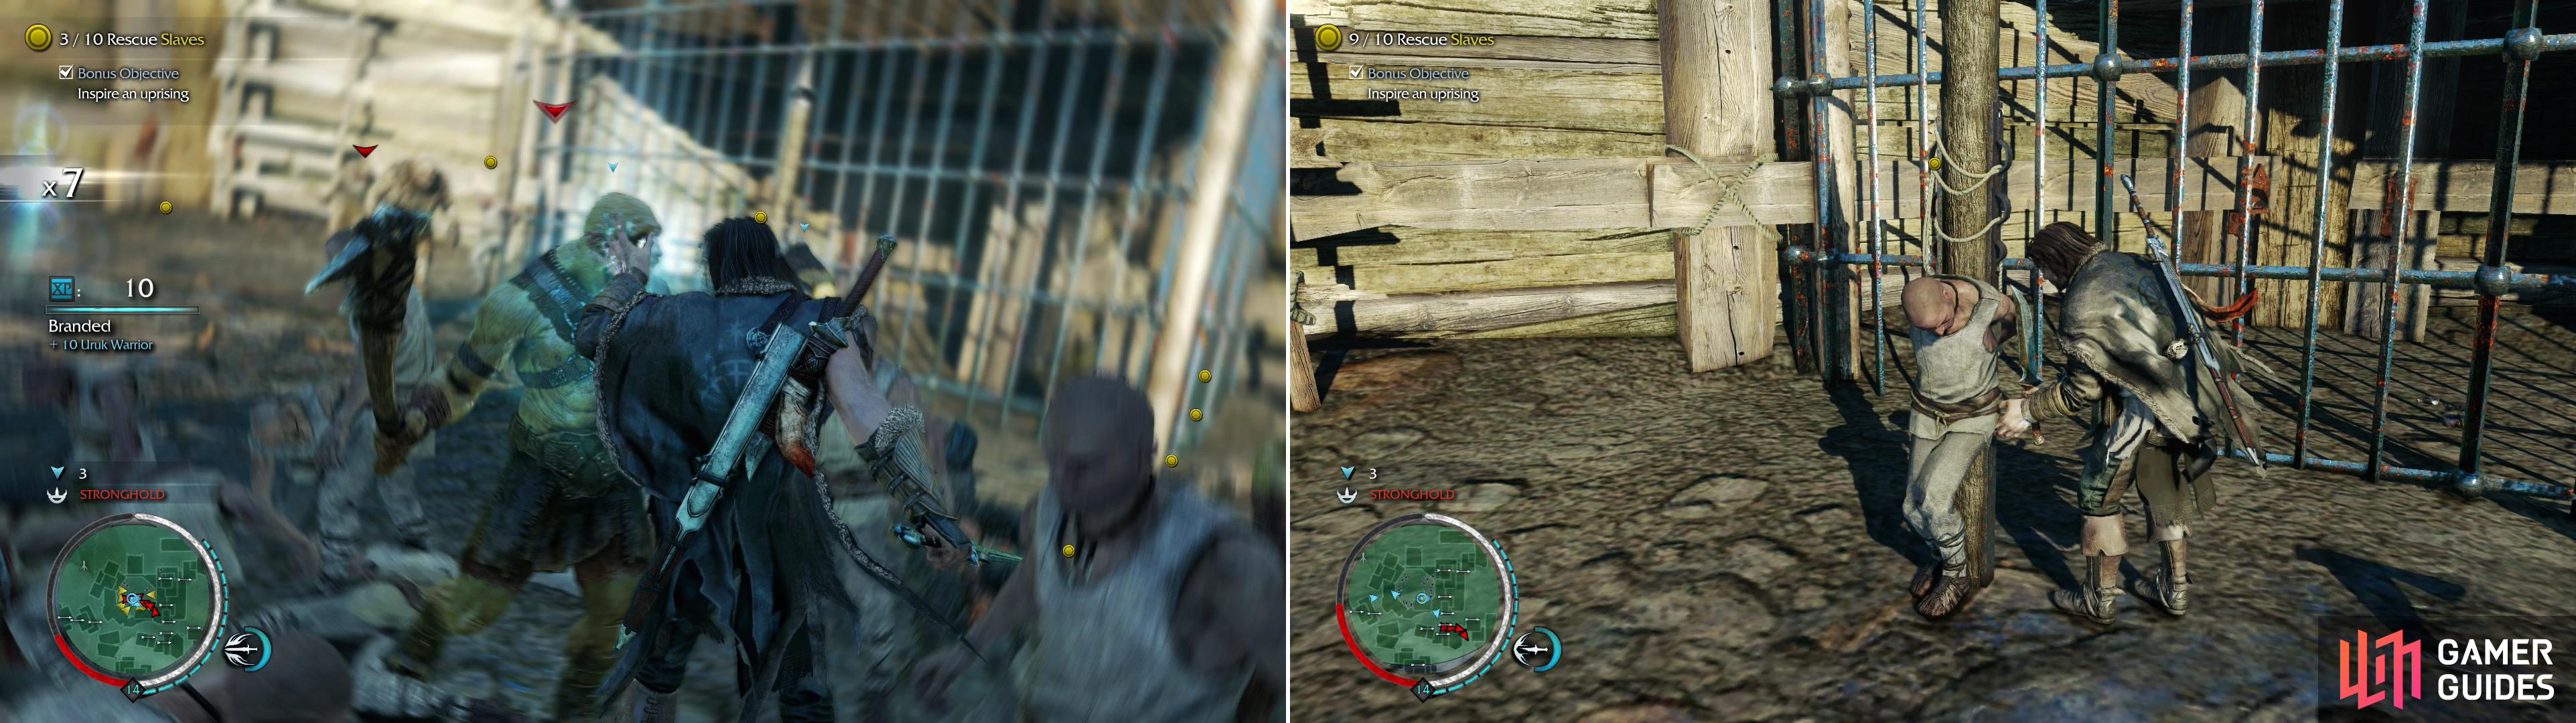
Location: Nurn, Fort Morn
Reward: 400 XP, 500 Mirian (+50 Mirian)
Objective: Rescue 10 Slaves
Bonus Objecive: Inspire an uprising
“Now the Tribesmen of Nurn believe that their Uruk masters can be resisted. You have given them hope where there was none. Rescue their leaders and they could escape this cursed land.”
Free some Slaves who are tied up in an arena and some Uruks will arrive after the first one shows up. Combat Brand some of them to bolster your numbers and more Slaves will join the fray, freeing other Slaves and generally making a mess of things. This should satisfy the bonus objective. When you have the opportunity free the rest of the Slaves to complete the mission.
Unbroken
Location: Nurn, Fern Outskirts
Reward: 400 XP, 400 Mirian (+50 Mirian)
Objective: Rescue 3 Slaves
Bonus Objecive: Don’t get hit
“The Uruks have little pity for slaves who cry out in pain. Showing weakness means more beatings and more hardship. This endless cycle of suffering must be broken.”
Rescue three Slaves without taking any damage. Fortunately, this mission takes place in the south-eastern part of the Fern Outskirts and the south-western part of Thang Talath, not in any Strongholds. The bonus objective for this mission calls for stealth, and using your bow to dispose of troublesome Uruks is also helpful.
Unchained
Use Attract to draw Uruks to your location (left) and while they move, position yourself to take advantage of them (right).
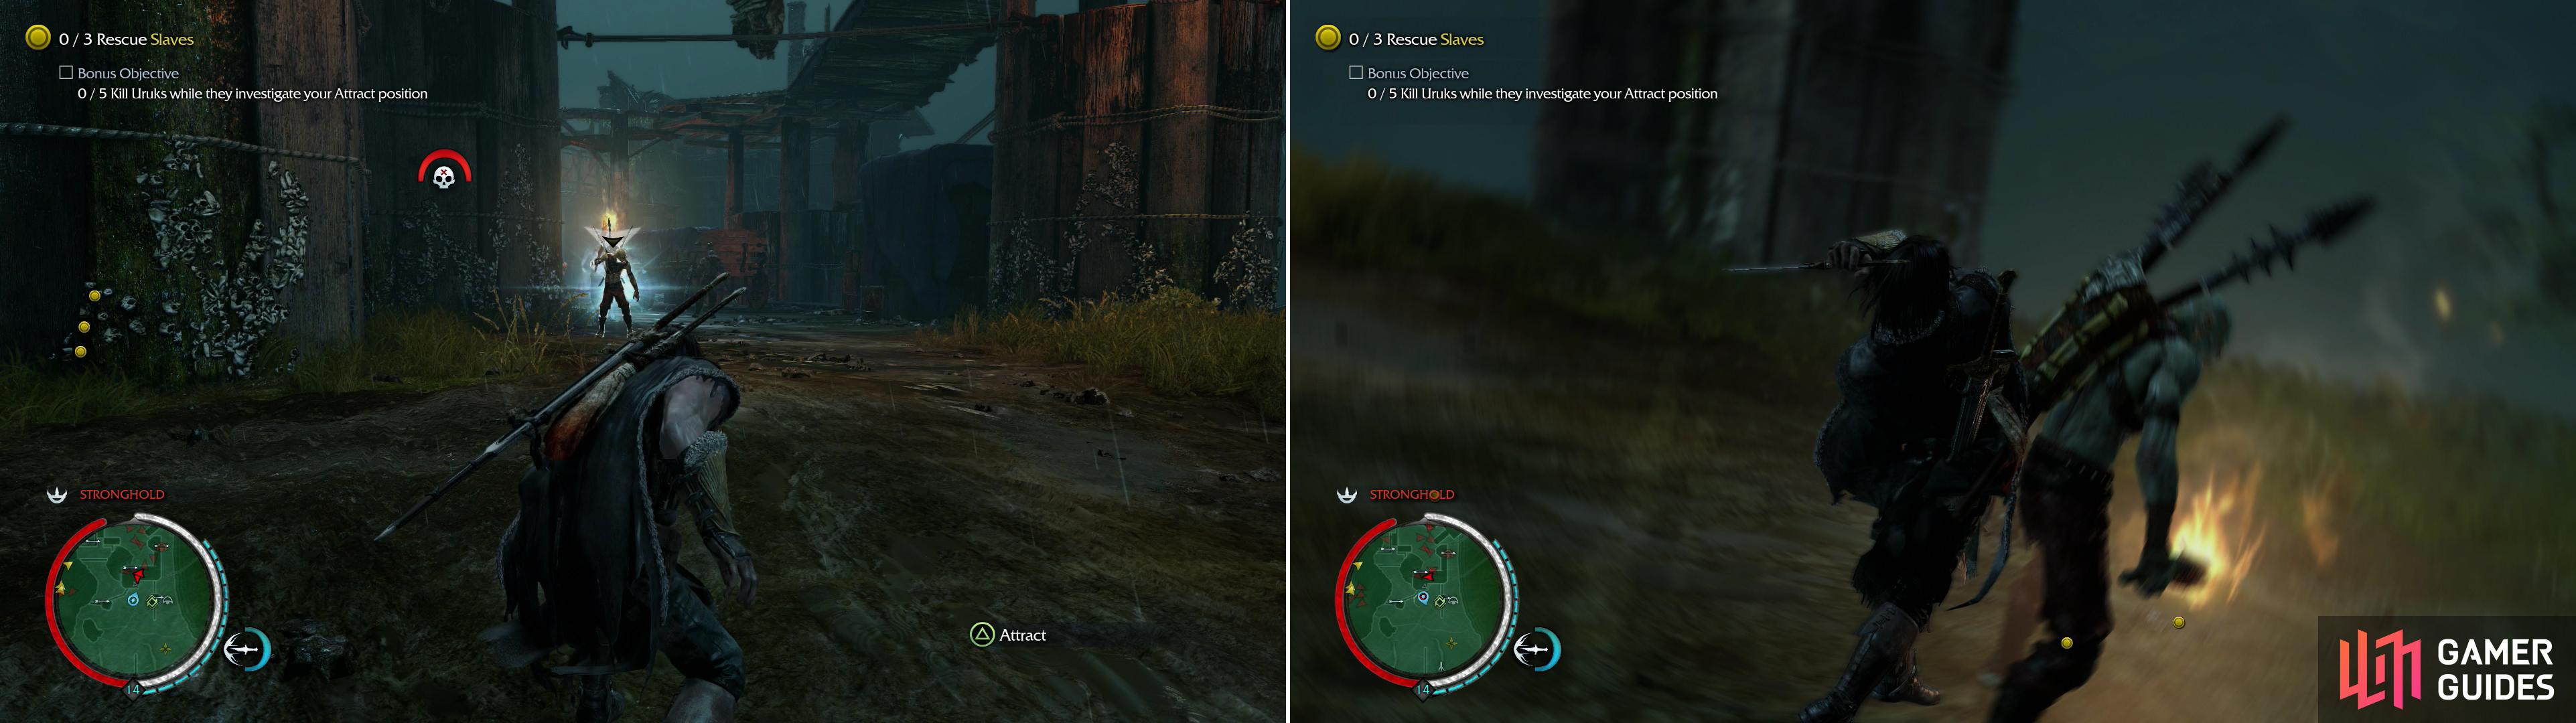
Location: Nurn, Nurnen Peninsula
Reward: 400 XP, 350 Mirian (+50 Mirian)
Objective: Rescue 3 Slaves
Bonus Objecive: Kill 5 Uruks while they investigate your Attract position
“These slaves are being tortured for trying to escape. Bring them freedom.”
A somewhat more challenging rescue misison, as the quest takes place in the Cape of Nurn and Nurnen Peninsula, the latter of which is a Stronghold. In particular, the Slaves can be found in the caves east of the Stronghold, but to satisfy the bonus objective-to kill five Uruks while they investigate your Attract position-you might want to raid the Stronghold, first. Ledge Kills and Strike From Above kills are a great way to do this, just try to avoid having an alarm raised.
Weapons of War
Location: Nurn, Nurnen Peninsula
Reward: 400 XP, 450 Mirian (+50 Mirian)
Objective: Rescue 5 Slaves
Bonus Objecive: Cause 20 Uruks to Kill Uruks
“The prisoners, armed only with shovels, stood little chance of defeating the Uruks. They attempted to craft better weapons, but were caught before they could use them. Rescue these warriors and return them to their tribe where they can hold swords again.”
Find Uruks, Brand Uruks, activate Uruks. Once you’ve racked up 20 kills this way, free the slaves. The area is a Stronghold, so things could get messy if you’re not careful, but on the other hand, getting 20 Uruk kills might be less work if the Alarm is raised. Consider freeing four Slaves, first, so the mission can be ended quickly if need be.

 Sign up
No Comments