
With the first Power Moon under your belt, the giant pillar falls down to form a bridge and Cappy mentions that the moon you just got will be able to power up this airship you’re looking for. Cross the bridge and a little scene will play out, where you will have found the airship. See that globe by the door? Toss Cappy at it and the Power Moon to just received will go into the ship, but it looks like you’ll need a few more moons in order to get it functioning again.
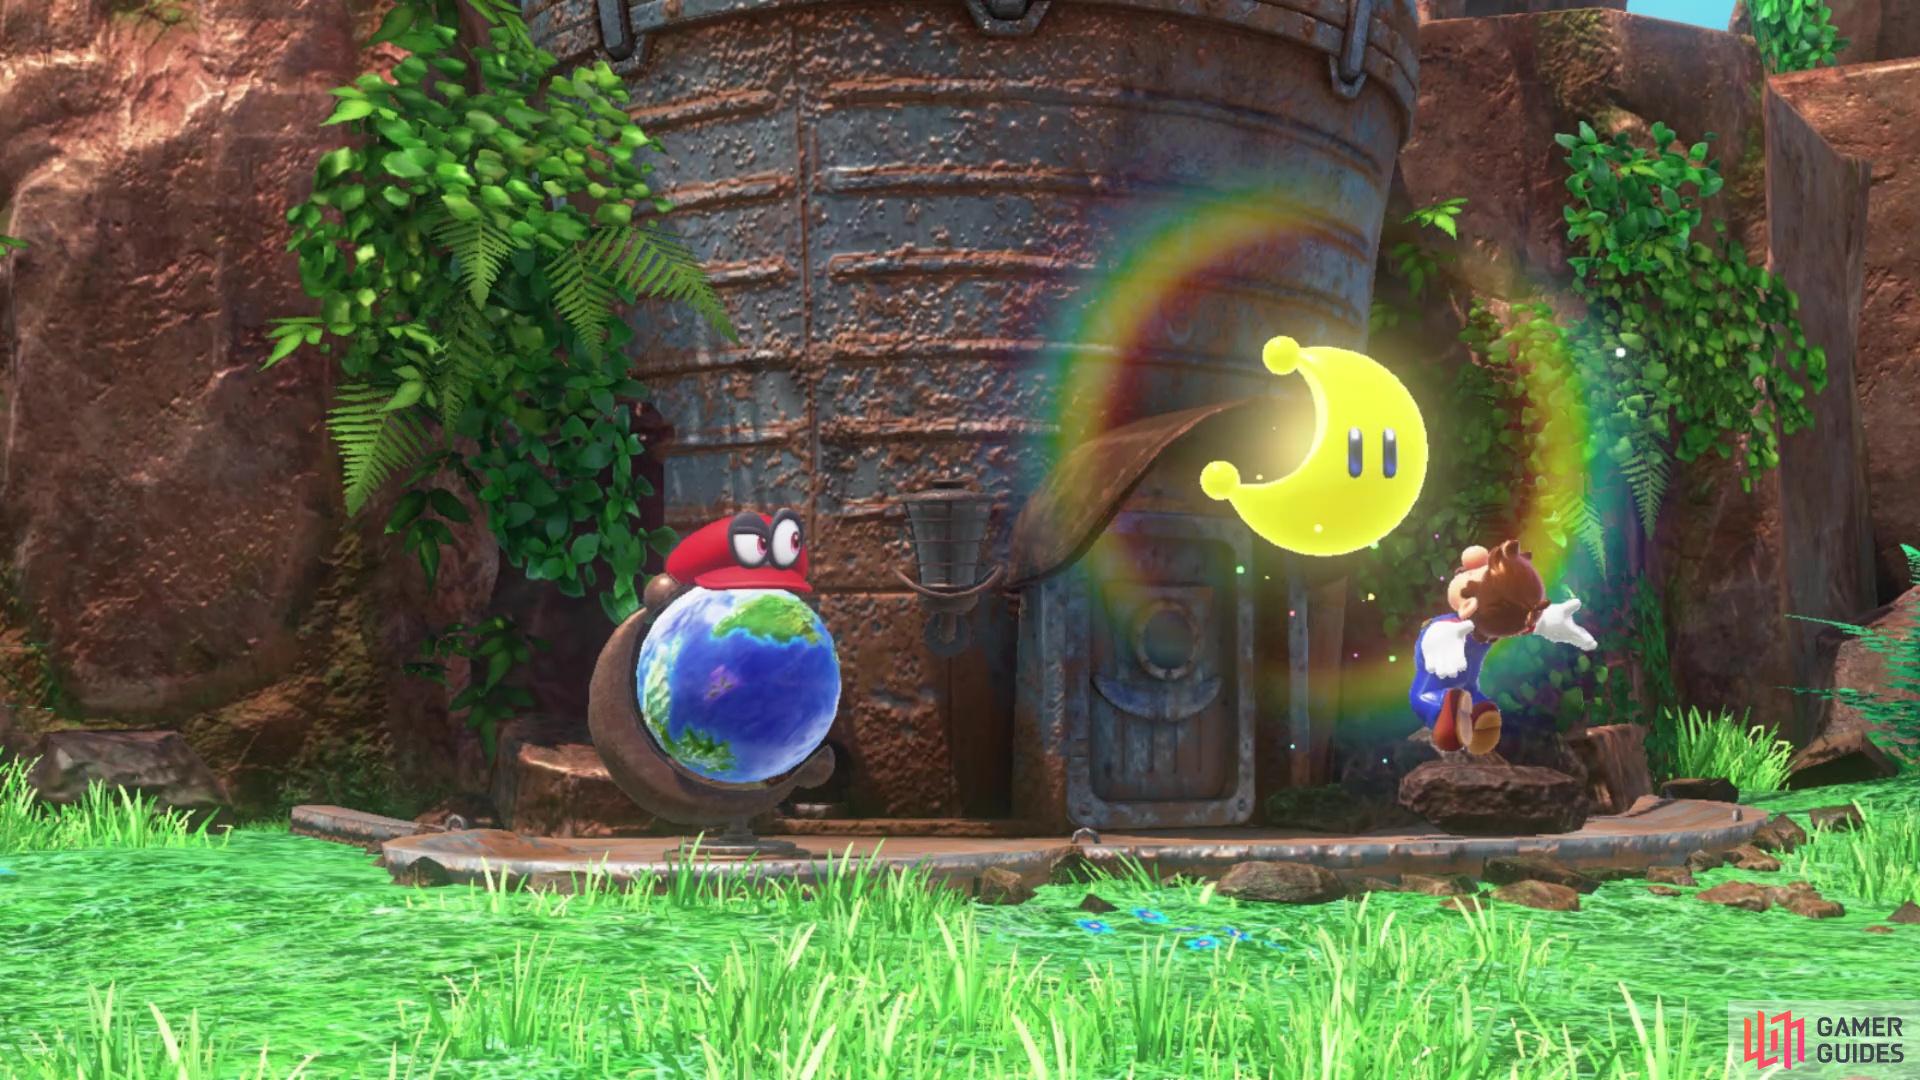
Toss Cappy at the globe to deposit the moons
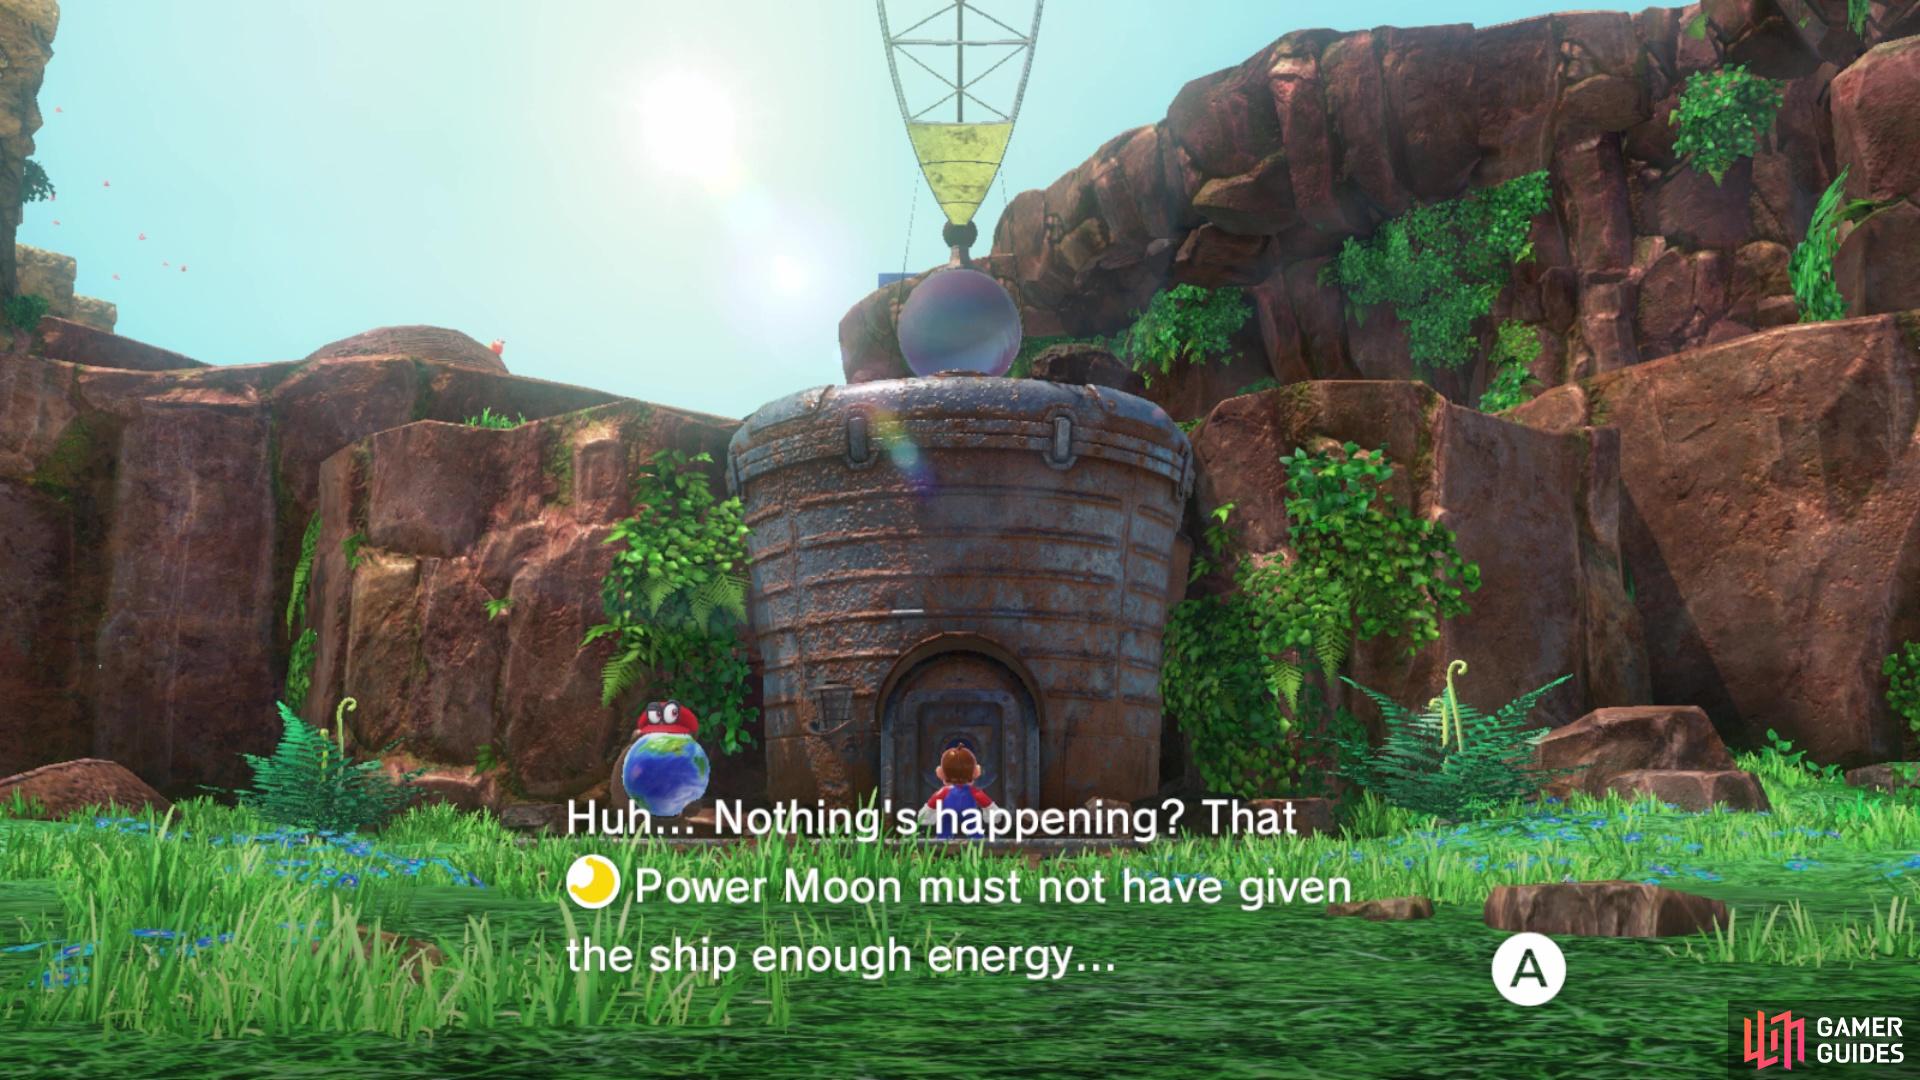
which aren’t enough to power up the Odyssey quite yet
Continue past the Odyssey to find a large pole you can climb. There’s nothing but a lone coin at the top, but near the cliff’s edge just past the pole will be three more purple coins (18) . As you keep pressing on, there will be a large plateau to your west and some fossils to your east. Jump to the top of the fossils to discover another three purple coins (21) . Take the time to survey your surroundings from atop the fossils to find some more Chain Chomps, as well as a sleeping T-Rex on the previously mentioned plateau.
Head off in the direction of the Chain Chomps and veer off to the west, while looking at the base of the plateau. You should be able to spot another hidden alcove, similar to the one near the waterfall, which houses three purple coins (24) . Now, you have two options here, with one to use the Chain Chomps to accomplish your objective and the other being to possess the T-Rex. There will be two things you want to do here, one of which is to destroy the fossil barrier blocking your progress (there is a way around it via a side path, but that’ll be saved for a little bit later).
You can possess a Chomp and use its ability to do this, but the far easier route is to get the T-Rex. It should be noted that your time as the dinosaur is limited, as the creature is large and Cappy’s power doesn’t allow him to take over such things without limitations. You’ll know your time is drawing to a close by the ticking clock noises. However, you can release the capture and immediately recapture the dinosaur to refresh the timer.
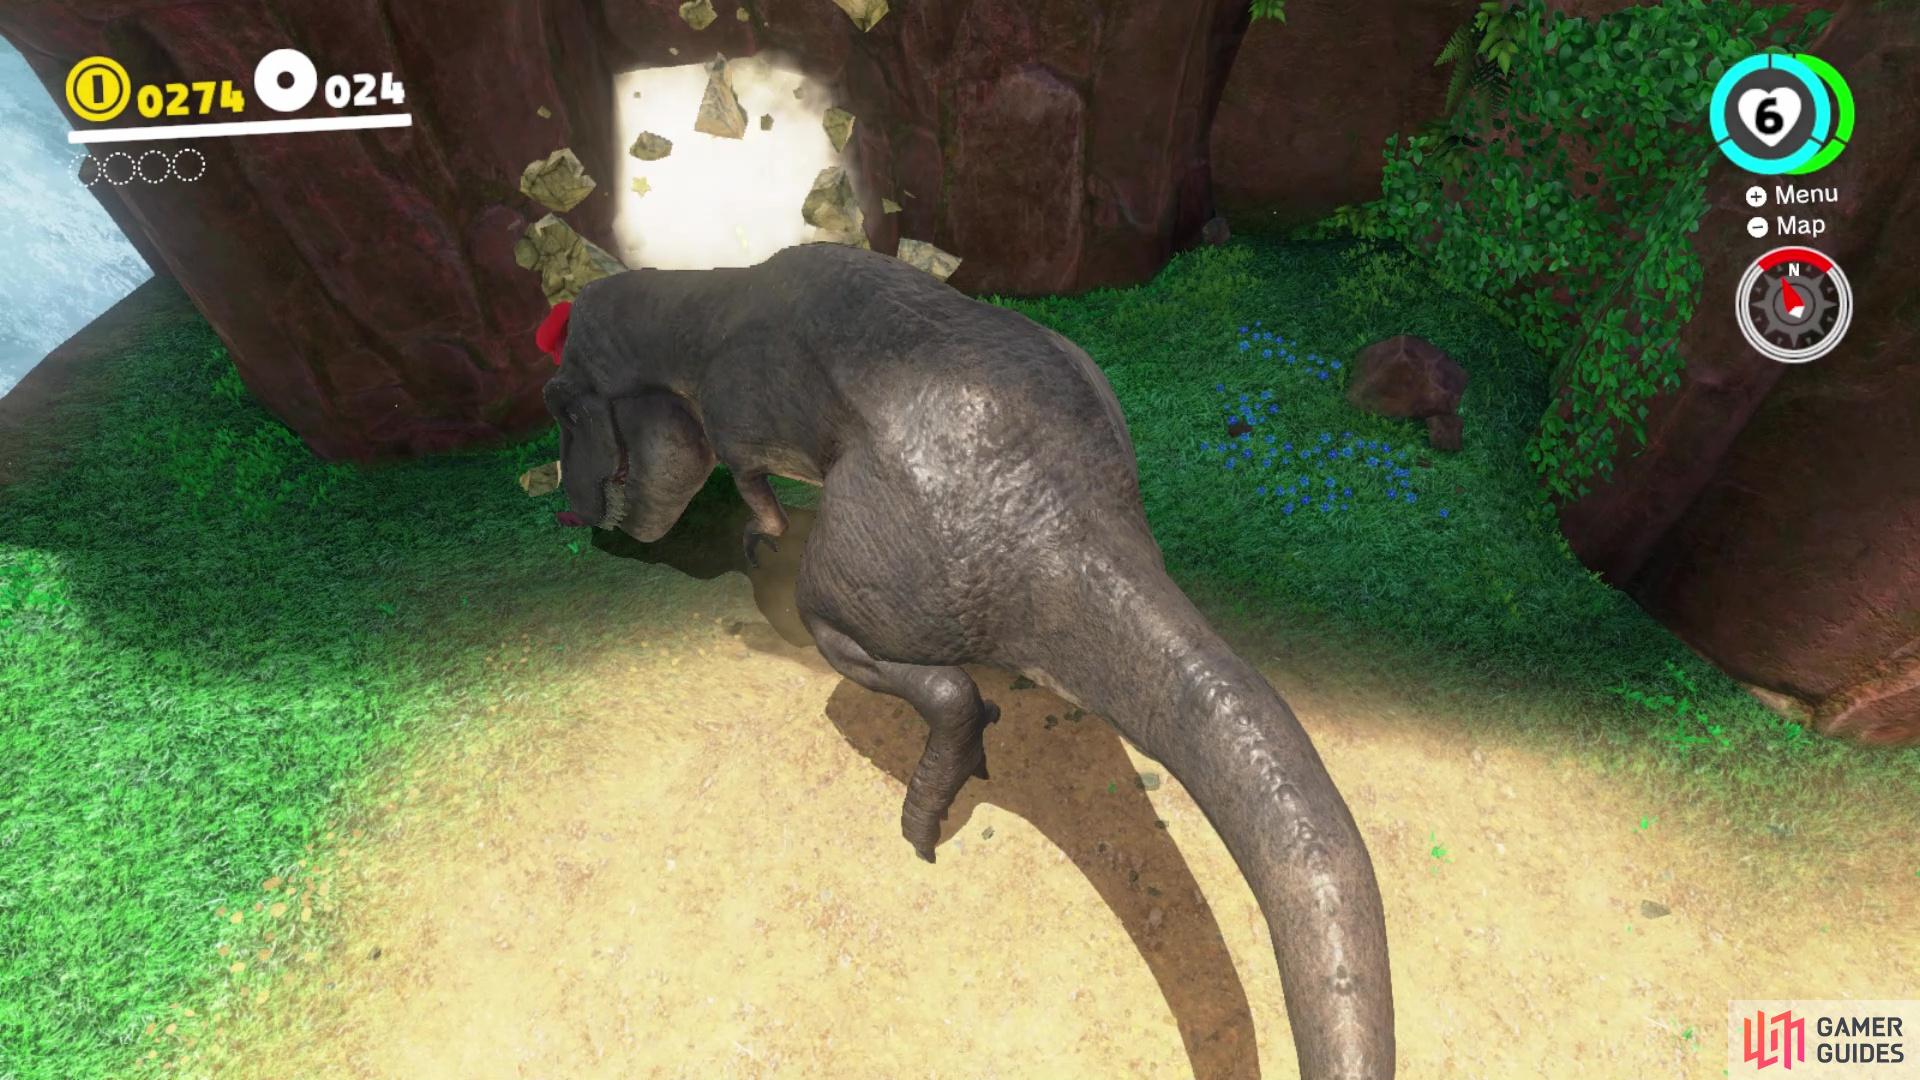
With that in mind, look at the Chain Chomps and you should notice a fossil in the wall near the westernmost Chomp. You can use the nearby Chomp to break it or just do it with the T-Rex - yes, the T-Rex can break the fossils by just running into them or by attacking with the B button. Behind the fossil wall will be another Power Moon (Chomp Through the Rocks) , so collect it and continue rampaging as the T-Rex to break down that fossil wall. With the wall down, you don’t really need the T-Rex anymore, so you can let go of the capture.
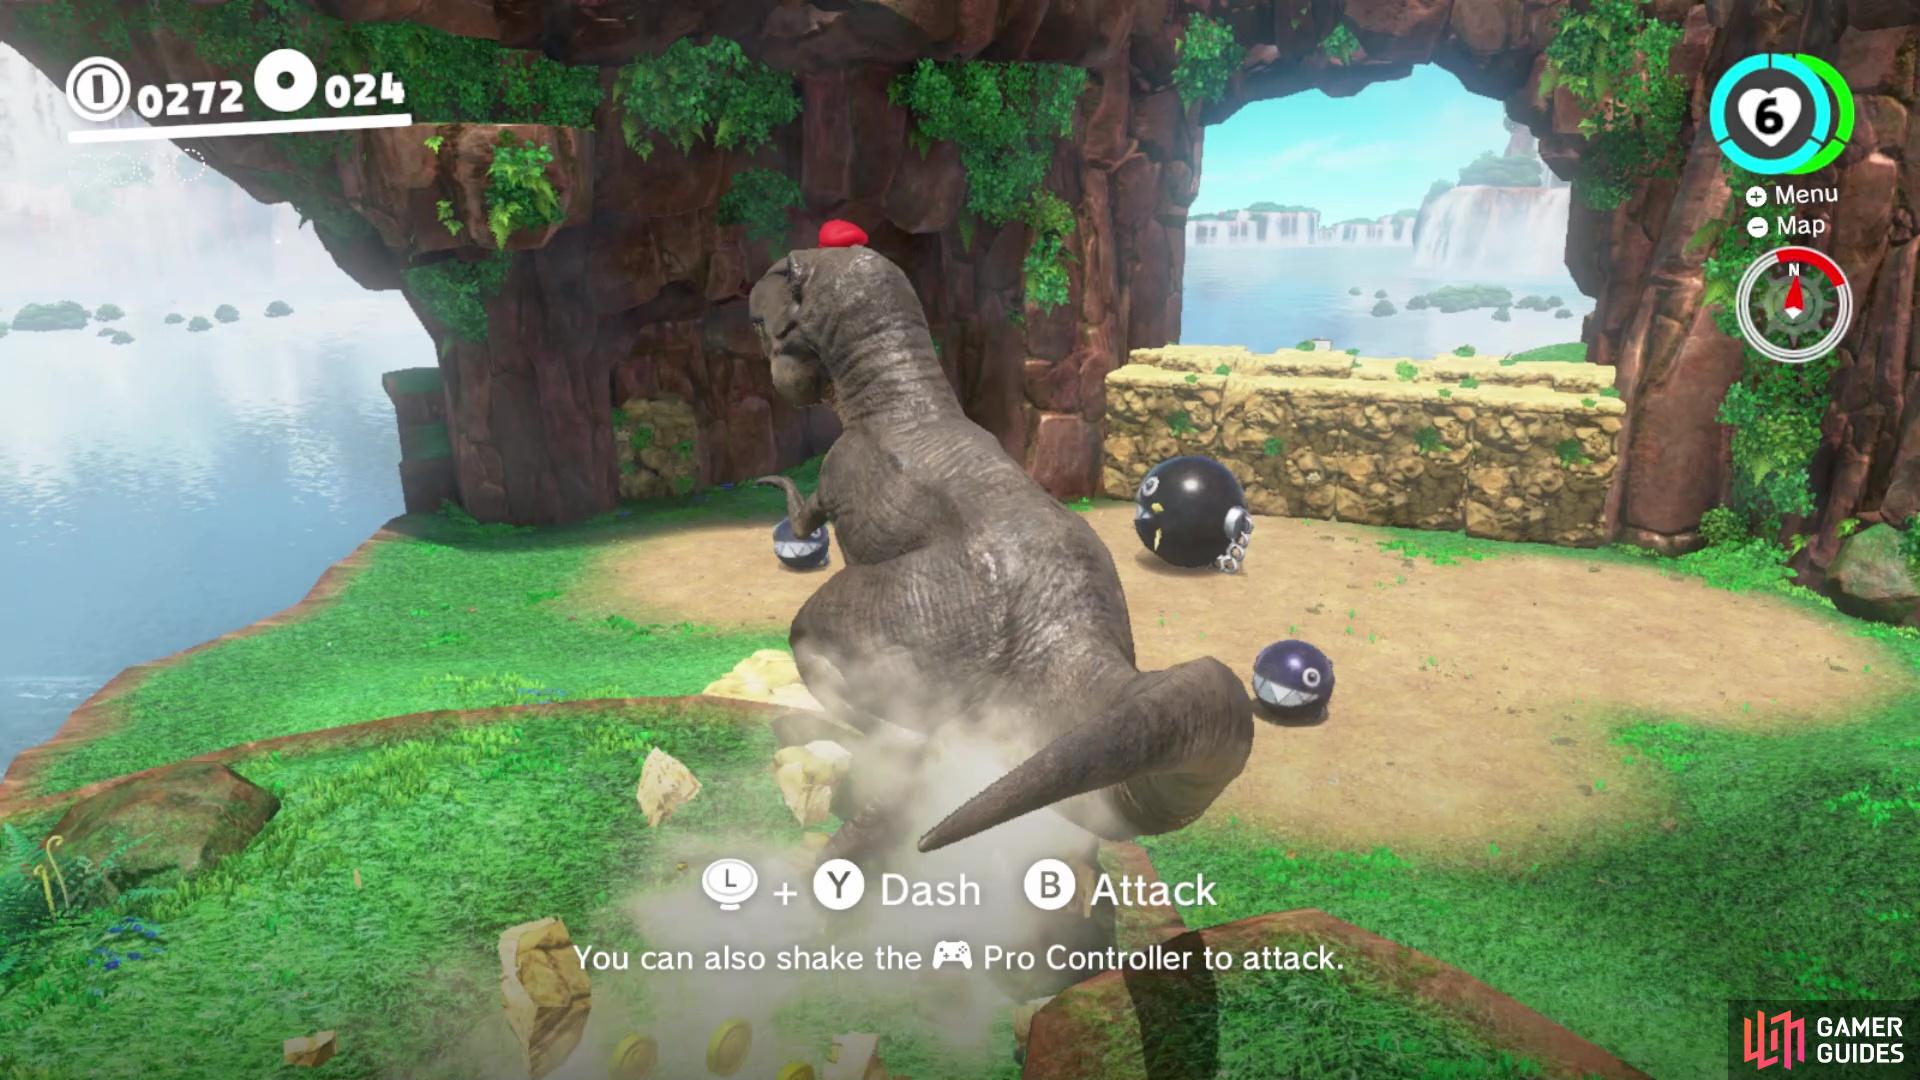
Yes, you can even capture control of the T-Rex
Use its chomp attack to break open this wall for a moon
To the west of the fossil hiding the Power Moon is a path along a cliff that extends around to put you on the other side of the big fossil wall, but there are some purple coins here (and another secret later). The three purple coins (27) are hanging in the air, with some white hat platforms over a pit. Luckily, you can collect the coins by throwing your hat at them, so you don’t need to jump down into the pit. Back on the main path, there are three more sets of purple coins you can grab, but grab the checkpoint flag for now.
From the flag, look to your south (use the compass) and you should be able to see some “stairs” and hat platforms a little higher up. Use these to get to a ledge with three purple coins (30) . Looking off into the distance a little bit, you should spot some more purple coins on top of another fossil block. You can reach the top of the massive fossil via some “stairs” on the northern side, where you can easily acquire the purple coins (33) . There is a giant Chain Chomp nearby, but before you capture it, look along the southwestern ledge to find three more purple coins (36) . Capture the Chain Chomp and aim at the suspicious wall, striking it to reveal a 2D Mario section.
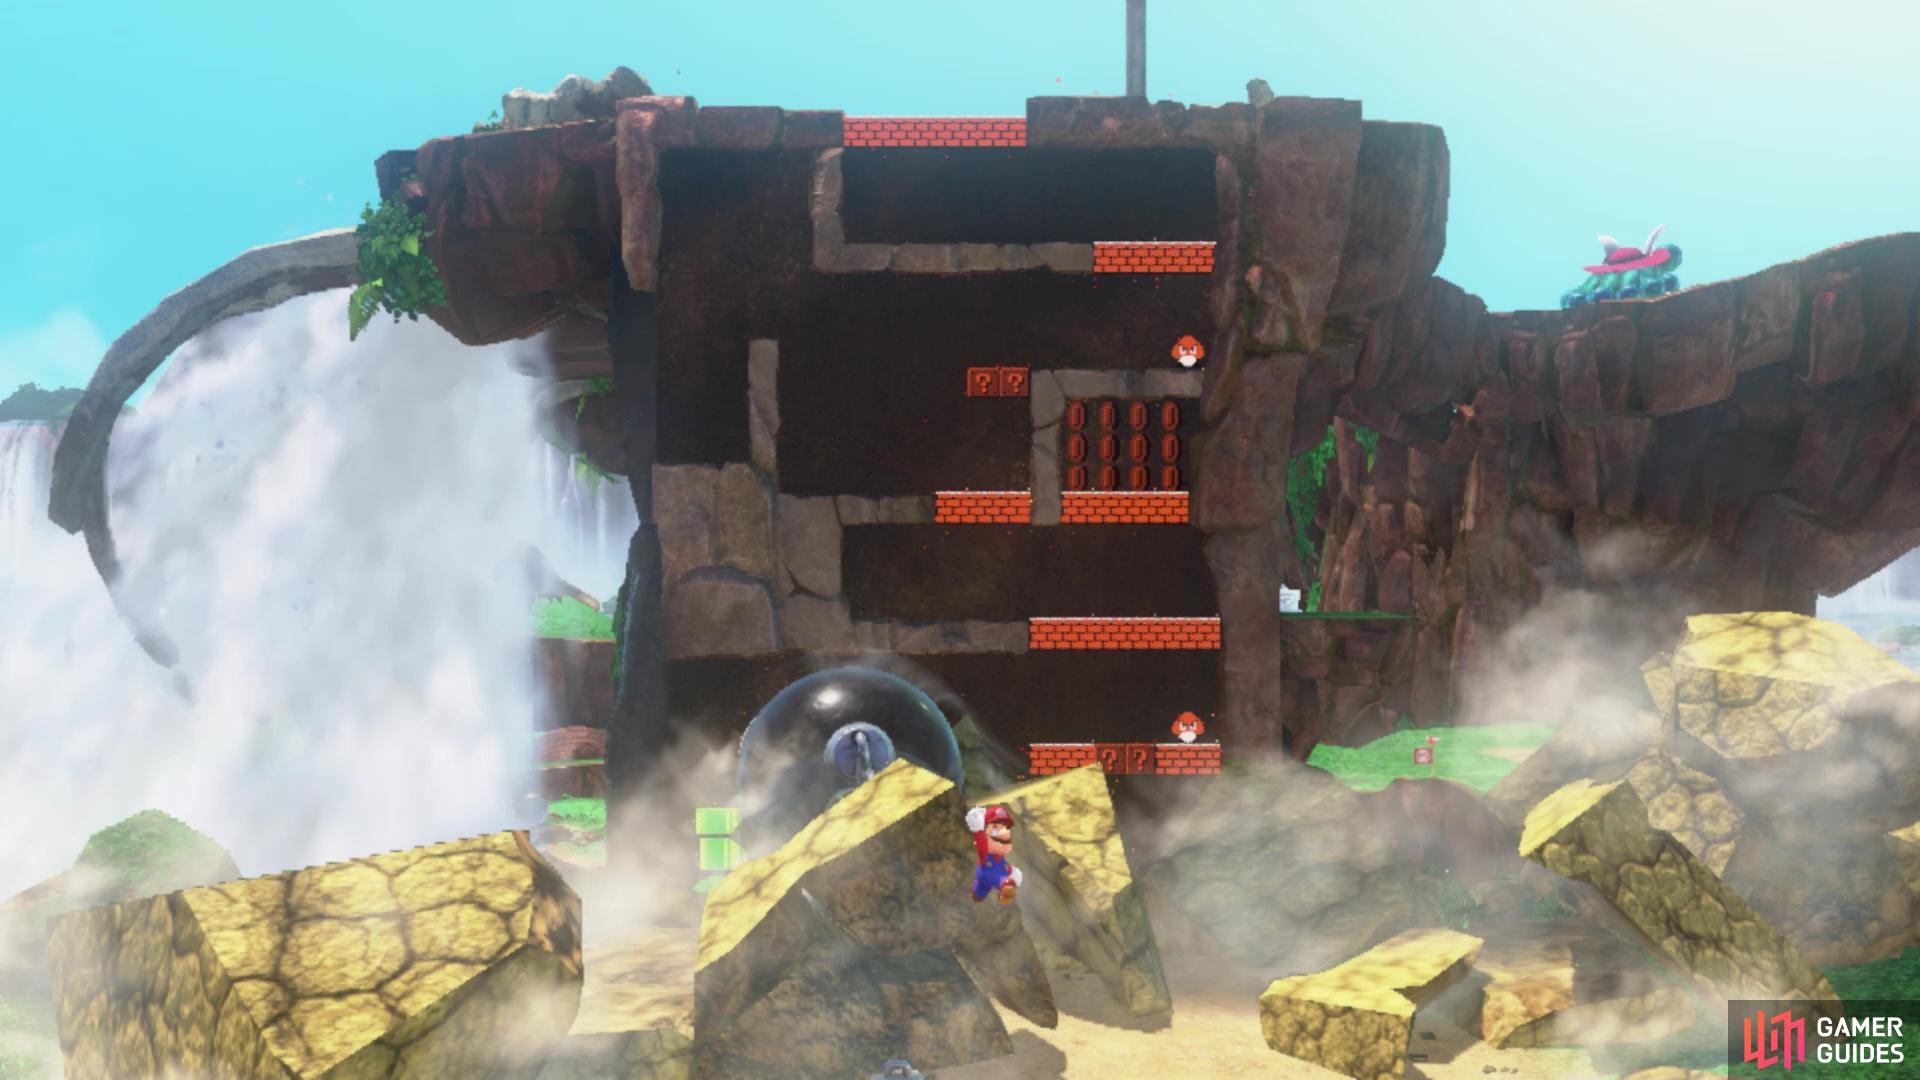
If you’ve played the original Super Mario Bros, then you should feel right at home here, as it is practically the same. You can jump with the B button and run with the Y button while moving in either direction. There are two Goombas here, one on the lowest level and another two tiers above you. Where you encounter the second Goomba, put Mario against the left wall and jump to reveal a hidden coin block. Jump on this and over the left wall, running left to find a hidden Power Moon (Behind the Waterfall) . Return to the right and climb the rest of the way up to spot one last checkpoint flag. There are two more Chain Chomps and you need to ricochet one off the other to hit the fossil up here to clear the way to the next boss.
BOSS - Madame Broodal
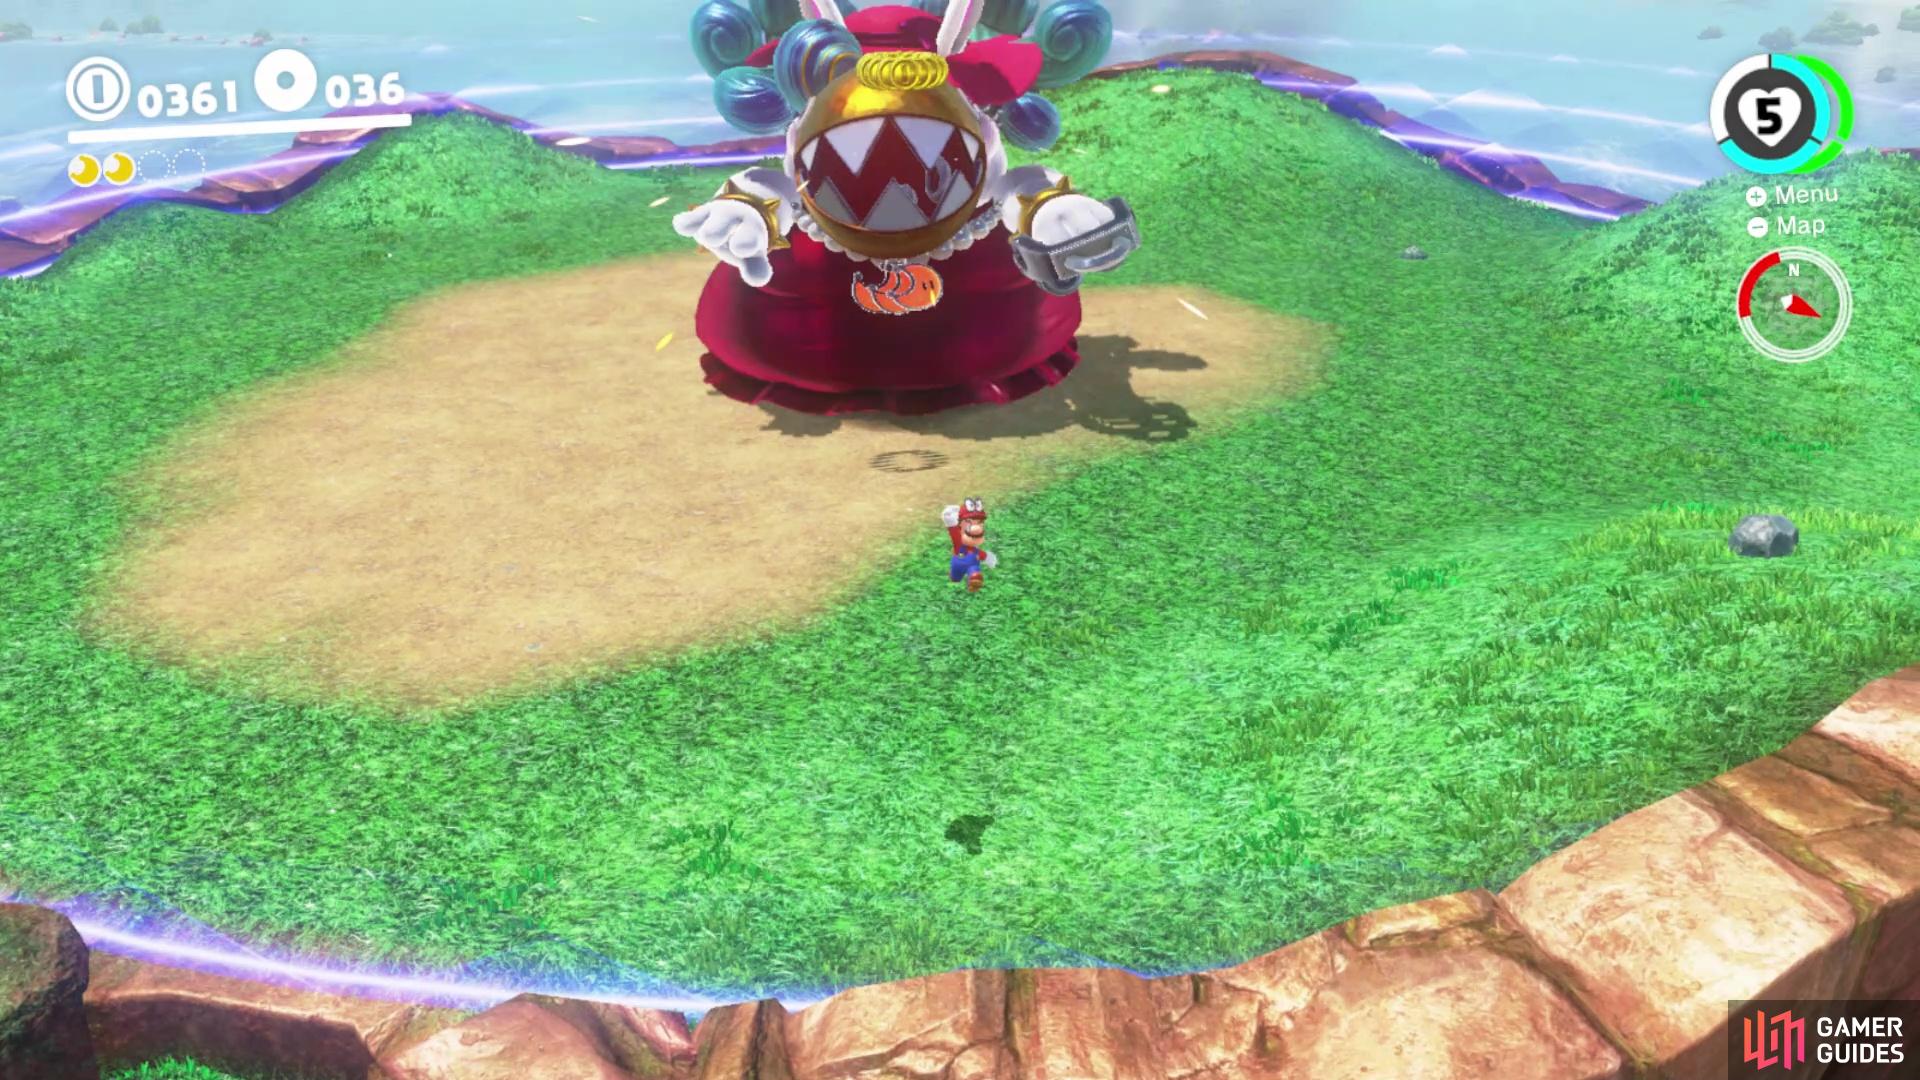
Madame Broodal is another fairly simple boss, as she only really attacks with her golden Chain Chomp. As soon as the battle begins, a set of arrows will appear on the ground and the Chain Chomp will charge along that path. Move out of the way and toss your cap at it once to knock off its hat, then once more to capture it. Once you do, reel back and send it flying at Madame Broodal’s face for the first hit. After this, she will reel back and toss the Chain Chomp at you, but if you stand close to her, it will go over your head.
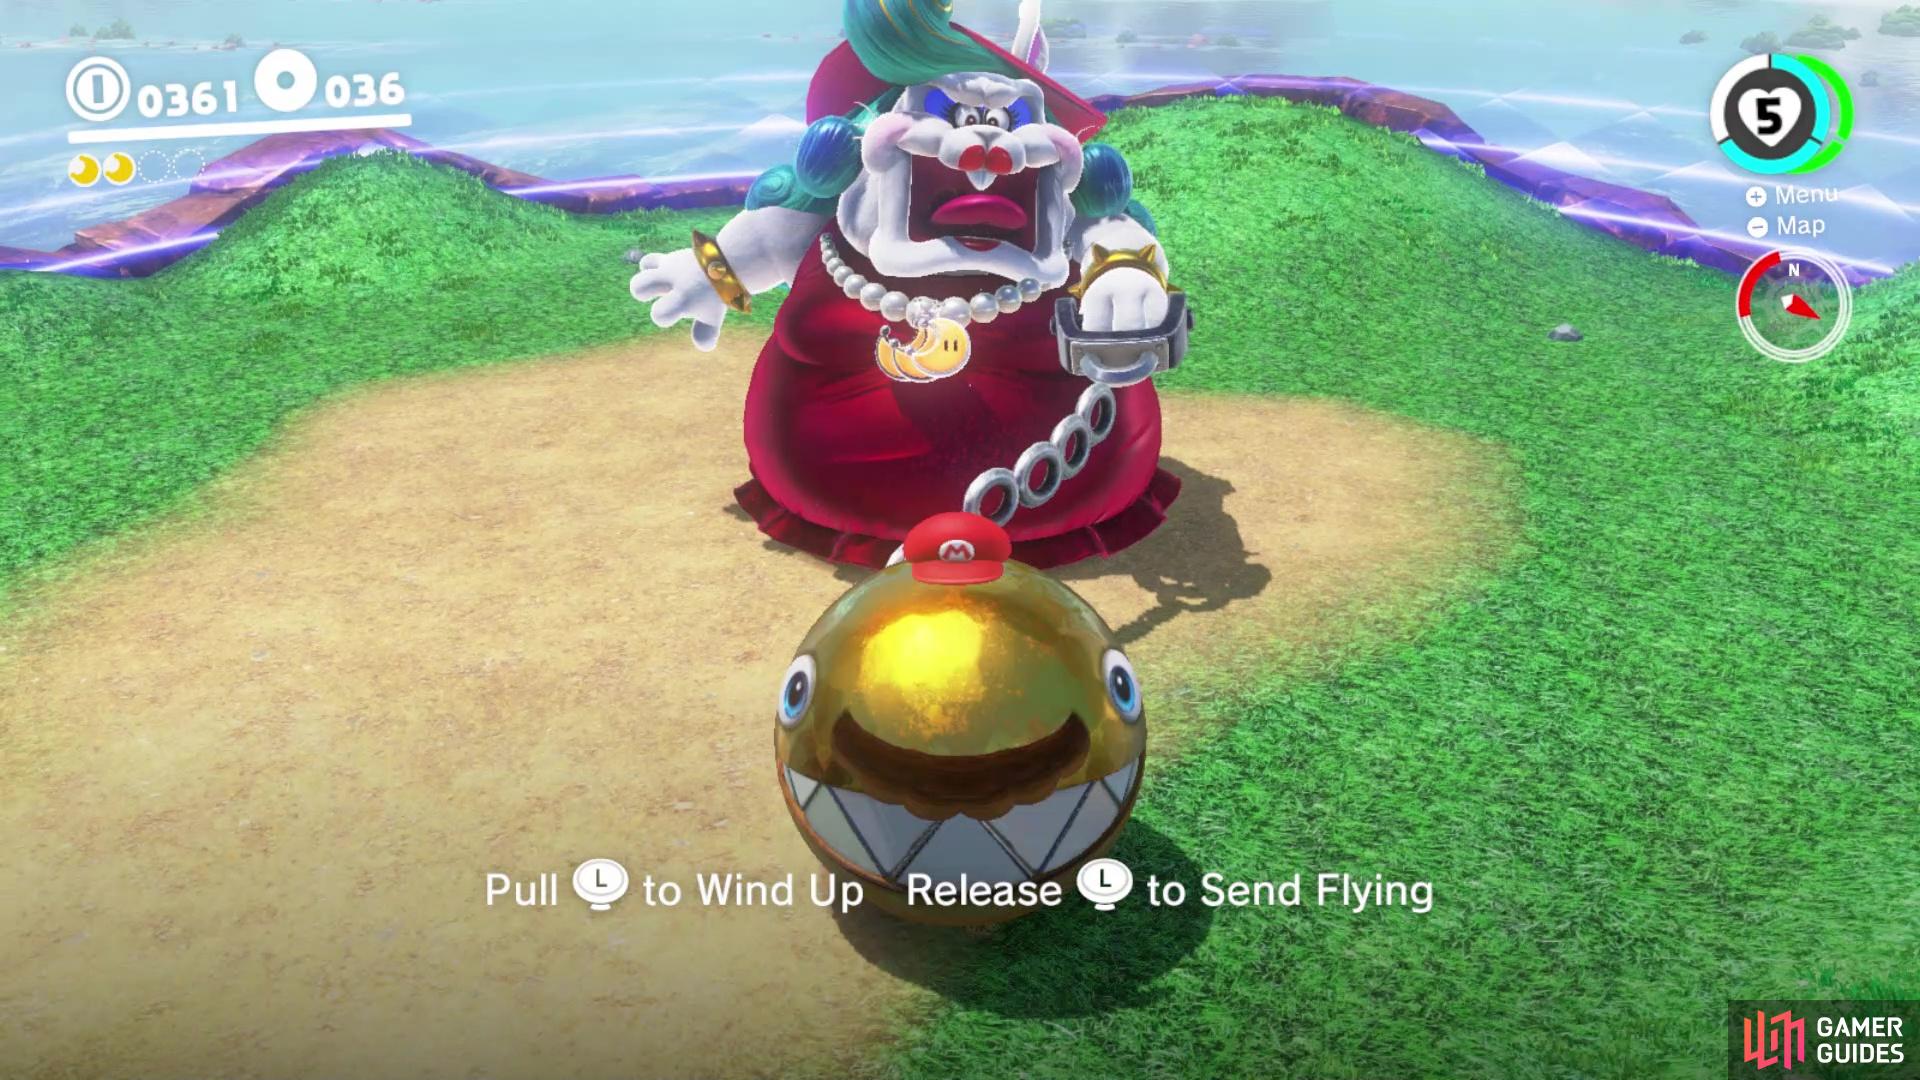
Capture the golden Chain Chomp
then fling is back at Madam Broodal’s face three times to win
Upon capturing the Chomp a second time, Madame Broodal will chase after you and try to smack you. If she succeeds, then you will be knocked out of the Chomp and have to recapture it. When you finally evade her heavy handed swipes, do the same thing as last time to hit her a second time. You’ll need to do the whole thing once more to finish off Madame Broodal and get your hands on the Multi Moon she was holding, which counts for three Power Moons (Multi Moon Atop the Falls) .
No Comments