
Lake Kingdom is a smaller kingdom, at least compared to the Wooded Kingdom. When you land, look around to see three purple coins on a ledge behind the Odyssey (3) . Go onto the shore nearby and just southwest of the binoculars is a shiny spot in the sand, so perform a ground pound to unveil a Power Moon (On the Lakeshore) . There are a number of things to do here in the first area of Lake Kingdom. Start by going into the water and touching the musical note at the bottom, which will spawn smaller notes. Collect them all within the time limit to get a Power Moon (Taking Notes: Dive and Swim) .
Right in front of you is a flower that you can use to reach the ledge above, but that is the way to reach the other side of the broken stairs. Right next to the musical note, in the water, is what appears to be a zipper. Capture this with your hat and move it along the perforations to unveil a hidden hole, which houses three purple coins (6) . You should also see a ledge above you to your east, with a flower in the corner below it. Use the flower to reach the higher area to find another of those mysterious white blocks, but you’re here for the three purple coins behind the wooden posts (9) .
There is one more hidden area behind a zipper, to the west of the main area you’ll be going to next. It’ll will be a small wall jumping section that leads to three more purple coins (12) . Now, head up to the main area, grabbing the gold coins behind the wooden crate if you want, then capture the zipper to unlock the area below. This leads to an underwater area filled with spikes, so watch your movement as you explore. If you need air, there will be a bubble-dispensing machine right where drop down, as well as random bubbles throughout the area.
As soon as you land, look to your south to find an alcove with four purple coins (16) , then take the northern path. This will bring you to a fork in the road, so continue north to find a treasure chest at the end, with a Power Moon inside (Treasure in the Spiky Waterway) . Double back, going the other path, past some Komboo (basically seaweed enemies) and to a checkpoint flag guarded by two Cheep Cheeps. You can capture the Cheep Cheeps, which will negate the need to breathe underwater, so it might be a good idea to do that here.
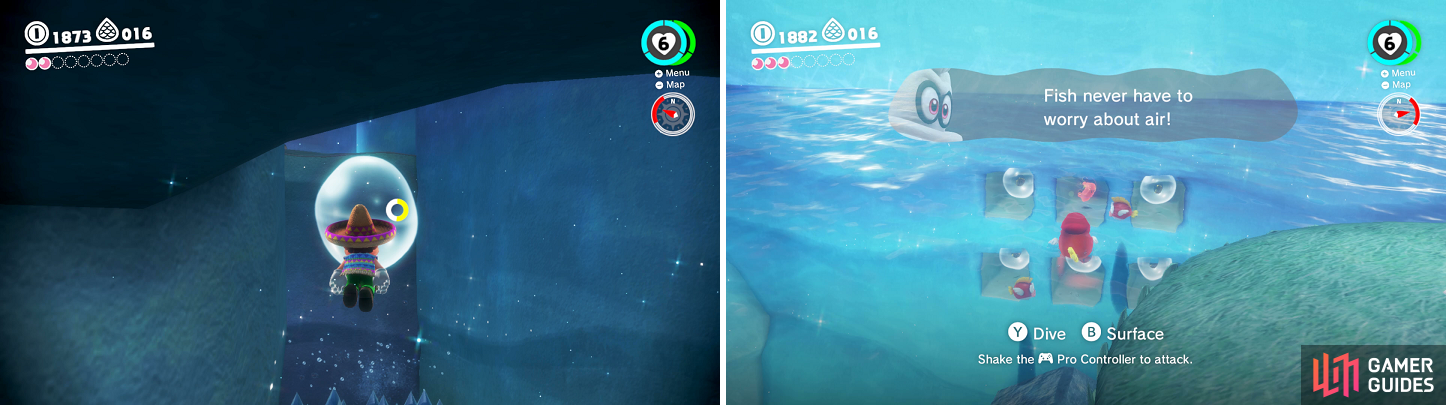
Bubbles can replenish your air supply while underwater (left). Of course, capturing a Cheep Cheep negates having to breathe (right).
Water Plaza
In control of a Cheep Cheep, you do not have to worry about finding bubbles to replenish your air supply, so you can freely explore underwater. As soon as you are in the new area, swim upwards (B button) and look behind you to spot six holes in the wall. The middle one in the top row will be holding another Power Moon (Cheep Cheep Crossing) . Look around for the large blue creature swimming, known as a Dorrie, who will be holding another Power Moon on its back, so make sure you grab it (Dorrie-Back Rider) .
To your south is some land, so release the Cheep Cheep and use the flower to get to the higher portion. This is the area that was accessible with the stairs in the previous portion, although they were broken. There are some Goombas here, a few of which are wearing bridal veils. Capture the tallest stack of Goombas, then start building a larger tower by jumping on the others. When you feel it’s big enough, release the capture to get onto the ledge with four purple coins (20) . The shiny spot on the little mound here contains nothing but Micro Goombas.
Jump into the little pond here to spot a painting on the floor, so go underwater and into the painting to be transported to an isolated platform in the Sand Kingdom. Grab the Power Moon here (Secret Path to Tostarena!) and return to the Lake Kingdom. Locate the flower on the platform where the Goombas are located, which can be used to reach the ledge to the north. Unzip to reveal a passage that can reach the Power Moon behind the pillars (End of the Hidden Passage) .
Find the large, round platform the Broodals are flying around and look for the three purple coins near the surface on the northern side (23) . Continue swimming east, along the surface, to find three more purple coins above the giant dome structure (26) . Now it’s time to return to where you entered the Water Plaza and capture another Cheep Cheep. As you might have spotted, there are Moon Shards around, with the first one located on the broken pillar to the left of where you entered. The second will be underneath the round platform the Broodals are circling.
Swim east and down to the water’s floor, then look behind you to spot a little jail-like area (this is just past the two triplets of Cheep Cheeps), where the third shard will be. To the north of that will be some wooden crates, which you can break by shaking your controller. This lets a Cheep Cheep do a spinning attack, so break the crates and navigate your way past the Komboos to find the fourth shard. Go to the bottom entrance of the big dome and south of that is a broken pillar with two Cheep Cheeps swimming around it. Do the spin attack at the top of the pillar to find a hidden Power Moon (From the Hidden Pillar) ; alternatively, you can just ground pound the top of the pillar.
Slightly up from the Power Moon are some wooden posts in the wall, hiding three purple coins (29) . The final shard can be found inside of the smaller dome on the southern side, near where you grabbed the last purple coins, and the Power Moon will spawn in front of the bottom entrance of the large dome (Moon Shards in the Lake) . Head inside the dome and look along the back wall for some hidden passages. The rightmost one has a small area you can wall jump up to reach 100 gold coins, while the second from the right has a hidden room with a resident, who will hand over a Power Moon for speaking with her (Our Secret Little Room) .
In the leftmost doorway, you can swim up to the second level of the dome. The shop will be to the north, a locked door to the south (where you came up from the water elevator) and you can grab three purple coins on the thin ledge in the front (32) . Go into the shop and purchase the Power Moon from the yellow side (Shopping in Lake Lamode) . If you want in the locked door, purchase the Swim Goggles (5 purple coins) and Swimwear (10 purple coins), then speak with the NPC outside of the door to be let in. Once inside, hang your hat on the wireframe (hold the Y button) and a Power Moon will pop out (I Feel Underdressed) .
Exit the dome and swim up to the top, using the entrance there to arrive at a higher floor. There’s a P-Switch here, which opens the door right in front of it, allowing you to use the tube to swim up to the top. Hit the second P-Switch up here to lower a platform, letting you collect three purple coins (35) . On the platform that lowered was a flower, which you can use to spring up to the platform with the wooden boxes. Ground pound the top one to unveil a Power Moon, which flies off to the opposite side. Head on over there and there will be a zipper on the wall, which uncovers a hole with four more purple coins (39) .
To get to the ledge with the Power Moon, use the flower near the Micro Goombas (What’s in the Box?) . Drop down to the path and use the flower there to hover over to the platform that is holding another four purple coins (43) . Use the same flower you used to reach the last purple coins to find a hidden alcove above it, with a door that leads to a special area.
The back wall on the ground floor in the big dome hides a few things, like a bunch of gold coins (left) and even a NPC who hands over a Power Moon (right).
Leaving Mario Hanging
This area is mostly about having Mario shimmy along some ledges and timing it with moving platforms. Use the flower to reach the first ledge, then move to the right and hang from the moving platform. Climb up and you’ll encounter a new/old enemy here, the Fuzzies. Ignore them and don’t touch them, as they can’t be killed. Hop from the next flower to the left ledge, where you can go around and collect three purple coins (46) , then double back and travel right. As you turn the corner, you’ll have to time your movement to avoid the Fuzzies moving along the wall. Touching them will make you lose your grip, falling to your doom and having to restart from the beginning.
Drop down to the flower at the end and leap over the Fuzzies wall, then time your descent to land on the next two flowers. “Land” in between the two towers of Fuzzies and slide down to another hanging ledge. Continue right and the yellow wall will begin moving up, so you’ll have to be careful to not hit the Fuzzies on the way. Get off to the right and wait until the yellow wall goes back down, as you will want to stand on top of it and ride it back up to the top. Once you arrive, hop up to the flower to reach a chest that contains a Power Moon (Jump, Grab, and Climb Some More) . From here, you can just jump down to the pipe, where another Power Moon will be waiting (Jump, Grab, Cling, and Climb) . Take the pipe back to the main area.
There’s one more thing to do before you go and smack some sense into the Broodals. On the opposite side of where you just came from, there is a pipe on a ledge above a flower. Head over there and enter the pipe to find an 8-bit mural. There will be a moving platform inside (it’s stationary until you jump on it) and a musical note. Hit the note to make others appear, then ride the platform across to the lft while collecting the notes. Getting them all will reward you with a Power Moon (Taking Notes: In the Cliffside) . Don’t leave yet, though, as there’s a hidden room to the left of the pipe, where you can use the moving platform to reach the final four purple coins (50) . Make your way back to the flowers surrounded by Micro Goombas and get to the arena to fight your next Broodal.
BOSS - Rango Broodal
Rango is a fairly simplistic boss, like the other Broodals. He’ll begin the fight by tossing his spike-brimmed hat at you, in a straight path. Hit his hat with your own to flip it over, turning it into a flower springboard, which you can use to reach Rango and stomp on his head. Once you do this, Rango will retreat into his hat and chase you while bouncing around. As long as you keep moving, you shouldn’t be hit by the boss while he bounces.

After hitting his hat, you can use it to bounce on Rango’s head (left). Keep moving to avoid Rango’s bouncing (right).
For the second phase, Rango will toss his hat in a circular pattern. Do the same thing as before, dodge his bounces, then you’ll move onto the final phase, where he’ll just alternate between the two throwing patterns. After hitting him a third time, the fight will be over and you’ll receive the Multi Moon (Broodals Over the Lake) .
No Comments