
This page offers a complete guide for every single Hidden Treasure in Super Mario RPG. There are 39 Hidden Treasures to collect in Super Mario RPG. They can be tricky to find but we’ll give you detailed location descriptions and screenshots to help you find every single one!
Wearing the Signal Ring will help you find Hidden Treasures.
All Hidden Treasures List
Below, we’ve listed all Hidden Treasures in a comprehensive list, but if you’re looking for more detail on how to find all hidden treasures, you can view more comprehensive instructions below for each region.
| Hidden Treasure Location | Description | Reward |
|---|---|---|
| Item Shop Cellar, Mushroom Kingdom | NPC will tell you to stand and jump in front of him. | Flower (and the Signal Ring from NPC) |
| Item Shop Cellar, Mushroom Kingdom | Wait for the NPC to stand in the corner near the stairs then jump on his head. | Flower |
| Mushroom Castle, Mushroom Kingdom | Hop on a NPC’s head to get on the platform above the door | Frog Coin |
| Second area of |
Hop onto the rightmost spinning flower then jump to the right to reveal a Hidden Treasure above. | Croaka Cola |
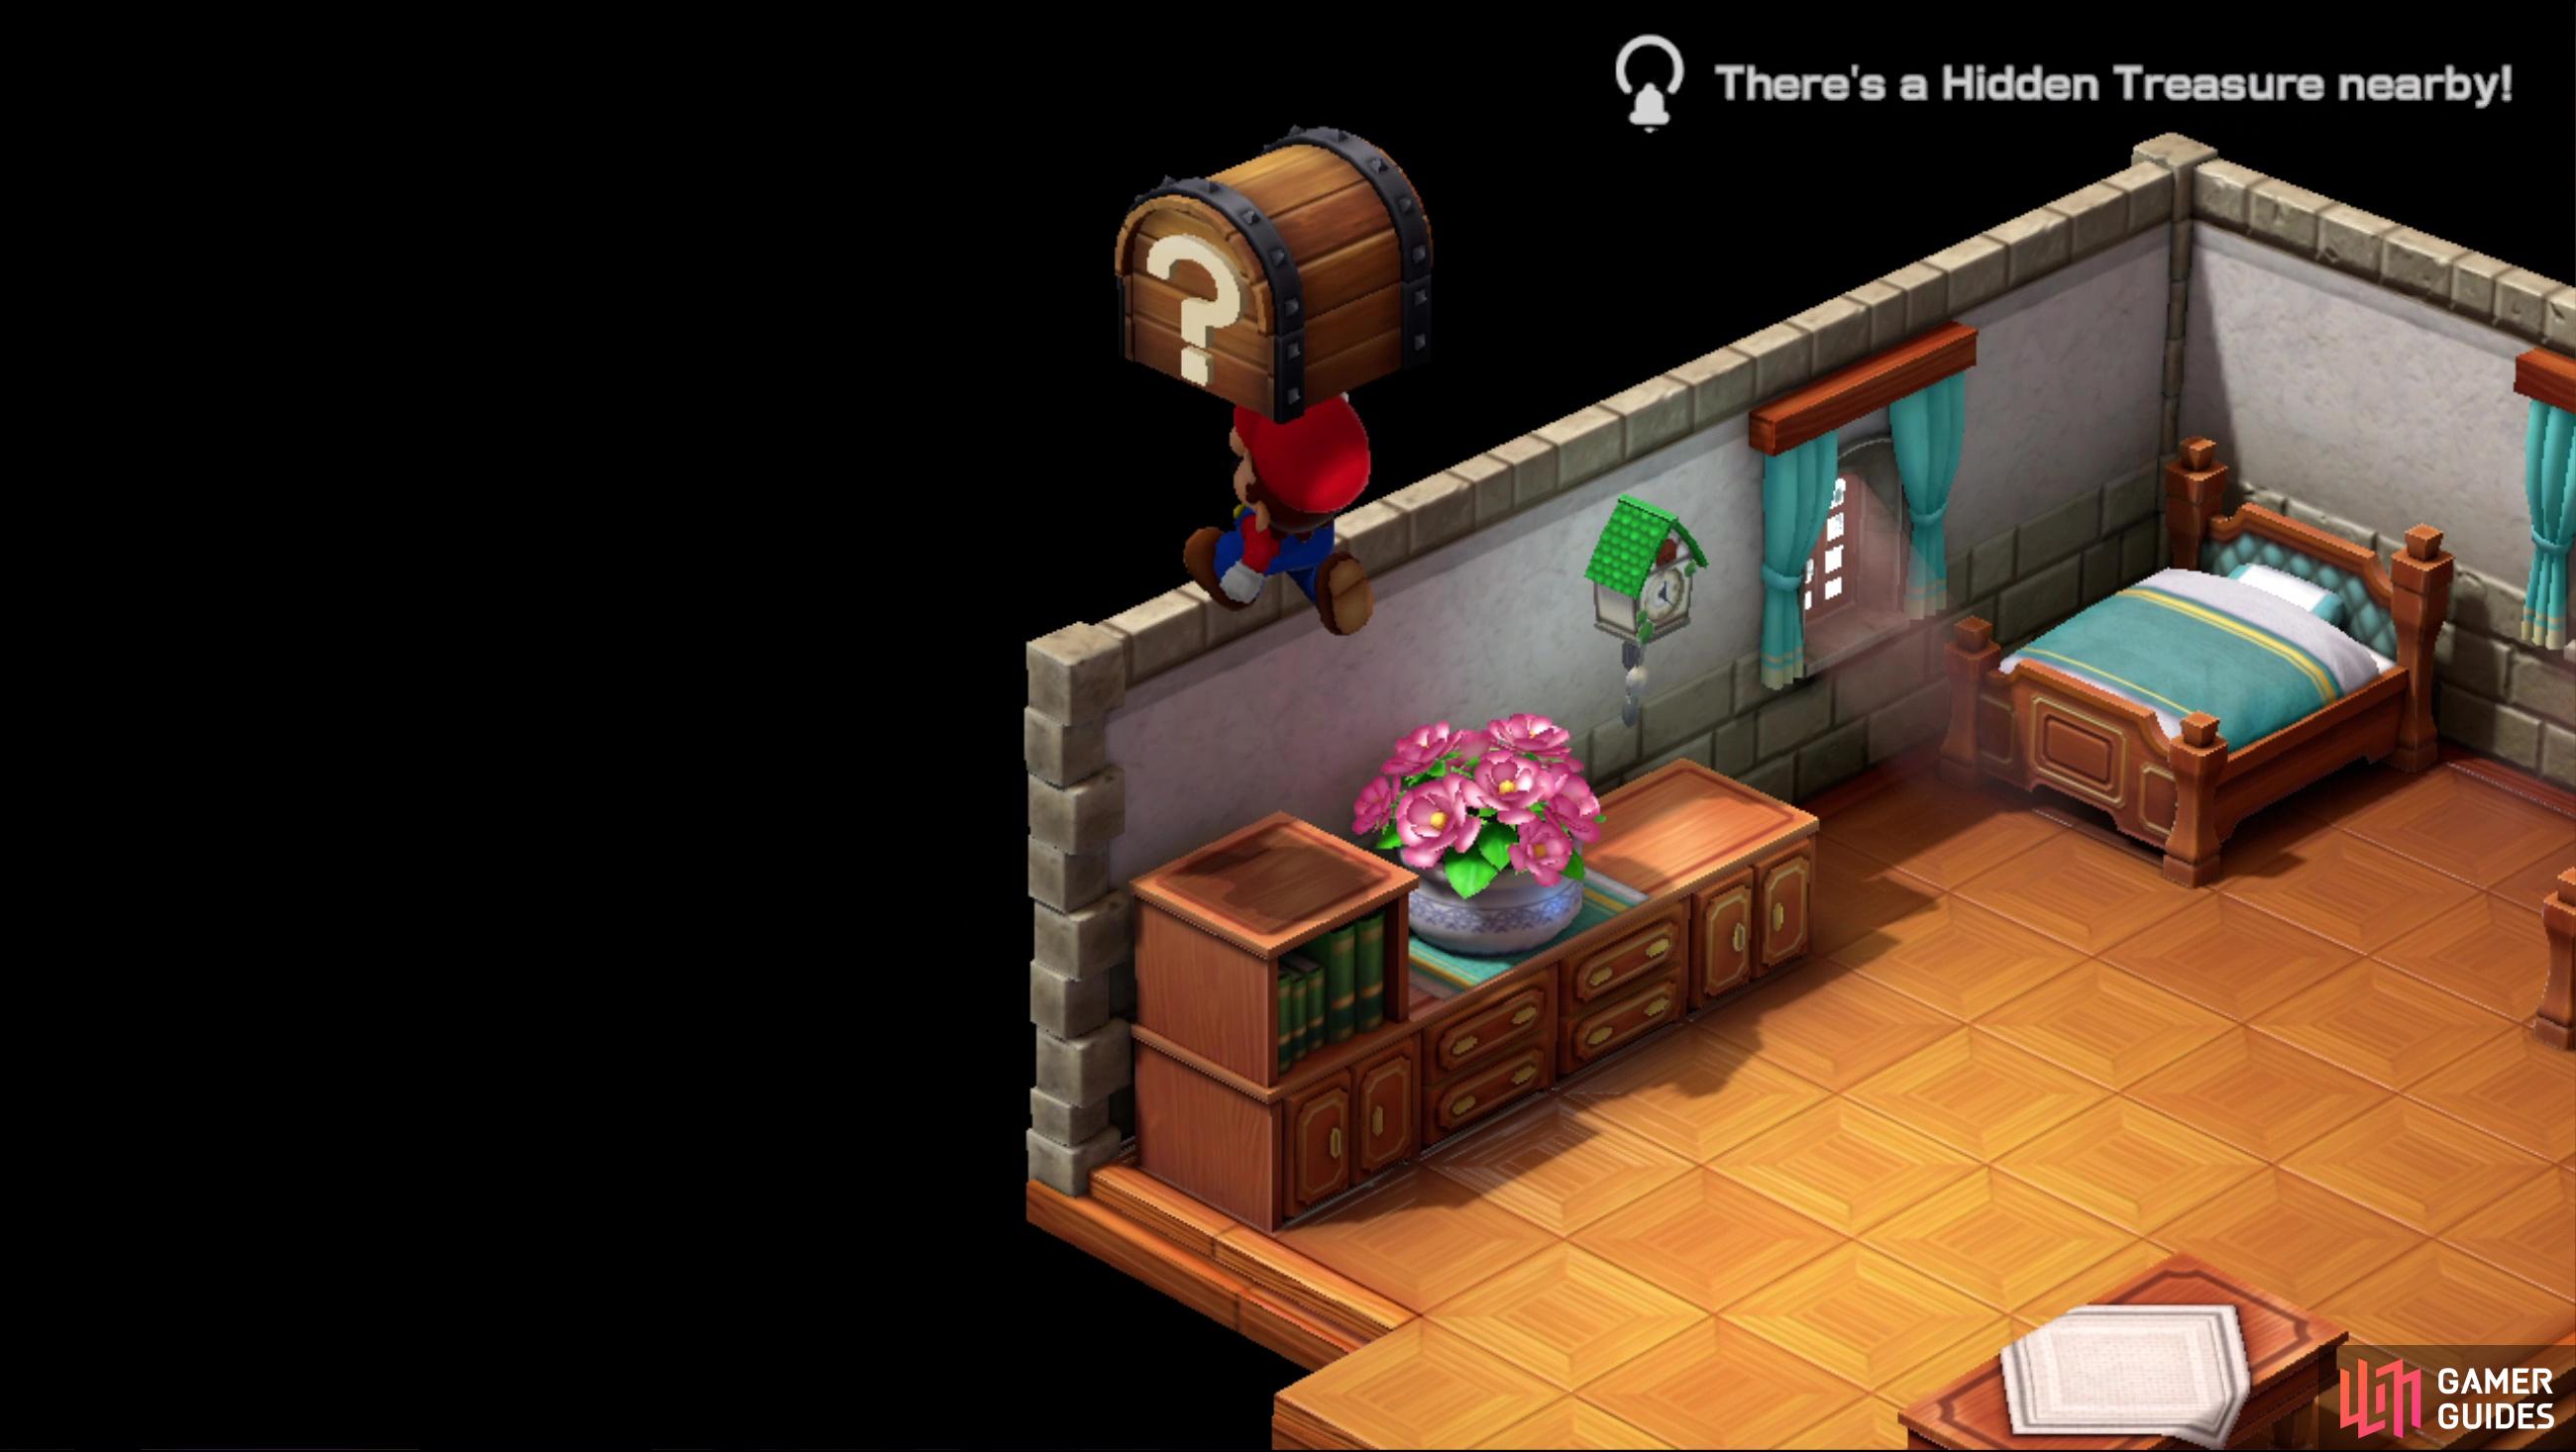
| Northwest house, Rose Town | Hop onto the NPC’s head to reach his house on the hill, then go upstairs. The Hidden Treasure is over the bed. Next, step on the switch to make the front steps appear. | Frog Coin |
| Item Shop, Rose Town | Jump on the bookshelf behind the counter in the Item Shop to reach this Hidden Treasure. | Frog Coin |
| First area of the Forest Maze | Go to the left of the first section of Forest Maze and jump up to reveal the Hidden Treasure. | Croaka Cola |
| Third area of the Forest Maze | The second treasure will be in the northwest corner of the stump. | Frog Coin |
| Fourth area of the Forest Maze | Locate the area with the numerous tree stumps. This treasure can be found by entering the right stump on the first row. In the cave, head west from the spring and jump around the area to find the chest. | Flower |
| Fourth area of the Forest Maze | Enter the left stump in the middle row. From the spring, head into the corner of the two walks to the northeast, and jump. | Empty! |
| Fourth area of the Forest Maze | Head around the Sleeping Wriggler and jump to find the treasure. | Croaka Cola |
| Final area of Forest Maze | Eventually, you’ll get through the maze and find a Save Point a bit further down. Before saving the game, immediately head left, hug the wall, and jump around in the corner to find the last hidden treasure. | Red Essence |
| Fourth area of Pipe Vault | Just before the green ledge, jump up to reveal a yellow block that you can use to reach the ledge. Walk onto the third slab of the ledge, and jump up to find the hidden treasure. | Frog Coin |
| Fourth area of Pipe Vault | In the same area, on the same ledge, walk a further two slabs across the ledge, and jump again to find the second hidden treasure. | Frog Coin |
| Yo’ster Isle | Head behind the save point, and jump in the air to find a hidden treasure. | Frog Coin |
| First area of Booster Pass | Make your way northeast, and turn northwest when you get the opportunity. Jump up onto a lower section of high ground and jump onto an even higher ledge to the northwest, stand on a plant, then jump up to find Hidden Treasure. | Flower |
| First area of Booster Pass | Return to the entrance and jump onto some rocks to the east, continue ascending to the northeast until you’re at the highest elevation. You’ll see a long path running northeast, leading to the next screen, but search the northern corner up here to find Hidden Treasure. | Rock Candy |
| Second area of the Booster Tower | Walk through the area, ascend to the upper level, stand in the corner, then head down one tile and jump to find the Hidden Treasure. | Frog Coin |
| Twelfth area of the Booster Tower | Work your way around to the westernmost corner of the room and jump to find Hidden Treasure. | Frog Coin |
| Seventeenth area of Booster Tower | Climb up the platforms, until you find a visible treasure chest. Jump back onto the top of the chest you just opened. When you get atop the chest, jump again to find a Hidden Treasure. | Goodie Bag |
| Seventeenth area of Booster Tower | Drop down to the ground floor and make your way to the southern corner of the room and jump to find a Hidden Treasure | Mushroom |
| Item Shop, |
Head upstairs, through the doors then jump on the bookshelf to find the Hidden Treasure | Frog Coin |
| Sunken Ship | After defeating |
Flower |
| First area of |
Jump into the large cannon sitting next to the save point, jump on the yellow platform to reach the chest | Red Essence |
| Second area of |
Jump into the nearby cannon and launch yourself northeast again. Defeat the enemies, reveal the yellow platform, and head back to the cannon to reach the higher ledge. Stand in the corner and jump to find the chest. | Croaka Cola |
| Fourth area of |
In the grassy area, take the low path east, and jump in between the two purple flowers. | Frog Coin |
| Sixth (secret cave) area of |
From the last treasure, head east and follow the lower path until you find a stone pillar. Jump into the hole to find yourself in a cave system. Head to the northernmost point of the room and jump in the corner for the chest | Frog Coin |
| Fifth area of |
Head through the gate from the Fortune Room. Find the treasure chest then jump on top of it to get the hidden treasure | Frog Coin |
| Fifth area of |
The second hidden treasure is nearby. Head down the stairs, and head north at the bottom. You’ll find the hidden treasure in the corner of the two walls. Jump up to get the treasure | Frog Coin |
| Monstro Town | Head through the door right at the end of the lower path. In the next room, you’ll see a small bush opposite the note on the wall. In the corner behind it, jump in the air to reveal the hidden treasure. | Frog Coin |
| Second area of |
Locate the two green pipes in the first area, and take the one on the right down. Head to the area on the left opposite the other green pipe there and jump in the air to find the hidden treasure. | Frog Coin |
| Fourth area of |
Head down the east pipe after you defeat the plant. Jump up onto the ledge to the east in this next area, then huge the wall until the third block - jump up to find the treasure | Red Essence. |
| Fourth area of |
Head back into the area with all the pipes, head down the southeastern pipe. Follow the path north, and then west, and you’ll find the hidden treasure one block away from both the wall and western edge, then jump up to find the hidden treasure. | Croaka Cola |
| Item Shop, Nimbus Land | On top of the boxes behind the counter in the Item Shop. | Frog Coin |
| Northwest house, Nimbus Land | Through the secret path at the bottom of the stairs in the room to the left of the save point (not first save point). Jump in the air behind the Jawful to find the treasure. | Frog Coin |
| Northwest house, Nimbus Land | Through the secret path at the bottom of the stairs in the room to the left of the save point (not the first save point). Defeat the Jawful, and head south, and then follow the path. (The Jawful will hide the path). | Frog Coin |
| Birdo room, Nimbus Land | Requires Castle Key 2 which drops from Birdo. Unlock the door at the back, defeat the Pinwheel, and then jump on top of the chest on your right. Jump again for the treasure. | Frog Coin |
| Large room with three doors, Nimbus Land | In the northwest corner of the large room with three doors. This chest originally is a Flower, once you finish the area, check the chest again to find the treasure. | Frog Coin |
| Second Save point in Weapon World | Jump to the left of the Save block to find the final Hidden Treasure | Mushroom |
All Hidden Treasures in Mushroom Kingdom
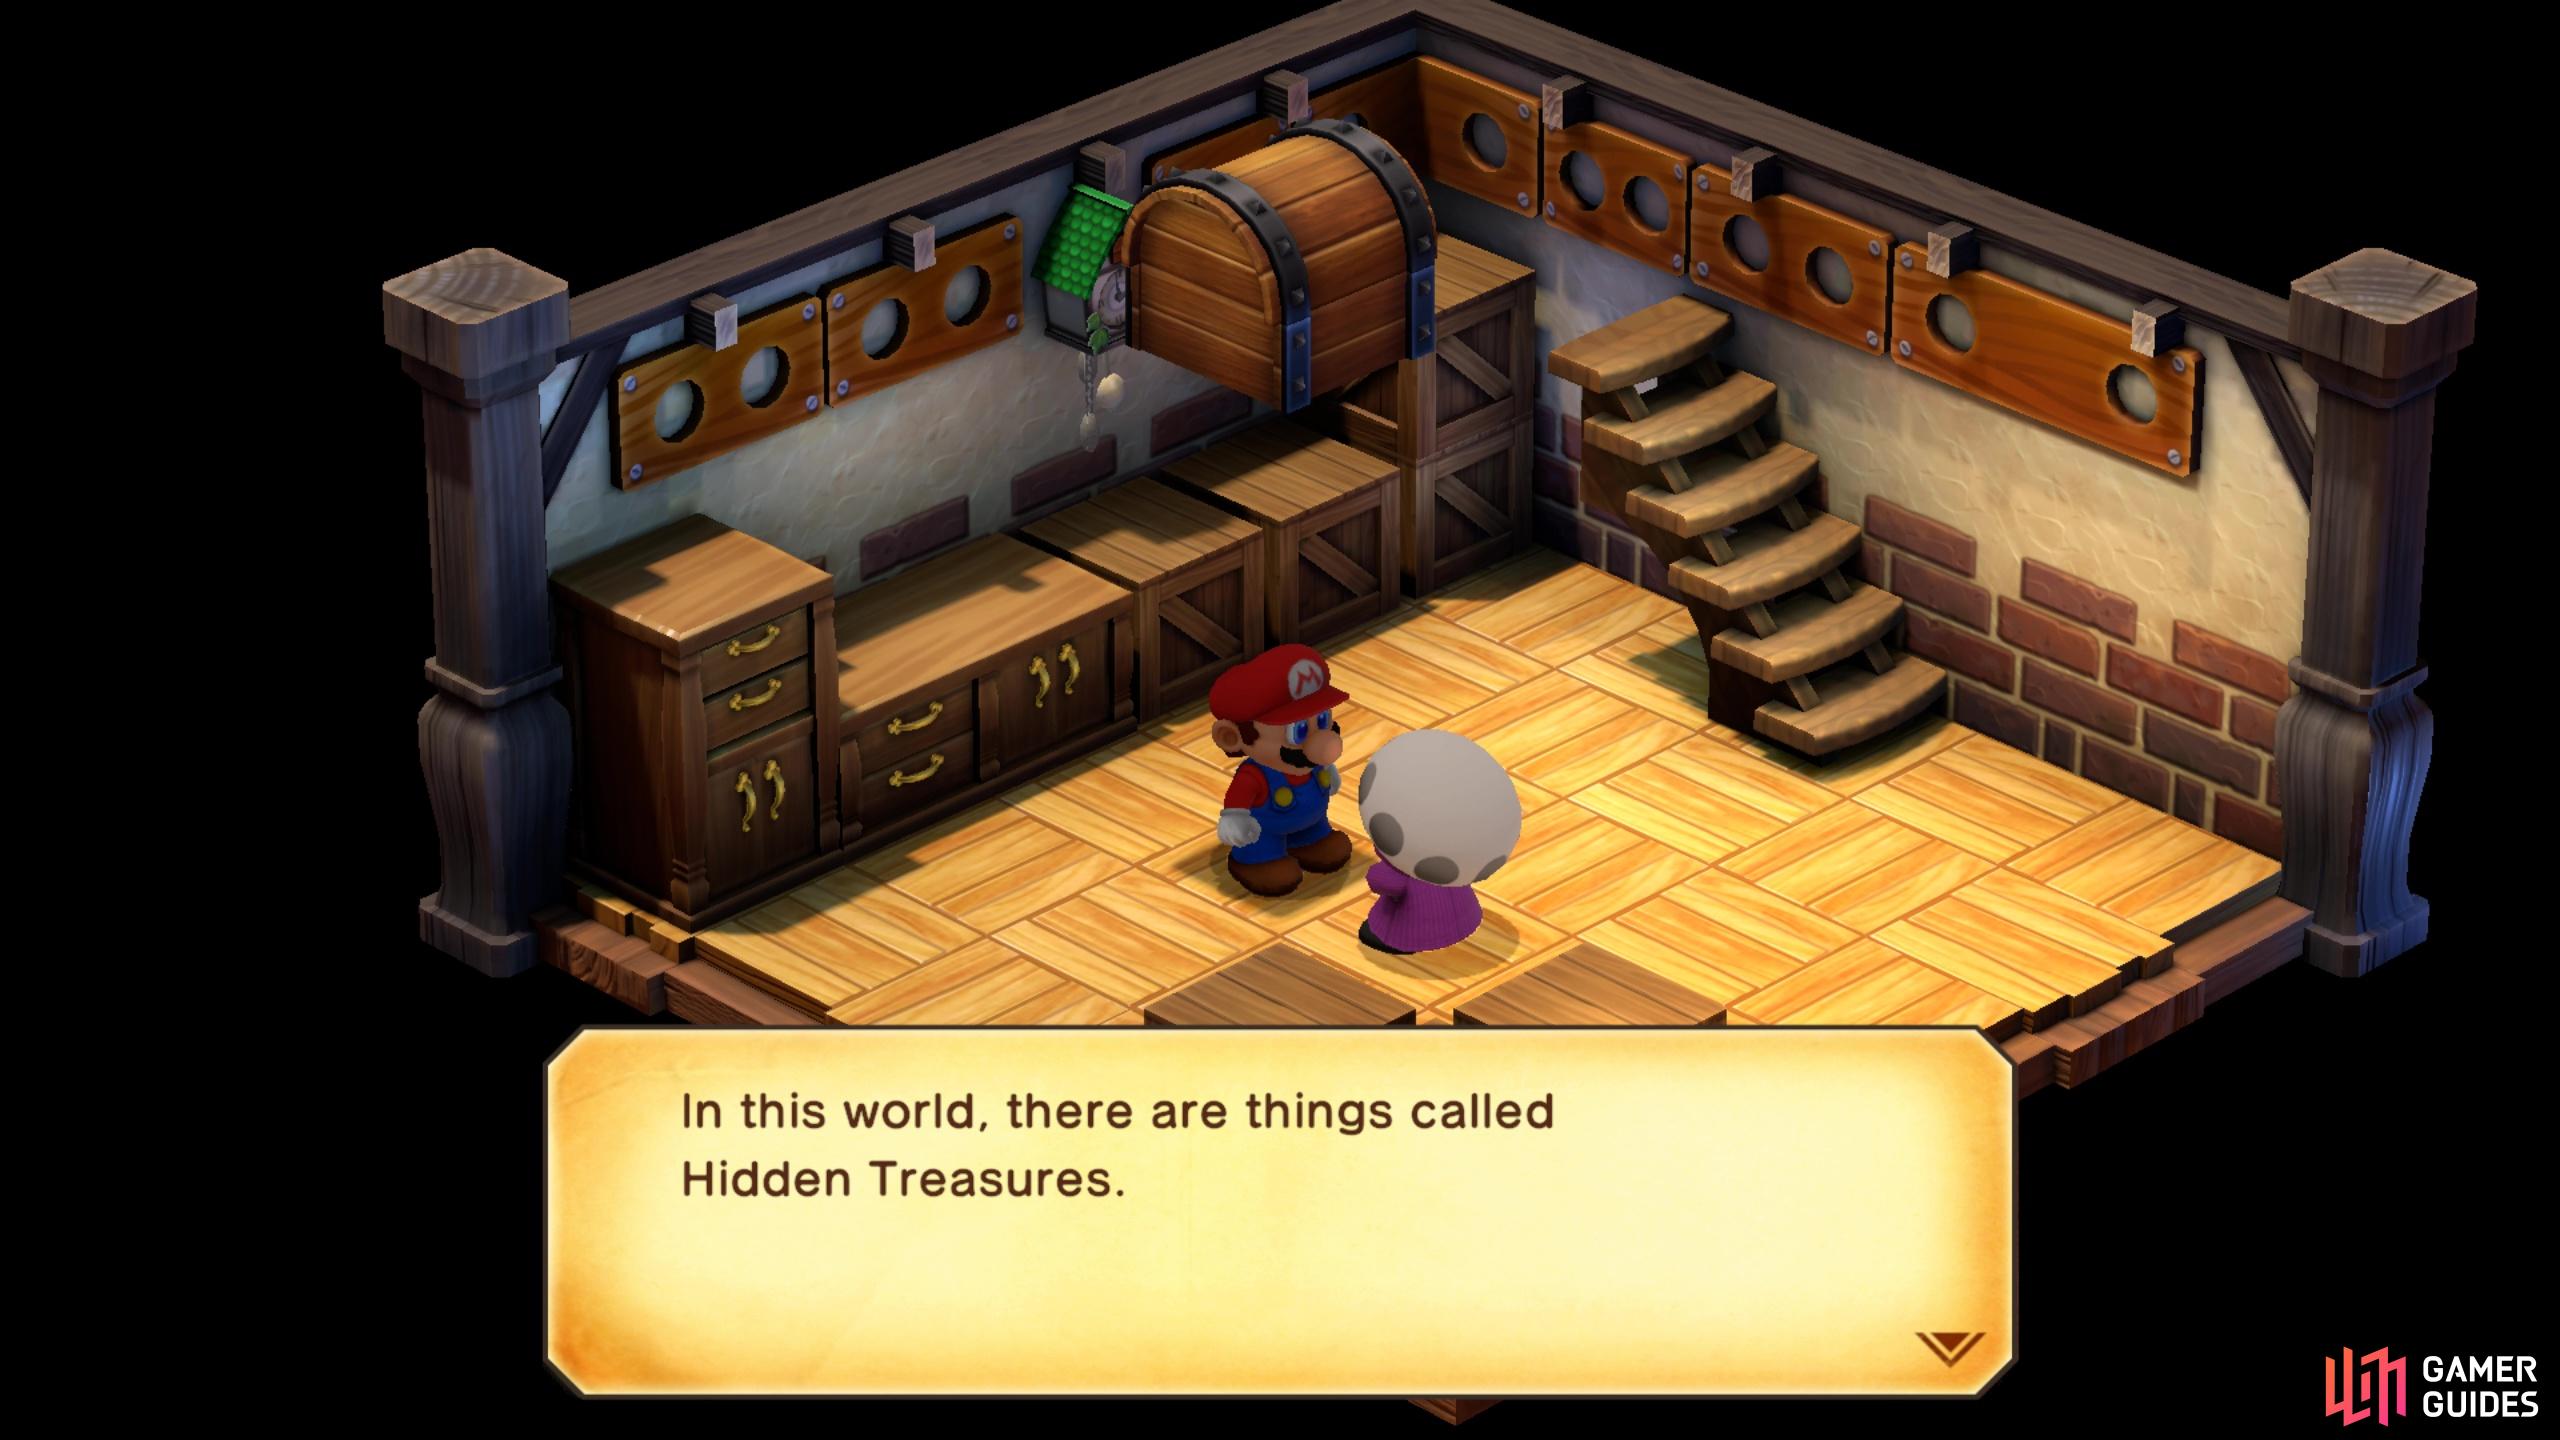
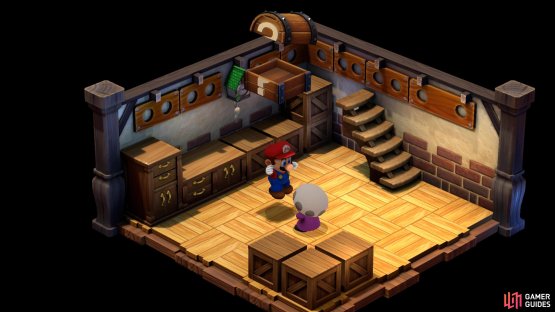
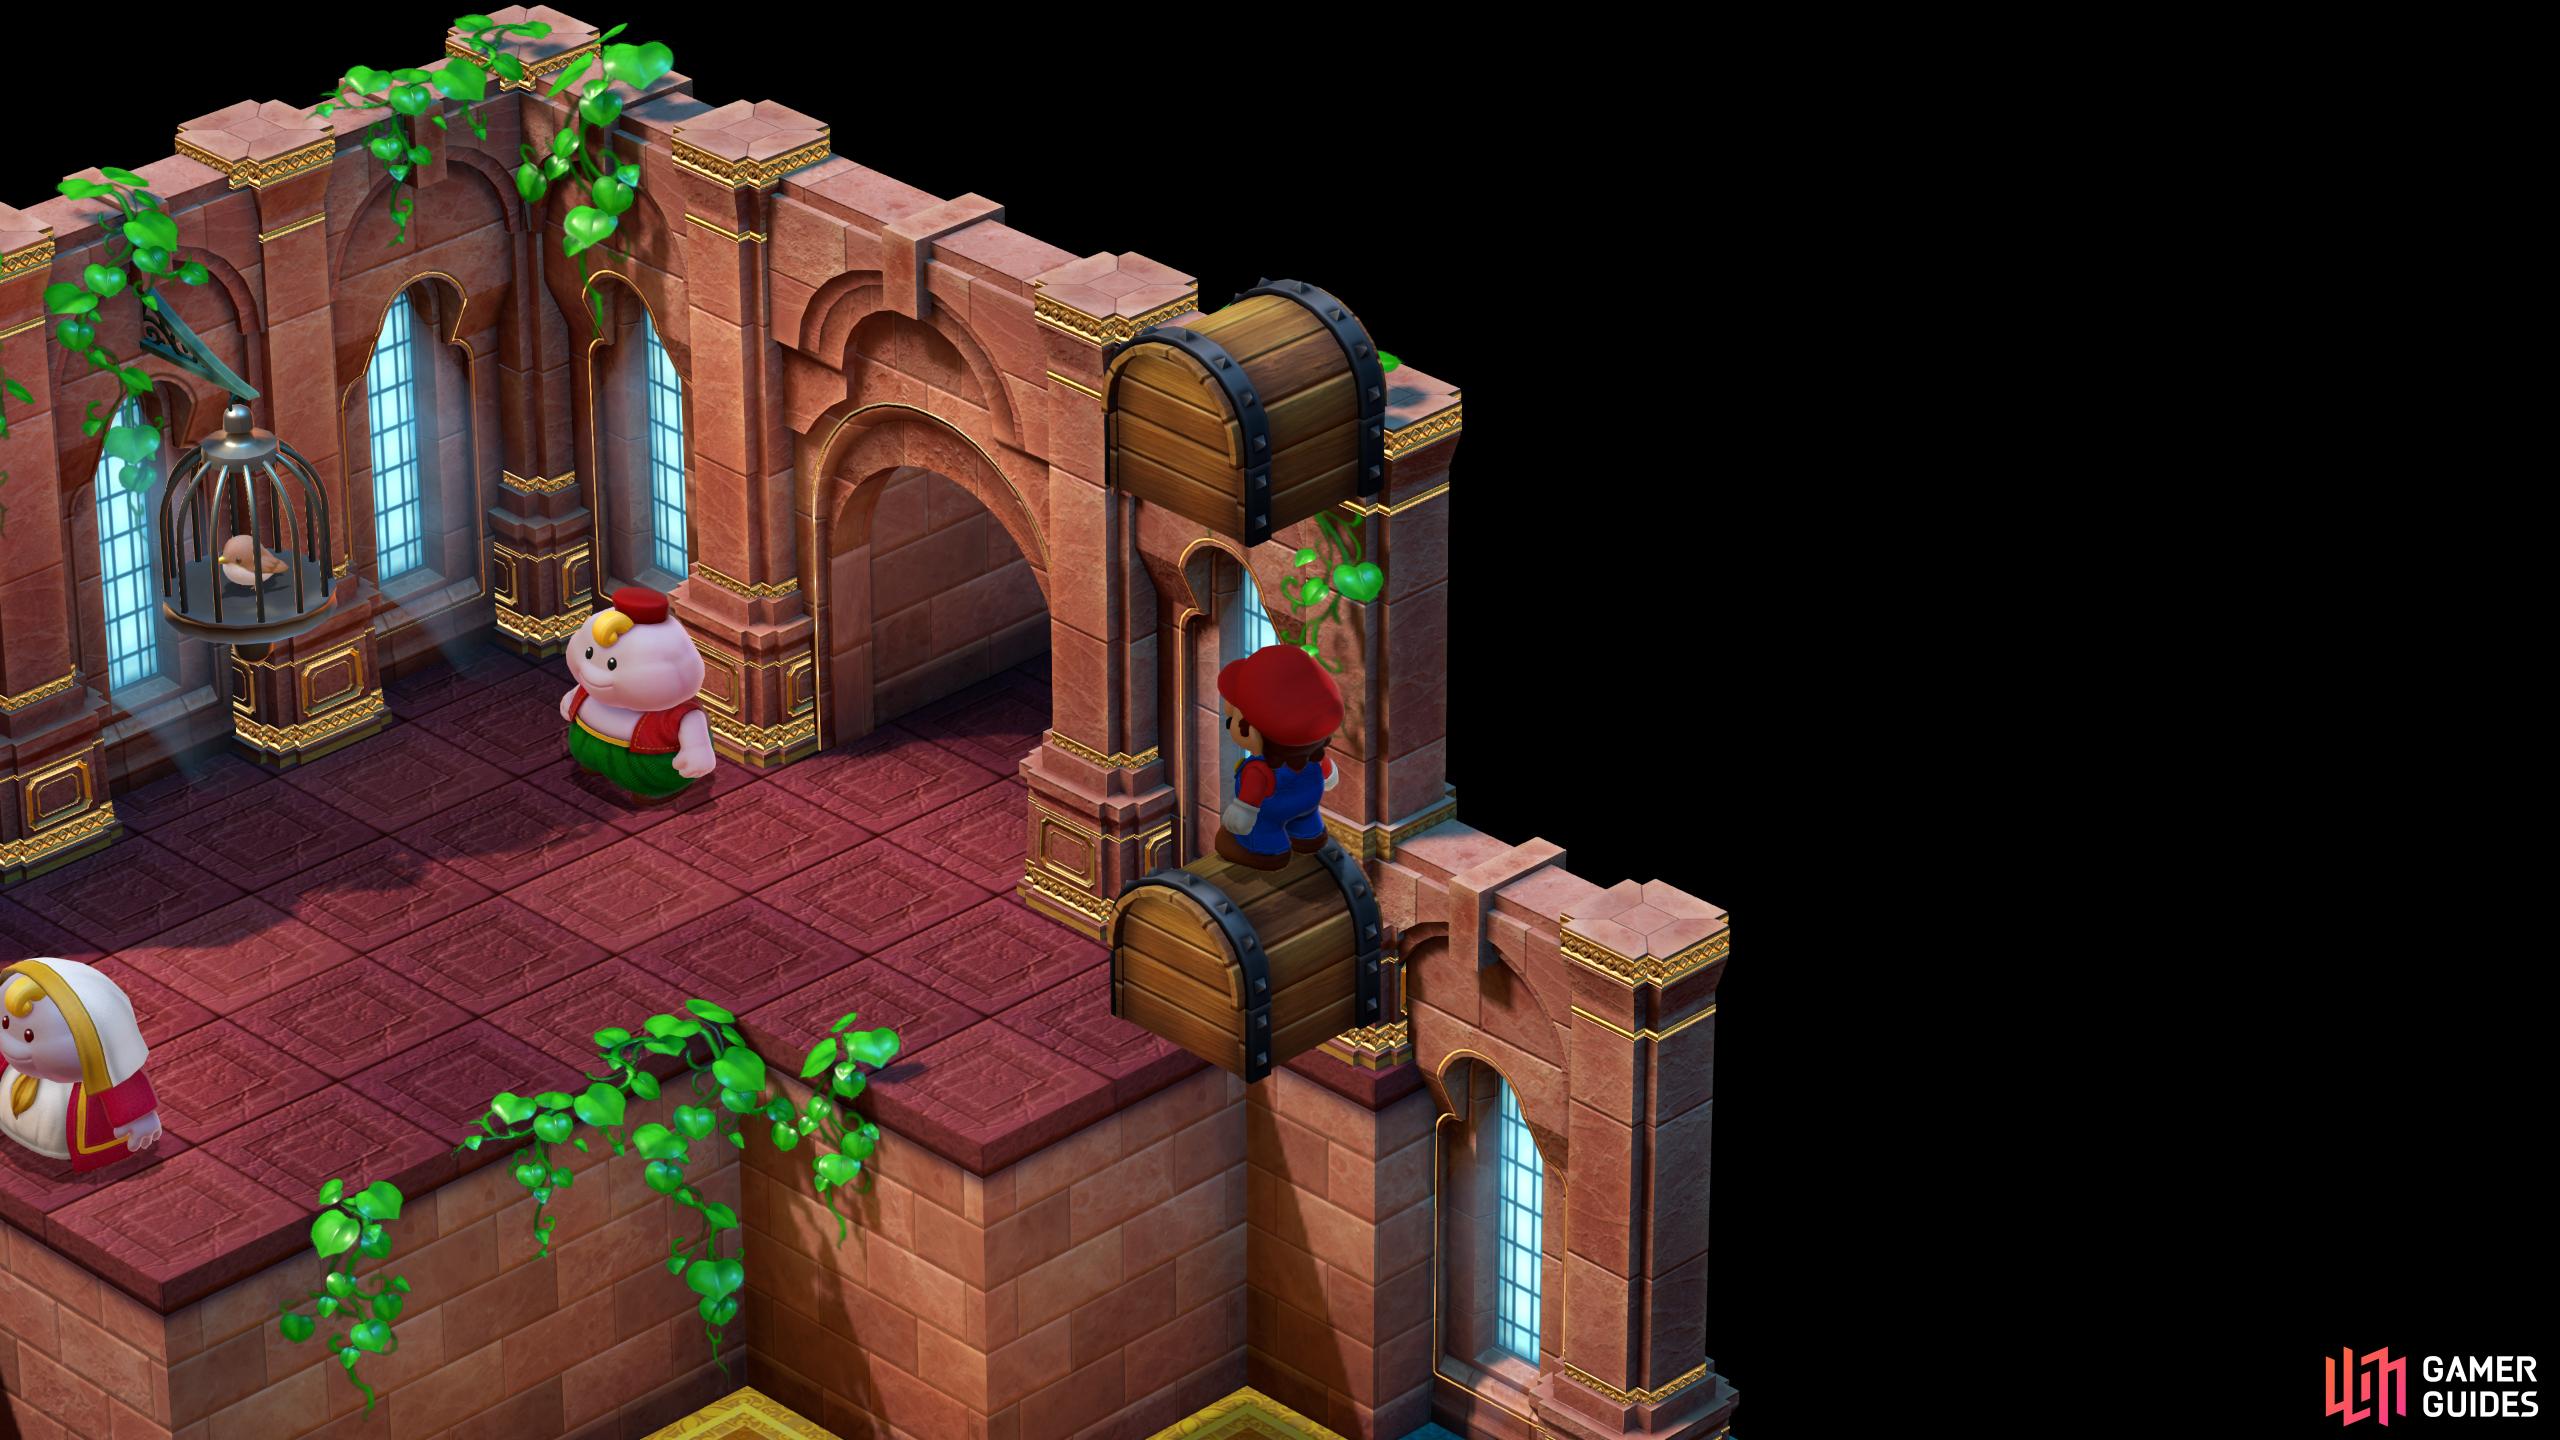
Head into the Basement of the Item Shop. In here, you’ll meet a strange NPC that’ll make you stand in front of him. When you do so, he’ll instruct you to jump up, causing Mario to jump into a chest containing a Flower. After doing so, he’ll give you a Signal Ring. When equipped, it’ll ping when you’re nearby a Hidden Treasure.
In fact, when you equip it in this basement, you’ll get an alert for another Hidden Treasure chest. To find this one, first wait for the NPC to stand in the bottom right corner, then jump on his head. A Hidden Chest containing a Flower will appear.

(1 of 2) Do as the NPC says and jump up to find a hidden treasure chest
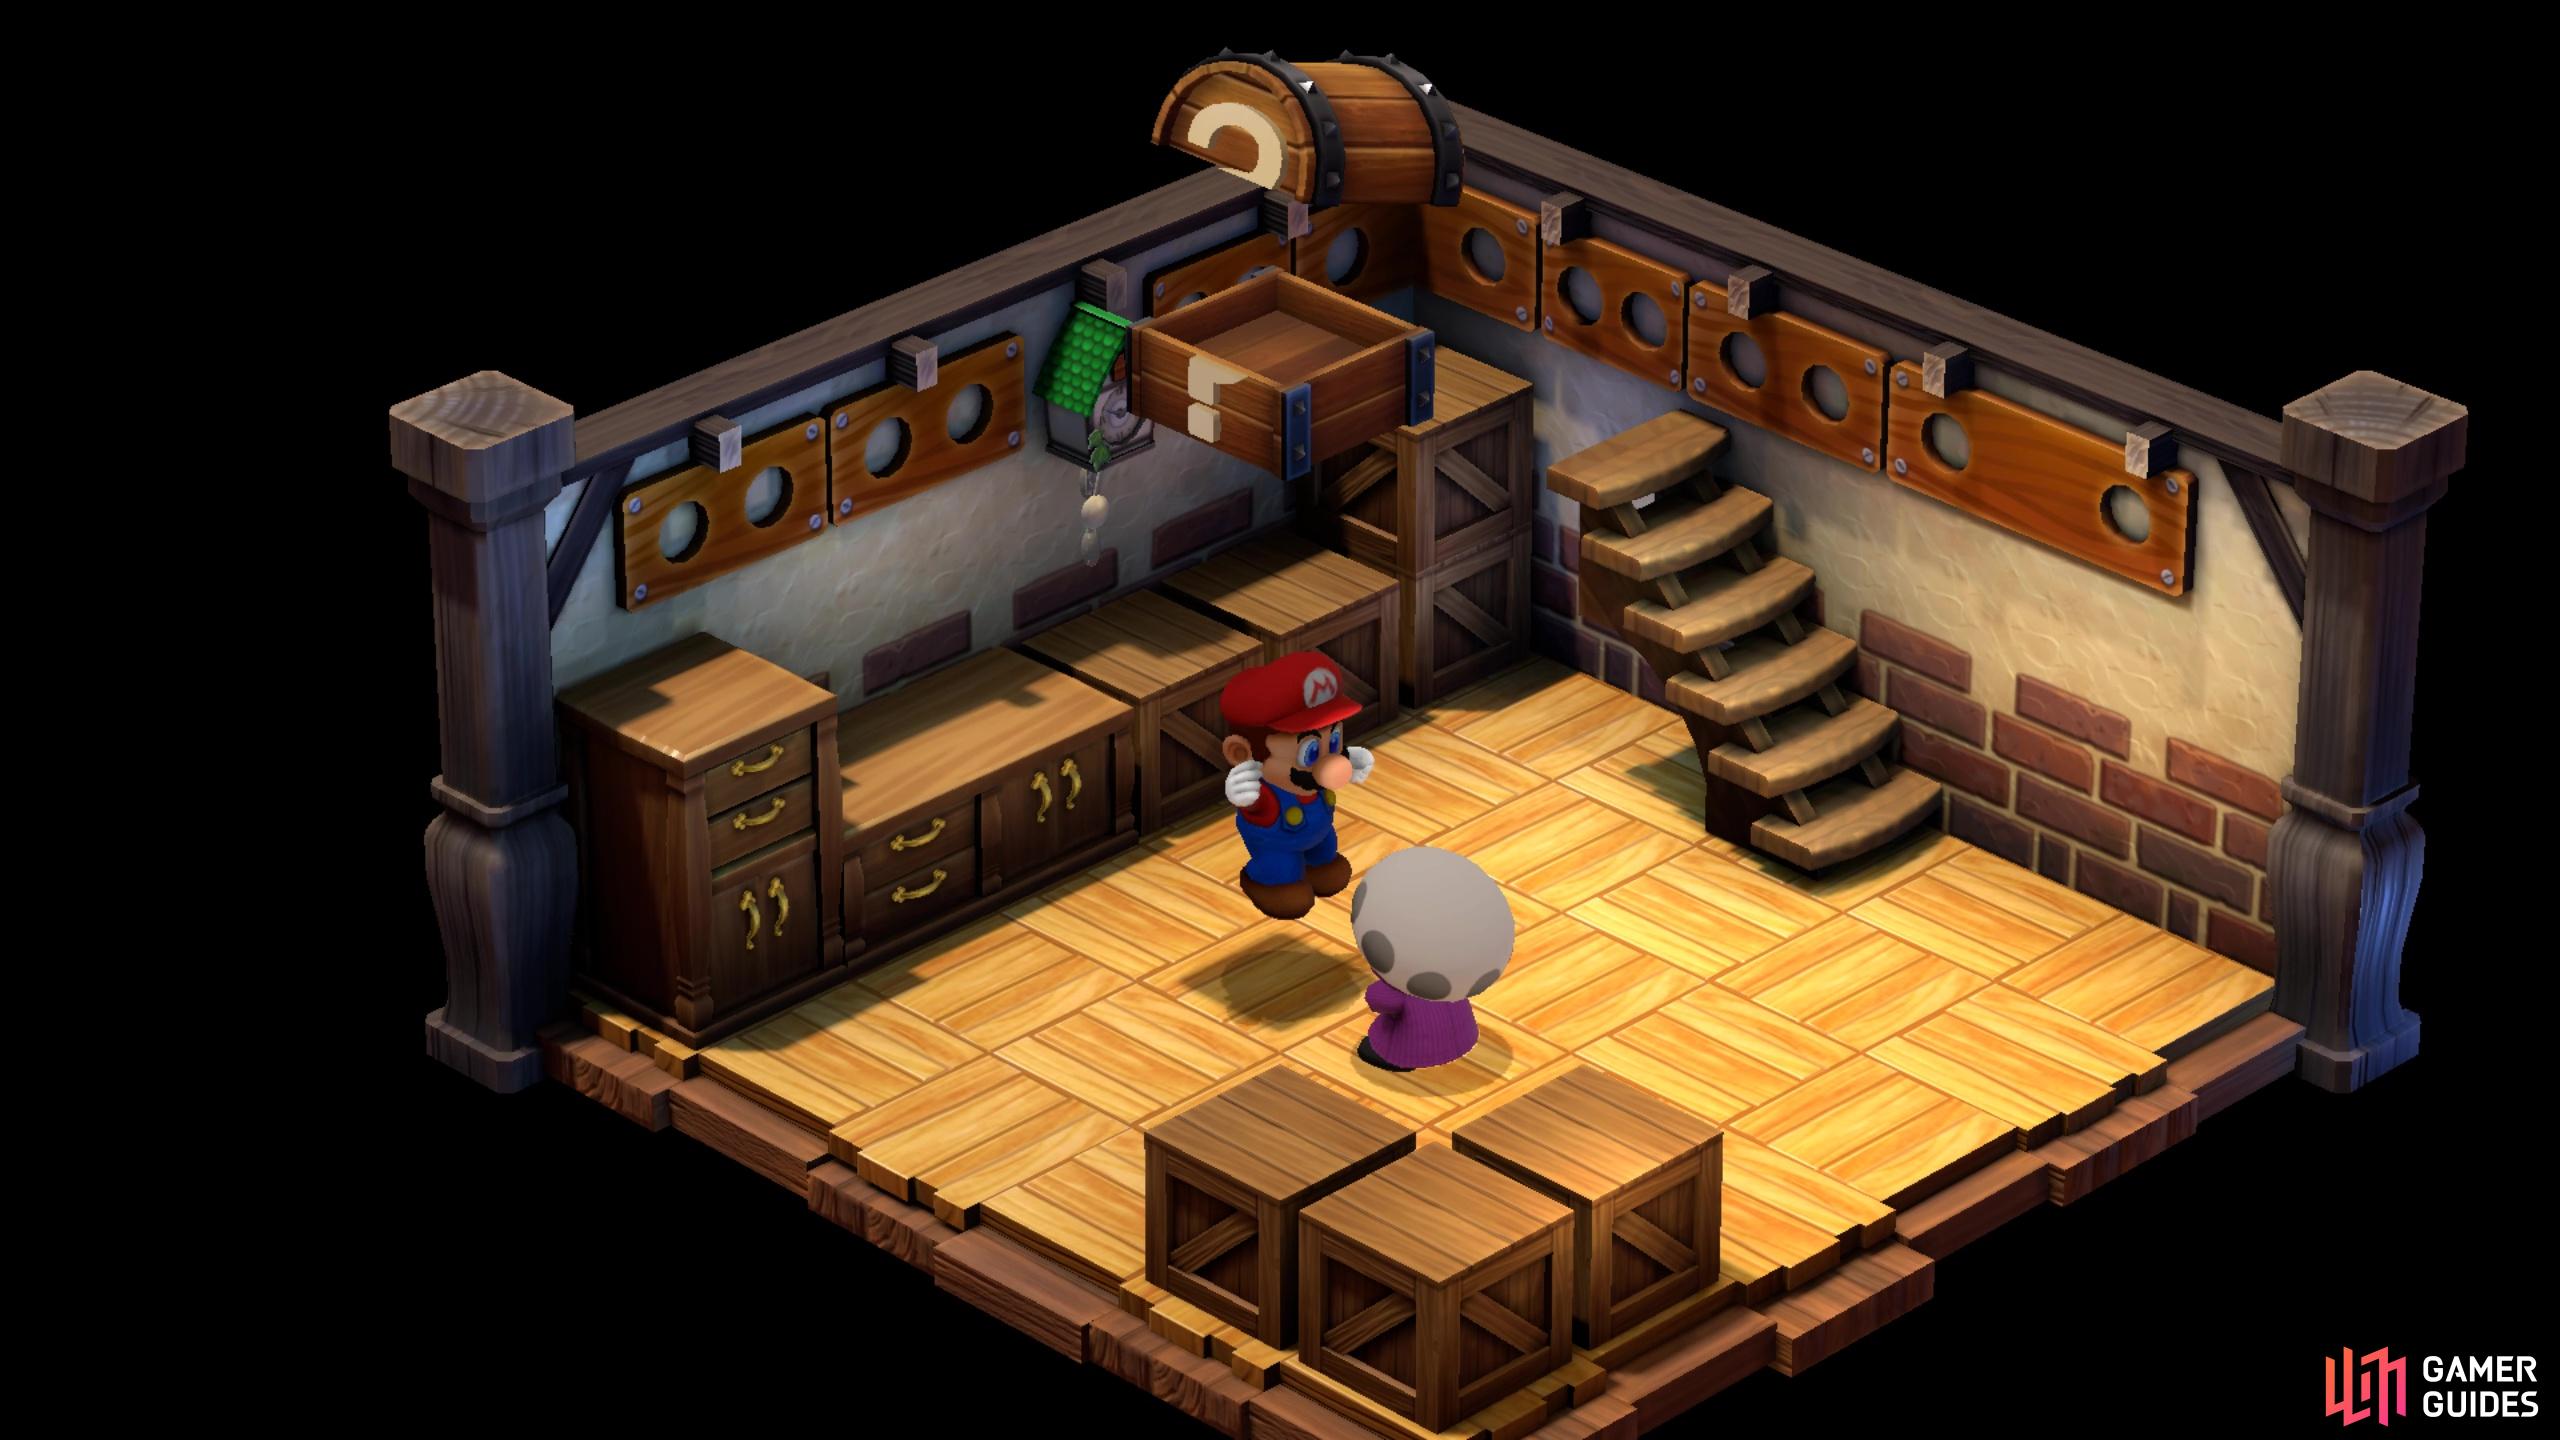
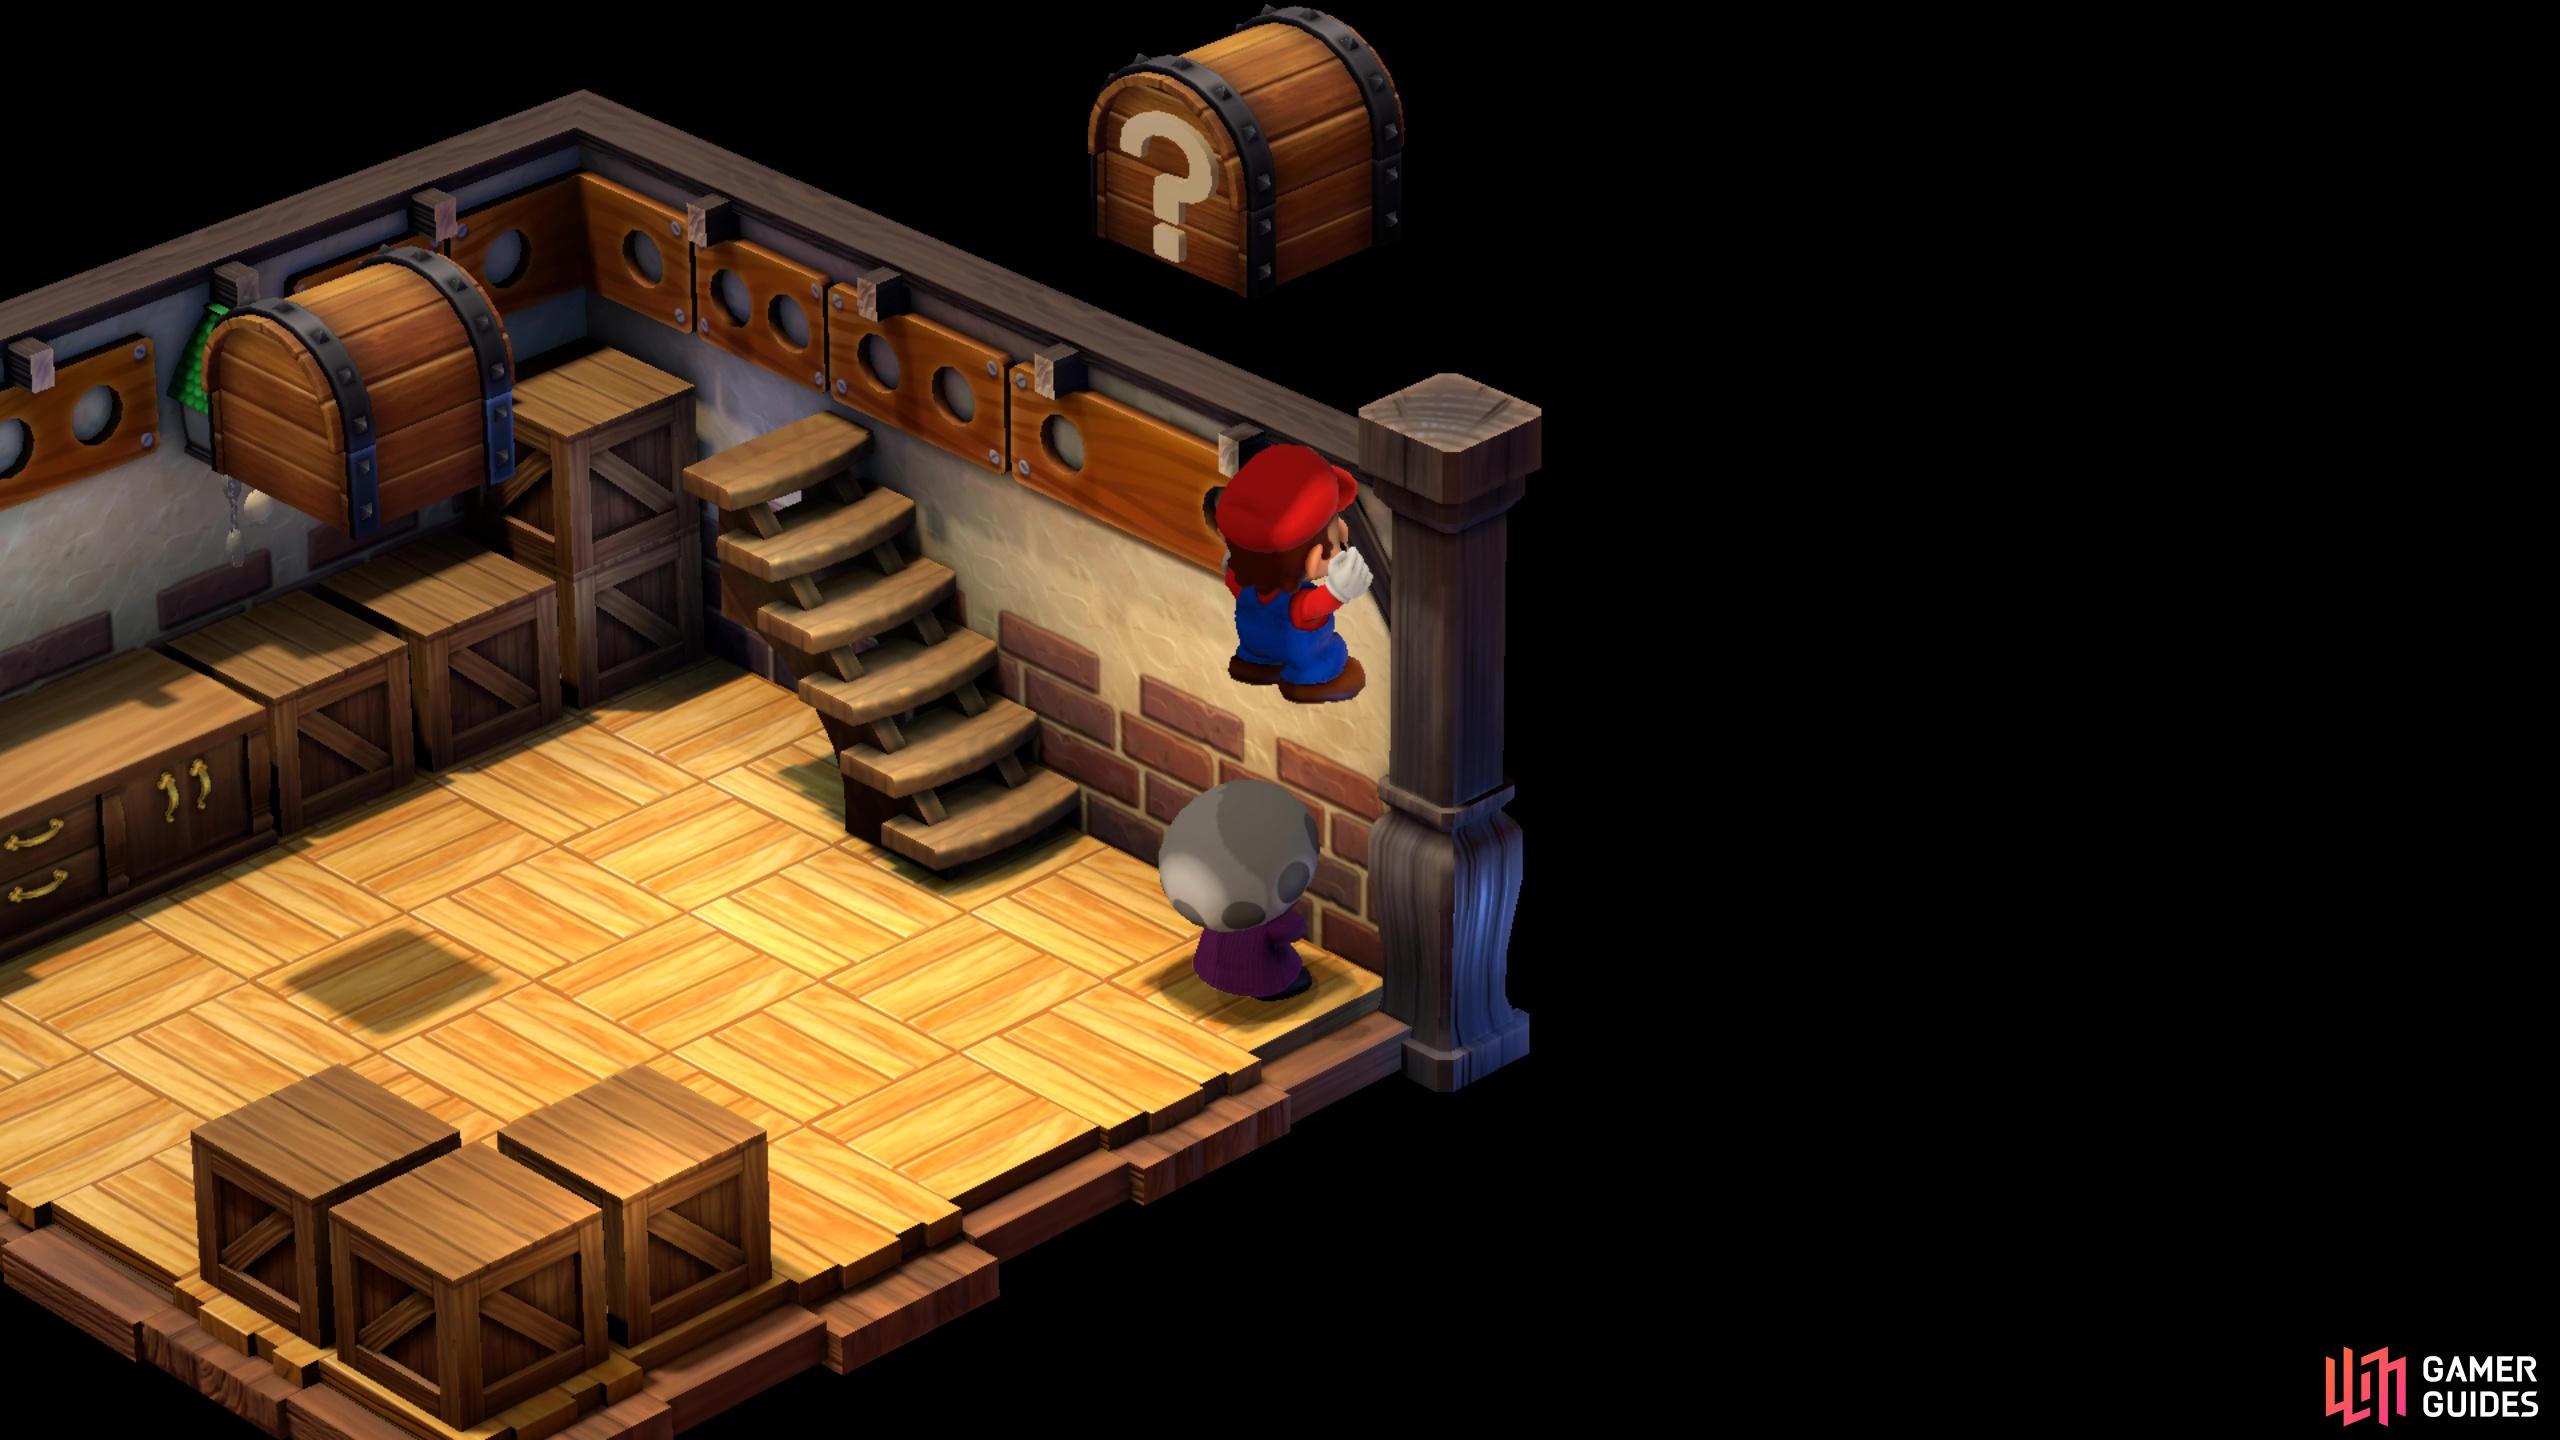
Do as the NPC says and jump up to find a hidden treasure chest (left), then equip the Signal Ring he gives you and find the hidden chest near the stairs. (right)
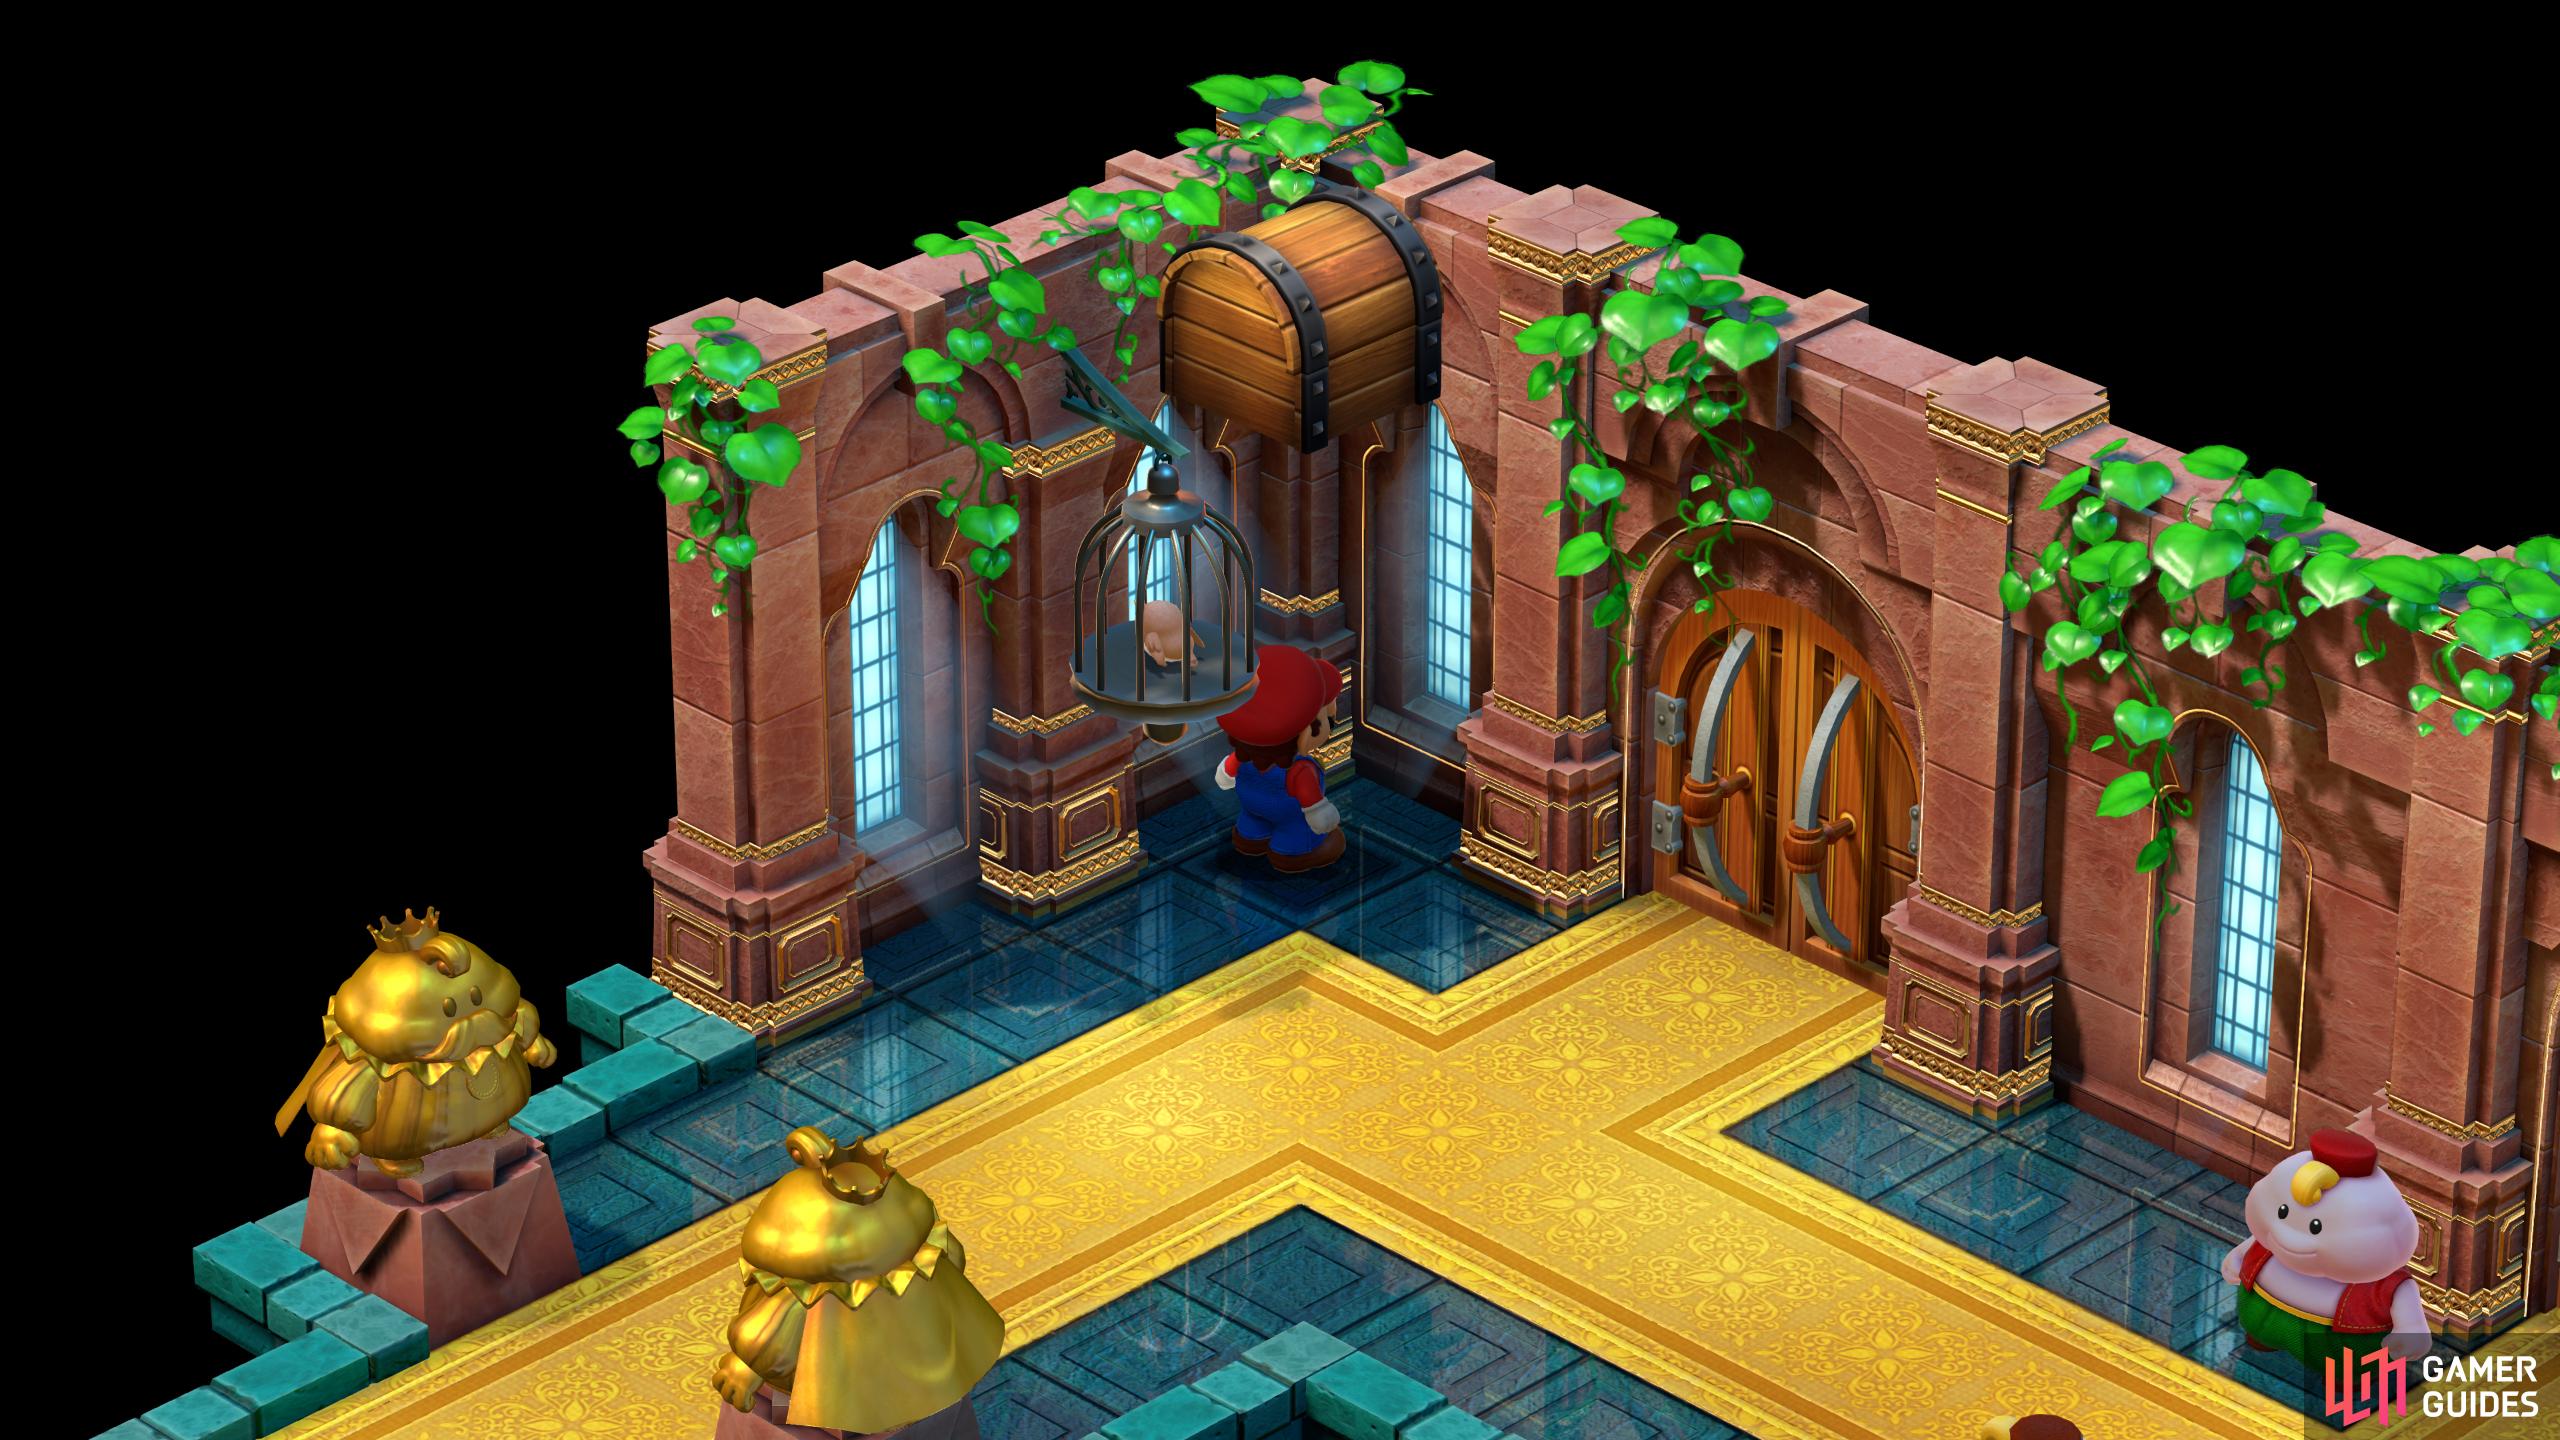
Head back into the Mushroom Castle’s hallway and walk over to the door at the back. Wait for one of the toad’s to make their way over and then hop onto their head to get on top of the ledge (these toads will be here after you’ve spoken to the Chancellor). Once up on the ledge above the door, jump up to reveal a Hidden Treasure chest, which contains a Frog Coin.
All Hidden Treasures in Bandit’s Way
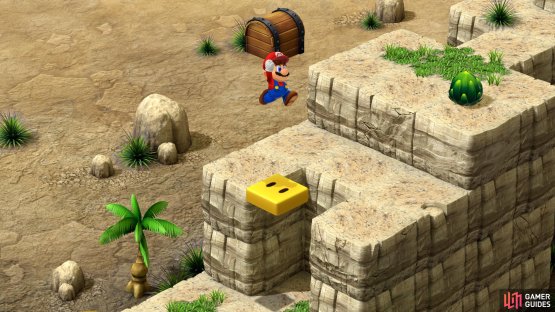
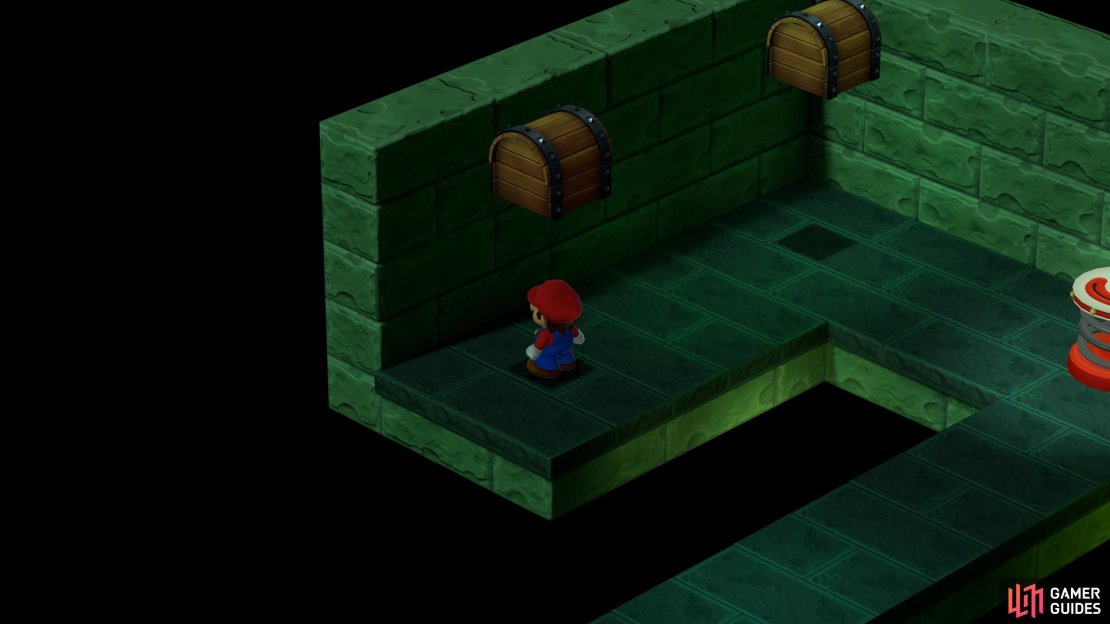
This Hidden Treasure is found in the second area of ![]() Bandit’s Way. When you reach the second bit of high ground, drop off to the east and note two flowers to the south, one red (west) and one purple (east). Jump on the red flower and wait for it to spin you until you’re facing the purple flower to the east, then jump off and you’ll soar up and into the air, hitting a Hidden Treasure well above Mario’s normal reach, scoring some Croaka Cola in the process. This elixir will fully restore the party’s HP and FP and is best saved for difficult fights.
Bandit’s Way. When you reach the second bit of high ground, drop off to the east and note two flowers to the south, one red (west) and one purple (east). Jump on the red flower and wait for it to spin you until you’re facing the purple flower to the east, then jump off and you’ll soar up and into the air, hitting a Hidden Treasure well above Mario’s normal reach, scoring some Croaka Cola in the process. This elixir will fully restore the party’s HP and FP and is best saved for difficult fights.
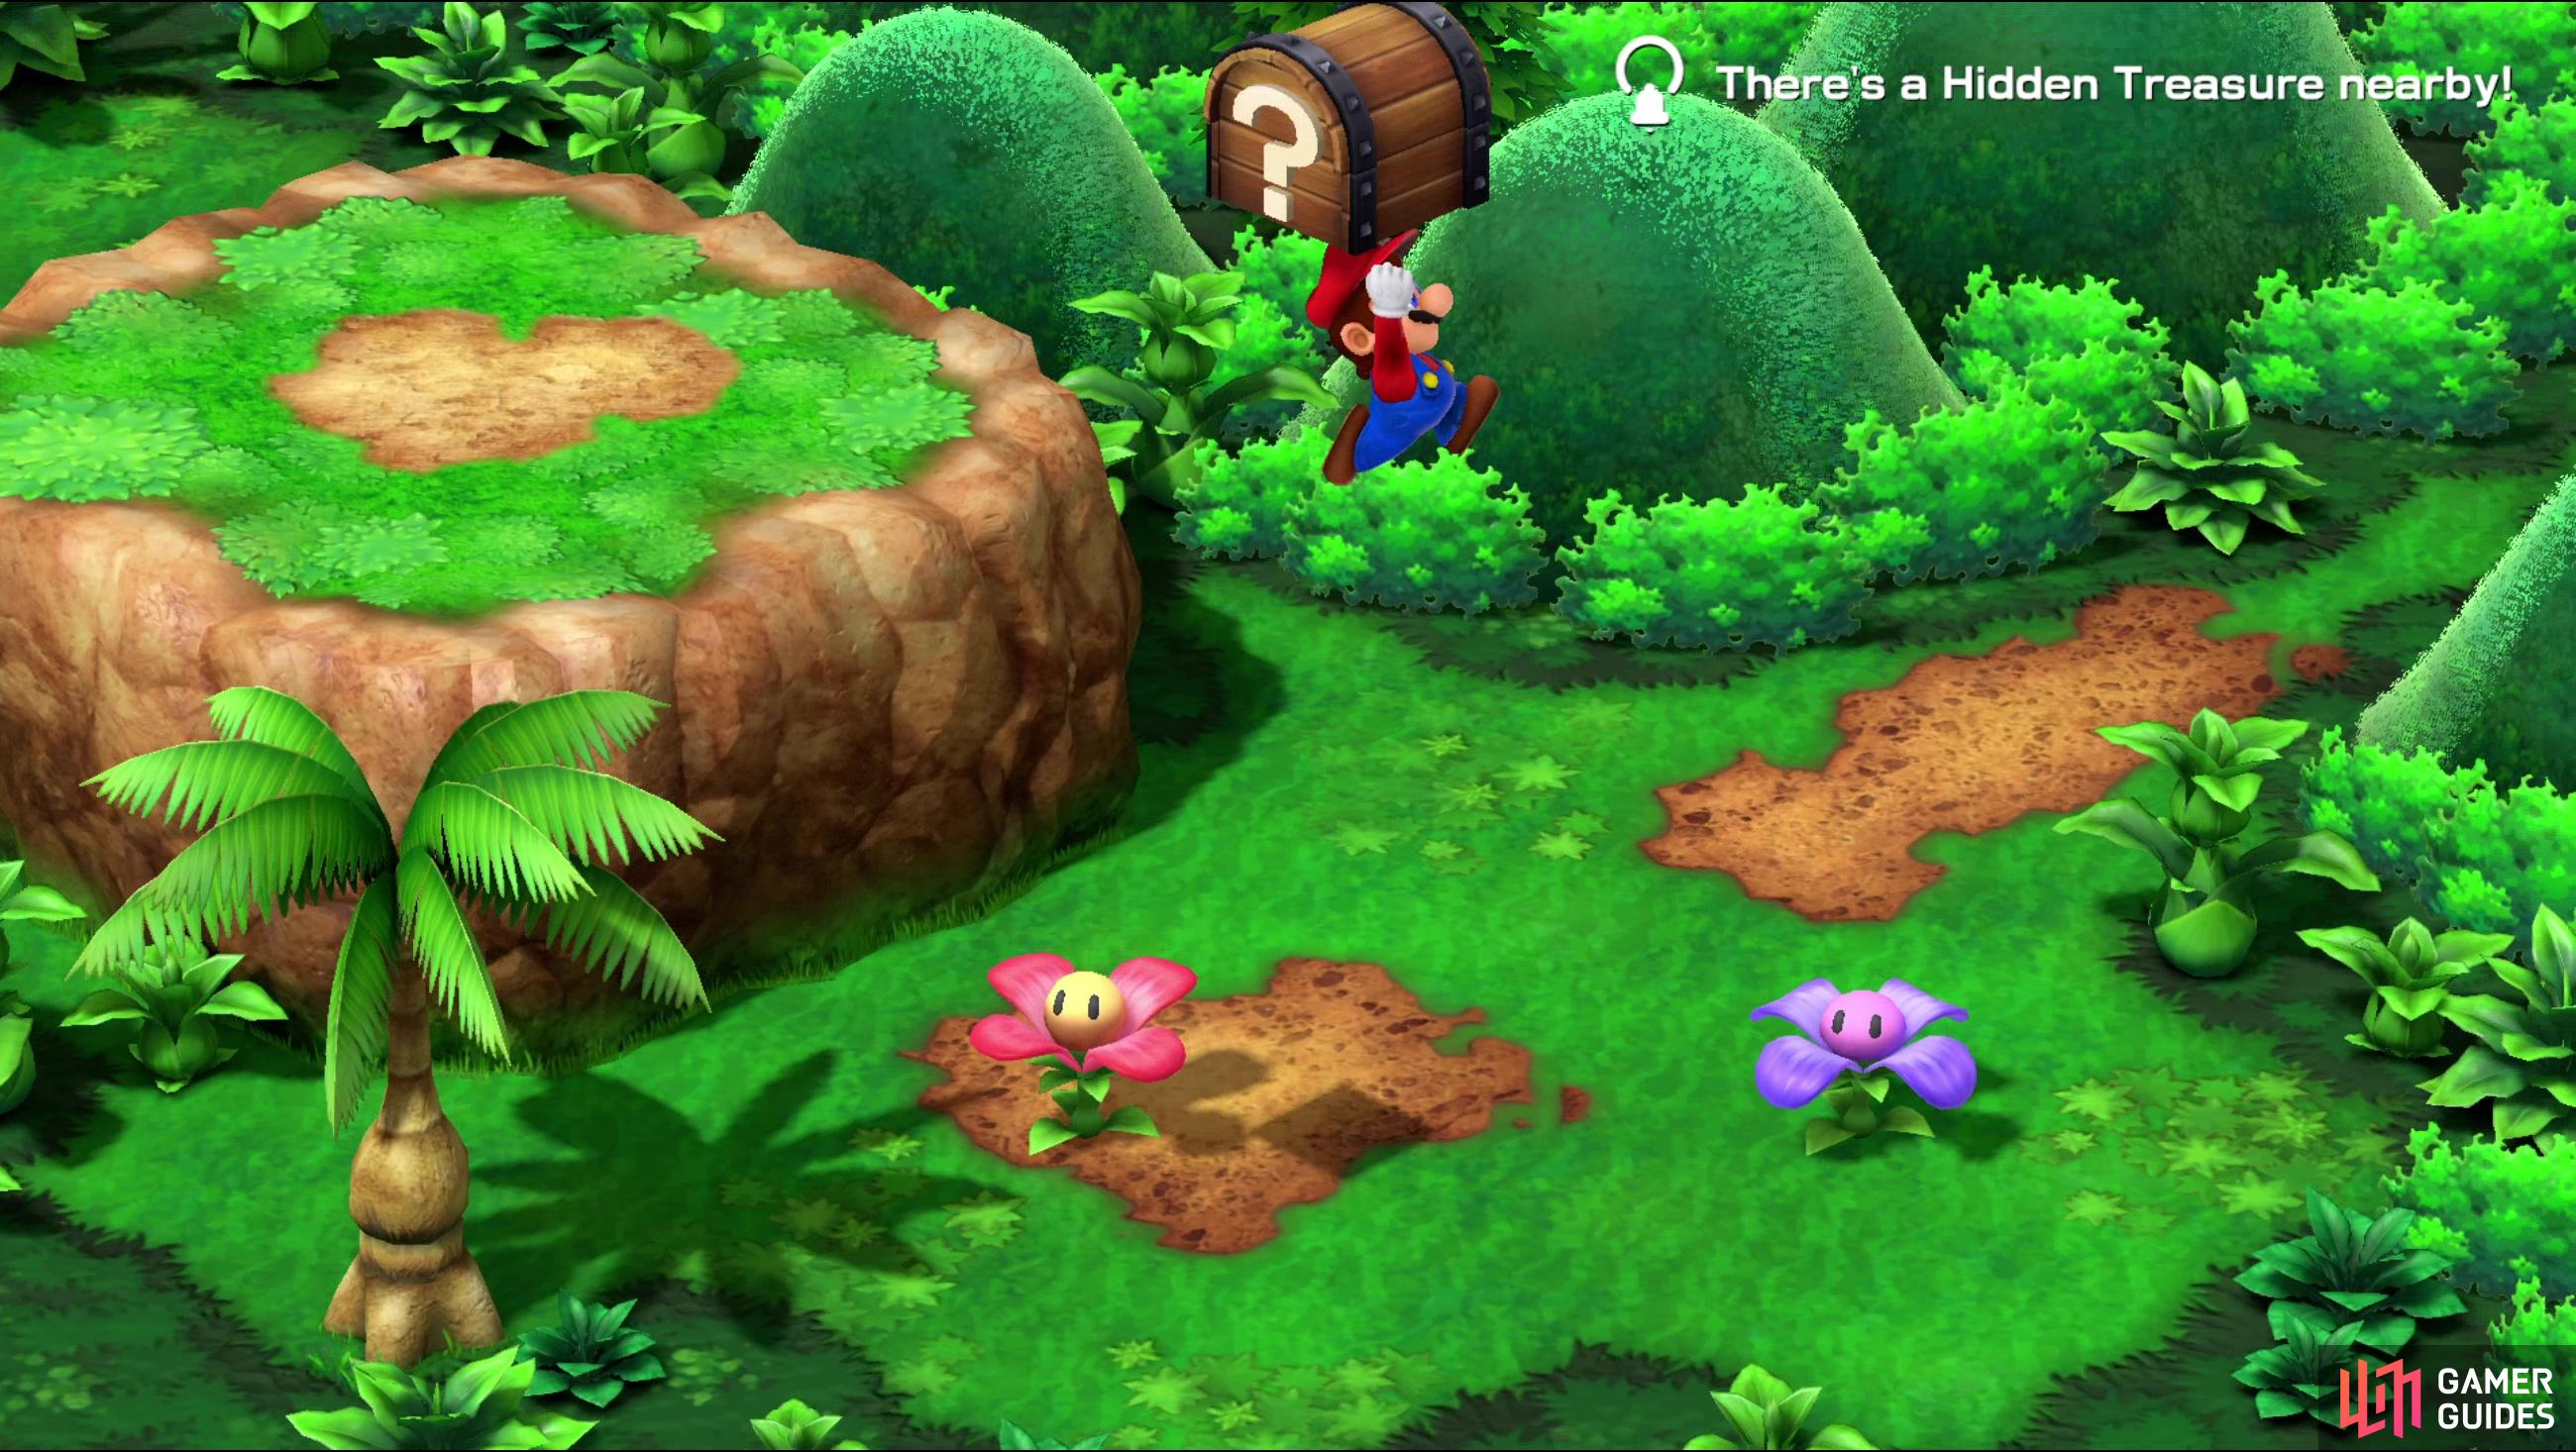
Near the end of the second screen, use a red flower to jump towards a purple flower to get this area’s lone Hidden Chest.
All Hidden Treasures in Rose Town
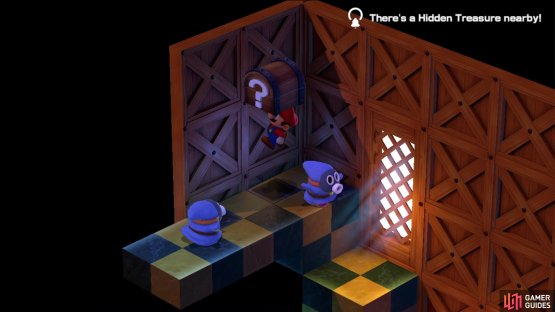
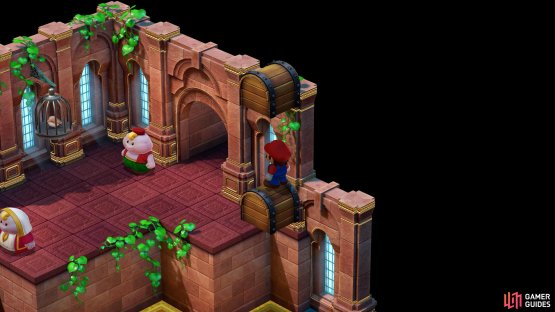
Head to the northwest of the village where you’ll find a toad. Speak to him, and he will tell you that he can’t get to its house due to the stairs that leads up to it has being taken away. Jump on his head up to the ledge where the house is, and then enter his house. Open up the two floating chests on the first floor before heading up the stairs to the next floor. Here, you’ll find the large green button the toad was telling you about. Jump on it to lower the stairs for the toad before jumping on the bed to find the hidden treasure which contains a Frog Coin. You can speak to the toad afterward, and if you’re honest with him, he’ll tell you a secret to get through the forest.

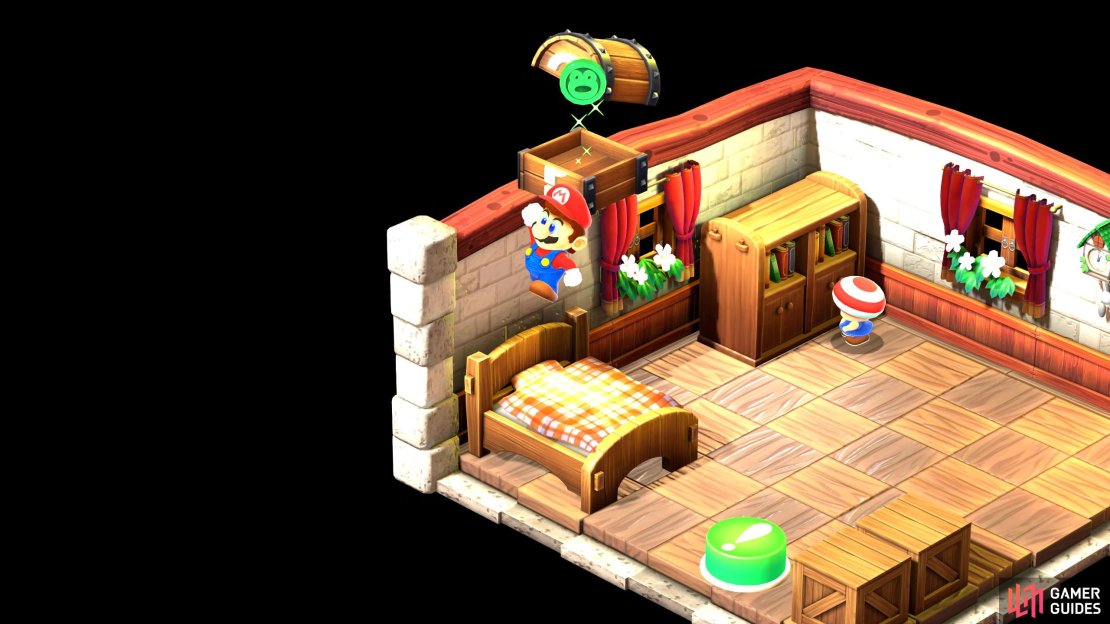

(1 of 4) Jump on the Toad’s head to reach the house on the raised ledge.
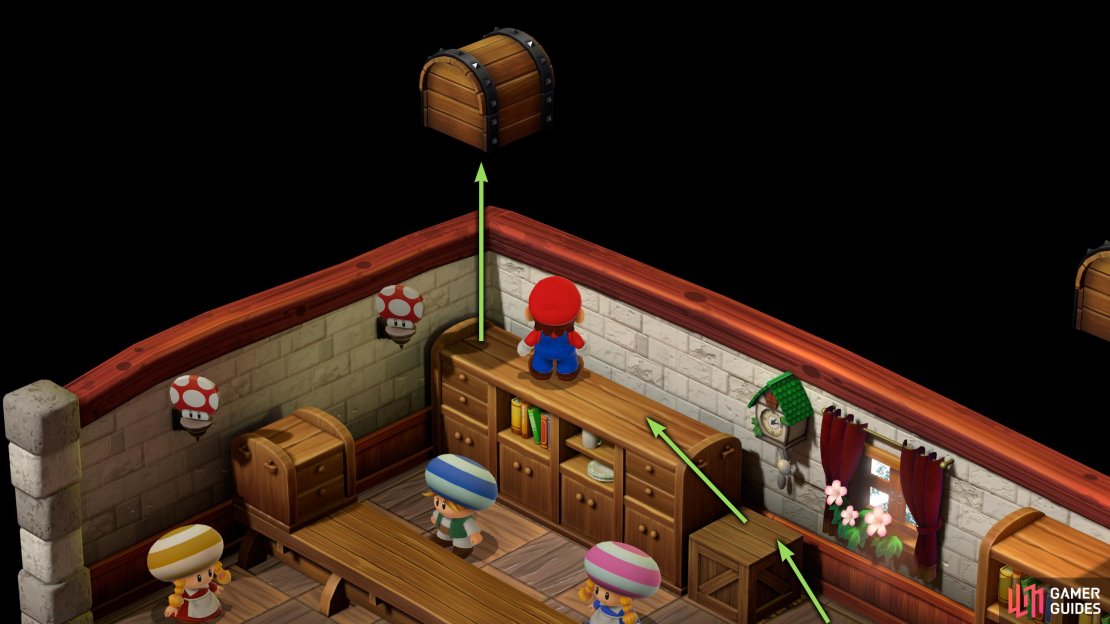
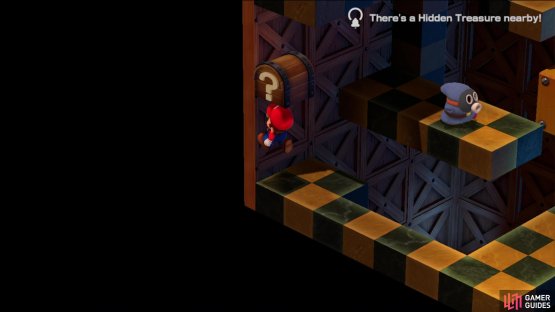
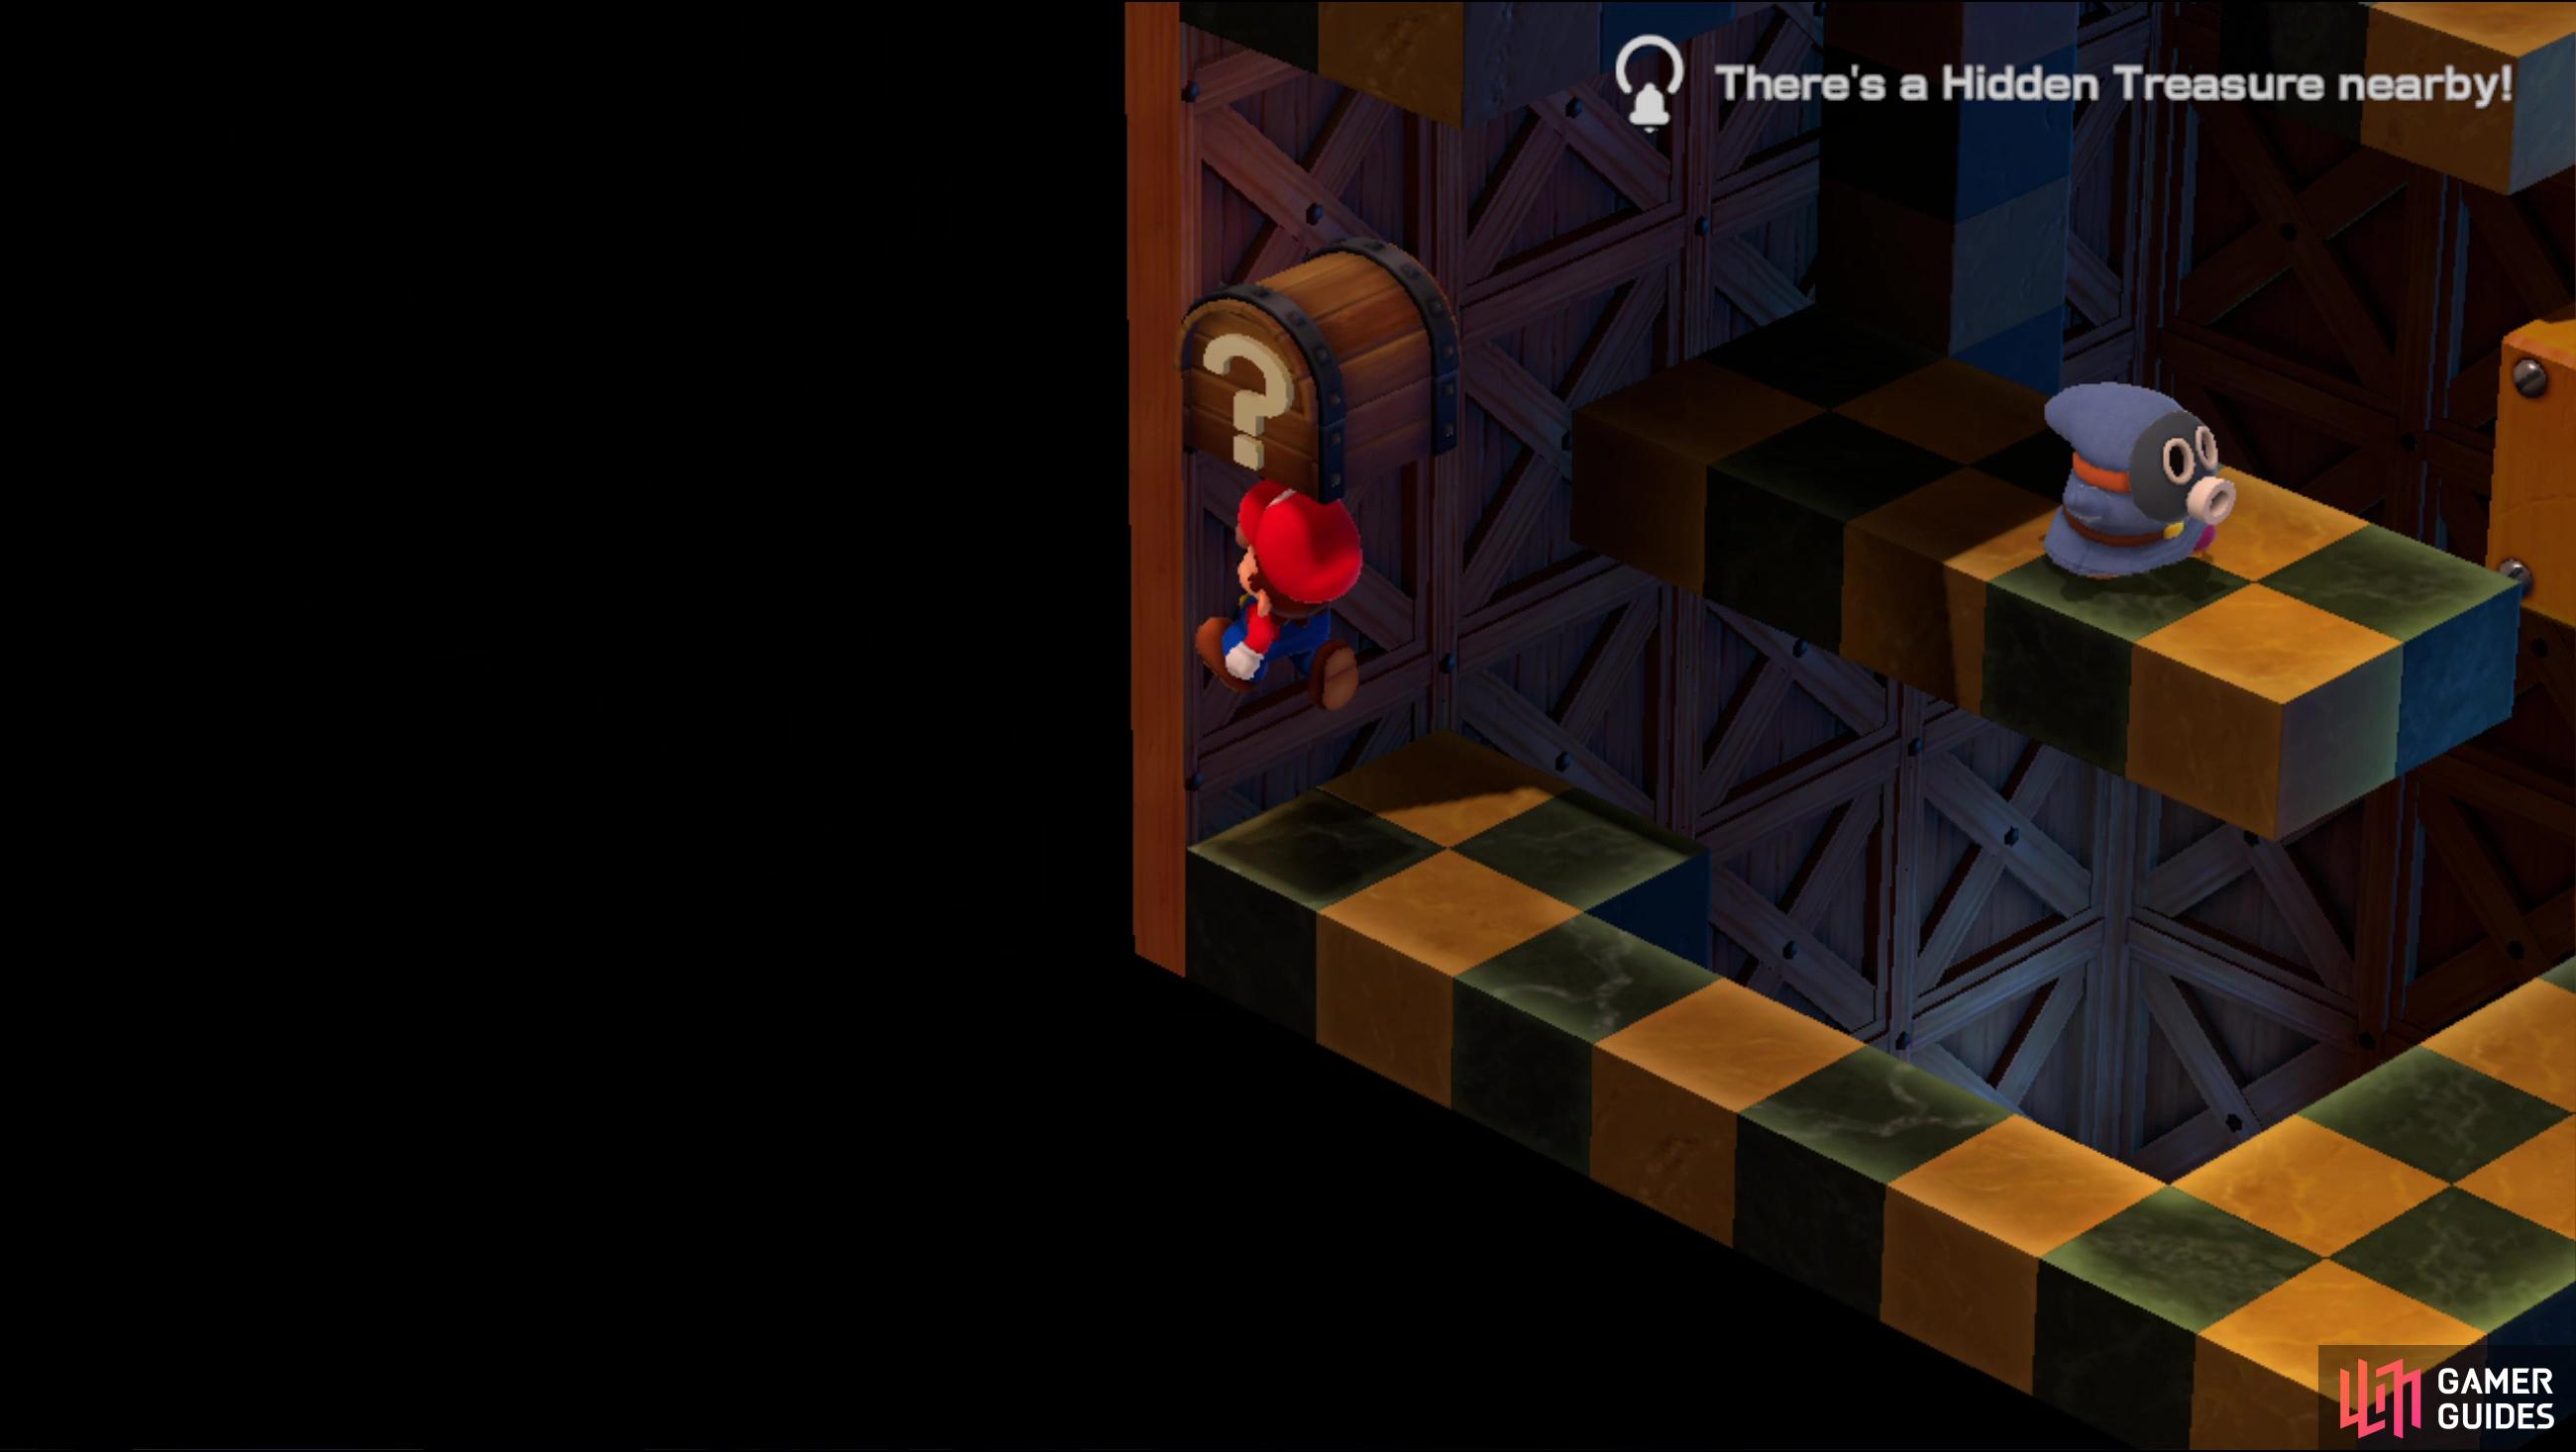
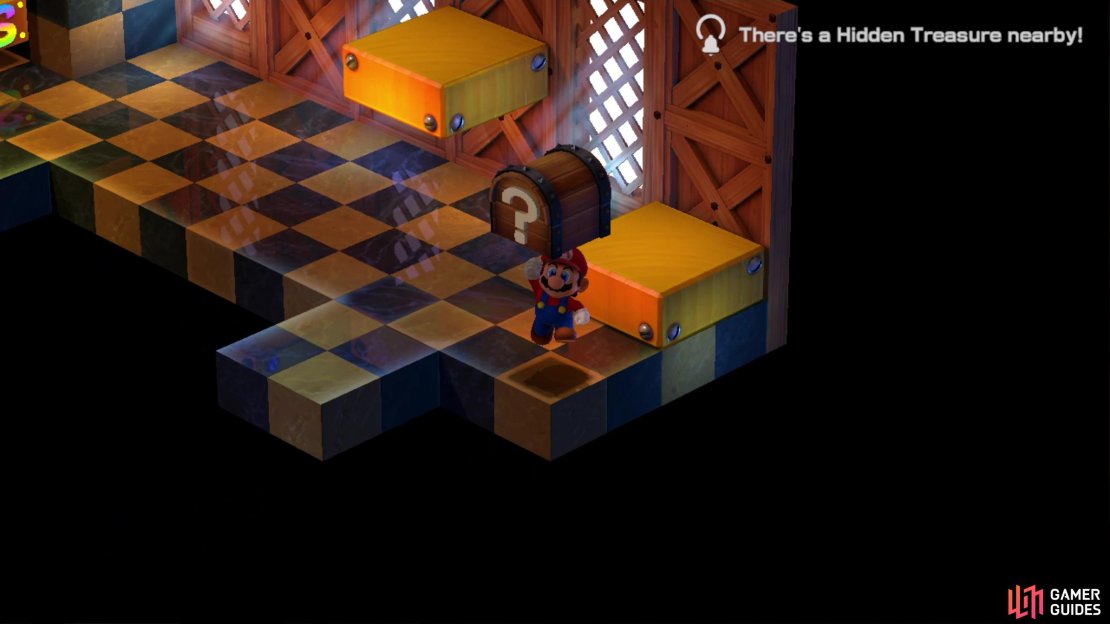
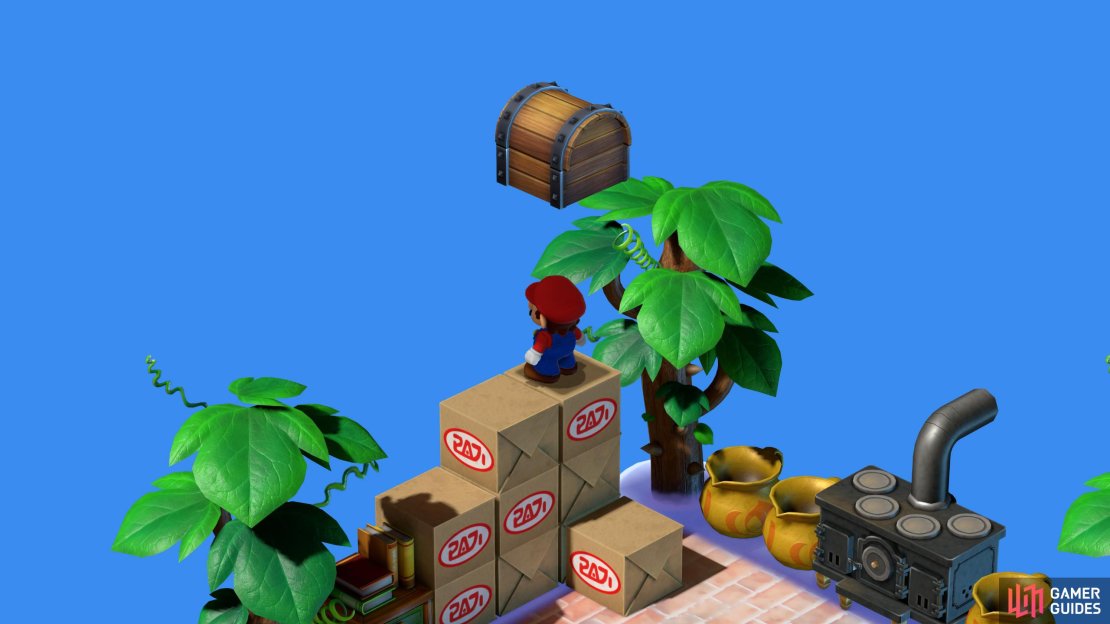
The second hidden treasure can be found inside the Item Shop which is situated on the east side of the town (has a spinning mushroom sign). Enter the shop, and head behind the counter. Jump on the crate to reach the top shelf, walk to the end, and jump to find the hidden treasure containing a Frog Coin. Note there is another chest in here on top of the bookshelf. To get this, you’ll need to exit the shop, head around the right side of the building, climb the crates, and enter the chimney. This will drop you on top of the bookshelf.
All Hidden Treasures in Forest Maze
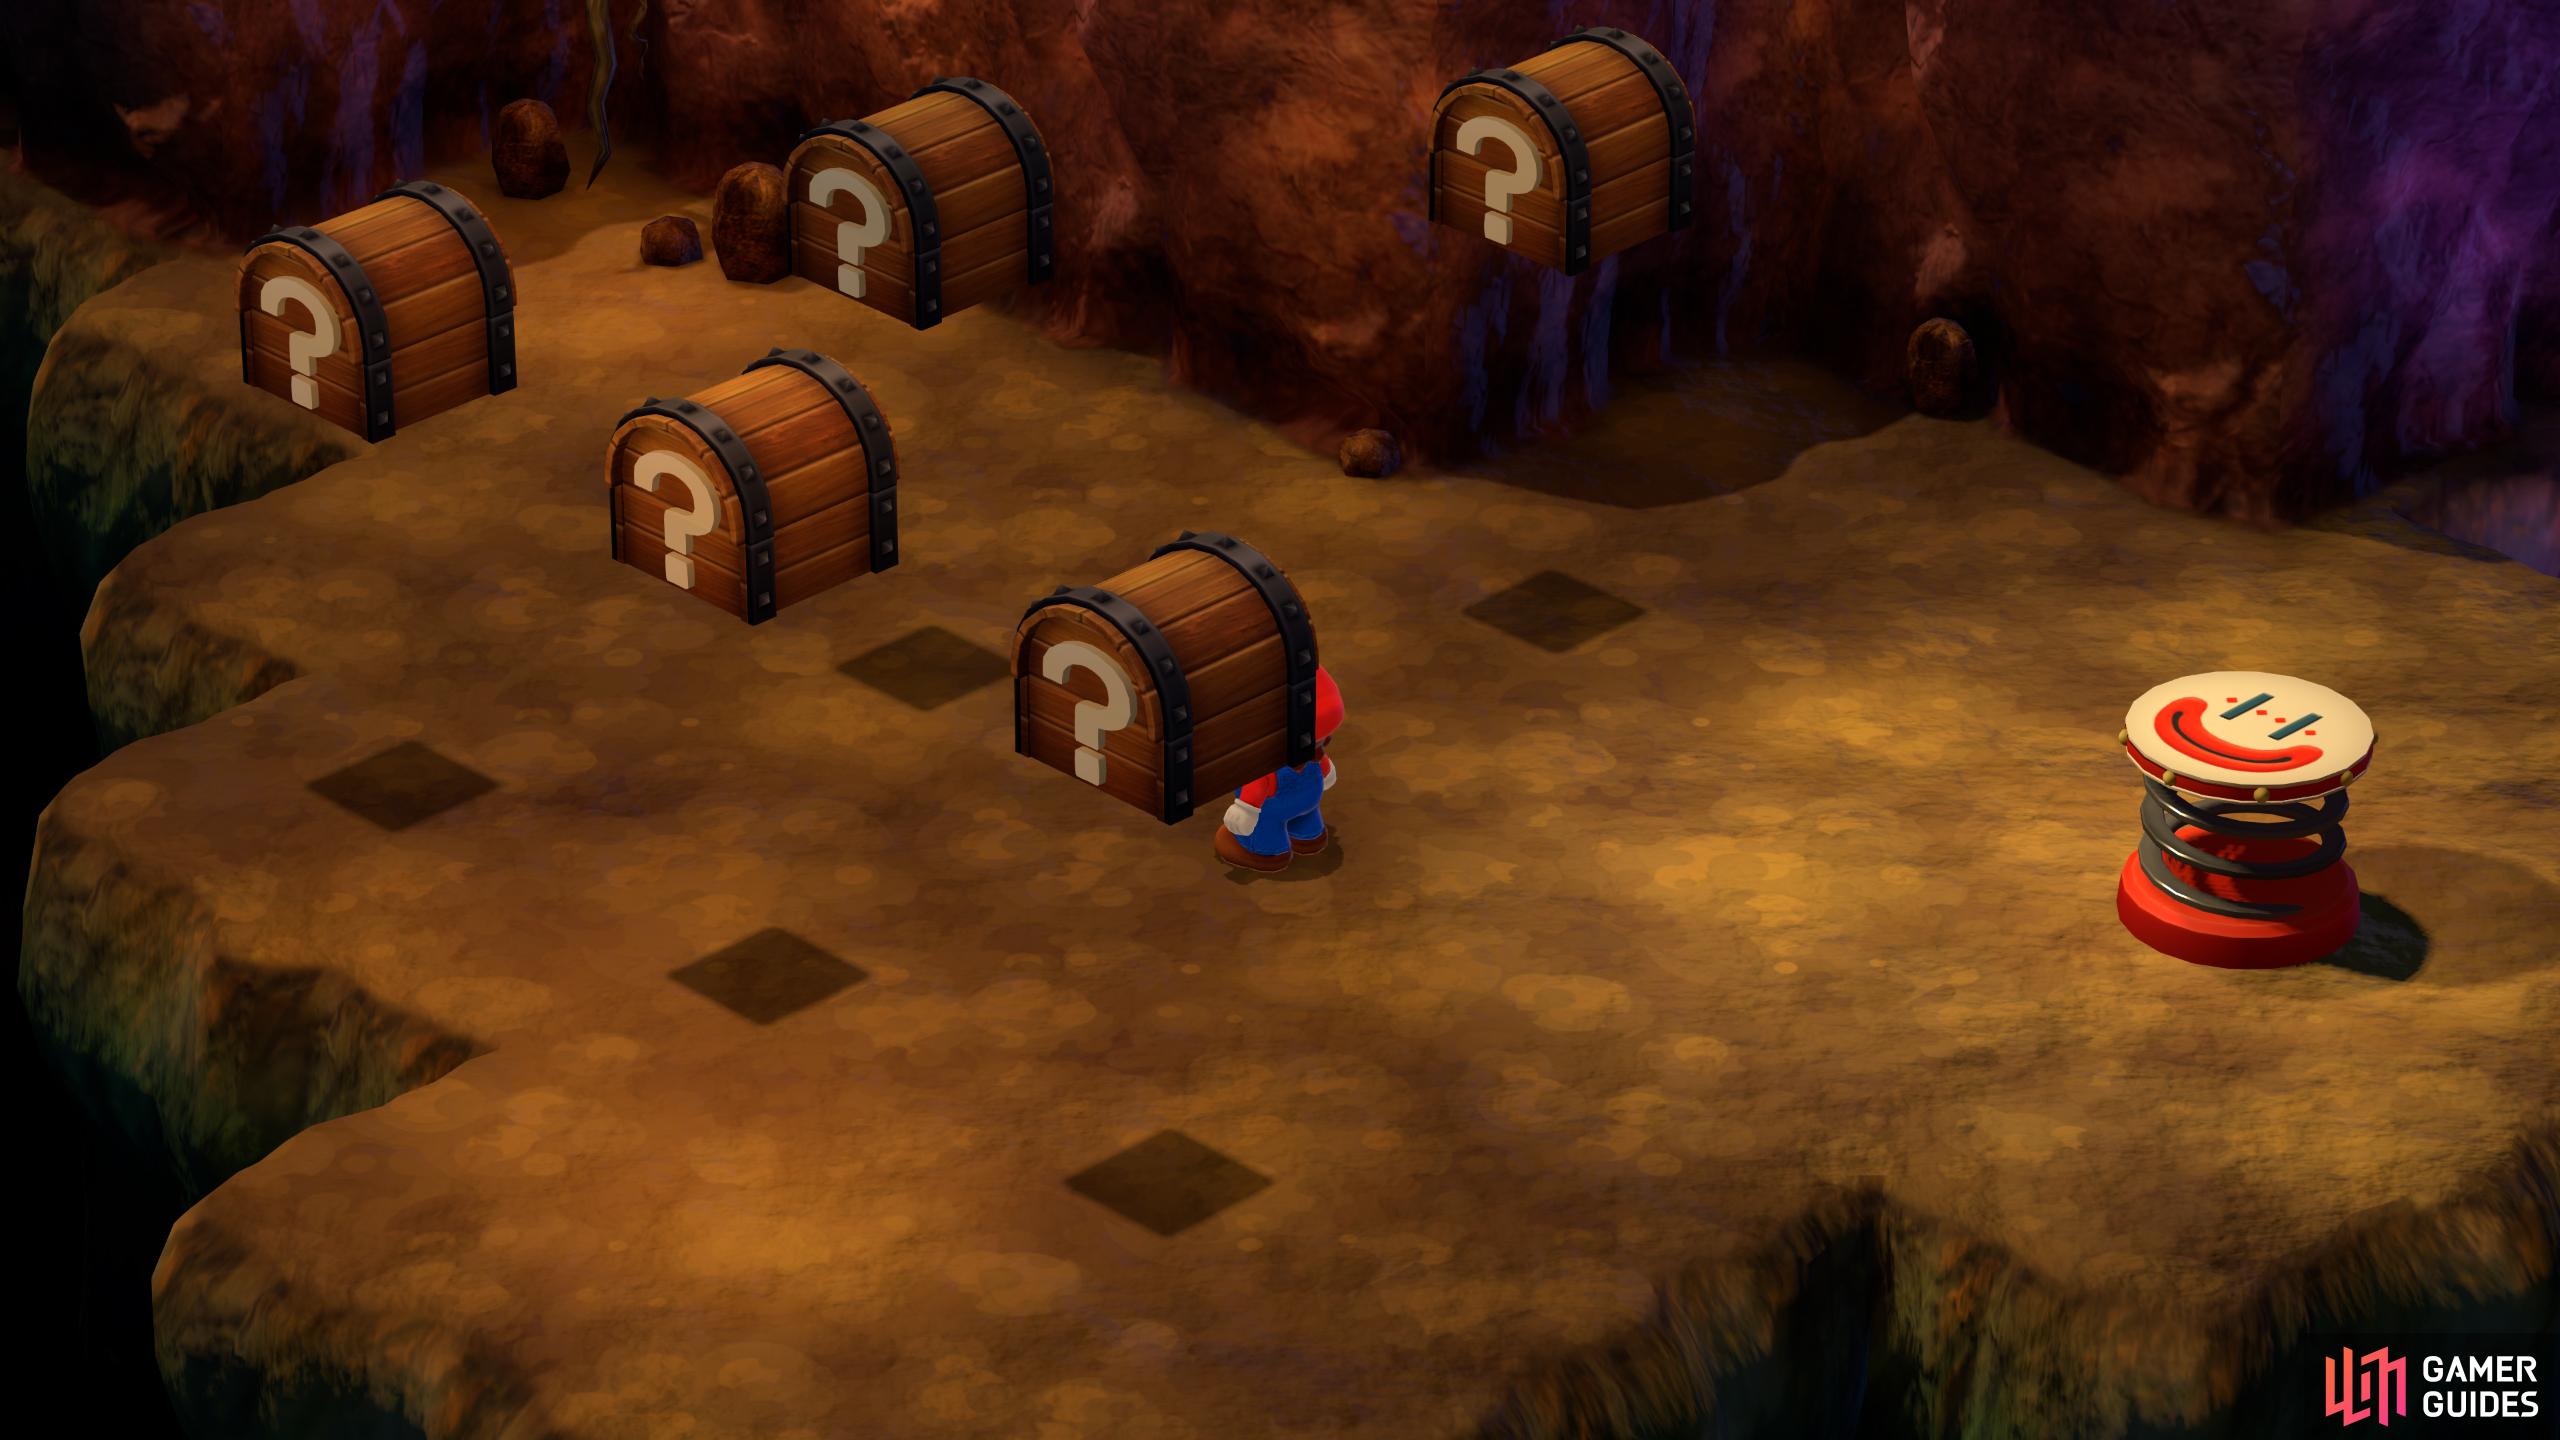
There are five Hidden Treasure chests in Forest Maze. The first treasure can be found as soon as you enter the Forest Maze zone. Immediately walk to the left, hug the left wall until you stop, and then jump to find the hidden chest. This will reward you with a Croaka Cola.
At the end of the first area, enter the stump, and head through the cave until you exit it. The second Hidden Treasure will be in the northwest corner of the stump. Keep jumping around the area, and you should eventually find it.
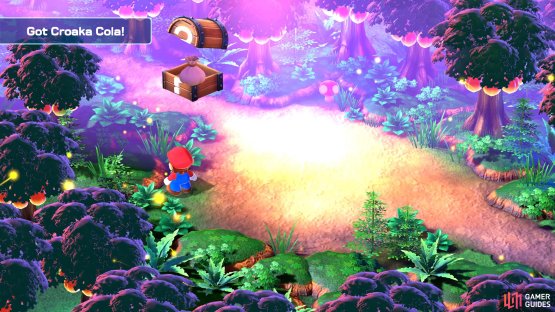

(1 of 2) From the entrance, hug the left wall, go forward until you can’t anymore, and then jump to find the first hidden treasure.

From the entrance, hug the left wall, go forward until you can’t anymore, and then jump to find the first hidden treasure. (left), When you exit the cave, jump in the northwest corner to find the second hidden treasure. (right)
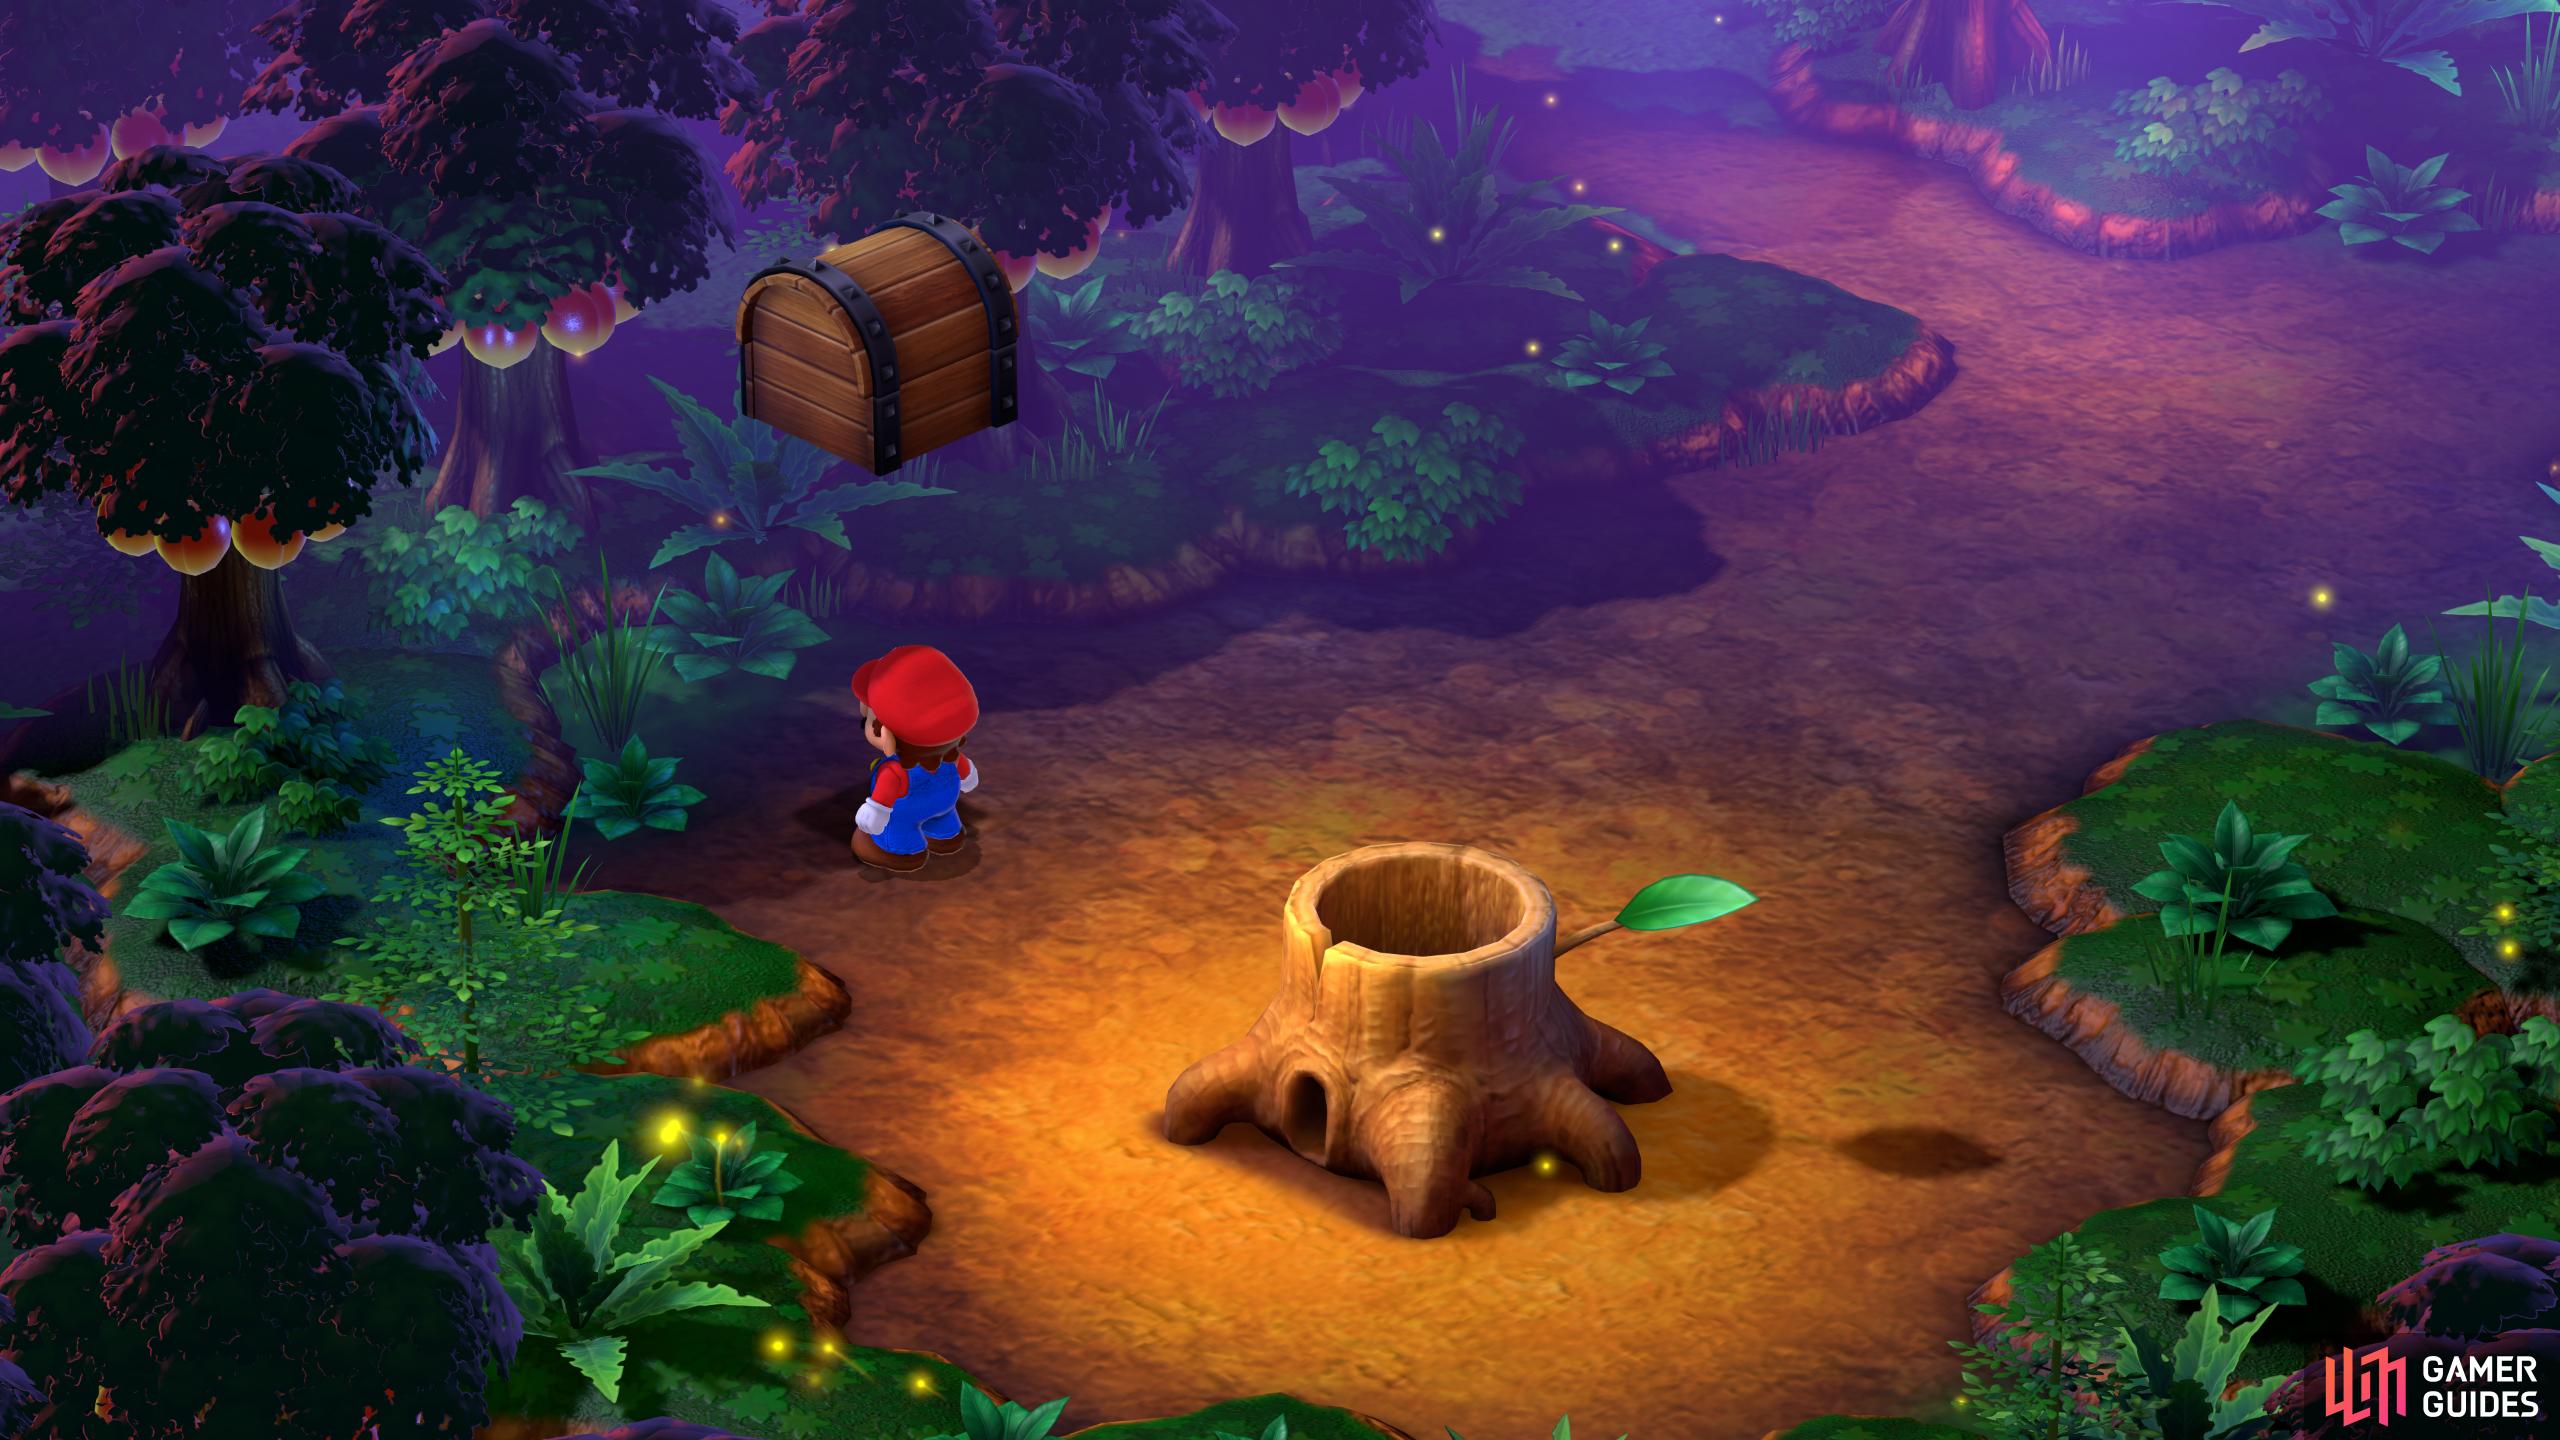
In the third area, you’ll find some stumps that you can enter into. First enter into the right stump of the first row. In the cave, head west from the spring and jump around the area to find the chest. It is a couple of squares to the right of the western corner and two squares north. This third Hidden Treasure chest will reward you with a Flower.
Head back into the area with all the stumps and proceed into the left stump in the middle row. From the spring, head into the corner of the two walks to the northeast, and jump. Finding this fourth Hidden Treasure chest rewards you with…nothing, it’s empty.


(1 of 4) When you reach the room of tree trunks, enter the right stump on the first row.
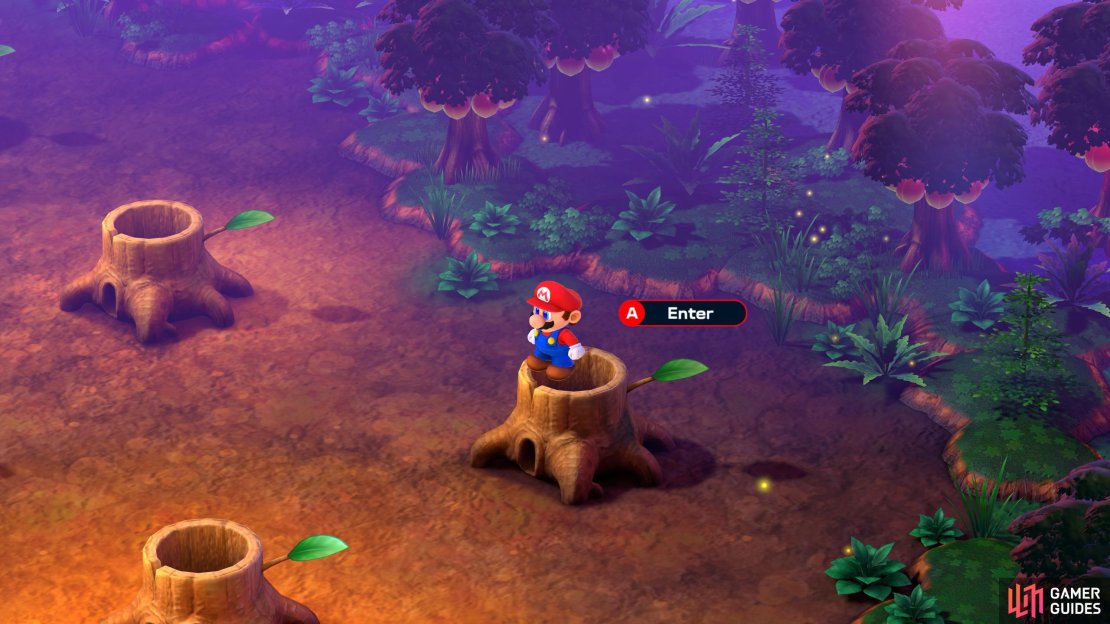
Once again, exit the last treasure’s cave, head to the end of the area, and then enter the lone tree stump. At the back of the cave, you’ll find a ![]() Wiggler that is sleeping. Before waking it up, head behind it and jump to find the fifth Hidden Treasure which will reward you with another Croaka Cola.
Wiggler that is sleeping. Before waking it up, head behind it and jump to find the fifth Hidden Treasure which will reward you with another Croaka Cola.
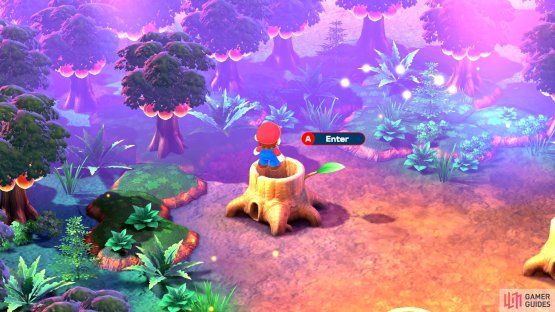
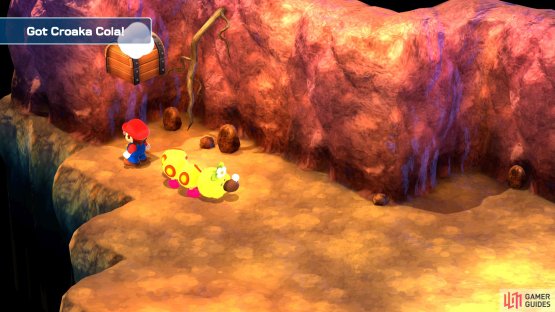
(1 of 2) In the room of stumps, enter the lone stump at the back.


In the room of stumps, enter the lone stump at the back. (left), Head behind the sleeping Wiggler, and jump to find the fifth hidden treasure. (right)
Once you’re done looting the Secret Treasure room, exit the cave, and make your way back to the crossroads. Follow Geno to bypass the maze. If you can’t find him anymore, follow these directions: east, north, north, east, north, west. Eventually, you’ll get through the maze and find a Save Point a bit further down. Before saving the game, immediately head left, hug the wall, and jump around in the corner to find the last hidden treasure. This will reward you with a Red Essence.


(1 of 2) The secret treasure room can be found by heading west, south, south, and west in the maze area.
The secret treasure room can be found by heading west, south, south, and west in the maze area. (left), Finally, after getting through the maze, you’ll find an area with a save point. Immediately head left and jump to find the sixth hidden treasure. (right)
All Hidden Treasures in Pipe Vault
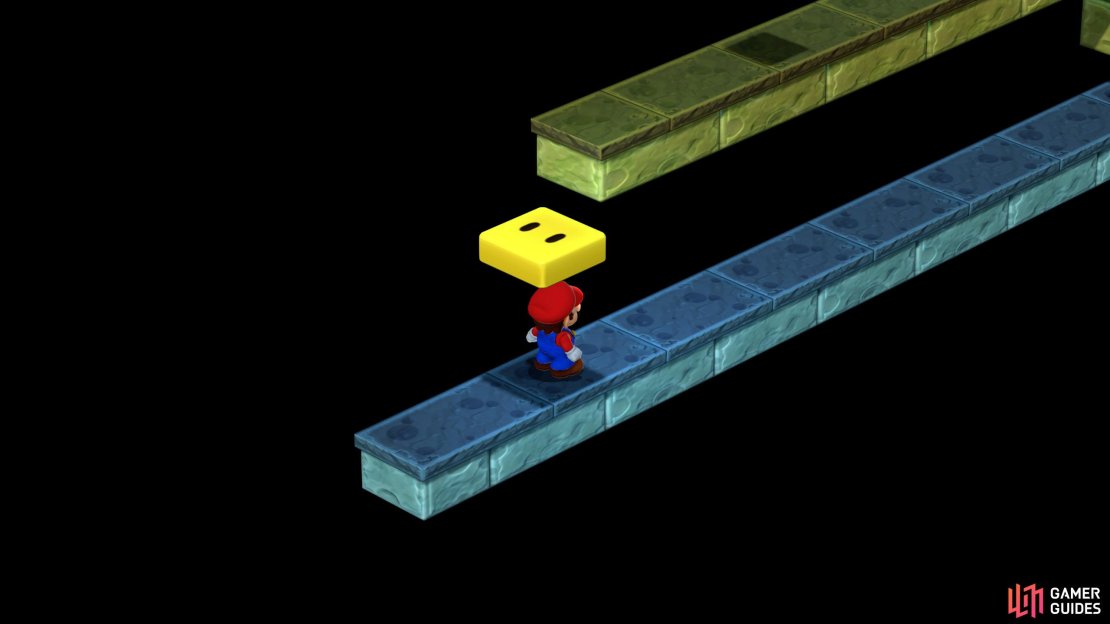
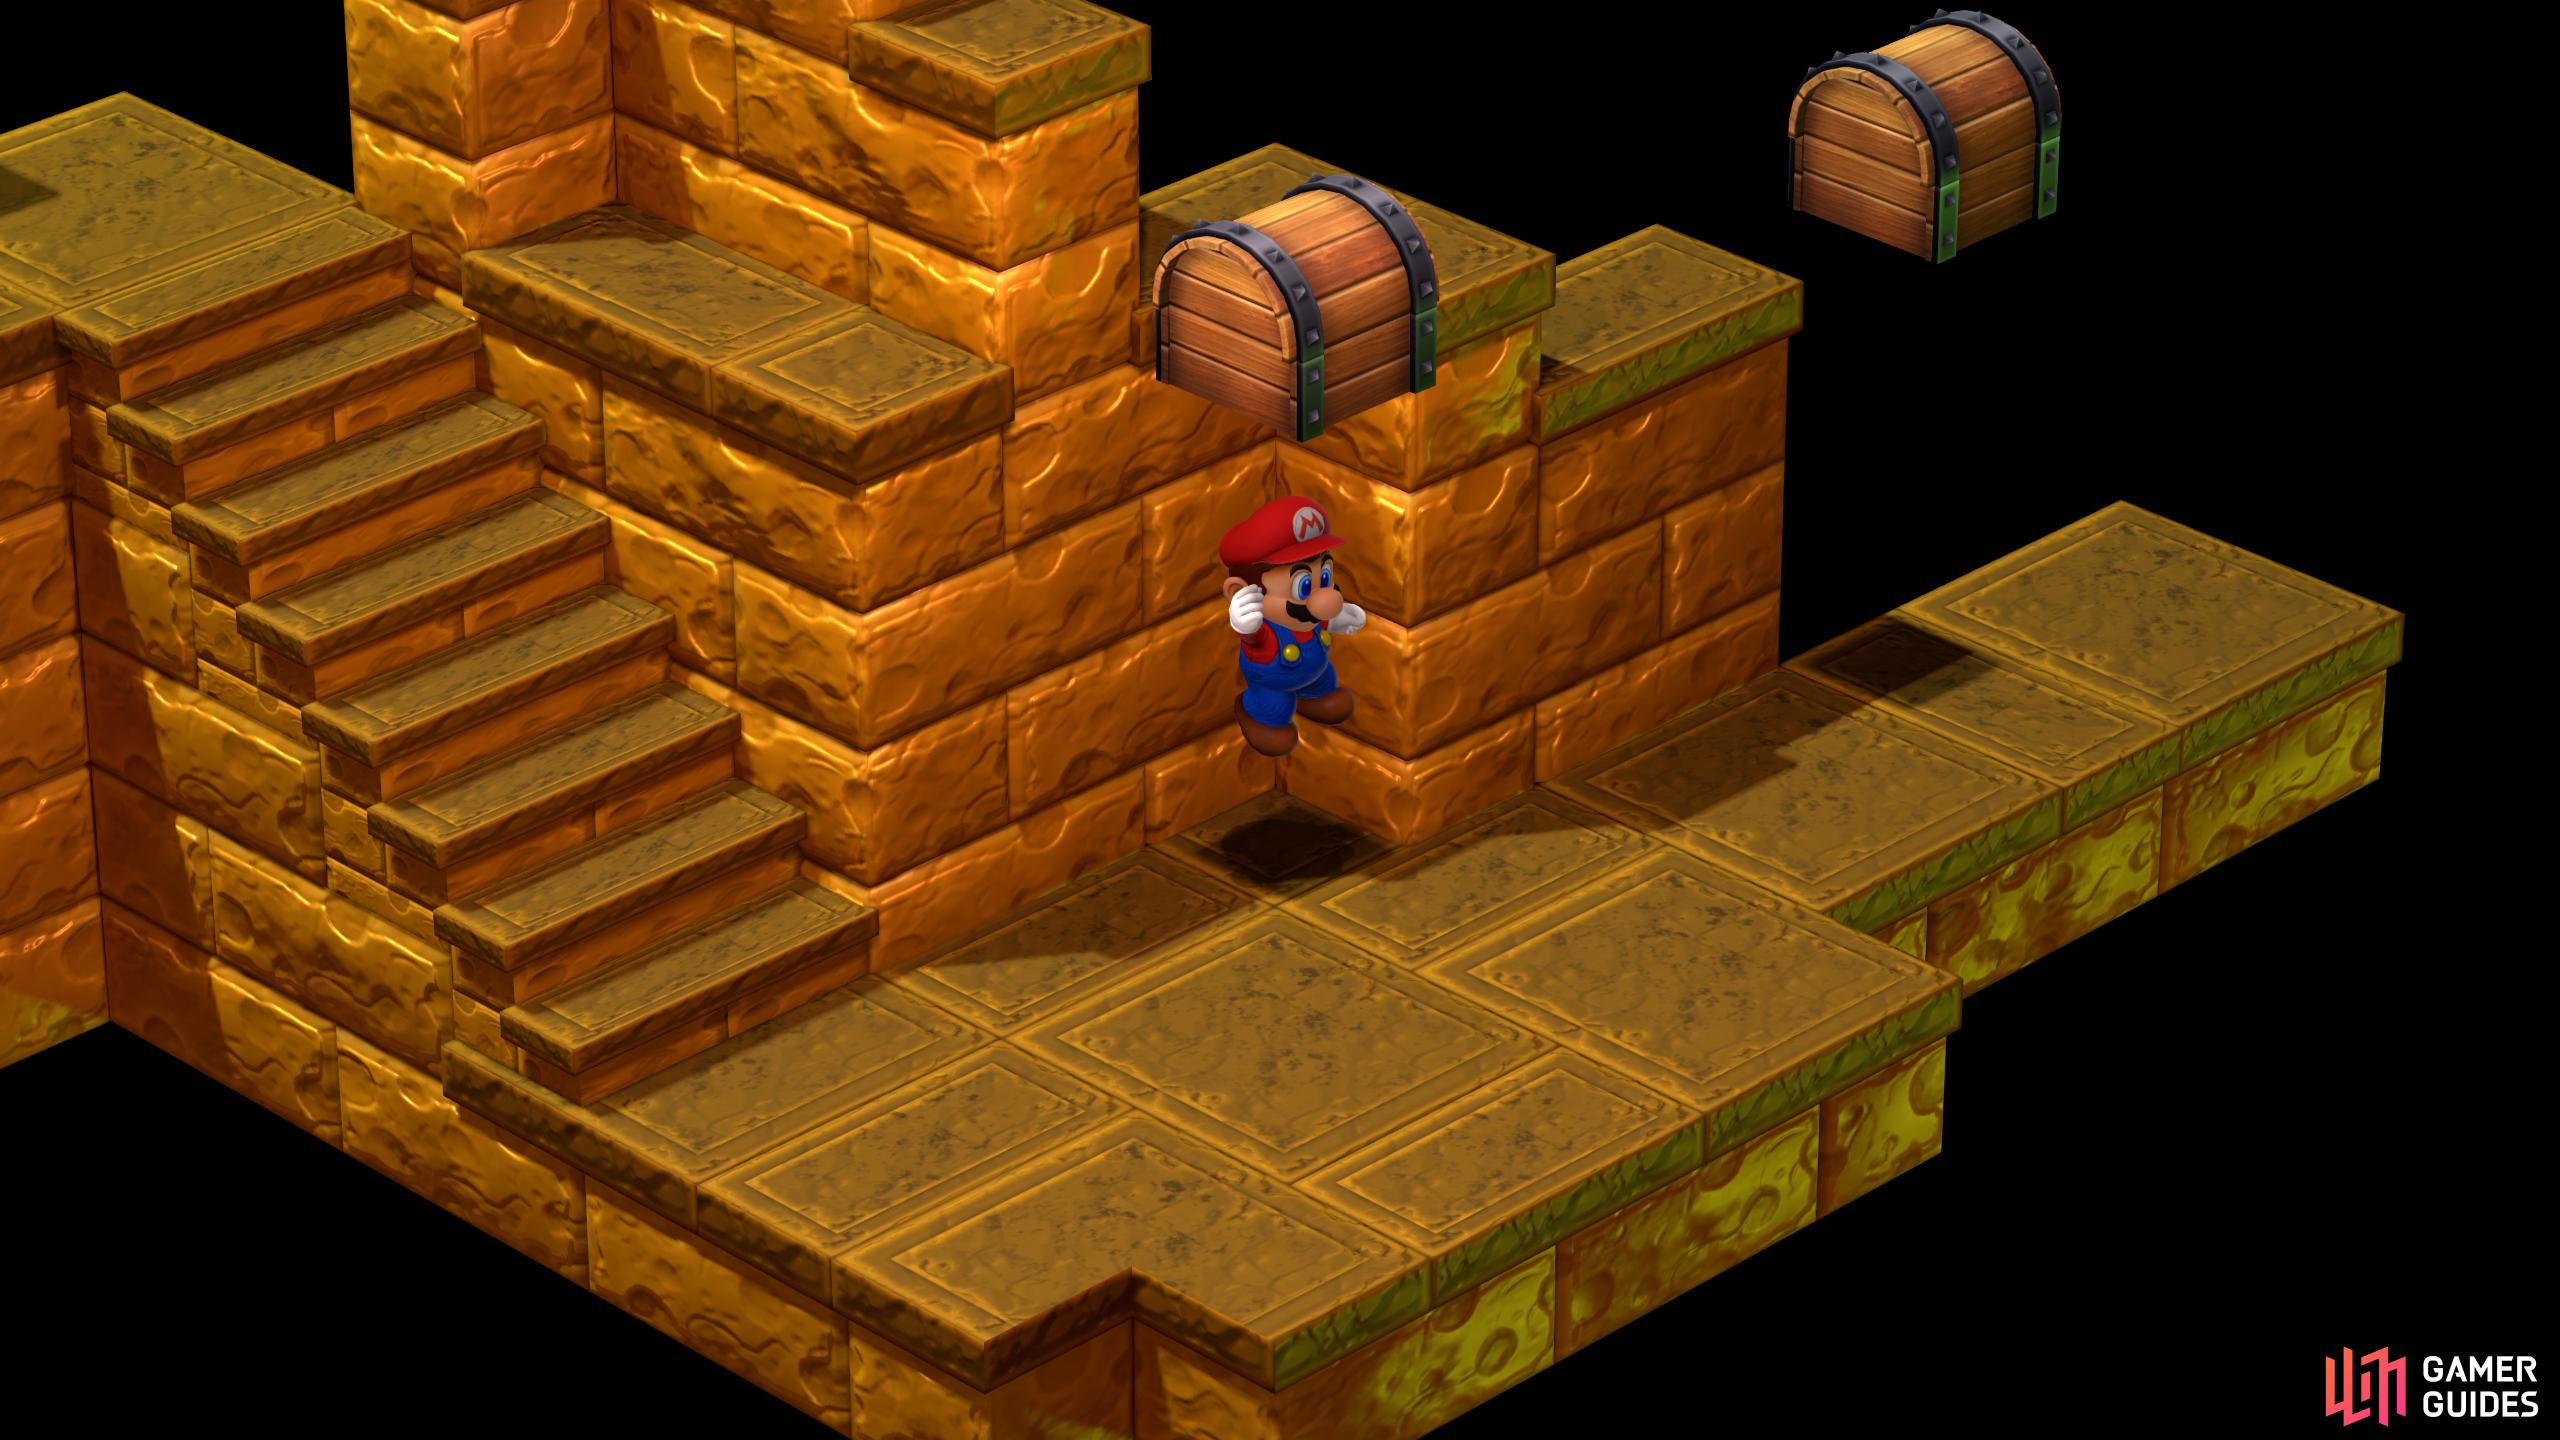
You’ll need to get to the third area in the Pipe Vault before you can find either treasure. In area three, go down the second green pipe in the room to reach the fourth area. Here you’ll notice a long greenish ledge above the path, just before the ledge, jump up to reveal a yellow block that you can use to reach the ledge. On the ledge, you’ll find a Treasure Chest that contains a Flower at the back, but before getting it, walk onto the third slab of the ledge, and jump up to find the hidden treasure containing a Frog Coin. In the same area, on the same ledge, walk a further two slabs across the ledge, and jump again to find the second Hidden Treasure that also contains a Frog Coin.

(1 of 4) Take the second pipe down in the third area.
All Hidden Treasures in Yo’ster Isle
As soon as you enter Yo’ster Isle, you’ll be greeted with a Save Point. Save the game if you want, and then head behind the save point, and jump in the air to find a hidden treasure containing a Frog Coin.
When you exit the pipe, you’ll be in Yo’ster Isle. Head behind the save point, and jump to find the hidden treasure.
All Hidden Treasures in Booster Pass
There are two Hidden Treasures to obtain in Booster Pass. From the entrance make your way northeast through the mazelike high ground, and turn northwest when you get the opportunity. Jump up onto a lower section of high ground and note more of those bulb-like plants. Jump onto an even higher ledge to the northwest, stand on a plant, then jump up to find a Hidden Treasure, which contains a Flower.
Return to the entrance and jump onto some rocks to the east and continue ascending to the northeast until you’re at the highest elevation. You’ll see a long path running northeast, leading to the next screen, but search the northern corner up here before you go to find another Hidden Treasure, within which you’ll find some Rock Candy.

(1 of 2) Stand on a plant to reach a hidden treasure containing a Flower

Stand on a plant to reach a hidden treasure containing a Flower (left), a second hidden treasure can be found near the exit to the next level. (right)
All Hidden Treasures in Booster Tower
Booster Tower is a very long area with multiple sub-areas to deal with. There are also four Hidden Treasures in this region. There is a lot to do in Booster Tower and we’ve covered all you need to know about how to make your way through the area in more detail on our Booster Tower Guide page.
In the second area of Booster Tower, you’ll need to jump up the cube stairs and hug the exterior walls if you want to avoid the endless parade of ![]() Snifits that will walk through this area. Ascend to the upper level, stand in the corner, then head down one tile and jump to find the first Hidden Treasure of the area, which contains a Frog Coin.
Snifits that will walk through this area. Ascend to the upper level, stand in the corner, then head down one tile and jump to find the first Hidden Treasure of the area, which contains a Frog Coin.
When you’re in the twelfth area of Booster Pass, before you jump anywhere, work your way around to the westernmost corner of the room and jump to find the second Hidden Treasure, which contains a Frog Coin.
(1 of 2) In the second area, jump up some blocks and find a hidden treasure near the upper corner of the second screen, inside of which is a Frog Coin

In the second area, jump up some blocks and find a hidden treasure near the upper corner of the second screen, inside of which is a Frog Coin (left), in the seventeenth area, search a corner to find a Hidden Treasure containing a Frog Coin, (right)
The third and fourth Hidden Treasures are found in the seventeenth area of Booster Pass (lotta areas, we know!). Make your way to the southeastern edge of the screen and jump on the lowest platform, then leap your way northwest across the platforms to reach the ledge above the save point, where you’ll find a chest containing a Frog Coin. You’re not done here, however, as there’s still hidden treasure in this area… and it’s right above the chest you just looted. Jump back onto the platform, then try to land a jump from said platform onto the top of the chest you just opened. It may take a few tries, but when you get atop the chest, jump again to find the third Hidden Treasure, which contains a Goodie Bag. Still not done! Drop down to the ground floor and make your way to the southern corner of the room and jump to find the fourth Hidden Treasure, which contains a Mushroom.


(1 of 3) Reach the ledge above the save point to find a chest with a Frog Coin,
All Hidden Treasures in Marrymore
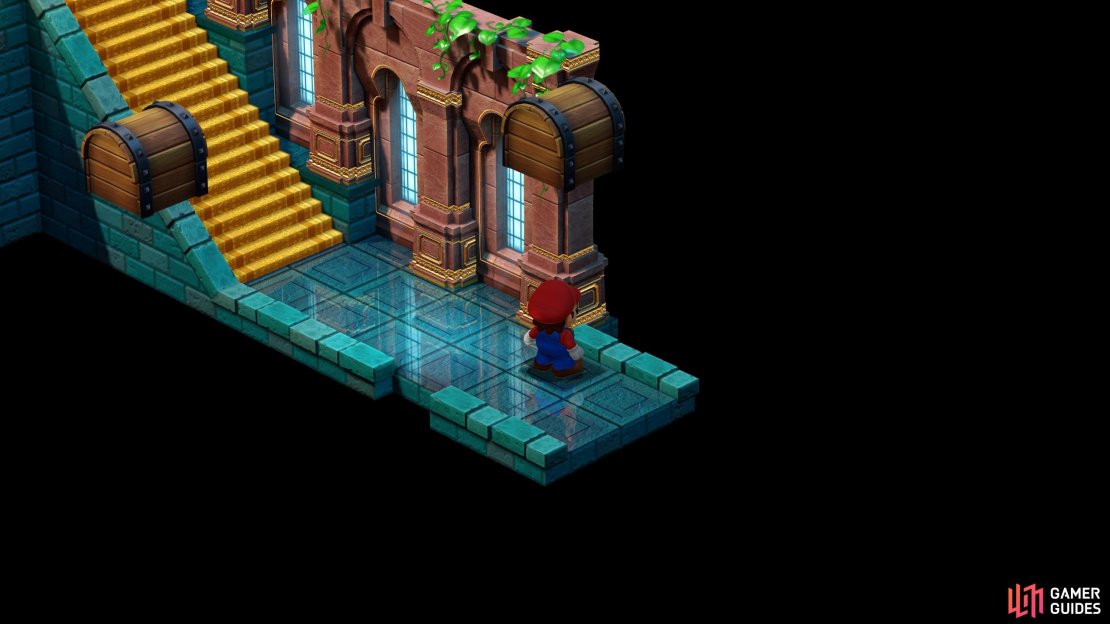
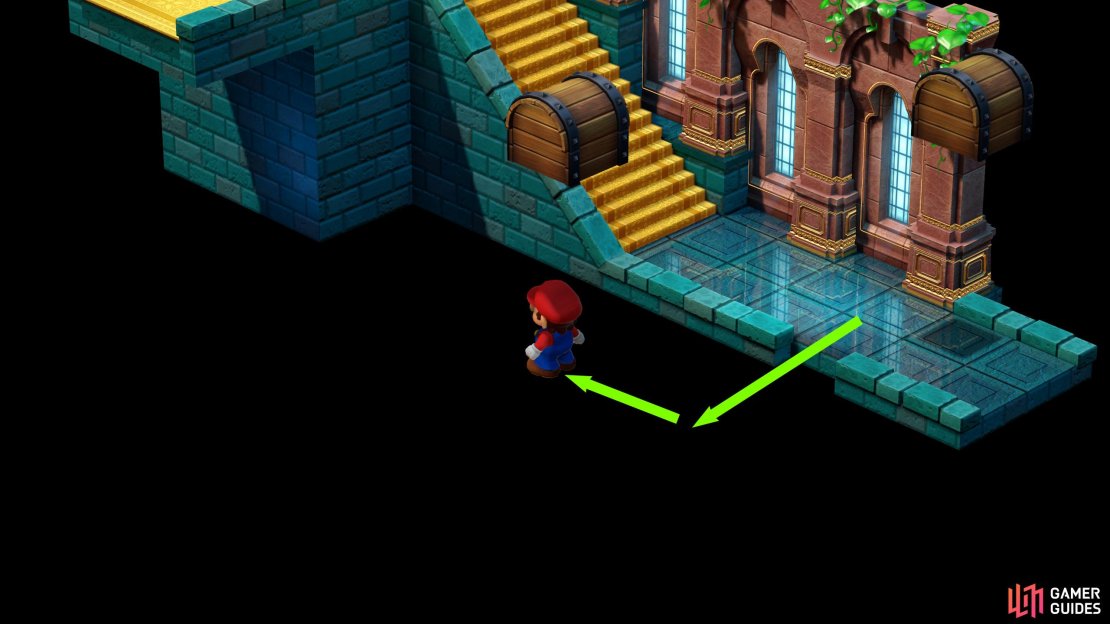
From the entrance, head up some stairs to the northeast, then turn northwest and go up another flight of stairs to find the inn/shop, which is the same building in this town. Convenient and economical! Ignore the shopkeepers for now, go upstairs, then go through the double doors to the northeast to reach a room, then jump on a bookshelf to the west and from this elevated perch jump again to discover a Hidden Chest, wherein you’ll find a Frog Coin.
Enter the inn, head upstairs, and jump on a bookshelf to find a hidden treasure.
All Hidden Treasures in Sunken Ship
Despite being a large dungeon, there’s only one Hidden Treasure in the Sunken Ship. After you defeat King Calamari you’ll reach a room where a Mario clone spawns! Don’t talk to this clone (if you do, you’ll start a fight with some common undead enemies that haunt the ship (![]() Greaper,
Greaper, ![]() Reacher,
Reacher, ![]() Straw Head, etc., and will have to leave the ship and reenter to get the clone to respawn). Instead, you need to hit an invisible J-box in the center of the room to get a chest to appear nearby. This chest is higher up, however, so you’ll need to get Mario on top of the head of his clone - the clone mirror’s Mario’s movements, so this can be pretty tricky. Once you’ve on clone-Mario’s head and within range of the chest, jump up to score a Croaka Cola. Much win!
Straw Head, etc., and will have to leave the ship and reenter to get the clone to respawn). Instead, you need to hit an invisible J-box in the center of the room to get a chest to appear nearby. This chest is higher up, however, so you’ll need to get Mario on top of the head of his clone - the clone mirror’s Mario’s movements, so this can be pretty tricky. Once you’ve on clone-Mario’s head and within range of the chest, jump up to score a Croaka Cola. Much win!
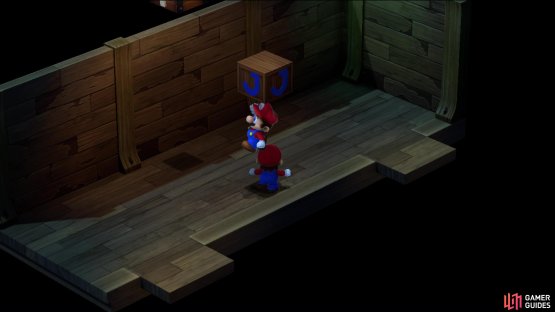
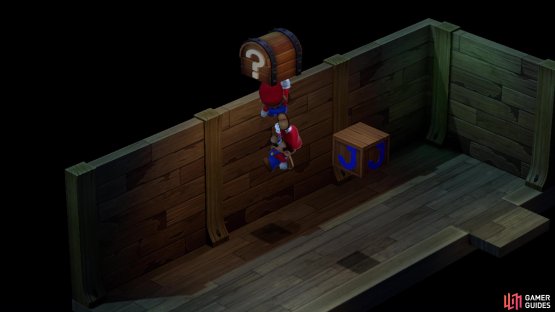
(1 of 2) Jump on the Shadow Mario’s Head

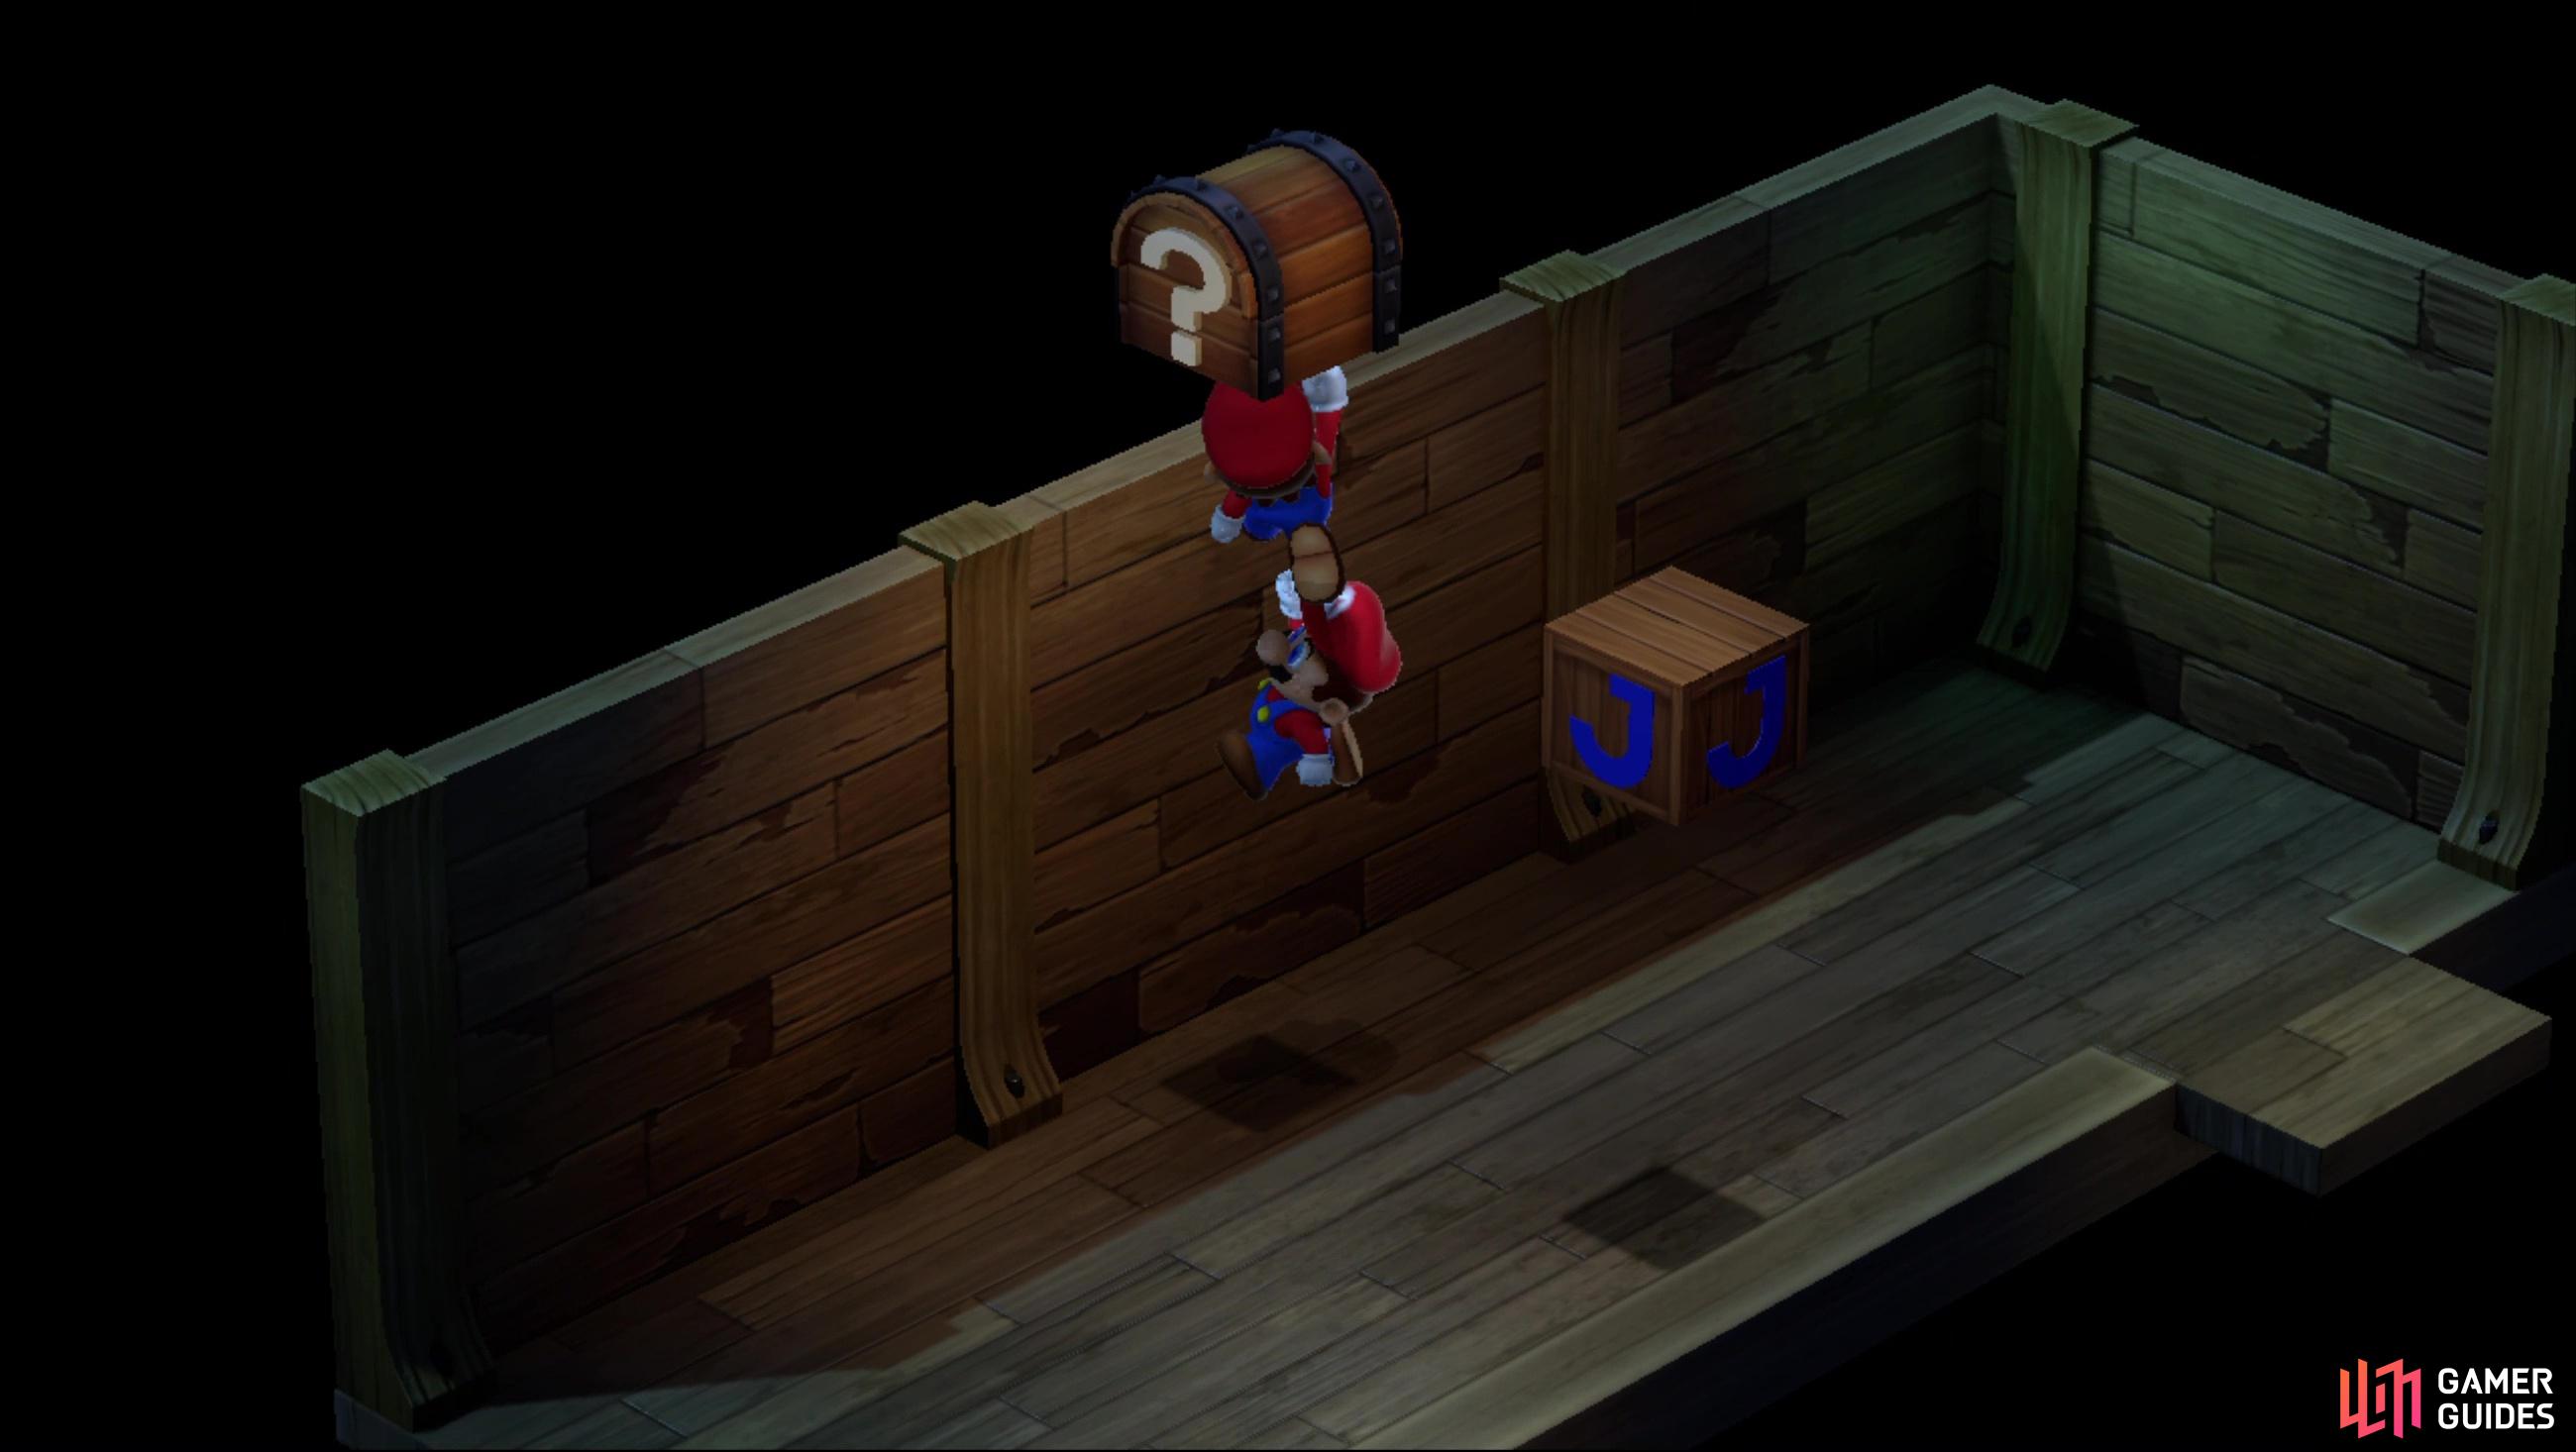
Jump on the Shadow Mario’s Head (left), to reach the Hidden Treasure. (right)
All Hidden Treasures in Land’s End
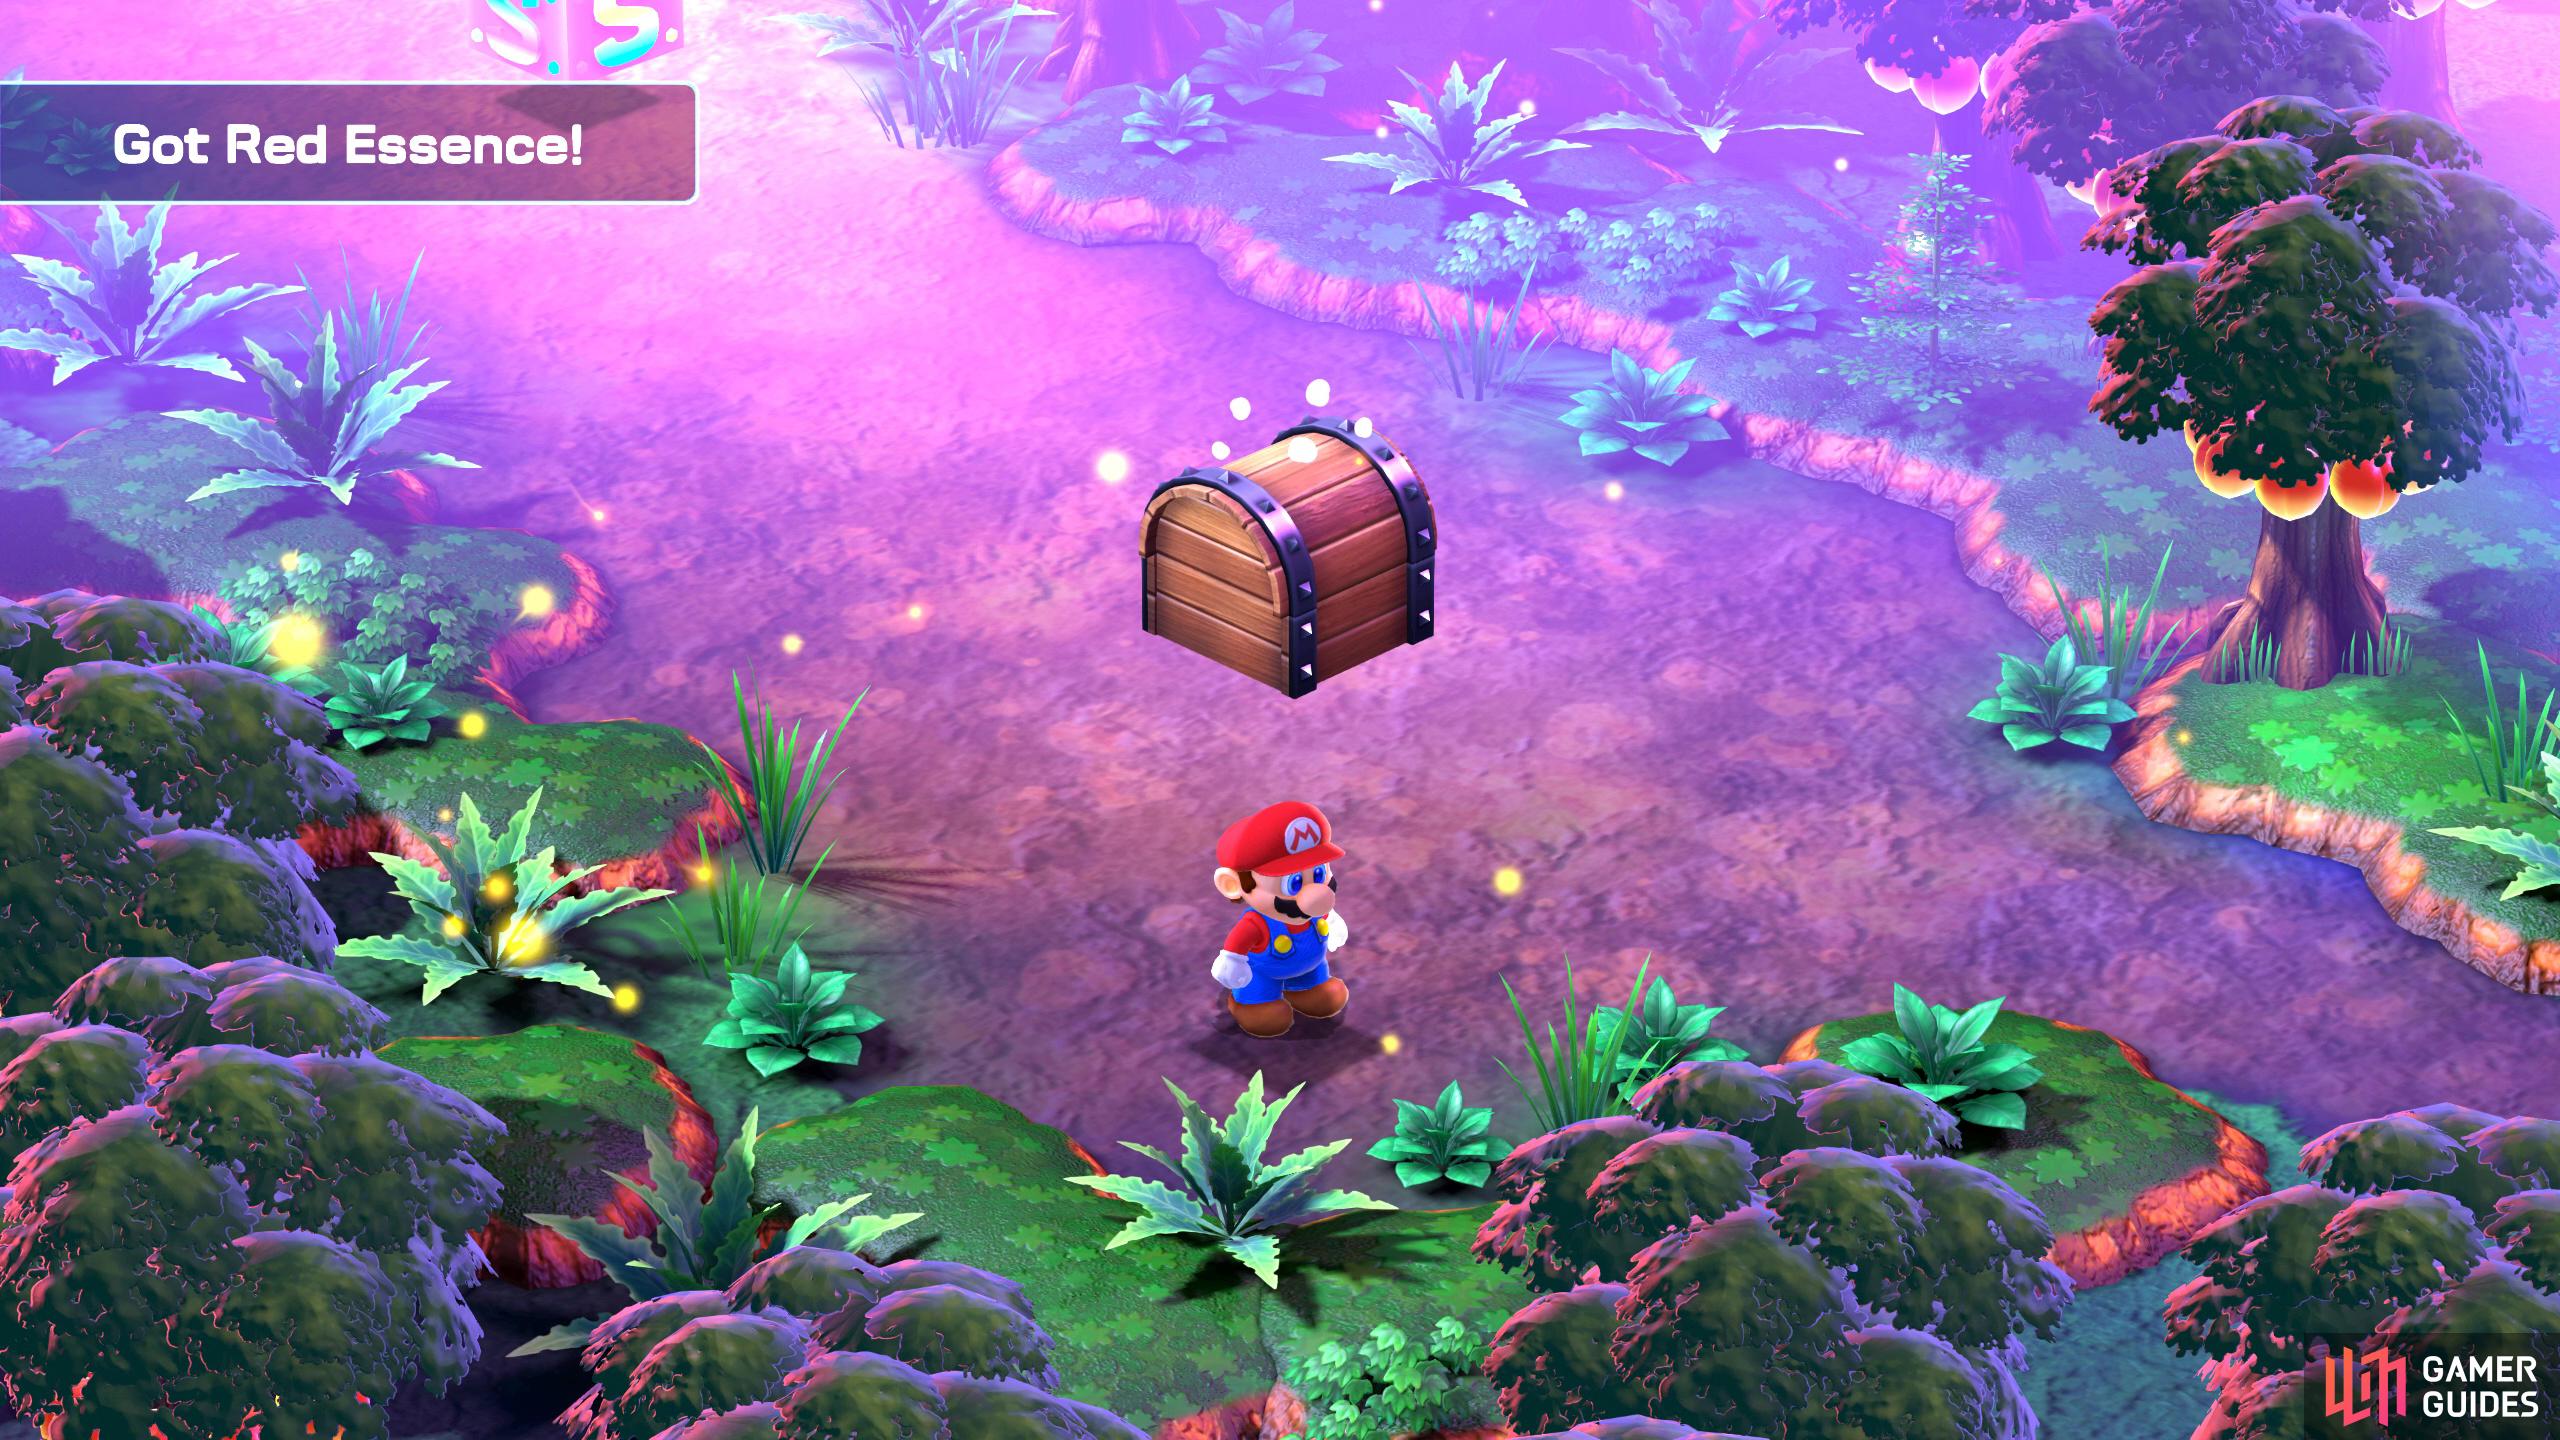
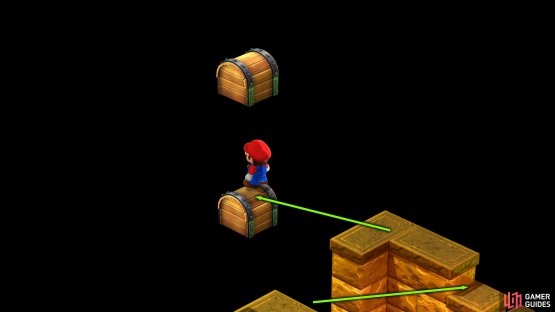
At the start of the area, jump in the nearby cannon that sits next to the save point. When the cannon faces northeast, press  to fire yourself onto the ledge in that direction. When you land, you should spot a yellow platform moving up and down. Jump on the platform, and when it reaches its peak, jump again to find the hidden treasure which contains a Red Essence. Enter the second area, and jump in the next cannon you see. Launch yourself to the northeast where you’ll land in a hole. This spawns three
 ![]() Chow enemies, defeat them, jump out of the hole, and then jump again at the southeast edge of the hole to reveal a yellow platform. Make your way back to the cannon, and fire yourself northeast again, but this time you’ll land on top of the yellow platform. Ride it along, get the chest, and then jump onto the higher ledge. In the northwest corner, jump again to reveal the hidden treasure chest containing a Croaka Cola.
Chow enemies, defeat them, jump out of the hole, and then jump again at the southeast edge of the hole to reveal a yellow platform. Make your way back to the cannon, and fire yourself northeast again, but this time you’ll land on top of the yellow platform. Ride it along, get the chest, and then jump onto the higher ledge. In the northwest corner, jump again to reveal the hidden treasure chest containing a Croaka Cola.

(1 of 2) Hidden Treasure 1: After launching yourself from the cannon. Jump onto the yellow platform. At its peak, jump again for the chest.


Hidden Treasure 1: After launching yourself from the cannon. Jump onto the yellow platform. At its peak, jump again for the chest. (left), Hidden Treasure 2: You’ll need to reveal the yellow platform first before using the cannon again to reach the highest ledge. (right)
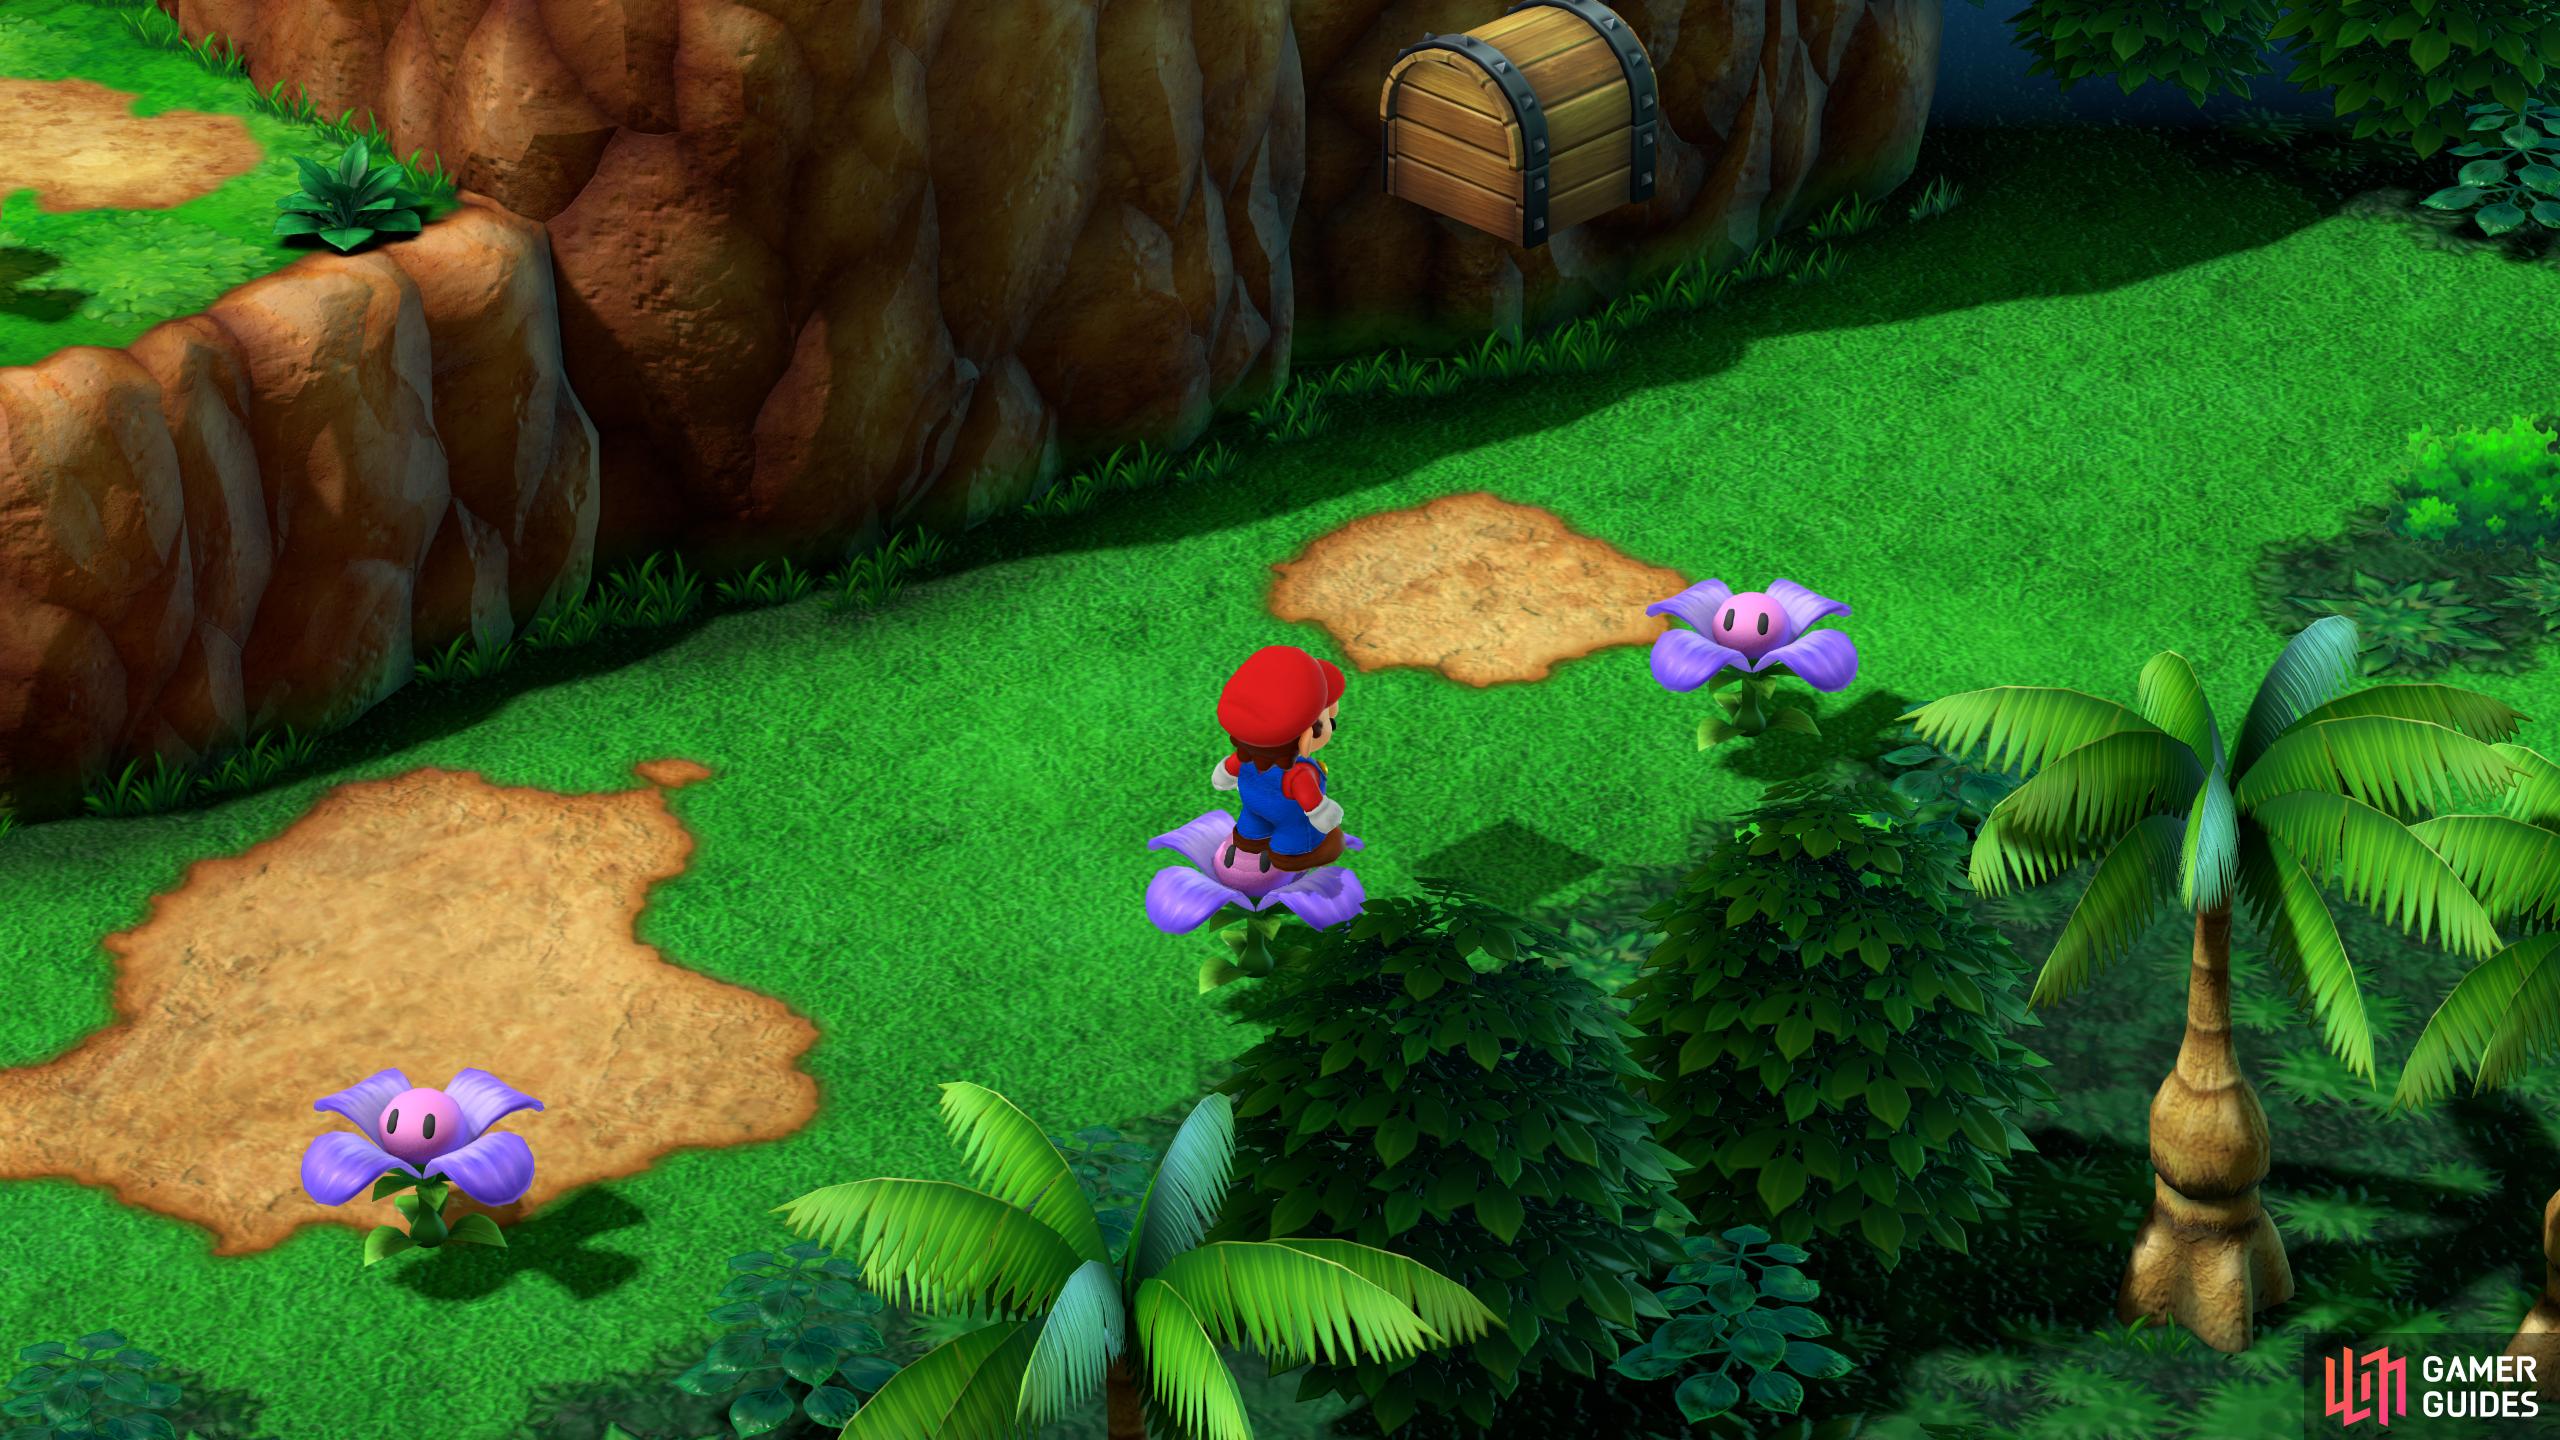
Continue on into the next room, and make your way into the following room by jumping over the pillars; if you fall, jump into the south cannon at the beginning to launch yourself back up. When you reach the fourth area, it will have grass, and red flowers nearby. Ignore this for now, and take the lower path to your east where you’ll find two purple flowers. Jump on the nearest flower, and jump across to the flower next to it to find the hidden treasure containing a Frog Coin. This treasure is in between the two purple flowers.
Just past the last purple flower, there is a secret path to your east. Follow it into the next area, and then head northwest to find an ominous black hole inside the rocky pillar. Although it may take a few tries, jump into it, and you’ll be transported to a cave system. Follow the linear path until you reach four crates stacked by/on each other to your right, and jump on them. Use this to reach the nearby chest for a Frog Coin. Continue along the path, and head into the northernmost corner where the Chow is, and jump to find the hidden treasure chest containing another Frog Coin.

(1 of 2) Hidden Treasure 3: In the grassy area, head east, and jump on the second purple flower. From there, jump across to the third purple flower to get the chest.

Hidden Treasure 3: In the grassy area, head east, and jump on the second purple flower. From there, jump across to the third purple flower to get the chest. (left), Hidden Treasure 4: After going through the rocky pillar, head up to the northernmost point to find the final treasure. (right)
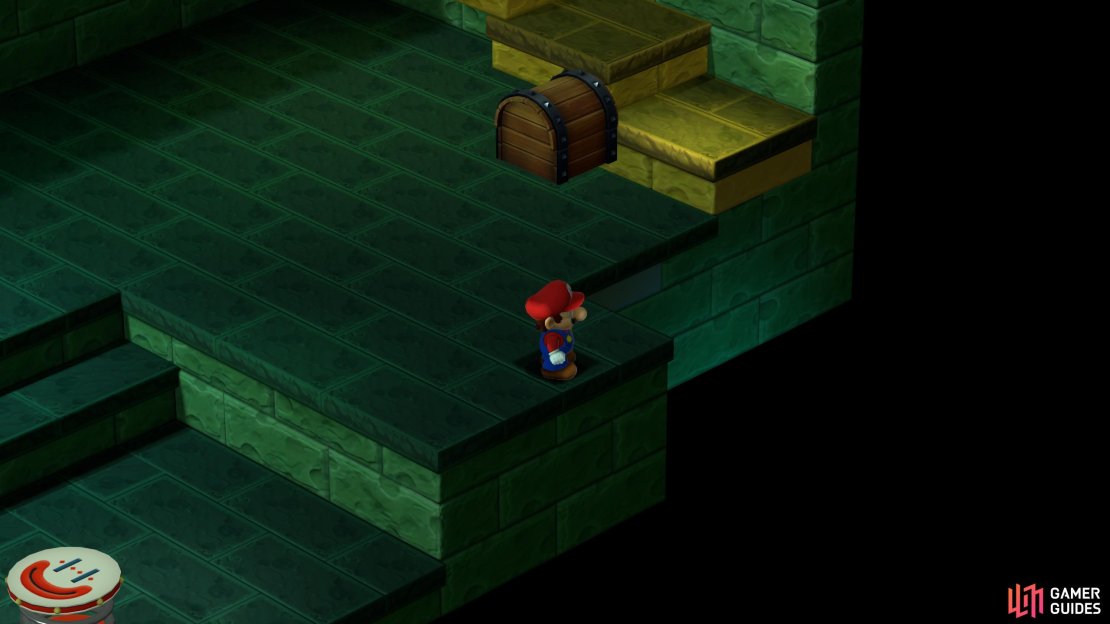
All Hidden Treasures in Belome’s Temple
From the Fortune room, jump on top of the blocks to reach the next area. Take the pipe down in the following area, and you’ll be in the room with the large gate. Open the chest to not only get your winning from the fortune minigame, but to also open the gate. In the next room, follow the path, and get the chest. The first hidden treasure can be found on top of this chest. Jump over to the ledge to the northeast and use its height to get on top of the chest you just opened. Now, jump straight in the air to get the first hidden treasure, which contains a Frog Coin.

(1 of 2) Hidden Treasure 1: Use the ledge to the east to jump on the chest. From there, jump in the air for treasure 1.

Hidden Treasure 1: Use the ledge to the east to jump on the chest. From there, jump in the air for treasure 1. (left), Hidden Treasure 2: At the bottom of the stairs, jump in the corner between the two walls for the second treasure. (right)
The second hidden treasure is not only in the same room, but it’s also nearby. Head down the stairs, and head north at the bottom. You’ll find the hidden treasure in the corner of the two walls. Jump up to get the treasure, which also contains a Frog Coin. That’s it, for ![]() Belome Temple, it’s not particularly a big place.
Belome Temple, it’s not particularly a big place.
All Hidden Treasures in Monstro Town
This is a really simple hidden treasure to find. When you enter Monstro Town for the first time, head through the door right at the end of the lower path. In the next room, you’ll see a small bush opposite the note on the wall. In the corner behind it, jump in the air to reveal the hidden treasure, which contains a Frog Coin.
All Hidden Treasures in Bean Valley
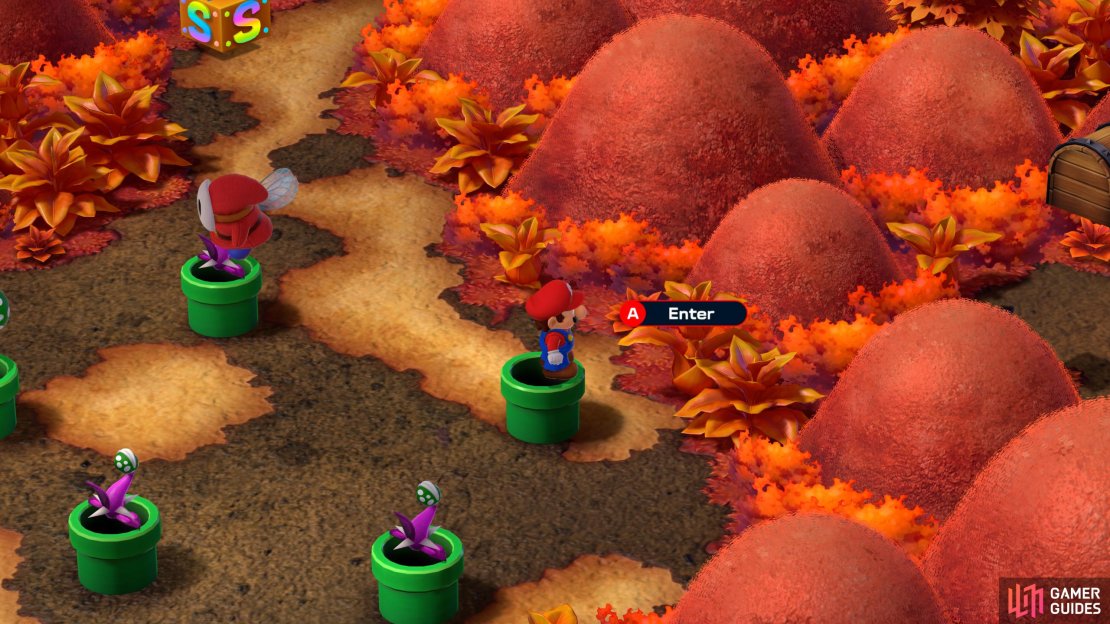
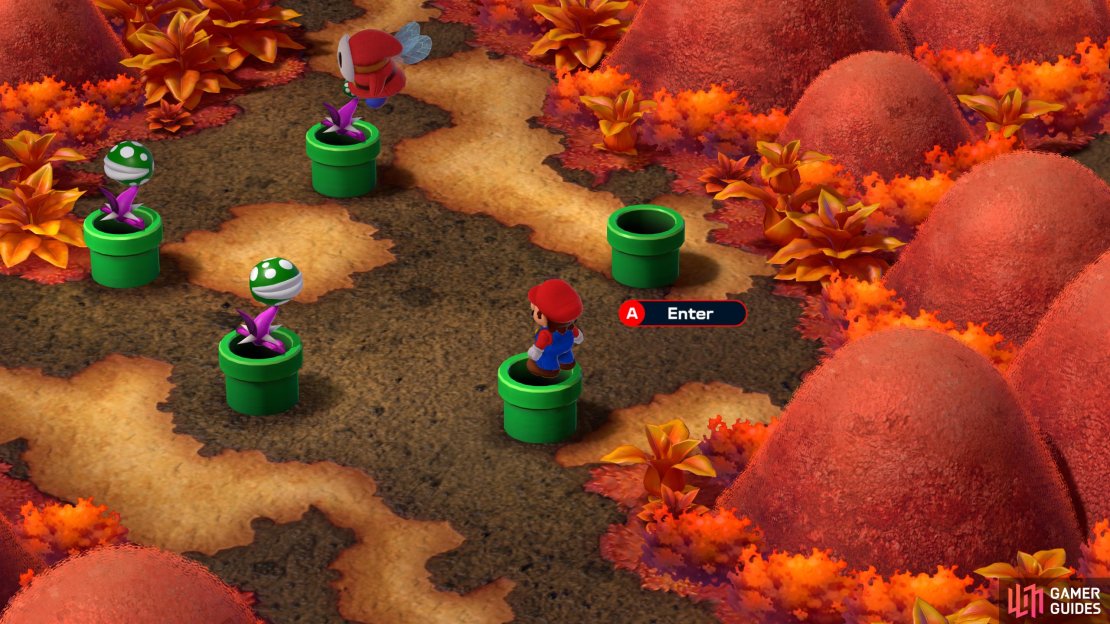
Starting at the ![]() Bean Valley entrance, head northeast until you reach two green pipes, and take the one on the right down. When you emerge, head to the area on the left opposite the other green pipe there and jump in the air to find the first Bean Valley hidden treasure, which contains a Frog Coin.
Bean Valley entrance, head northeast until you reach two green pipes, and take the one on the right down. When you emerge, head to the area on the left opposite the other green pipe there and jump in the air to find the first Bean Valley hidden treasure, which contains a Frog Coin.

Hidden Treasure 1 - Bean Valley: From the entrance, take the right green pipe down. In the next area, hug the left wall to find the treasure.
From Hidden Treasure 1, take the green pipe down in the north into the next area. Follow the northwestern path into another area, and you’ll notice five green pipes in the room as well as a save point. There is a pipe in each of these directions: Northwest, West, Southwest, Southeast, and East with each one of them having something in them which you can read about below. For this treasure, wait for the Shy Away to water the plant on the east pipe, and when it gets bigger, defeat it. This allows you to go down the pipe. In the next area, jump up the ledge to the east, and hug the wall until you reach the third block. Jump up to find the hidden treasure, and you’ll be rewarded with a Red Essence.
Jump on the spring to leave the room, and you’ll be back in the five pipes area. Repeat the steps above to enter the southeastern pipe, and once again, you’ll be in a new area. Follow the path north, and then west, and you’ll find the hidden treasure one block away from both the wall and western edge. Jump up, open the treasure, and you’ll acquire a Croaka Cola.
(1 of 4) Hidden Treasure 2: Take the east pipe down to the next area.
All Hidden Treasures in Nimbus Land
When you reach the main town of Nimbus Land, head inside the Items Shop. At the back of the shop, behind the counter, you’ll see a stack of boxes. Climb atop the highest box and jump in the air for the first hidden treasure, which contains a Frog Coin.
Head into the house in the northwest, and speak to Garro, the statue-maker. He will paint you gold and take you into the castle. When you regain full control in the area (after escaping Dodo), take the northern room in the area after the save point (first one), and keep following the path until you reach the room with the three doorways. Go through the door furthest on the left (get the chest in the corner before you do), and then walk through the next two rooms. In the second room, there will be a set of stairs heading down. Make your way to the bottom, and stand behind the Jawful (enemy). Now, jump in the air to find the hidden treasure that contains another Frog Coin.
In almost the same location as the previous treasure, defeat the Jawful. Once it’s defeated, you should notice a small path leading off the map to the south, where the Jawful was. Follow the path south, and then northwest before jumping at the dead end. This will unveil the hidden treasure, which once again contains a Frog Coin.
(1 of 3) Hidden Treasure 1: On top of the boxes in the Item Shop.
After you defeat Birdo, you’ll receive Castle Key 2. Use it to open the door at the back of the room where you defeated it, and head into the next room. Before moving further, defeat the nearby Pinwheel, otherwise, it’ll blow you off the ledge. Continue on until you spot the chest to your right, and then jump on top of it. Jump again to reveal the hidden treasure, which contains yet another Frog Coin.
When you finish the area, defeat the bosses, and speak to the king. Head back to the room with the three doors. Do you remember the chest in the corner near the door on the far left, which contained a Flower? Well, now it is a hidden treasure. Jump in the corner next to the door to get the last hidden treasure of the area, which contains one more Frog Coin.
(1 of 2) Hidden Treasure 4: Go through the door at the back in the Birdo Boss room. Defeat the Pinwheel in the following room, and then jump on the chest to the right. The treasure is above the chest.
Hidden Treasure 4: Go through the door at the back in the Birdo Boss room. Defeat the Pinwheel in the following room, and then jump on the chest to the right. The treasure is above the chest. (left), Hidden Treasure 5: In the corner of the room with three doors, next to the left door. Only available after speaking to the king. (right)
All Hidden Treasures in Weapon World
This final Hidden Treasure is found at the Gate area outside of Smithy’s Factory in Weapon World. Just look for the Save Block and then jump to the left of it to reveal the Hidden Block. The final Hidden Treasure chest of the game contains a measly Mushroom!
Is there a Reward for Collecting All Hidden Treasures?
Unfortunately, there are no rewards for collecting all 39 Hidden Treasures and instead you’ll just have to settle with Bragging Rights. In your Completionist heart you’ll know you’ve completed the Hidden Treasures and that’s all that matters…right?
We hope you’ve had fun collecting all these sneakily hidden treasure chests, but if you’re looking for more post-game fun, check out our All Post-Game Boss Rematches page!
No Comments