
Part 1: Tailing
As we begin this mission, we’ll need to activate Eagle Vision to mark the two guards who we need to follow. This tagging is a new feature of Eagle Vision in Assassin’s Creed IV, and will allow us to see the targets through walls and they will appear highlighted in gold even when returning to normal vision mode.
The target will start walking off. The pair of guards we are interested in tailing will move along a set path and stop at regular intervals to peek behind to check to see that they aren’t being followed. As such, we need to follow from a distance, making sure to use the various haystacks, stalking zones and groups of people to hide from them when they stop.
Remember to always tag targets when you can during tailing missions.
They will move along the waterfront and when they reach a small marketplace will cut into an alley on the right. This entrance is guarded, so climb up to the roof and work your way across the adjoined rooftops here whilst keeping them in sight. There is a gunner on the high roof on the far left, so take him out. Run across the rope here to the next building complex and clear out the guard on the opposite side of the roof. The targets will pass through the courtyard of the complex below and out the other side into a square.
Drop back down to ground level and tail them again. After a few moments they will run off. Note that all though they are running, they will still make time to stop and look behind occasionally – so keep your distance! Keep following for a short while longer and an eavesdropping event will begin.
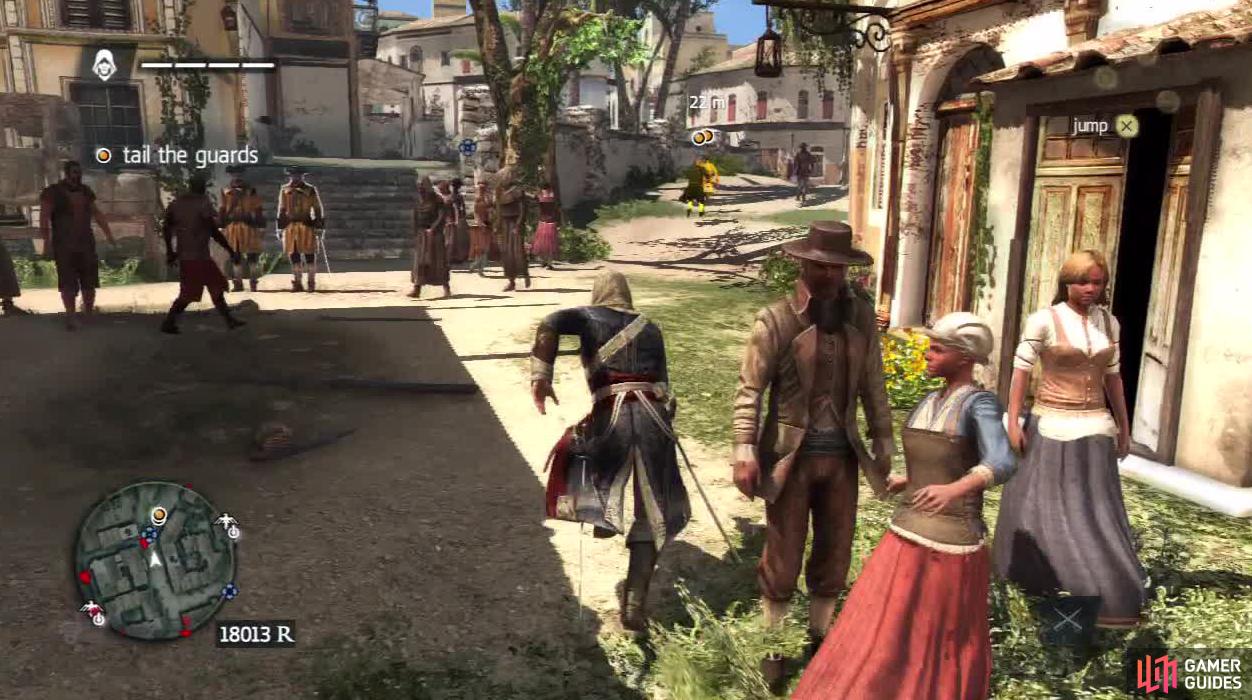
Keep a healthy distance from your targets but don’t let them get too far or you will fail the mission.
Part 2: Eavesdrop
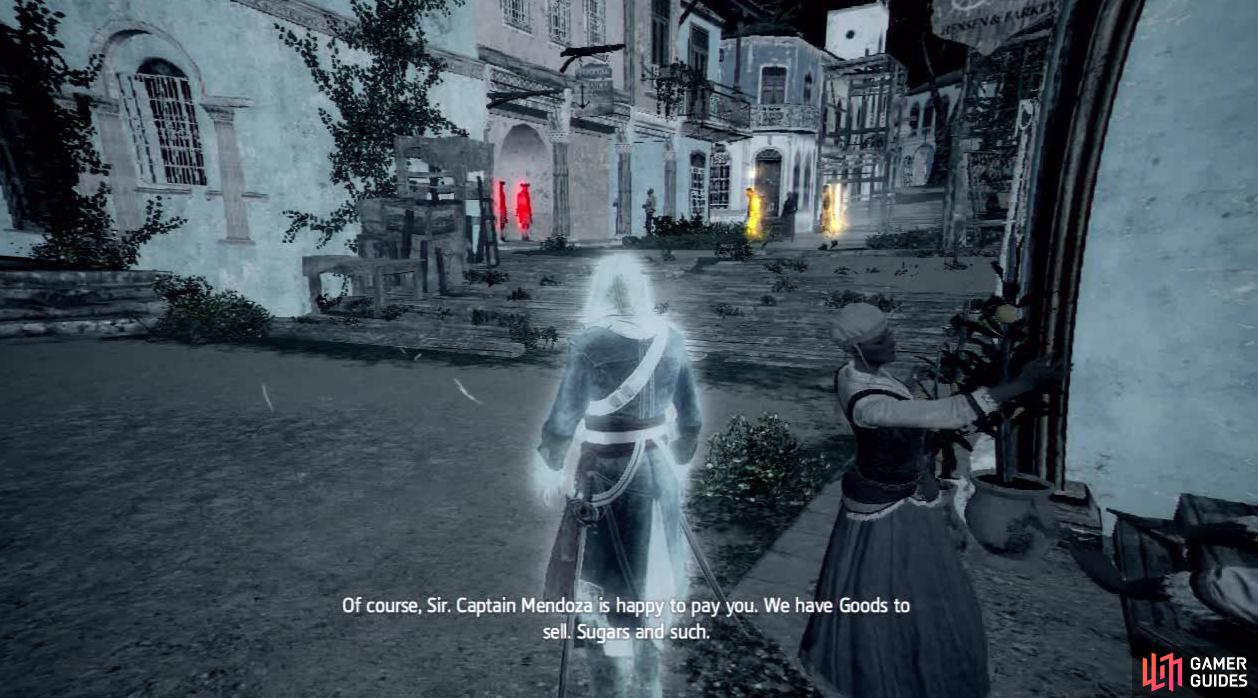
We’ll now have to stay within close proximity to the guards to listen to their conversation without being detected. To do this, use the crowds around as cover and ensure that you stay within the green circle representing the eavesdropping zone. The pair of guards will walk a short distance forwards and stop in front of the gallows. Hang out in the crowd here until the conversation is complete.
Alternatively, you can rush to the group of dancers near the guards, hire them and have a useful moving hiding place the whole time. Be quick to do this or you will be spotted. This will also complete one of the optional objectives.
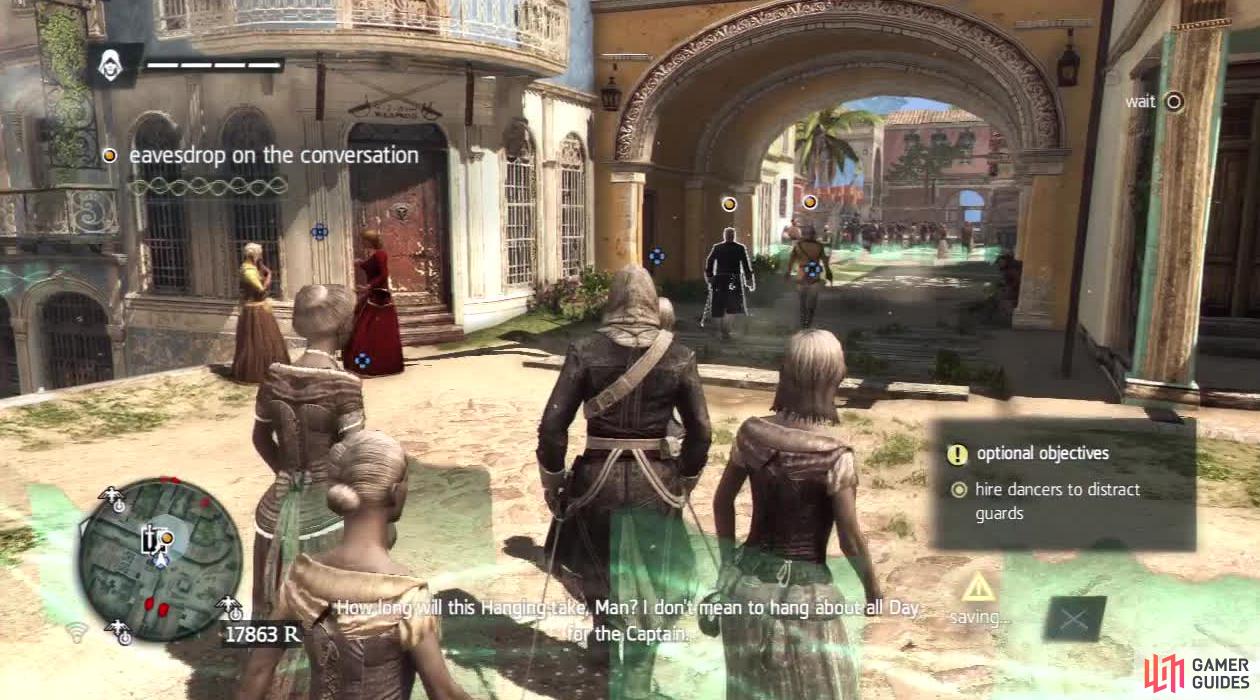
Paying for dancers will allow you to remain invisible when you need to stay close to a target, or even lure guards away from their posts. So don’t be shy in throwing a few coins their way as they’re usually worth it.
Part 3: Tailing
The game will now want you to tail the captain. This guy will descend the stairs from the gallows and walk off towards the fort to the north. Follow him and hire the group of dancers that you walk past for 150 Reales. He’ll soon enter a restricted area (marked by a red area on the mini-map). Use the dancers you hired to distract the guards blocking the entrance, and then follow the captain inside. Sneak up on him and pickpocket him or kill him and loot the body for a key. Exit the restricted area.
You can also wait for a large group of guards to pass near the entrance to the restricted area, then use the dancers to distract them all. They will all leave together leaving the space outside pretty clear of guards. If you wait for the captain to come back outside, you can pickpocket him as he walks away, reducing any risk of you being caught by guards inside the restricted area.
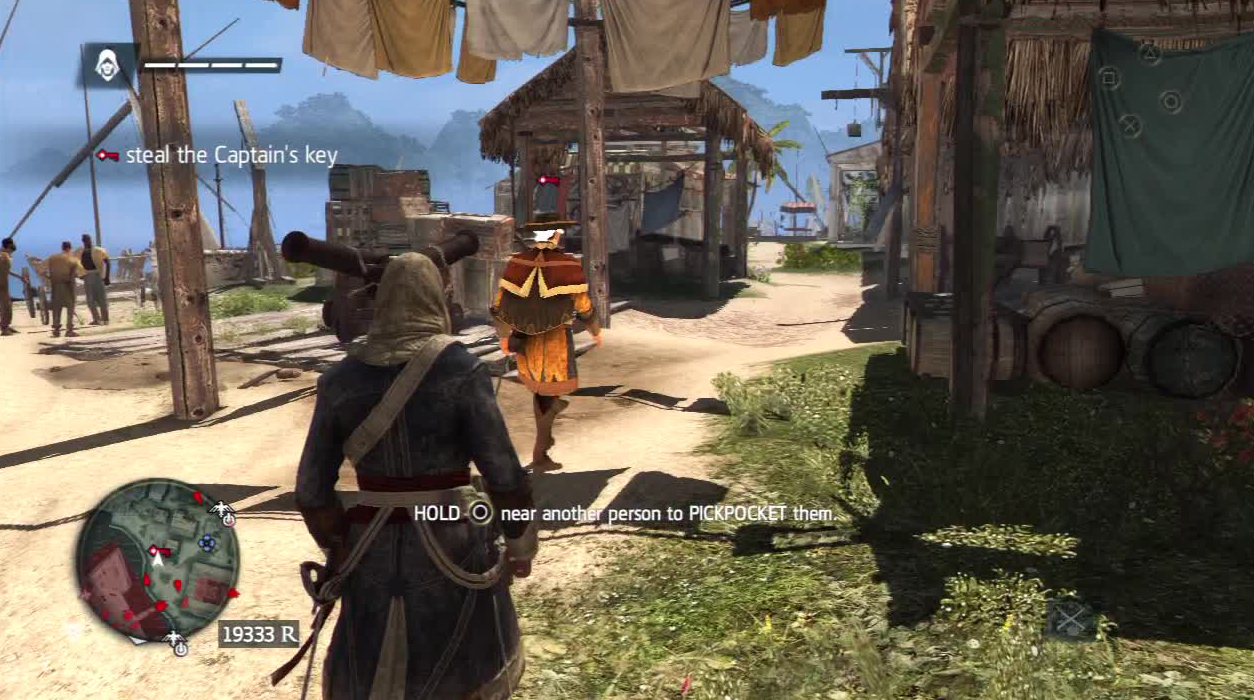
Wait until the captain walks over here, past any patrolling guards before you steal the key.
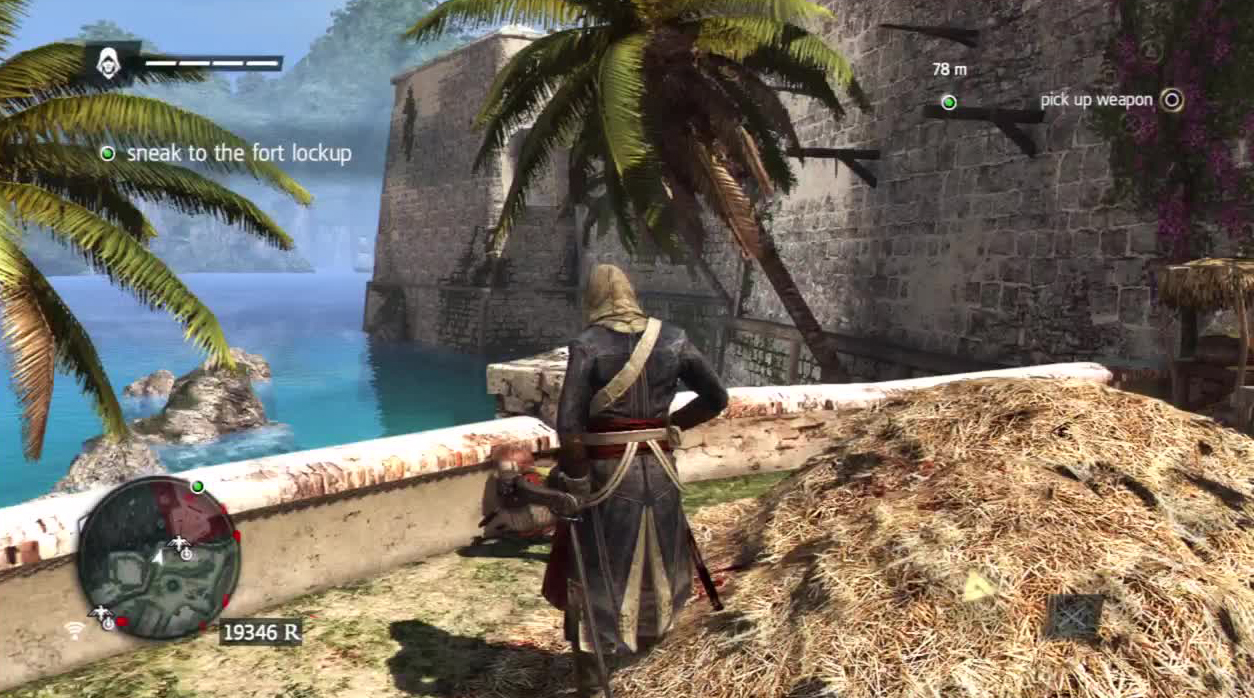
Part 4: Infiltrate
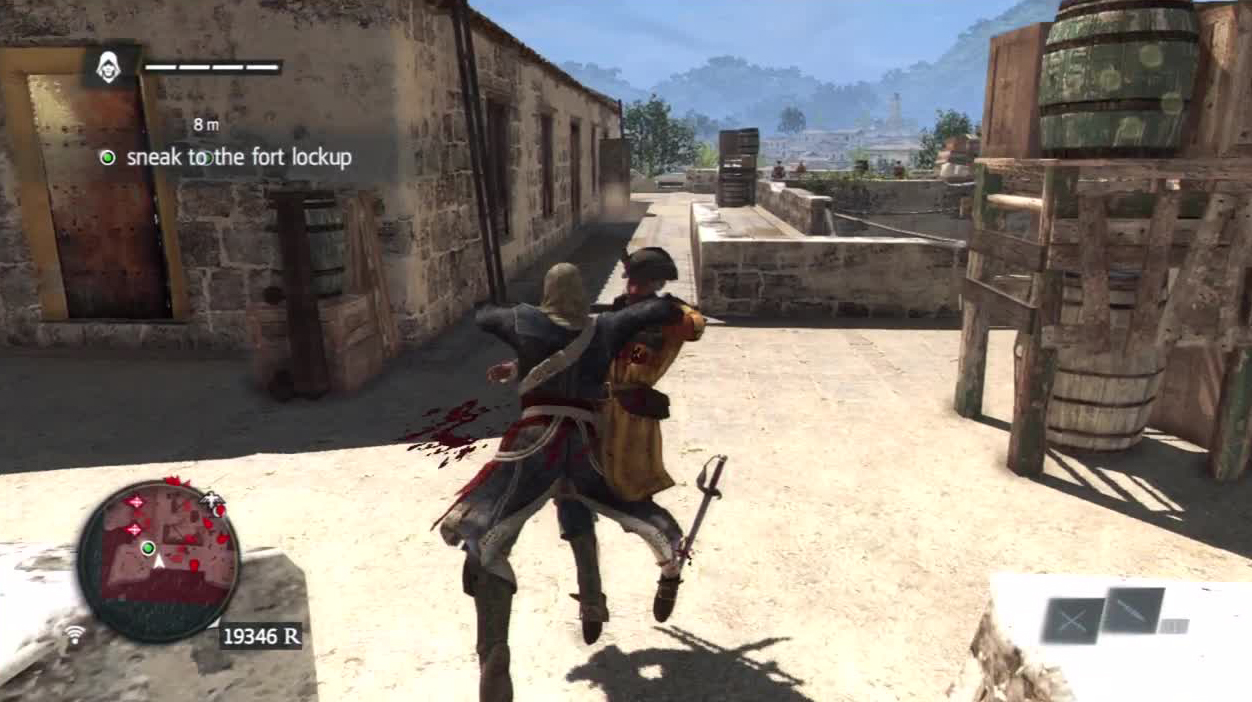
We’ll now have to sneak into the fort. Note that to earn the second optional task we need to get in and loot the target room without entering combat. To do this, make your way over to the westernmost corner of the fort (denoted by a viewpoint icon on the mini map). Hop into the haystack on the ground here and assassinate the guard patrolling nearby from cover. Now use the handholds on the side of the fort here to move along the wall and around the corner.
Jump to the beam opposite the window ledge and follow the climbable path to the top of the fort, but don’t climb up yet – hang from the ledge. Wait for the pair of guards ahead to split up. Once will walk over to the ledge above you, so perform a ledge assassination on him as he does. The other will patrol off to the right. Wait for him to patrol back and he will also come and stand on the ledge above you. Deal with him as you did the first.
Start your ascent from this corner for the first strategy.
Climb up onto the roof and turn left. Take cover behind the corner of some of the crates here and whistle at the guard near the cannon. Perform a corner takedown on him. Head over to the next stack of crates near the corner and from cover, check out the next part of the roof.
There are two stationary guards up on the ledge to your left and another further down and fortunately they will be fixated on the sea below the fort, so will cause you no trouble unless you bother them first. However, there is a fourth guard that will patrol up and down this length of the roof who we will need to take care of.
Note that there are two gunners on top of the target building as well (so make sure they aren’t looking when you make your move!). Wait for the patrolling guard to walk towards the room and using the crates here as cover, follow him. Take cover behind the stack of crates behind the single guard on the ledge and perform a corner take down on the patroller as he walks past.
This is the only guard you will need to take out when you get to the top of the fort.
Now make your way over to the glowing door and interact with it for a scene. Afterwards, turn to the right and jump off the fort via the hole in the wall here. Swim over to the objective marker and talk with Stede to complete the mission.
If you want to cut to the chase and don’t want to practise your sneaking skills, simply dive into the water at the west side of the fortress near the pile of hay and swim all the way round the side until the green objective marker is almost above you.
Use the wood panels here to climb to the top and wait for the patrolling guard to come to the edge. Dispatch him and then shimmy across to the guard stood in front of the objective door. Climb up, quickly dispatch the guard ahead and go straight to the door.
No Comments