
Part 1: infiltrate
After the introduction, dive into the water and swim over to the ruin on the shore nearby. Use the various handholds and platforms to climb all the way to the top.
Now that we are up, find the dirt trail leading from the top of the ruins inland. Follow this around the corner and sneak up and assassinate the guard patrolling along the path here. When you reach the end of the path, drop down to the area below and sneak up on and double assassinate the pair of guards nearby on the mini-map.
They will also separate, leaving you to pick them off one by one if you so choose.
Continue towards the green objective marker. When you reach the ruined half-wall, wait for the guard patrolling the path by it to turn away and sneak up and dispatch him. Keep going down the path until you reach the green waypoint killing a further two guards patrolling the path as you go.
After you reach the green marker, follow the Cliffside path to the right. Hop over the gap and use the rope bridge to climb up the other side. Follow the linear path here down a short way until you come across some enemy guards ahead.
There will be two standing on the path in front, a third some distance away in a stationary position and a fourth patrolling back and forwards between the two positions. Take them all out from stalking zones, (starting with the patroller to make things easier) or sneak by them. Continue past the thatch house in the centre of the path and enter the stalking zone bushes to the right.
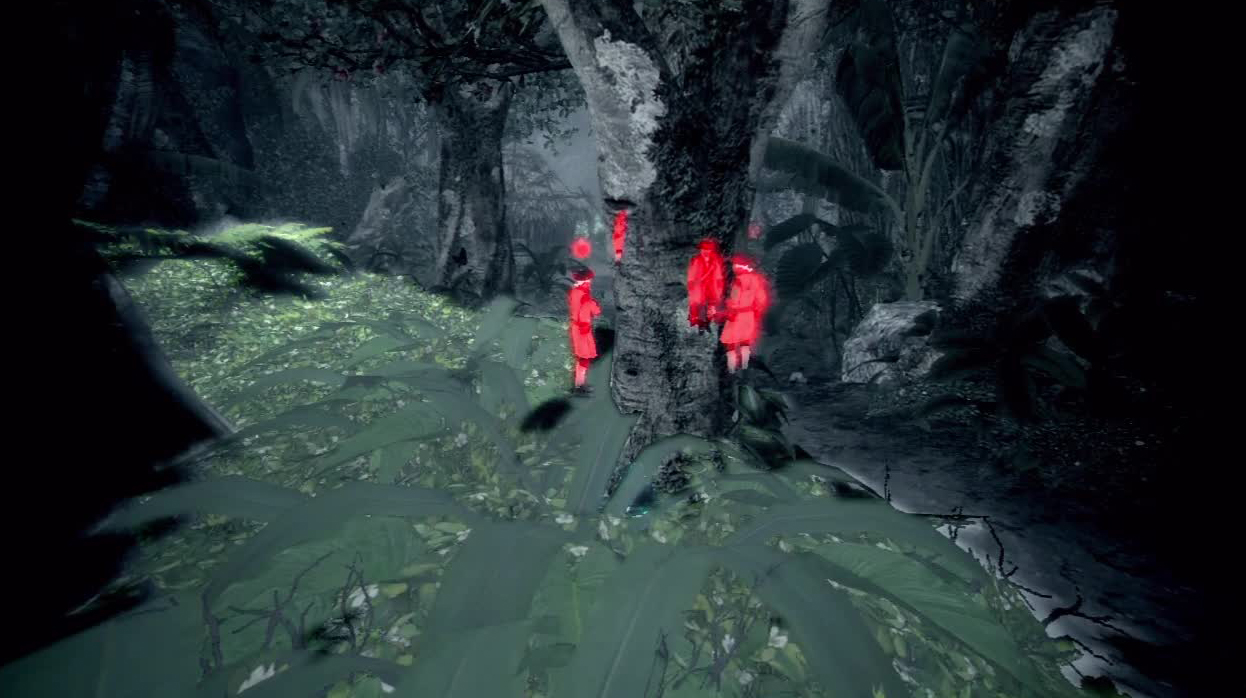
This is the first real test of your stealth skills in this mission. The guard on the right is drunk so you can kill the other two nearby with relative ease. Just make sure not to kill someone right under his nose as even he will notice. Use whistles to get them away.
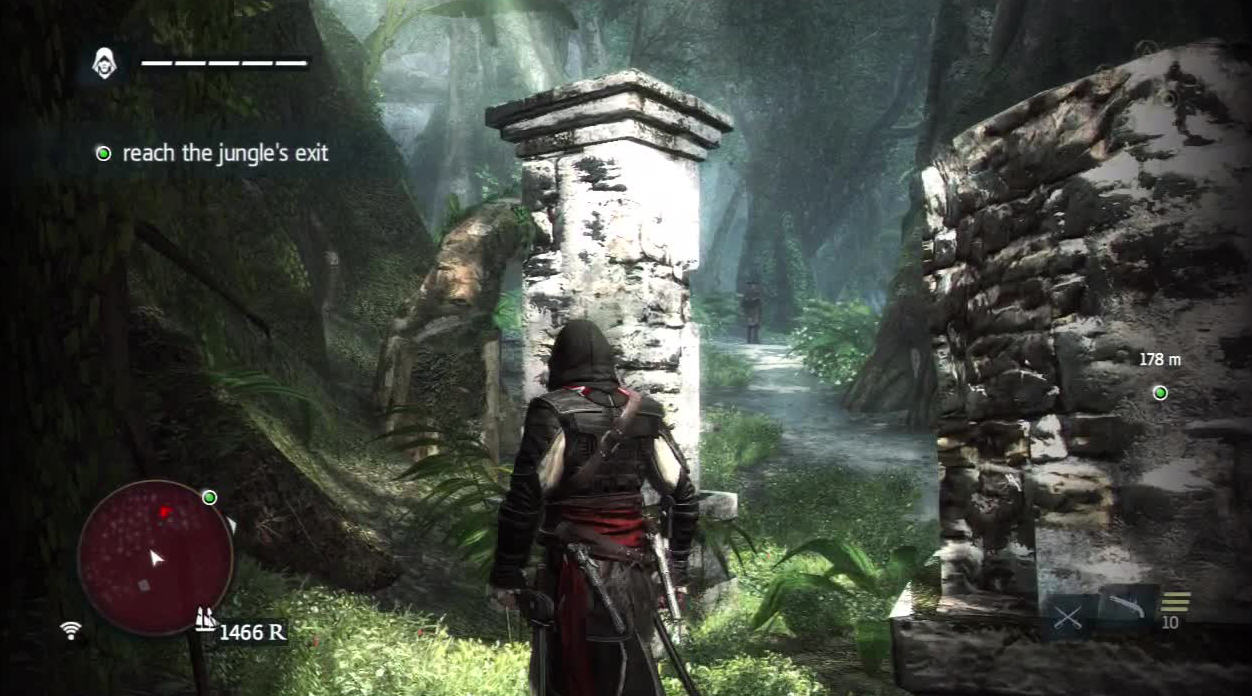
Ahead there is a gunman located on a platform in the tree in the centre of this area and a brute and guard at ground level. Again, take out or sneak past the ground-based enemies whilst the gunman in the centre is looking away from you. A little further along the path is another pair of regular guards. Do what you wish with them. Keep following the path until you reach a small village.
Part 2: Assassinate
Once you arrive at the village, enter the stalking zone bush near the exit. In the distance you will see a ship docked. This is where our target is located. Note that from this point on we are able to achieve the mission’s two optional objectives – stay out of combat and to perform an air assassination on the target. Wait for the guards ahead to look away and then run over to the bush to the left of the building directly in front of the path.

Even though the objectives first pop up here, you must stay out of combat for the entire mission, including the part through the jungle!
When it is clear to do so, make a run for the nearest sugarcane field. Whistle at the guy standing on the side of the field closest to the water and assassinate him from cover when he comes to investigate. Deal with the patroller here to the south as well if you wish to do so.
Make your way to the far end of the field. A guard patrols from here down to the buildings below. Wait for him to start down and follow him. Duck into the stalking zone bushes to the left of the small dirt road. Hang out here for a moment.
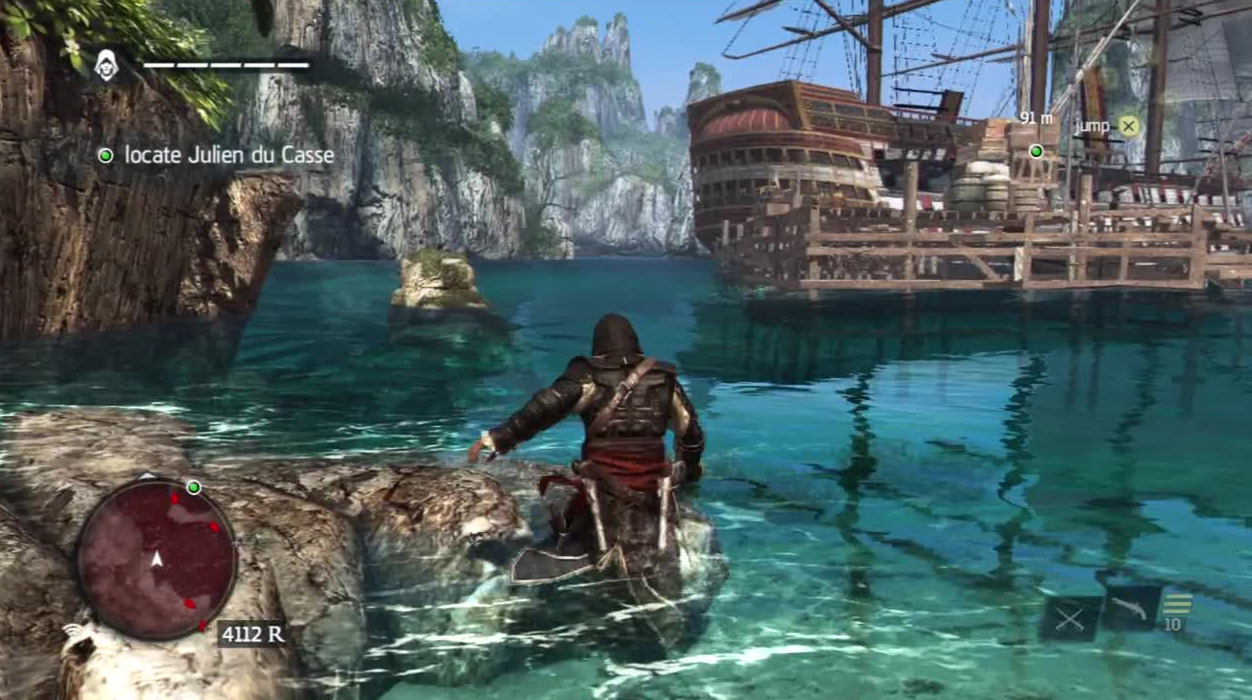
At this point, wait until no guards are looking your way and make your way over to and follow the cliff wall to the west all the way until you reach the water. At this point, you’ll be fairly close to the back end of the ship. Swim out and around the opposite side of the ship from the village, using the stealth swim option if you get spotted.
Get in the water here and stealth swim to the back of the ship so the guards on the walkways cannot spot you.
Climb up the side of the ship near the bow and when you reach the top rail, shimmy around and ledge assassinate the guard looking out from the back of the ship. From your position on the ledge here, activate eagle vision to identify the target.
Maintain your position here for a little longer, two regulars will patrol across the back of the ship and then descend the stairs to the main deck. Your assassination target will do the same. When all three have passed (and no-one is looking your way) you have a brief window to move.
Hop over the railing and climb the mast until you reach the first cross beam. Now wait here until the target makes another lap. When he passes below you, hit the attack button to air assassinate him to complete the optional objective and the mission.
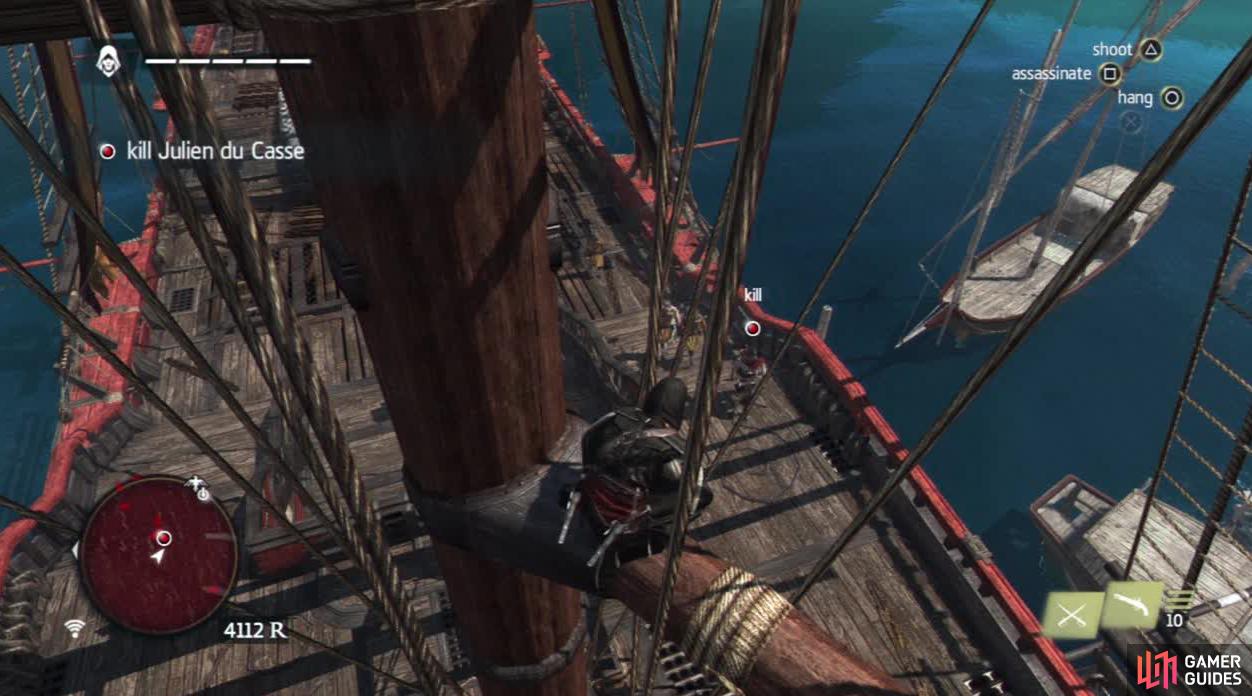
This is the moment to make the air assassination.


No Comments