| Icon | Title | Category | Subcategory |
|---|
NPCs
| Icon | Title | Details | Type | Screenshots | ||||||||||||||||||||||||||||||||||||||||||||||||||||||||||||||||||||||||||||||||||||||||||||||
|---|---|---|---|---|---|---|---|---|---|---|---|---|---|---|---|---|---|---|---|---|---|---|---|---|---|---|---|---|---|---|---|---|---|---|---|---|---|---|---|---|---|---|---|---|---|---|---|---|---|---|---|---|---|---|---|---|---|---|---|---|---|---|---|---|---|---|---|---|---|---|---|---|---|---|---|---|---|---|---|---|---|---|---|---|---|---|---|---|---|---|---|---|---|---|---|---|---|---|

|
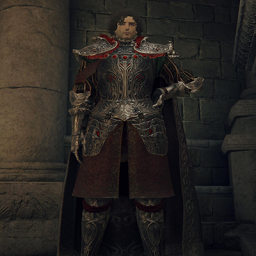
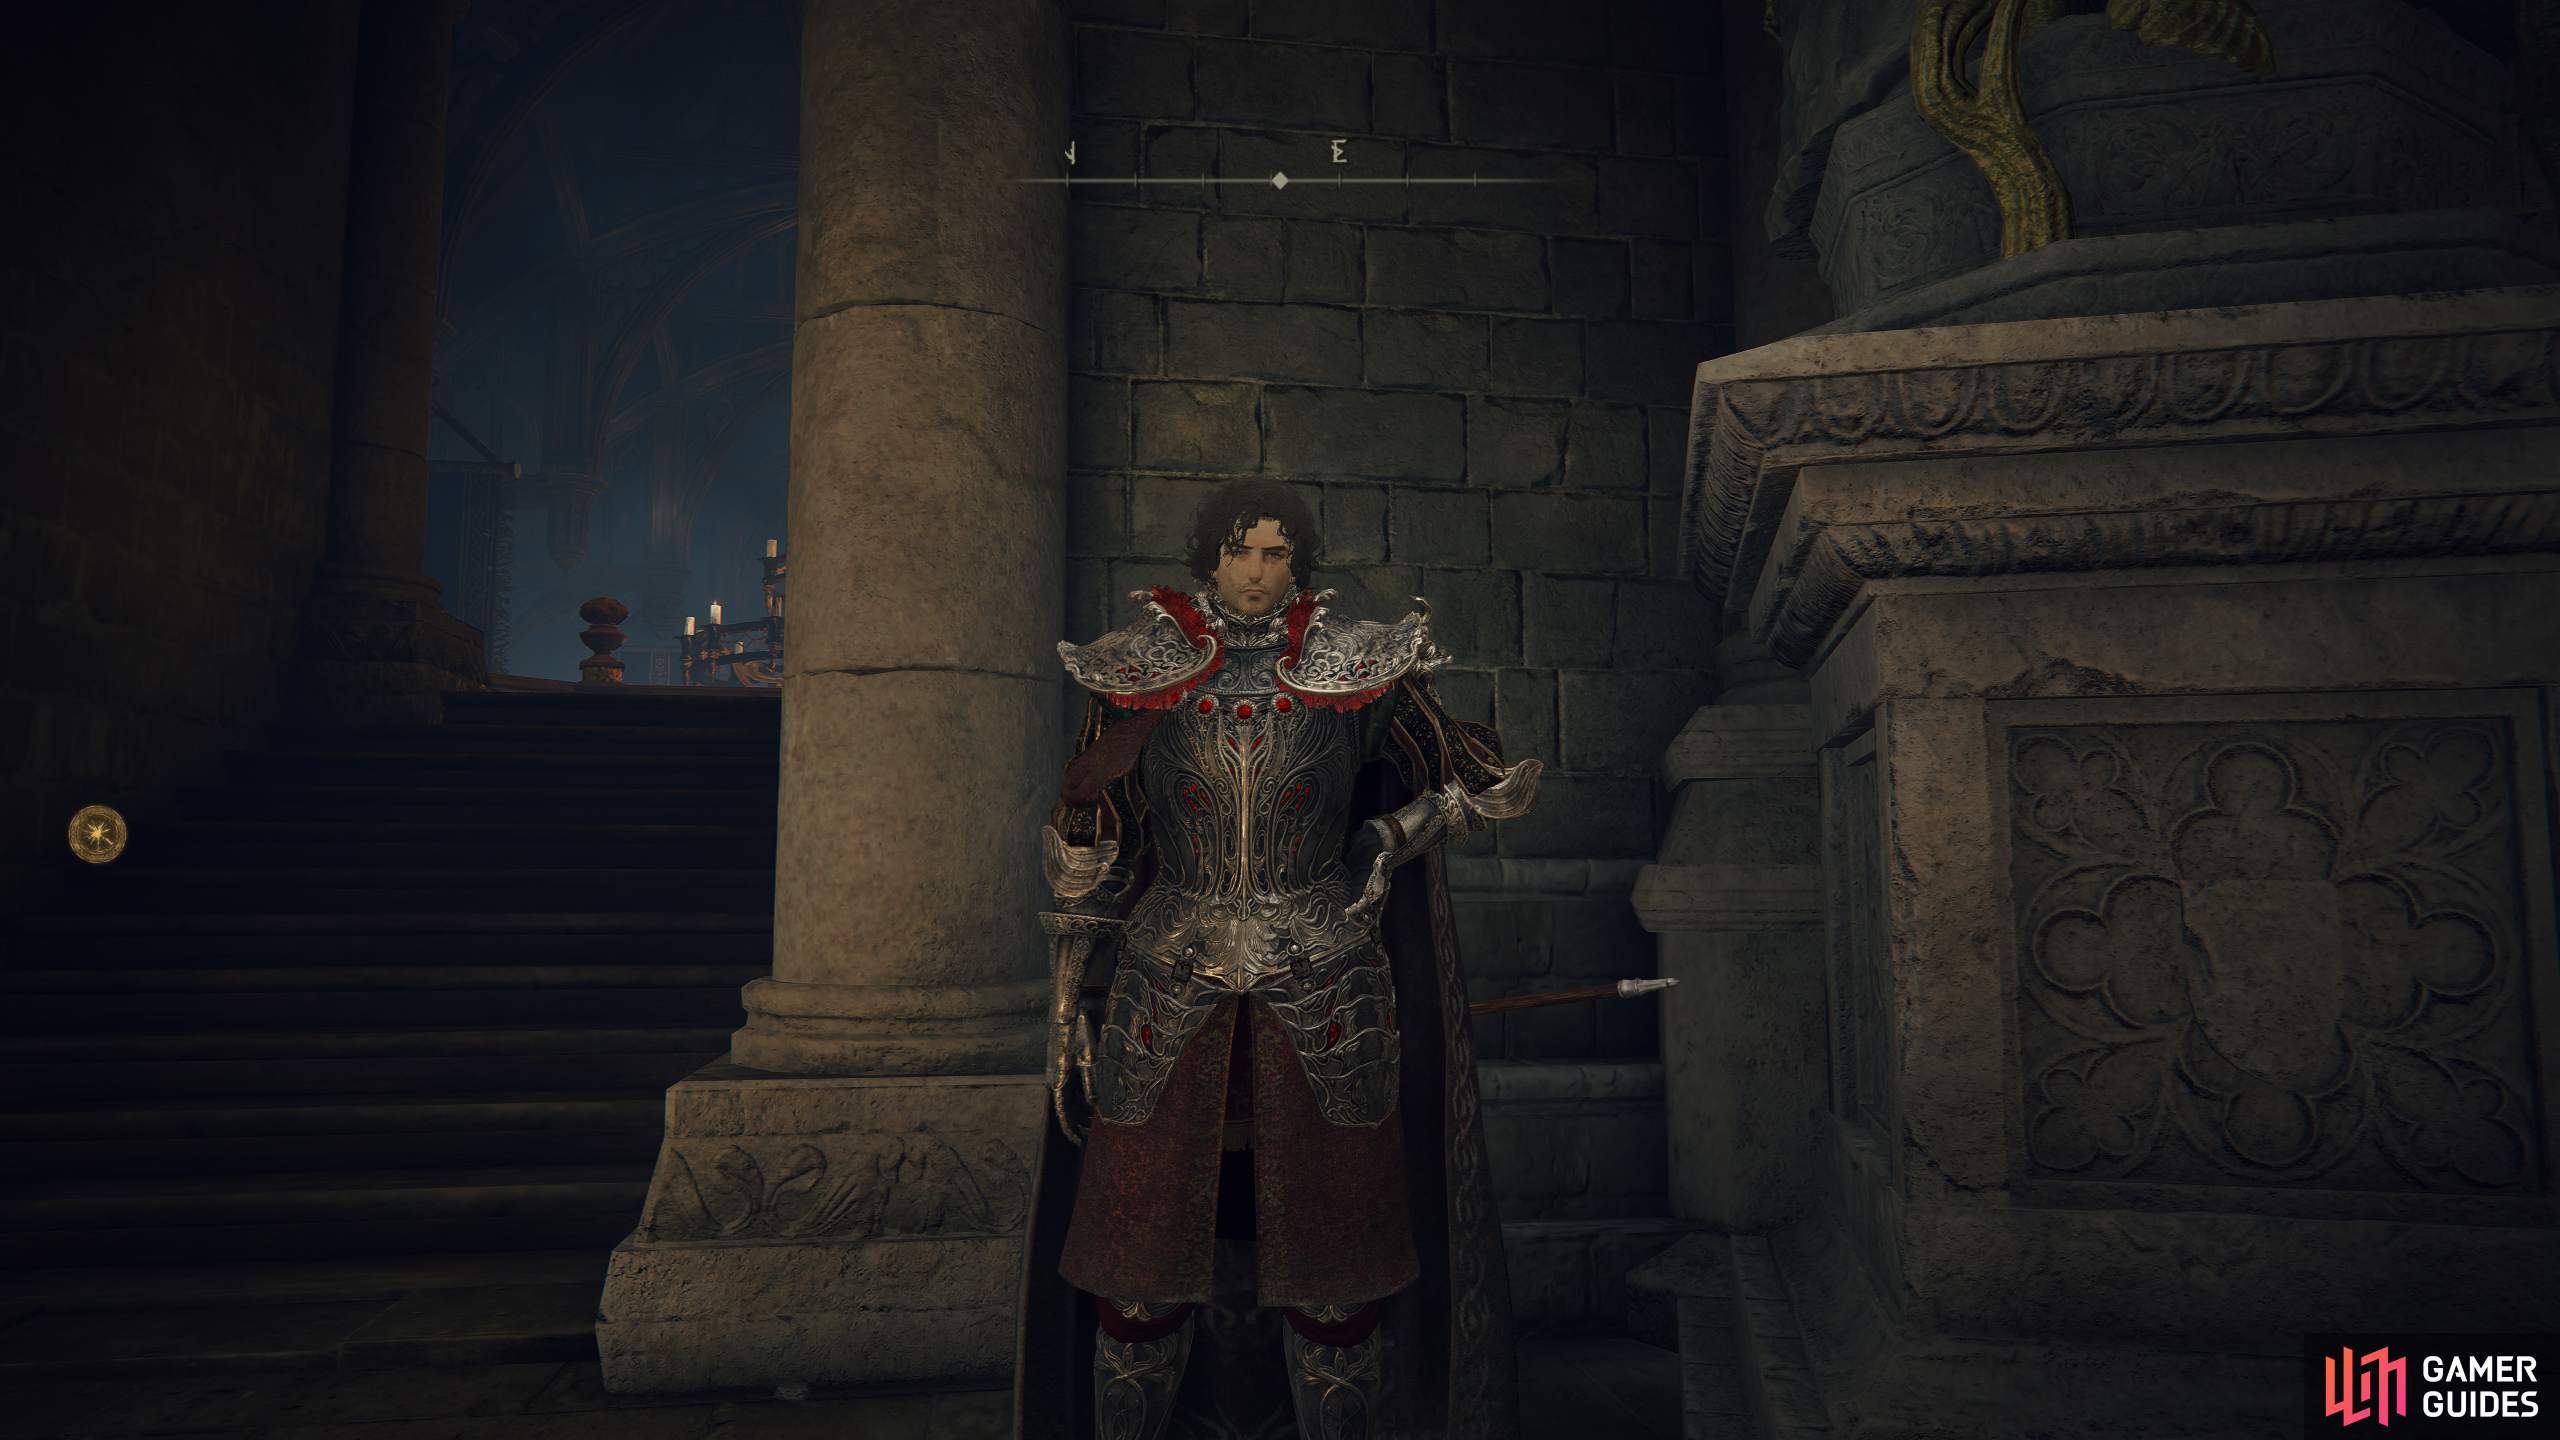
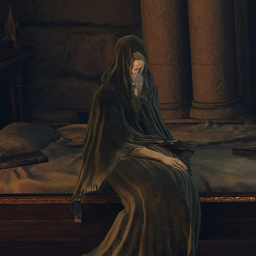
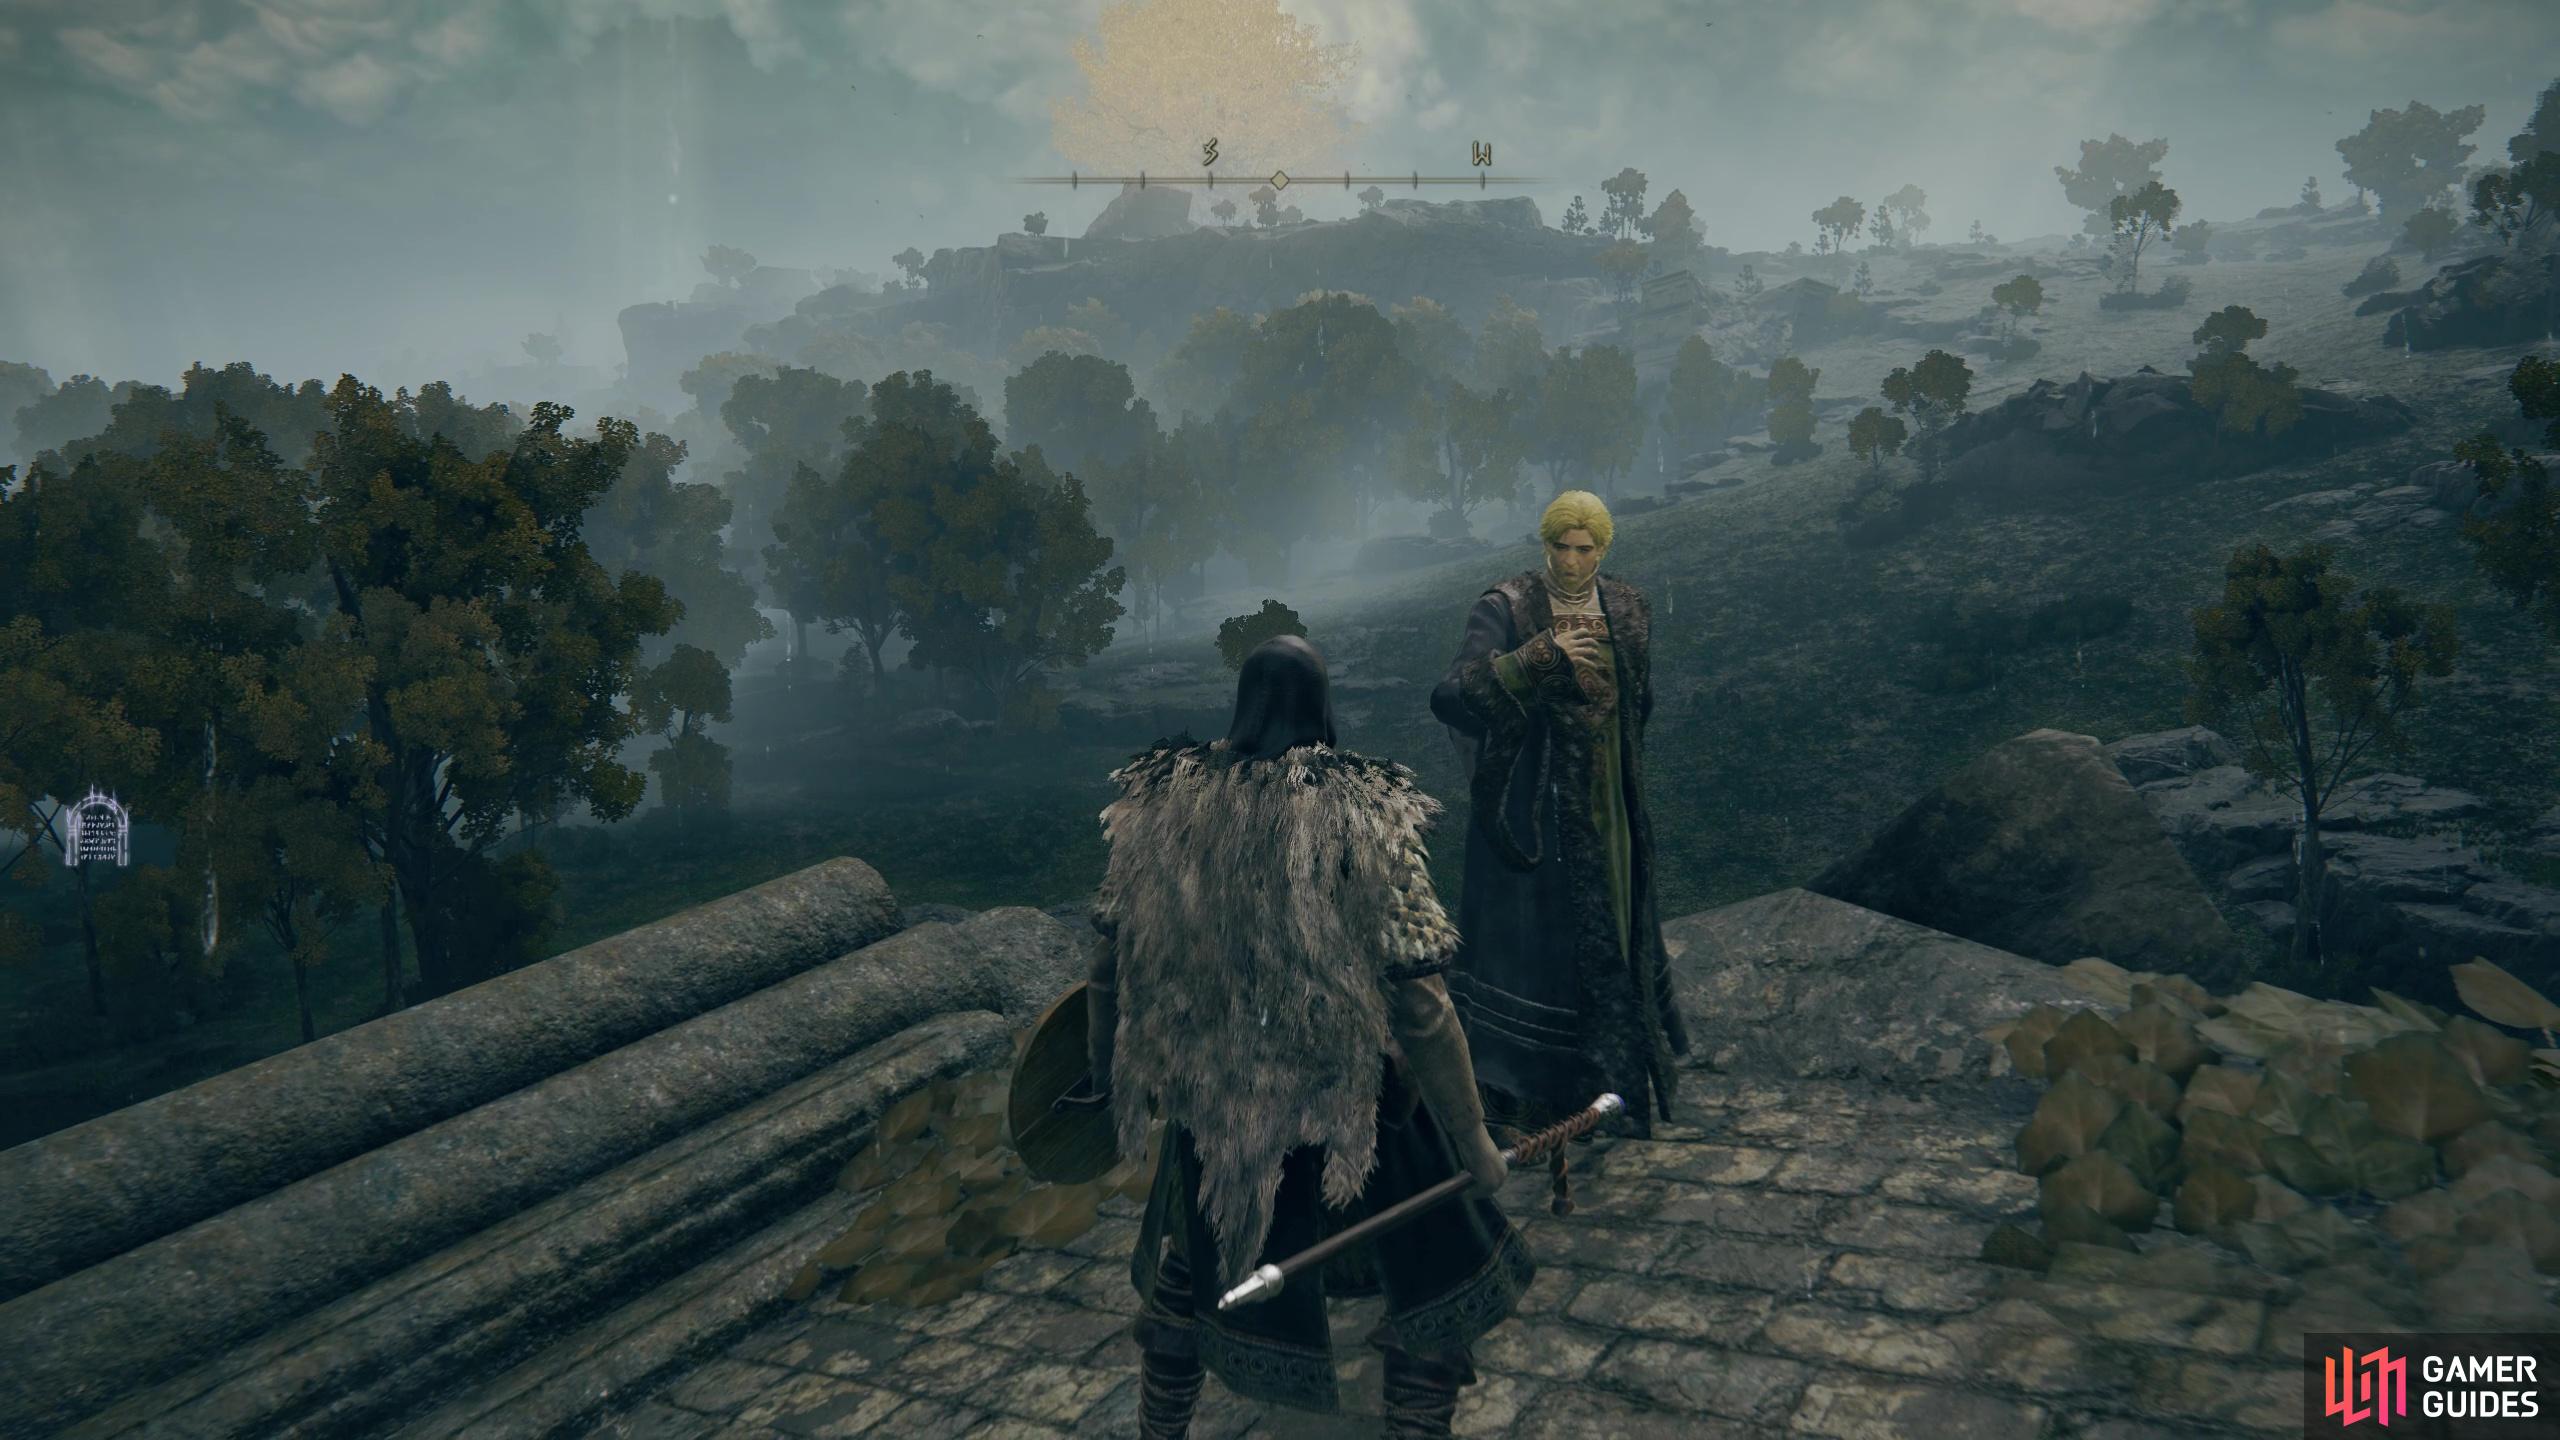
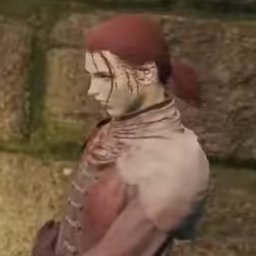
Albus |
Albus is an Albinauric that resides in the Village of the Albinaurics. He begins a short, but important, Questline.
Lore
I am Albus. An Albinauric, as you can see. We are finished. The whole village is finished. The cursemongers have destroyed everything. Not one that remains has their wits about them. I beg you. Would you look after this medallion?
Location
Info
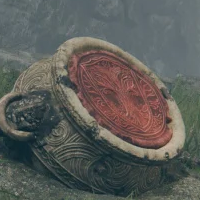
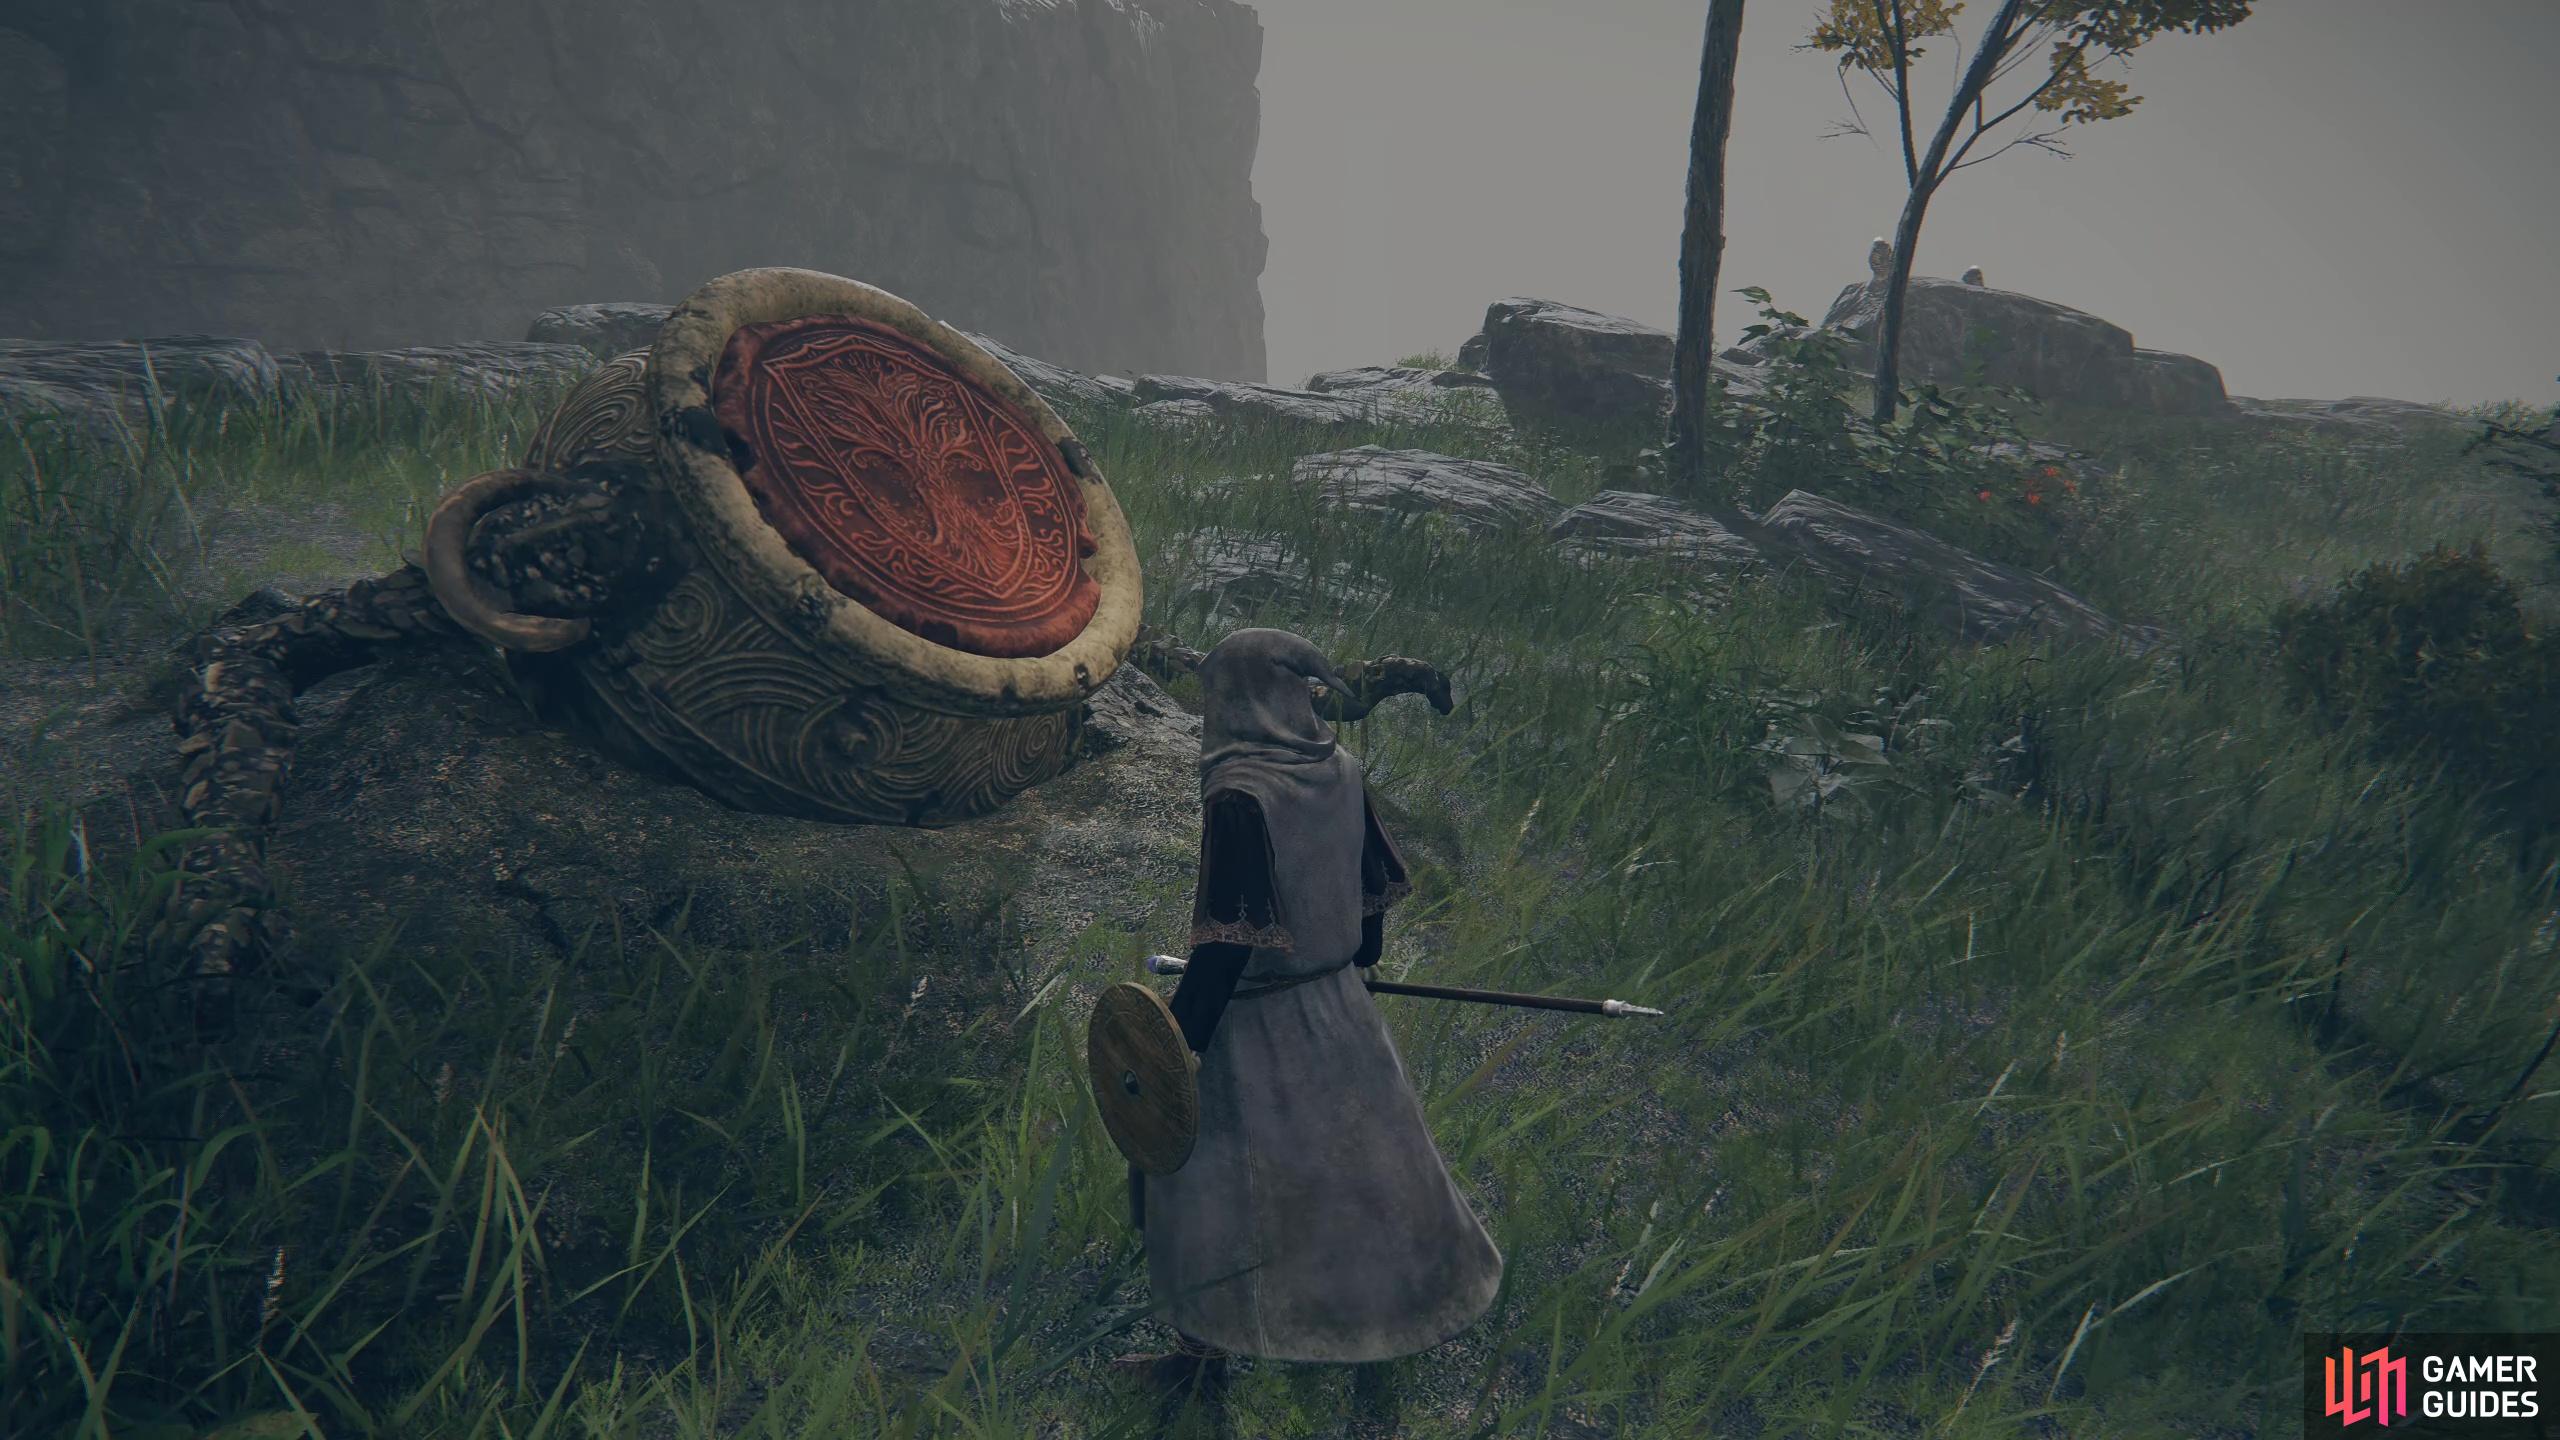
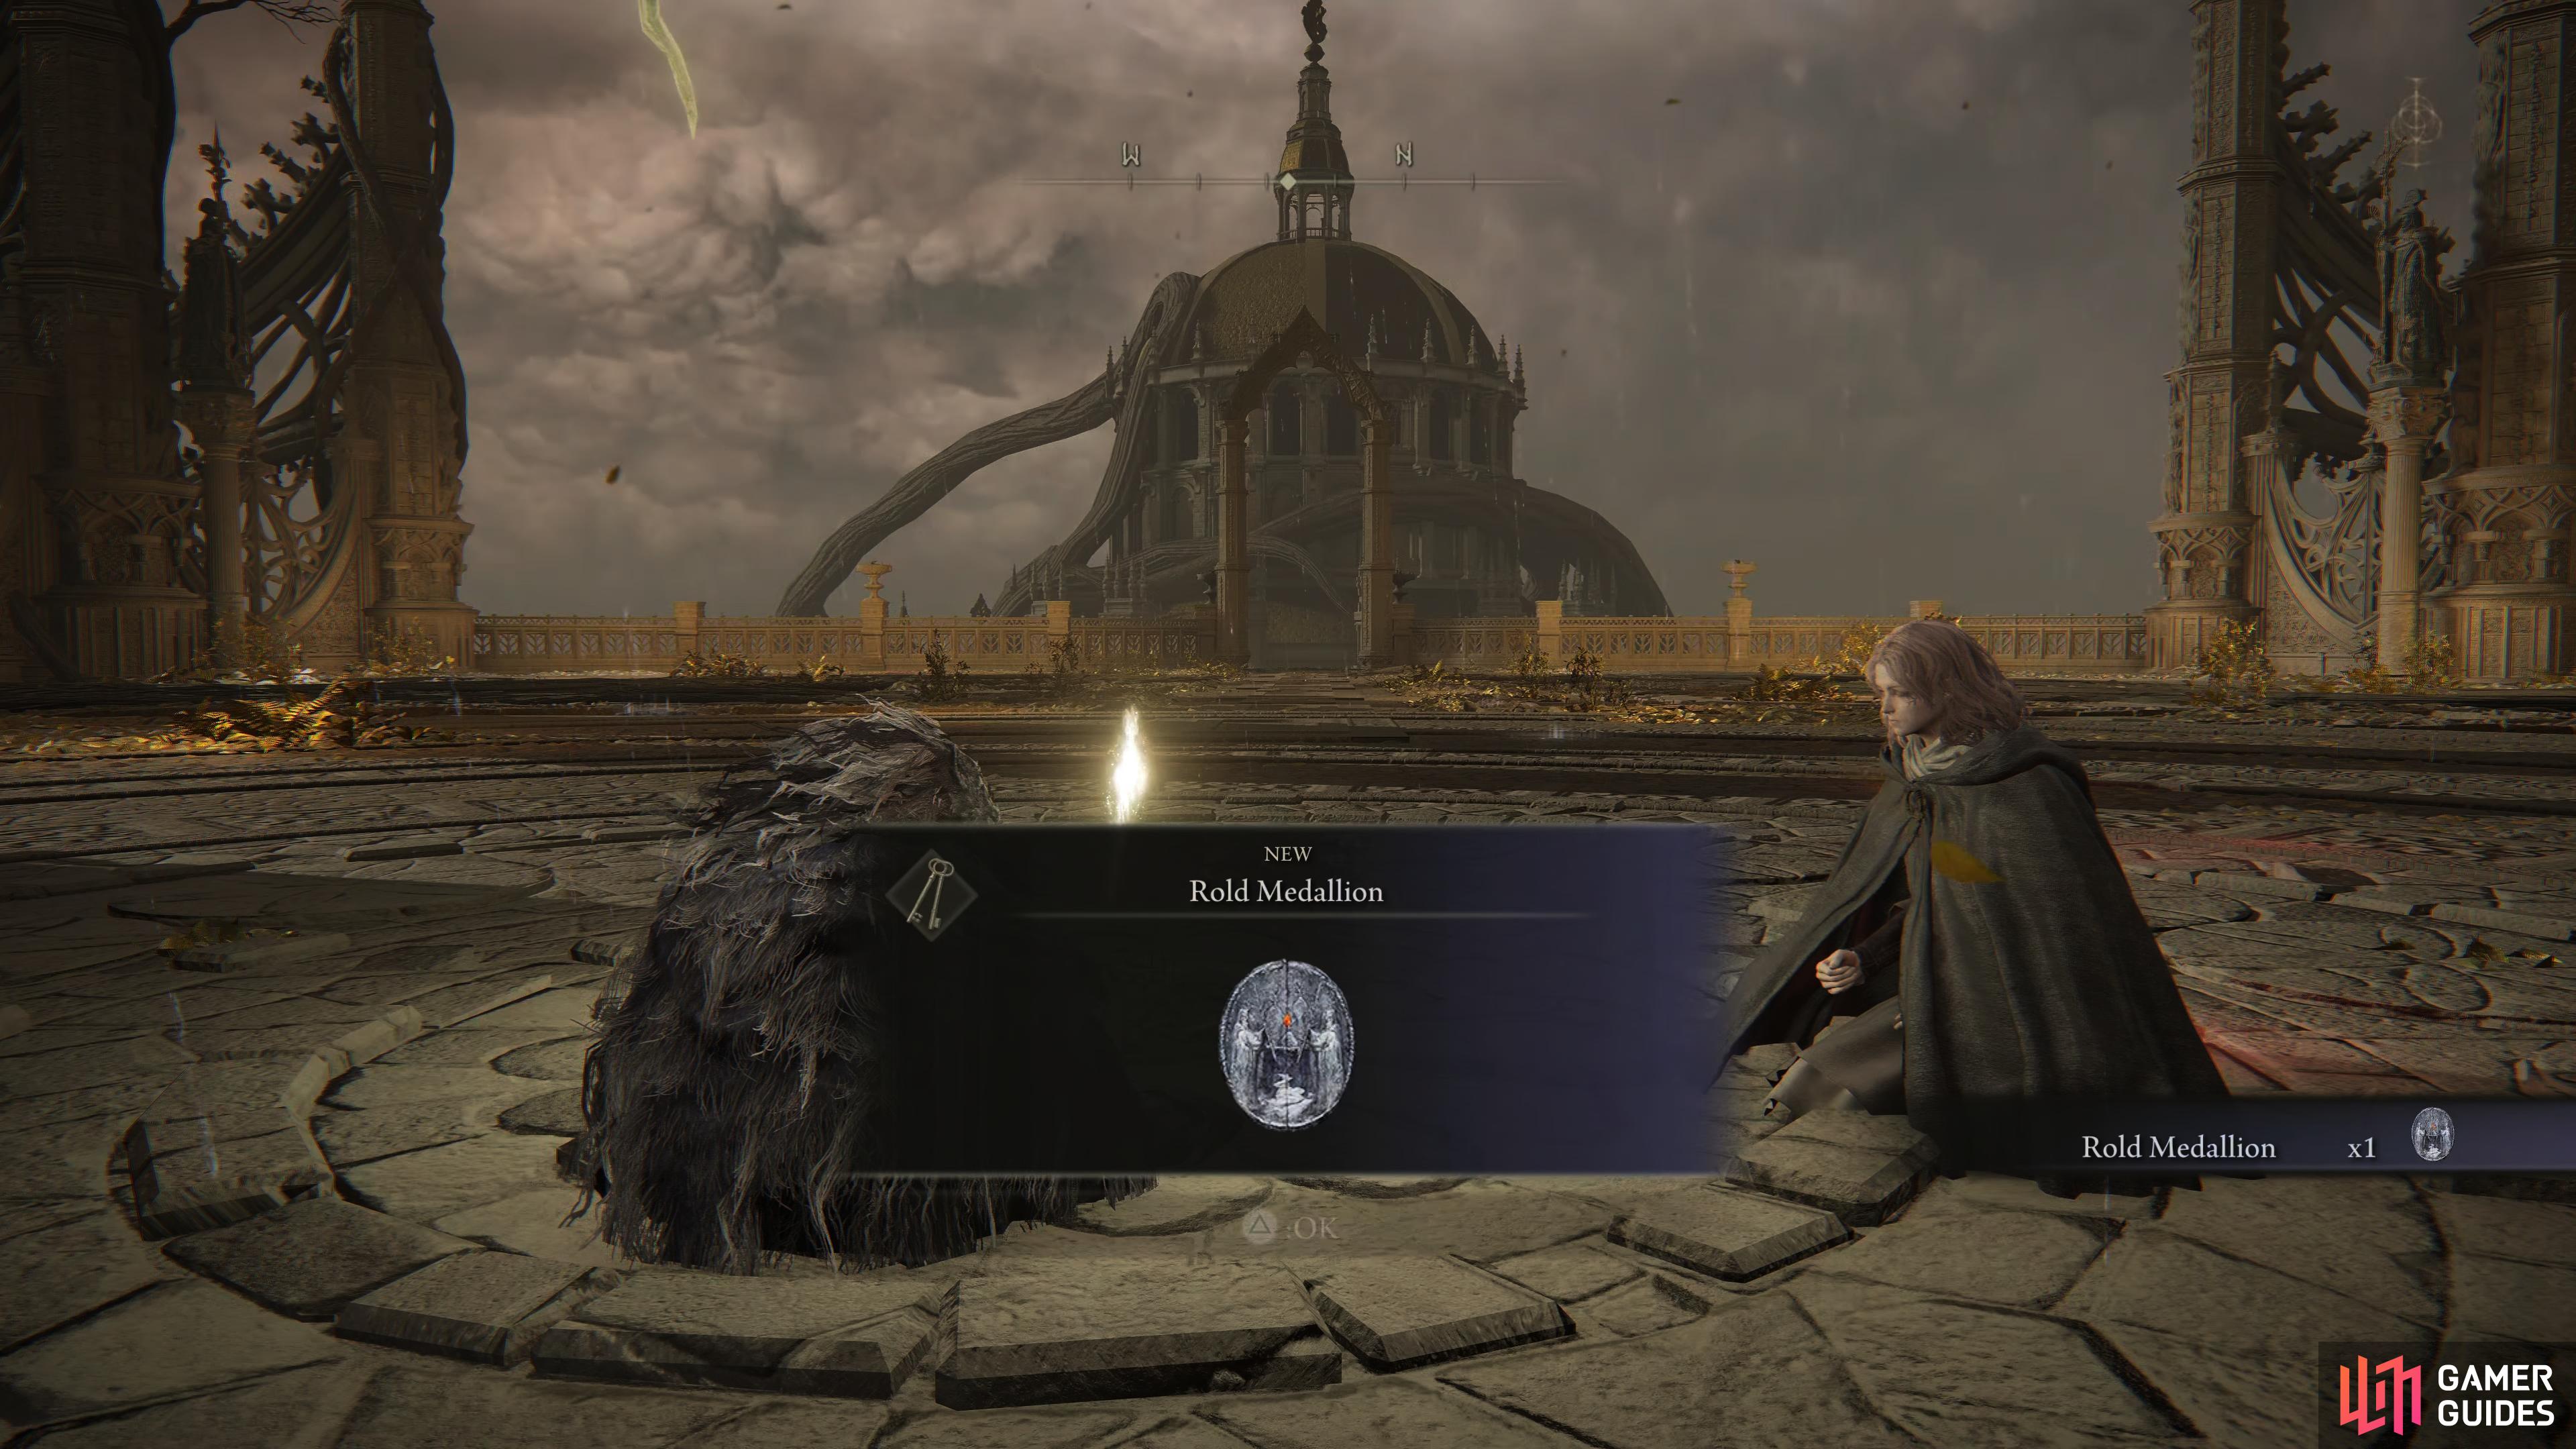
Encounter From the Village of the Albinaurics Site of Grace, head up the slope and deal with the Depraved Perfumer. Once defeated, proceed to the edge of the area (ignoring the bridge) and you’ll find a pot. Roll into the pot to reveal Albus, who will hand over the Haligtree Tree Secret Medallion (Right) and bid you to seek out Latenna. |
||||||||||||||||||||||||||||||||||||||||||||||||||||||||||||||||||||||||||||||||||||||||||||||||
|
Alexander the Iron Fist |
Iron Fist Alexander is an NPC in Elden Ring and is involved in a lengthy Questline across the Lands Between.
Lore
Oh my stars I’m so happy to see you!
Location
Info
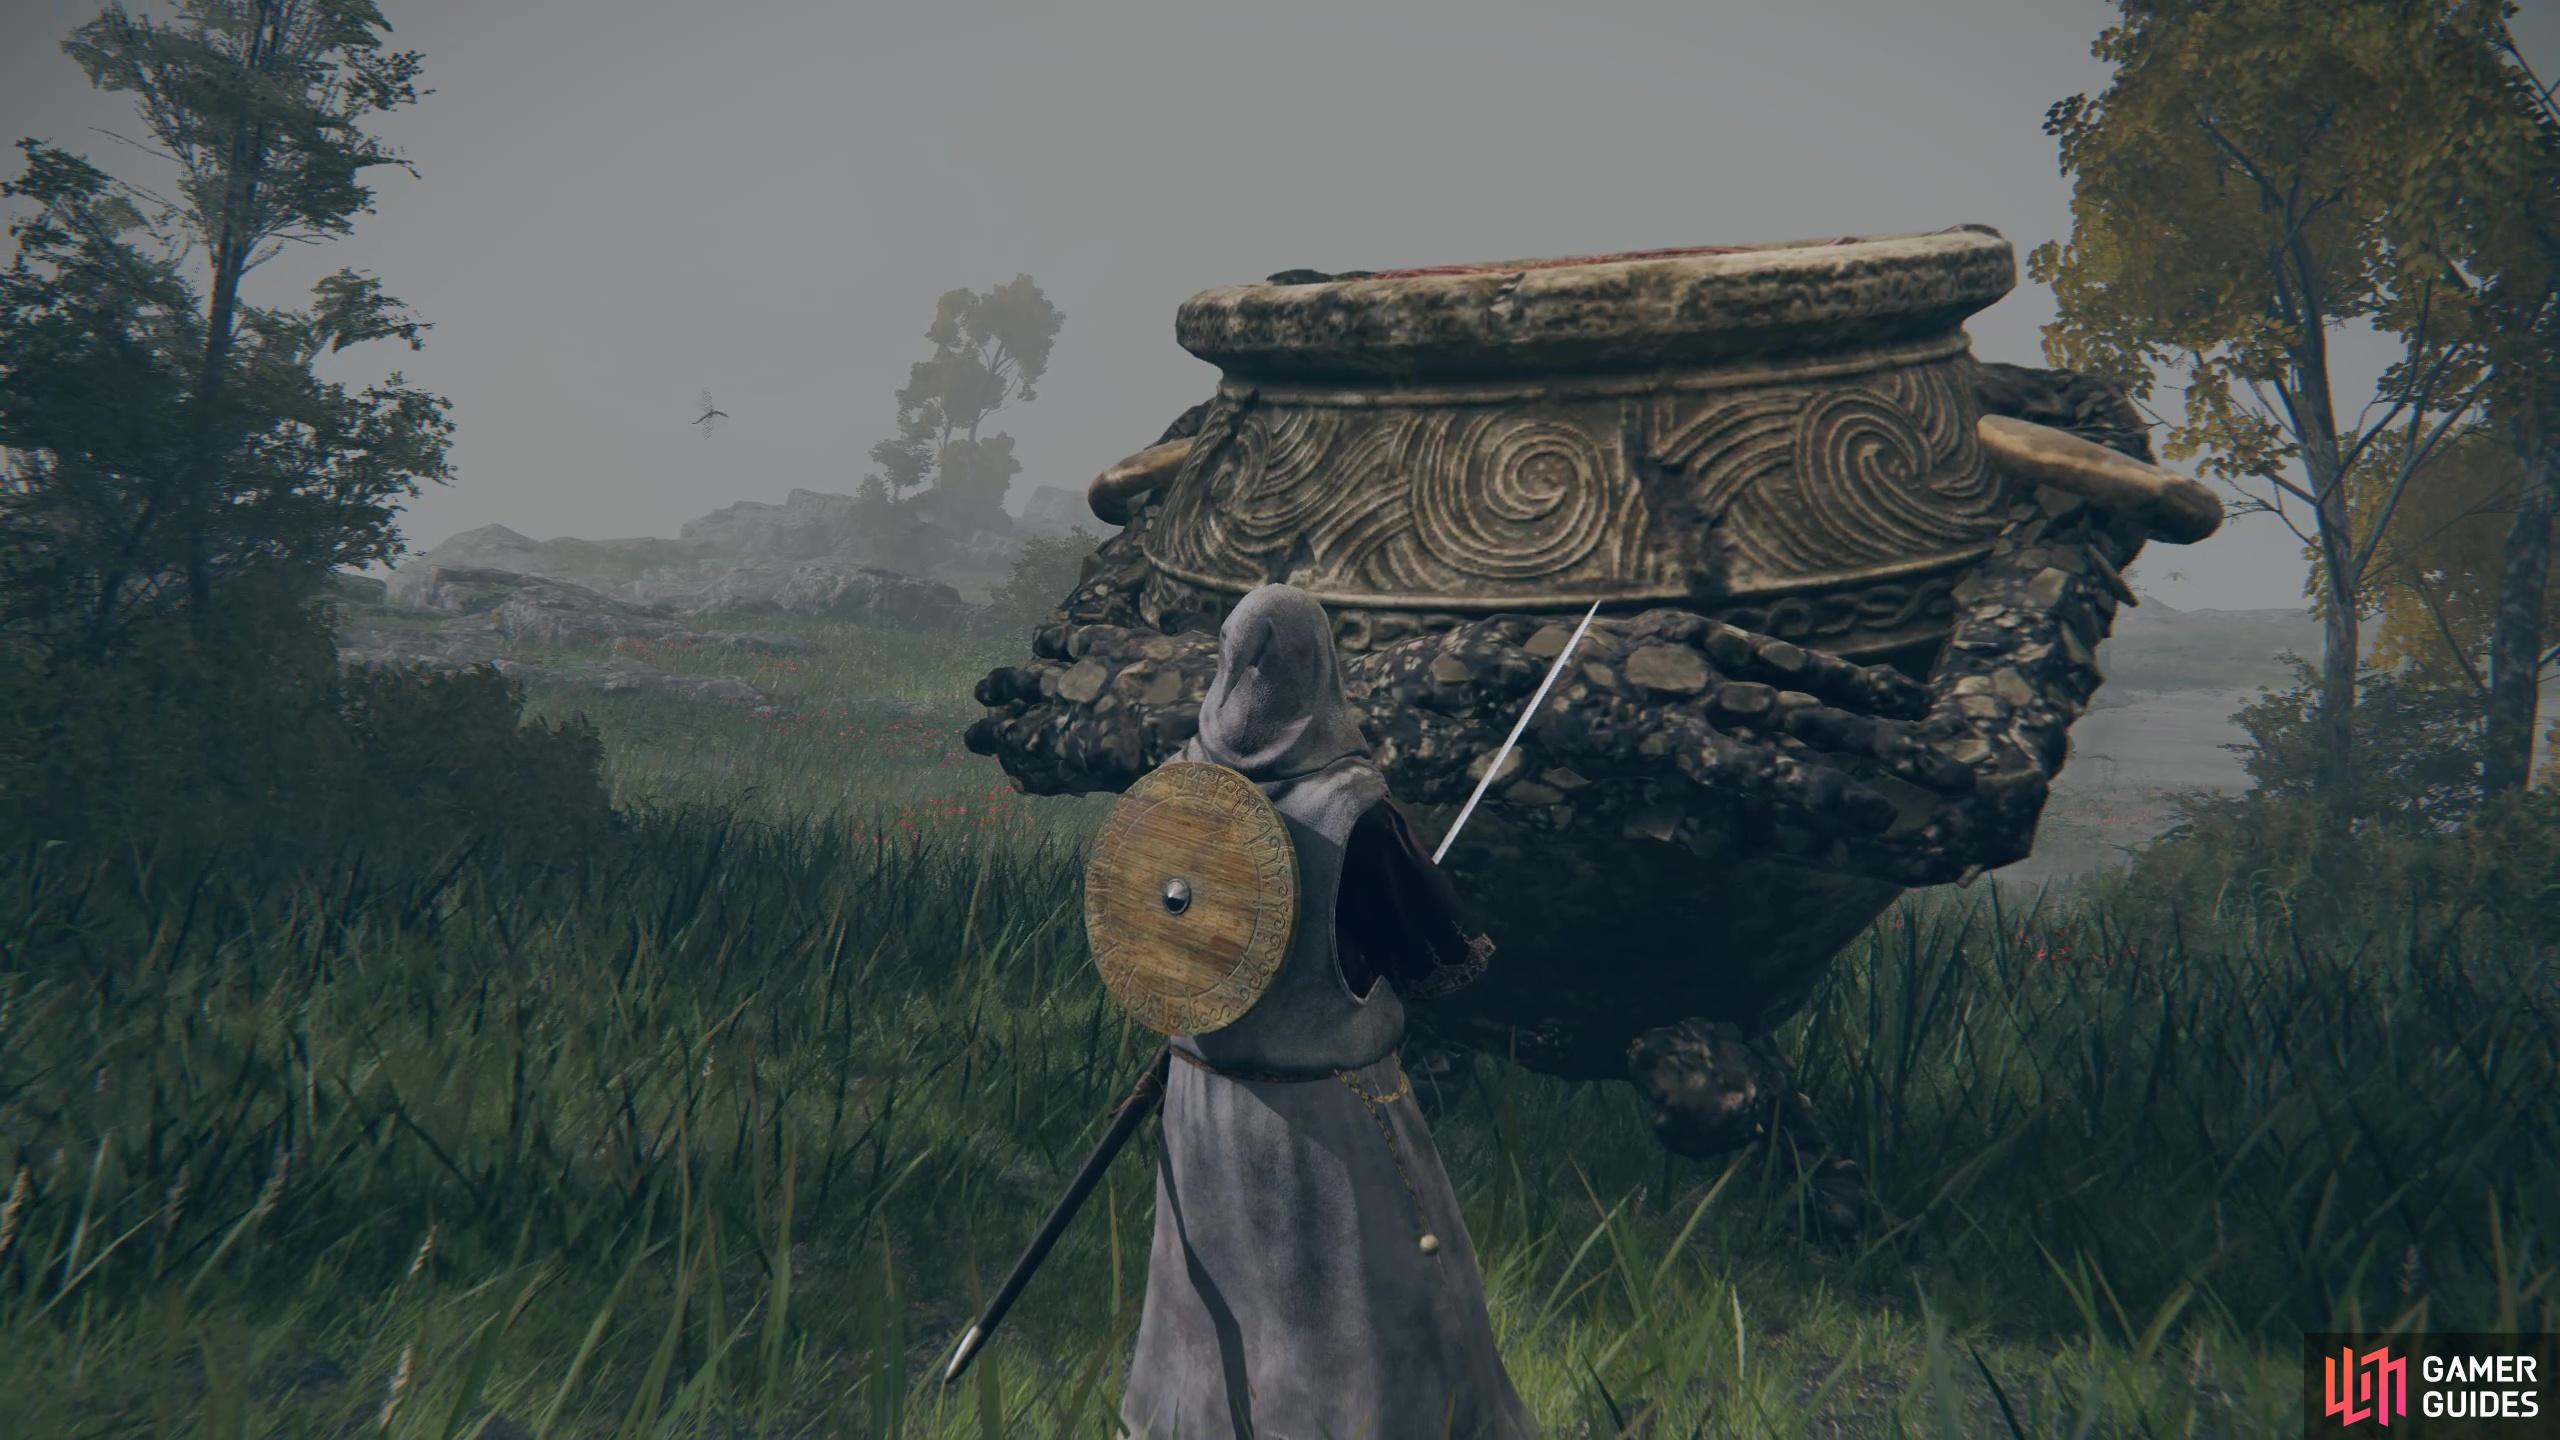
First Encounter At the top of the cliff overlooking the road you’ll find a strange sentient cauldron-man stuck in the ground. Upon speaking to him, you’ll discover that his name is Alexander but that he is more commonly known as the Iron Fist. He will ask you to help push him out of the ground by smacking his behind with a strong blow. You’ll want to use a heavy attack to generate enough force to dislodge his cauldron-body from the ground. You’ll unlock the Triumphant Delight emote. The next place you’ll find Alexander is in Gael Tunnel in Caelid Wilds. There are two ways to enter the tunnel: from the Rear Entrance tunnel and the front entrance. If you happen to head down the rear entrance tunnel first and talk to Alexander he’ll tell you that he seems to have hit a dead end. There is a door on the back wall of this area but it seems to be locked. When you head into Gael Tunnel via the Caelid entrance, you’ll want to take out the enemies on the wooden platform then descend down the steps into the pit. To the west, you’ll find a pathway down into another lower down pit. There’s another enemy chilling on the wooden platform next to the ladder down. Once you’ve dealt with him, descend down and you’ll find a path that heads through to what appears to be a dead end. There’s actually a door on the back wall, it’s not hidden but it isn’t that obvious at a quick glance. Interact with it to open the door then speak to Alexander, who’s found on the other side. Third Encounter As you progress through Caelid, you’ll eventually meet Alexander just north of the Redmane Castle Plaza Site of Grace in Caelid, to the southeast of the region. If Alexander wasn’t in the Gael Tunnel, he’ll already have moved to this location where you can continue his Quest. Speak with him to learn that he’s here to attend the festival and wishes you luck on the battle ahead. Once the battle with Starscourge Radahn is underway, he’ll be one of the many NPC summons that you can use. You can summon him multiple times and his death in the battle does not impact the Quest. Once Starscourge Radahn is finally defeated, you’ll find him near the Site of Grace where he laments his weaknesses and vows to get stronger. Fourth Encounter Following your encounter at Redmane Castle, Alexander will have begun his journey north. You’ll next find him directly south of the Carian Study Hall Site of Grace in eastern Liurnia of the Lakes, on the higher ground. To reach this, you will need to find the Artist’s Shack Site of Grace and head southeast, you should hear Alexander calling out to you. As you can see, he’s once again found himself stuck in the ground, and wishes for the Tarnished’s assistance again. This time around you’ll need to use an Oil Pot on him before striking him in the back. He’ll thank you and then remark that he’s on his way to forge himself in the strongest fires. Fifth Encounter The fires that Alexander mentioned can be found on Mt. Gelmir, to the northwest of the Altus Plateau. You will need to head along the base of the mountain by heading west from the Wyndham Ruins to reach the Seethewater River and following this to the northwest where you’ll eventually reach Fort Laied. From here, it’s just a short journey to the south where you’ll locate a lava field. As you approach, you’ll be attacked by the Magma Wyrm and once defeated, you’ll find Alexander standing in the fires to the left of the large rock here. You can stand on the ground just in front of him and talk to him from range, so that you avoid taking damage in the lava. This time around, he’ll hand over the Jar, a helmet inspired from Alexander himself. Final Encounter It’ll be some time before you meet with Alexander again, in the game’s penultimate area, Crumbling Farum Azula. Once you reach the area, continue through until you reach the Dragon Temple Lift Site of Grace (you’ll need two Stonesword Keys to gain access). From this Site of Grace, make your way through the plaza, going up the stairs and to your right to spot a fallen structure you can leap over to. Leap to the one on the left and cross over to the other side where Alexander will be waiting after passing over another fallen ruin. He will challenge you to a duel, and should you win, you’ll obtain the Shard of Alexander Talisman along with Alexander’s Innards. Should you be defeated in the duel, you can return here and challenge him as many times as you like until victory is yours. Despite Alexander’s questline coming to an end, you can use Alexander’s Innards to progress Jar Bairn’s Quest at Jarburg in Liurnia of the Lakes. |
|
|||||||||||||||||||||||||||||||||||||||||||||||||||||||||||||||||||||||||||||||||||||||||||||||
|
Blackguard Big Boggart |
Blackguard Big Boggart is an NPC in Elden Ring and is involved in the Quests for Rya and Dung Eater.
Lore
You’re Tarnished too, ain’tcha? Can you see it then? The guidance of grace, I mean. I can’t see it at all no more. Makes no bloody sense anyway, why some no-name shithead like me should get called to the Lands Between. Cruel bloody joke, you ask me.
Location
Info
First Encounter Your first meeting with Blackguard (as he is knwon by at first) is likely to be through the start of Rya’s Quest which is started nearby. She will send you to Blackguard asking to retrieve the Necklace that he stole from her. Blackguard can be found at Boilprawn Shack which can be found a little to the southwest of the Academy Gate Town Site of Grace in the center of the lake in Liurnia (alternatively a little to the northwest from where you spoke to Rya). Once you reach his shack, he admits he has the Necklace and you’re presented with two options. You can either purchase it for 1000 Runes, or you can just choose to kill him, at which point you’ll be able to loot the Necklace from his body. It should go without saying but avoid killing him at all costs should you wish to progress and complete his Quest, this operates independently of Rya’s and is heavily related to Dung Eater’s Quest. Upon agreeing to buy it, you’ll gain access to his Shop, although the only other item he offers is Boiled Prawn, a useful consumable that will boost physical negation for a short time. You’ll need to purchase at least one for him, to progress his Quest as he remarks that anyone with a taste for prawns is someone he can trust, striking up a friendship with him. This will allow you to summon him for the Magma Wyrm Makar Boss in the Ruin-Strewn Precipice dungeon. Second Encounter Once you reach Altus Plateau, head to the northeast of the city and you’ll find yourself in the Capital Outskirts. From the first Site of Grace in the city, Capital Rampart, exit outside to the northeast and follow the path down to the water below, to the west you’ll find Blackguard has set up camp. Speak with him and you’ll learn that he’s selling Boiled Crabs now, which are a better version of the Boiled Prawns he sold before. Exhaust his dialogue here and he’ll mention about the time he spent with Dung Eater in prison, remarking that you should steer well clear of him. Final Encounter You must now progress Dung Eater’s Quest until he mentions that he will be waiting for you in the outer moat. Return to Blackguard and exhaust his dialogue to learn that he believes Dung Eater is somewhere nearby. Refresh the area and you’ll find a wounded Blackguard who begs for his death, oblige and you’ll be able to obtain a Seedbed Curse, Blackguard’s Bell Bearing, Iron Ball, and Blackguard’s Iron Mask. You’ll also be invaded by the Dung Eater here, defeat him and you’ll obtain the Sword of Milos and progress his Quest. |
||||||||||||||||||||||||||||||||||||||||||||||||||||||||||||||||||||||||||||||||||||||||||||||||

|
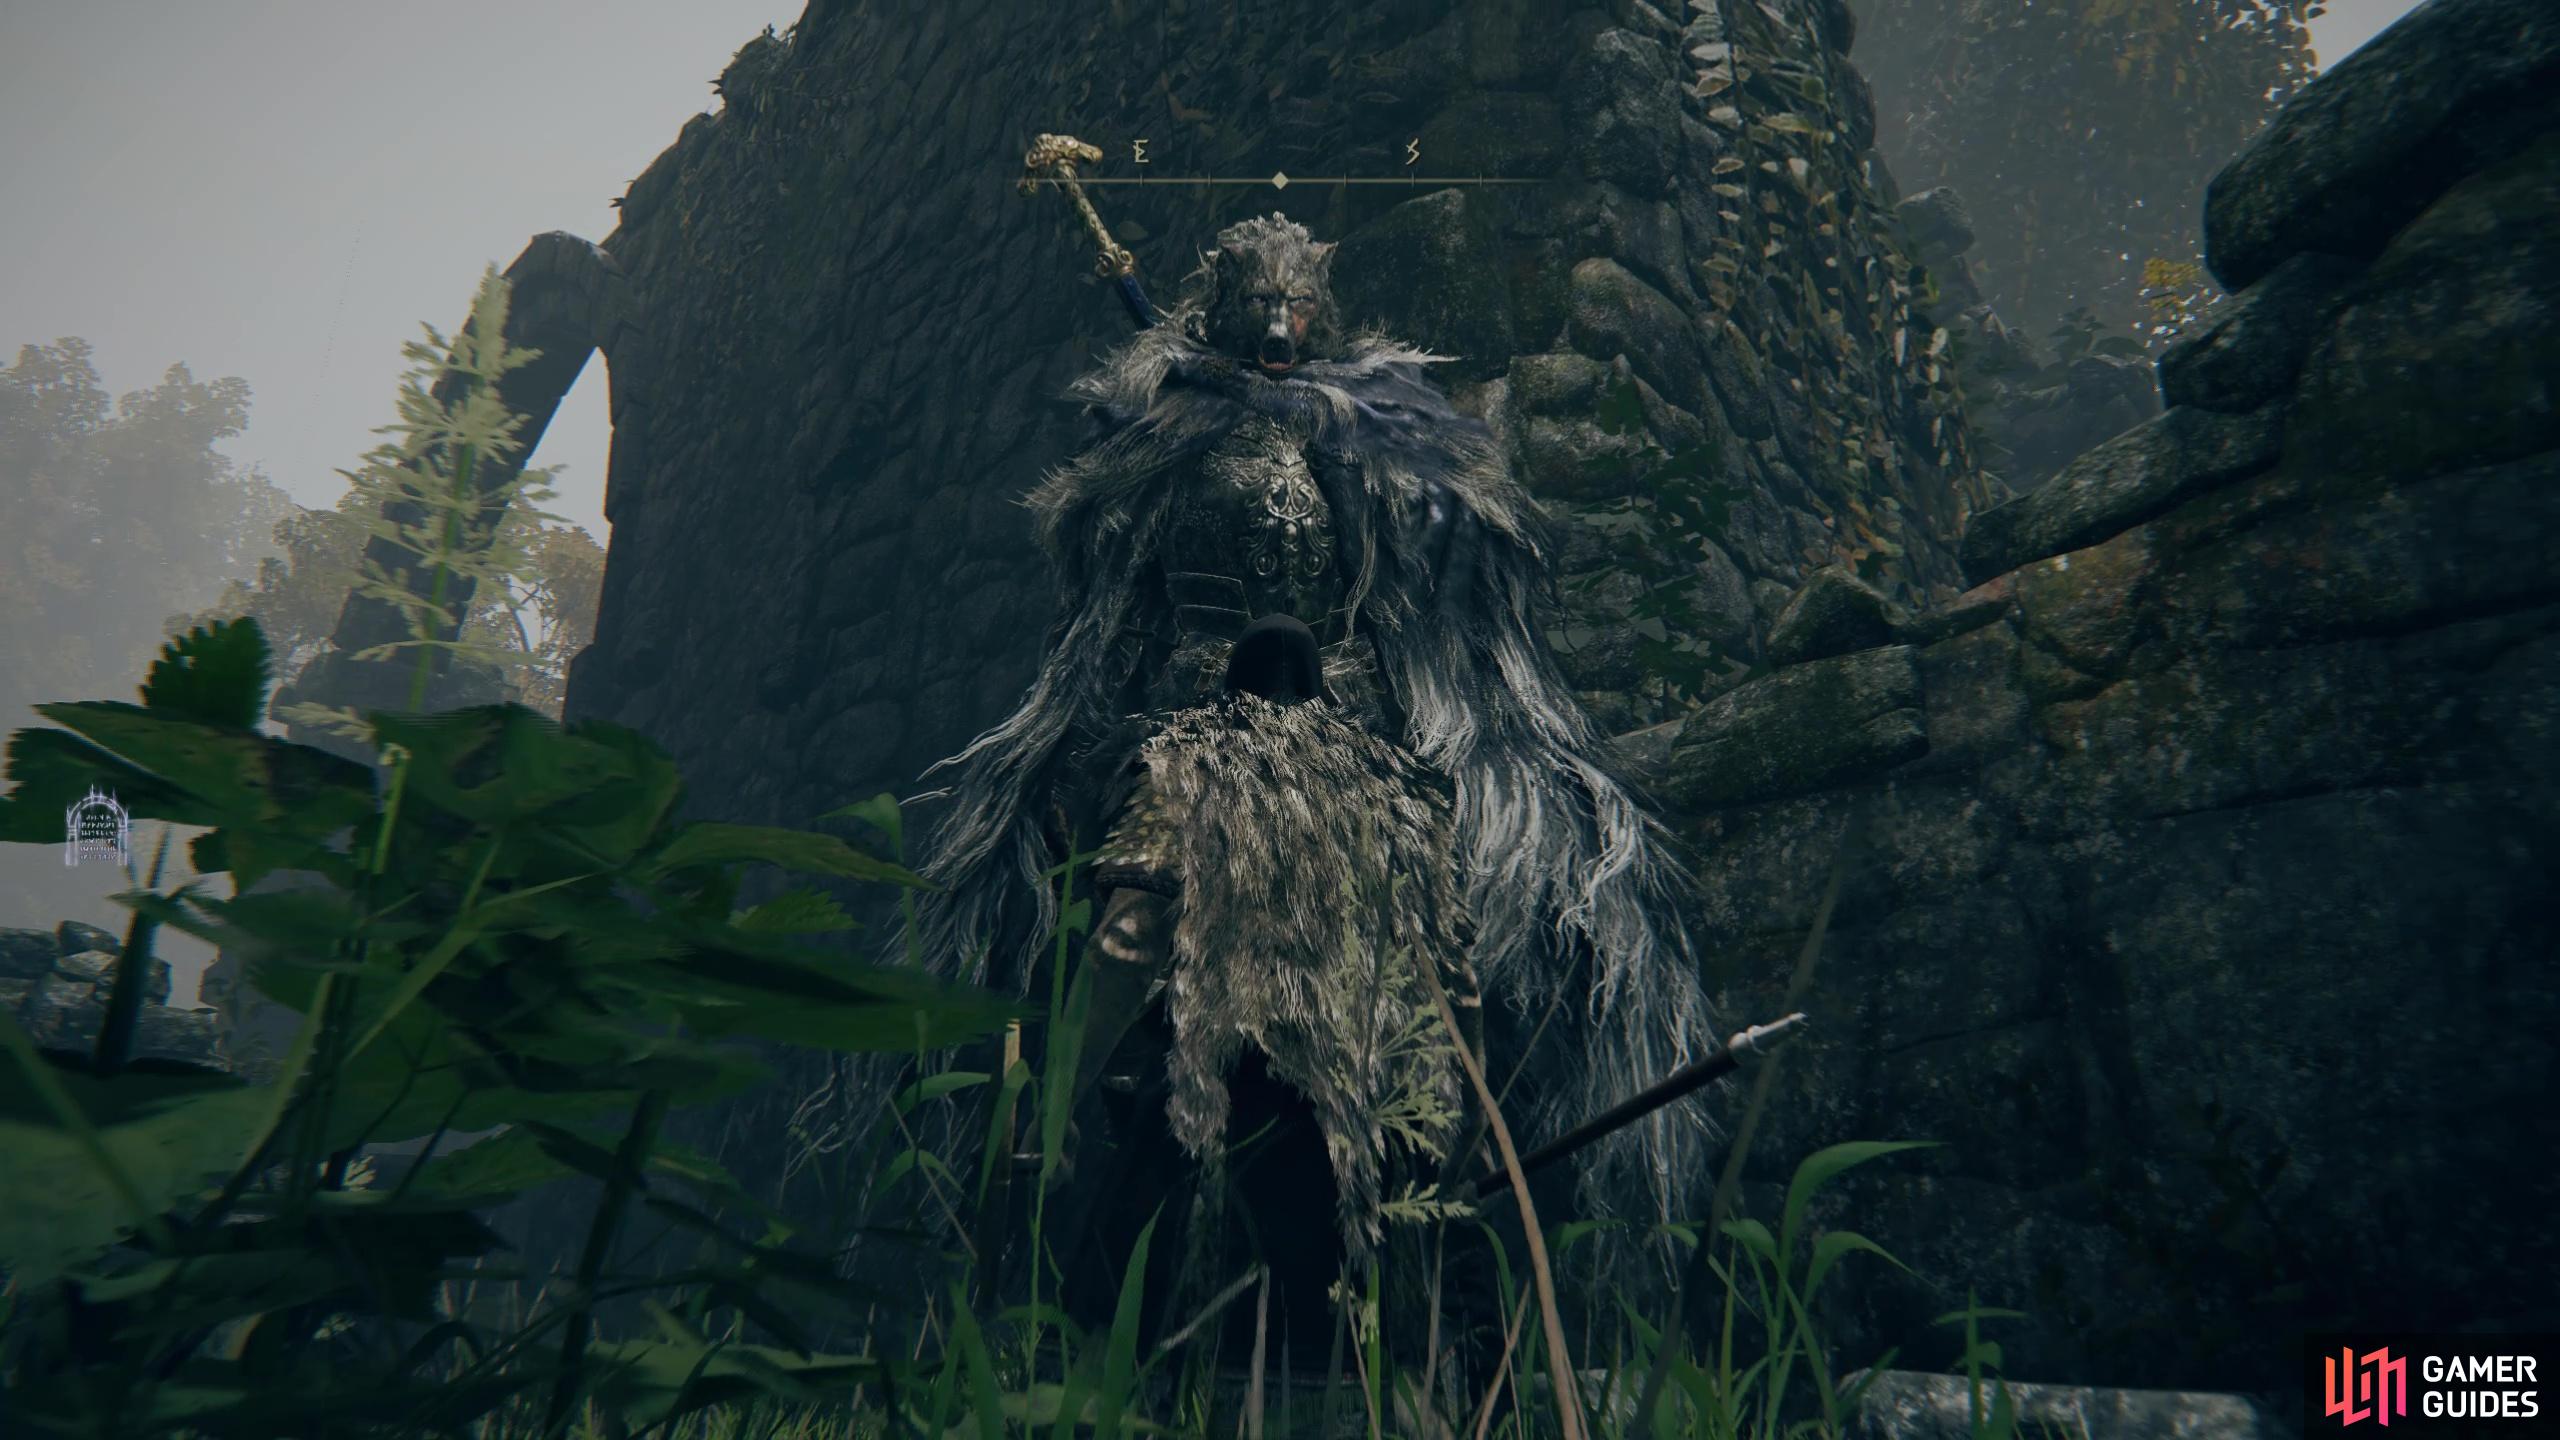
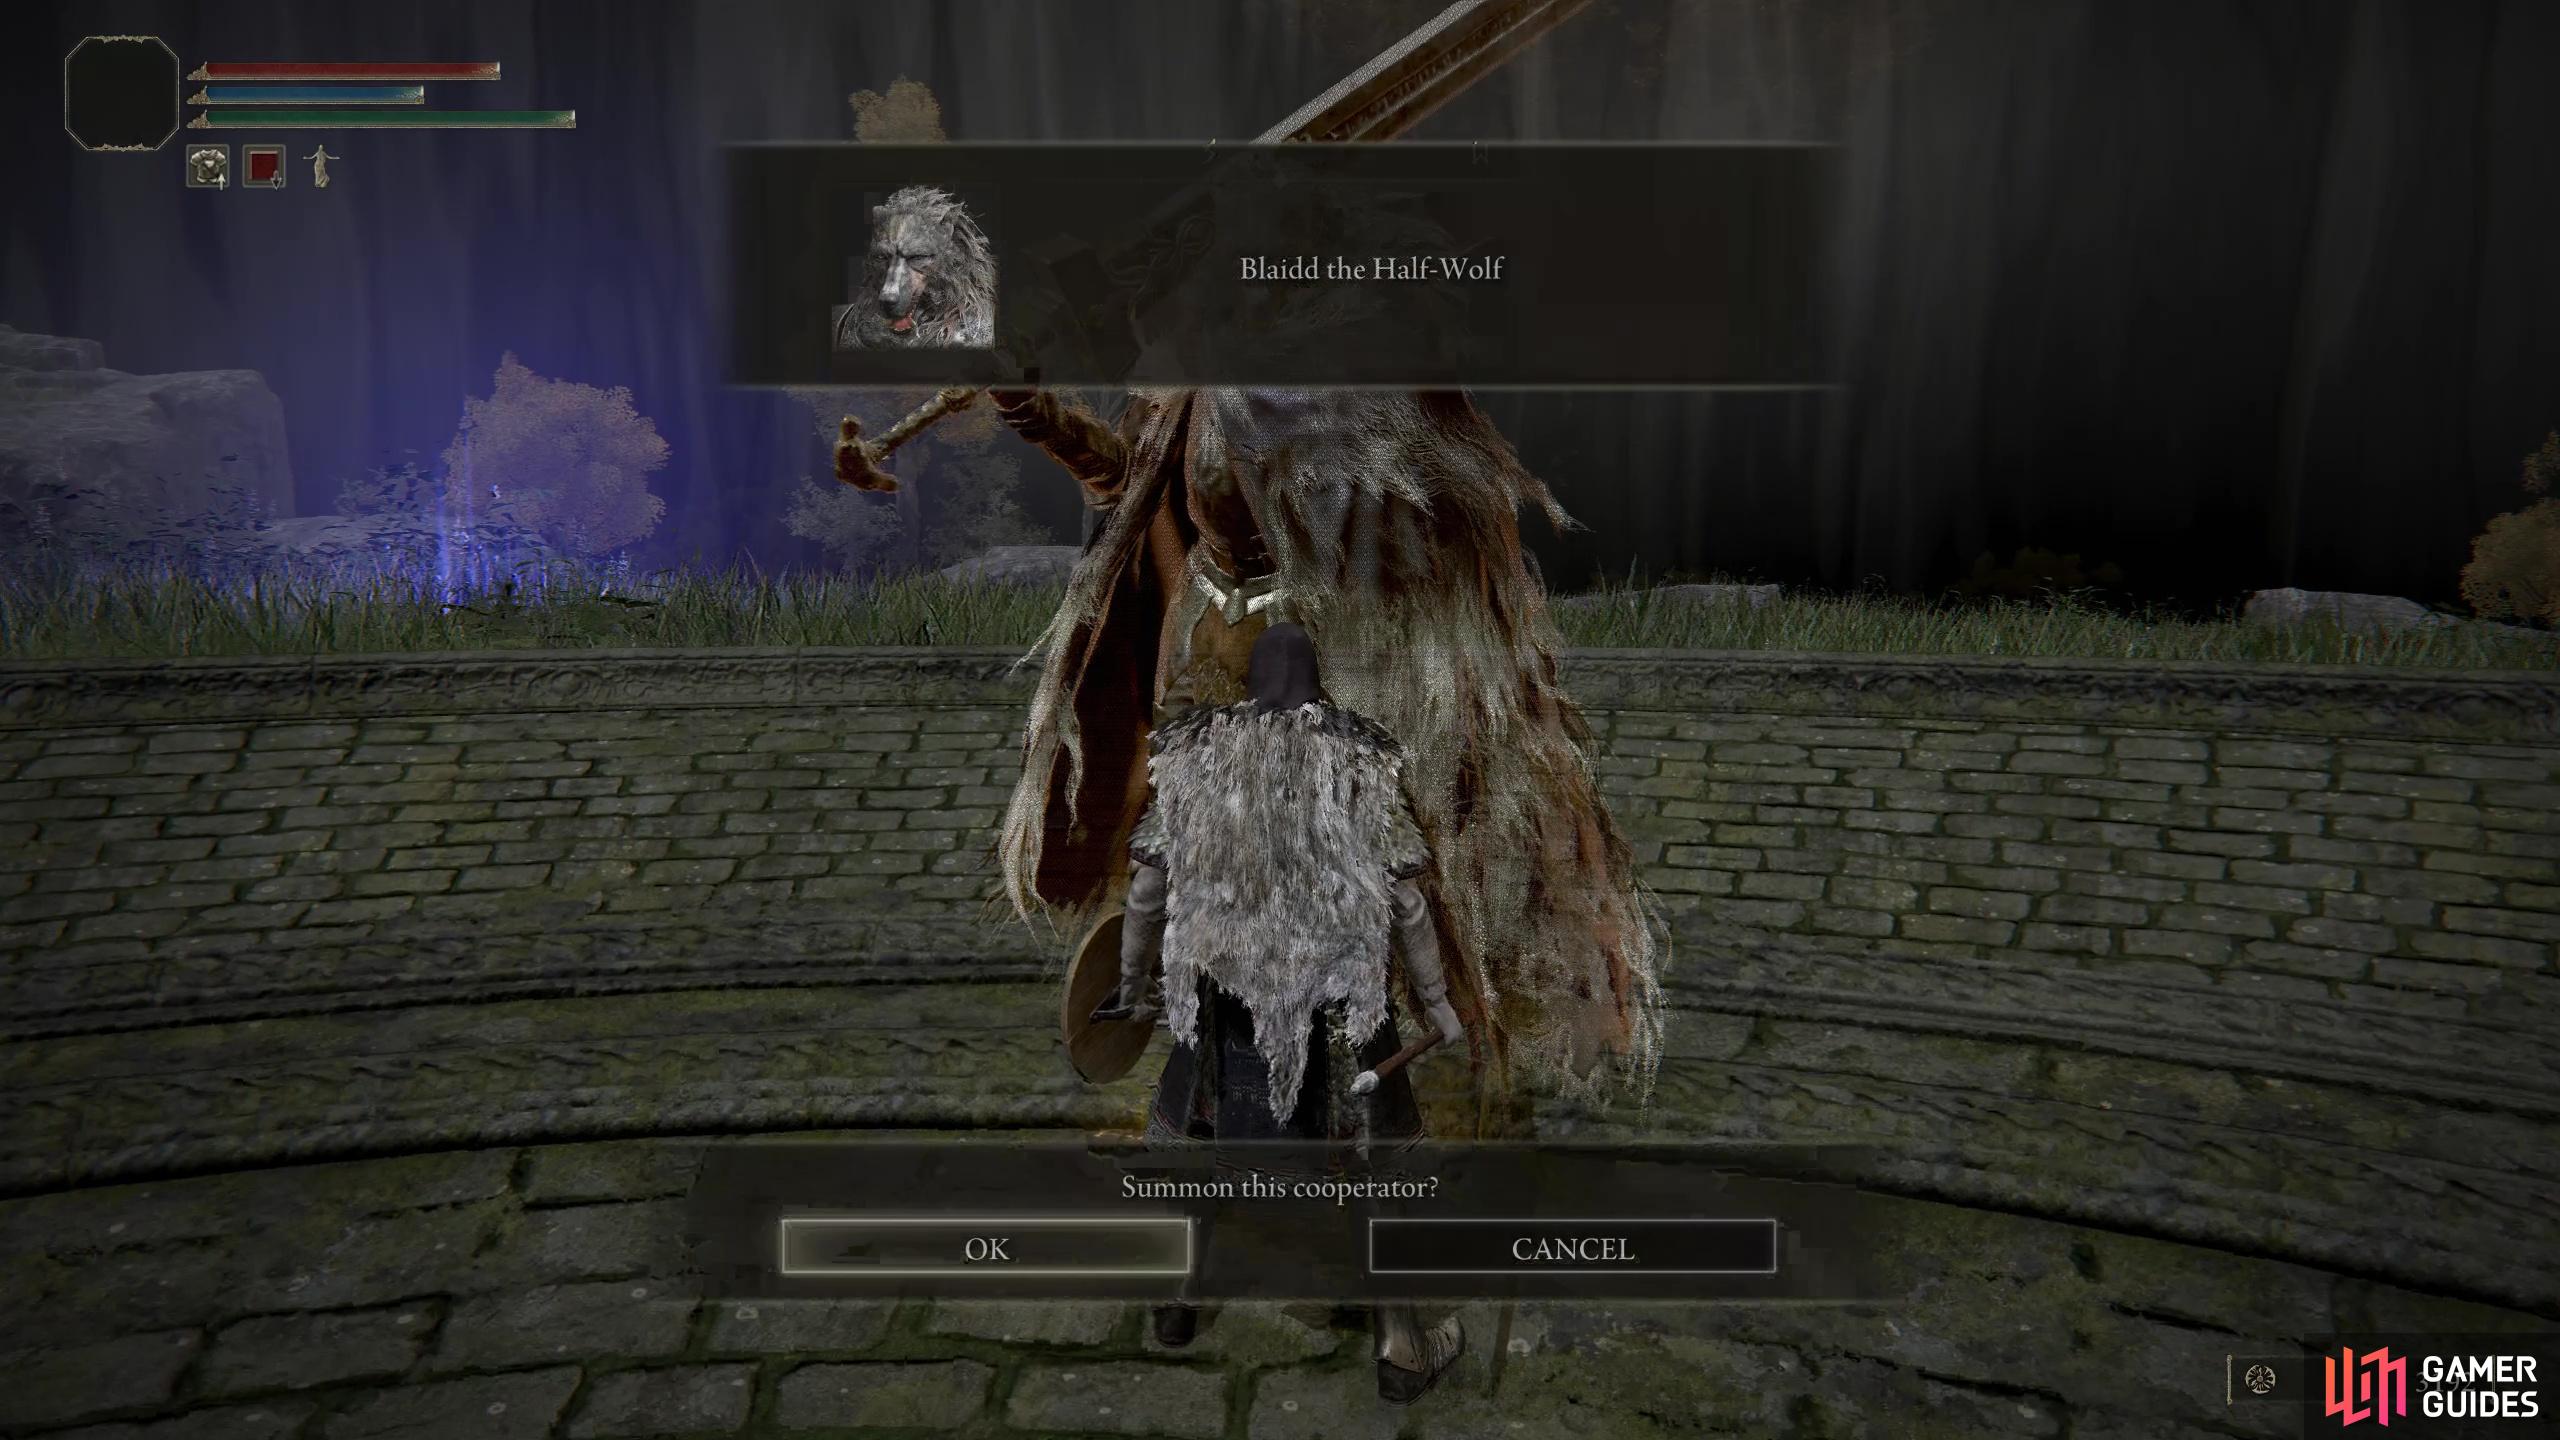
Blaidd |
Blaidd is an NPC in Elden Ring and is involved in a lengthy Quest with Ranni the Witch that awards an alternate ending.
Lore
*Who goes there? Kalé send you, did he? Ever the bloody busybody.
Location
Info
First Encounter The first thing you’ll need to do is head to Mistwood Ruins, which can be found north of Fort Haight. As you approach the ruins, you’ll hear some howling. At this point, head to the Church of Elleh and talk to Merchant Kalé. He’ll give you the Finger Snap emote and tell you to use it where you heard the howling. Head back to the Mistwood Ruins and use the Finger Snap emote. Blaidd will jump down from the ruins, allowing you to speak to him. If you can’t find him at first, walk around the ruins, and you should see him as Blaidd is a tall imposing figure, half man, half wolf. During your conversation with him, he’ll mention that he’s looking for someone who goes by the name of Darriwil. Second Encounter Remember that Blaidd told you that he was looking for Darriwil? Well now is the time to find him. Darriwil can be found in the Forlorn Hound Evergaol which is situated right at the southern tip of Limgrave. The nearest Site of Grace to it is the Agheel Lake South. From there, follow the southwest path until you see a circular stone floor with a blue glyph in the center. Interact with the blue glyph to enter an arena of sorts. Right next to the glyph you’ll notice a gold summon sign, this will summon Blaidd for the upcoming boss, Darriwil. Once Blaidd has appeared in your game, approach the edge of the arena where you’ll see a faint blue line, this’ll make Darriwil appear. Once he’s defeated, speak to Blaidd again, and he’ll reward you with a Sombering Smithing Stone [2]. Talk to him a second time, and he’ll tell you about a blacksmith in Raya Lucaria, and that you should mention his name if you meet him. Third Encounter You’ll next meet a projection of Blaidd at Ranni’s Rise, located just behind Caria Manor. He will suggest that you meet with him in Siofra River in the attempts to locate a way to Nokron. You’ll find the entrance to Siofra in eastern Limgrave and heading northeast from the Fort Haight West Site of Grace. Once in Siofra River, make your way down to the Siofra River Bank Site of Grace and head east under the aqueduct to locate Blaidd. He’ll suggest that it’s time to pay Seluvis another visit and see if there’s more information that he’s not sharing. Return to Blaidd in this location once more after speaking with Seluvis at Seluvis’s Rise and Blaidd will inform you that he’s moving on to Redmane Castle, for the festival. Fourth Encounter Your next encounter with Blaidd will take place in Redmane Castle Plaza in Caelid, just before the boss battle against Starscourge Radahn. Speak to him and he’ll learn that he cut open a path to the plaza for you (hence the reason the castle grounds were so devoid of any enemies). Once you head into the battle with Starscourge Radahn, Blaidd will be one of the many NPCs you can summon to help against him. When Radhan finally falls, you’ll trigger a cutscene showing the way to Nokron is now open. Head over to Radhan’s Site of Grace and speak with him, he’ll remark that the way to Nokron is finally open. Fifth Encounter This fifth meeting with Blaidd is entirely optional, but one well worth pursuing to learn more about how Blaidd relates to Ranni and his relationship with Iji. Return to the Forlorn Hound Evergaol in Limgrave and you’ll hear his voice, at which point you can head to the seal and release him. Return to Iji now to learn why he placed Blaidd in the Evergaol and the threat he poses to Ranni. Final Encounter You’ll have to wait until you see Ranni’s Quest to its completion for your final encounter with Blaidd. By now, you should be well aware of Blaidd’s relation to Ranni, so it’s no surprise that when you return to Ranni’s Rise that you’ll find a Blaidd on the cusp of madness. There’s nothing you can do for him here, and a battle is an inevitable outcome. Bladd attacks a lightning pace despite his stature and his weapon skill, Wolf´s Assault will deal massive Frost damage in the area that he lands. Once Blaidd is defeated, he’ll drop the Royal Greatsword, along with his Armor Set minus the helm. To locate this, head down to Seluvis’s Rise and look the right of the tower entrance to find a thin wall you can climb up, the Black Wolf Mask can be found behind the tower up on this wall. |
|
|||||||||||||||||||||||||||||||||||||||||||||||||||||||||||||||||||||||||||||||||||||||||||||||
|
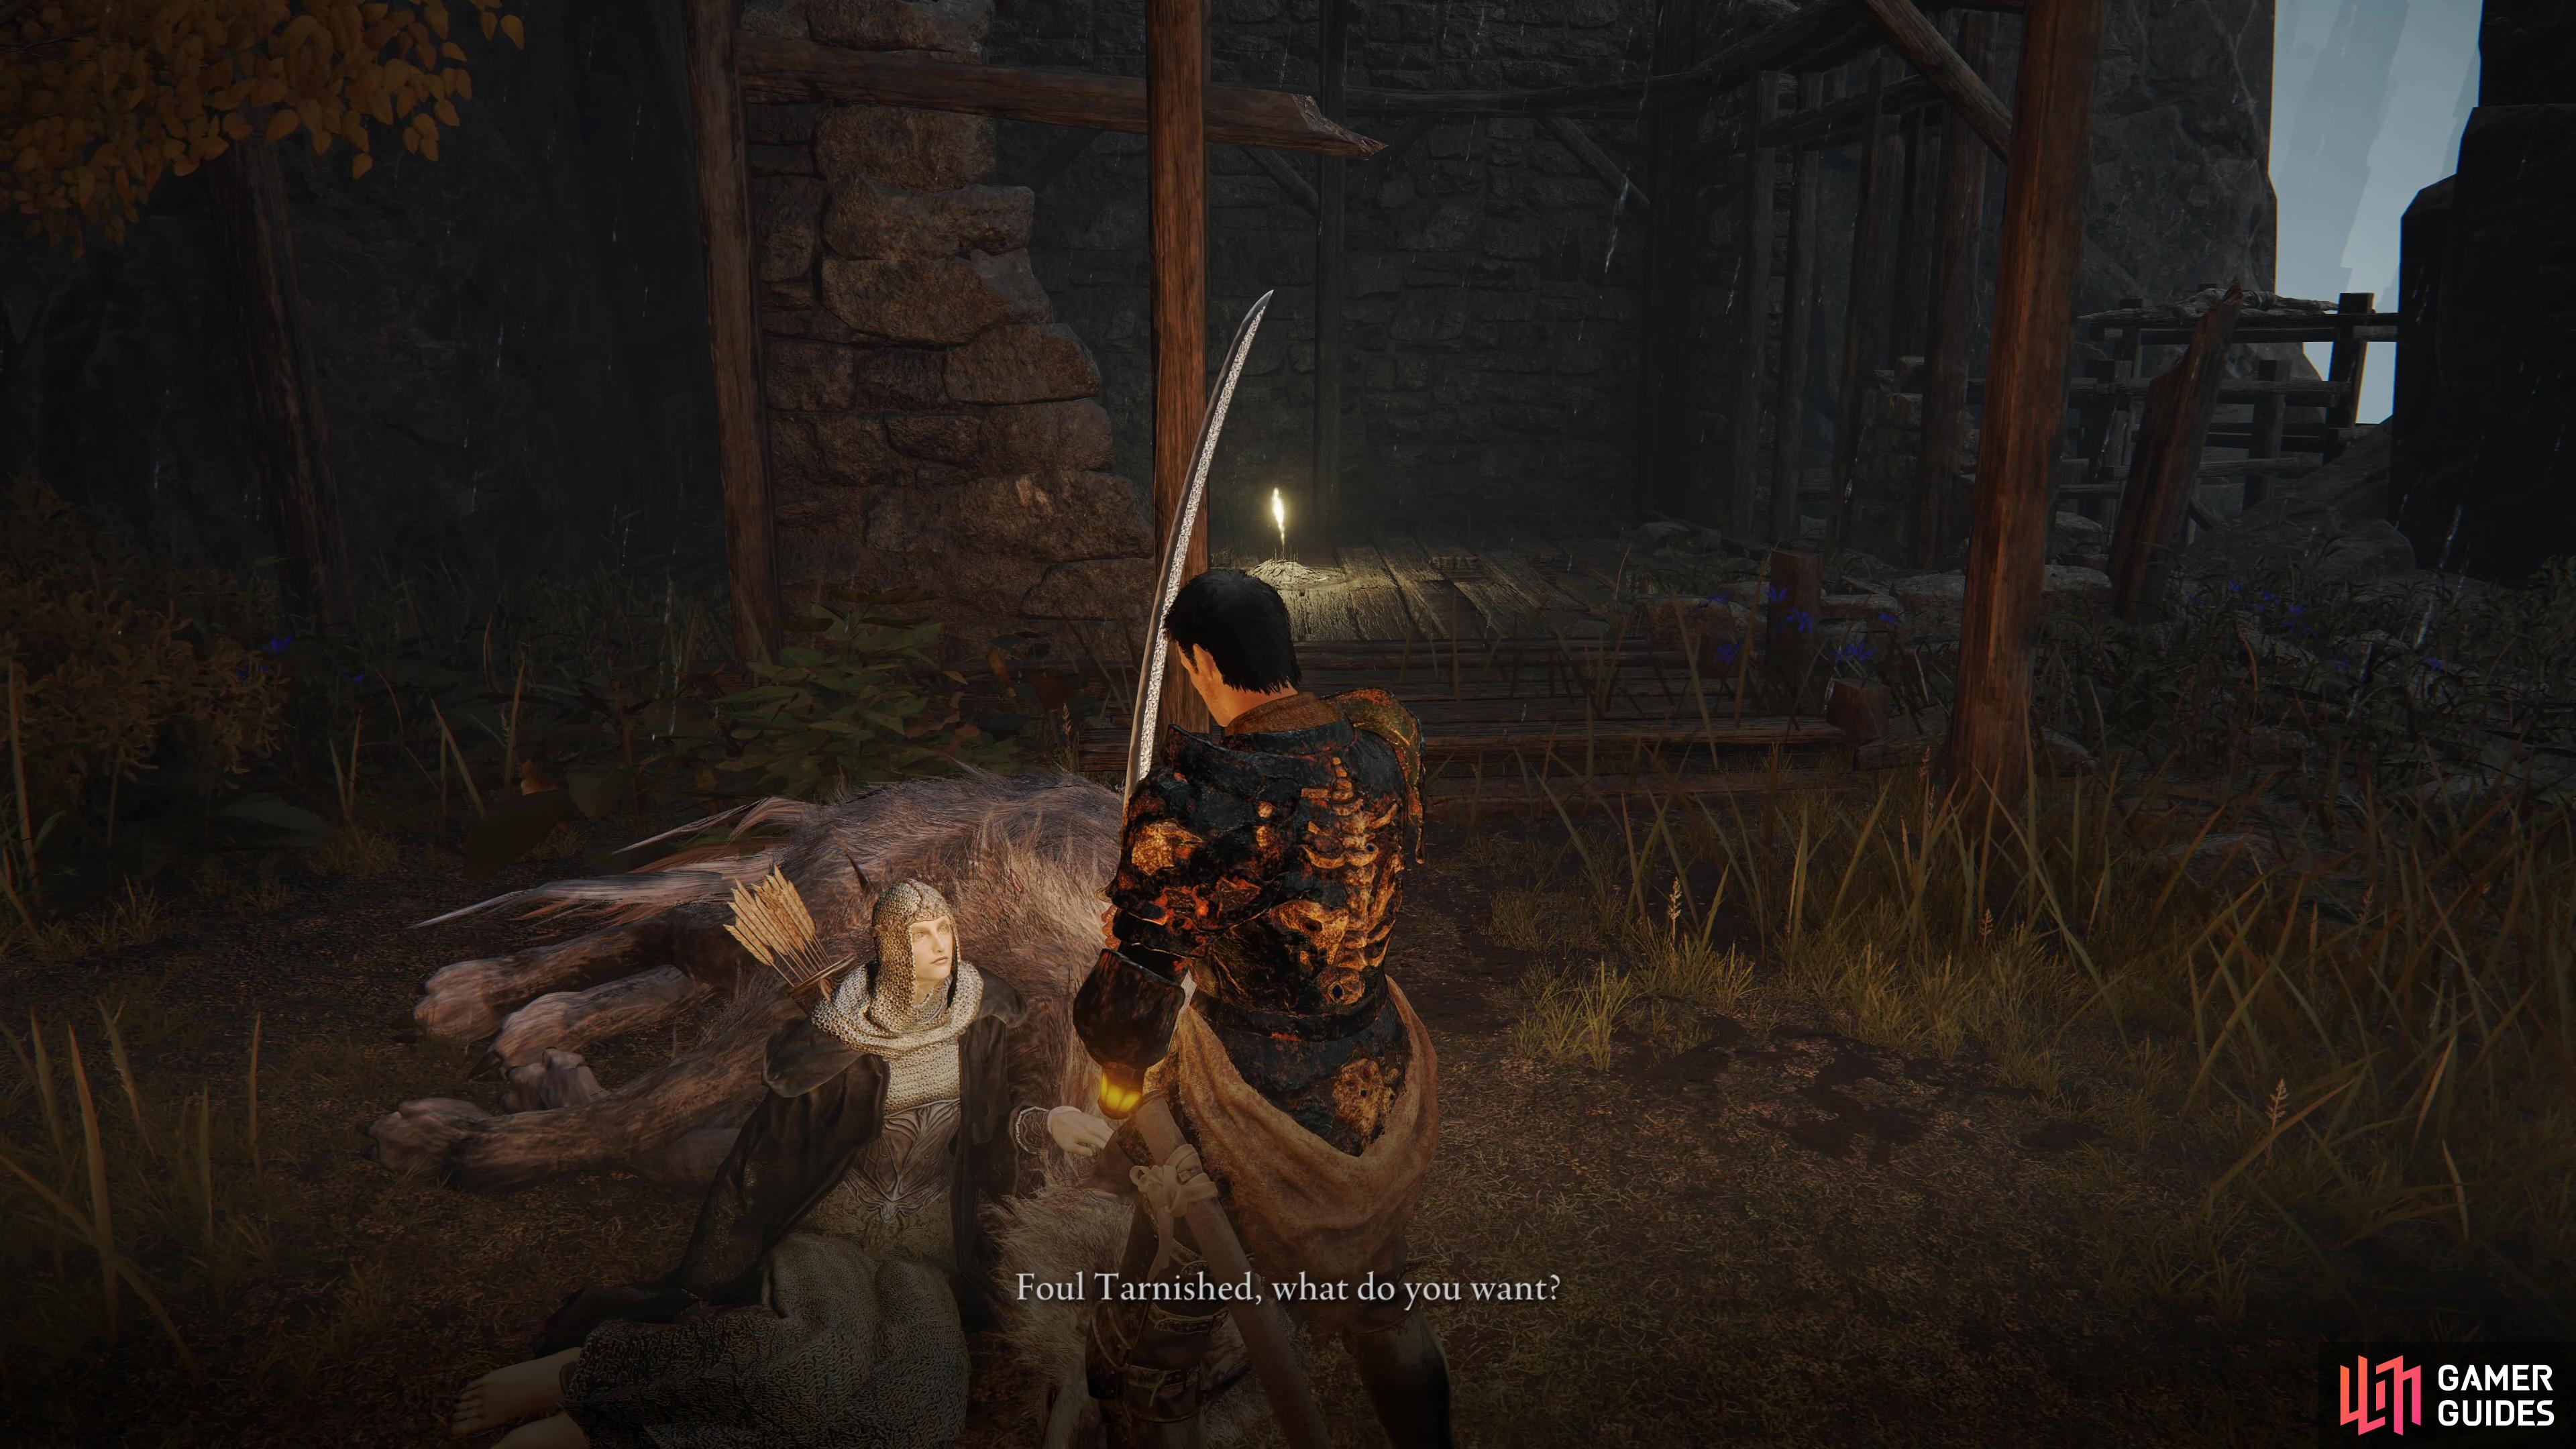
Bloody Finger Hunter Yura |
Bloody Finger Hunter Yura is an NPC in Elden Ring. He is a hunter of Bloody Fingers and possess knowledge of the Dragon Cult.
Lore
Be on your way. Perhaps we will meet again, if fate permits
Location
Bloody Finger Hunter Yura can initially be found under an overpass directly northeast of Seaside Ruins in southern Limgrave.
Info
|
|
|||||||||||||||||||||||||||||||||||||||||||||||||||||||||||||||||||||||||||||||||||||||||||||||
|
Diallos |
Diallos is an NPC in Elden Ring, whom you will first meet in the Roundtable Hold. He appears to be a Knight of the House Hoslow.
Lore
Ah, hello. You must be new here. I’m… Well, just call me Diallos.
Location
Info
First Encounter Diallos can be found standing near the path leading to the balcony when you set foot in the Roundtable Hold for the first time. Second Encounter Once you reach the Liurnia region after finishing up Stormveil Castle, Diallos will vanish from the Roundtable Hold as he goes to search for Lanya himself. You can find both him and Lanya’s corpse northwest of the Academy Gate Town Site of Grace and he remarks about a particular house. You can learn more about how to complete Diallos’ Quest here. |
|
|||||||||||||||||||||||||||||||||||||||||||||||||||||||||||||||||||||||||||||||||||||||||||||||
|
Edgar |
Lore
Ah, there’s a face I’ve not seen before. I’m Edgar, warden of this castle as ordained by Lord Godrick himself.
Location
Info
First Encounter The start of Edgar’s Questline doesn’t start with him, but with his daughter Irina, who you will find just south of the Bridge of Sacrifice Site of Grace in the Weeping Peninsula. She’ll recount the state of affairs in Castle Morne to the south, and inform you that her father, as commander, will not leave his post. Instead, she offers you Irina’s Letter to deliver to him. Once you reach Castle Morne to the south, take the lift up and from the the courtyard, head past the Pumpkin Head and around the corner to find a ladder leading up. Dispatch the enemies up ahead and then climb down the ladder to your left to find another set of enemies. At the end of this pathway are some stairs leading up, where you’ll find Edgar. At first he will lament about the dire situation at Castle Morne, and hand over a Sacrificial Twig. Speak to him again though and you’ll be given the option to hand over the letter, at which point he remarks that he cannot leave until Leonine Misbegotten falls and retrieves the sword, but he’ll head for his daughter after. At this point, make a quick detour to check up on Irina and you’ll discover her cruel fate. Second Encounter Return to Edgar’s location after defeating Leonine Misbegotten and he will thank you for helping him fulfill his duty, allowing him to go reunite with his daughter, Irina. Third Encounter As you’re well aware of Irina’s fate, return to the Bridge of Sacrifice Site of Grace and head to where Irina’s body is. You’ll find the grief-stricken Edgar there, swearing vengeance against those who harmed her. Final Encounter Once you reach the region of Liurnia, you’ll find an isolated shack on the western side of the region named Revenger’s Shack. As you attempt to interact with the Site of Grace here, Edgar the Revenger will attack as an Invader. Defeat him and he will drop the Banished Knight’s Halberd +8 along with a Shabiri Grape. There is no way to avoid Edgar from becoming an Invader following the death of Irina, this is the sad conclusion to the Irina and Edgar Questline. |
||||||||||||||||||||||||||||||||||||||||||||||||||||||||||||||||||||||||||||||||||||||||||||||||
|
Ensha of the Royal Remains |
Ensha of the Royal Remains is an NPC in Elden Ring. He has no dialogue in the game, and serves as the bodyguard to Gideon Ofnir, forever standing guard outside his room.
Lore
Ensha got rather ahead of himself, it seems.
Location
Info
First Encounter Your first encounter is actually, a non-encounter, Ensha has little interest in speaking to you (in fact, Ensha will never speak to you) and instead will bestow the Gesture, What Do You Want?. There’s not much else you can do with Ensha for now, as Ensha will refuse to speak or even acknowledge the Tarnished for now. Second Encounter Once you’ve explored Liurnia of the Lakes, and have met Albus the Albinauric, he’ll eventually hand over the Haligtree Secret Medallion (Right), an important item needed to reach an entirely optional area. With this in hand, prepare yourself and travel back to Roundtable Hold, you’ll discover everything is not as it seems. You’ll be immediately invaded by Ensha of the Royal Raiments, who will immediately attack you. You cannot avoid this battle, and Ensha’s storyline has no other outcome so take the fight to him! Once defeated, you’ll obtain the Clinging Bone weapon along with being able to loot the Royal Raiment Armor Set. If you speak to Giden following Ensha’s demise, you’ll learn that he believes that Ensha overstepped his boundaries, bringing a close to this tale. |
||||||||||||||||||||||||||||||||||||||||||||||||||||||||||||||||||||||||||||||||||||||||||||||||
|
Fia |
Fia is an NPC in Elden Ring and is involved in a lengthy Quest that is a requirement for the Age of the Duskborn Ending.
Lore
Greetings, great champion called by grace. I am Fia.
Location
Info
First Encounter You’ll be able to have your first encounter with Fia when you set foot in the Roundtable Hold for the first time. You’ll find her in a side room, just beyond Smithing Master Hewg. Once inside, she’ll ask to embrace the Tarnished, doing so will reward you with a Baldachin’s Blessing which, when used, will increase your Poise. You can only hold one of these at a time, but you can return to her for another helping whenever you use your current one. Second Encounter After Rogier returns to the Roundtable Hold after the events of Stormveil Castle, exhaust his dialogue and then pay Fia a visit to be held once again. This time you’ll be able to ask her something and she will give you more information on Rogier’s conundrum and will hand over a note that details where you can find the Black Knifeprint. Follow Rogier’s Questline until you obtain the Black Knifeprint and then return to Fia to speak to her. Third Encounter The next step can be tricky to activate, but it seems that you can trigger it by obtaining at least two Great Runes and have used the Grand Lift of Dectus to reach the Altus Plateau. With this done, speak to Fia and ask her to hold you and this time, you’ll be able to speak to her and she will hand over the Weathered Dagger, asking you to find the owner. This owner is D, head over to him and hand it to him and he will remark that he knows who it belongs to and requests that you leave it with him. At this point, you’ll need to refresh the Roundtable Hold by resting at the Site of Grace and then when you head towards Smithing Master Hewg, you’ll notice the door at the back is now open. When you head inside, you’ll spot D on the ground, dead, with Fia standing over him. Once Fia vanishes, you’ll be able to head over to his body to collect his Bell Bearing along with the Twinned Set. Keep hold of this set and be sure that you don’t alter it, it’s required to advance the Quest of D’s Twin Brother. Fourth Encounter You’ll need to find your way down to the Deeproot Depths for your next meeting with Fia. You can do this by heading through Siofa River and defeating the Valiant Gargoyle & Valiant Gargoyle (Twinblade) Boss just beyond the Aqueduct-Facing Cliffs Site of Grace. Once they’re defeated, you’ll find a coffin that you can ride in to reach Deeproot Depths. Once in here, progress through the area until you take the roots up to the north where you reach the Across the Roots Site of Grace. Just beyond here is a large open area and as you head forward, you’ll be thrust into a battle against Fia’s Champions, a simple battle that shouldn’t pose a threat. Once the battle is finished, go over and speak to and have her hug you once again to reveal that she’s looking for the Cursemark of Death. This can be obtained by progressing Ranni’s Quest so go ahead and progress through that until you obtain the Cursemark (if you already have this, you can hand this over right away by resting at the Site of Grace). Hand over the Cursemark of Death and speak with Fia and she’ll hand over a Radiant Baldachin’s Blessing. Exhaust her dialogue and rest at the Site of Grace to find her resting, speak with her and she’ll let you enter Godwyn’s dream to fight Lichdragon Fortissax, a fearsome battle against a deadly dragon. Emerge victorious and you’ll be able to obtain the Mending Rune of the Death-Prince, this is required for The Age of the Duskborn Ending. If you’ve advanced D’s Twin Brother’s Quest by handing him the Twinned Set, reload the area by resting at the Site of Grace and you’ll be able to obtain Fia’s Armor Set. Reload once more and you’ll find D’s Twin Brother standing over Fia, reload again and you’ll be able to reacquire the Twinned Set and the Inseparable Sword as a final reward of this Questline. |
||||||||||||||||||||||||||||||||||||||||||||||||||||||||||||||||||||||||||||||||||||||||||||||||

|
Finger Reader Crone |
Finger Reader Crones are NPCs in Elden Ring that are elderly women that hold staves with bells attached to the tips. They have the gift of foresight and can provide telling vague hints about the future. Whenever they come across the Tarnished, they become excited and ask if they could read their fingers. Enia at Roundtable Hold is a Finger Reader.
Lore
You, please, I can read them. Your fingers, please, your fingers…
Location
Finger Readers can be found at the following locations:
|
||||||||||||||||||||||||||||||||||||||||||||||||||||||||||||||||||||||||||||||||||||||||||||||||
|
|
Frustrated Spirit | |||||||||||||||||||||||||||||||||||||||||||||||||||||||||||||||||||||||||||||||||||||||||||||||||
|
Gideon Ofnir |
Gideon Ofnir is an NPC in Elden Ring and is involved in a Quest that will see you rewarded for some of your discoveries.
Lore
You’ve received the wisdom of the Two Fingers, have you not? Then, just as promised, I bid you welcome, as a true member of the Roundtable.
Location
Info
First Encounter You’ll be able to have your first encounter with Gideon Ofnir when you set foot in the Roundtable Hold for the first time. You will find him standing by the hearth and to begin with, he won’t even offer you his name as refuses to accept you as anything more than all the other Tarnished that pass through the Hold. Leave the Hold however, and return once more to find that Gideon has retreated to his room, located down the path near Brother Corhyn and where Ensha stands guard outside. Head inside the room and he will agree to give you more information, and accept as you a Knight of the Hold if you can track down and kill one of the Elden Lords, namely Godrick the Grafted at Stormveil Castle. Second Encounter Once you have successfully defeated Godrick the Grafted, return to the Roundtable Hold only to find that Gideon Ofnir has closed his door to you. In order to progress his storyline, you’ll have to first speak to his daughter, Nepheli Loux, who you will first meet just before you fight Godrick at Stormveil Castle. After speaking with her, head into the room to speak with Gideon (you must first speak with Enia in the new accessible room for Gideon to reopen his doors) and he will impart knowledge of all the Demigods for you. For now, Gideon will serve this role as the All-Knowing. Third Encounter Upon defeating your second Lord, return to Gideon and he will offer some insight on where to go next. More importantly, you can ask him about his feelings towards Nepheli Loux, of which he remarks that she has not been of use to him. You can head between the two to keep the dialogue going, but this ends in Nepheli feeling like she’s been cast out. Around this time, if you’ve been following the Preceptor Seluvis Quest, you may have a potion that he has tasked you with giving to Nepheli. To avoid any negative outcomes to Nepheli (or later, Dung Eater’s) Quest, you can opt to give the potion to Gideon, who will take it off your hands and asks that you lie to Seluvis that you handed it over. This is the best outcome for the Potion as all other outcomes will end that person’s Quest. Fourth Encounter Once you’ve ventured through Leyndell, Royal Capital and defeated Morgott, the Omen King, return to the Roundtable Hold and speak with Gideon once more. He’ll disclose the location of other Shardbearers and will begin providing rewards for your progress, these are as such:
Final Encounter Your final meeting with Gideon takes place in the final moments of the game. Once you’ve finished the events at Crumbling Farum Azula and return to Leyndell, head forward towards the Erdtree Sanctuary and you’ll be greeted by Gideon only this time, there will be no friendly conversation. You’ll be thrust into a battle against Sir Gideon Ofnir, The All-Knowing, a required boss battle. This should be a relatively simple battle at this stage of the game and for victory you’ll obtain the All-Knowing Set and the Scepter of the All-Knowing. |
|
|||||||||||||||||||||||||||||||||||||||||||||||||||||||||||||||||||||||||||||||||||||||||||||||
|
Goldmask |
Goldmask is an NPC that can be found in various locations and he is also part of Brother Corhyn’s Questline.
Location
Goldmask can be found in the following locations:
Info
Location
1×
|
Humanoid |
|||||||||||||||||||||||||||||||||||||||||||||||||||||||||||||||||||||||||||||||||||||||||||||||
|
Hyetta |
Hyetta is an NPC in Elden Ring and is involved in a Quest that is related to one of the game’s endings.
Lore
Hello? Is someone there? My name is Hyetta, and I’m journeying in search of the distant light.
Location
Info
First Encounter Before you can even get started with this Quest however, you must see Irina’s short Quest in Weeping Peninsula to its conclusion. Once you’ve achieved this, head to the Lake-Facing Cliffs Site of Grace at the entrance to Liurnia of the Lakes and refresh the area. You’ll find Hyetta here and after exhausting her dialogue, you’ll learn she’s on a journey and on the lookout for Shabriri Grapes. For this first encounter, you may already have your first Shabriri Grape, heading north from the Godrick the Grafted Site of Grace in Stormveil Castle, follow the path towards Liurnia and you should come across a spirit near an item, this item is your first grape. With it in hand, return to Hyetta and hand it over, she’ll thank you and teach you the As You Wish Gesture. Then, after you rest at the nearby Site of Grace, will move on to her second location in Liurnia. Second Encounter You’ll next find Hyetta by following the northeast of Liurnia until you reach the Liurnia Highway South and start heading northwest to reach the Purified Ruins. Head to the far west here, close to where the lake begins and you’ll find Hyetta once more, who wishes for another Shabriri Grape. This second Grape can be found nearby, head northeast to the other part of the ruins here and you’ll need to deal with a large group of soldiers. Once they’ve been dispatched off, head into the main area here and you should see some planks on the ground. Roll into these to break them and find some stairs leading down to the second Shabriri Grape and the Two Fingers Heirloom. Return to Hyetta, hand it over, and exhaust her dialogue once more to have her move on to her next location. Third Encounter For the next Shabriri Grape, you’ll need to go to a different location than Hyetta, but do head north from your current location and activate the Gate Town Bridge Site of Grace, it will save some travel time later. Once you’ve done this, you’ll need to head to western Liurnia and head just north from from the Minor Erdtree here to discover the Revenger’s Shack Site of Grace. Prepare yourself, rest at the Grace and then enter the shack to be invaded by Edgar the Revenger, your final meeting with Edgar from Weepining Peninsula. Defeat him and you’ll obtain your next Shabriri Grape among other goodies. Return to the Gate Town Bridge Site of Grace and Hyetta can be found just to the north of it. Hand over the latest grape and when given the choice, inform her of what the grapes really are. After reeling, and then thanking you, rest at the Site of Grace and speak with her again, exhausting her dialogue options. Rest once more at the Site of Grace following this and she’ll move on to her next location. Fourth Encounter You’ll next run into Hyetta at Bellum Church, to the north of Liurnia. You can best access this by heading north along eastern Liurnia, following the road until you reach the Ruined Labyrinth Site of Grace. From here, start heading northwest and drop down (using the tombstones on the edge of the cliff) to the land (but not the lake) below you. From here it’s just a short trip to the northwest through the trees to reach Bellum Church where you’ll meet Hyetta once more. This time, she requests a Fingerprint Grape. To find this grape, head northeast from the Church of Bellum and then as you approach the Grand Lift of Dectus, head southeast and climb up a little to find the Frenzied Flame Village on your left. Before heading any further, head towards the tower on your left and defeat the Maniacs at the top to stop the constant buildup of Madness in this area. Next, head northwest here and you’ll eventually reach the Church of Inhibition where Festering Fingerprint Vyke will invade. Be sure to have protection against Madness and defeat Vyke to obtain, among other loot, the Fingerprint Grape. Return to Hyetta and hand it over to her for her to come to the conclusion that she must become a Finger Maiden, after which you should rest at the nearby Site of Grace. At this point, Hyetta will then move on to her next location, in Lyndell, where you won’t see her for a while. Final Encounter Once you’ve progressed the game to the Leyndell, Royal Capital Legacy Dungeon and explored the Subterranean Shunning-Grounds, you’ll reach a boss battle against Mohg, the Omen. After his defeat, head behind the altar to find an hidden path (strike the wall) that will lead you to the Frenzied Flame Proscription. Speak with her and she’ll give you a hint about how to get through the door ahead, simply removing all of your equipment and you’ll gain access to the Three Fingers. Return to Hyetta and she’ll ask you to burn her with the flame to make her your maiden (this is your last chance to prevent losing Melina), you’ll need to stand directly in front of her to get the option. Exhaust her dialogue at this point and her Quest will come to an end, you’ll be able to obtain the Frenzied Flame Seal from her body. |
||||||||||||||||||||||||||||||||||||||||||||||||||||||||||||||||||||||||||||||||||||||||||||||||
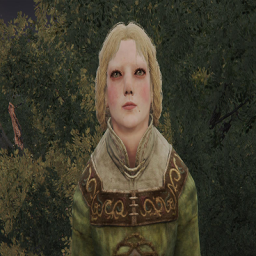
|
Irina |
Lore
Hello? Is somebody there?
Location
Info
First Encounter It’s difficult to miss Irina upon entry into the Weeping Peninsula for the first time. Once you successful navigate the Bridge of Sacrifice linking the region with southern Limgrave, you’ll find a Site of Grace of the same name. From here, you should see a small campfire up ahead, where Irina sits. Speak with her to learn her tale, and that her father still sits in the occupied Castle Morne. As the commander, he refuses to leave his post but Irina asks you to send a letter to her father, handing over Irina’s Letter in the process, you’ll find her father, Edgar, in Castle Morne. At the courtyard, head past the Pumpkin Head and around the corner to find a ladder leading up. Dispatch the enemies up ahead and then climb down the ladder to your left to find another set of enemies. At the end of this pathway is some stairs leading up where you’ll find Edgar who will take the letter from you. Second Encounter After delivering the letter, return to the campfire near the Bridge of Sacrifice Site of Grace to find Irina laying lifeless next to a cleaver. There is nothing you can do to prevent Irina’s death, and this is an unfortunate condition to progress Edgar’s Questline. |
||||||||||||||||||||||||||||||||||||||||||||||||||||||||||||||||||||||||||||||||||||||||||||||||
|
Jar Bairn |
Lore
Hello coz, what are you doing here? |
||||||||||||||||||||||||||||||||||||||||||||||||||||||||||||||||||||||||||||||||||||||||||||||||

|
Jerren |
Witch-Hunter Jerren is an NPC in Elden Ring and is involved in a Questline alongside Sorceress Sellen.
Lore
Finally, my work is done. I am no longer bound to this fortress.
Location
Info
First Encounter The first time you come across Jerren, it will be as the herald for the festival of war at Redmane Castle in Caelid. There’s not much you can do with him here, and you’ll have to interact with him to gain access to the Starscourge Radahn battle. After the battle is over, refresh the area and head north of the Redmane Castle Plaza Site of Grace to find Jerren sitting on a chair. Speak with him to learn that now that the war festival is over, he’ll be moving on soon. Second Encounter You’ll next need to progress through Sorceress Sellen’s Quest up until the fourth meeting, where you use her Primal Glintstone on the puppet in Liurnia. Make your way back to where Sellen was chained up in the Witchbane Ruines, Weeping Peninsula and you’ll now find Jerren. He’ll remark that he’s sure that Sellen lives on elsewhere. Final Encounter Once you’ve cleared Raya Lucaria Academy, return to the Raya Lucaria Grand Library Site of Grace and head outside, you’ll find two summon signs either side of the door. A gold one that will summon you to the aid of Sellen against Witch-Hunter Jerren, doing this will result in Jerren’s death and end his Questline here, preventing the rewards from that. The red sign will allow you to invade Sellen and assist Jerren, ending Sellen’s Questline and preventing her rewards, you must make a decision as you cannot complete both on a single playthrough. As for rewards, Sellen’s conclusion offers the greater rewards (you can find out more about Sellen’s rewards on her respective NPC page). Sellen is by far the tougher adversary here, her Sorcery spells can hit a huge area so let Jerren take the focal point and attack her from behind when it’s safe to do so. Once she’s defeated, you’ll obtain Sellen’s Bell Bearing and the Witch’s Glintstone Crown. Leave the library and you’ll find Jerren standing to the right (as you exit) and he’ll hand over an Ancient Dragon Smithing Stone as way of thanks. |

|
|||||||||||||||||||||||||||||||||||||||||||||||||||||||||||||||||||||||||||||||||||||||||||||||

|
Kenneth Haight |
Kenneth Haight is an NPC in Elden Ring and is involved in a Questline that intersects with Nepheli Loux.
Lore
Ah, you’ve come to lend me your aid, have you? Well, that’s very kind, but, um… No, no.
Location
Info
First Encounter Kenneth Haight can be found atop some ruins near the road heading northeast from Mistwood Outskirts Site of Grace in Northeast Limgrave - you’ll be able to hear him shouting for help when you approach the area. He’ll ask you to take back his fort which is found south, beyond the Mistwood. Second Encounter Before you head into Haight Fort, you’ll want to rest at Fort Haight site of grace, which is just below the fort itself, near the beach to the west. When you head through the gate into the fort, you’ll want to run straight through this inner courtyard and look for cover to avoid the numerous enemies that’ll shoot flaming arrows at you. If you head up the steps, there’s a weak enemy to the right, next to the barrels. There are a couple of minor enemies that’ll be shooting at you that you’ll want to take out before facing the mini boss of this area. Once you’ve cleared out the lower level, you’ll want to follow the steps all the way to the top of the walls of the fort, where you’ll find the mini boss of the fort - an unnamed knight in golden armor. He wields a pretty nasty sword but his big slashing blows are quite slow and easy to interrupt with your own attacks (if you’re in melee combat). Upon defeating him, you’ll get an Ash of War: Blood Slash. When you return to Kenneth Haight, who’s found atop the ruins nearby Mistwood Outskirts site, he’ll thank you for your service and reward you with an Erdsteel Dagger. Upon receiving the reward, make sure to speak to him two more times to exhaust all dialogue options. First he will tell you he is returning to the fort, and then when you talk to him again you’ll be prompted to pledge service to him, which should you accept you’ll be asked to meet him back at Fort Haight for your knighting ceremony. Second Encounter Once you return to Fort Haight, it’ll be overrun with enemies again - luckily no pumpkin heads or golden armored knight. Once you’ve taken out the handful of weak enemies, speak to Kenneth, who’s found atop the castle’s walls. He’ll tell you he can’t actually make you a knight as he doesn’t have the authority. He wants to find a legitimate ruler for Limgrave. Final Encounter Once you reach Crumbling Farum Azula, return to the Roundtable Hold and exhaust the dialogue options between Smithing Master Hewg and Roderika, you will need to rest several times at the Site of Grace to refresh the area. You’ll need to ensure that you’ve completed Nepheli Loux’s Quest up to the point you hand her The Stormhawk King. Make your way over to the Godrick, the Grafted Site of Grace in Stormveil Castle and rest at it again to refresh the area (this is required) and you’ll find Nepheli and Kenneth in the throne room. Nepheli has seemingly taken up the role of the new ruler of Limgrave and will hand over an Ancient Dragon Smithing Stone. If you’ve managed to see Gatekeeper Gostoc’s Quest to its conclusion, you’ll find him here too and he will offer to sell you another one for 20,000 Runes. |
|
|||||||||||||||||||||||||||||||||||||||||||||||||||||||||||||||||||||||||||||||||||||||||||||||
|
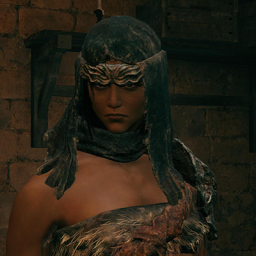
Latenna |
Latenna is an NPC in Elden Ring and is involved in a short Quest that gains you access to an optional, secret, area in the Mountaintops of the Giants region.
Lore
I’m Latenna. An Albinauric, the same as Old Albus.
Location
Info
First Encounter You will find Latenna at the Slumbering Wolf’s Shack looking over the body of her fallen companion and although dismissive at first, remark to her about Albus and the medallion that you have. She will change her tune and then ask if you could take her to the Haligtree, saying in return she will give you a clue on the whereabouts of the other half of the medallion. Agree to help her and you’ll get your clue, along with her willingly joining you as a Spirit Ash, Latenna the Albinauric, a useful summon that will aid you in your journey. This may seem like the natural conclusion to Latenna’s Quest, but there is one more step with a useful reward at the end of it. |
|
|||||||||||||||||||||||||||||||||||||||||||||||||||||||||||||||||||||||||||||||||||||||||||||||
|
Melina |
Melina is an NPC in Elden Ring and plays the role of the Maiden who offers you the power to use Runes to level up.
Lore
Greetings. Traveller from beyond the fog. I Am Melina. I offer you an accord.
Location
Info
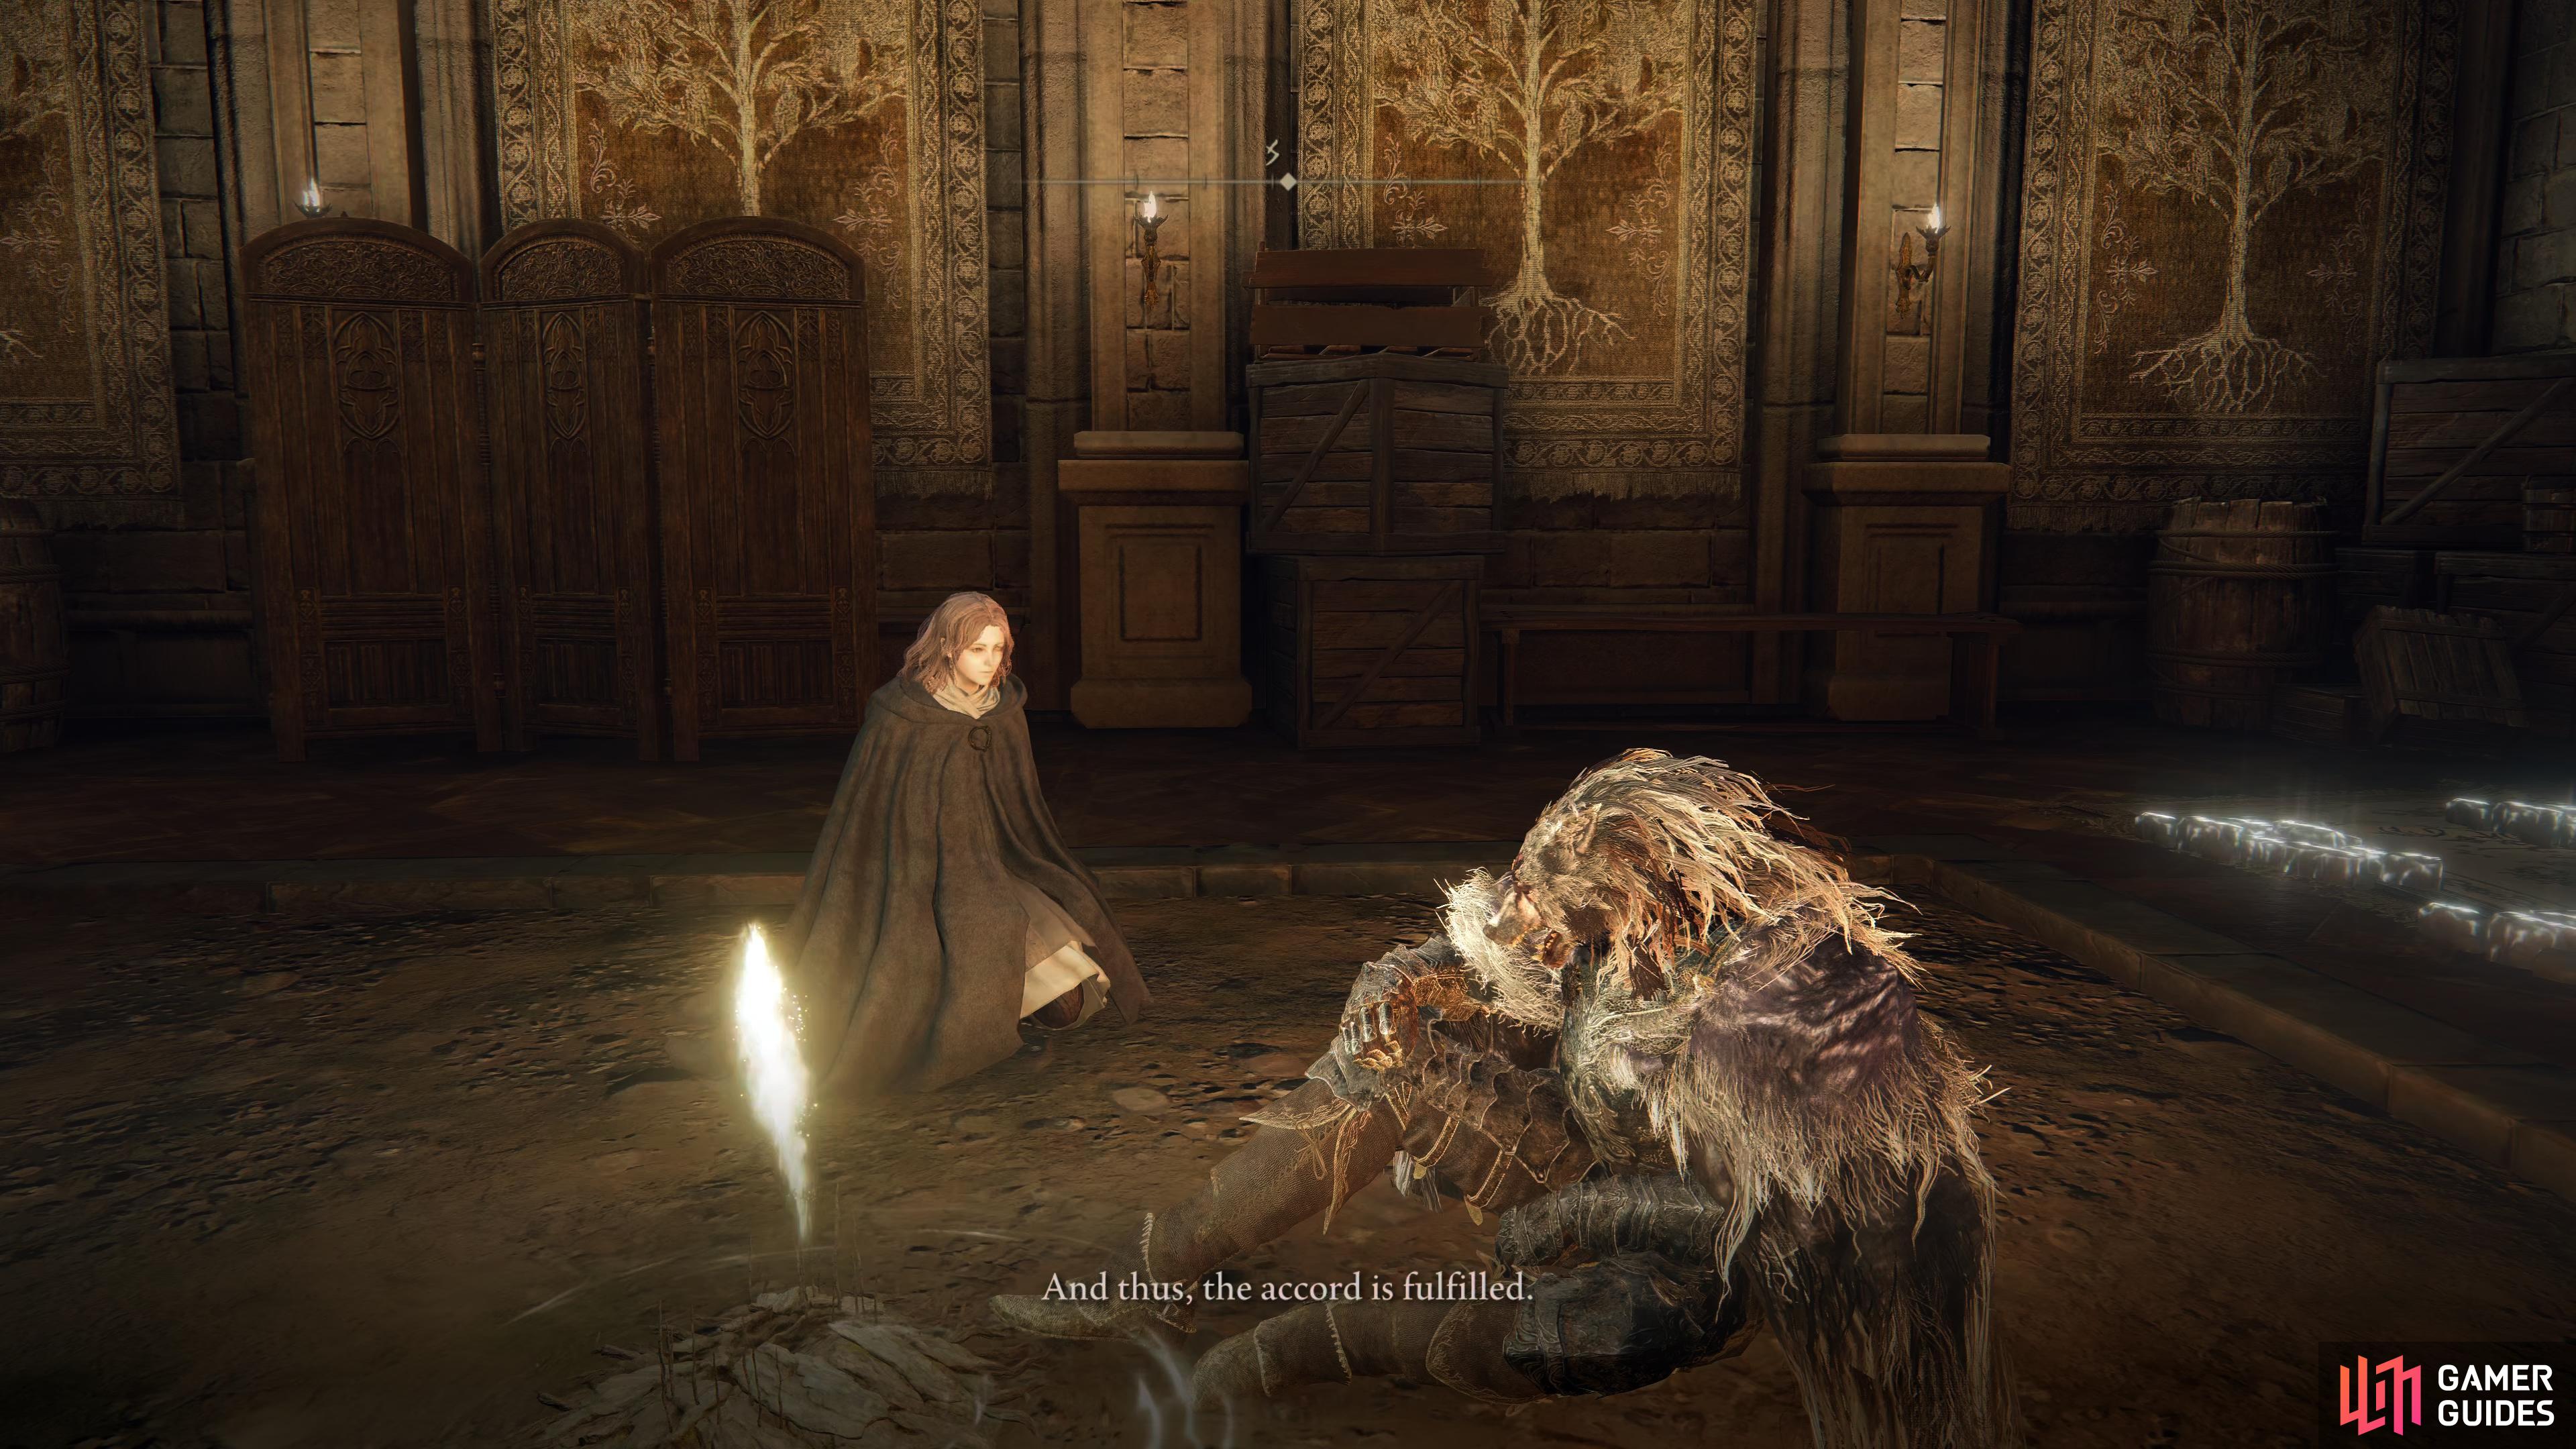
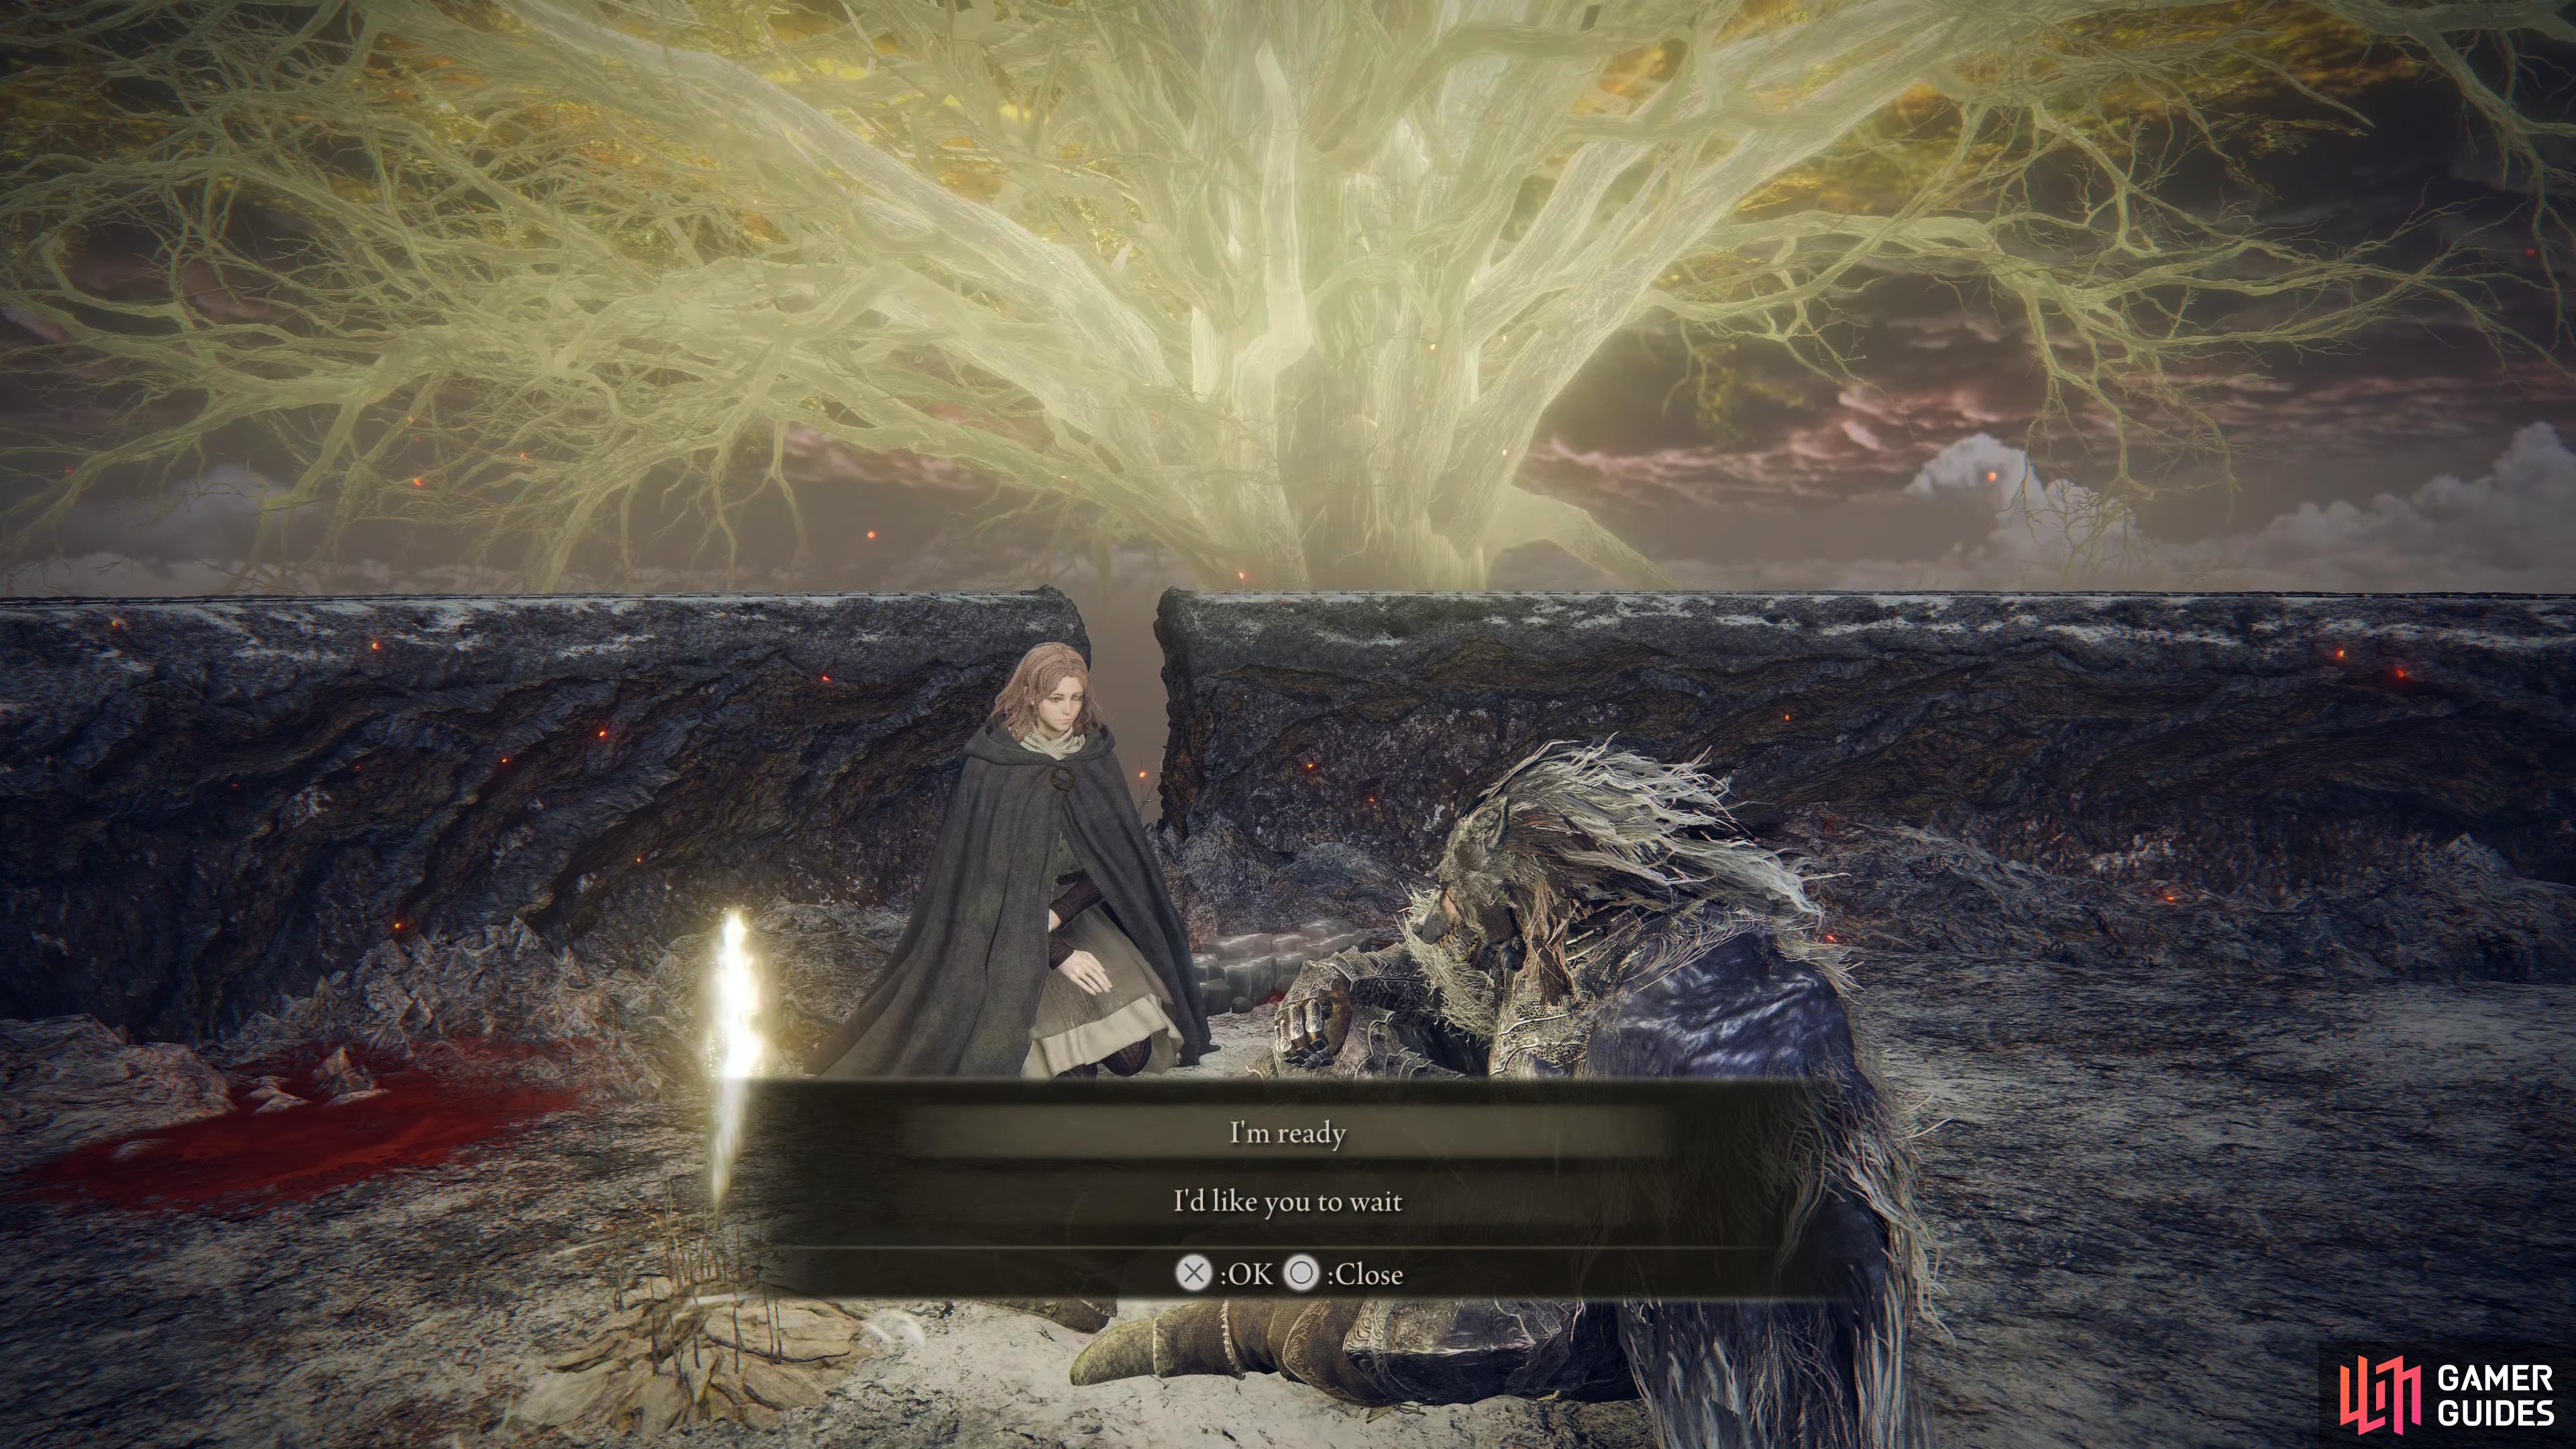
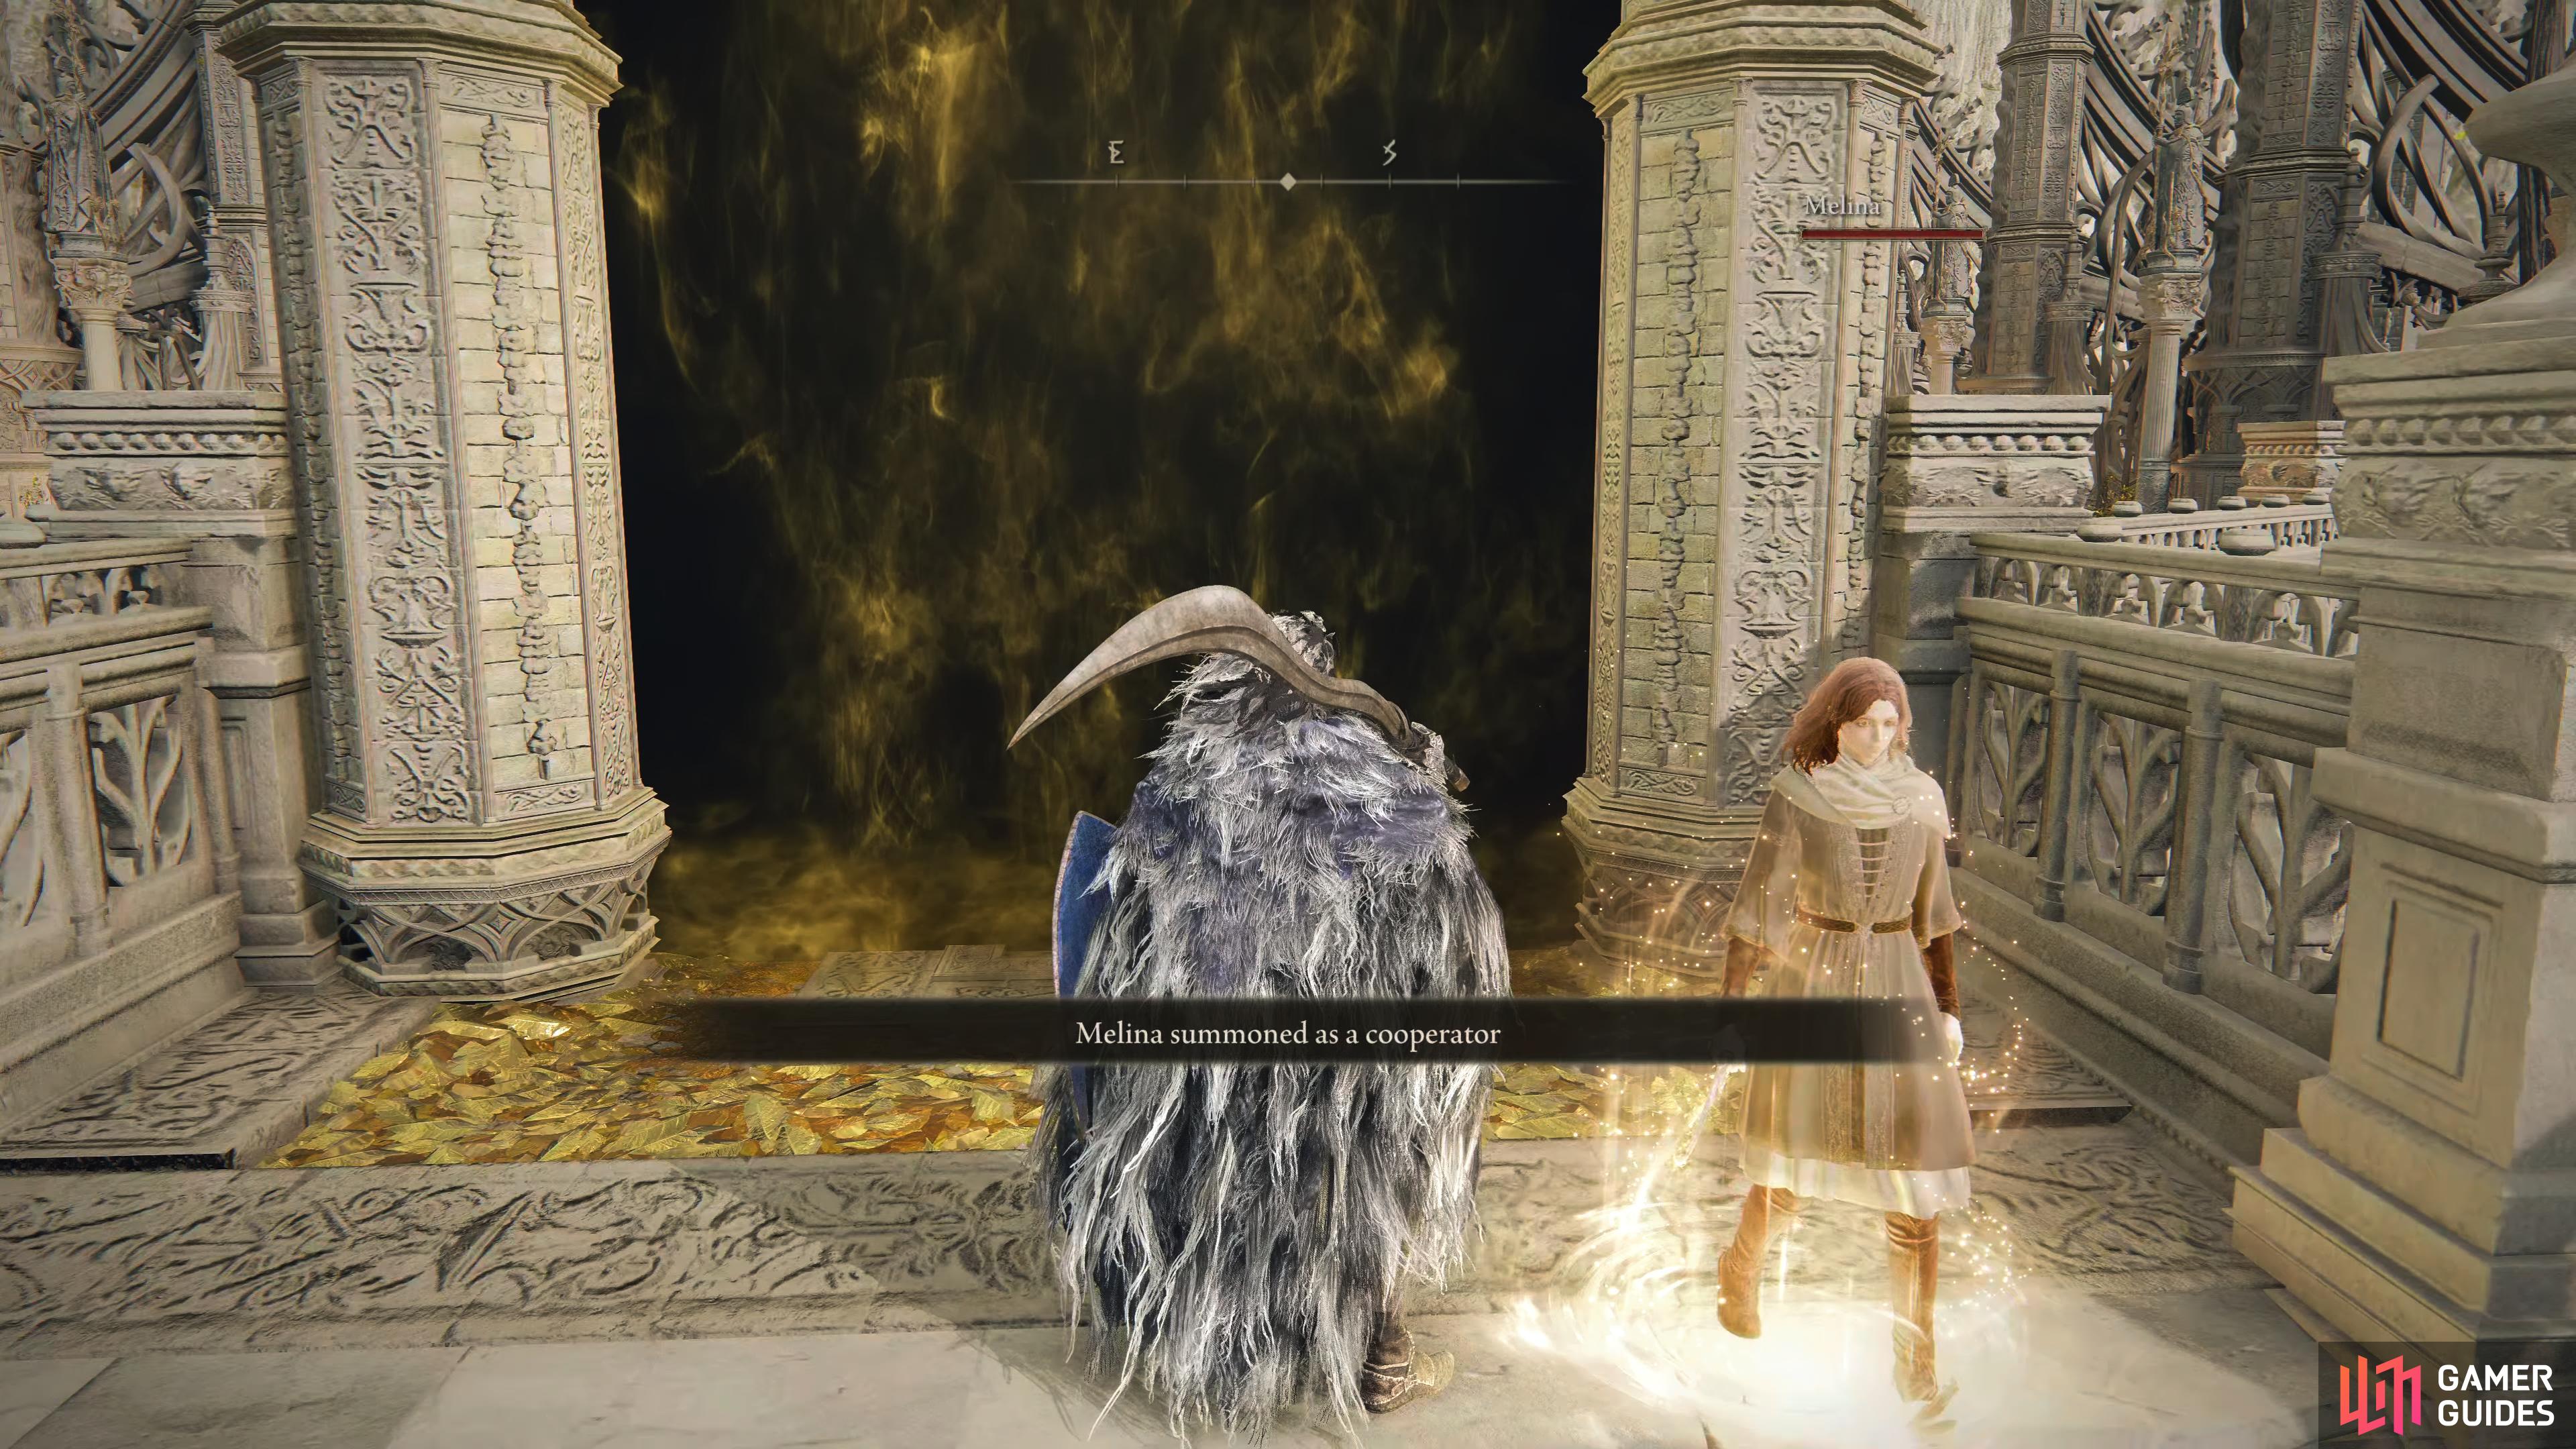
First Encounter Melina will come to you when you rest at a Site of Grace for the third time. You can either find three separate Sites of Grace or rest at the same one three separate times to trigger the encounter with Melina. We rested at the following Sites of Grace: The First Step, the Church of Elleh and the site of Grace at Gatefront, which is a short ways north of the Church of Elleh. When you first speak to Melina she’ll ask to become your Maiden. You can decline her offer but having a maiden is important for several reasons. She’ll give you Torrent the mount and you’ll also need a Maiden to level up and progress through the main story. If you initially declined her request but have since decided you do want her to be your Maiden, you can talk to Melina and change your mind whenever you rest at a Site of Grace point. Second Encounter The next time that Melina greets you at a Site of Grace, she’ll transport you to the Roundtable Hold, which is the hub world only accessed via sites of Grace. There seems to be two different ways that you can gain access to Roundtable Hold. You can either defeat the first main story boss and then rest at the site of grace that spawns in the boss area, or you can do a bit of exploring and after discovering a few more Sites of Graces, she’ll pop up at any random site location. Third Encounter Once you gain access to Leyndell, Royal Capital for the first time and use the first Site of Grace, the East Capital Rampart, Melina will make another appearance. This time, she informs you that your pact is complete, and that she will take her leave, although she will still grant you the use of Torrent and allow you to convert Runes into power. As you progress through the area, you’ll eventually reach the Queen’s Bedchamber and the boss of the area just beyond. Look closely however and you’ll spot a summon sign, allowing you to call for Melina’s aid in the battle to come. This is the only battle that you can summon her for in the game. Following your victory, use the Site of Grace here and Melina will appear again to make a new accord, handing over the Rold Medallion in the process. Final Encounter Once you have completed Melina’s request and reached the Forge of the Giants, you’ll find a Site of Grace at the back, rest at it and Melina will appear for a final time. She will ask if you are ready to commit a cardinal sin, give her your blessing and will Melina will go about using herself to burn the Erdtree and send you off to Crumbling Farum Azula, setting in motion the final main area of the game. |
|
|||||||||||||||||||||||||||||||||||||||||||||||||||||||||||||||||||||||||||||||||||||||||||||||
|
Millicent |
Millicent is a young woman stricken with an incurable case of Scarlet Rot. Gowry will send players to look for her in an attempt to cure her of scarlet rot. Millicent will also invade the player in the Swamp of Aeonia at all times of the day. She has light armor and has a single sword that uses the Wild Strikes ash.
Lore
I would rather trust you than simply continue to spoil from within.
Location
Info
|

|
|||||||||||||||||||||||||||||||||||||||||||||||||||||||||||||||||||||||||||||||||||||||||||||||

|
Milos (Dung Eater) |
Dung Eater is an NPC in Elden Ring and is involved in a Quest related to one of the game’s endings.
Lore
I am the Dung Eater.
Location
Info
First Encounter Once you reach the Altus Plateau, return to the Roundtable Hold and you’ll find the door near the Twin Maiden Husks is now open and inside, a vile man sits on the ground. Approach him and speak to him to learn his thoughts on curses and defilements before he declares that he’ll no longer speak to you. To progress his Quest, you’ll need to track down the first Seedbed Curse and the earliest one you can obtain is in Leyndell, Royal Capital. Head to the East Capital Rampart Site of Grace and head along the linear path, taking the lift down at the end. Proceed into the next room and you’ll spot a ladder on your right, climb it and follow the stairs to the top of the building to find the first Seedbed Curse on a corpse in a chair. With this in hand, return to him at the Roundtable Hold and show it to him, he’ll urge you to visit his corporeal flesh trapped in the Leyndell, Royal Capital Sewers, handing over the Sewer-Gaol Key in the process. Second Encounter With the key in hand, you’ll now have to venture down into the sewers of Leyndell, Royal Capital. The Subterranean Shunning-Grounds can be accessed from the Avenue Balcony site of grace and heading down the northwestern stairs in front of it. Go through the door into the open area, and head west to hug the railing until you can see roofs to jump on to on your left. Jump down to them and drop off to the right and turn around on yourself and north where you’ll see a well behind a dilapidated wall. Take the ladder down into the well and pick up the Rune Arc from the corpse at the end of the corridor, then head back and open the gate. With the gate open, head into the next area and take the next ladder down and follow the damp corridors northeast until you see the text pop-up for the Subterranean Shunning-Grounds. Once you reach the Site of Grace there, head out of the room and follow the dim hall northeast whilst running past the first Omen and keep heading northeast until you reach the second Omen. To your left will be an open grate that you can drop into which is just before the giant gate in front of you. Drop into the grate, and you’ll be in a damp rat-infested tunnel with two directions to take. Opt for the northwestern path and about halfway up, a rat will be hiding amongst the crates to your left with another three just in front of it. Defeat them and loot the corpse at the end and run past the three large Miranda Flowers to the southwest and climb the ladder at the end. When you reach the top, go around the corner and be wary of the small hand enemies and their larger counterpart just before Dung Eaters cell. Once you defeat these, they won’t respawn, and you’ll be back here a few times so take them out now to avoid them hassling you later. Use the key and speak to Dung Eater to tell him to leave the gaol. Third Encounter Return to the Roundtable Hold and you’ll discover that the Dung Eater is no longer there and a message has been left for you. Before you head to the moat, you’ll want to ensure that you’ve progressed Blackguard’s Quest to its final steps and return to where he is in the Capital Outskirts. All Seedbed Curse Locations To complete Dung Eater’s Quest, you’ll need a total of five (from the six available) Seedbed Curses, you can discover below where you can find them.
Final Encounter Once you have four more Seedbed Curses on you (to save yourself multiple trips), return to where Dung Eater’s gaol in the Subterranean Shunning-Grounds and you’ll find him strapped to a chair. You’ll be able to feed him the Seedbed Curses and upon the fifth one, he’ll die, allowing you to loot the Mending Rune of the Fell Curse, this is needed to trigger the Blessing of Despair Ending. Quit your game and reload your save following this and you’ll be able to loot the Omen Set. |
||||||||||||||||||||||||||||||||||||||||||||||||||||||||||||||||||||||||||||||||||||||||||||||||
|
Nepheli Loux |
Nepheli Loux is an NPC in Elden Ring and is involved in a lengthy Quest that spans the entire game.
Lore
Well, who do we have here?
Location
Info
First Encounter You will first come across the warrior Nepheli Loux while exploring Stormveil Castle and there are two ways to access the door that she’s residing in. Heading from the Liftside Chamber Site of Grace, leave the room and head along the path to where the barricades are. Deal with the Eagles, pick up the Golden Seed at the base of the tree and then enter the nearby door to find her. Alternatively, you can head south from the Secluded Cell Site of Grace, although you’ll need to deal with a Troll to reach the door, making this the quicker, but deadlier route. Once you reach her room, you’ll find her standing over the body of a knight. Speak to her to learn her name, and that her father sent her here to deal with Godrick. Once you’re ready, head to the fog door leading to the Godrick battle and summon her to help in the battle. There is a good chance that she may well die during the battle, but fret not, she’ll be safe when you meet her for the second time. Second Encounter With Godrick defeated, when you return to the Roundtable Hold, you’ll find Nepheli standing outside Gideon Ofnir’s room who just so happens to be her adopted father. Speak with her and she’ll hand over the useful Arsenal Charm as thanks for taking down Godrick and will give you some more information about her history. Exhaust all her dialogue options here and Nepheli will inform you that she’s moving on, leaving the Roundtable Hold. Third Encounter Your next meeting with Nepheli takes place in the Village of the Albinaurics in southwest Liurnia. From the Village of the Albinaurics Site of Grace, head under the large bridge and you’ll find her kneeling down. Speak with her and exhaust her dialogue options before heading up the path behind her and across the bridge. Up ahead here is a boss, Omenkiller near the firepit but if you look carefully, you’ll find Nepheli’s gold summon sign to the left or the large rock here. Summon her and defeat the Omenkiller to complete this step of her Quest. Fourth Encounter After defeating the second Elden Lord, return to the Roundtable Hold and you’ll be able to speak to Gideon about his feelings towards Nepheli. You will then find Nepheli sat at the bottom of the stairs near Smithing Master Hewg. At this time, if you’ve been pursusing a Quest for Preceptor Seluvis and be in possession of a Potion that he intends for you to give to Nepheli. If you do this, you’ll end her Questline here (although you’ll gain her as a Spirit Ash via Seluvis), instead, take the Potion to Gideon and you’ll be able to hand it over to him to dispose of and you’ll trick Seluvis into thinking you handed it over to Nepheli. Speak with Nepheli after speaking with Gideon and you can tell her that you heard the news about Gideon. She will inform you of some of the atrocities that Gideon has begun to commit and that she doesn’t know what to belive in anymore. At this point, you’ll need to head to the Chapel of Anticipation, where you begun the game at. You can access this via the Four Belfries in northwest Liurnia taking the eastern Teleport, the Imbued Key you’ll need can be found in a Chest nearby. Once there, head through, defeat Grafted Scion (Chapel of Anticipation) and proceed to the building at the back. You’ll find a hole in the wall where you can head around and eventually loot The Stormhawk King. Despite being a Spirit Ash, it’s not one you can use as it is a Key Item. Return to Nepheli Loux at the Roundtable Hold and you’ll be able to hand this over to her, ending this step of her Quest. Final Encounter Once you reach Crumbling Farum Azula, return to the Roundtable Hold and exhaust the dialogue options between Smithing Master Hewg and Roderika, you will need to rest several times at the Site of Grace to refresh the area. Next, you’ll need to ensure that you’ve completed Kenneth Haight’s Quest where he mentions he’s looking for a new ruler. Make your way over to the Godrick, the Grafted Site of Grace and rest at it again to refresh the area (this is required) and you’ll find Nepheli and Kenneth in the throne room. Nepheli has seemingly taken up the role of the new ruler of Limgrave and will hand over an Ancient Dragon Smithing Stone. If you’ve managed to see Gatekeeper Gostoc’s Quest to its conclusion, you’ll find him here too and he will offer to sell you another one for 20,000 Runes. |
||||||||||||||||||||||||||||||||||||||||||||||||||||||||||||||||||||||||||||||||||||||||||||||||
|
|
Palm Reader | |||||||||||||||||||||||||||||||||||||||||||||||||||||||||||||||||||||||||||||||||||||||||||||||||

|
Patches (NPC) |
Patches is a Merchant, NPC and Boss in Elden Ring. Patches is a recurring character in From Software games, usually playing the part of a liar or betrayer. He can be found in Murkwater Cave. During combat, when Patches reaches low health, he will offer to surrender. If the surrender is accepted, he will open up a shop in Murkwater Cave.
Lore
I’m Patches. Patches the Untethered.
Location
Info
If beat in battle but not killed (do not reduce health to 0): If killed in battle after surrendering:
|
|
|||||||||||||||||||||||||||||||||||||||||||||||||||||||||||||||||||||||||||||||||||||||||||||||
|
Preceptor Seluvis |
Preceptor Seluvis is an NPC in Elden Ring and is involved in a Quest that impacts several other characters.
Lore
I see… You must be Ranni’s new hireling.
Location
Info
Should you give Seluvis Potion to Nepheli Loux? When you speak to Seluvis at his tower, found to the southwest of Ranni’s Rise, he’ll ask if you could give his potion to Nepheli Loux, whom you’ll find back at the Roundtable Hold should you already progressed through Raya Lucaria Academy, sitting down the stairs from Smithing Master Hewg. You have an important decision to make here, if you decide to go along with Seluvis’s scheme and hand the potion to Nepheli, you’ll end her Questline, but in the process, gain a unique Spirit Ash from Seluvis in the process. Your second option here is to wait until you’re beyond Altus Plateau and have the Dung Eater in the Roundtable Hold. Advancing his Quest far enough will allow you to feed him and should you feed him the potion, you’ll end his Questline, but get another unique Spirit Ash. If you wish to continue Seluvis’s Quest and not void the other two, there is a third choice available to you. You can mention about the Potion to Gideon Ofnir at the Roundtable Hold and you’ll be able to hand it over to him to dispose of and tricking Seluvis into thinking you gave it to Nepheli, but it didn’t work. You won’t gain either of the two unique Spirit Ashes, but you will be able to continue all three Questlines. Seluvis and Ranni The next step of Seluvis Quest requires you to progress Ranni’s Quest and speak with Blaidd in Siofra River, who will suggest you speak to Seluvis to learn more about Nokron. Return to him and speak to him to obtain Seluvis’ Introduction. At this stage, you’ll need to purchase all available Sorceries and Puppets from Seluvis, to prompt his next step of the Quest. There is a deadline to this step, you must do this before you plunder Nokron and hand over the Fingerslayer Blade to Ranni, or else you will find Seluvis dead the next time you visit him in his tower. Once you’ve purchased everything he has to offer, he’ll request that you assist him in creating a potion that can turn even a demigod (Ranni), into a puppet. This begins the betraying Ranni Questline, but you can still advance this for now with little consequence. To make this point, he’ll need an Amber Starlight found in the Altus Plateau. Make your way to the Altus Highway Junction Site of Grace and head east along the path, then north to find a valley, at the end of this you will find your Amber Starlight. Return to Seluvis once more and hand this over, as thanks you’ll obtain the Magic Scorpion Charm Talisman, the main reward for Seluvis’ Quest, along with the Amber Draught that he asks for you to give to Ranni. This is decision time once again, if you decide to hand this over to Ranni, she will kill you, then Seluvis and you’ll fail her Quest, preventing you from a secret ending among other things. As the outcome is Seluvis’ death regardless, we strongly advise giving this Amber Draught to Ranni. |
||||||||||||||||||||||||||||||||||||||||||||||||||||||||||||||||||||||||||||||||||||||||||||||||
|
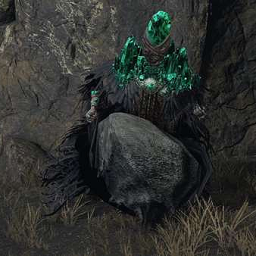
Primeval Sorcerer Azur |
Primeval Sorcerer Azur is an NPC that can be found near the cliffs north of the Hermit Village in Mt. Gelmir.
Lore
Once a grand master at the Academy of Raya Lucaria, now exiled and residing near the Hermit Village.
Location
Primeval Sorcerer Azur can be found in the north of Hermit Village in Mt. Gelmir, near the edge of the cliffs.
Info
|
Humanoid |
|||||||||||||||||||||||||||||||||||||||||||||||||||||||||||||||||||||||||||||||||||||||||||||||
|
|
Queen Marika | |||||||||||||||||||||||||||||||||||||||||||||||||||||||||||||||||||||||||||||||||||||||||||||||||

|
Ranni the Witch |
Ranni the Witch is an NPC in Elden Ring and her Quest is required for the Age of Stars Secret Ending. You will first meet her under the guise of Renna at the start of your journey.
Lore
I am the witch Ranni. I stole Death long ago, and search now for the dark path.
Location
Info
Meeting Ranni Complete Caria Manor in northwest Liurnia and head to Ranni’s Rise to speak with her. If you’re on Rogier’s Quest, you must return to him and back again to enter Ranni’s service. Balidd in Sofira River Head to the Siofra River Bank Site of Grace and travel southeast to locate Blaidd. You conversation with Blaidd suggests Preceptor Seluvis knows more than he’s letting on. Return to Preceptor Seluvis, found at the southern town of the Three Sisters area behind Caria Manor and speak with him, he’ll give you Seluvis’s Introduction and tells you to seek out Sorcerer Sellen. You can learn more about how to complete Ranni’s Quest here. |
||||||||||||||||||||||||||||||||||||||||||||||||||||||||||||||||||||||||||||||||||||||||||||||||

|
Renna |
Renna is an NPC in Elden Ring and is involved in one of the longer Questlines in the game.
Lore
A pleasure to meet thee, Tarnished. I am the witch Renna.
Location
Info
First Encounter Your first meeting with Renna can actually be an easy one to miss, and it’s important you don’t because you’ll obtain the useful Spirit Calling Bell in the process. Once you meet Melina, the maiden, for the first time at your third Site of Grace in the field, rest until it’s night. At that point, travel back to the Church of Elleh and you’ll encounter her sitting on the ruins. There’s not much you can do for now, but simply speaking to her and confirming that you have use of the Spectral Steed, Torrent will see her hand over the Spirit Calling Bell. This will allow you to make use of the Ashes you find throughout the Lands Between and summon Spirits to aid you in challenging battles. Following this first, brief, meeting with Renna, you won’t encounter her again until much later in your adventure where you will officially begin her Quest. Second Encounter You’ll eventually meet up again with Renna once you defeat the boss of Caria Manor and gain access to the Three Sisters sub-region. Inside here, you’ll find Ranni’s Rise to the west where you can speak with Ranni the Witch, the true identity of Renna. This begins an important game-wide Quest, and you’ll find more details on Ranni the Witch’s page. |
|
|||||||||||||||||||||||||||||||||||||||||||||||||||||||||||||||||||||||||||||||||||||||||||||||
|
Rya |
Rya is an NPC in Elden Ring, whom you will first meet in Liurnia. She is a scout in the service of Lady Tanith of the Volcano Manor and is involved in a long Questline.
Lore
I am Rya, in the service of Lady Tanith of the Volcano Manor.
Location
Info
First Encounter Your first meeting with Rya takes place in Liurnia, at a small pavilion where the Birdseye Telescope is east of Scenic Isle. Head over and speak to her to learn that another Tarnished has stolen her necklace from her, and requests that you track it down for her. Agree to assist her and she’ll inform you that he should be at his home down the way a little. Leave the pavilion and head a short distance to the northwest and you’ll locate Boilprawn Shack, along with the thief, Blackguard. Upon speaking with him, you’ll learn that he does have it, leaving you with two options, you can either kill him and loot it from his body or you can agree to purchase it from him for 1000 Runes. Return to Rya with the Necklace and she’ll thank you, remarking about your character and that it’s something that her mistress would find useful indeed. She’ll hand over a Volcano Manor Invitation and depart from this current location. Second Encounter Once you finally gain access to the Altus Plateau, ride the Grand Lift of Dectus and there’s a chance you may see Rya again. If she’s not here, head northwest to the Lux Ruins, of which you’ll find the Erdtree-Gazing Hill Site of Grace nearby where Rya should be. Speak with her to learn more about her and Volcano Manor where she’ll move to after this meeting. You can learn more about how to complete Rya’s Quest here. |
||||||||||||||||||||||||||||||||||||||||||||||||||||||||||||||||||||||||||||||||||||||||||||||||
|
|
Rykard | |||||||||||||||||||||||||||||||||||||||||||||||||||||||||||||||||||||||||||||||||||||||||||||||||
|
Shabriri |
Shabriri is an NPC that can be found at the Mountaintops of the Giants and looks exactly like Bloody Finger Hunter Yura. He implies the hunter died and he has been given his body. Shabriri becomes available as an NPC Summon against Godfrey, First Elden Lord depending on questline progress and ending route.
Lore
May chaos take the world! May chaos take the world!
Location
Shabriri can be found at Mountaintops of the Giants, near the starting area location.
|
||||||||||||||||||||||||||||||||||||||||||||||||||||||||||||||||||||||||||||||||||||||||||||||||
|
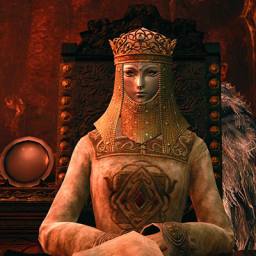
Tanith |
Tanith is an NPC in Elden Ring and involved in a Questline that offers an alternative path through the Volcano Manor legacy dungeon.
Lore
Your decision is most welcome. Now you belong to the Volcano Manor family.
Location
Info
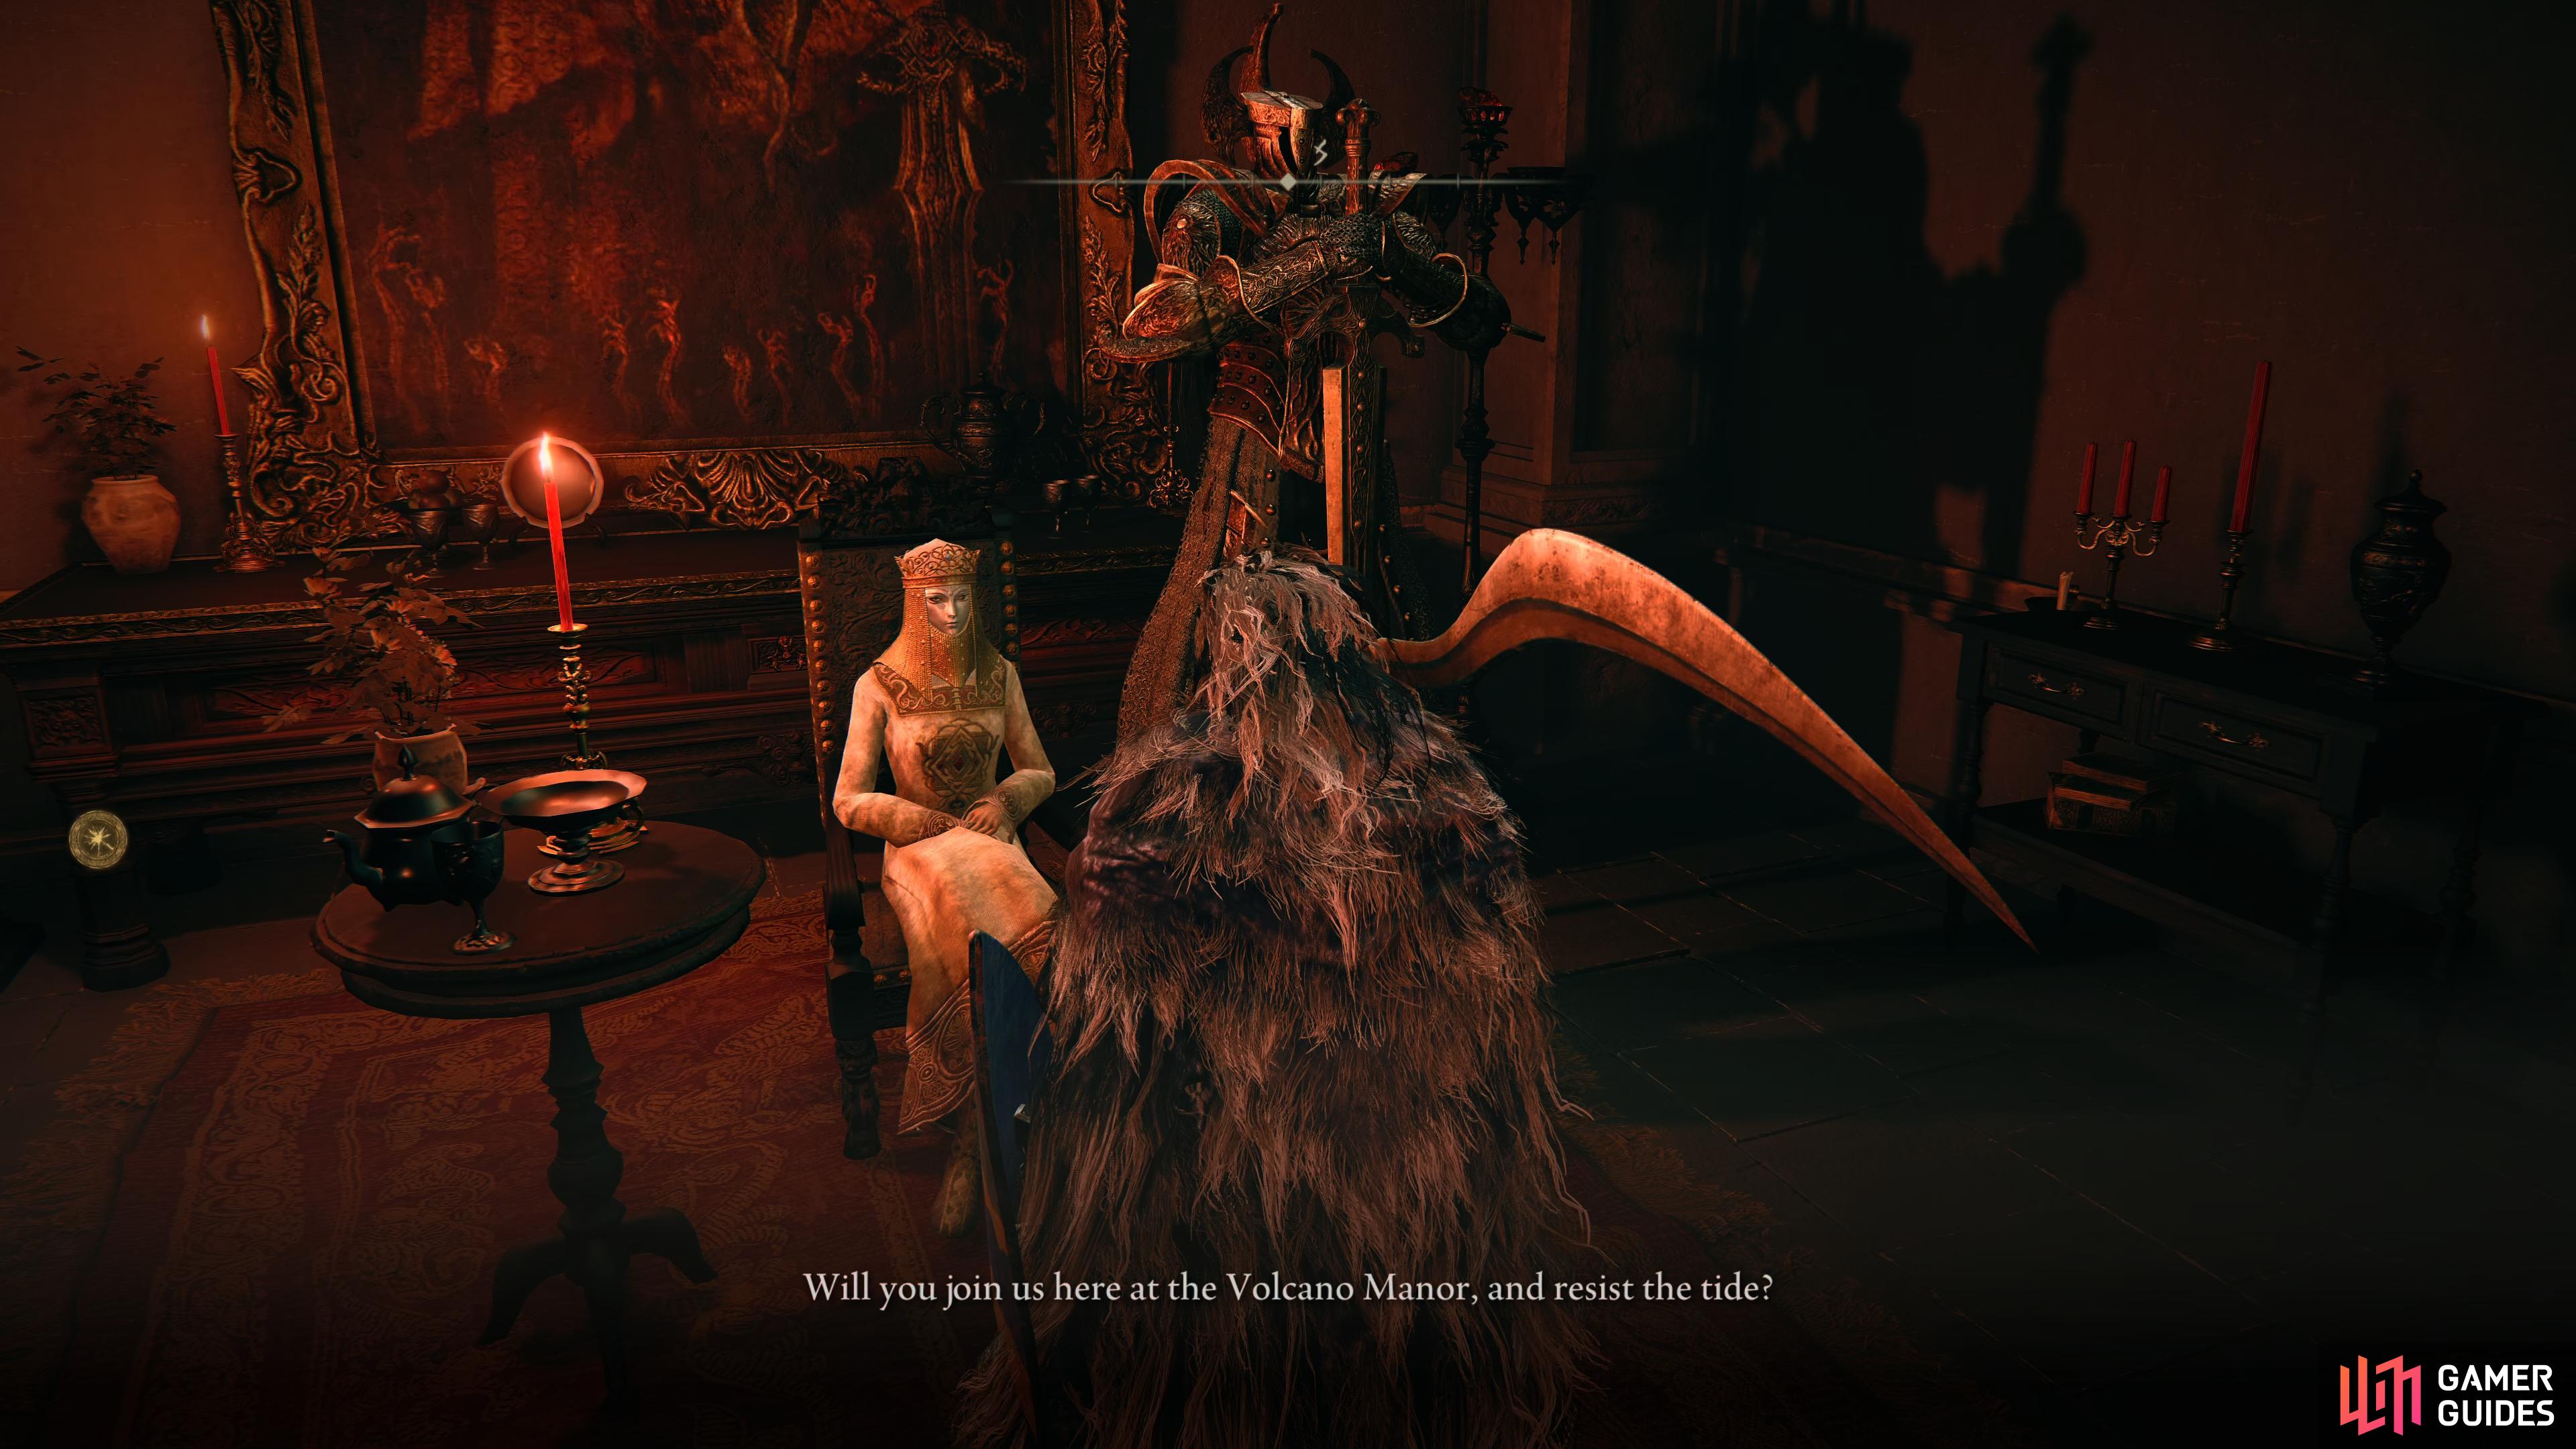
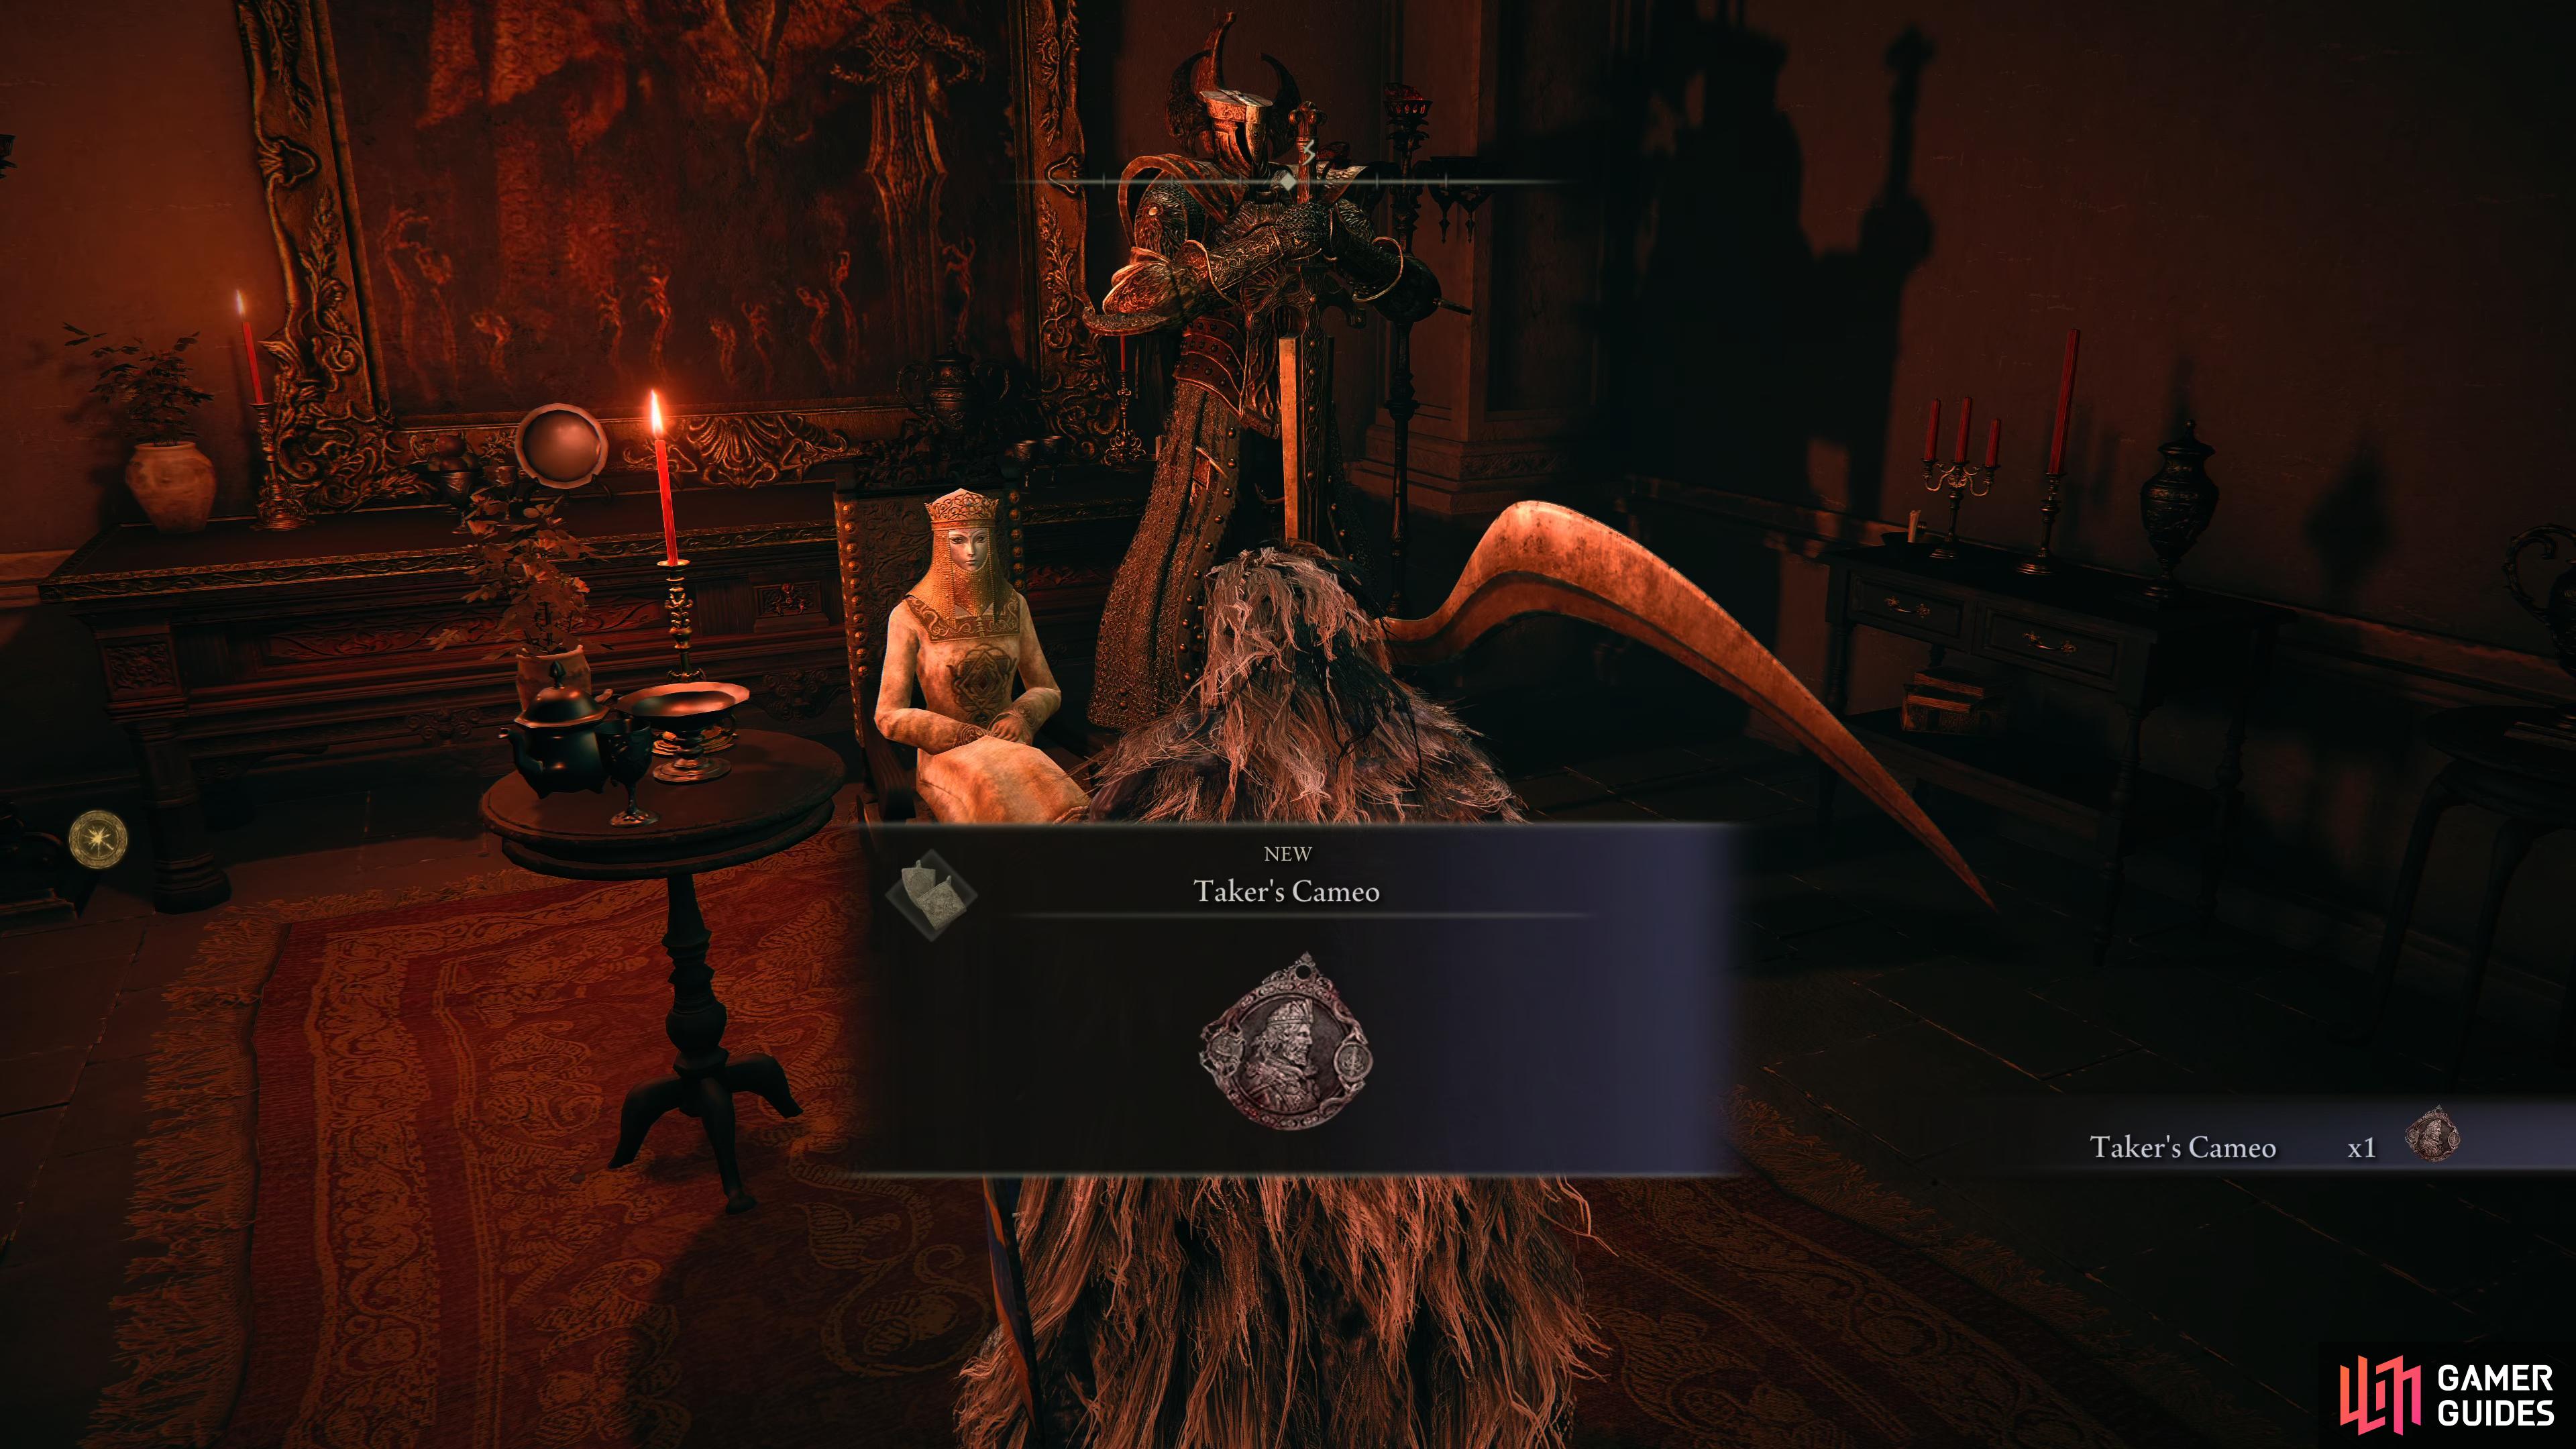
First Encounter Head to Volcano Manor in the Altus Plateau and speak with her near the Volcano Manor Site of Grace and she’ll give you a rundown on what the Volcano Manor, and the Recusants, are all about. Agree to join the manor and she’ll hand over the Drawing-Room Key needed to access a room down the western corridor. Inside, you’ll find a host of characters such as Knight Bernahl, Rya, and possibly Diallos. Patches can also be located near the entrance of the Volcano Manor and all of these characters have Quests that you should finish all of their Volcano Manor related steps before the final assassination contract. Take a look on the dining table here, and you’ll obtain the Recusant Finger and the Letter from Volcano Manor, this will detail the location of your first target (which will be marked on the map). This first contract takes you back to Limgrave, where you must slay Old Knight Istvan, you’ll find the sign to invade him just north of the Warmaster’s Shack, under the bridge, in Stormhill and you’ll obtain the Scaled Set upon his defeat. Second Encounter Return to Volcano Manor and speak with Tanith to report news of your success and she will hand over the Magma Shot Sorcery. Return to the drawing-room and you’ll find the next Letter from Volcano Manor on the table. Be sure to take the time to progress any other character’s Quest before you head out on your next assassination contract. This time, you’ll need to make your way to where the Shaded Castle is in the north of Volcano Manor and head south to find the sign to invade Rileigh the Idle who will drop the Crepus’s Vial Talisman. Third Encounter Once again, return to Volcano Manor and deliver the news to Tanith to obtain the Serpentbone Blade, a Katana that inflicts deadly poison. Return to the drawing-room again and this time, you’ll find a Red Letter on the table, this is the final assassination contract and completion of it and speaking with Tanith upon it will proceed to the boss of this legacy dungeon. Your final target is in the Mountaintops of the Giants, so you’ll need to finish the events in the Leyndell, Royal Capital legacy dungeon before you gain access. Once there, make your way to the Ancient Snow Valley Ruins Site of Grace and head northeast to hit the frozen stream. From there, head west and you’ll reach Shack of the Lofty where you can find a red invasion sign to fight Juno Hoslow, Knight of Blood. You’ll obtain the Hoslow’s Oath gesture at the start of the battle and upon his defeat, the Hoslow’s Set and Hoslow’s Petal Whip. Fourth Encounter Be sure that you’ve completed all necessary steps from characters in the Volcano Manor and then return to Tanith to report your success once more to obtain the Taker’s Cameo Talisman, this will restore HP as you defeat enemies. At this point, Tanith asks if you wish to meet her Lord and accepting this will transport you directly to the room to challenge Rykard, Lord of Blasphemy. Return to Tanith after the battle and then return to the Rykard, Lord of Blasphemy Site of Grace to find Tanith now feasting on the remains of her lord. Tanith will remain here now, although you do have the option of killing her to obtain the Consort’s Set although be aware that her Crucible Knight will appear and attack. Defeat the knight however, and you’ll obtain the Aspect of the Crucible: Breath Incantation. |
|
|||||||||||||||||||||||||||||||||||||||||||||||||||||||||||||||||||||||||||||||||||||||||||||||
|
|
Two Maiden Husks | |||||||||||||||||||||||||||||||||||||||||||||||||||||||||||||||||||||||||||||||||||||||||||||||||
|
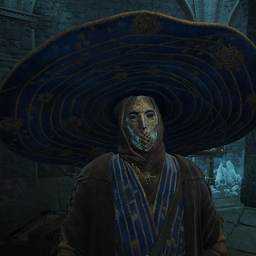
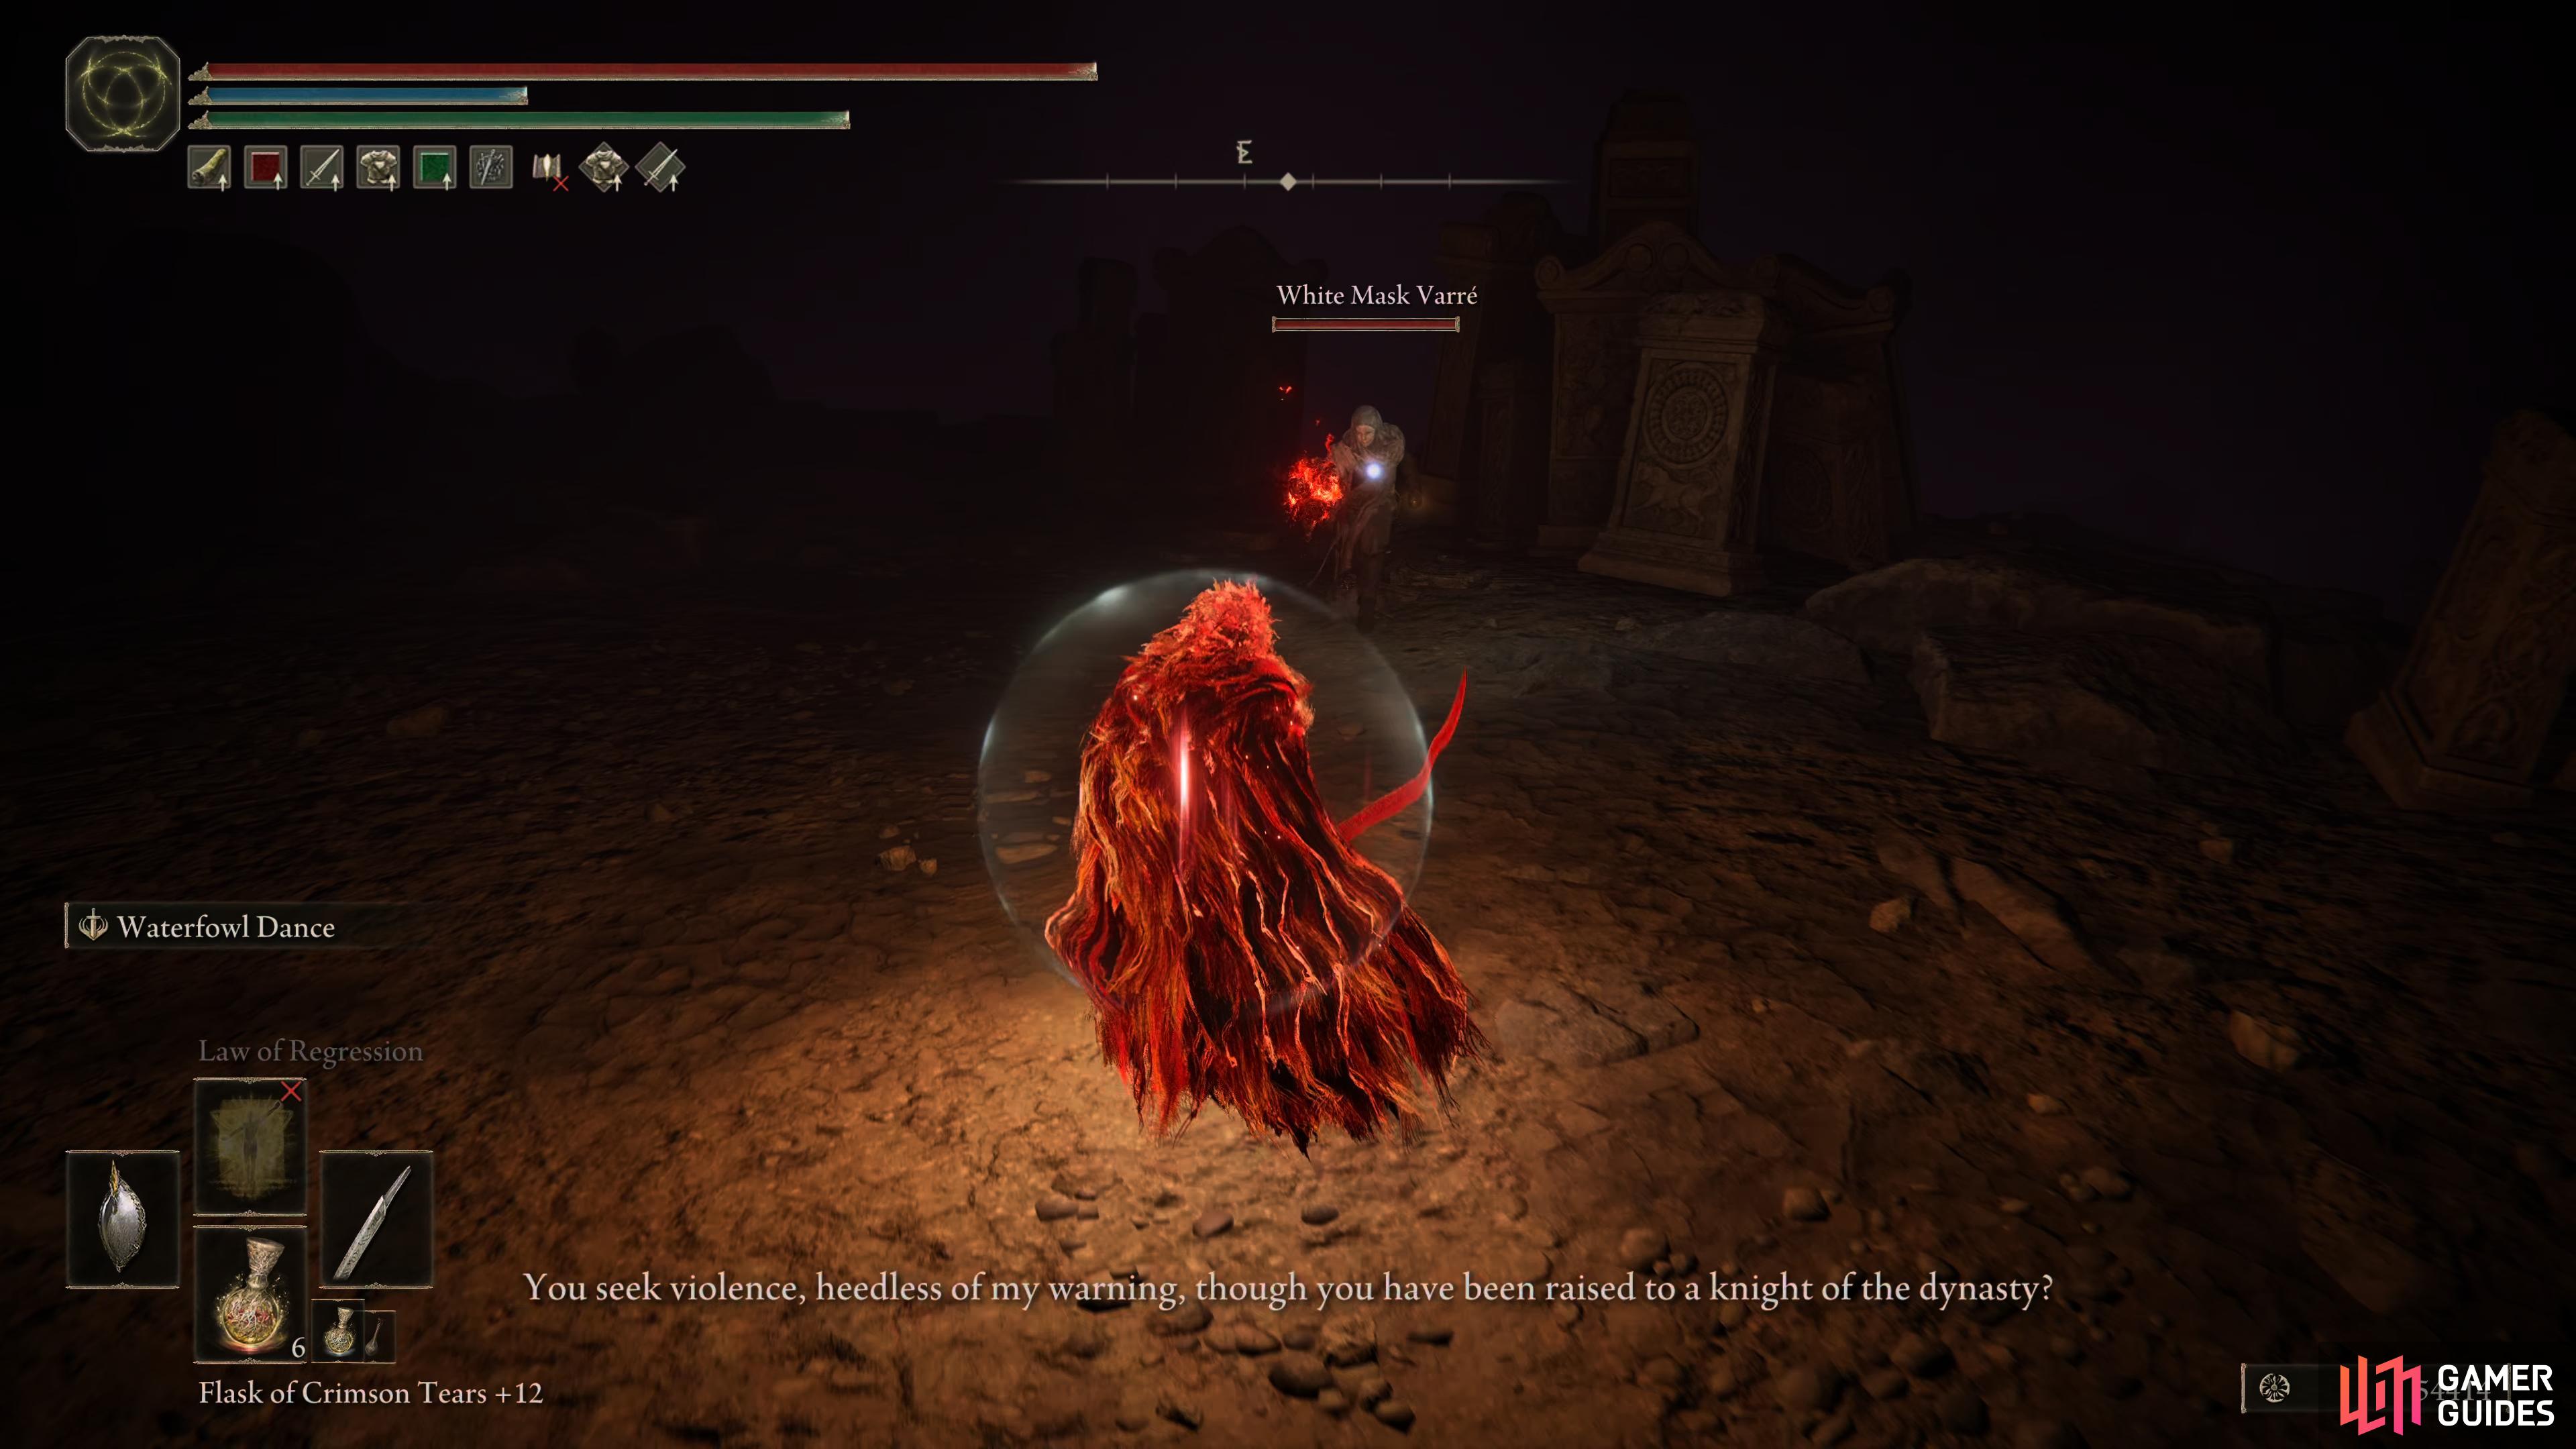
White-Faced Varré |
Lore
“Are you familiar with grace? The golden light that gives life to you Tarnished. You may also behold its golden rays pointing in a particular direction at times. That is the guidance of grace. The path that a Tarnished must travel.”
Location
Info
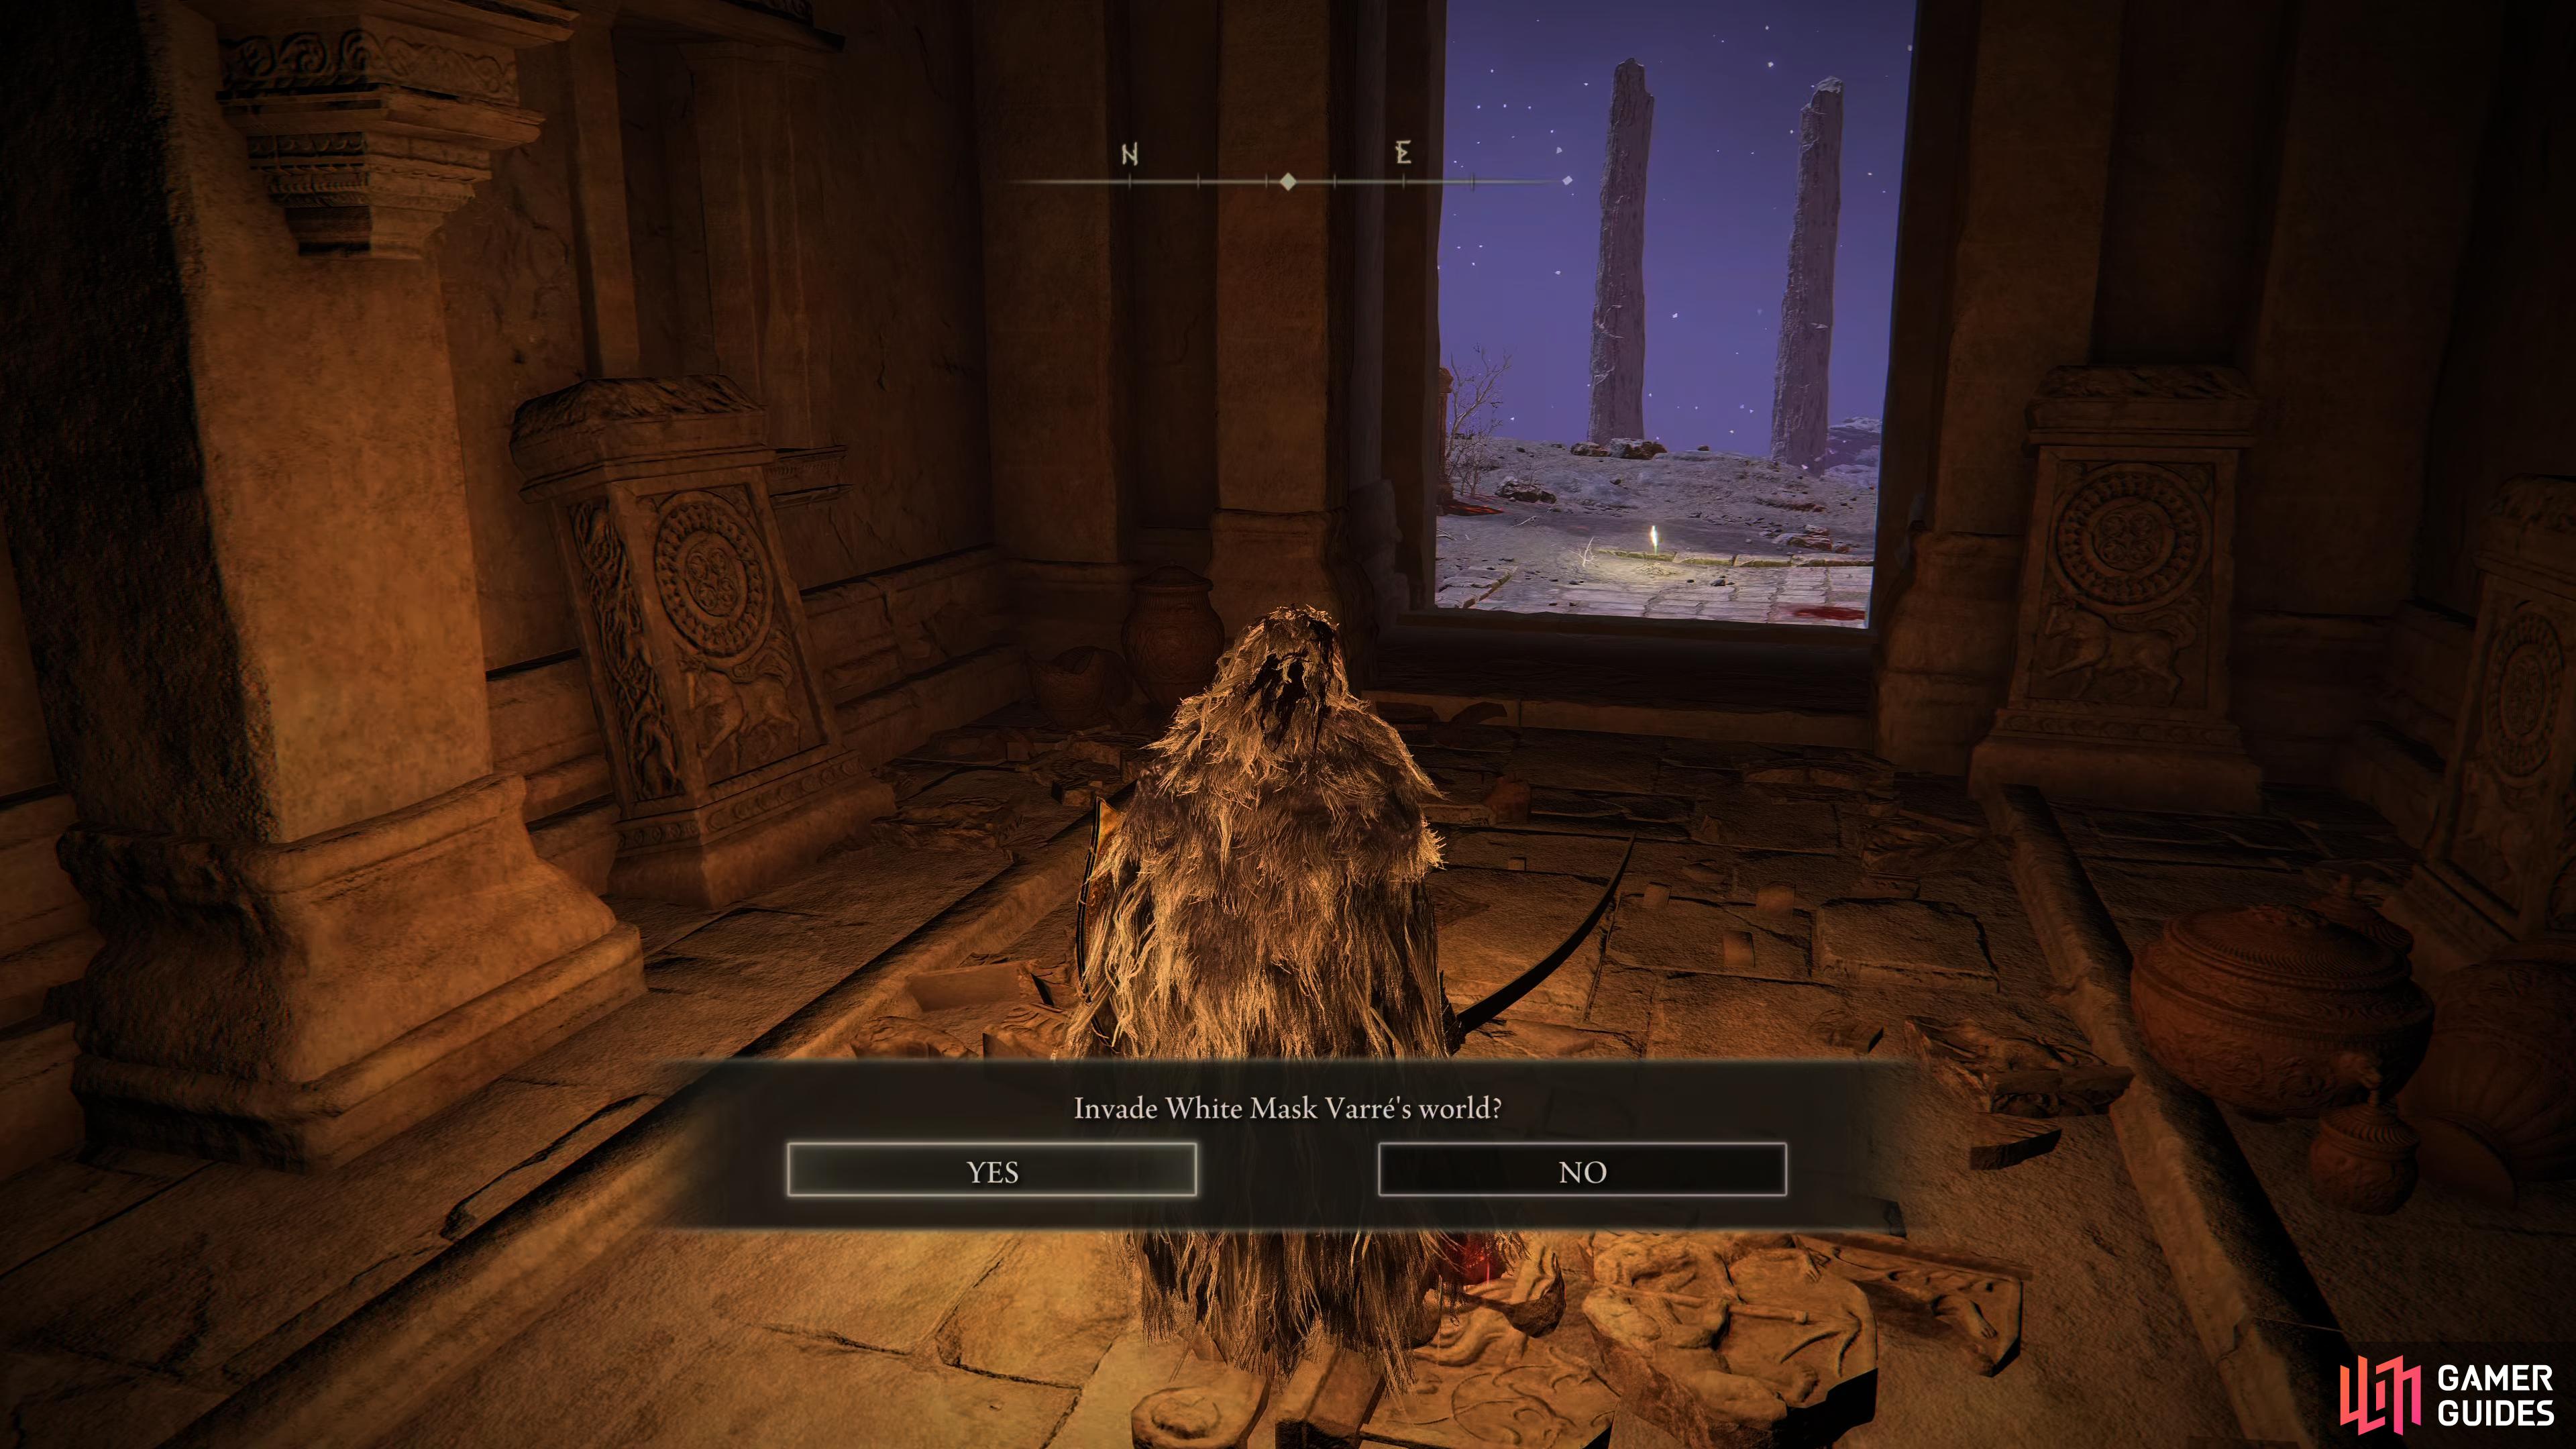
First Encounter You can find Varré near The First Step Site of Grace. There won’t be much you can do with him at the start, but he will tell you that you should head to Stormveil Castle, as well as mention Godrick the Grafted. He won’t leave The First Step until you defeat the boss Godrick at Stormveil, and reach the Roundtable Keep for the first time. If you’ve been to the Roundtable Keep, but not defeated Godrick yet. You can progress his quest some by talking to him again, as he’ll acknowledge that you’ve made it to the Roundtable Keep, and answer the first option “I’ll fly straight and true”. When you talk to him again, he’ll tell you that you need a Great Rune, and Godrick just happens to have one. Second Encounter After defeating Godrick the Grafted, White-Faced Varré can be found at the Rose Church in Liurnia of the Lakes. The Church is on the central island between three sites of graces, these being: Folly on the Lake, Temple Quarter, and Fallen Ruins of the Lake. You’ll find Varre standing outside the northeastern side of the Church. After exhausting all of his dialogue, he’ll give you the Festering Bloody Finger and ask you to invade three players. You can do this right here by interacting with the Festering Bloody Finger, this will put you in another online players world, and your goal is to defeat them. For the quest, you only need to invade three times, not win. Once you’ve invaded three people, head back to Varre and talk to him again. He’ll tell you that want to anoint you, “A knight to serve Luminary Mohg, the Lord of Blood, and establish a new dynasty.” Tell him to “Anoint me” and he’ll give you one final task to complete before he accepts you in their order. The task would normally be to kill your own maiden, but as you’re maidenless, he’ll tell you that anyone’s maiden will do. There are two maidens you can get the blood from, and they can be found at either the Church of Inhibition, which is on the eastern landmass of Liurnia northwest of the Frenzied Flame Village. The second place is the Chapel of Anticipation, which can only be accessed by unlocking the second belfry of The Four Belfries in the western landmass of Liurnia. To unlock the belfry, you’ll need an Imbued Sword Key, which can be found in a chest in front of the fourth belfry at the top. It’s worth noting that if you go to the Chapel of Anticipation, you’ll need to fight a boss first. When it’s defeated, the maiden can be found dead by the left side of the wall as soon as you enter the Church. Once you have the blood-soaked favor, head back to Varre, and he’ll reward you with a reusable Bloody Finger, talking to him again will reward you with the Pureblood Knight’s Medal. This leads to Mohgwyn’s palace, where you can fight Mohg, Lord of Blood. This is the earliest part in the game that you can fight this Lord. Final Encounter After using the Pureblood Knight’s Medal, head up the stairs to the southwest and to a Site of Grace. Now make your way all the way to the end of this path, ignoring the enemies along the way and you’ll enter a dark passage. Use your Lantern and keep to the left, defeating the first enemy and then proceeding northwest to an area with plenty of tombstones. Keep to the left still and follow this area to the northeast and you’ll find a way out of this crypt. You’ll come across an invasion sign, but ignore it first and use the Dynasty Mausoleum Midpoint Site of Grace first. Now return to the Invasion sign and you’ll see it belongs to White-Faced Varré and you’ll need to invade him and kill him to complete this Quest. Head back to the south to have Varré attack you and you’ll want to be wary of his weapon, this will cause massive Bloodloss buildup so back away and recover if it’s too high. He does seem to have low poise, allowing to flinch him easily with heavier weapons (or using skills such as the Waterfowl Dance from the Hand of Malenia). Once you return to your world, you’ll find him on the floor, speak with him and exhaust his dialogue and once he’s passed, you’ll be able to loot the Varré’s Bouquet weapon from his body. |
|
|||||||||||||||||||||||||||||||||||||||||||||||||||||||||||||||||||||||||||||||||||||||||||||||