
After the scenes and when you have collected your reward, warp to Luxerion South Station and then catch the first train to the Wildlands. What a huge place! Finally, some greenery. The Wildlands is a world away from the gloom of Luxerion and it really is quite a pleasure to explore. The early Main Quests here allow you access to some very useful schemata and a very special way to get around the Wildlands.
Upon your arrival at the station, sprint in the direction of Canopus Farms out in the middle of the Grasslands. On your way, watch out for the Blue Flan bobbing around and for any sparkling flowers on the ground. The Blue Flan are very weak to Thunder and are easily defeated. They also offer materials used in a sidequest. There are numerous plants dotted around the Wildlands which are used in a variety of ways, mostly for sidequests. Collect them as you find them to save a lot of time later on.
As soon as you arrive at Canopus Farms, head straight for the Outfitters and purchase the four garb there. It is entirely possible you will only be able to afford a couple of them so prioritise Ignition and Electronica . As their names suggest, they each bear a strong innate spell, namely Fire+ Level 2 and Thunder+ Level 2 respectively. These spells are incredibly powerful and many of the monsters you find in the Wildlands are weak to these spells.
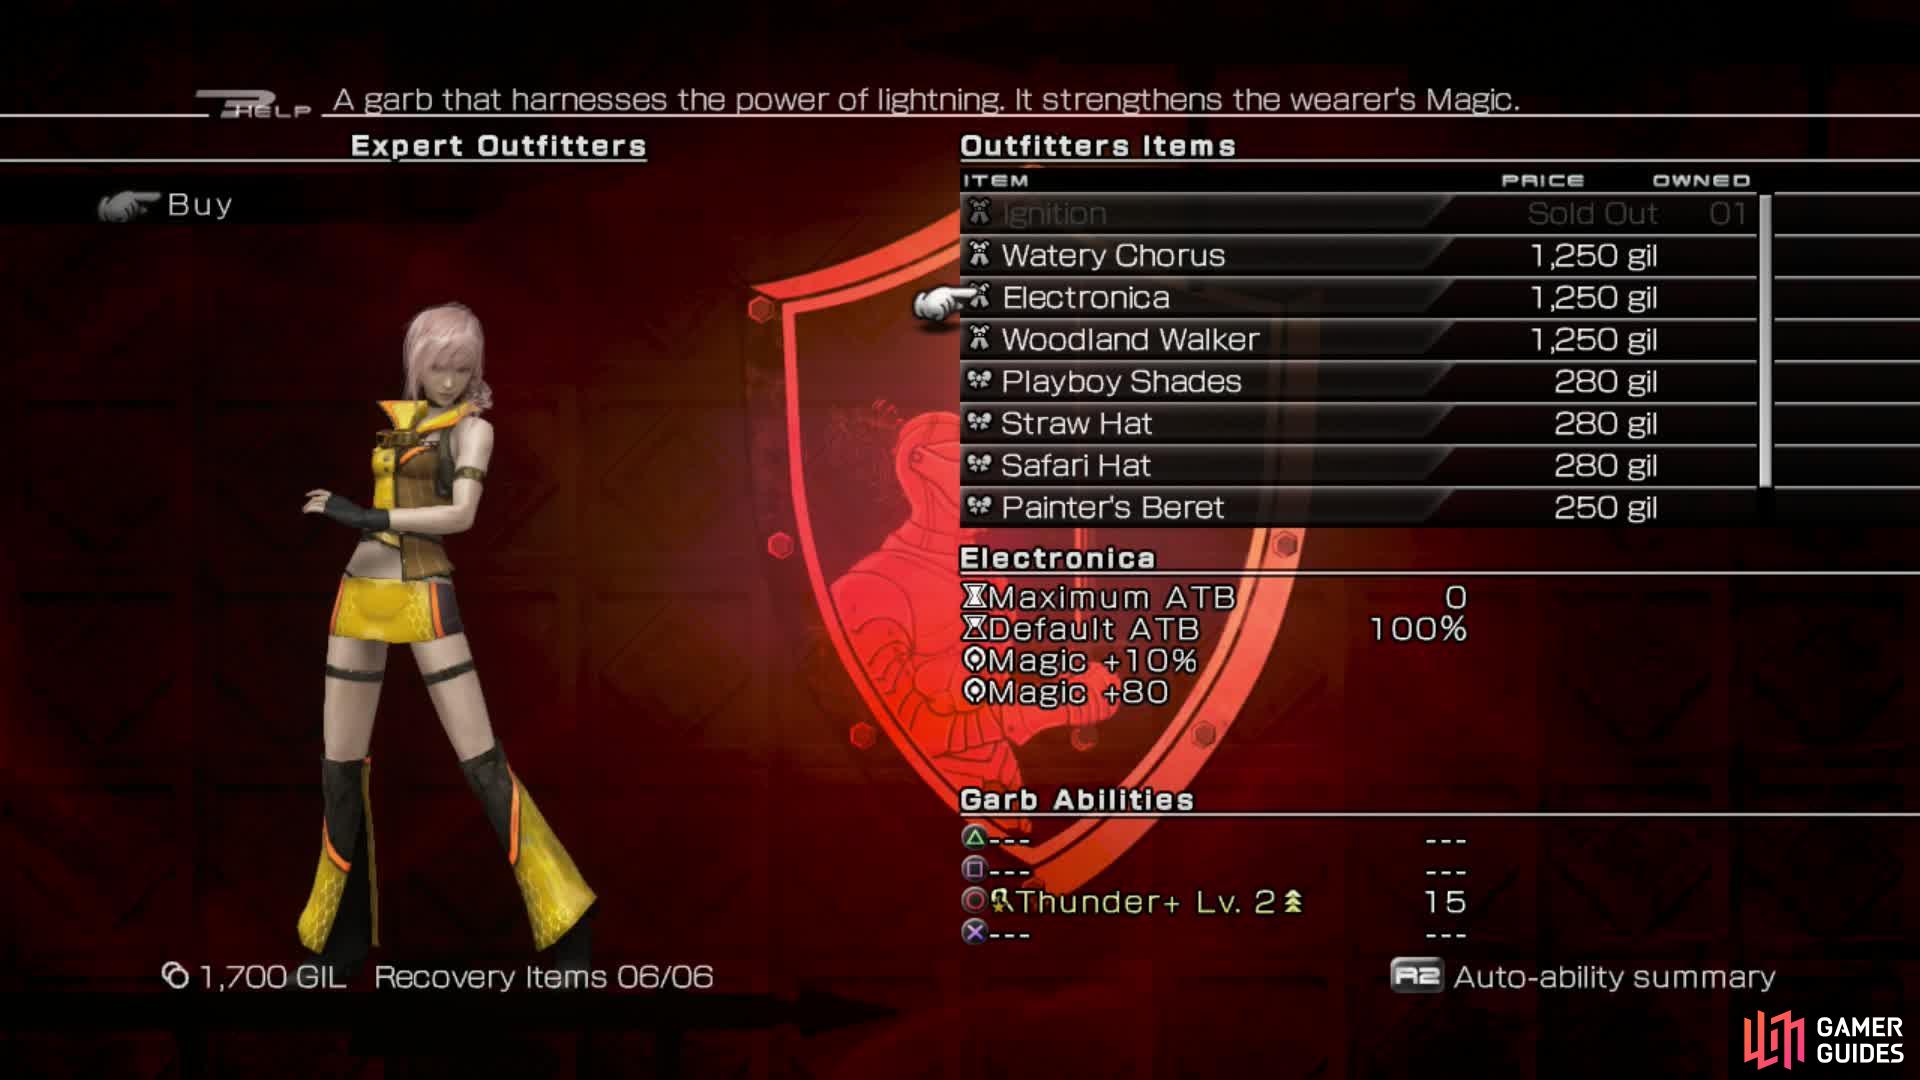
If you have enough Gil feel free to purchase the other two garbs. They can be very powerful later.
Schemata Setup
Passion Rouge (default)
- Deprotect Level 2 (locked)
- Guard Level 2
- Thundara
- Deshell Level 2 (locked)
This schema should be your default because of its Saboteur-like abilities. The Level 2 versions of Deshell and Deprotect can immediately debuff almost any enemy so it is very good practise to start each battle by debuffing the enemy and then switching to a more aggressive schema. A Guard ability is always a good idea, at least at the moment and a Level 2 Guard can block all but the strongest attacks. Thundara is an excellent augment to the schema because of the wide variety of enemies with a vulnerability to it.
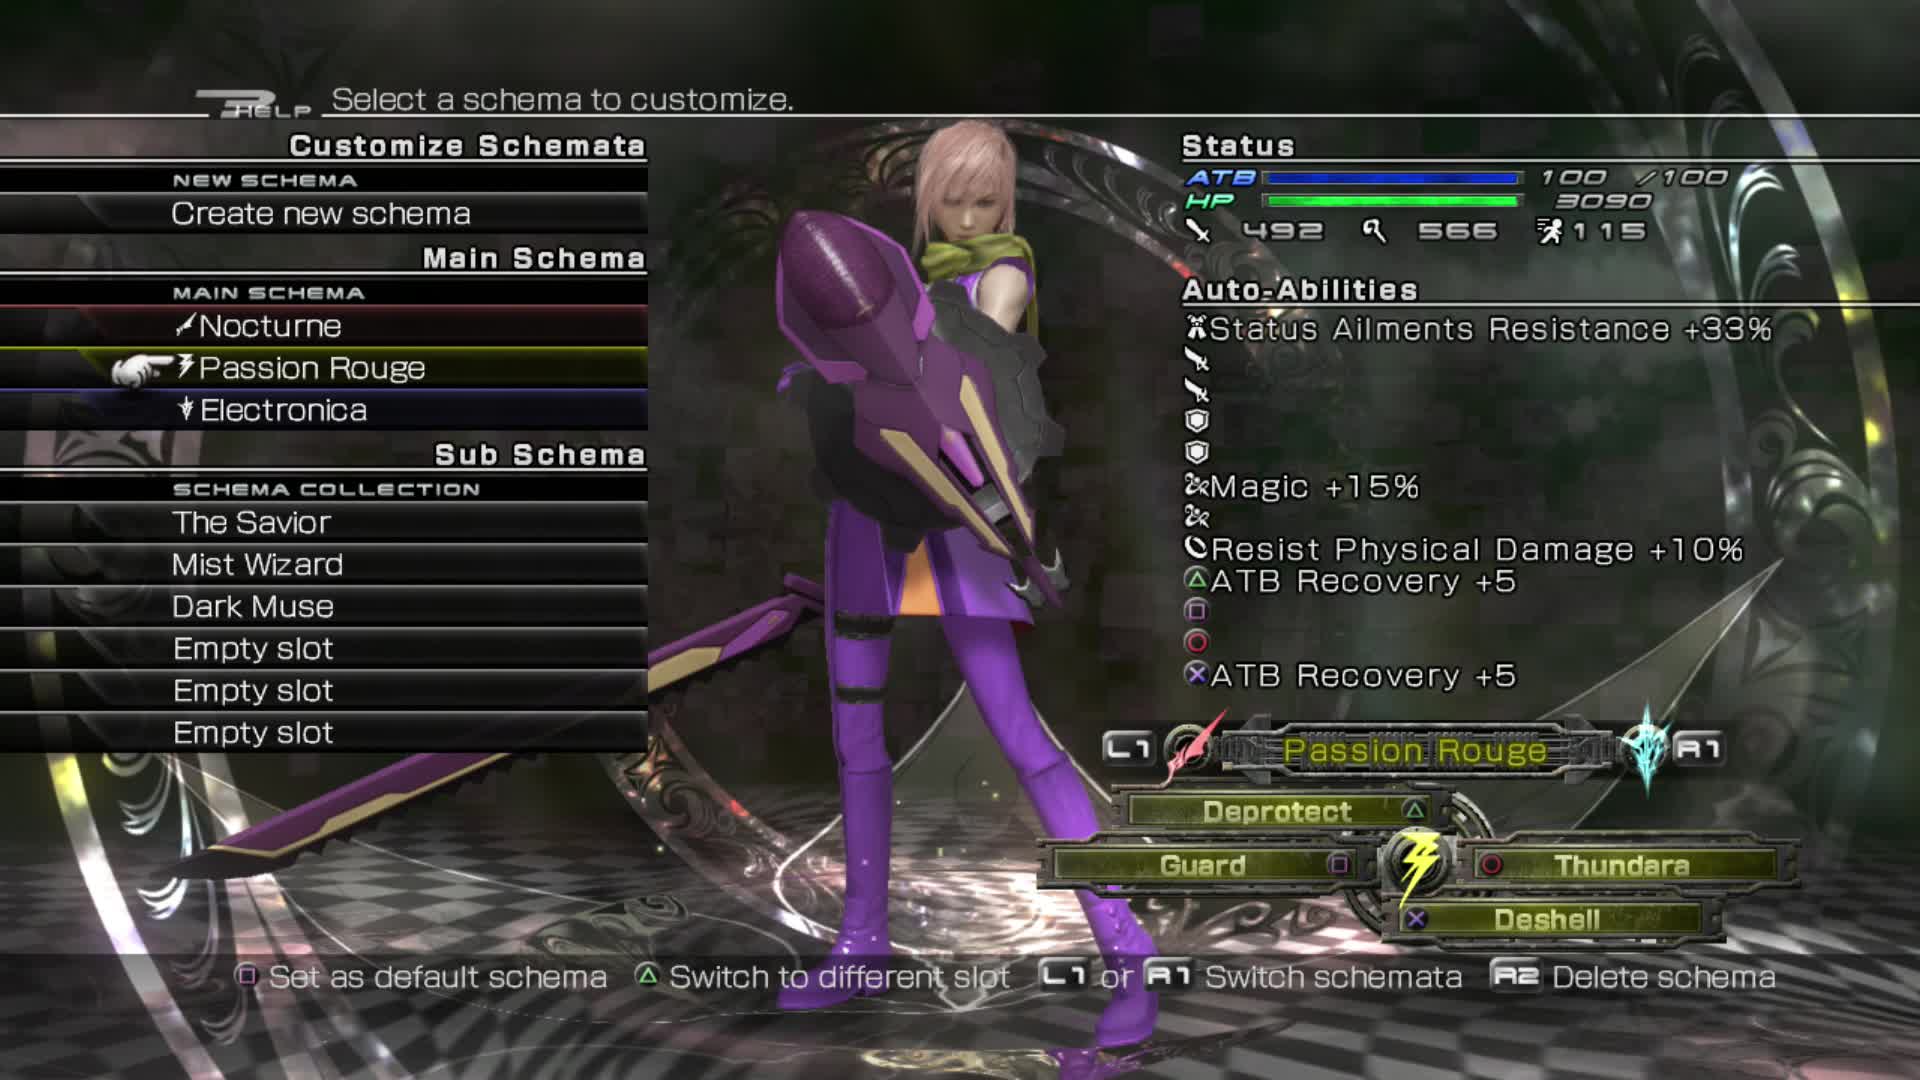
The Passion Rouge schema should always be default for its debuffing abilities.
Electronica
- Fire
- Aero
- Thunder+ Level 2 (locked)
- Blizzard
Switch between this and Ignition depending on an enemy’s weakness. Start with Electronica as your staple magical schema. Adding a variety of elemental spells enables you to deal with almost any enemy you come across with ease. Thunder+ is an incredibly strong spell and remains useful for a large portion of the game. Equip magic boosting accessories and equipment.
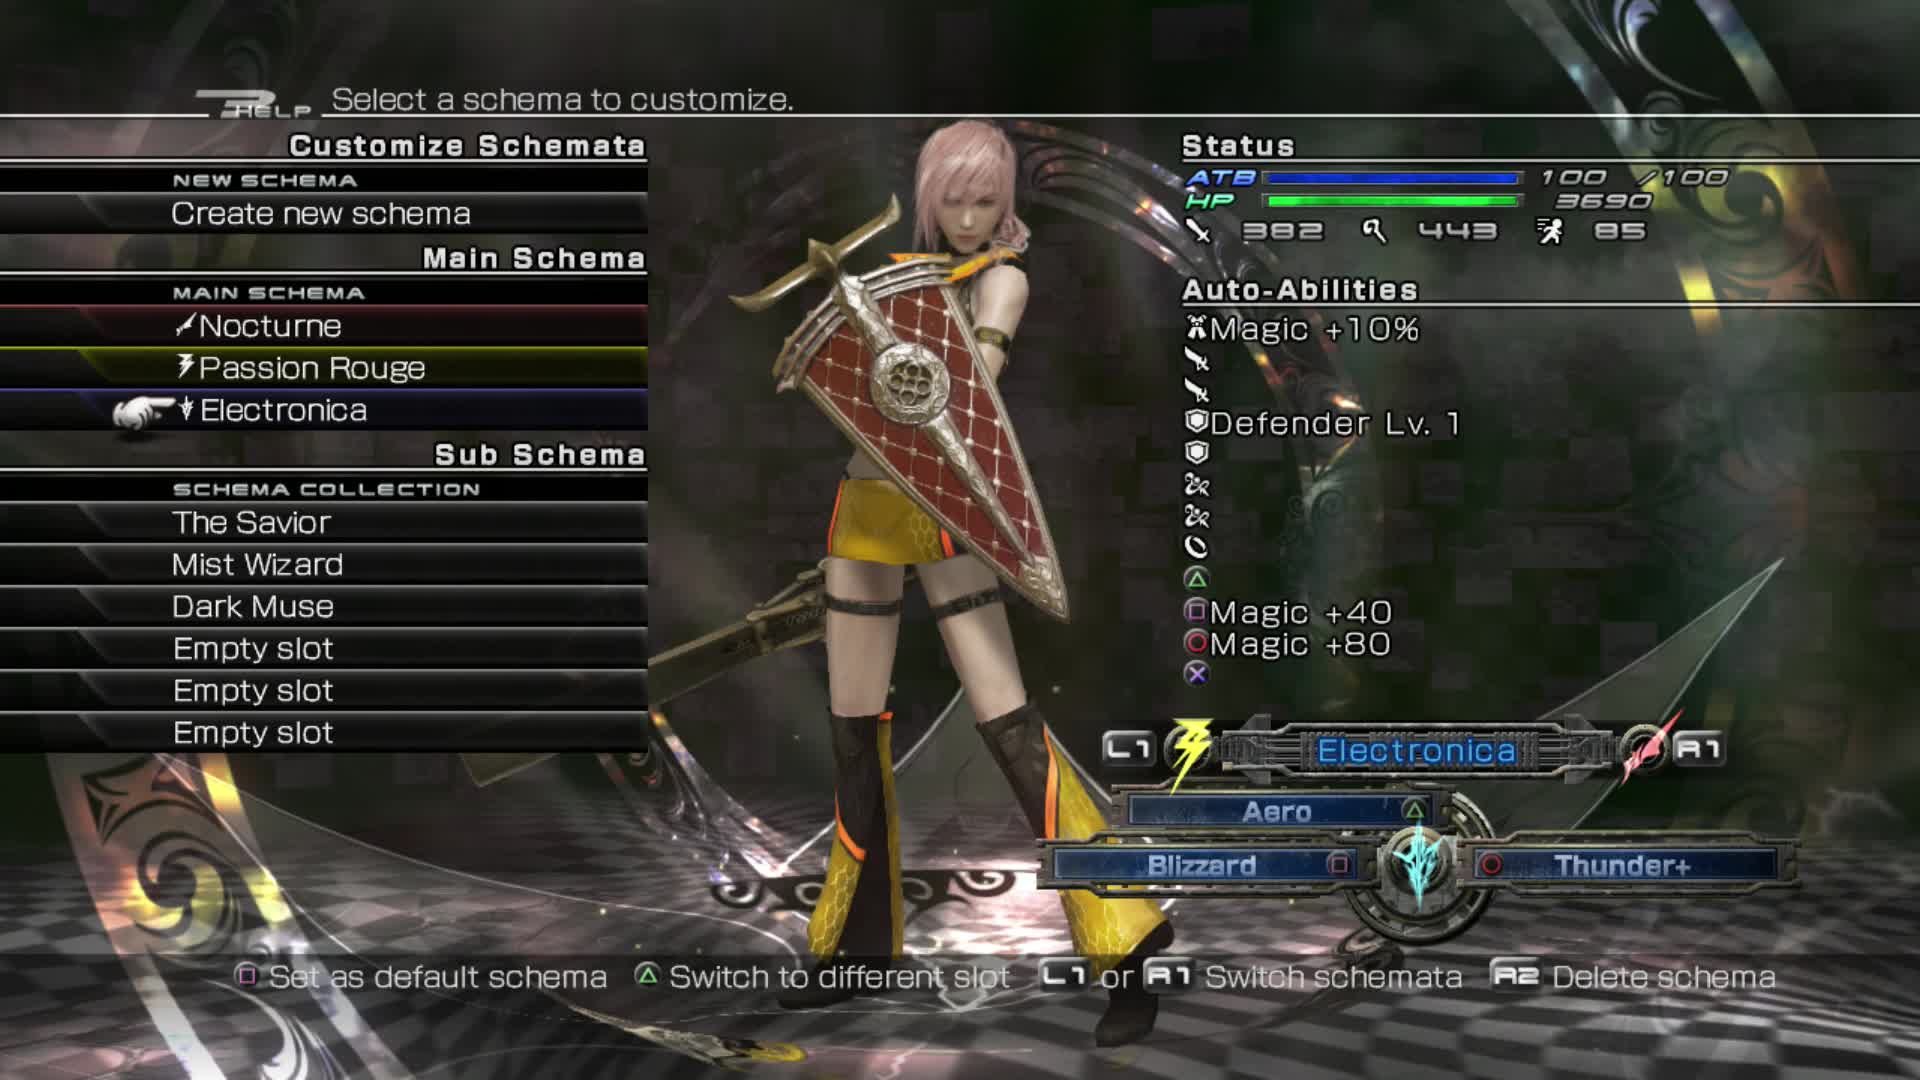
You will be relying on Electronica heavily for the next day. It’s Thunder+ ability is very powerful.
Nocturne
- Galestrike Level 2
- Guard Level 1
- Attack Level 2 (locked)
- Sparkstrike Level 2
Nocturne will be your primary physical damage dealer, with the ability to strike in an elemental way if needed. Sparkstrike will become very useful during the next day or two to defeat some powerful adversaries. Equip a strong sword and shield with high strength and HP to really boost your attacking prowess. Use strength and physical based accessories for that extra kick.
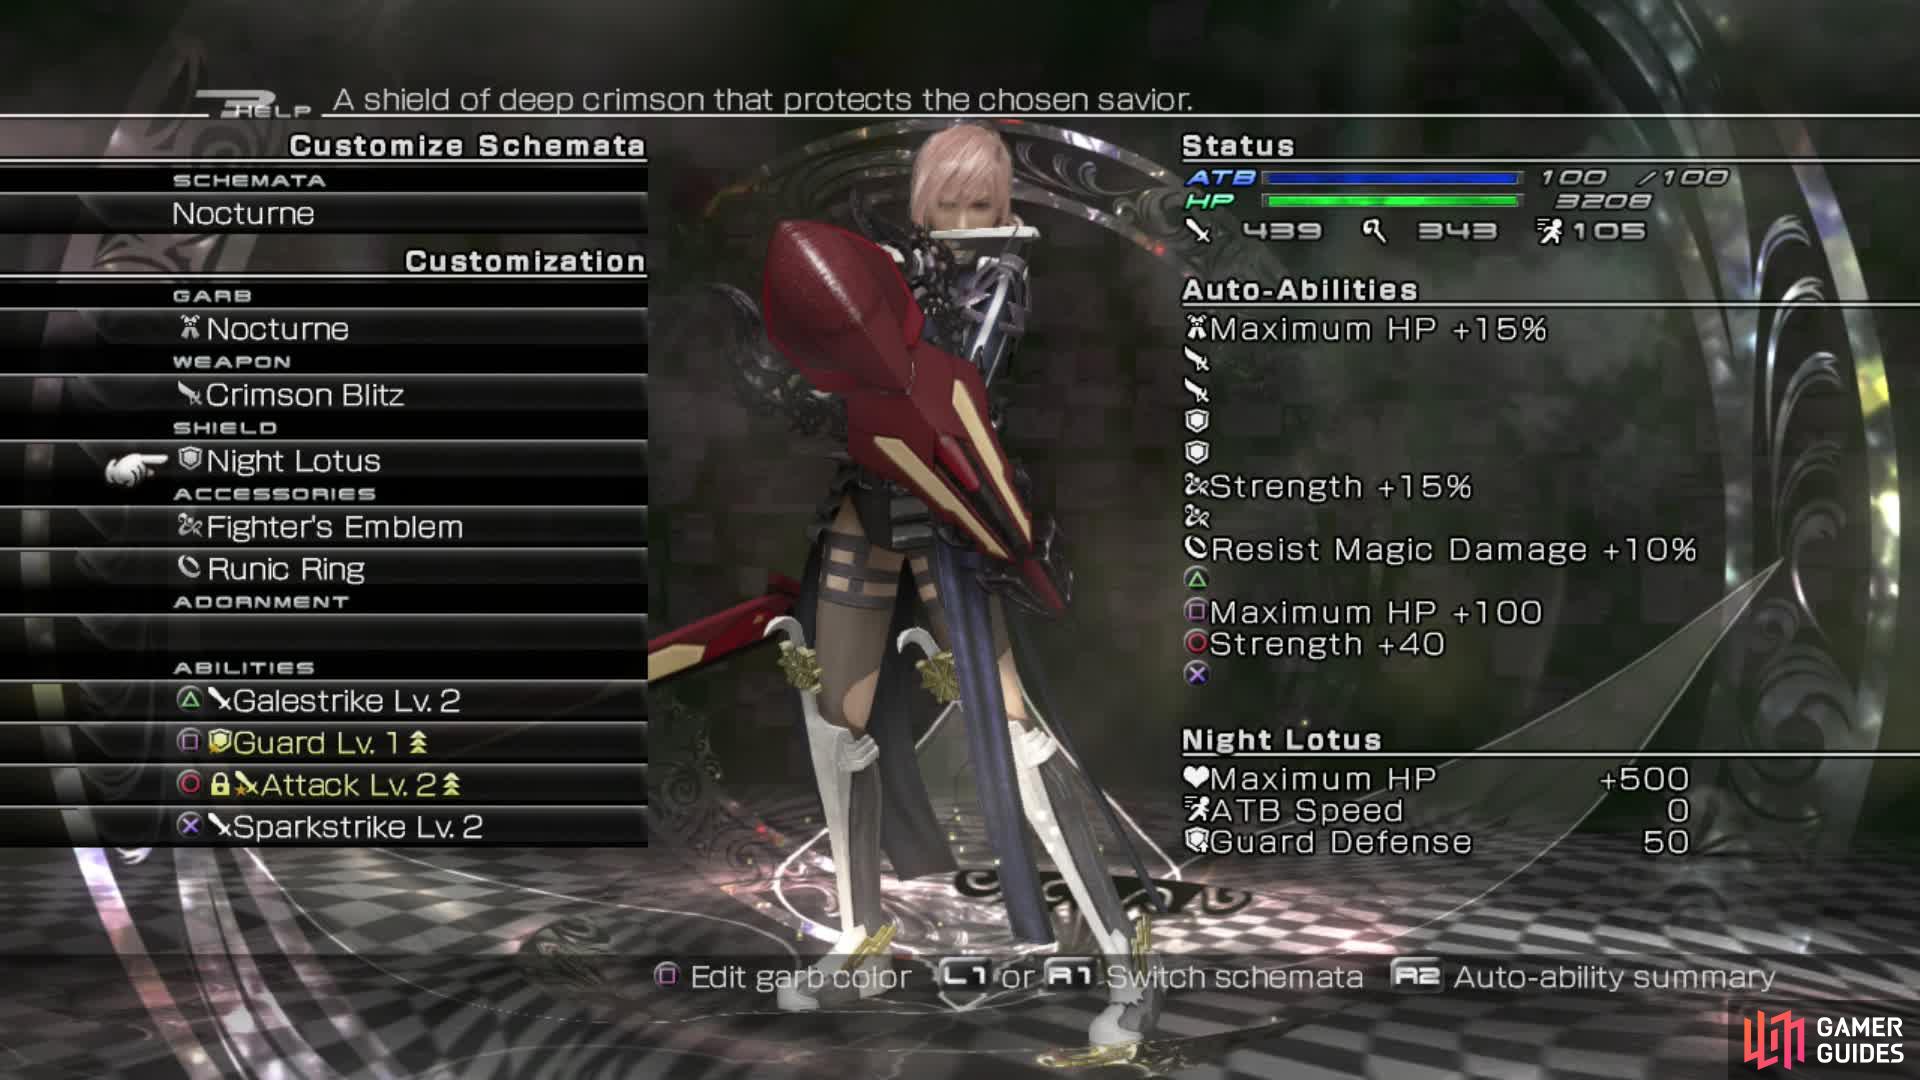
Nocturne is your primary damage dealer, especially during Overclock.
After equipping yourself, head on over to the blue ! where Dr Gysahl waits to tell you all about the Angel of Valhalla . If the doctor’s name didn’t give it away then after speaking with him you will know what you have to search for. He suggests you speak with the villagers for more information.
The man you need is a red haired one chopping wood in the southwestern corner. He goes by the name of Seven (don’t ask) and tells you that the Angel seeks out his mortal foe; a Chocobo Eater . The last sighting of one was in the City of Ruins to the northeast. It’s a safe bet to assume if you find the Chocobo Eater, you’ll likely find the Angel too.
Find The Angel
Head out in the direction of the City of Ruins (marked by the blue !). Remember to pick up any flowers on the way (see the boxout below for details of their locations and bloom times) and fight every monster (with the exception of the Reaver) you see. This will build a solid collection of various abilities allowing you to strengthen them later at a synthesis shop.
Be very careful as you arrive in the City of Ruins. Reavers have a nasty habit of popping up in confined spaces just waiting for you to run into them. While it is possible to defeat one at this point, it will result in a protracted battle and diminish your supplies of restorative items which you will need for the battle versus the Chocobo Eater. Avoid them at all costs!
These Behemoths are very powerful and act like their counterparts in previous games in that, after dealing a significant amount of damage, they will rise up on their legs, heal themselves and become very aggressive. You can defeat them but it takes a few potions and possibly EP which you really shouldn’t waste at this stage. Head for the waypoint when you’re ready.
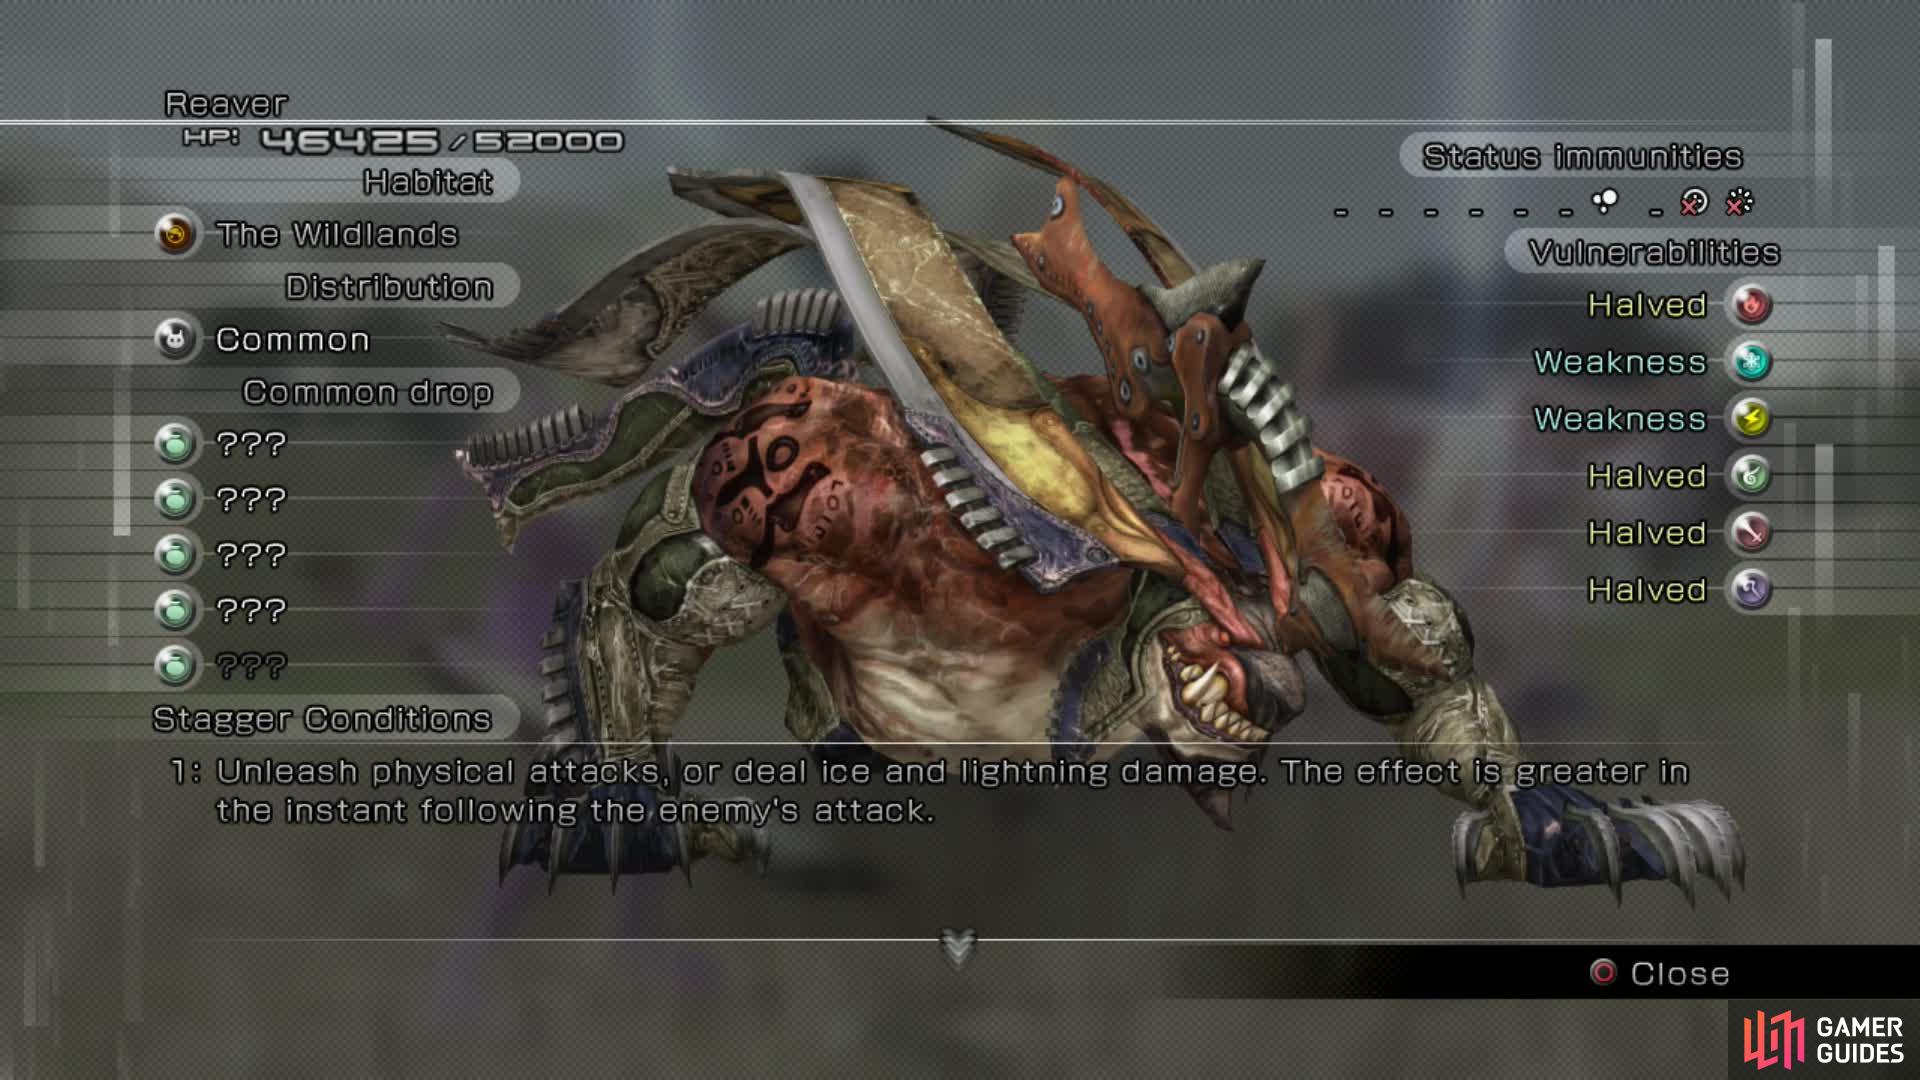
Reavers can really jump out and surprise you if you aren’t careful.
Boss Battle - Chocobo Eater
Luckily, the Angel has done half of the work for you. The Chocobo Eater will start with half HP and has a terrible weakness for lightning-based attacks. Start the battle by casting Deshell and Deprotect and then proceed to drive his Stagger Wave up with extended use of Thundara, Thunder+ and Sparkstrike. Use Guard when you can (some of his attacks are difficult to predict so don’t worry too much if you get hit) and he’ll quickly Stagger.
Once he’s staggered, focus on doing as much damage as possible with physical attacks. Use Overclock in this state and he’ll be almost dead after the stagger has finished. Repeat what you’ve already been doing and keep chipping away at his HP. Be aware that as he gets near death he uses “ I’ll Cook Them ” which really boosts his attack power. Try to quickly finish him off before he gets to attack you. Use another Overclock if you have to.
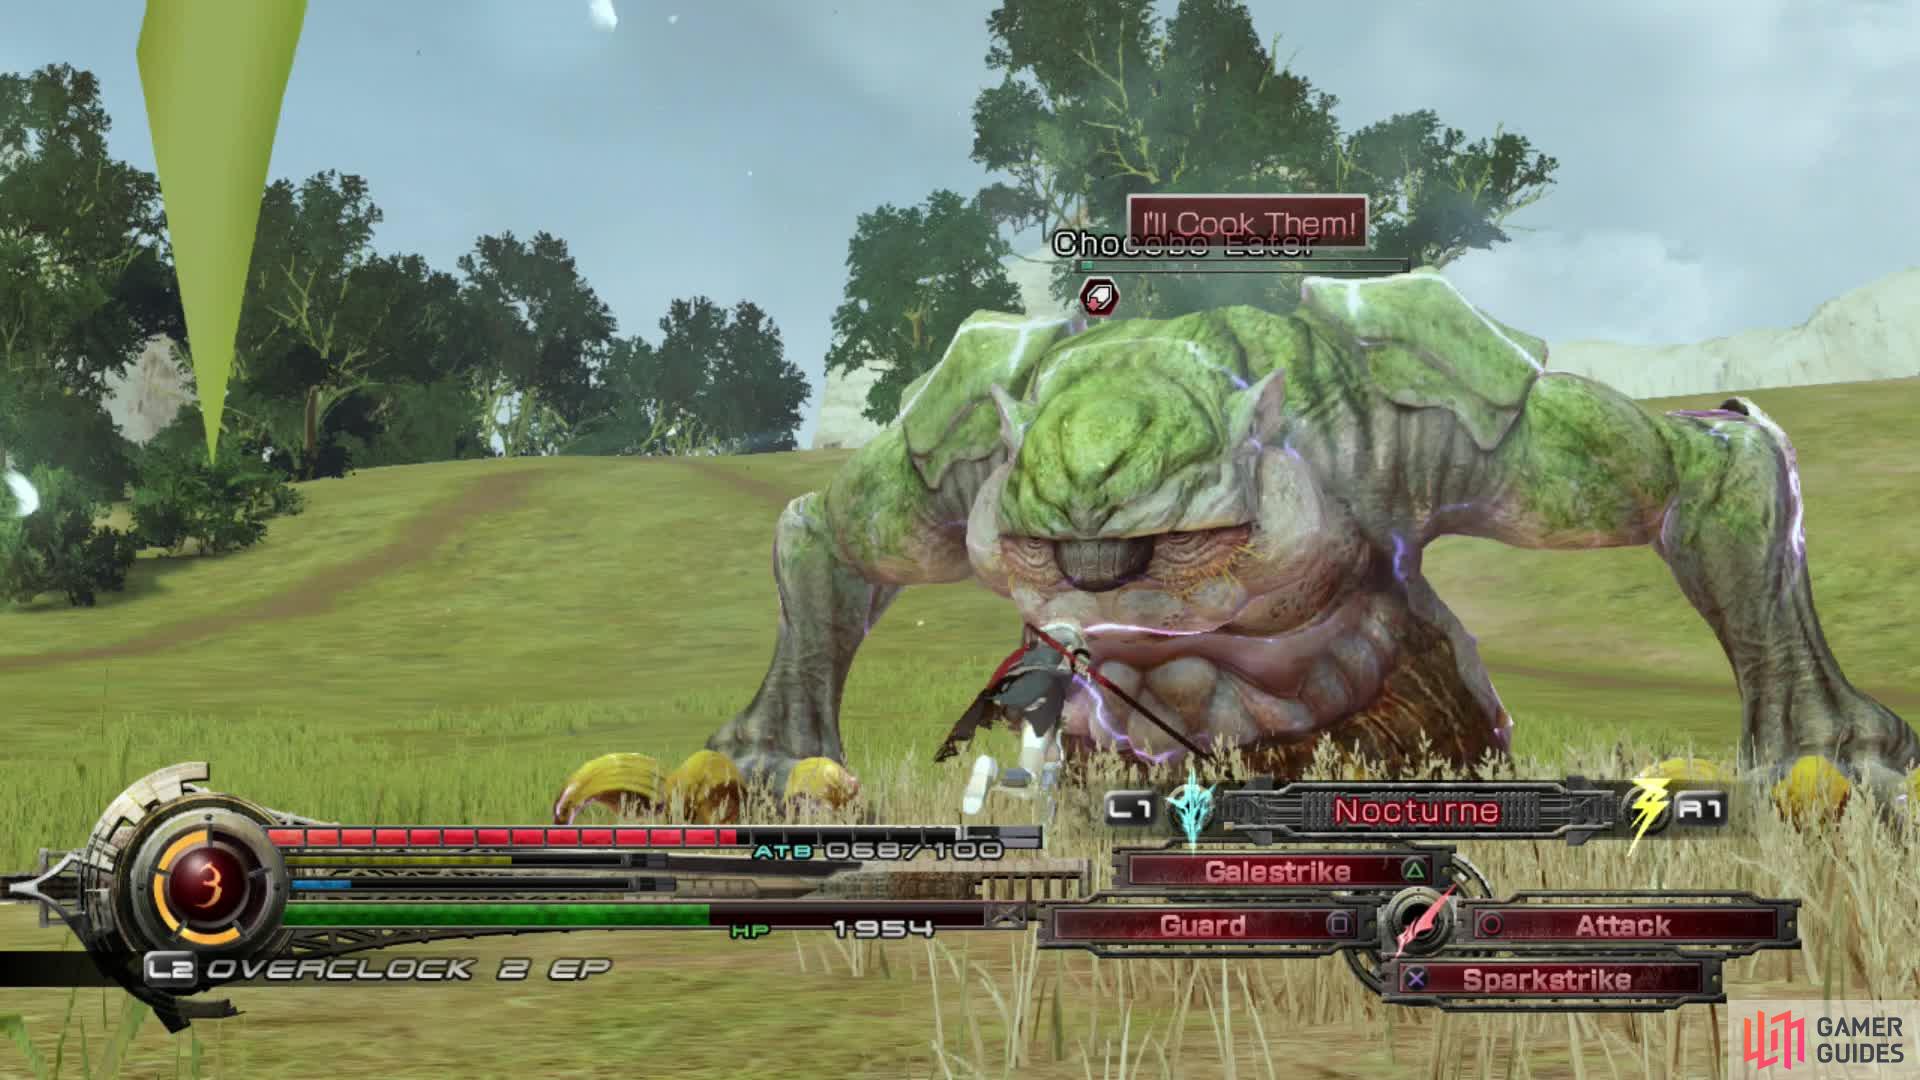
He gets very nasty during this phase so you really don’t want to hang around longer than you have to or there is a massive chance he’ll decide to eat you too.
The poor thing is severely wounded and needs urgent treatment. Run back to Canopus Farms and see how he’s faring. Being a typical egoist he is refusing to eat from everyone but you. Talk to him and then select “Give to him” and choose the Gysahl Greens. He has recovered a little but will need a lot more medicine and food to get him back to full fighting fitness. Luckily, there are plenty of items around.
No Comments